Category Archives: Wonder Curve Ruler

Saying Goodbye Again

A little over two years ago I donated a half dozen quilts to Hopewell House, a hospice facility in Portland that reopened in January 2023 after a three-year hiatus. A call had been issued for donated quilts that would be chosen by residents to offer them comfort as the end of their lives approached. I wrote about my donated quilts here.

As Jill Citro, the Comfort Quilt Program coordinator, explained at the time, “The Quilt Program will offer patients a quilt of their choice, handmade by generous and creative community members who have donated their time, talents and materials. Each quilt will remain with the patient during their care. Upon the patient’s death, their quilt will be part of their ‘passage observance’ with their family, friends and caregivers, and the family will be invited to take the quilt home with them. As you can see, the quilt becomes an extremely meaningful, moving and cherished gift.”

Recently I contacted Jill to see if I could provide a few more quilts and she responded in the affirmative very quickly. I forgot to take a photo of the quilts before I delivered them to Hopewell House so I’m showing them here as a way to create a visual record for myself.

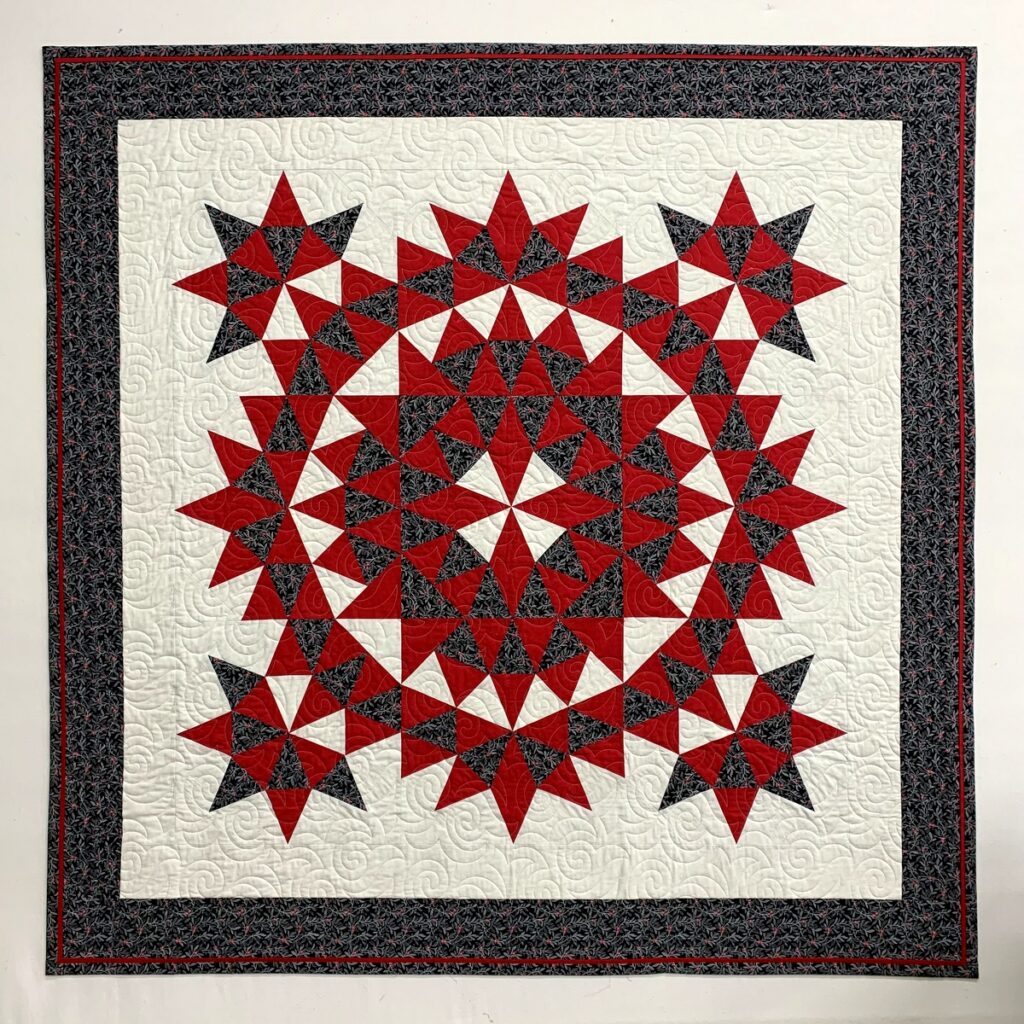
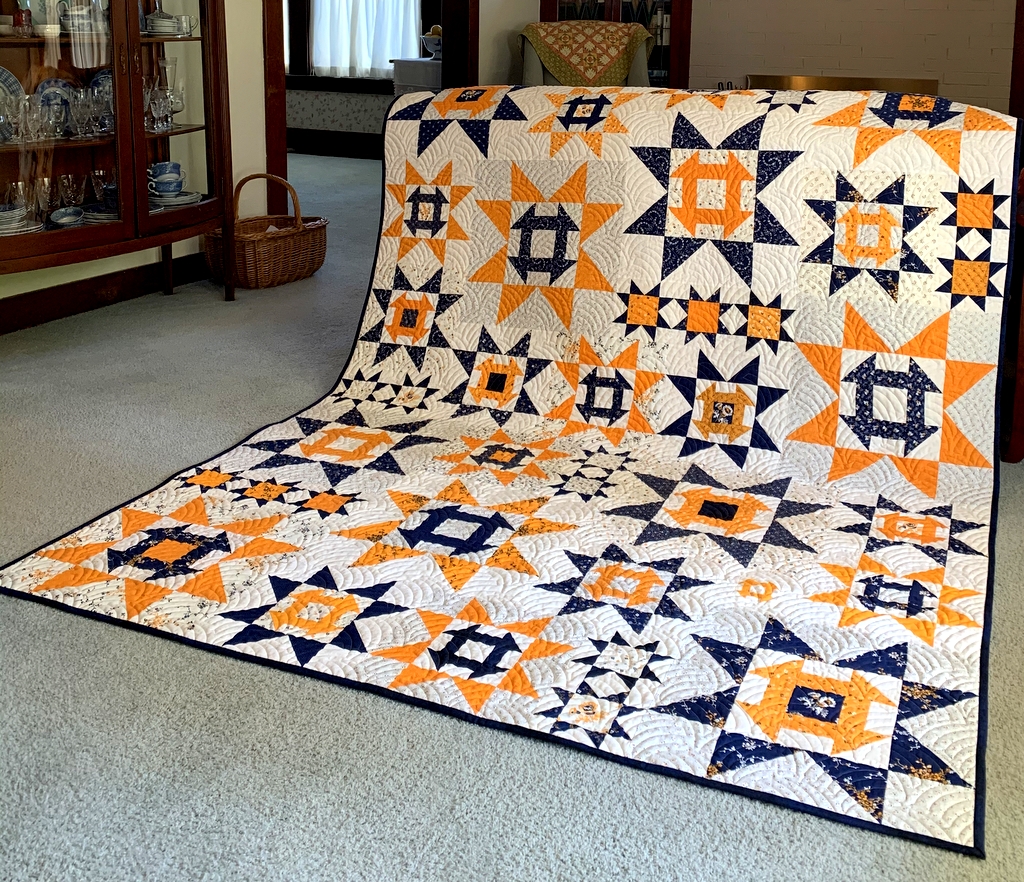
First up is Billie’s Star, made in 2015 and named in honor of Billie Mahorney, my favorite quilt teacher and mentor:

It’s an original design inspired by Billie’s love of star blocks. It measures about 56″ square and was quilted by Nancy Stovall of Just Quilting. Billie encouraged her students to make pieced backs, often using leftover blocks, so that’s what I did here:

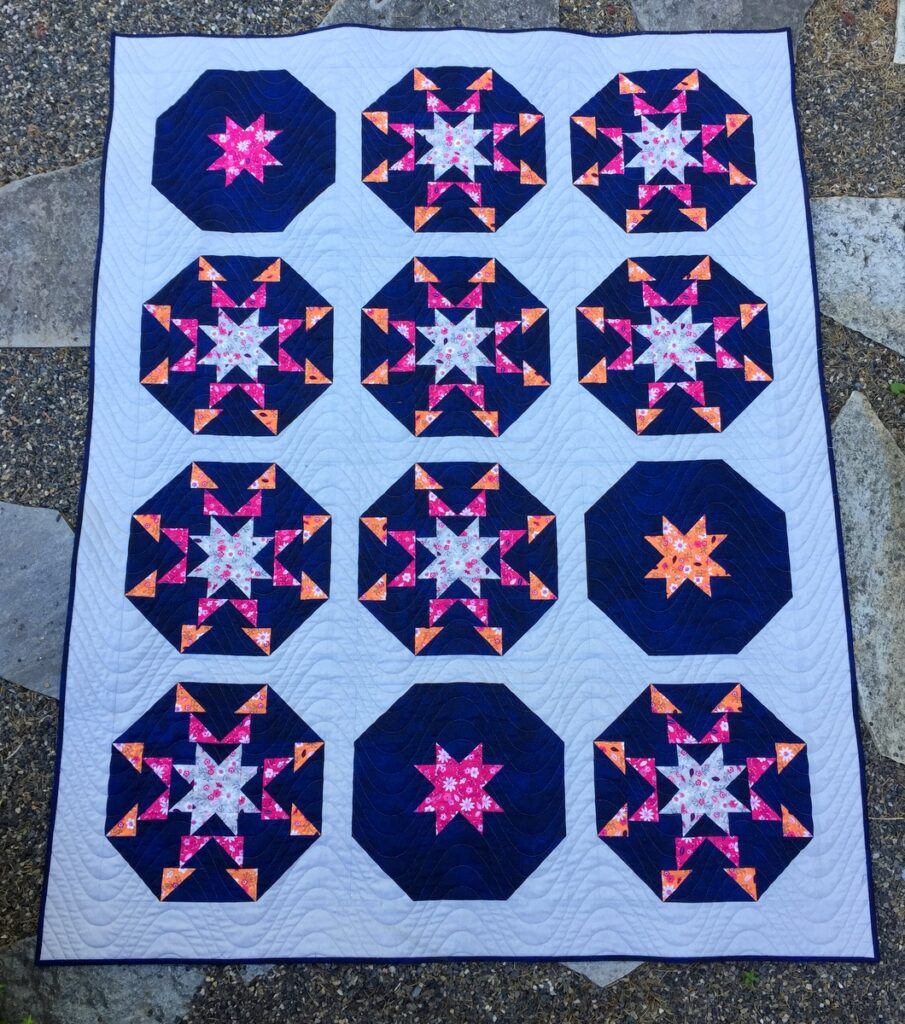
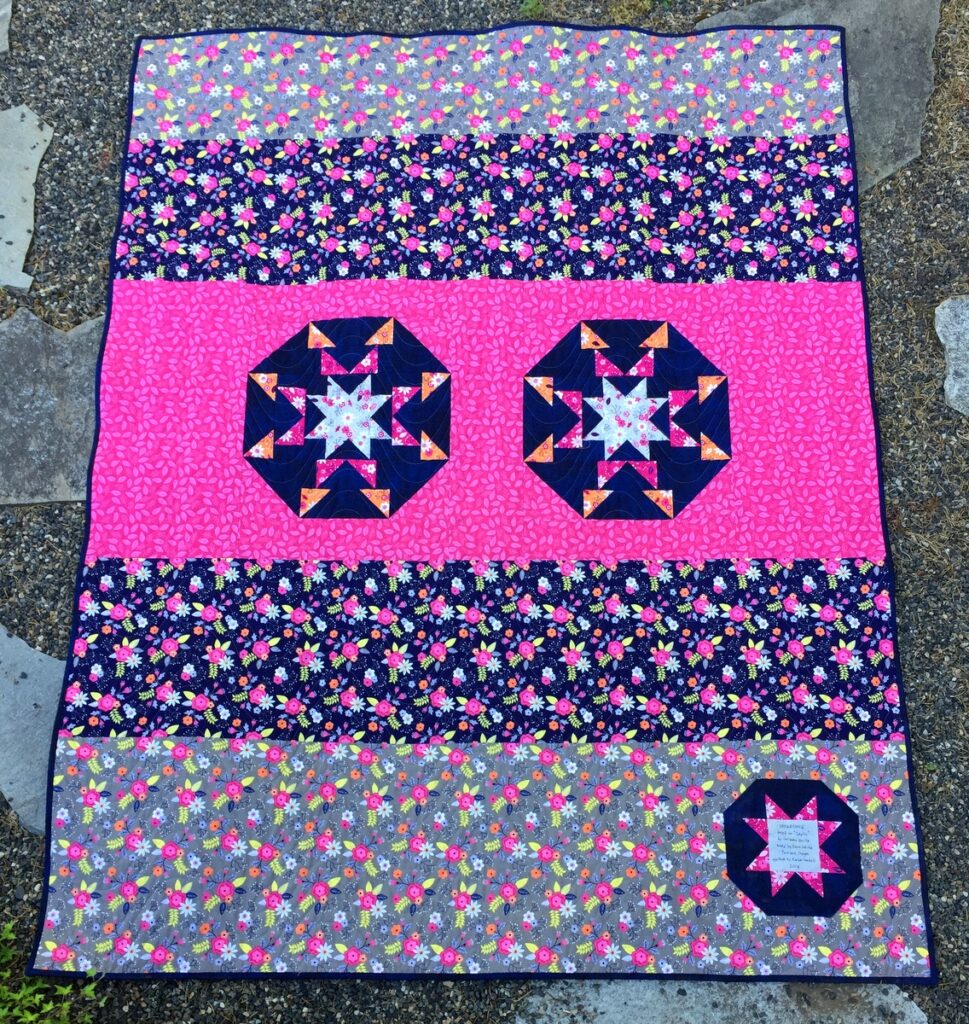
This is Stella by Starlight, made in 2016 based on a block design called “Spinners” by Heather Peterson of Anka’s Treasures:

It measures 51½” x 71″ and was quilted by Karlee Sandell of SewInspired2Day.

Next up is Spokesong, made in 2018 and based on the pattern Idyllic by Corey Yoder of Coriander Quilts:

Check out the leftover blocks on the back and the label made to echo the block design:

Spokesong measures 53½” x 67″ and was also quilted by Karlee of SewInspired2Day.

This is Currant Affairs, begun in 2015 in a class with Joyce Gieszler, author of Then and Now Quilts, and completed in 2021:

The quilt is based on a very traditional design called Grandma’s Surprise but the placement of the colored triangles and the limited number of fabrics give it a decidedly contemporary feel. It measures 66″ square and was quilted by Sherry Wadley.

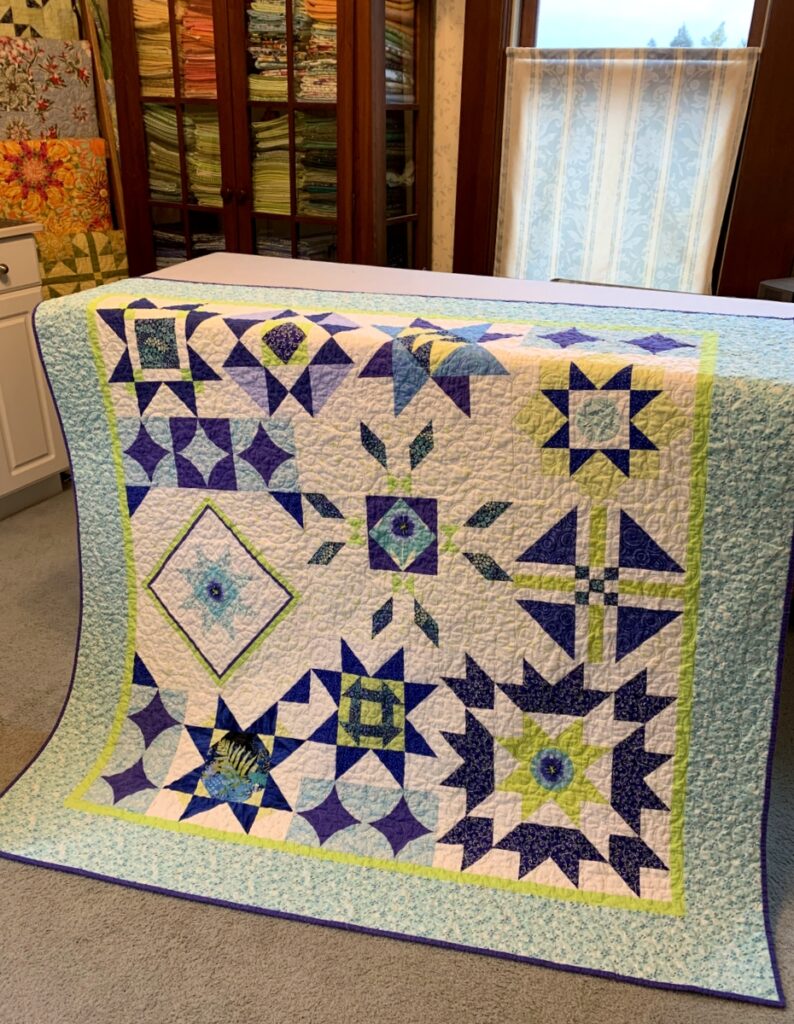
Next up is Sea Star Sampler, completed in 2022:

It measures 59″ square and gets its name from the fabrics, which feature starfish and schools of fish and other prints suggestive of things like anenomes, seaweed, and waves. It was quilted by Karlee of SewInspired2Day.

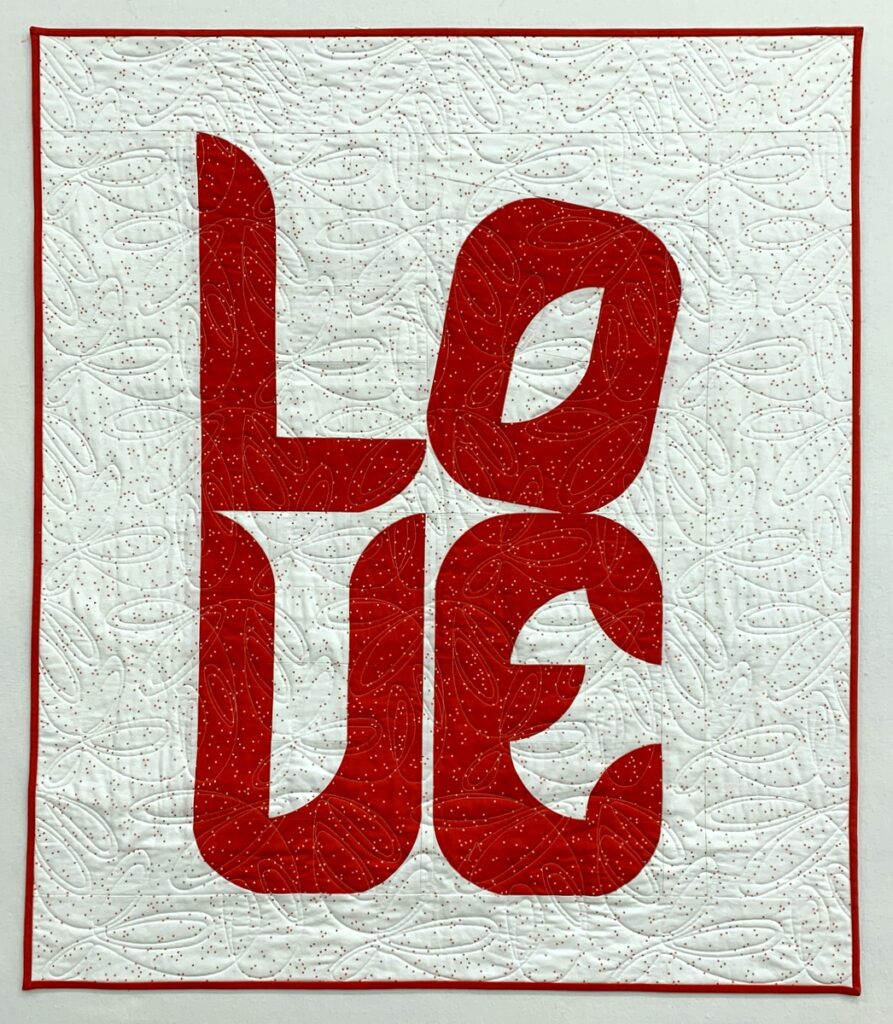
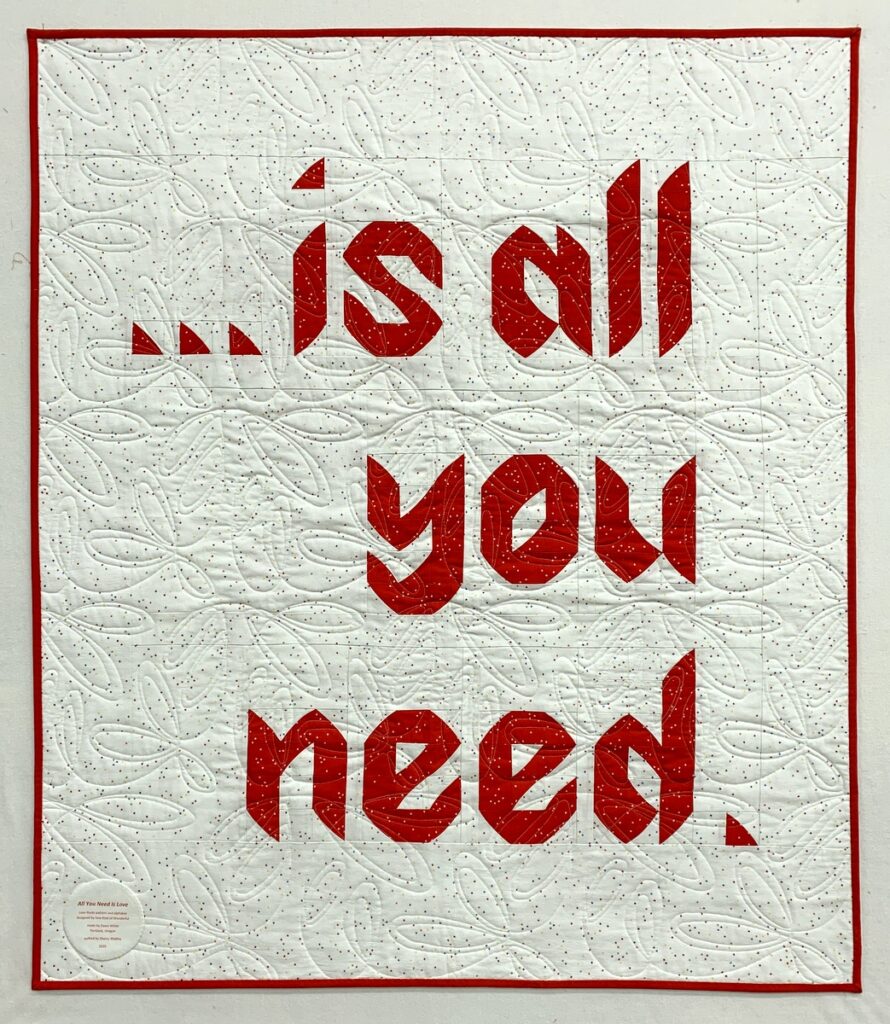
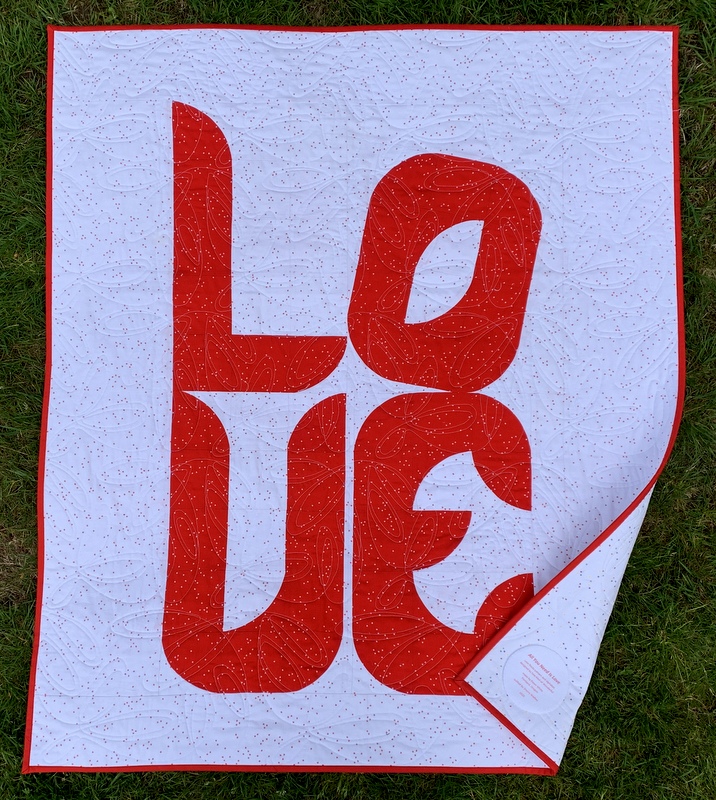
The last quilt I offered Hopewell House was smaller than a lap-size quilt or throw but I thought it might resonate with a resident or a resident’s family and Jill was quick to agree. It’s a two-sided quilt measuring only 38″ x 44″ but it comes with a powerful message:

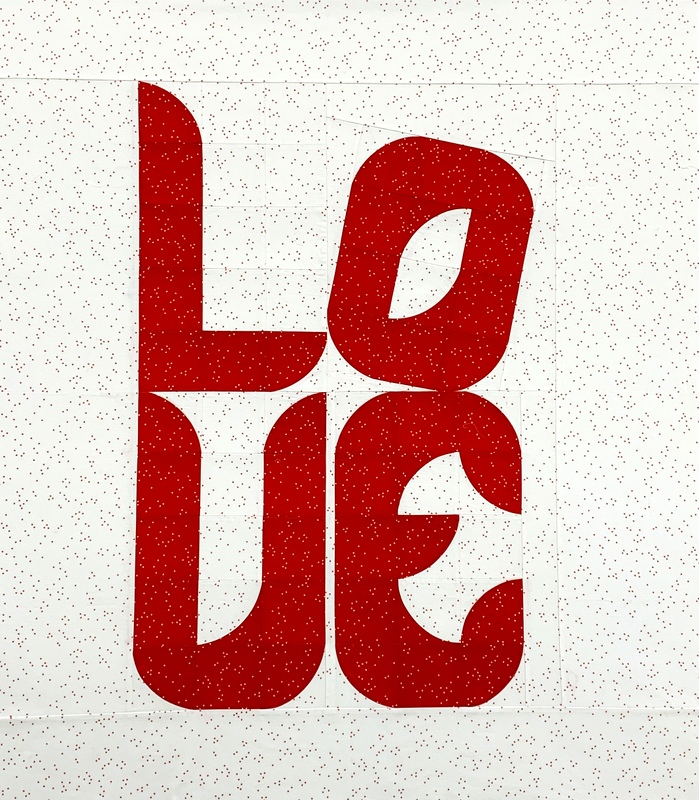
All You Need is Love is the name of this quilt (cue the Beatles song written by John Lennon and Paul McCartney) made in 2020. I used the pattern Love Rocks from Sew Kind of Wonderful’s book Text Me featuring letters, numbers, and emojis created with the Wonder Curve Ruler. Sherry Wadley quilted this one for me.

Will I miss these quilts? Absolutely! But I have had the pleasure not only of making them and sharing the process with my blog followers but also of showing them to quilt guilds and displaying them in my home, where I (and presumably the Dear Husband) have enjoyed them immensely. I am grateful to have the opportunity to share these quilts with Hopewell House residents, hoping they and their families will find comfort in them. What more could a quiltmaker ask for?



Posted in family, faux-kaleido quilts, hexagons, Idyllic, kaleido-spinner, kaleidoscope quilts, quilt labels, sampler quilt, update, Wonder Curve Ruler | 10 Comments

Atomic Stars

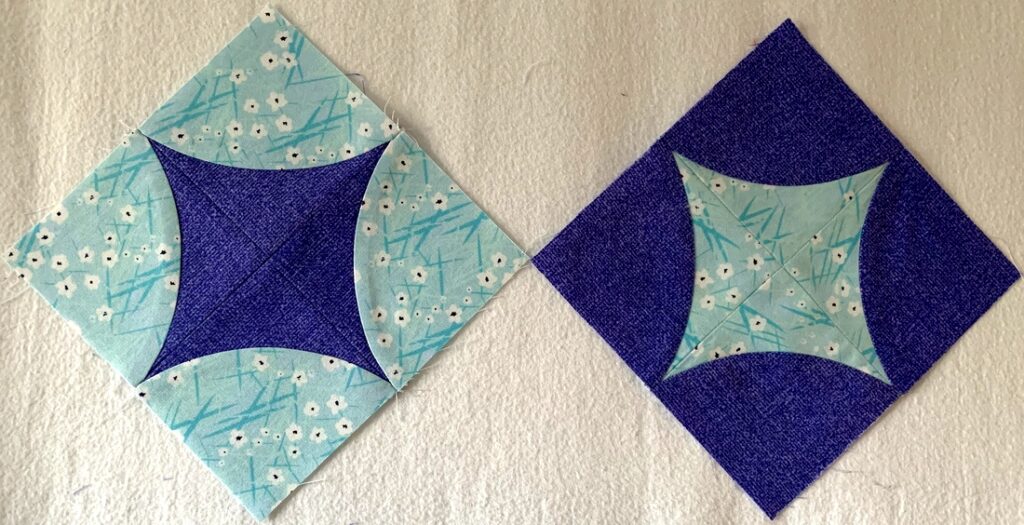
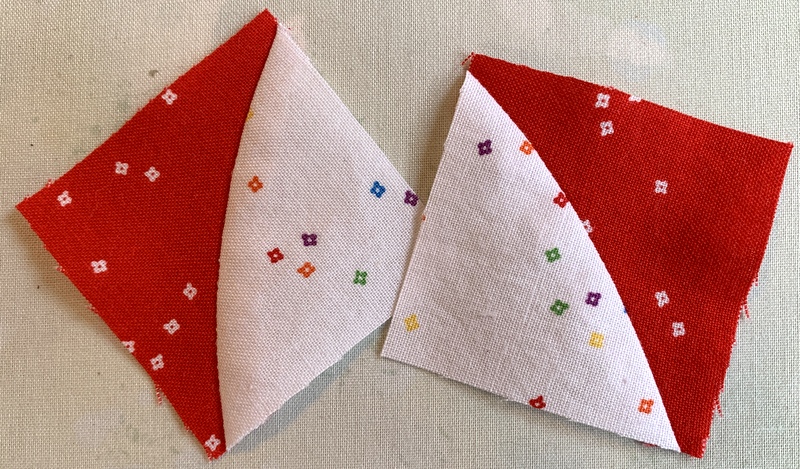
Why, hello there! Can it really be almost three weeks since my last post? The summer is speeding by much too fast and I haven’t spent nearly enough time in my sewing room. All I have to show you since my last appearance are these two little curved blocks:

But aren’t they sweet? I think of them as “atomic stars.” Finishing at 6″ square, they will either be stand-alone blocks or wind up in the center of 12″ star blocks in my current Work in Progress.

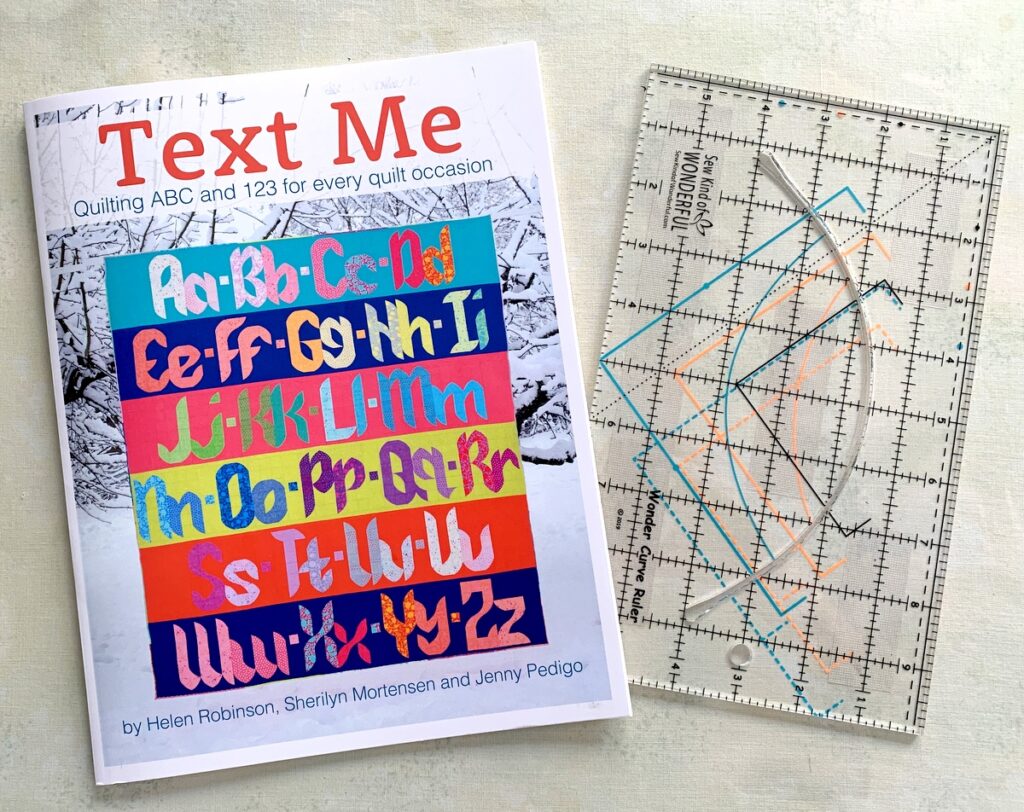
A few months ago Kristin at Montavilla Sewing in Lake Oswego designed a Block of the Month sampler quilt for me and some of my students as an optional project we can work on and share via monthly Zoom meetings until classes resume (which they will in the fall!). Kristin provided templates for the curved blocks but I wanted to see if I could get the same result using my Wonder Curve Ruler from the Sew Kind of Wonderful sisters (Jenny, Helen, and Sherilyn) and instructions from their companion book Text Me:

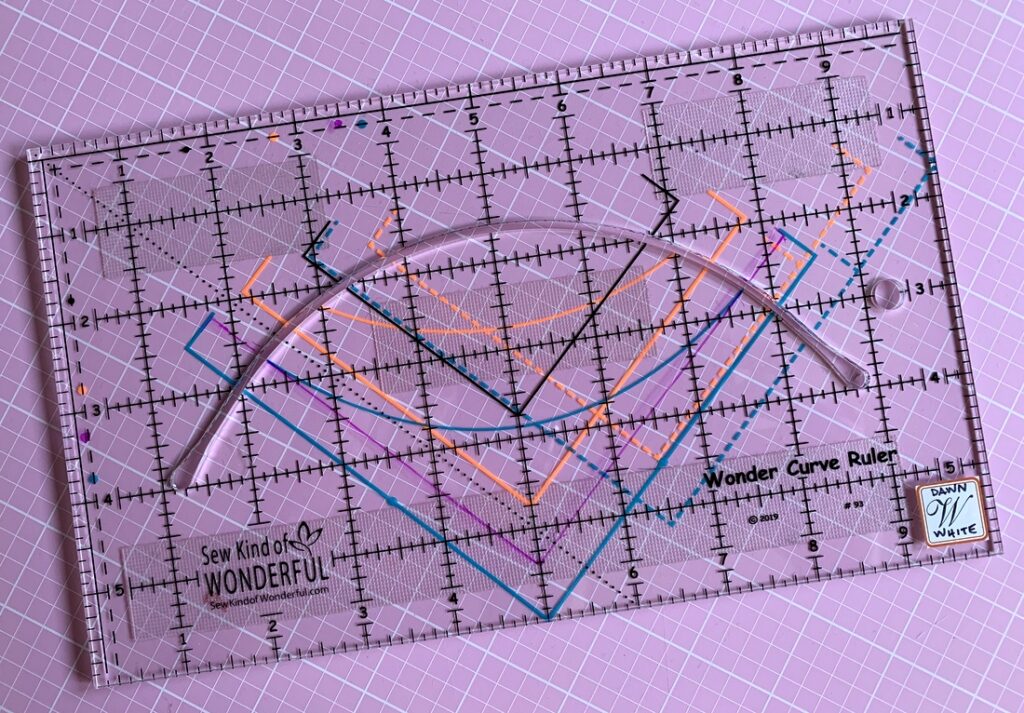
The four curved units that make up the atomic star needed to finish at 3″ square (so when they are sewn together they fit into a 6″ finished block). The curved units in Text Me finish at 1½”, 2½”, and 3½” respectively so I had to add a marking line to the ruler to make my block the proper finished size. My marking line is the dark pink one:

It took a couple of tries to get the points of the atomic stars right where I needed them: a few stitches away from the quarter-inch seam allowance. That way there’s no danger of the points disappearing into a seam.
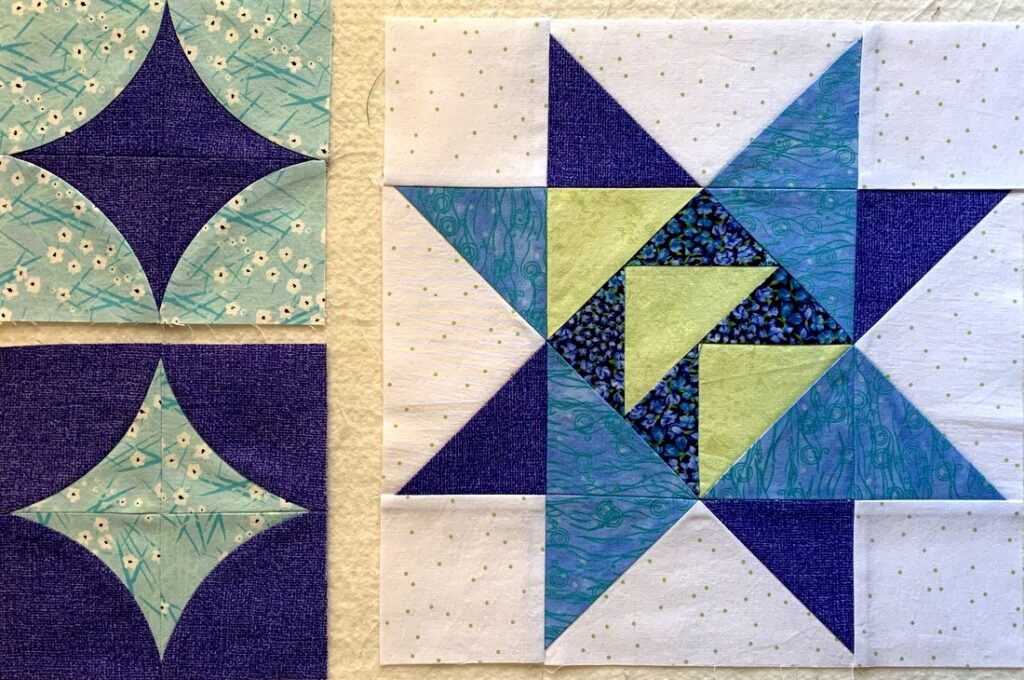
The aqua floral fabric is one of my all-time favorite prints so I’m using it sparingly. It’s from Portland designer Mo Bedell’s debut line of fabric dating from 2010 called “Party Dress” for Blue Hill Fabrics.

Here’s a look at the atomic stars next to my 12″ Stargazer Lily block (subject of my last post):

Although they lose their atomic star vibe, I really like the way these blocks look on point, too:

I also like the positive-negative effect. Really, I could tinker endlessly with these blocks but the end of July is fast approaching and I want to get a couple of other WIPs finished by then. Wish me luck!


Posted in Block of the Month (BOM), Quilt-Along, sampler quilt, update, Wonder Curve Ruler | 4 Comments

First Light Designs: Best of 2020

Cheryl at Meadow Mist Designs is hosting a Best of 2020 Linky Party, inviting bloggers to highlight their top five posts of the year. It’s a fun way to look back over the last 12 months and identify some of the high points. (And wouldn’t we all much rather dwell on the high points of 2020 than the low points?!)

My top five are below, in reverse order. Clicking on the links will take you to the original posts.

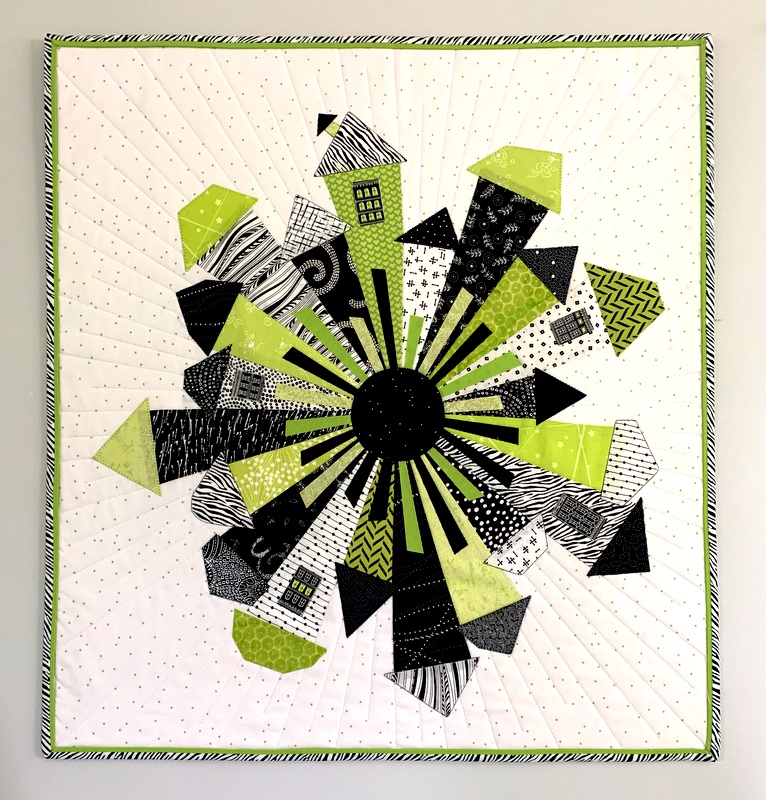
5. Uptown Funk. My version of Dresden Neighborhood by Kim Lapacek of Persimon Dreams. It was so much fun to make!

Uptown Funk (24″ x 26″) by Dawn White (2020)


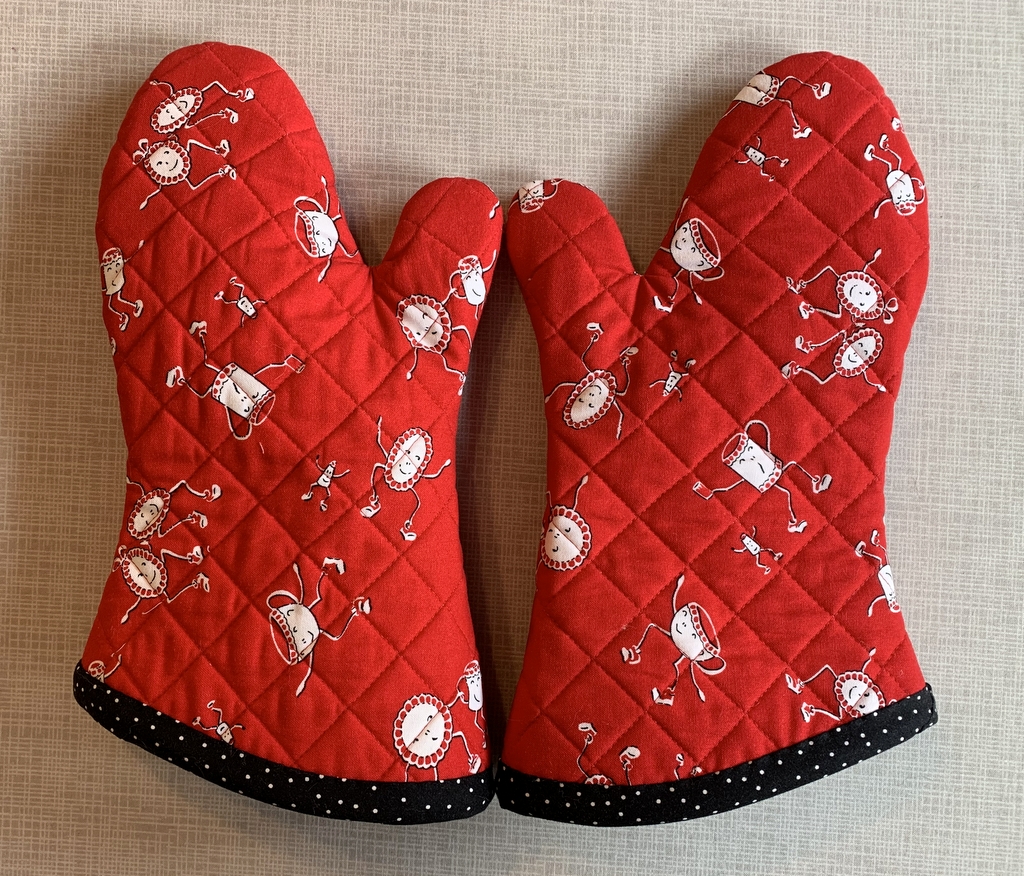
4. Something in Red: New Oven Mitts. Every oven mitt I’ve tried on in a store has been oversized, and every tutorial I’ve found online has included a pattern that’s too big. What’s a quilter to do? Why, make her own, of course! I just started making oven mitts in December and am still tweaking my process but I plan to offer my own tutorial and free pattern in early 2021.

Mitts that Fit! Made by Dawn White (2020)


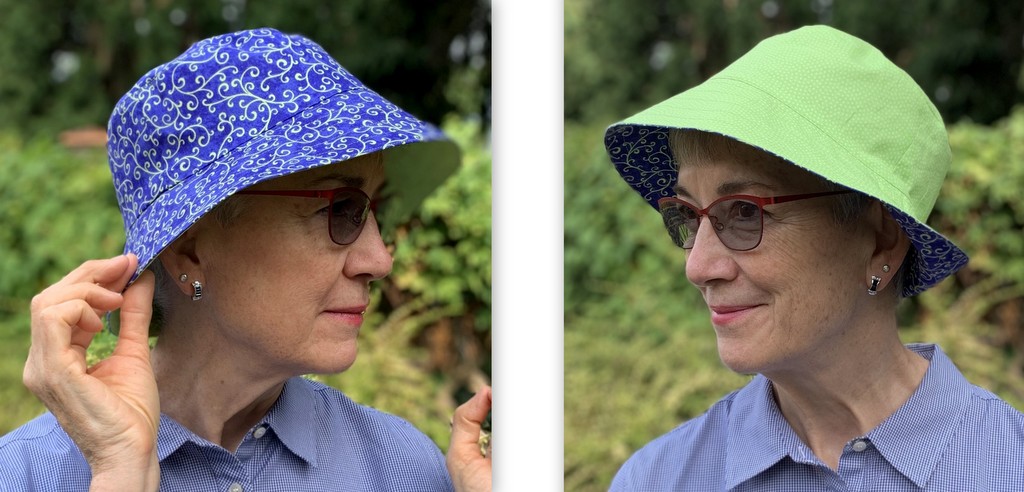
3. A Bee in my Bucket Hat. A reversible hat made using the Sorrento Bucket Hat pattern from Elbe Designs.

Dawn’s Sorrento Bucket Hat (2020)


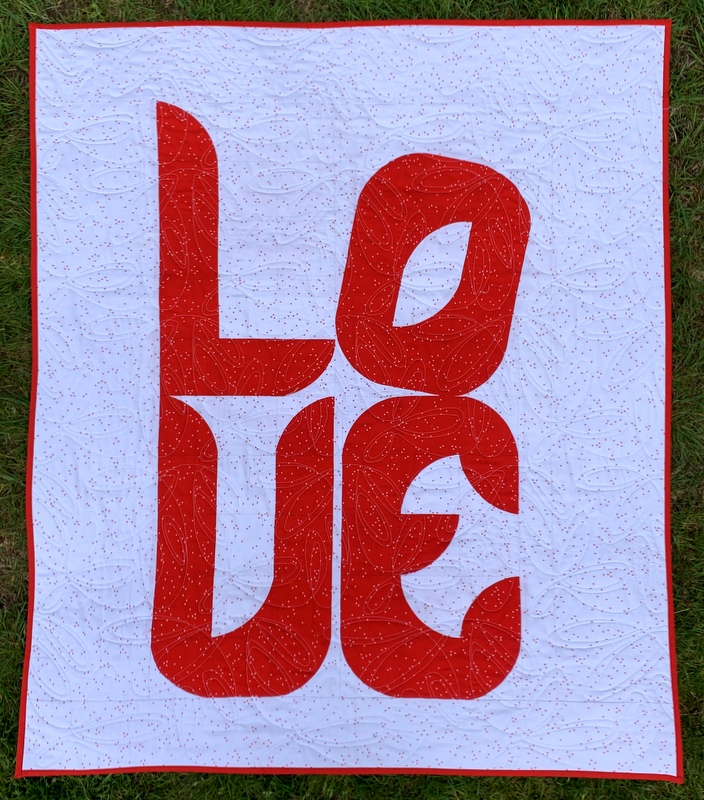
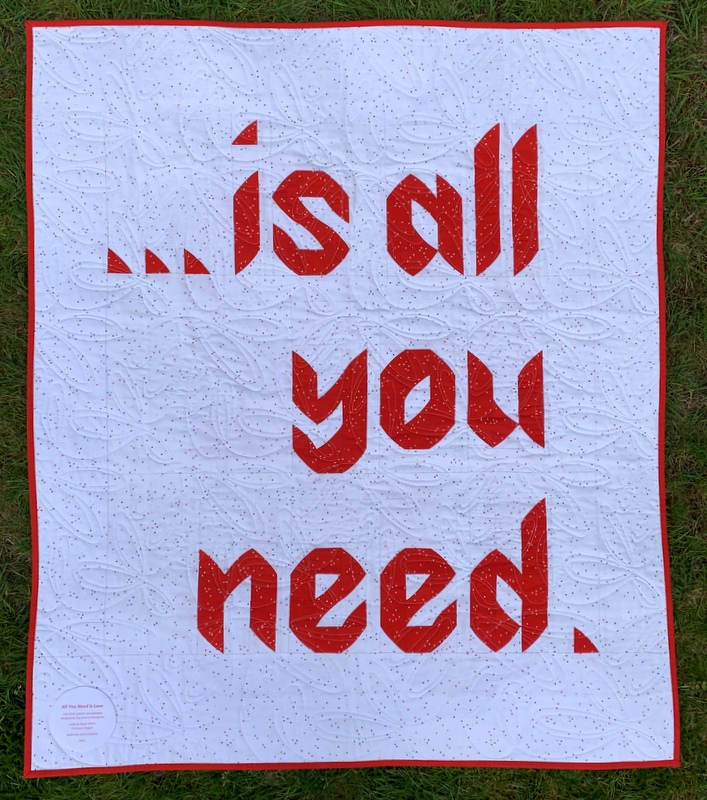
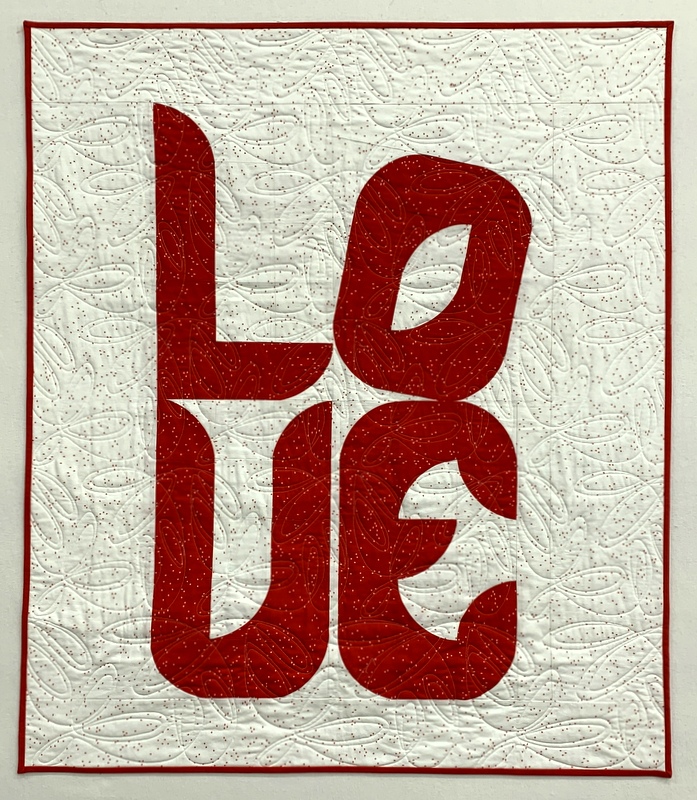
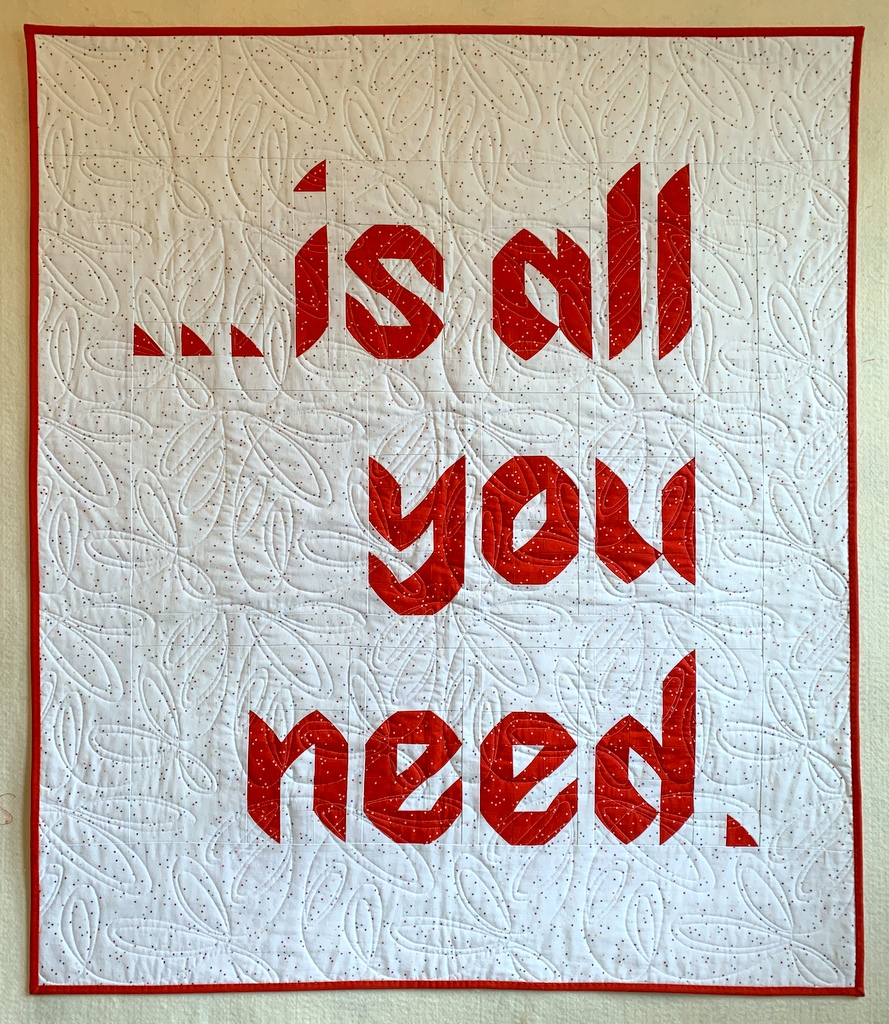
2. Love Rocks. All You Need Is Love, made using the Love Rocks pattern and alphabet (both contained in Sew Kind of Wonderful’s latest book, Text Me) and the Wonder Curve ruler.

Love Is All You Need (38″ x 44″) by Dawn White, quilted by Sherry Wadley (2020)
back of All You Need Is Love (38″ x 44″) by Dawn White, quilted by Sherry Wadley (2020)


1. Scattered Stars, an original design using a block first seen in Jenifer Gaston’s quilt Churning Stars.

Scattered Stars (66″ x 88″), made by Dawn White, quilted by Karlee Sandell (2020)


Thank you so much for checking out my “top five” blog posts. If you’re a blogger, you can join Cheryl’s party, too. The link is open until January 2. Be sure to check out the top five posts of the other quilting/blogging partygoers — and prepare to be inspired!


Posted in bucket hat, cheddar and indigo, Churning Stars quilt block, home dec, machine applique, tutorial, update, wall hanging, Wonder Curve Ruler, wonky Dresden neighborhood | 10 Comments

Here, There, and Everywhere

Do you ever buy a piece of fabric that you have no idea what to do with but you just know you have to have it? A couple years ago I was in a quilt shop in Bend, Oregon and spotted a succulent print in greens from the “Canyon” line designed by Kate Spain for Moda. I had to have some!

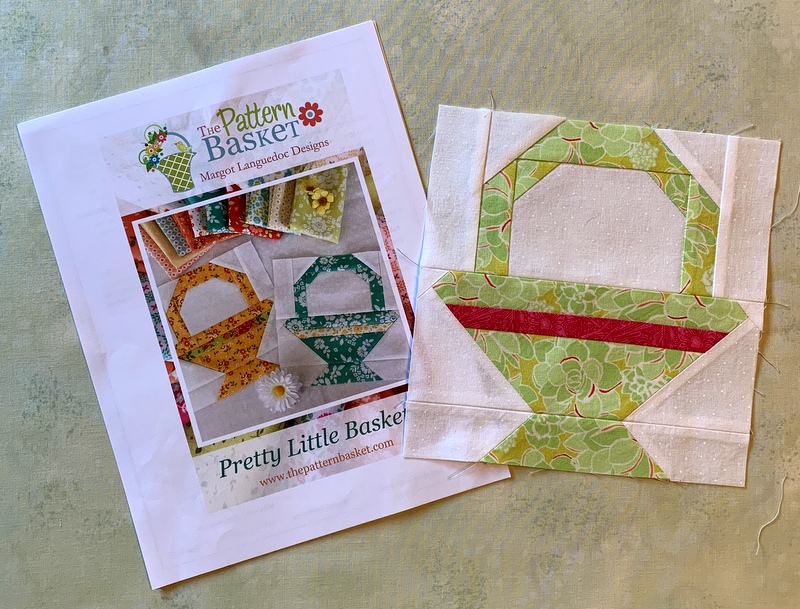
It sat on a shelf in my sewing room cabinet until a few weeks ago when I pulled it out to make this test block from a new pattern by Margot Languedoc called Pretty Little Baskets:

The pattern is definitely on my “to do” list but I only made one block with that fabric.

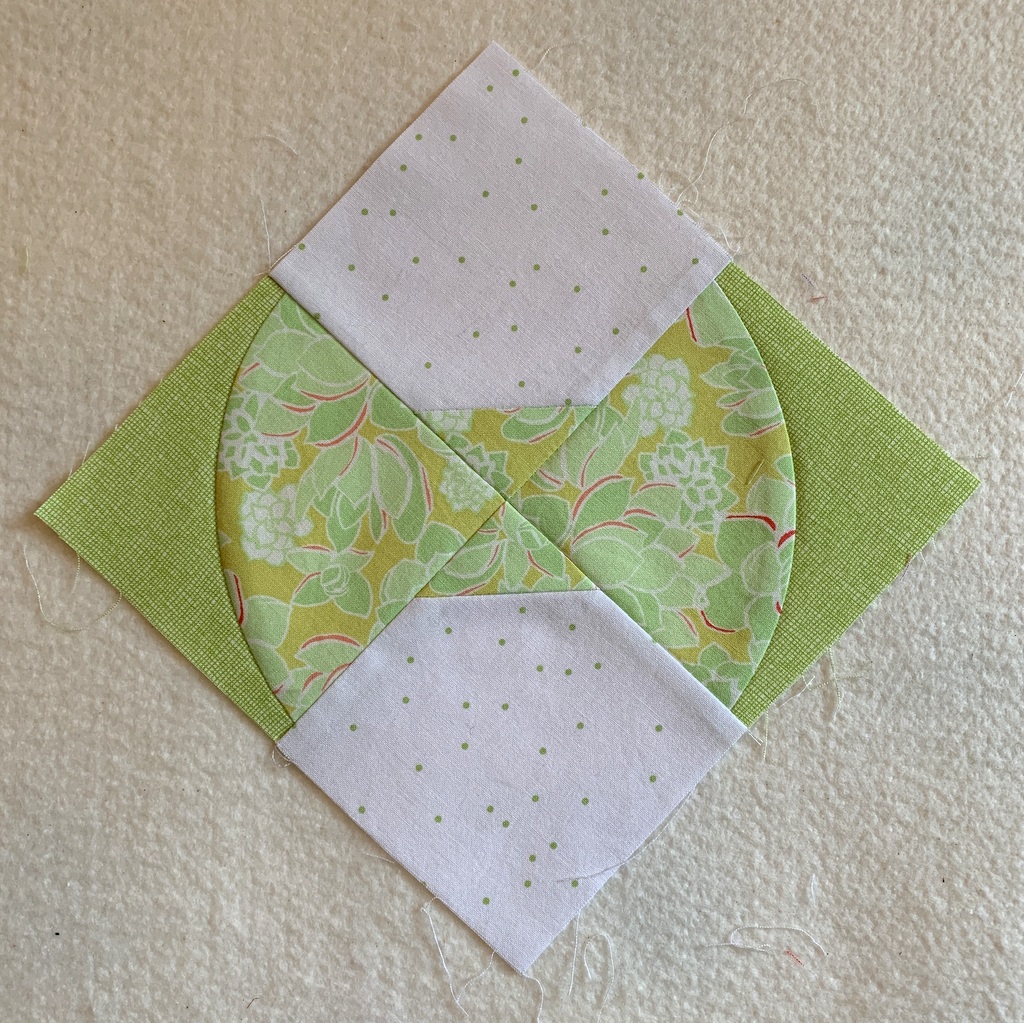
Then very recently Sew Kind of Wonderful released a new pattern called Curvy Bow Tie using the new Wonder Curve Ruler and I used a bit more of the fabric to make this test block:

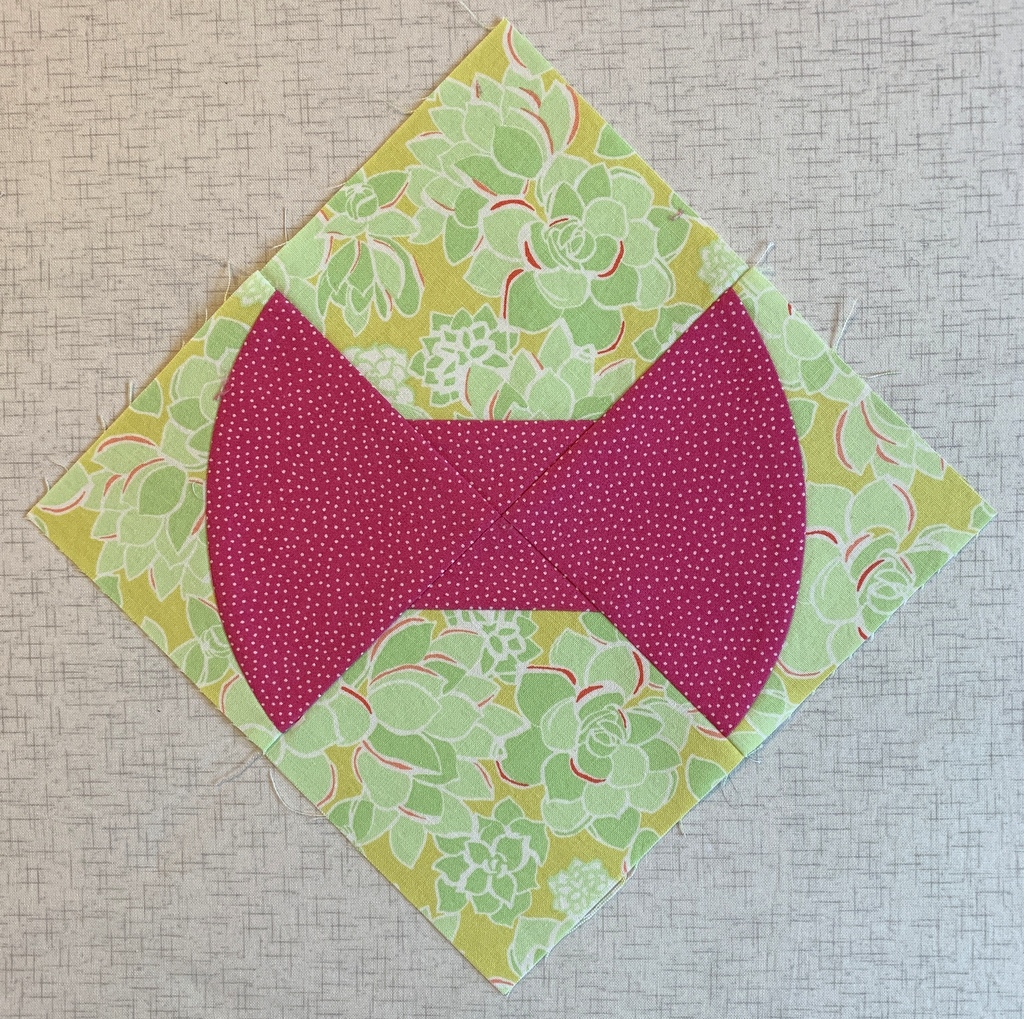
Such a cute block but I wondered if the fabric would look better as the background of the block rather than the focal point. I made another block to see:

Oh yes, I like that better. But I’m not ready to make an entire quilt out of it just yet. (I love the Curvy Bow Tie pattern, though, and do plan to make a quilt when I’ve decided on a color scheme.)

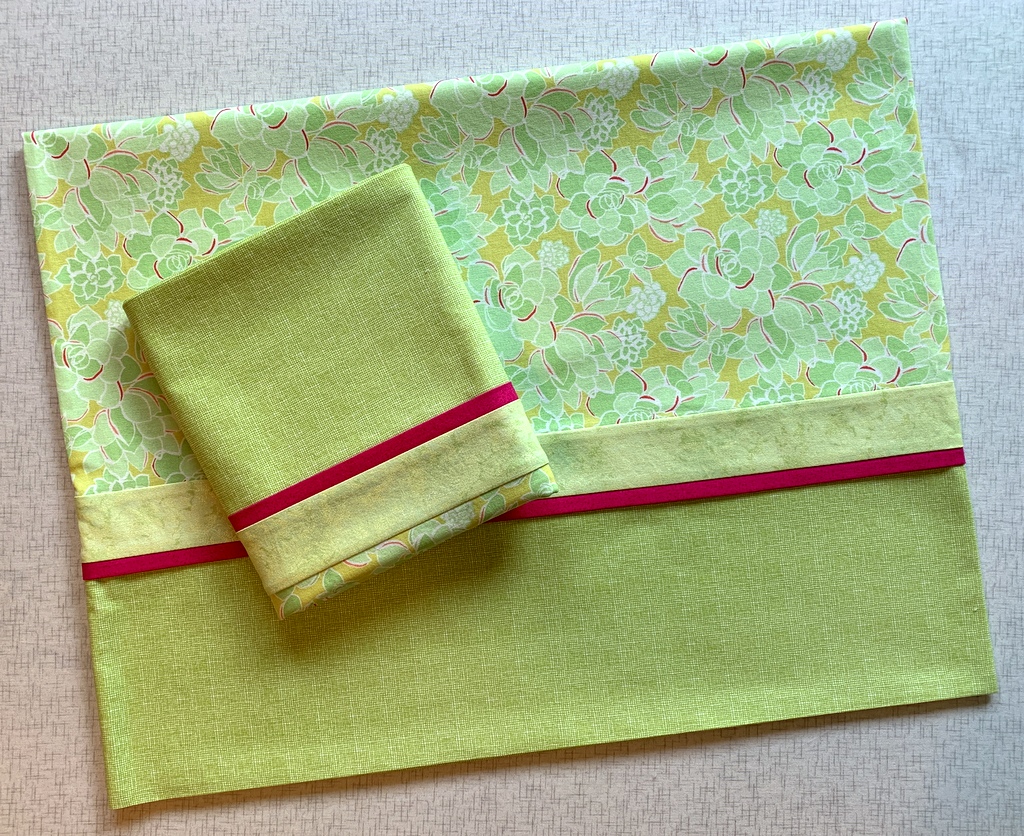
What I really wanted to do with that fabric was make a pair of pillowcases for the Portland White House (using my own tutorial). So I did:

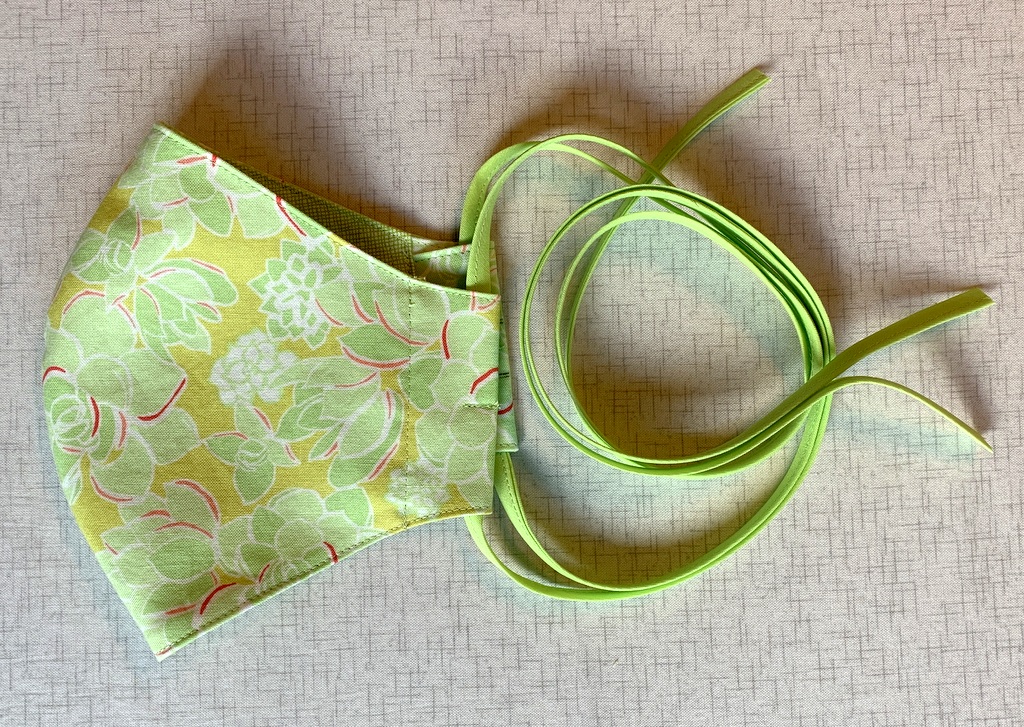
And I used some scraps to try out a new mask tutorial:

Now I can’t stop thinking of ways to use this fabric. Wouldn’t it make a great camp shirt?


Posted in bias tape, bowties, face masks, home dec, roll-it-up pillowcases, tutorial, update, Wonder Curve Ruler | 12 Comments

Of Luck and Labels

I made a serendipitous discovery today when making the label for All You Need Is Love, my latest quilt. Before I explain, let me show you a few photos of the quilt taken outdoors this afternoon. The photos are so much better than the indoor shots I showed you in my last post. I’m especially loving the contrast between the red of the quilt and the green of the grass:


Did you happen to notice the label in the lower left corner in the photo above?

No? How about in the photo below, showing the front of the quilt with one corner turned back?

It’s not very noticeable, is it? That was my goal!

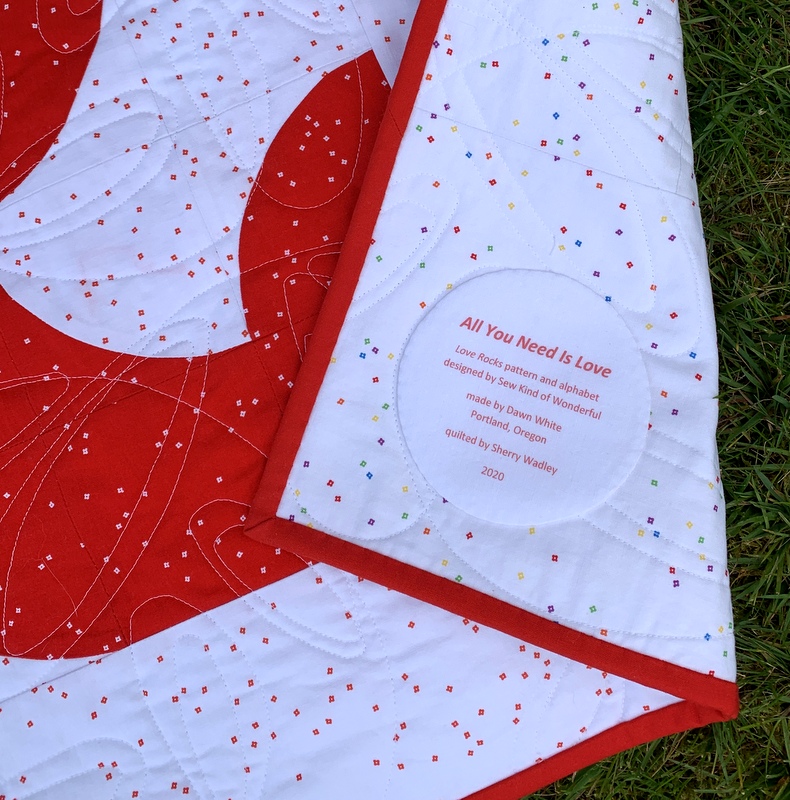
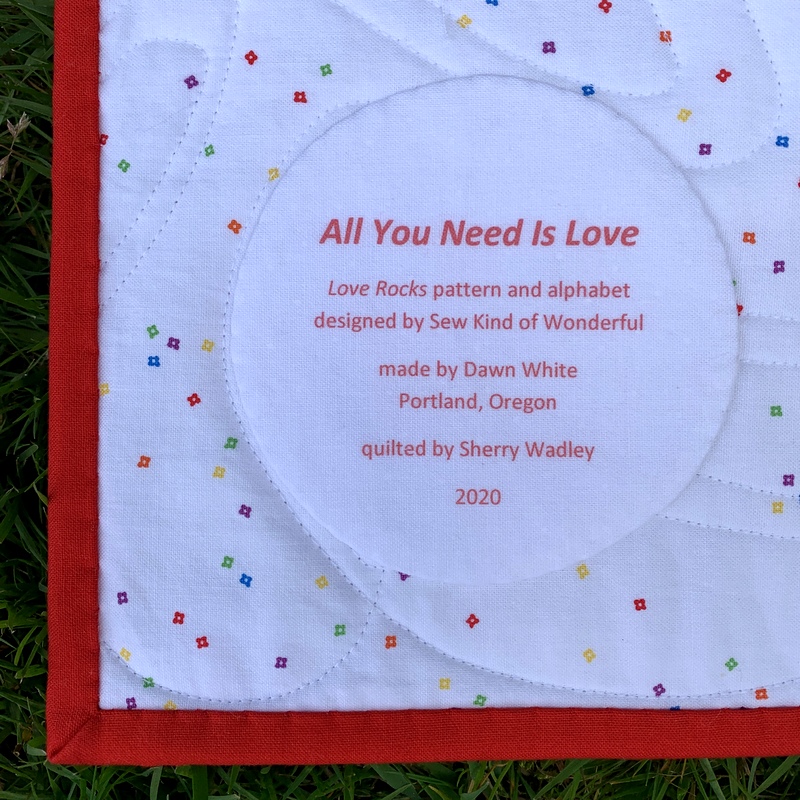
Here’s a close-up:

The label contains important information: the name of the quilt, who designed it, who made it, where it was made, who quilted it, and the year it was finished. But I wanted the label to take a back seat to the message on the back of the quilt.

To achieve that I did three things: printed the label from my computer so that I could use smaller letters than I can comfortably write by hand; used red ink, which blends into the background better than black ink would; and reduced the size of my circle pattern from my usual measurement of 4⅝” in diameter (the width of a compact disc) to 3¾” in diameter . The quilt finishes at 38″ x 44″ so a smaller label was definitely called for.

This is my second experience printing a label using my inkjet printer. The first time was a few months ago when I made the label for Give Me the Simple Life. The procedure was pretty straightforward. You start with label fabric and freezer paper that are both cut larger than a standard piece of paper, press the shiny side of the freezer paper to the wrong side of the label fabric, and trim the result very carefully to exactly 8½” x 11″. You create a label on your computer, determining the font and point size based on the desired finished size of your label. You insert the fabric/freezer paper combo into your printer and print the label.

When I tried this the first time I found I had to use two layers of freezer paper to get my printer to accept the combo and even then it was a bit temperamental, jamming my printer a couple of times until I got the the result I wanted.

I would have followed the same procedure this time but for my concern that the bright little flowers on my background fabric would show through the white label fabric. I was using the same white fabric for the back of the label but I wanted an extra layer in the middle to make sure those bright little flowers stayed hidden.

I decided to try fusing featherweight interfacing to the back of my label fabric before pressing it to one layer of freezer paper. I’m so glad I did! The interfacing gave the fabric just the right amount of body to feed smoothly through my printer. Serendipity!

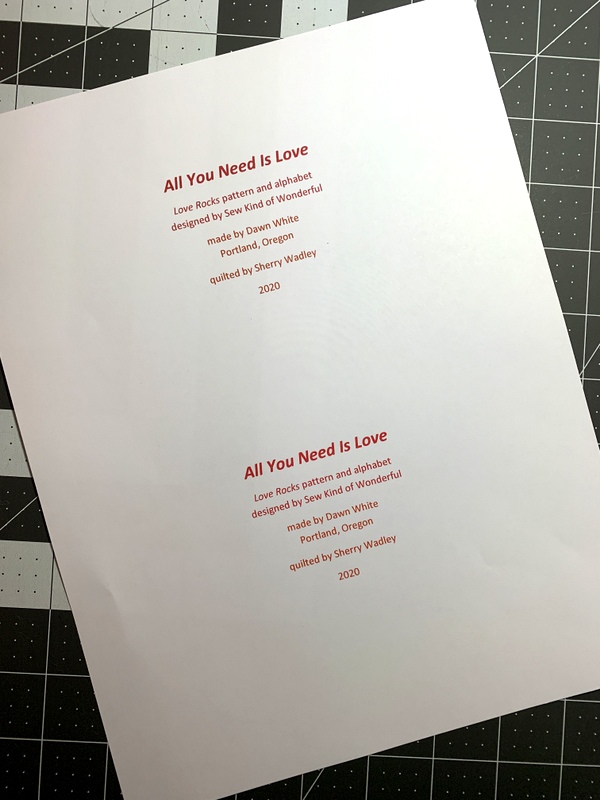
I previewed my label first on paper using two different shades of red:

The bottom red was a better match with the red in the quilt. Next I printed the label on my fabric/interfacing/freezer paper combo:

The ink on fabric wasn’t quite as bright as the ink on paper but would certainly be fine for my purpose.

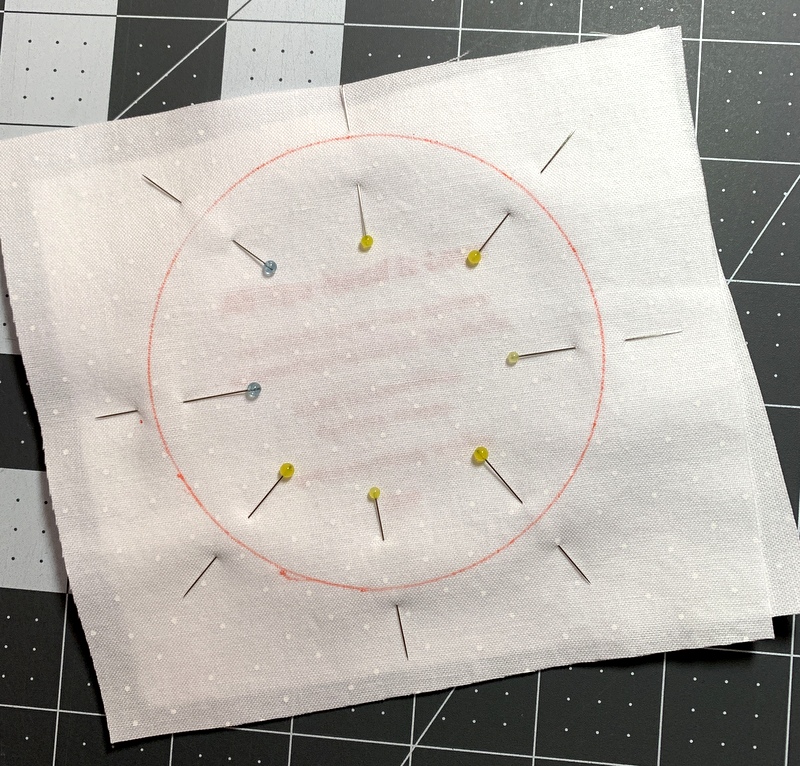
After determining a circle 3¾” in diameter would work well as a finished label size (based on the width of the longest line), I wandered around my kitchen opening cupboard doors until I found something just the right size to trace around for the back of the label:

In the next photo the fabric for the back of the label is on top of the label fabric, right sides together and pinned in place. You can just make out the printing on the label through the top layer:


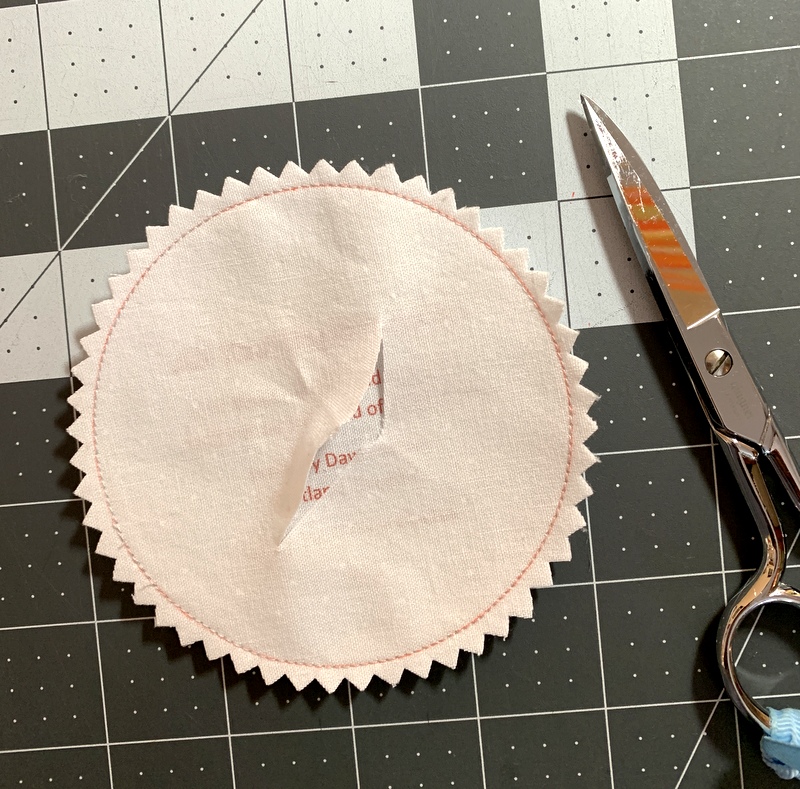
After stitching all the way around the circle (taking out the pins as I come to them) and trimming very close to the stitched edge with pinking shears, I cut a slit in the back of the label so it can be turned inside out:


With the label turned, pressed, and hand appliquéd in place, the slit in the back will never be seen. And I’m very happy with the result:

I have a feeling I will be using this method on future labels!


Posted in appliqué, Hazel's Diary Quilt, quilt labels, update, Wonder Curve Ruler | 9 Comments

Love Rocks

Always has, always will!

May I present my latest quilt finish? It’s called All You Need Is Love based on the pattern Love Rocks from the new book Text Me from Sew Kind of Wonderful:

The book features several sizes of alphabets made using Sew Kind of Wonderful’s new Wonder Curve ruler. I like to piece the backs of my quilts so I decided to have some fun with the alphabet and carry a message from the front of the quilt to the back:

My little quilt — 38″ x 44″ — sports an edge-to-edge quilting design. I wanted something modern and was attracted to this design that looks a bit like doodling:

“Modern Ties” is a whimsical design that offers a pleasing counterpoint to the precision of the letters. Sherry Wadley did such a nice job on this for me. The quilting enhances the design of the quilt without overpowering it, just the effect I was going for.

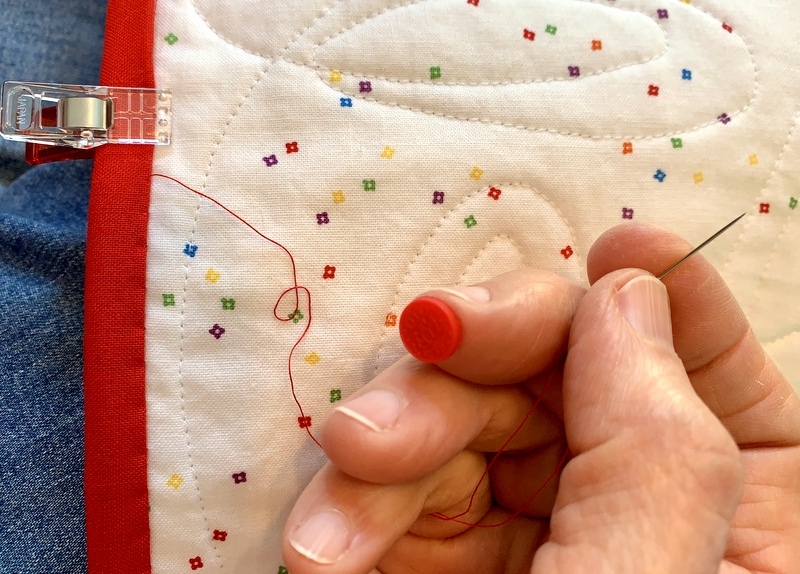
A lot of quilters I know don’t enjoy binding their quilts but I do. Stitching down the binding on this quilt was a breeze both because the quilt is small and because I used a nifty little “sticky thimble” to push the needle through the fabric:


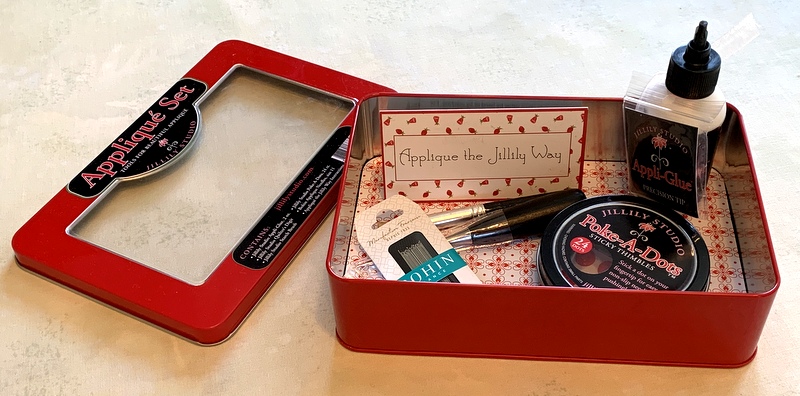
The thimble is called a Poke-a-Dot — how cute is that? — and comes in a little round tin containing 24 dots. Each thimble can be used multiple times so I probably have a lifetime supply. I could have ordered just the small tin of Poke-A-Dots but I treated myself to a bigger tin — the full Appliqué Set from Jillily Studio — several weeks ago:

Having learned how to do needleturn appliqué last year in the making of Give Me the Simple Life, I’m interested in learning other approaches. And I do confess that the tin this appliqué set comes in influenced my decision to purchase it. (This is not a paid endorsement, by the way; I just happen to like these products.)

Another confession: I jumped the gun in showing you my latest quilt. It’s not quite finished. Still to come: the label.


Posted in appliqué, Hazel's Diary Quilt, needleturn appliqué, update, Wonder Curve Ruler | 5 Comments

All You Need is Love

All you need is love
All you need is love, love
Love is all you need.
— the Beatles (1967)

When I made my Love Rocks quilt top a couple weeks ago using Sew Kind of Wonderful’s design from the new book Text Me, I decided I wanted to put a message on the back. Of course, it took me much longer to piece the back of the quilt than it did the front. The individual letters on the back range from 6″ to 9″ tall and are made from blocks that finish at 1½” square.

I still have to add borders to the back but here’s a collage photo showing you both sides:


You may remember I was using a positive/negative print from Riley Blake Fabrics (“Blossom” by Christopher Thompson) when working on the top:


After finishing the top I needed more of both fabrics so I went back to cool cottons, one of the best quilt shops in Portland, for more. There was plenty of the red print in stock but the background fabric was gone. Look what I found instead:


The very same “Blossom” print in the colors of the rainbow!

You gotta *love* it!


Posted in update, Wonder Curve Ruler | 5 Comments

Short Stack

Am I dreaming of pancakes?

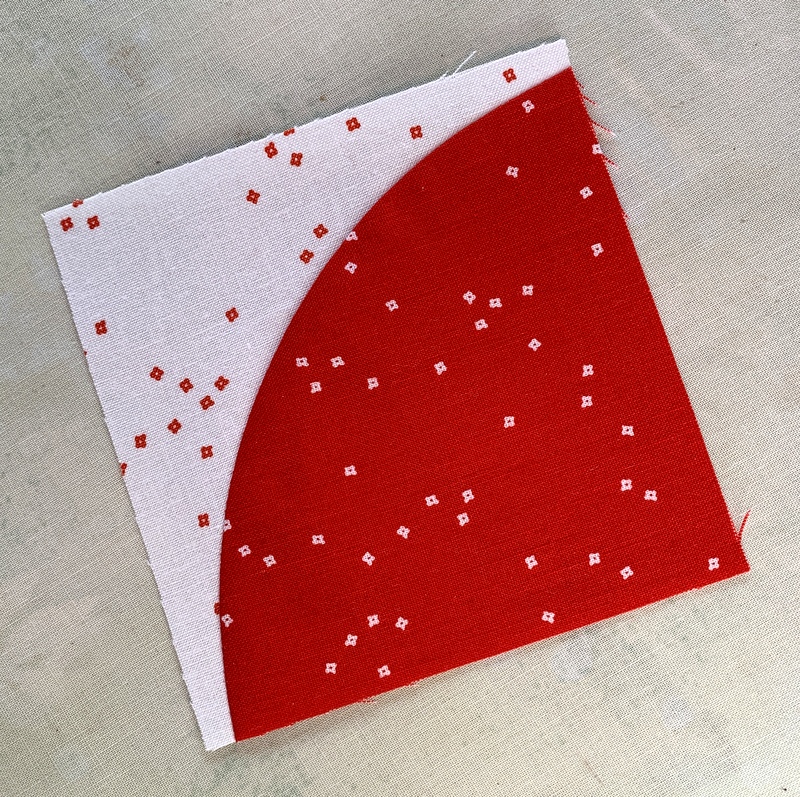
Nope. What I have here is a short stack of curves, ready to sew into letters for a message on the back of my Love Rocks quilt:


The markings on the new Wonder Curve Ruler from Sew Kind of Wonderful make it easy to cut the curves. Once I’ve sewn and pressed the curves, I’ll trim the resulting blocks into 2″ squares and sew those blocks together to form letters that will be 9″ tall when finished.

Tall letters from a short stack. And I’ll have to cut several more stacks of curves to have enough blocks for the simple message I have in mind.

Now I can’t stop thinking about pancakes.

Hmmmmm. Pancakes for dinner? Why not?!


Posted in update, Wonder Curve Ruler | 3 Comments

Love Is in the Air . . .

. . . and on my design wall. Take a look:

The pattern is Love Rocks, from the brand new book Text Me by those talented sisters at Sew Kind of Wonderful. The curves were made with the Wonder Curve Ruler, also by Sew Kind of Wonderful, which made its debut last fall:

The book was just released at the end of January. Being a huge fan of Sew Kind of Wonderful’s other rulers and designs, I ordered Text Me as soon as it was available. And even though I couldn’t possibly justify starting a brand new project, I absolutely couldn’t wait to try out the new ruler and one of the designs in the book.

I already had the perfect fabric in my stash: a pair of positive/negative prints in red and white from the “Blossom” collection by Christopher Thompson for Riley Blake Fabrics. Here’s a close-up of the print:

To give you some perspective, the block above is 4″ square. The letters L, V, and E in my quilt top measure 17½” tall! The quilt finishes at 35″ x 40″. (Mine will be a little larger because I cut my borders a bit wider.)

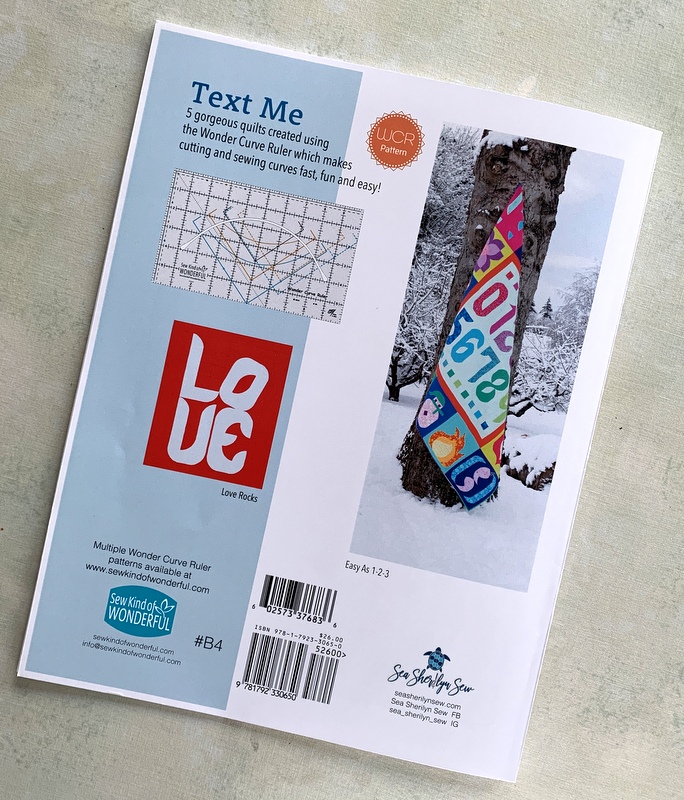
Here’s a photo of the Love Rocks quilt on the back cover of Text Me:

As you can see, I reversed the red and white fabrics in my version. Doesn’t have to be red and white, of course. Wouldn’t it be a darling baby quilt in just about any combination of fabric and colors?

The book has instructions for making letters and numbers in three different sizes. Also included are directions for five quilts plus two bonus quilts made with leftover blocks. And there are 16 fun emoji blocks. The sisters even included an alphabet made from half square triangles (HSTs) in case you want to create letters without sewing curves.

Gosh, my post sounds like a commercial endorsement, doesn’t it? I’m not being sponsored by Sew Kind of Wonderful. I just love their designs and enjoy sewing curves using their rulers and no-pin method of sewing them.

And I have an idea in mind for the back of my quilt that may just involve some letters . . . and maybe an emoji . . .


Posted in baby quilt, update, Wonder Curve Ruler | 3 Comments