Category Archives: home dec

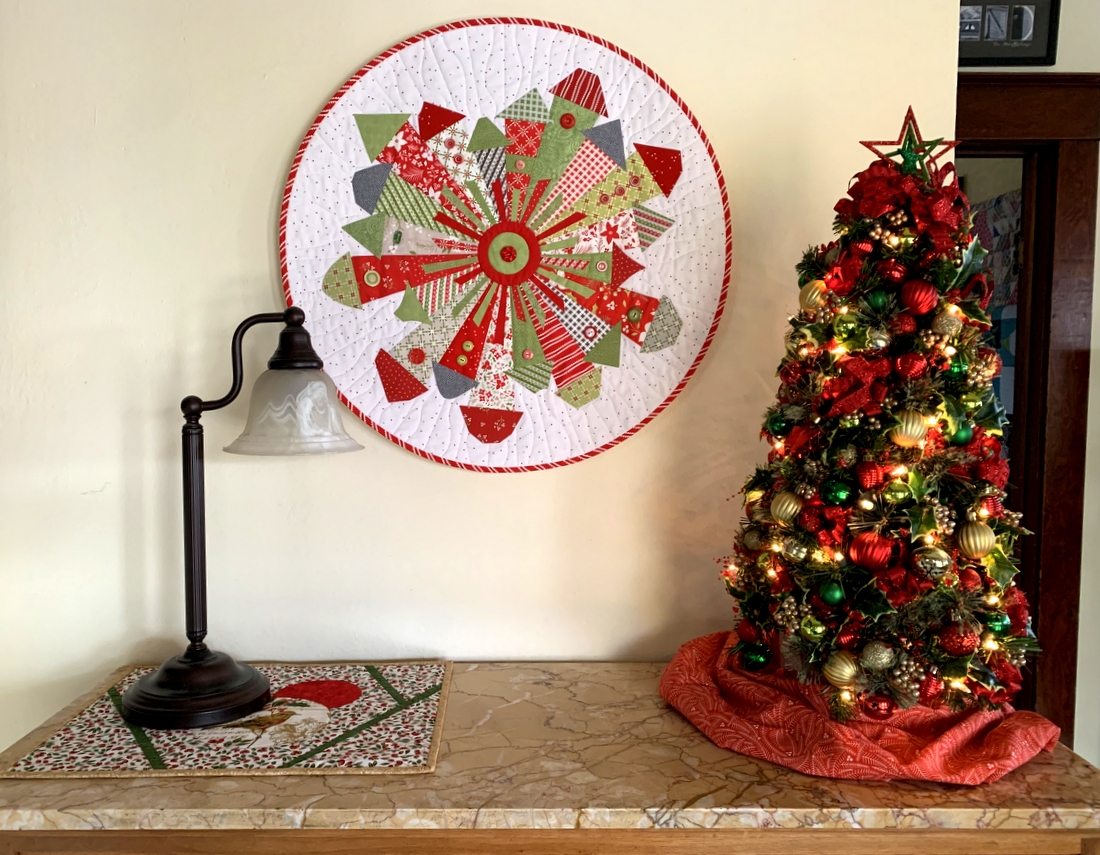
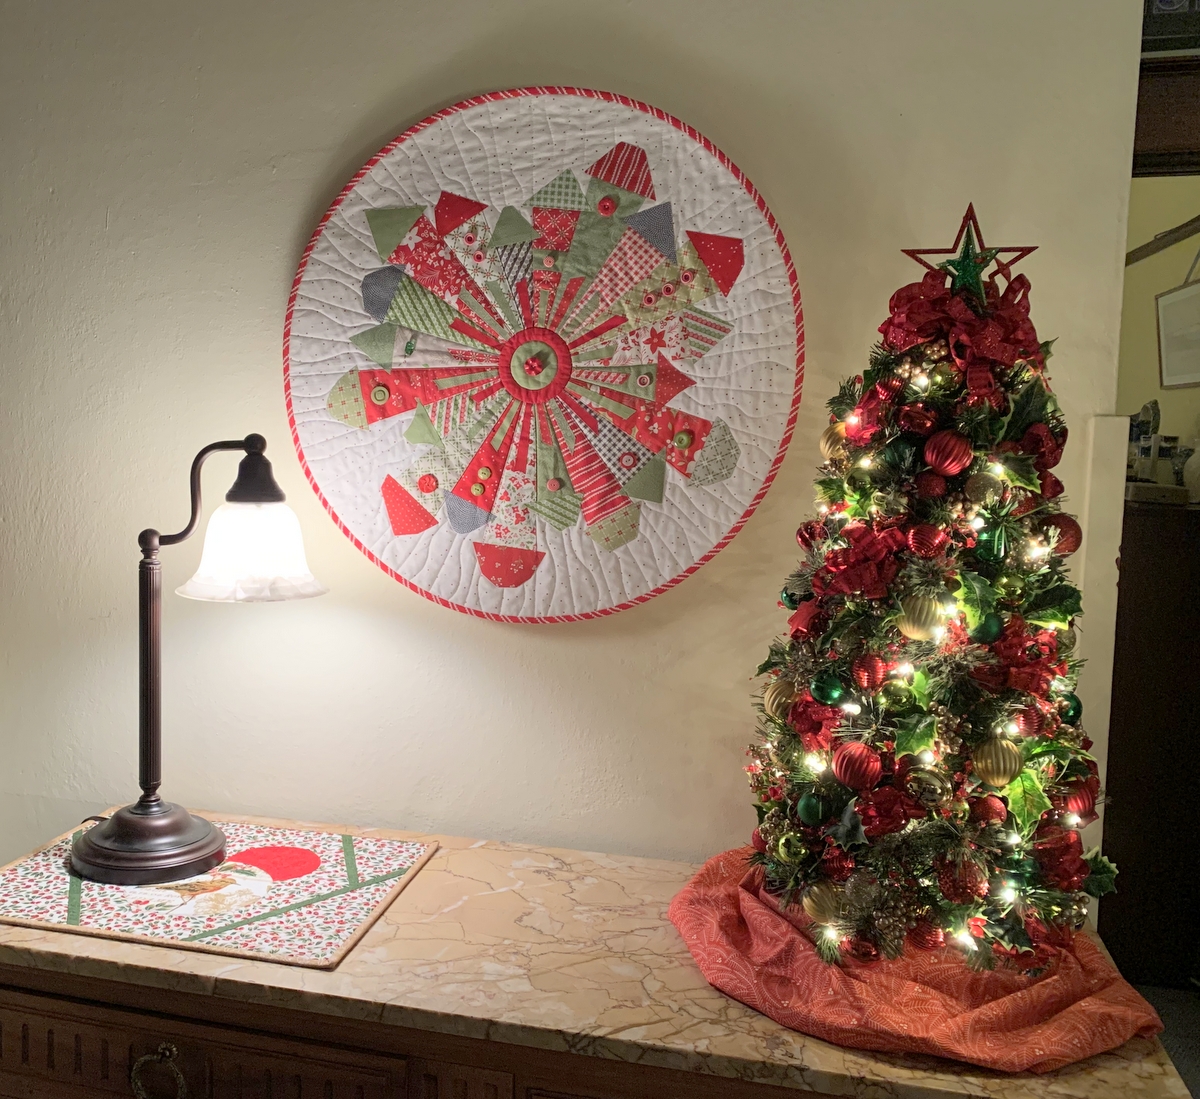
Another Home Dec Project Completed . . .

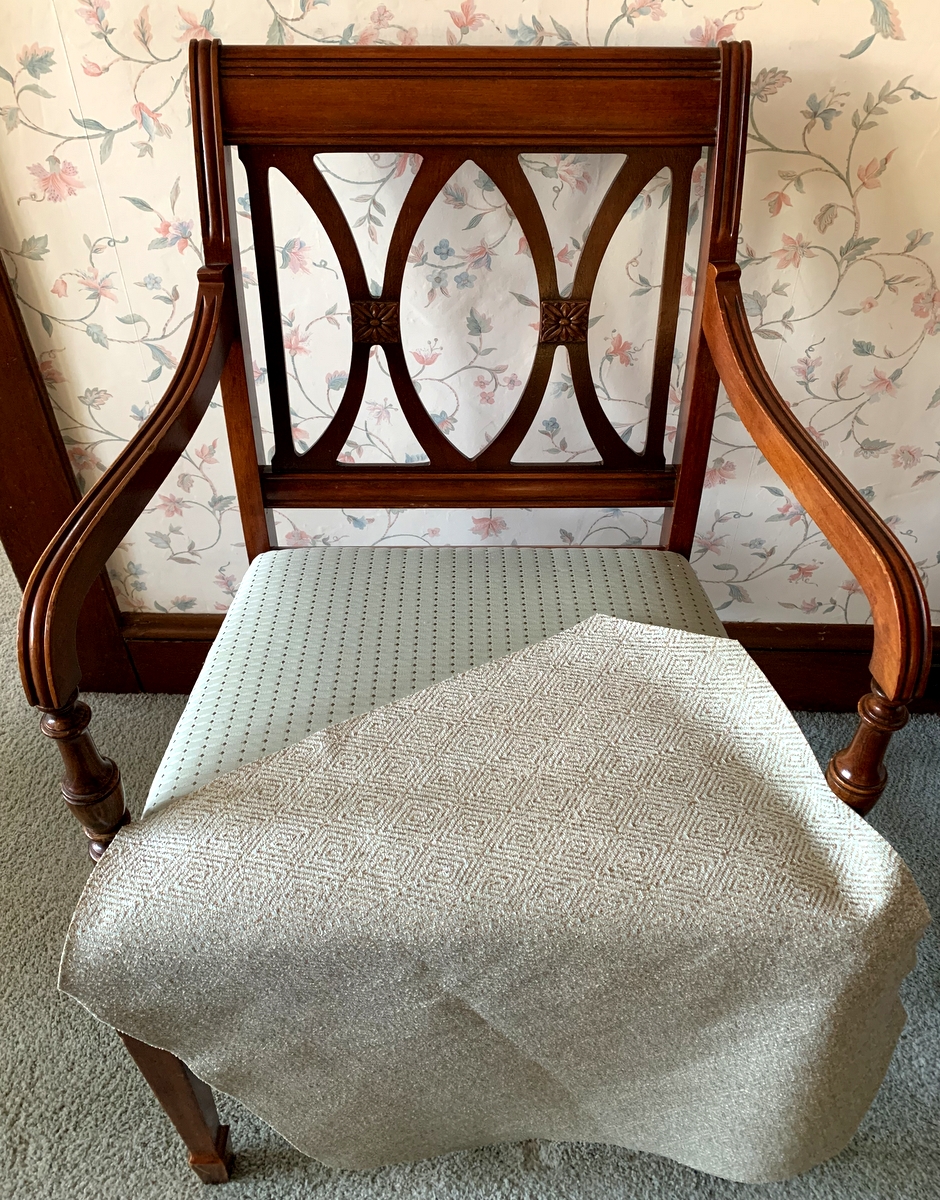
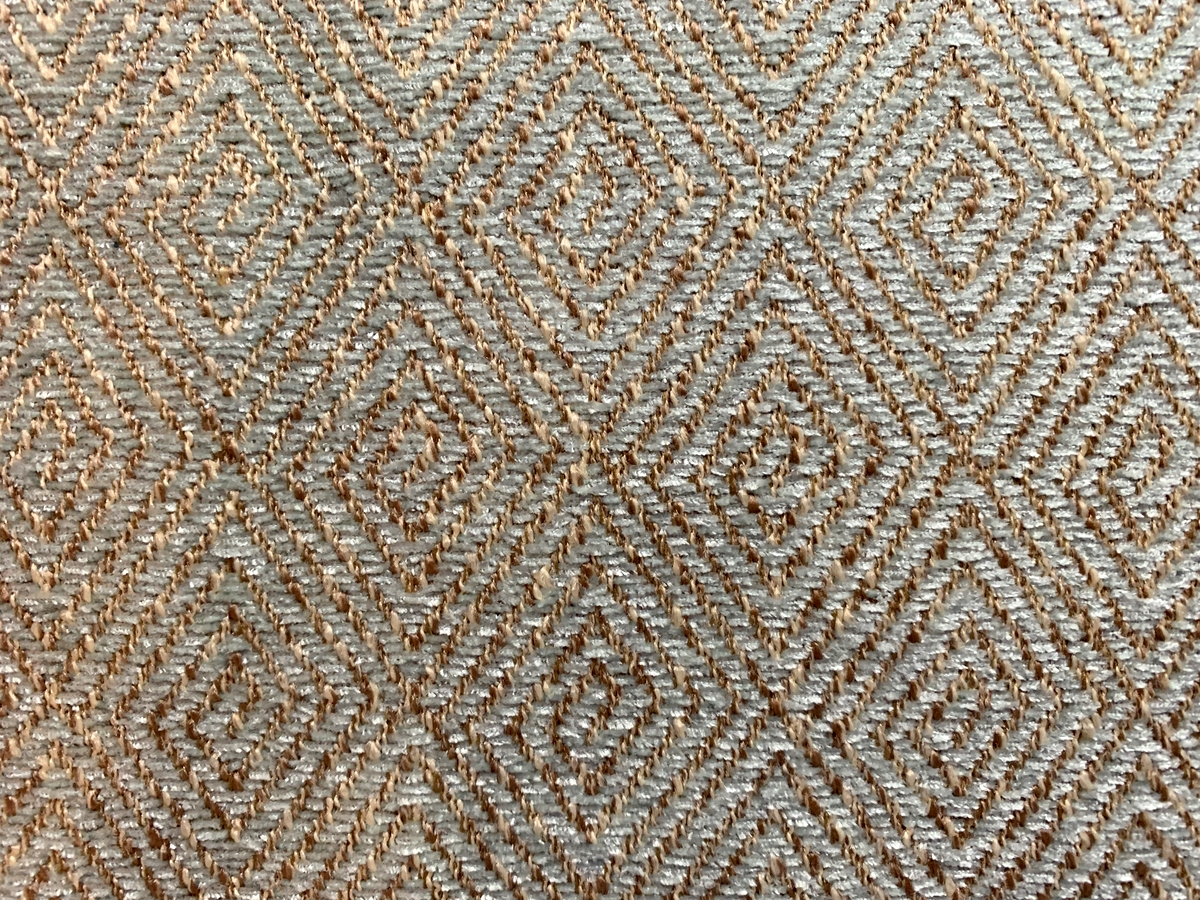
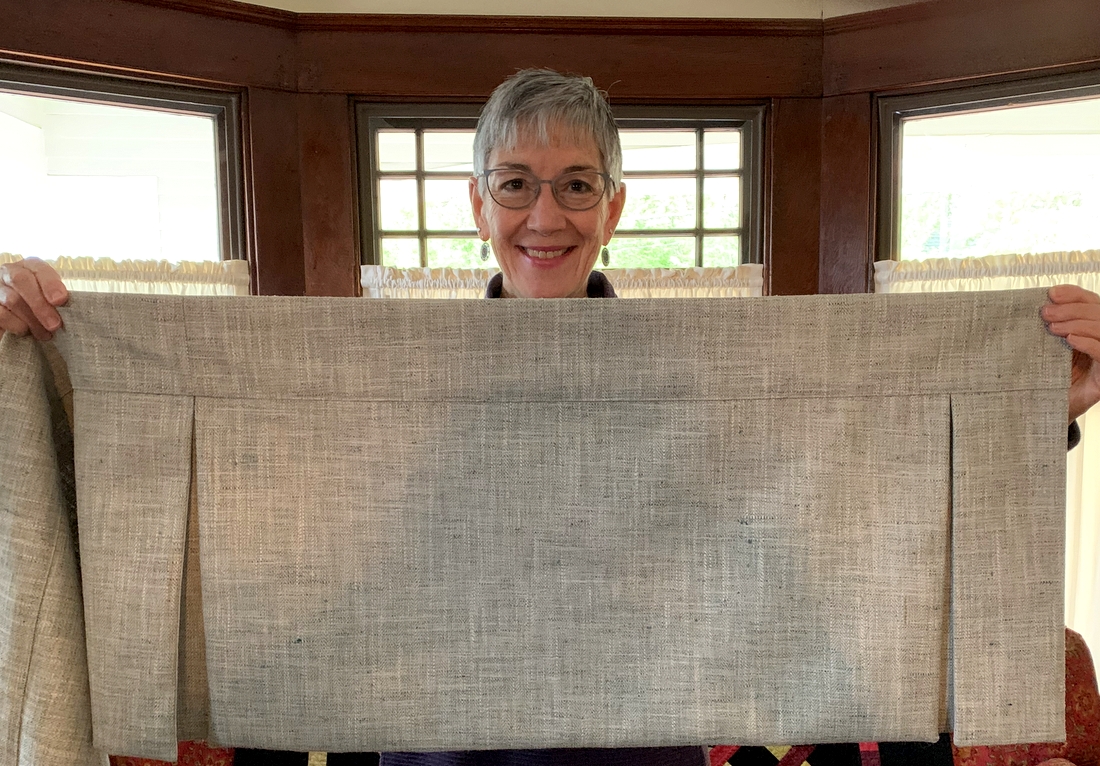
. . . and would you believe it took two years? I’m rather embarrassed to admit it took so long but the posts on my blog detailing the process leave no doubt. It was in the fall of 2021 that my stepmother Shirley asked if I would make valances for the three living room windows in her home in Bend. She had just bought new furniture and was looking for valances that would complement her upholstered couch. Here’s a look at one of the completed valances against the couch fabric:

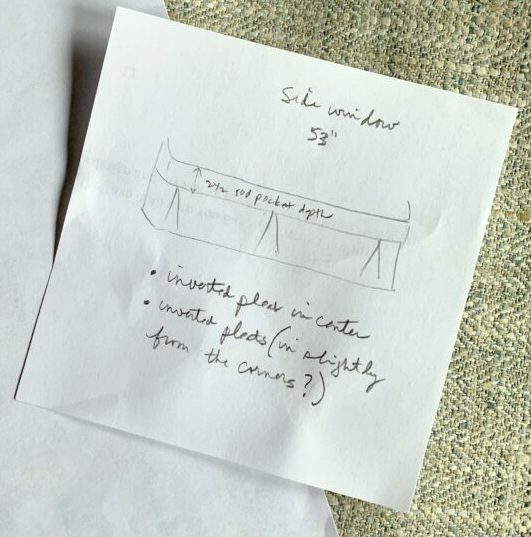
Back in 2021 Shirley and I looked at valances online and I sketched out our shared vision: tailored valances with inverted pleats in the center and each end, to be mounted on wide-pocket wraparound curtain rods:

By the fall of 2022 the valances were made and ready to hang , , ,

. . . but the trip from Portland to Bend to install them was postponed when the Dear Husband and I came down with Covid. Our cases were mild and we recovered quickly but by then road conditions between western and central Oregon — snow and ice in the passes — forced the decision to wait until spring. Due to a scheduling snafu on my part, the spring trip to Bend didn’t happen until summer (as in last week). Shirley’s grandson Scott (my nephew) drove up from southern Oregon to install the curtain rods; that guy is a keeper!

This is the valance on the front window . . .

. . . and these are the ones on the other side of the room:

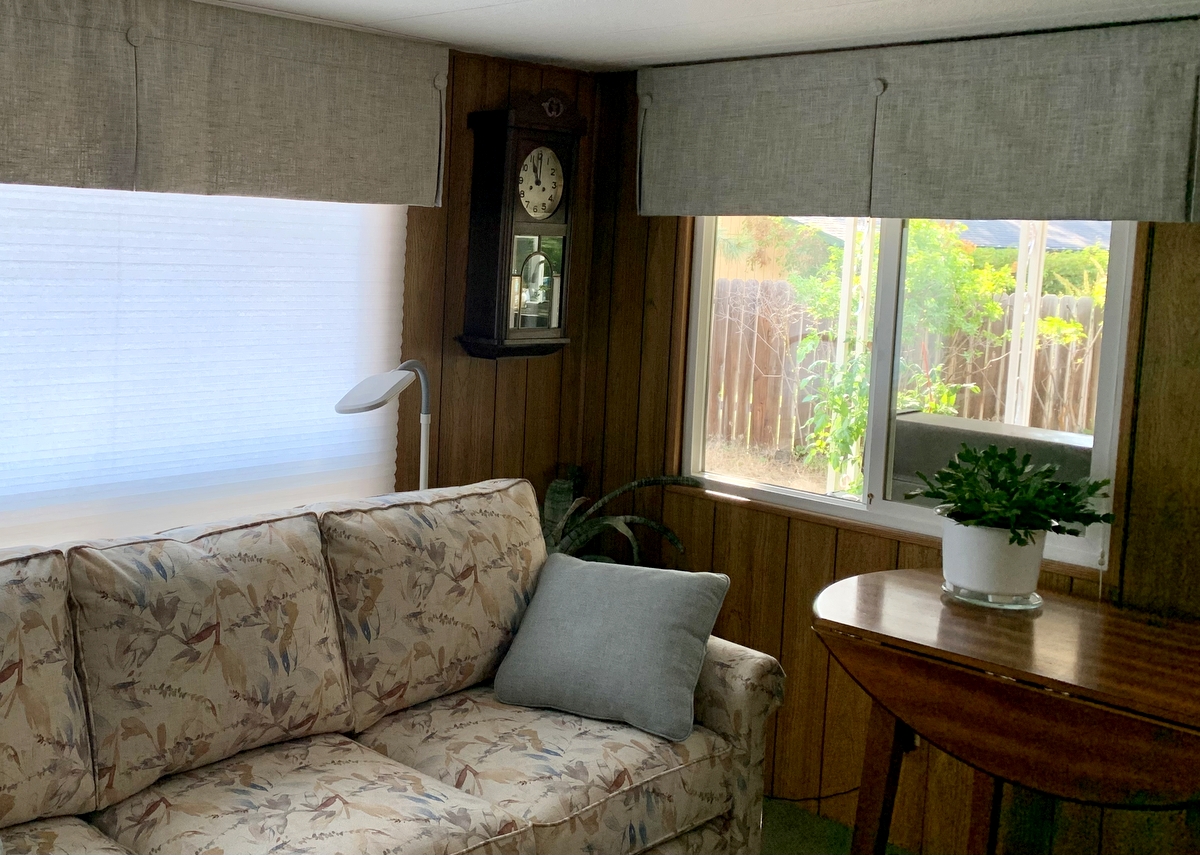
Underneath the valances are cellular shades, also called accordion blinds, that can be lowered depending on the location of the sun. This next shot shows the front window with the shade lowered against the morning sun:

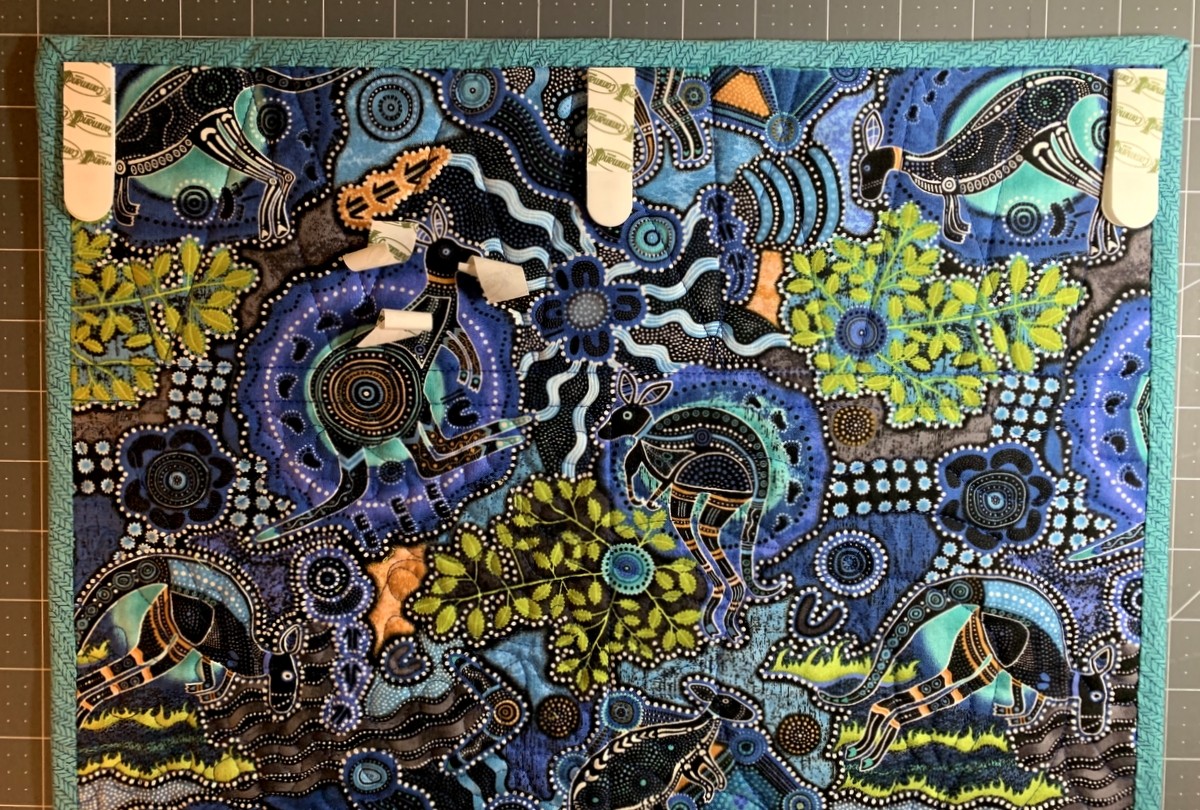
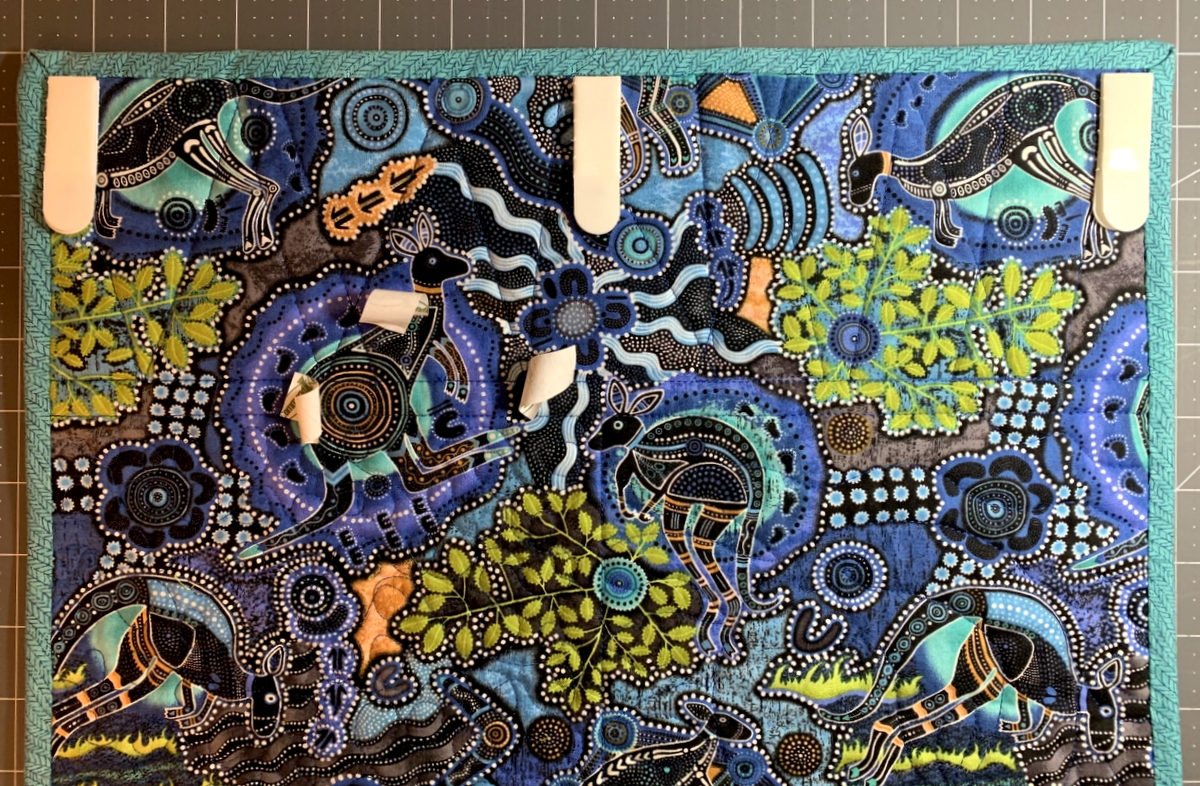
Did you happen to notice that my original sketch didn’t include buttons at the top of each pleat? They were an afterthought — and they were by far the hardest part of the project! The buttons are curved metal discs with teeth on the inside to grip the valance fabric, which is cut in circles and then wrapped tightly and smoothly around the discs:

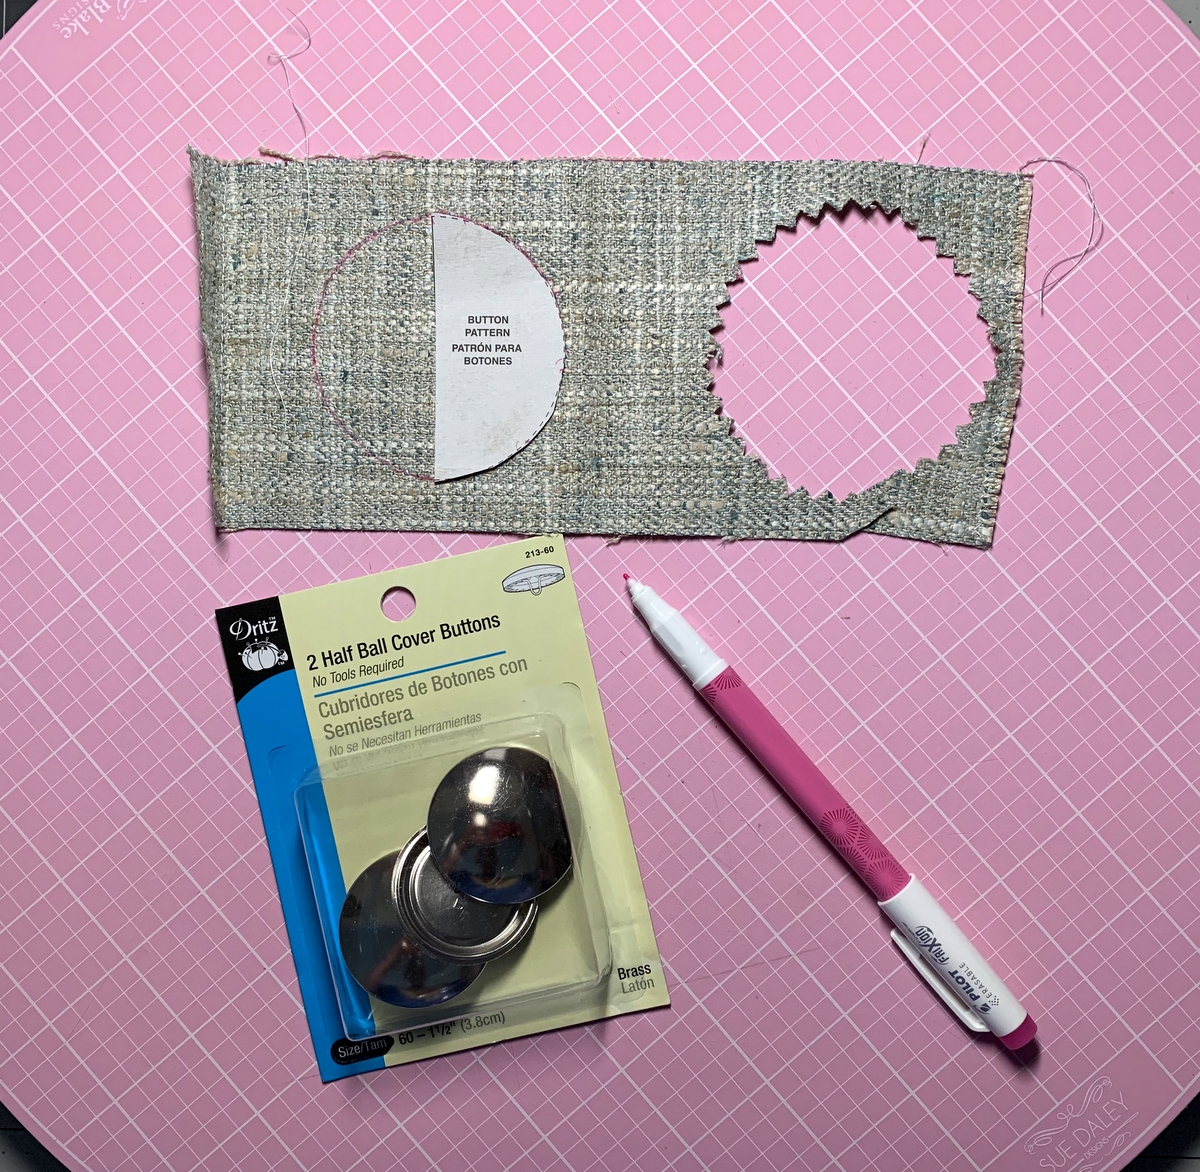
The decorator fabric is quite stiff and also ravels easily so I used pinking shears to cut out the circles. It was a battle getting each fabric circle neatly around a disc. I’m afraid I used some unpardonable language getting those buttons covered. (The DH was in earshot and can attest to that.) Each valance has three buttons. That makes nine of them (eleven if you count the two I ruined).

But all’s well that ends well. Shirley and I are both delighted with how well the valances turned out. It makes me so happy I could fulfill her wish for new window treatments.


Posted in family, home dec, update, valance | 6 Comments

Home Dec Duo

I’m taking advantage of my twin sister’s visit to spruce up the Portland White House. A few years ago I helped Diane recover her dining room chairs and now she’s returning the favor. I actually found the perfect fabric on my last trip to Georgia to visit her: a four-yard remnant of a beautiful “high performance” fabric, more than enough to cover six chairs. The beauty of having extra fabric is that there’s plenty to make new covers should the need arise.

In the photo above you can see a piece of the new fabric artfully draped over a chair to cover the stains and worn spots. Here’s a close-up of the fabric:

Isn’t it gorgeous? I love the subtle diamond design.

The chairs are part of an antique dining room set the Dear Husband and I bought 25 or 30 years ago. I had the chairs recovered professionally at the time. The upholsterer did such a good job that all Diane and I needed to do was cover the existing chair pads — no need to remove the old covers and dig out all those staples. An excellent DIY project but a two-person job for sure.

I started by making a freezer paper pattern, tracing around an existing chair pad for the shape and adding about 3½” extra to wrap the fabric around to the back:

Five of the six chairs have no arms; the sixth is the one in the first picture, the one I think of as the Papa Bear chair because it’s a couple inches wider and an inch longer than the other ones. After cutting fabric for the five armless chairs, I sliced the pattern to add the extra width and length for the Papa Bear chair:


Now take a look at the finished product:

Pretty nice, eh?

Here’s a look at one of the armless chairs:

I really loved the old fabric on the chairs but I must confess the new fabric looks a bit more luxurious:

As Diane would say, “Simply elegant and elegantly simple!”


Posted in family, home dec, update | 8 Comments

A New Project . . .

. . . and it’s not a quilt!

I can’t remember the last time I made myelf something to wear (not counting bathrobes and aprons). My inspiration for making a summery short sleeve shirt can be attributed to the glorious weather we’ve been enjoying in Portland the last few weeks. That and the fact that the Dear Husband and I are taking a little road trip soon and it would be fun to have something new to wear.

Over the years I’ve given most of my patterns away but have hung on to some thinking I might use them someday. For this project I’m using a Butterick pattern that probably dates back to the 1980s. (I couldn’t find a date on the envelope or instruction sheet.) When I pulled the pattern pieces out of the envelope I discovered they had already been cut out. By me. I’ve made this pattern before — but I have absolutely no recollection of what fabric I used and when I made it. (And why don’t I still have the shirt?)

The fabric is from the “Canyon” line designed a few years ago by Kate Spain for Moda. I’ve used it to make a pair of pillowcases for the Portland White House . . .

. . . and this sweet little basket block that may wind up in a quilt someday:


Posted in family, garment sewing, home dec, pillowcases, roll-it-up pillowcases, update | 9 Comments

This Time the Dream’s On Me

What’s with the title of my blog post? It’s the name of a 1941 song written by Harold Arlen with lyrics by Johnny Mercer. You’ll understand as you read on . . .

I gave myself the day off today from working in the yard to play in my sewing room.  What do you think of my new pillowcases for the Portland White House?

The main body, accent strip, and flange are from the “Mindscape” line of fabric designed by Katarina Roccella for Art Gallery Fabrics. The apricot-colored band at the bottom of the cases is a treasured piece of “Gypsy Girl” designed by Joanna Figueroa of Fig Tree & Company. If these four fabrics look familiar, it’s because I’m using them in my current Work-in-Progress, which I wrote about here.

That WIP has been on the back burner for most of May because the Dear Husband and I have been taking advantage of an unusually long stretch of warm dry weather to work outside. In a perverse sort of way, I’m wishing for a little rain to come our way so I can spend more time in my sewing room. Kidding! (Well, maybe not . . .)

It feels so good to finish a project. Pillowcases provide a fast way to achieve sewing satisfaction. Not instant gratification but pretty darn close. By the way, I followed my own tutorial to make what I call “Perfect Pillowcases.”

I’ll bet you can guess what the DH and I are sleeping on tonight! I predict sweet dreams.


Posted in family, home dec, pillowcases, roll-it-up pillowcases, tutorial, update | 9 Comments

At a Snail’s Pace

We’re only a few day into February and it’s turning out to be every bit as busy as January. I’ve only managed to make three more blocks for my new project, an autumn leaf quilt — but the blocks are beauties, as you shall soon see!

It feels like I’m moving at a snail’s pace but the fact is that my sewing time has been limited lately. The Dear Husband and I had a lovely week with visiting relatives from the East Coast. We went on some outings and worked on family history together. It turns out that our relatives are also voracious readers so while they (and the DH) were relaxing in the living room with books in hand, I managed to hie to my sewing room a few times to work on blocks.

Take a look:

In case you missed my last post, here are the first two blocks:

I gravitate toward primary colors so this palette is not one I normally work with, yet I am loving the look of the warm oranges, golds, and rusts against the two focus fabrics in the maple leaves.

The leaf block is virtually the same in the two patterns I purchased, Forest Floor by the Pattern Basket and Maple Stars by Kim Diehl, the latter being a design in her latest book, Simple Double-Dipped Quilts:

I haven’t decided yet which design direction I will go with my quilt. On the one hand, I like the look of the floating leaves in Forest Floor. On the other hand, I like the way the stems of the leaves in Maple Stars touch smaller Sawtooth Stars. Kim Diehl also included an alternate design for a bedrunner where four stems meet at a single Sawtooth Star, a look that I absolutely love. The bedrunner can be made with just 12 blocks.

My plan is to make several more star blocks before deciding. I’m heading out of town for a few days so I will continue to ponder my choices as I anticipate my return to my sewing room. Do check back in, please!


Posted in bed runners, family, home dec, leaf block, update | 6 Comments

Addendum: Hanging Quilts with 3M Command Strips

After seeing my last post on using 3M Command Strips to hang quilts, one of my readers asked an excellent question: “Can you successfully remove the strip from the back of the quilt?”

The answer is “yes” — but there’s a surprise involved. When you take a quilt off the wall that was hung with Command Strips, the strips stay on the wall — not the quilt! And there is no residue whatsoever on the back of the quilt.

I discovered something else quite by accident: if you’re planning to take one quilt down and put up another one of the same or slightly wider width, you can reuse the strips that are already attached to the wall. Serendipity!

On one wall in our main floor bath I took down Uptown Funk (now on loan to a quilt guild for an upcoming workshop) . . .

Uptown Funk, 24″ x 26″ (2020)

. . . in order to hang Loose Leaf:

Loose Leaf, 24 1/2″ square (2015)

I saw that I had hung Uptown Funk using Medium-size Command Strips, which measure ¾” x 2¾”. All I had to do was separate the top strip from the bottom strip of each pair on the wall. You will remember from my previous post that the strips work in pairs, with the Velcro-like textured sides coming together with an audible click. It’s quite easy to separate them, leaving one half of the pair on the wall with the Velcro-like side exposed:

I took three new strips from the package (each strip is half of a pair) . . .

. . . and pressed each Velcro-like side to its mate on the wall. Then I peeled off the paper backing to expose the adhesive and pressed Loose Leaf into place. Easy as pie! It took less than two minutes.

If you’re the least bit apprehensive about attaching adhesive strips to either your wall or your quilt, I have a suggestion. Start with one pair of Command Strips. Remove the paper backing from one strip and attach it to the back of one of your quilts. Remove the paper backing from the other strip and attach it to a wall in an inconspicuous place — perhaps behind a door or a piece of furniture. Leave both strips in place for a week or two. Then remove the strips, remembering to pull straight down and very slowly on the rounded tab . . .

. . . until the strips completely separate from the fabric and the wall.

Pulling slowly and straight down on the tab is what loosens the bond between the adhesive and whatever it is attached to (fabric or wall). If you pull the tab out from the wall instead of straight down, you run the risk of pulling part of the wall or paper off with the tab. (This has never happened to me, by the way). If you pull too fast, the strip will snap you like a rubber band when it comes off. (This has happened to me but it won’t ever again, I assure you.)

I predict that trying this experiment will give you the confidence to hang your own quilts with Command Strips.


Posted in home dec, New Big Leaf, tutorial, update, wall hanging, wonky Dresden neighborhood | 2 Comments

Practical Magic: Hanging Quilts with 3M Command Strips

Happy New Year!! I’m starting the year with a bit of practical magic:  using Command Picture Hanging Strips from 3M to change out the wall hanging in my master bath. Command Strips have a sticky Velcro-like texture on one side and adhesive on the other side covered by paper backing. The strips are assembled in pairs, with adhesive facing out on both sides and the Velcro-like sides in the middle, like a sandwich. When the paper backings are removed, one adhesive side attaches to the wall and the other side to the back of the quilt — without leaving a trace on either when they are removed. Seriously!

I have several wall hangings that I like to rotate more or less according to the seasons. Dark Moon, pictured on the left below, went up in December as my choice for winter but as the New Year rang in I was longing for something brighter. It took fewer than five minutes to swap out Dark Moon for Hip Hop:

Hip Hop features five different kangaroos gamboling on an Australian aboriginal print background. The playful ‘roos and bright colors are definitely lightening my mood during these gray and rainy days in Portland:

But I digress. Let me show you how very easy it is to hang quilts using these Command Picture Hanging Strips.

Packaging varies. I bought a “value pack” containing four small and eight medium pairs of command strips:

The strips come in Small (holding up to four pounds), Medium (up to 12 pounds) and Large (up to 16 pounds). As mentioned above, the strips are geared for picture frames but they are eminently suitable for quilts. The size Small is more than sufficient for my wall hanging, which weighs much less than four pounds. FYI, Hip Hop measures 16″ x 59″.

These are the four pairs of small Command Strips, front and back:

The strips are separated by pulling them apart (very easy). I’m using three pairs for my wall hanging:

Each strip is ¾” wide and 2⅛” long. Before removing the paper backing, I press two sticky sides together to form a pair, causing them to make an audible clicking sound as they connect. This is what they look like from the side:

I peel off one set of paper backing pieces and place the strips sticky side down right next to the binding at the top back of my quilt — one strip on each end and one in the middle:

Then I remove the second set of paper backing pieces . . .

. . . turn the quilt around, and place it on the wall, pressing firmly from the right side of the quilt. I actually run my fingers up and down where the Command Strips are for a good 30 seconds, pressing the runner firmly against the strips for good adhesion. Note: this wall hanging is going on a painted sheetrock wall. I have also used the strips successfully on wallpapered walls (although the instructions say not to do this with picture frames) and on lath and plaster walls in my 1913 home.

Oh, and one more thing: I want to show you how to remove the strips from the wall after you’ve taken the wall hanging down. This shot was taken after I took Dark Moon off the wall:

All you do is grasp the rounded tab at the bottom and pull gently, firmly and — this is important! — slowly straight down from the strip. That tab will stretch a good 12″ or more before the entire strip releases from the wall, leaving no trace behind of the adhesive. If you pull too fast or too hard, the strip snaps like a rubber band. Ouch! You only do that once, believe me.

Note: I have no affiliation with 3M, the maker of Command Strips. I’m strictly a consumer, recommending this product based on personal experience. As far as I know, there is no other comparable product on the market. Using this method to display quilts on my walls has eliminated the need to mar the surface of the walls with nails or screws in order to hang rods or other hardware.

About the wall hangings: both are original designs. Hip Hop was made using my first pattern, Full Moon Rising. Dark Moon was made from my second pattern, Full Moon Rising II. If interested, you can look at the front and back of the patterns on the Patterns page on my website.

A final thought:  I think this post qualifies as a tutorial. I’m adding it to the Tutorials page on my website. It’s Tutorial #23. Maybe you should check out the other ones!

Update posted Jan. 23, 2023:  Be sure to read the follow-up post to this one! It’s called Addendum: Hanging Quilts with 3M Command Picture Hanging Strips. Clicking on the link will take you right to the post.


Posted in home dec, tutorial, update, wall hanging | 8 Comments

First Light Designs: Best of 2022

It’s that time of year again. Cheryl Brickey of Meadow Mist Designs is inviting bloggers to share their top five posts of the year in her “Best of 2022 Linky Party.” This is the eighth consecutive year Cheryl has hosted this linky party and my fifth year participating.

Clicking on the links will take you to the original posts where you can see more photos and read about my creative process.

Number 1. Isabella’s Quilt

Isabella’s Quilt, 40″ x 44″ (2022)

Isabella’s Quilt, made for a new great grandchild, was adapted from the pattern Star Stream Quilt by Sally Davies of Chasing Tigers.  I chose to make only a portion of the original design, using just two stars and enlarging them for maximum graphic effect. Instead of using one fabric for the background, I used several greens from my ample stash to create a low volume effect.

Number 2. Arctic Stars  (I liked Isabella’s Quilt so much I made a second version!)

Arctic Stars, 50″ x 63″ (2022)

Made to be a throw size, the quilt features two additional stars, with each star containing a fussycut image from the “Icy World” line by Gareth Lucas for Windham Fabrics. Here are a couple of close-ups:

8″ Star Block in Arctic Stars
16″ Star Block in Arctic Stars

Number 3. My Eleventh (!) Junior Billie Bag (JBB)

Dawn’s Latest Junior Billie Bag, the Essential Quilter’s Tote (2022)

I teach other quilters how to make this tote, making one myself in the process. That’s why I’ve made so many. To see earlier versions, click here.

I’ve also been making accessories to accompany each JBB. Here’s my latest suite:

Dawn’s Junior Billie Bag Accessories (2022)

You’ll find tutorials for the rotary cutter coat and scissors case at these links to my website:
 Rotary Cutter Coat (Oct. 10, 2014)
 Scissors Case from First Light Designs (Sept. 5, 2018)

Number 4. Pillowcases to Make You Dream of Italy

Pillowcases for the Portland White House (2022)

I love sleeping on pillowcases made from beautiful cottons. These cases were made using the “Capri” line designed by Katarina Roccella for Art Gallery Fabrics. (I used the burrito or roll-it-up method for the pillowcases, using my own tutorial which you can find here.)

Number 5. Holliberry Circle

Holliberry Circle, 25″ in diameter (2022)

My very first finish of 2022 was this mini quilt using the delightfully whimsical pattern Dresden Neighborhood by Kim Lapacek of Persimon Dreams. I used scraps from Corey Yoder’s “Holliberry” line from 2021 plus a few other red and green fabrics culled from my stash. I embellished the quilt with a few strategically placed vintage buttons. The link above the photo will take you to the post in which I explained (with lots of photos) how I converted my little quilt from a square to a circle.

Thank you so much for visiting First Light Designs. And thank you, Cheryl, for getting the party going. Be sure to check out the top five posts of the other quilting/blogging partygoers. If you’re a quilter, you can join Cheryl’s Best of 2022 Linky Party, too. The link is open until January 2.

All the best in 2023!


Posted in baby quilt, Billie Bag, home dec, Junior Billie Bag, roll-it-up pillowcases, rotary cutter case, sewing tool caddy, tote bags, tutorial, update, wall hanging, wonky Dresden neighborhood | 7 Comments

Arctic Stars is a Wrap!

How appropriate! I finished Arctic Stars today and the temperature in Portland, Oregon as I write this is a frigid 14 degrees. I’ve lived in Portland for 65 years and can’t recall a time when it was this cold. With the wind chill factor taken into account, the temperature is -6 degrees. Brrrr!

I bound Arctic Stars in the same navy blue used for the star points. Here’s a look at the front . . .

. . . and the back:

In case you missed an earlier post, you can see close-ups of all the star blocks here.

The quilt measures 50″x 63″ — a nice snuggle size. I’m tempted to wrap myself up in it this very minute but it needs to take a trip first through the washer and dryer to get that soft, crinkly effect. Mmmm, now I’m thinking about how good it will feel to wrap myself up in it while it is still warm from the dryer . . .

P.S. As a follow-up to my last post about holiday decorating, here’s a look at the wreath I found on sale this week at the grocery store:

I added red jingle bells to dress it up a bit. Thus concludes my holiday decorating!


Posted in home dec, update | 1 Comment

In the Christmas Spirit

Isn’t this a sweet holiday scene? My sister Diane sent this photo to me a few days ago. The table runner was made last year by moi from my own pattern, Season to Taste, and gifted to Diane. I think the runner looks sensational on the built-in buffet in her dining room, don’t you? (I still have plans to make a second winter version of Season to Taste using a different color palette. Just haven’t gotten around to it yet.)

Christmas decorations at the Portland White House have become increasingly minimal. The Dear Husband and I have segued in recent years from a live tree decorated with strings of lights and lots of ornaments to a small imitation tree that sits on the sideboard opposite the front door. This year I added my mini quilt made from the pattern Dresden Neighborhood by Persimon Dreams:

The little scene looks lovely at night. I struggled to get a photo that would do it justice. This was the best I could do:

The tree and quilt can be seen from the street through the glass in our front door. I especially like how the icicle lights on the curved arch on our front porch are reflected in the door and windows:

Now I just need to find a wreath of fresh greens to hang above the house numbers.

There’s something irresistible about the combination of red and green, even if you don’t celebrate Christmas. It’s no coincidence that red and green figure prominently in my stash of quilt fabrics!


Posted in family, home dec, table runner, table topper, update, wall hanging, wonky Dresden neighborhood | 7 Comments