Category Archives: Junior Billie Bag

Accessorizing the Home

I’ve been spending a wee bit of time in my sewing room over the last week. It could have been more but I had my nose in a book. A big book:  715 pages, to be exact. It’s Abraham Verghese’s bestselling novel The Covenant of Water. I actually bought it last summer but was reluctant to begin such a lengthy tome until after my cataract surgeries in June and August. Reading is once again a great pleasure, and this freezing cold snap in the Pacific Northwest over the last several days presented an ideal opportunity to curl up with a good book with either a cat or a quilt (sometimes both) on my lap.

I did venture into my sewing room from time to time, working around the schedules of the workmen repairing the walls and ceiling in the upstairs hallway following water damage from a rain storm. The hallway now looks brand new — a touch of irony in a house that’s 111 years old — but the texture on the walls beautfully mimics the original lath and plaster so you’ll hear no complaints from me. All the hallway needs now is a coat of primer and two coats of color.

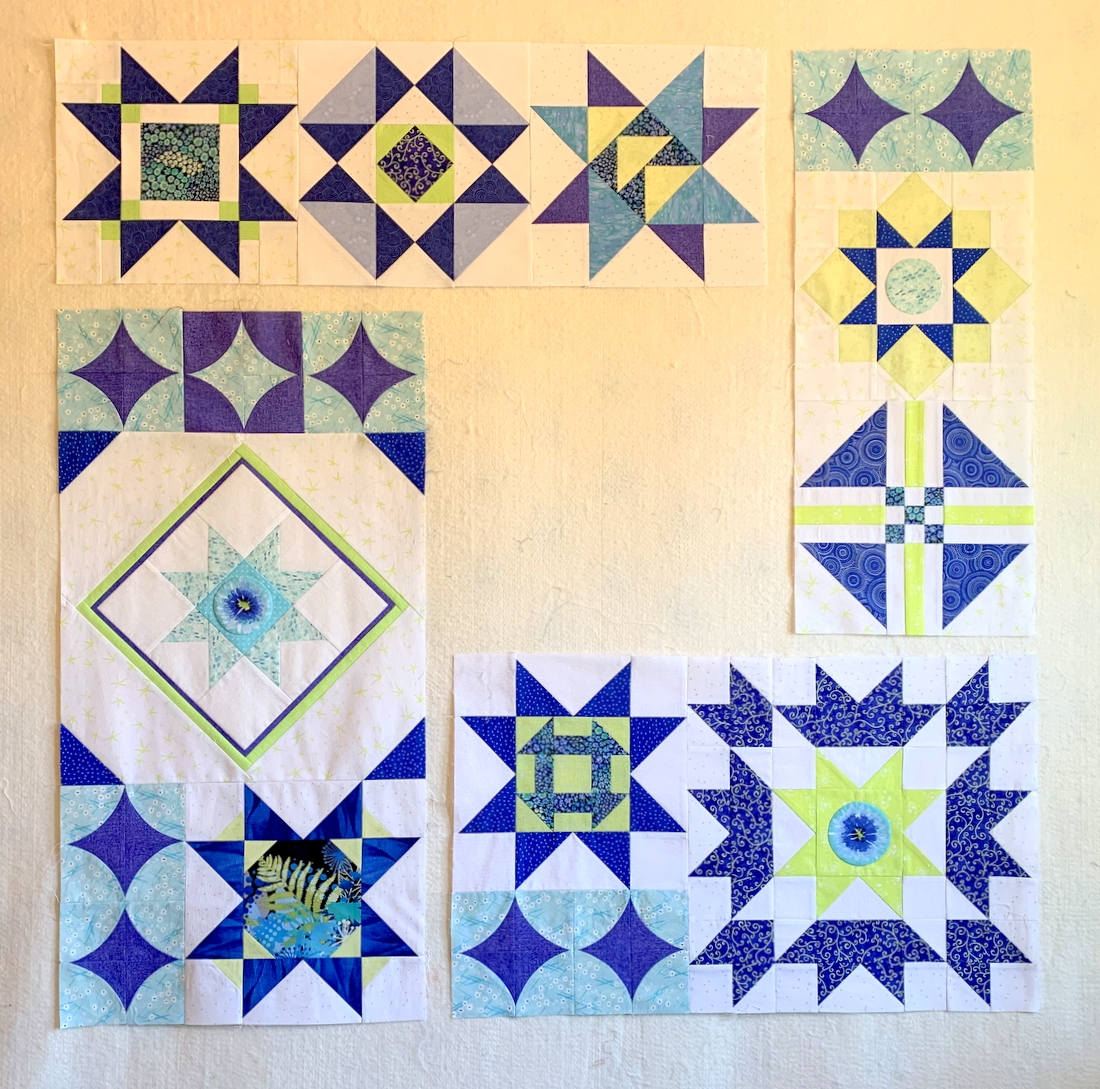
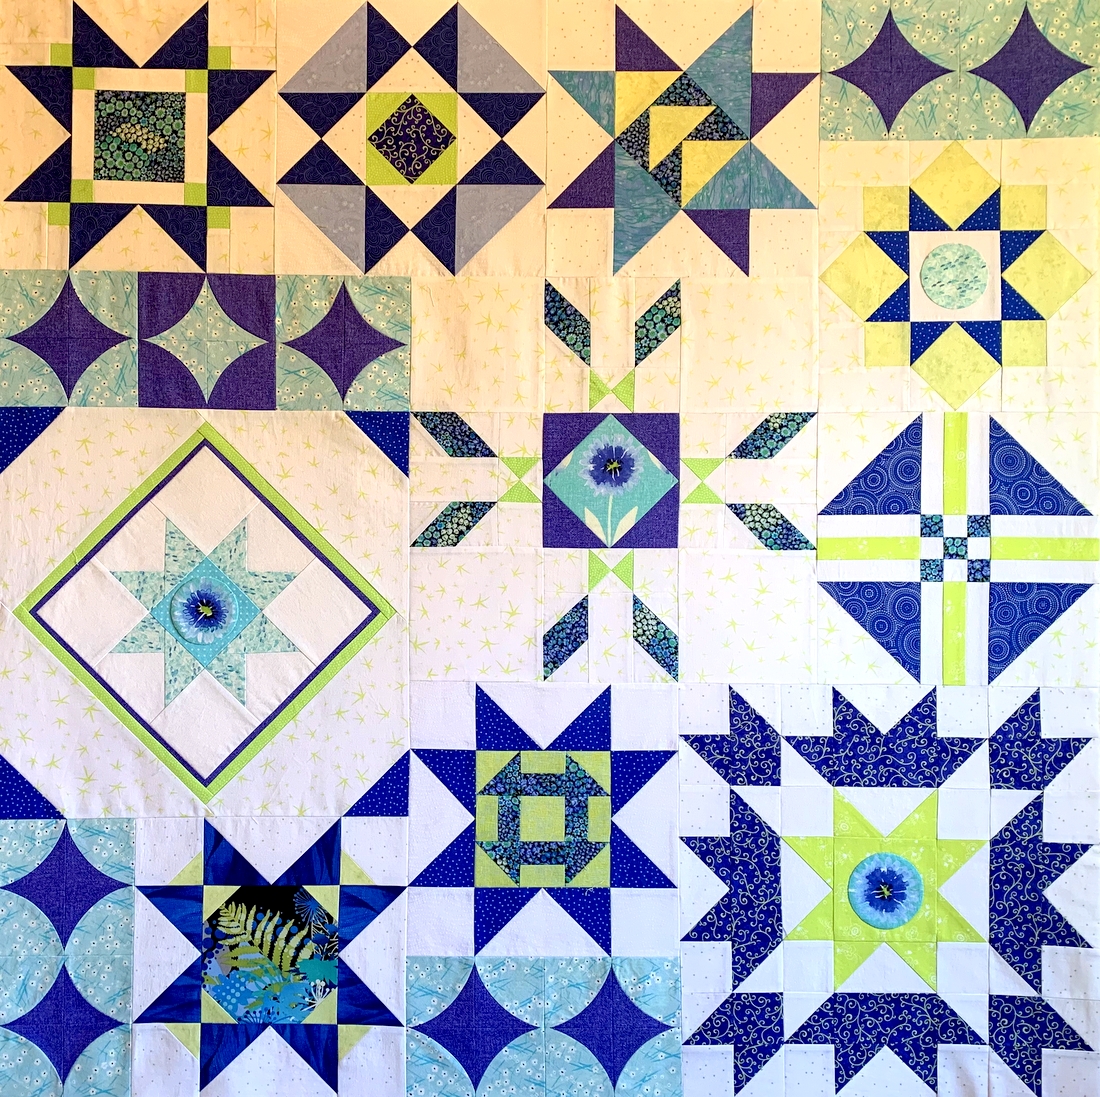
I’ve been working on some small things:

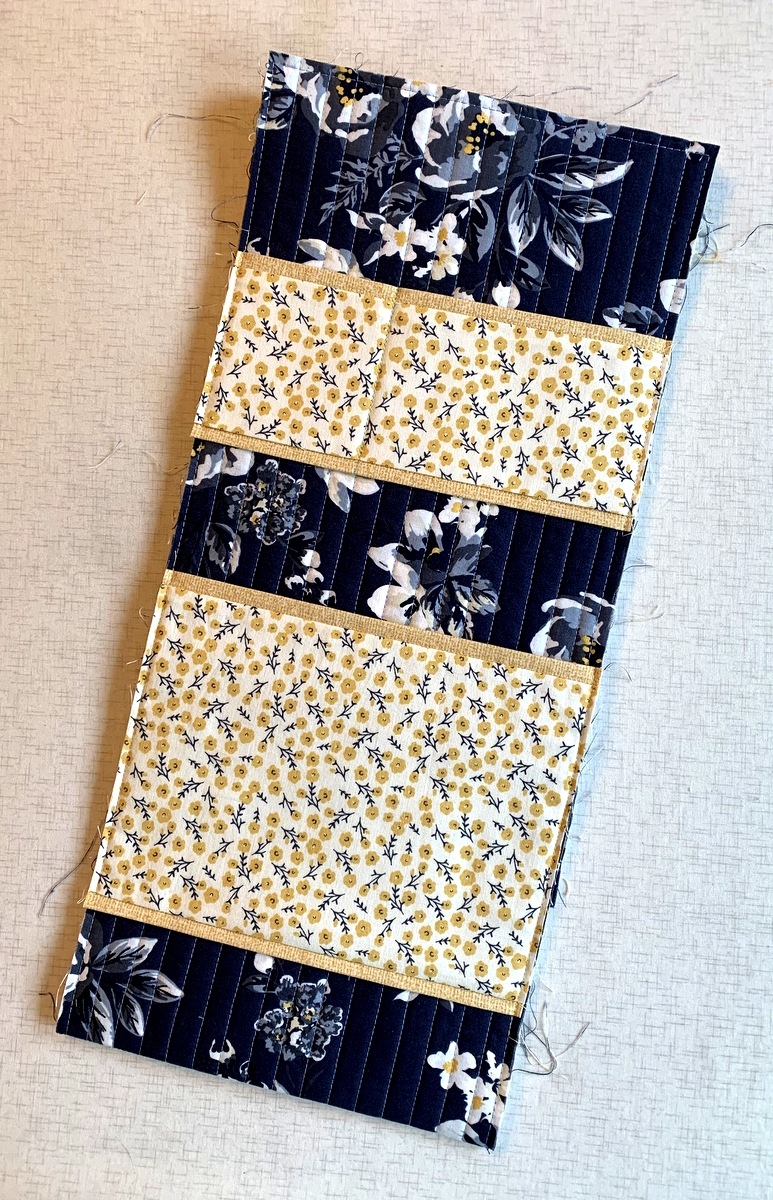
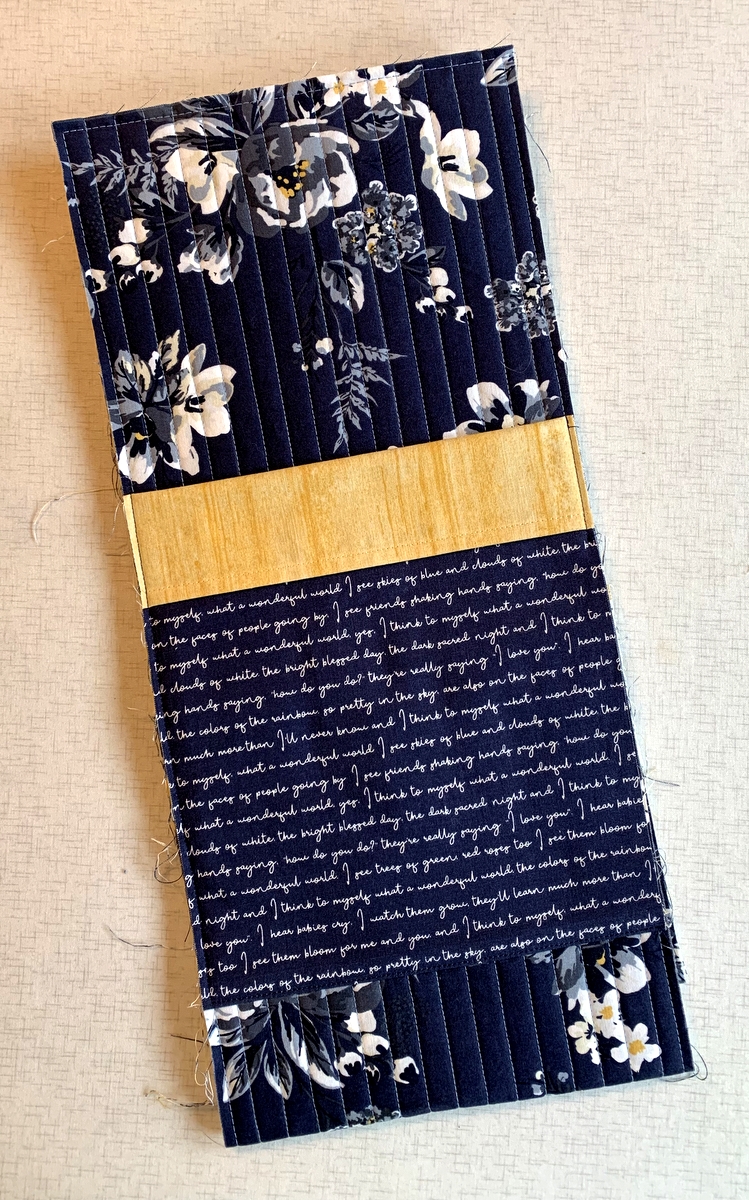
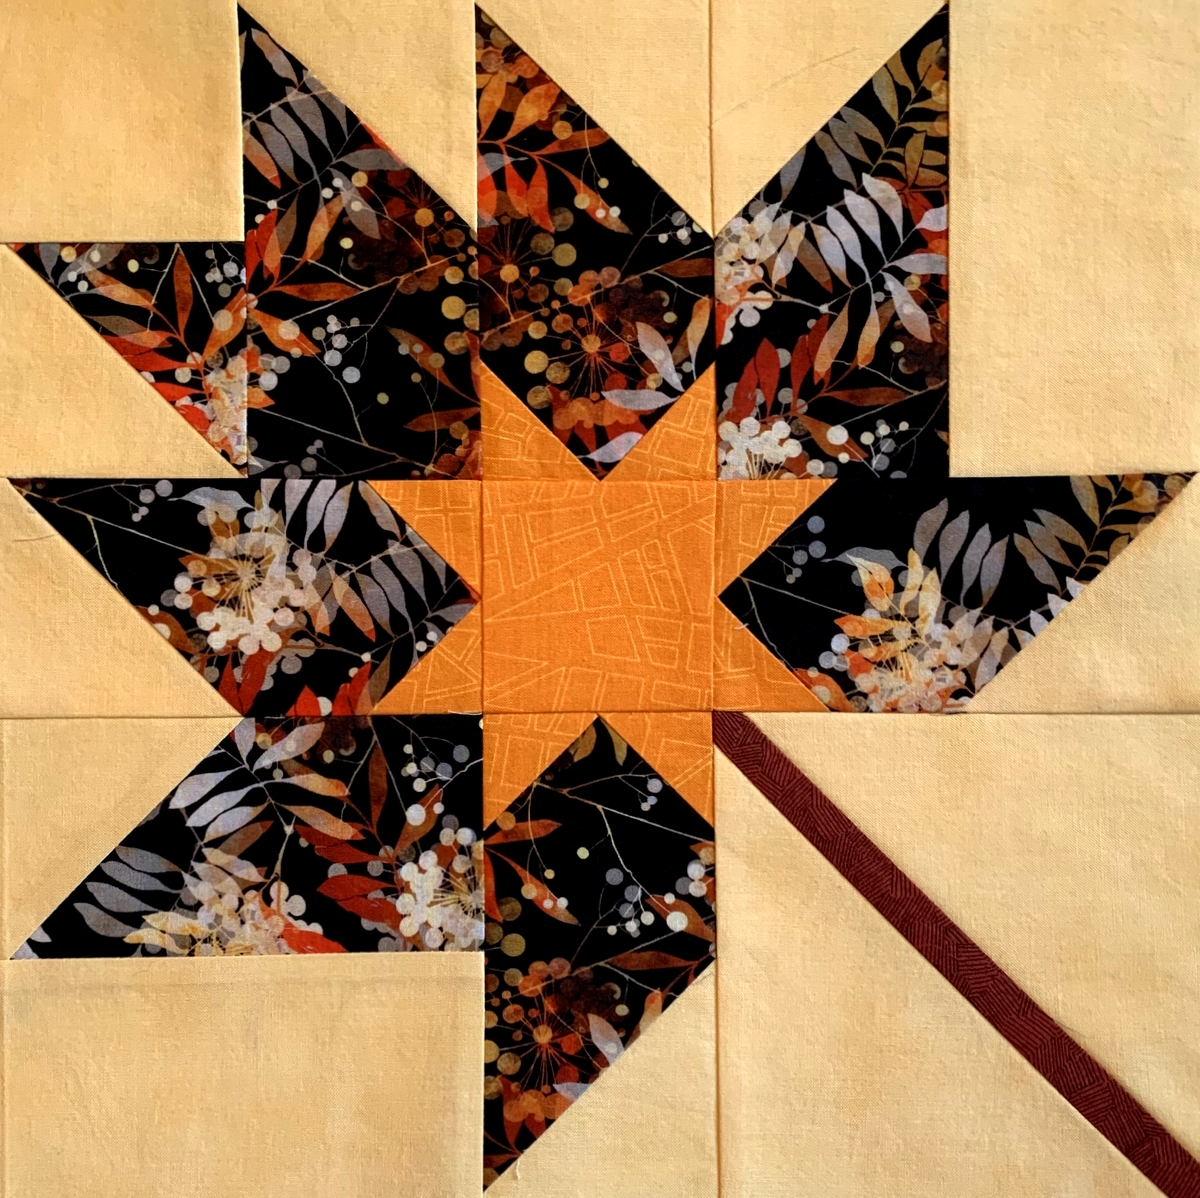
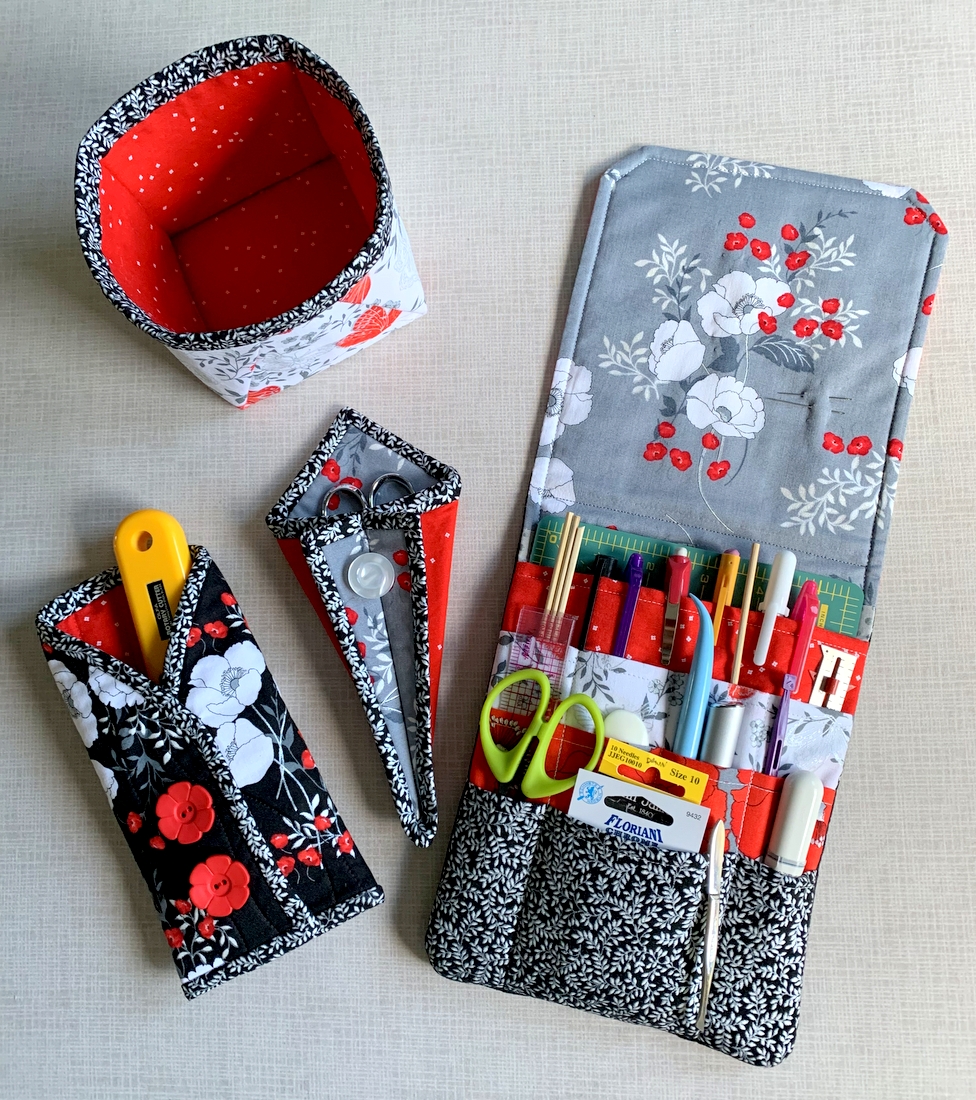
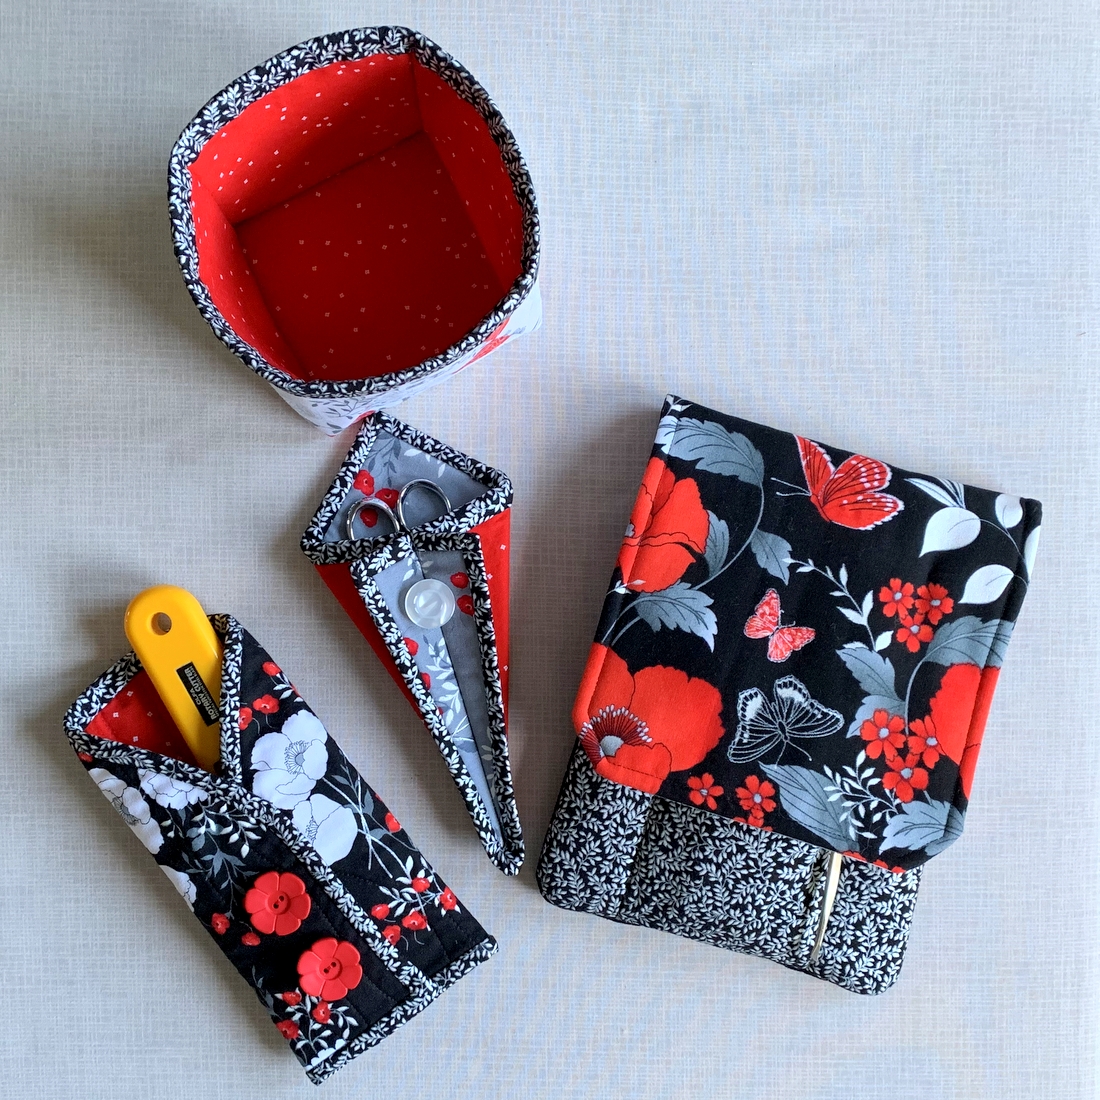
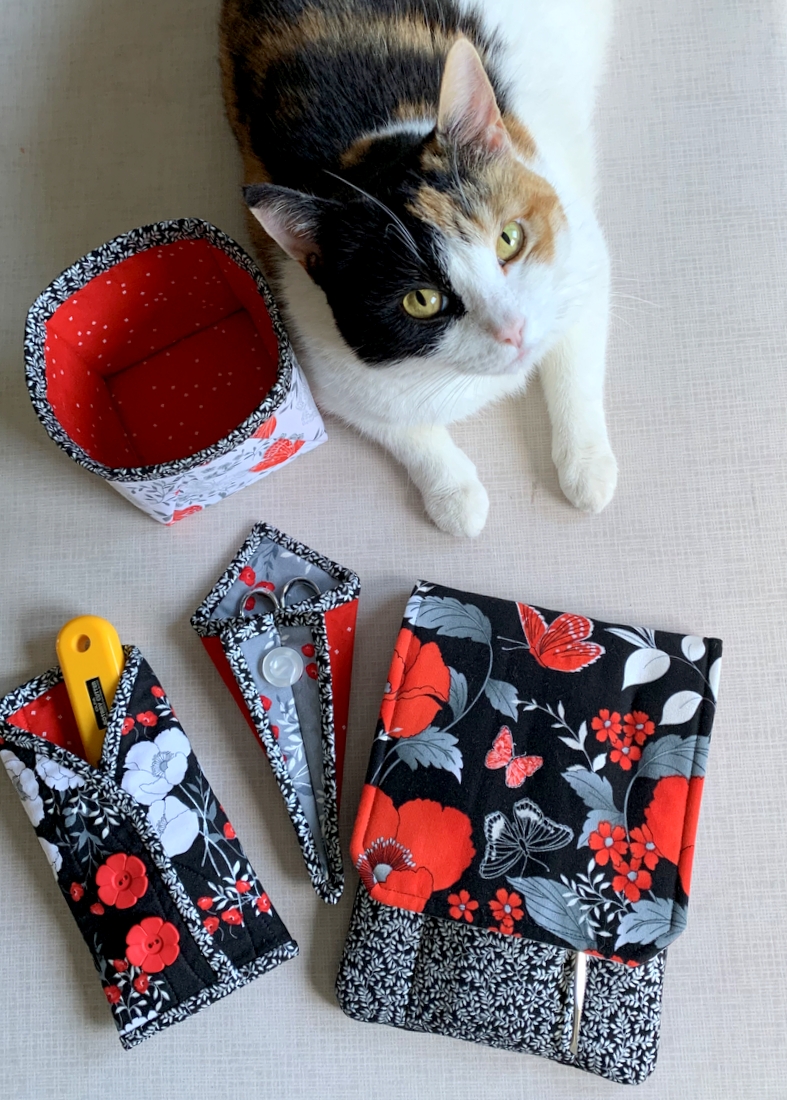
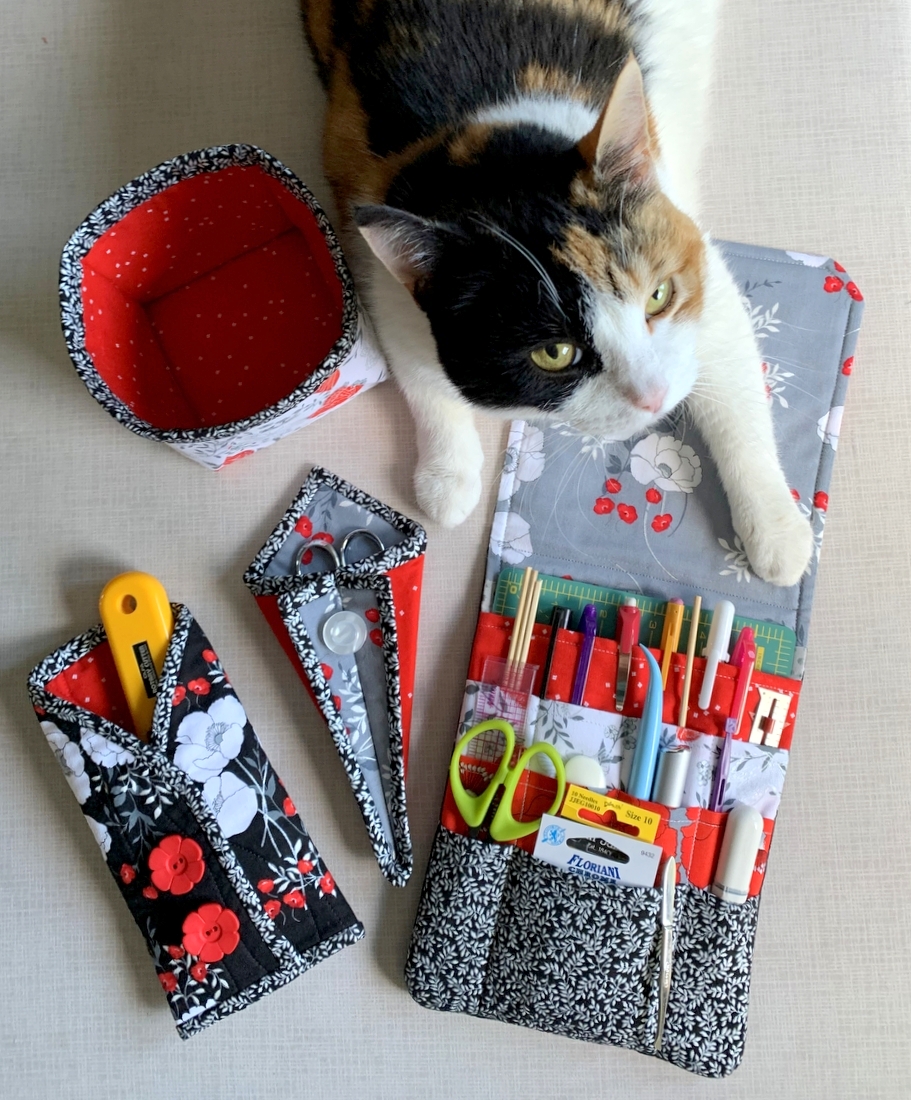
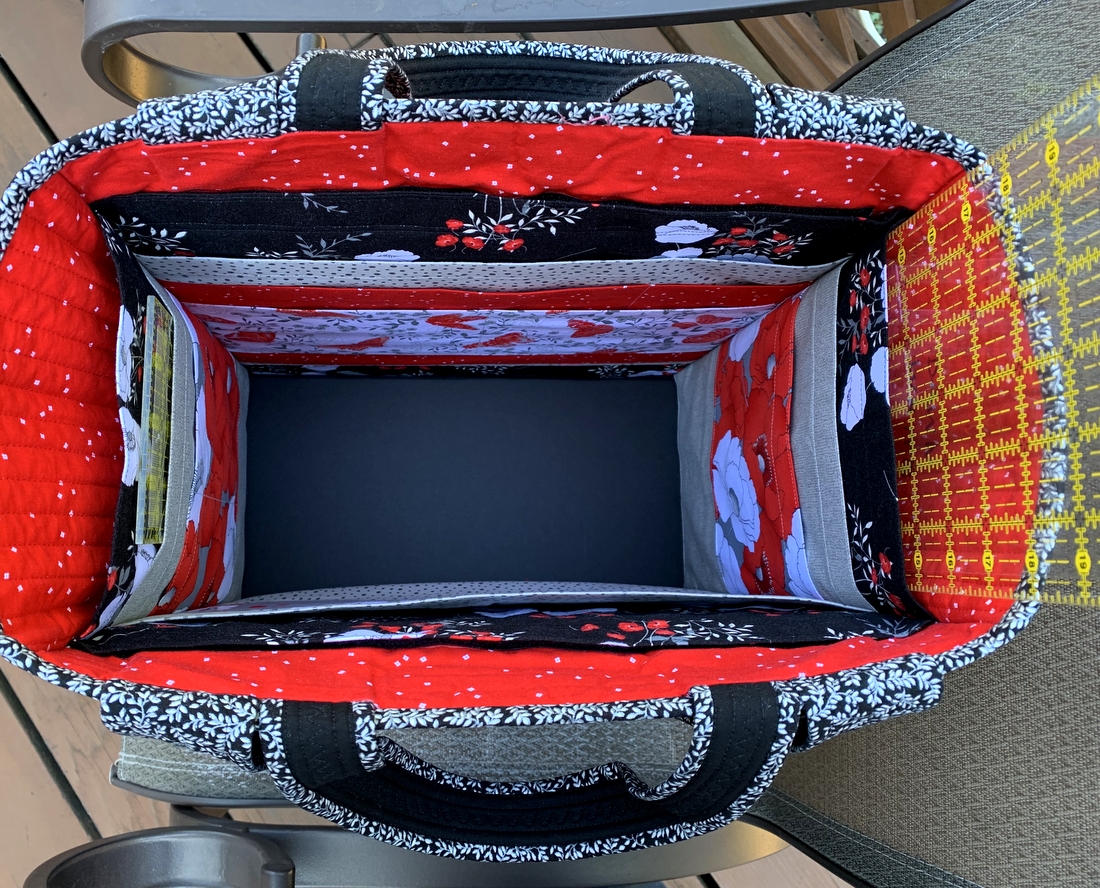
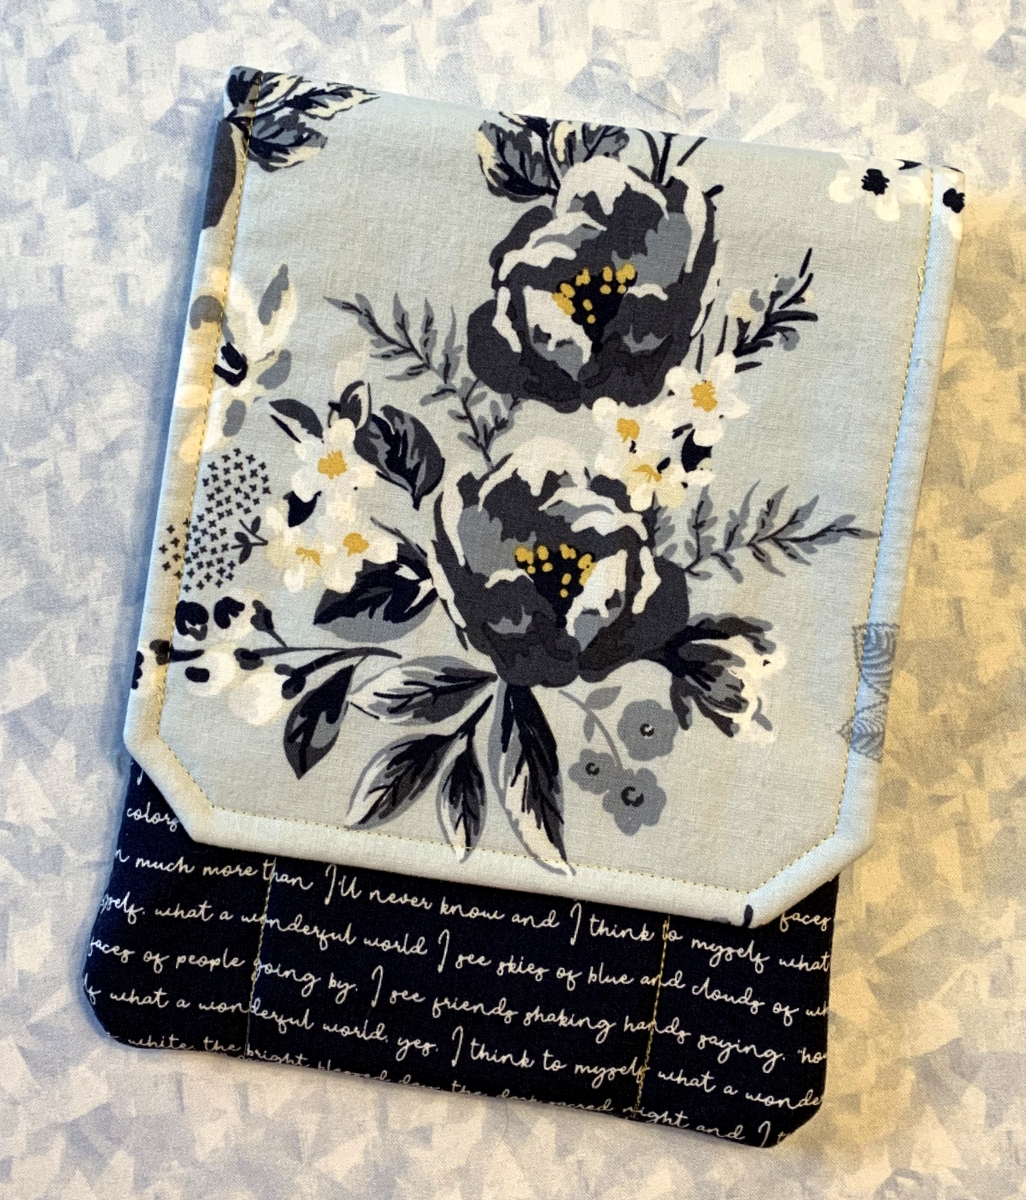
This is a quilter’s tool caddy, using the pattern Travel Case by Pearl Pereira of P3 Designs. I’ve made several versions over the years, modifying the design in a few ways but most importantly by adding a fourth pocket so the caddy holds more:

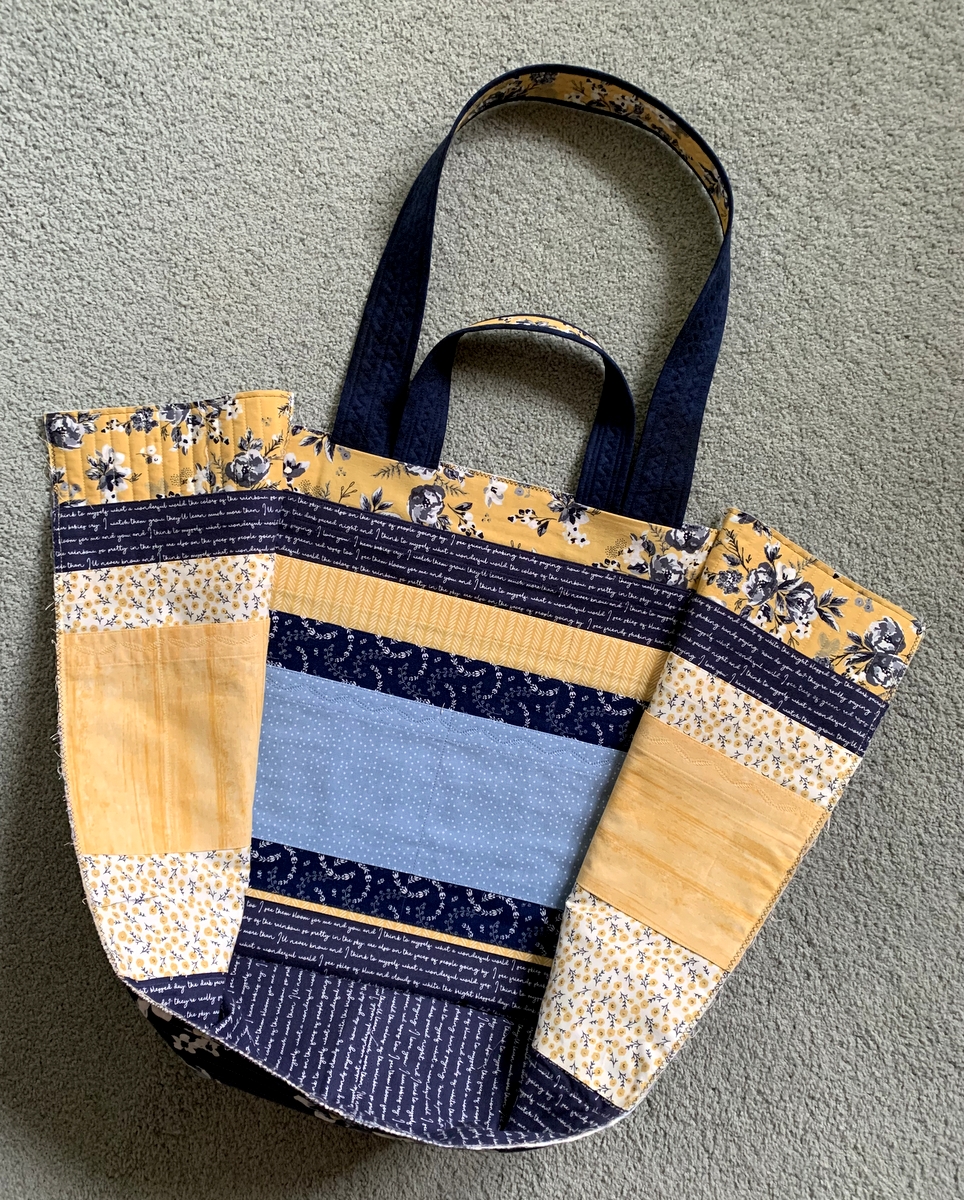
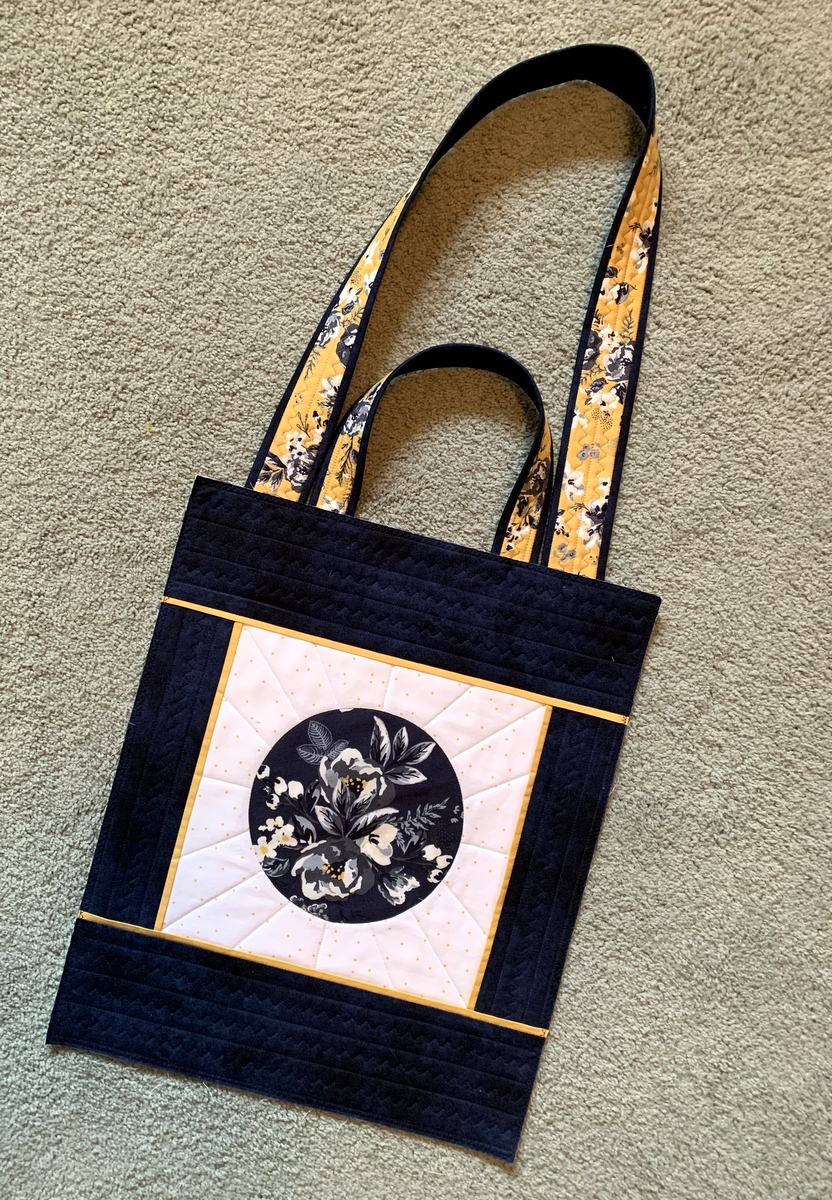
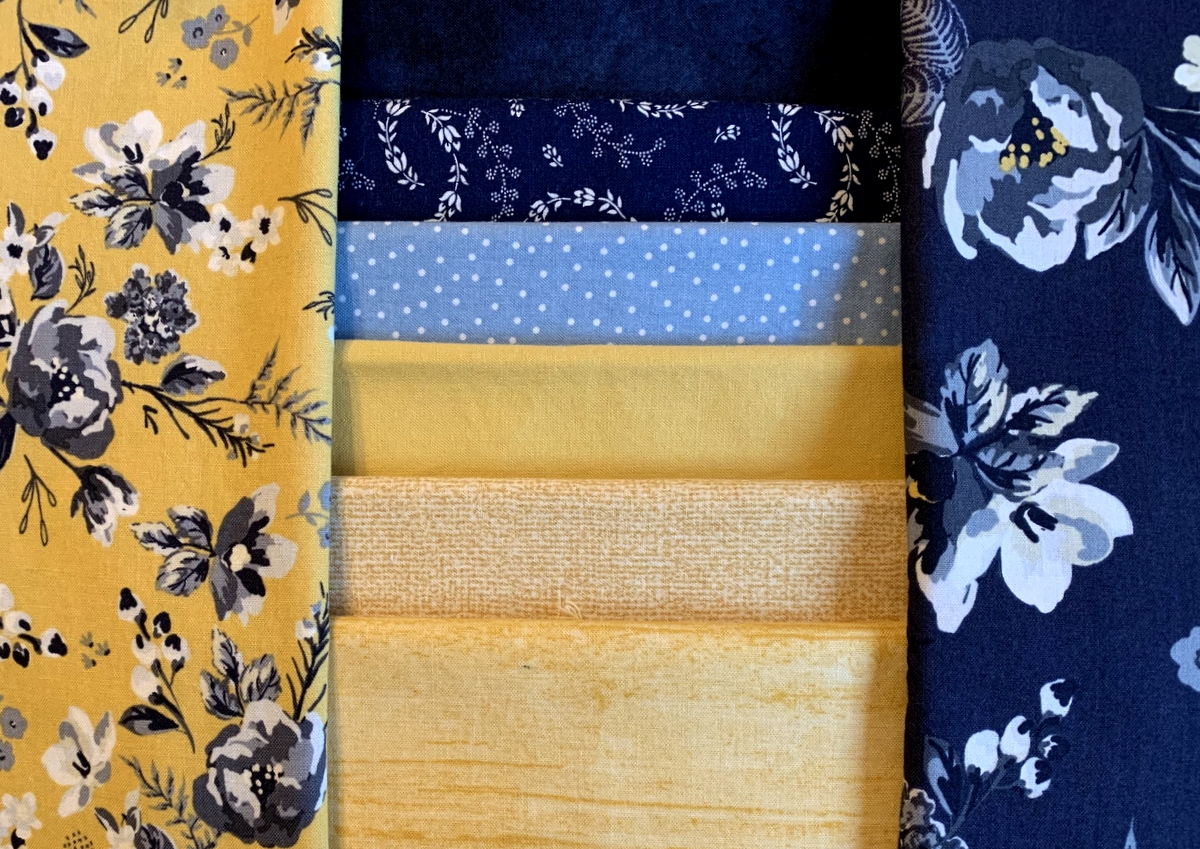
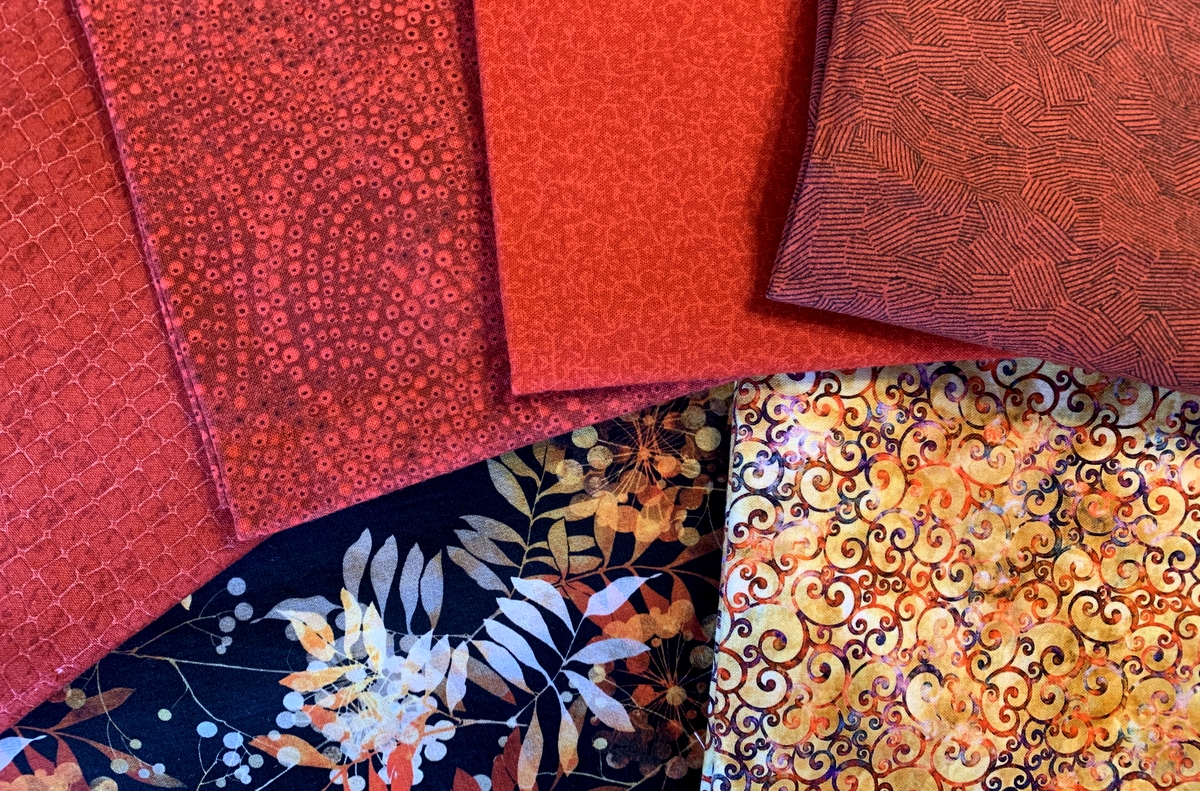
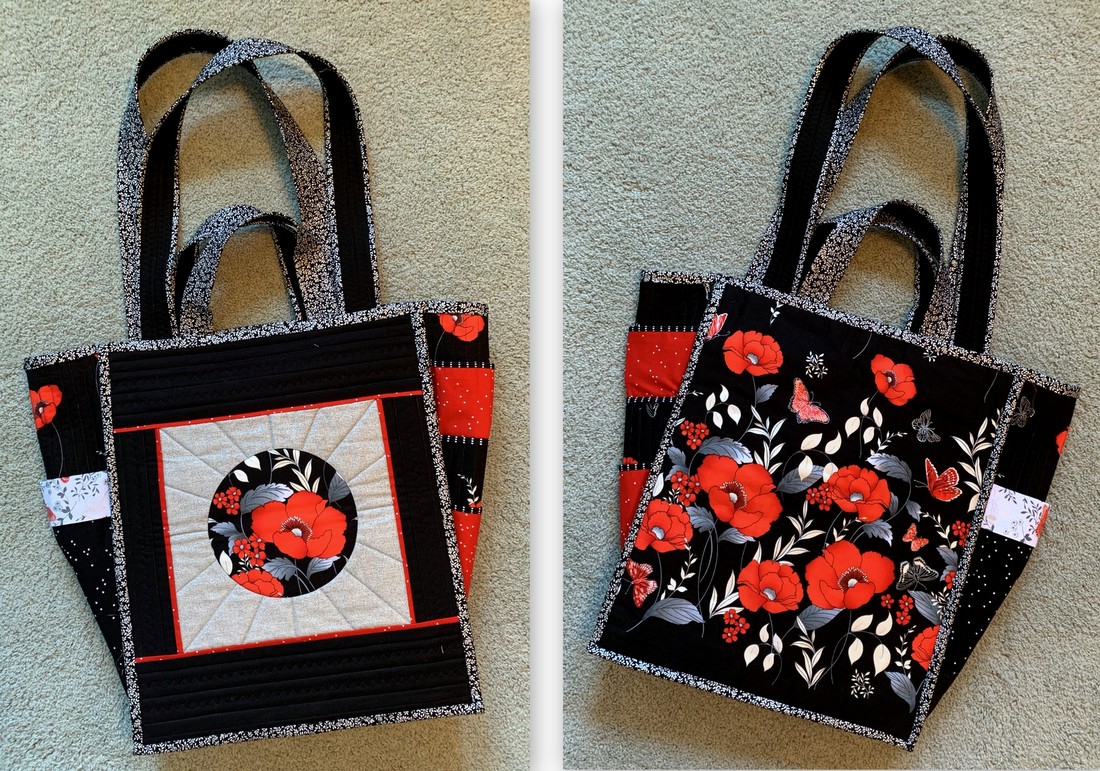
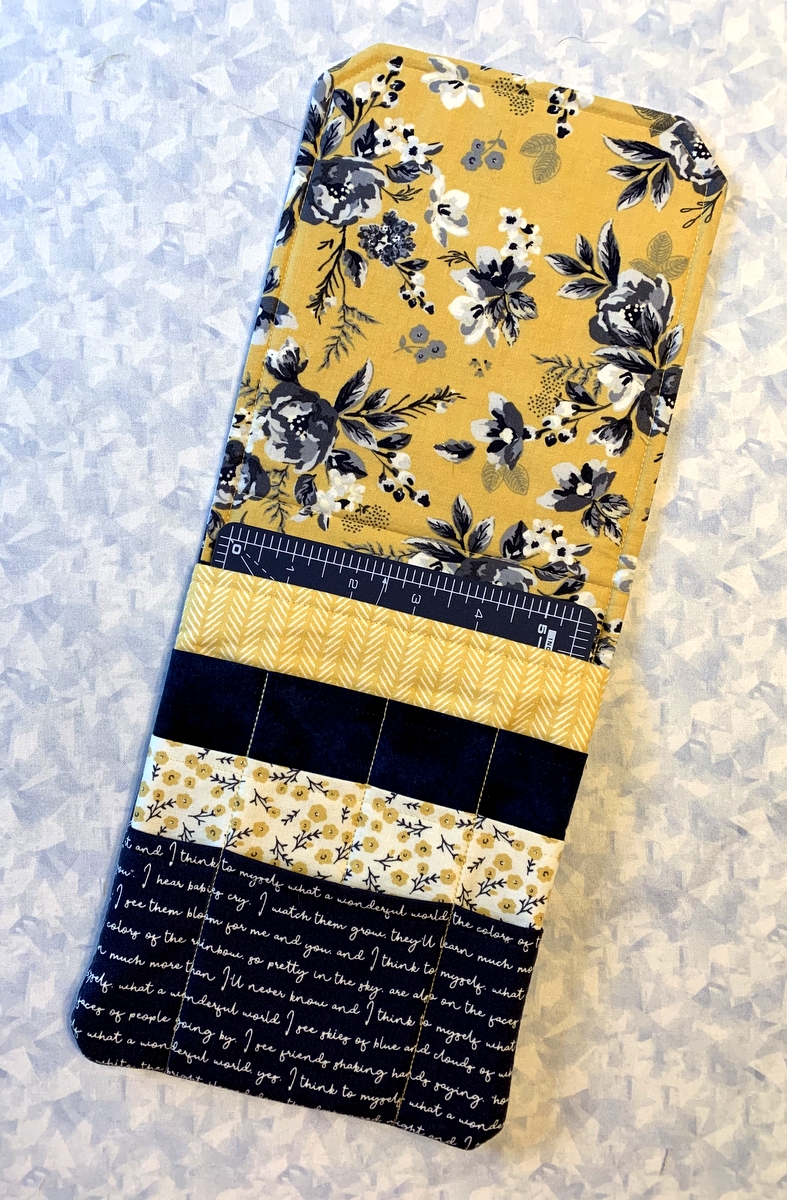
The tool caddy is one of four accessories to go with my current Junior Billie Bag-in-progress. I’ll finish it soon along with three other accessories that go with it — a rotary cutter coat, a scissors case, and a fabric box that I use as a threadcatcher. I’m so enjoying the fabrics — most of them from the Gingham Foundry line by Riley Blake that came out in 2021.

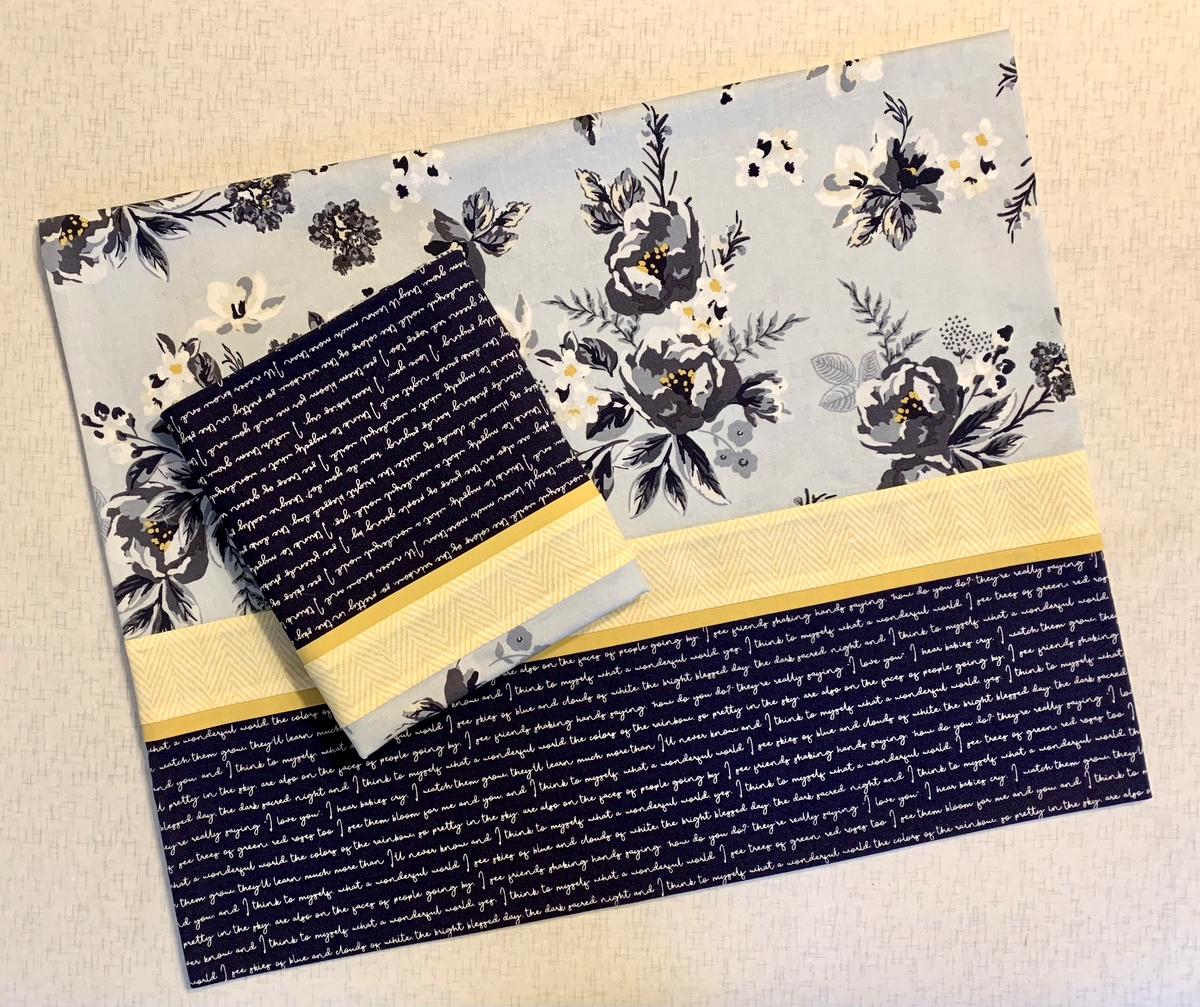
You may remember I used the same fabric last October in a pair of pillowcases made for the Portland White House. I just finished a second pair for my twin Diane, who arrives on Saturday for a two-week visit. Ordinarily she would be surprised by seeing them wrapped up with a ribbon in the guest bedroom but she reads my blog so as soon as she sees this post she’ll know they await.

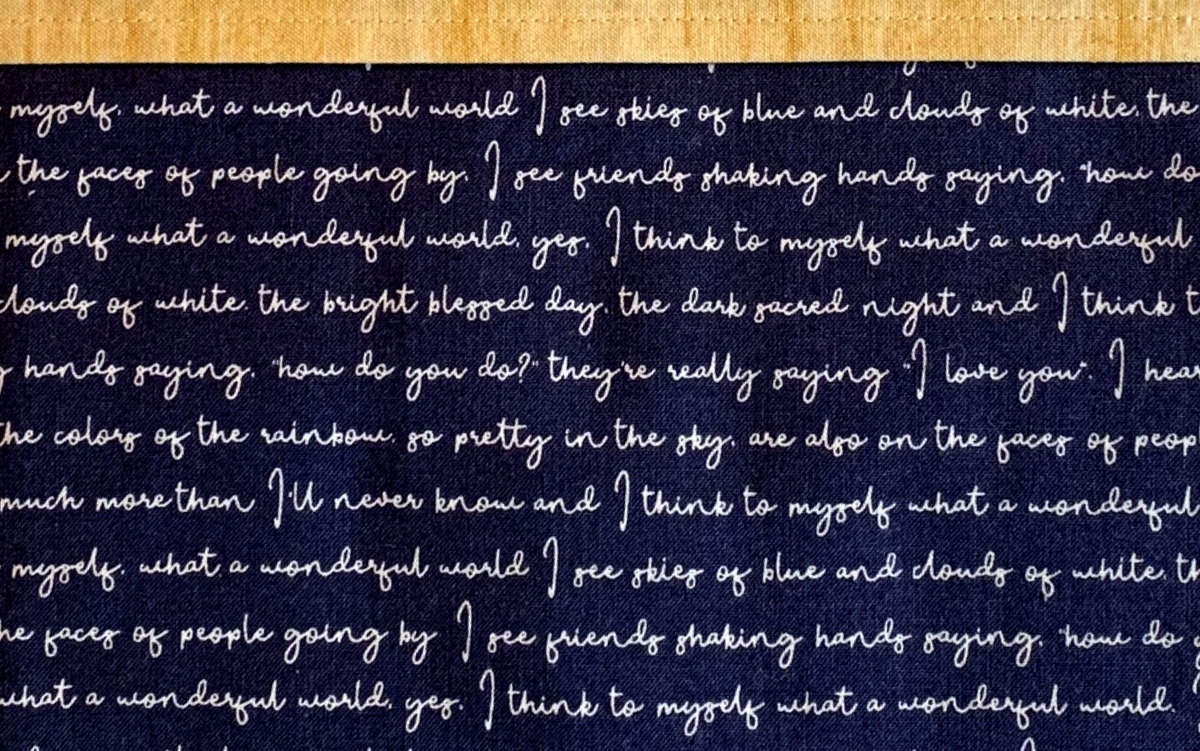
I couldn’t resist fussycutting the text print on the band so that the refrain “I think to myself what a wonderful world” appears on the top and bottom lines of the band:

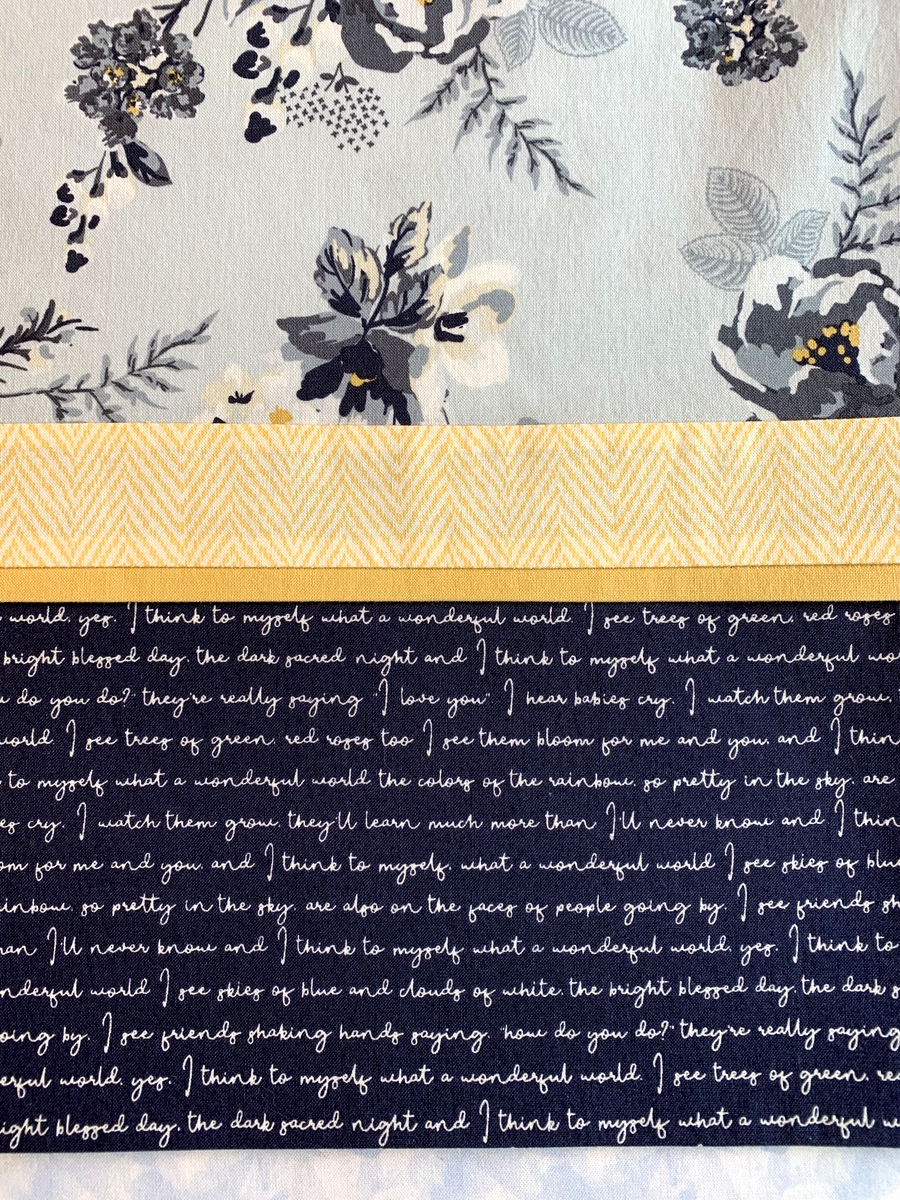
A bit obessive-compulsive? Umm, yes.

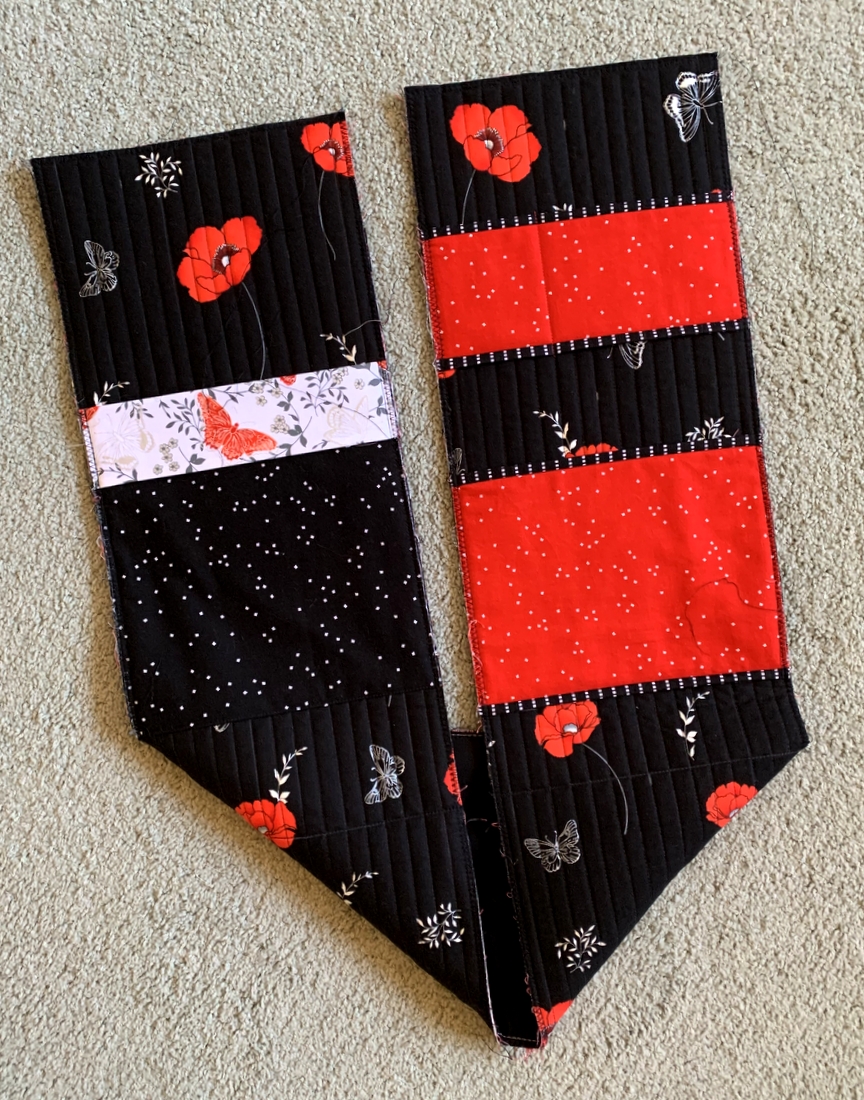
I also made myself a new oven mitt (from my own tutorial) but got two in the bargain:

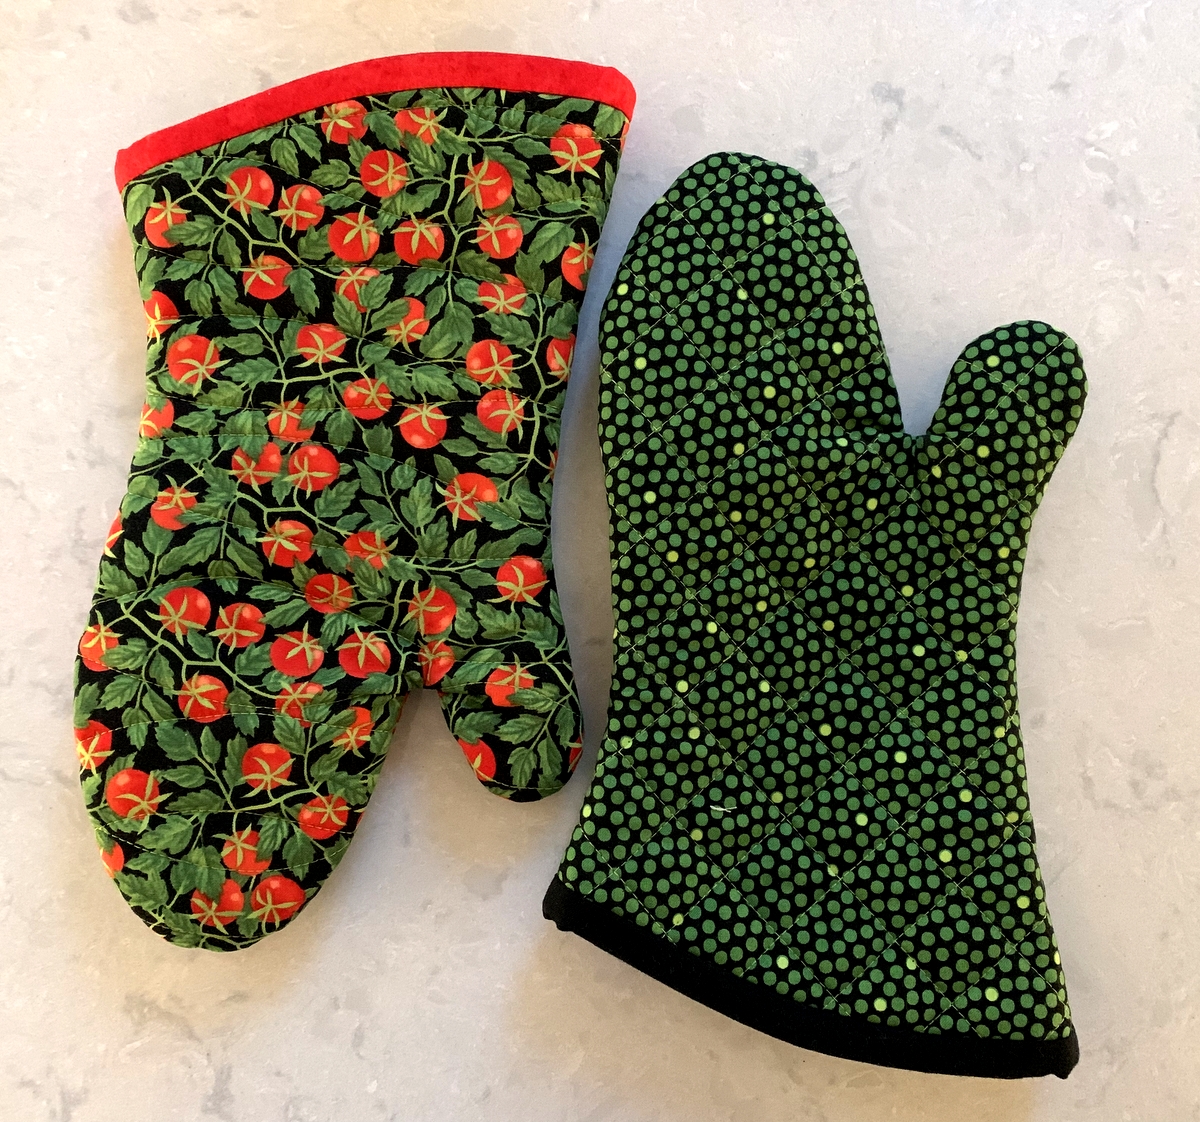
I had cut out the fabric and batting weeks ago for the mitt on the right; the materials were stacked in my sewing room closet just waiting for me. I can’t remember why I got out the tub that my oven mitt supplies are stored in but when I did I was surprised to find there was a mitt inside that was almost finished! All I needed to do was tack the red band down and turn the mitt right side out. I adore that tomato print and thought I had used the last of it. Now I well and truly have.

So much for accessories. What about quilts? Well, I have two quilts I started last year that I really need to finish but I’m already dreaming about starting a new one. . .


Posted in Billie Bag, cats, family, home dec, Junior Billie Bag, oven mitts, pillowcases, roll-it-up pillowcases, rotary cutter case, sewing tool caddy, tote bags, tutorial, update | 4 Comments

“Open Sesame”

I’m always tempted to utter those magic words when my Junior Billie Bag (#12) goes 3-D. With the side panels/bottom unit pinned to one of the front/back panels, it’s easier to envision what the finished bag is going to look like.

And what about those pockets?! I count 14 in the photo above. When the other front/back panel is added, the inside pockets will number 19. And then there are four outer pockets. All of the pockets are sized to hold my essential tools. Anything that won’t fit in the pockets will go in the middle of the bag.

(If you’re new to my blog, you may not know what a finished Junior Billie Bag looks like, inside and out. Click here to see photos of JBB #9, finished in May 2019.)

I still need to make the binding but right now I’m going to head up to my sewing room and spend the afternoon working on a project I set aside several weeks ago. Bye for now!


Posted in Billie Bag, Junior Billie Bag, tote bags, update | 3 Comments

One of These Days . . .

. . . I’ll get back to the business of quiltmaking. For now I seem to be in an extended home dec phase. Between making valances for my stepmother’s home and continuing my construction of Junior Billie Bag #12 for the class I am teaching, the quilt blocks on my design wall have been unattended for weeks. I will get back to them. All in good time.

It was work on my current Junior Billie Bag that interrupted quilt progress. When I posted about the JBB, I included a link to the Gingham Foundry fabric line I was using. Little did I know the link would lead me down a rabbit hole! You see, Montavilla Sewing Center, where I teach the JBB class, carried part but not all of the Gingham Foundry line. When I included a link to the entire line, I spied a fabric I could not live without. (You know what I mean, right?)

It was the main focus fabric in a background called “mist,” a pale blue gray. I knew in a heartbeat that I needed to get some of that fabric to make a pair of pillowcases for the Portland White House. Why? Because I could so clearly see the text print with lyrics to the song “What a Wonderful World” as the band at the bottom of the cases and the “mist” focus print as the body of the cases. Surely you agree!

Lucky for me, I found what I was looking for at an online quilt shop in Texas. The fabric arrived a few days ago, and this is what I have to show for it:

“What a Wonderful World” is one of my favorite songs. I am especially fond of the renditions by Louis Armstrong and Israel Kamakawiwo’ole but I also love the duet by Tony Bennett and k.d. lang. Is there another version I should know about?


Posted in Billie Bag, home dec, Junior Billie Bag, pillowcases, roll-it-up pillowcases, tutorial, update | 2 Comments

Playing with Pockets

As promised, I’m popping back in to show you the pockets I’m making for Junior Billie Bag #12. Call me crazy but I make a new bag every time I teach a class. It really helps my students to see the individual components of this wonderful quilter’s tote before they take on the challenge of making their own.

Here are the exterior pockets attached to the quilted side panels:

Here’s  close-up of that wonderful text print with lyrics to “What a Wonderful World”:

Students are free to design their own pockets sized for the tools they favor but I like to provide a few options. Over the 13 years I’ve been making Junior Billie Bags I’ve experimented with pockets for the exteriors side panels but I keep coming back to this combination because it works so well for me.

To provide context, take a look at the same pocket design added to JBB #11 made last year, first under construction . . .

. . . and then in the finished product:

Now for a look at the interior pockets for #12’s side panels:

You can see that I’m using the text print on the outside and inside of this JBB.

The gold fabric with striations is directional; I deliberately had the striations go horizontal in one pocket and vertical in the other. I’m probably the only one that would notice that when peeking inside the bag. Just a little example of having fun while playing with pockets!

Here’s a sneak peek at the inside pockets for the front and back panels:

The gold floral at the top is the lining fabric; all the fabrics below it are pockets. I’m loving that vintage blue and white floral print (so old there is no information on the selvedge other than “Springs, Ind., Inc.”) next to the gold and white chevron print.

My class starts a week from today. I’ll be ready for it!


Posted in Billie Bag, Junior Billie Bag, tote bags, update | 6 Comments

JBB #12 — Can You Believe It? — Is Under Construction

I’ve been gearing up to teach my Junior Billie Bag class that begins at Montavilla Sewing Center next week by creating the components that make up a completed bag. This is one of two front/back panels and it gives you a good sense of my color scheme: navy, gold, and white with just a touch of dusty blue. An elegant combo, yes?

My inspiration came from these fabrics I bought at Montavilla a couple of years ago:

At the time I wasn’t sure what I would make with them but I knew I would come up with something. The line is called “Gingham Foundry” and was designed for Riley Blake Designs by My Mind’s Eye. It features a large floral print on a navy background and several companion prints, including the text design you see above right. In case you can’t make out the words, they are the lyrics for “What a Wonderful World” — one of my all-time favorite songs.

The design on the front/back panel is one that I came up with a few Junior Billie Bags ago. It features a large bloom from the main print set into a circle and framed with a narrow flange.

I returned to another favorite design for the other front/back panel:

It’s a Churn Dash block set into the center of a Sawtooth Star block. I call it a Churning Star block as a nod to Jenifer Gaston, who designed a quilt front this block that she named Churning Stars. Her blocks are set on point in her charming version:

I found several fabrics in my stash that play nicely with the “Gingham Foundry” fabrics you see on the left and right sides of this photo:

You’ll see these fabrics in supporting roles in the JBB: they will appear on the inside and outside of the bag as pockets. Oops, I see I forgot the white and gold dot fabric that’s one of the “Seasonal Basics” by Lori Holt for Riley Blake dating back to 2019. I have that dot in a few different colorways.

Please check back soon. I’ll have a preview of those pockets — and you’ll be amazed how many pockets there are in this tote bag I call “the quintessential quilter’s tote.”


Posted in Billie Bag, Churning Stars quilt block, Junior Billie Bag, tote bags, update | 3 Comments

A New Leaf

Ah, as in turning over a new leaf? No no. As in making a leaf block. As in starting a new project. And this is happening during the first month of the New Year, when many quilters are going through their bins of Unfinished Objects (UFOs) and Works in Progress (WIPs), making charts and even joining challenges to tick those projects off their list.

Alas, I am not one of those quilters. I do have a few (ahem) UFOs I plan to tackle this year but this particular project has been percolating in my mind since last August, when I first saw Forest Floor, a new pattern from Margot Languedoc of the Pattern Basket, on Instagram. The very same day I saw a picture on Instagram of a quilt by Kim Diehl called Maple Stars featured in her new book, Simple Double-Dipped Quilts, published by Martingale Publishing. Both designers inserted a Sawtooth Star in the center of a Maple Leaf block. The settings are different but the idea is the same.

A few weeks later two fabrics from unrelated lines caught my eye at Montavilla Sewing Center in Lake Oswego, where I teach. Yielding to impulse — oh, how good I am at that! — I bought some yardage without a clue as to what I would do with it:

I looked at the two prints frequently, waiting for inspiration. A couple of weeks ago my musings on combining these fabrics in a quilt of leaves finally coalesced. I pulled some golds and oranges out of my stash to audition them with the two focus fabrics:

Then I realized I had some barn reds and rusts that might work, too:

For the background I pulled a creamy yellow from my stash that I’ve had for years and years. So far I’ve made only two blocks. Here’s the second one:

(I’ve cropped the seam allowances to show you what the blocks will look like finished.)

I haven’t used the second focus fabric yet. But I have a plan.

After buying a pdf copy of Forest Floor, I decided to buy the Kim Diehl book as well because I wanted to compare the patterns and instructions of the two designers. Martingale has recently ceased publication and print versions on the website are sold out but I was able to purchase an eBook version of Kim Diehl’s book for $9 and printed only the pages I needed to get her instructions for Maple Stars.

Both designers created their blocks to finish at 10″ square. I resized my blocks to finish at 12½” square. That may seem an odd size until you consider that the Maple Leaf block is on a 5 x 5 grid, which means that the finished size must be easily divisible by five. I have a fondness for blocks that finish at 12″ square — neither too large nor too small. It just so happens that a 12″ block is perfect for the front/back panels on a Junior Billie Bag — and 12½” blocks work, too.

Could my blocks be making an appearance on a future Junior Billie Bag (JBB)? Probably not these blocks, because I have a quilt in mind. But I do love the idea of this block design appearing on a future JBB. Time will tell.

In the meantime, I am trying to carve time from what has turned out to be a very busy month to make a couple more blocks before February arrives. Wish me luck!


Posted in Billie Bag, Junior Billie Bag, leaf block, update | 3 Comments

First Light Designs: Best of 2022

It’s that time of year again. Cheryl Brickey of Meadow Mist Designs is inviting bloggers to share their top five posts of the year in her “Best of 2022 Linky Party.” This is the eighth consecutive year Cheryl has hosted this linky party and my fifth year participating.

Clicking on the links will take you to the original posts where you can see more photos and read about my creative process.

Number 1. Isabella’s Quilt

Isabella’s Quilt, 40″ x 44″ (2022)

Isabella’s Quilt, made for a new great grandchild, was adapted from the pattern Star Stream Quilt by Sally Davies of Chasing Tigers.  I chose to make only a portion of the original design, using just two stars and enlarging them for maximum graphic effect. Instead of using one fabric for the background, I used several greens from my ample stash to create a low volume effect.

Number 2. Arctic Stars  (I liked Isabella’s Quilt so much I made a second version!)

Arctic Stars, 50″ x 63″ (2022)

Made to be a throw size, the quilt features two additional stars, with each star containing a fussycut image from the “Icy World” line by Gareth Lucas for Windham Fabrics. Here are a couple of close-ups:

8″ Star Block in Arctic Stars
16″ Star Block in Arctic Stars

Number 3. My Eleventh (!) Junior Billie Bag (JBB)

Dawn’s Latest Junior Billie Bag, the Essential Quilter’s Tote (2022)

I teach other quilters how to make this tote, making one myself in the process. That’s why I’ve made so many. To see earlier versions, click here.

I’ve also been making accessories to accompany each JBB. Here’s my latest suite:

Dawn’s Junior Billie Bag Accessories (2022)

You’ll find tutorials for the rotary cutter coat and scissors case at these links to my website:
 Rotary Cutter Coat (Oct. 10, 2014)
 Scissors Case from First Light Designs (Sept. 5, 2018)

Number 4. Pillowcases to Make You Dream of Italy

Pillowcases for the Portland White House (2022)

I love sleeping on pillowcases made from beautiful cottons. These cases were made using the “Capri” line designed by Katarina Roccella for Art Gallery Fabrics. (I used the burrito or roll-it-up method for the pillowcases, using my own tutorial which you can find here.)

Number 5. Holliberry Circle

Holliberry Circle, 25″ in diameter (2022)

My very first finish of 2022 was this mini quilt using the delightfully whimsical pattern Dresden Neighborhood by Kim Lapacek of Persimon Dreams. I used scraps from Corey Yoder’s “Holliberry” line from 2021 plus a few other red and green fabrics culled from my stash. I embellished the quilt with a few strategically placed vintage buttons. The link above the photo will take you to the post in which I explained (with lots of photos) how I converted my little quilt from a square to a circle.

Thank you so much for visiting First Light Designs. And thank you, Cheryl, for getting the party going. Be sure to check out the top five posts of the other quilting/blogging partygoers. If you’re a quilter, you can join Cheryl’s Best of 2022 Linky Party, too. The link is open until January 2.

All the best in 2023!


Posted in baby quilt, Billie Bag, home dec, Junior Billie Bag, roll-it-up pillowcases, rotary cutter case, sewing tool caddy, tote bags, tutorial, update, wall hanging, wonky Dresden neighborhood | 7 Comments

It Was Inevitable

Having recently finished my 11th Junior Billie Bag, it was inevitable that I would make a suite of accessories to go with it:

In clockwise order starting at the top, you can see a 4 x 4 fabric box (which I use as a threadcatcher), a quilter’s tool caddy (an embellished version of P3 Designs’ Travel Case pattern), a rotary cutter coat, and a scissors case. Directions for the rotary cutter coat and scissors case are on my Tutorials page.

It was also inevitable that Princess Cordelia aka Coco would photobomb my picture-taking efforts:

I shooed her off the ironing board so I could take a photo of the quilter’s tool caddy in its open position . . .

. . . and she returned to photobomb that as well. Notice the proprietary paw placed firmly on the tool caddy:

Here’s a better look at the threadcatcher:

I’ve devised a way to attach the binding that does not involve sewing!

This fall I’ll be teaching a class at Montavilla Sewing Center in Lake Oswego on how to make all four of these accessories. The class, called “Quilter’s Tote Accessories,” is intended as a companion to my Junior Billie Bag class but these accessories would be welcome additions to any quilter’s tote.

If you’re in the Portland metropolitan area and would like to treat yourself to some useful accessories or perhaps make gifts for your best quilting buddies, this may be the class for you. Thanks for stopping by!


Posted in Billie Bag, cats, Junior Billie Bag, rotary cutter case, sewing tool caddy, tote bags, tutorial, update | 5 Comments

It’s a Wrap: Junior Billie Bag #11

Officially finished and ready to load! Here ’tis, my eleventh Junior Billie Bag (JBB):

The block in the left photo above features an inset circle. Rather than make a different block for the other side (right photo), I used an uncut piece of the focus fabric because I wanted to showcase that gorgeous poppy border print. I really like how nicely the binding fabric — a metallic silver and black leaf print — sets off the grey, red, and black fabrics as well as the poppy print.

The bag is 14″ wide, 17″ tall, and 7″ deep. The depth of the bag is sufficient to hold a 6″ x 24″ acrylic ruler, which is only one of the terrific features of Billie’s design.

It’s always rather difficult to get good photos of the JBB with both sets of straps in plain sight. Here you see both sides flattened out, with the short and long handles in view:

Why two sets of handles? It’s so handy being able to choose when to carry the bag as a satchel using the short straps or when to carry it over your shoulder using the long straps.

It’s also difficult to get a good look at the pockets inside a Junior Billie Bag:

Here’s a photo of the interior (from a previous post) taken before the fourth side was added:

If you’re new to my blog, you may be wondering why on earth I’ve made so many Junior Billie Bags. The short answer is that I’ve been teaching this scaled down version of Billie Mahorney’s original design since 2015, and every time I teach the class, I make a bag because I’ve found that the best way for me to demonstrate construction techniques is to build a bag alongside my students.

Because of the pandemic, quilt classes came to a halt early in 2020. The last JBB I made was in 2019. When I started working on this one I realized how rusty I had gotten. As I tell my students, “This is a challenging bag to make but so worth the effort!”

You can see all of my Junior Billie Bags on the Gallery page of firstlightdesigns.com or by clicking here.


Posted in Billie Bag, Junior Billie Bag, tote bags, update | 10 Comments

Afternoon Delight

I can’t remember the last time I spent the entire afternoon in my sewing room. Despite the fact that it was really hot upstairs — the temperature in Portland reached 100 degrees at 6:00 pm today — I was in heaven. Fortunately, my ironing board is positioned right under the ceiling fan; the circulating air helped. I still got hot and sticky but it was totally worth it.

First I worked on Junior Billie Bag #11, the one I am making as a teaching tool for my students at Montavilla Sewing Center in Lake Oswego. I could have finished the bag today but I needed to leave the final steps undone so I can demonstrate them for my students at our third and final class on Friday. Look for the final reveal of this ultimate quilter’s tote next week!

Then I finally got the blocks sewn together on my Sea Star Sampler quilt. Because the blocks are of different sizes — finishing at 6, 12, and 18 inches — I knew I’d be sewing the top together in sections. You can see the four sections here:

What’s missing? The 18″ Chicago Star block, which goes in the center:

The Chicago Star was the first block I made way back in May of last year, when Kristin at Montavilla Sewing introduced it in a Block of the Month program via Zoom. Once in-person classes resumed at the Lake Oswego store in the fall of 2021, the BOM project faded away but I carried on, not really knowing what I would end up with. By the time I finished making blocks, I had used only two of the ones in Kristin’s design — but I feel sure she would approve.

The Chicago Star block needed to be added to my top with partial seams . . . and here it is in its rightful place:


I did wind up making one last-minute swap of two blocks and am pleased with the decision. Right now the top measures 48½” square but there are two borders to come. Maybe tomorrow?!


Posted in Billie Bag, Block of the Month (BOM), Churning Stars quilt block, Junior Billie Bag, sampler quilt, tote bags, update | 6 Comments