Category Archives: rotary cutter case

Accessorizing the Home

I’ve been spending a wee bit of time in my sewing room over the last week. It could have been more but I had my nose in a book. A big book:  715 pages, to be exact. It’s Abraham Verghese’s bestselling novel The Covenant of Water. I actually bought it last summer but was reluctant to begin such a lengthy tome until after my cataract surgeries in June and August. Reading is once again a great pleasure, and this freezing cold snap in the Pacific Northwest over the last several days presented an ideal opportunity to curl up with a good book with either a cat or a quilt (sometimes both) on my lap.

I did venture into my sewing room from time to time, working around the schedules of the workmen repairing the walls and ceiling in the upstairs hallway following water damage from a rain storm. The hallway now looks brand new — a touch of irony in a house that’s 111 years old — but the texture on the walls beautfully mimics the original lath and plaster so you’ll hear no complaints from me. All the hallway needs now is a coat of primer and two coats of color.

I’ve been working on some small things:
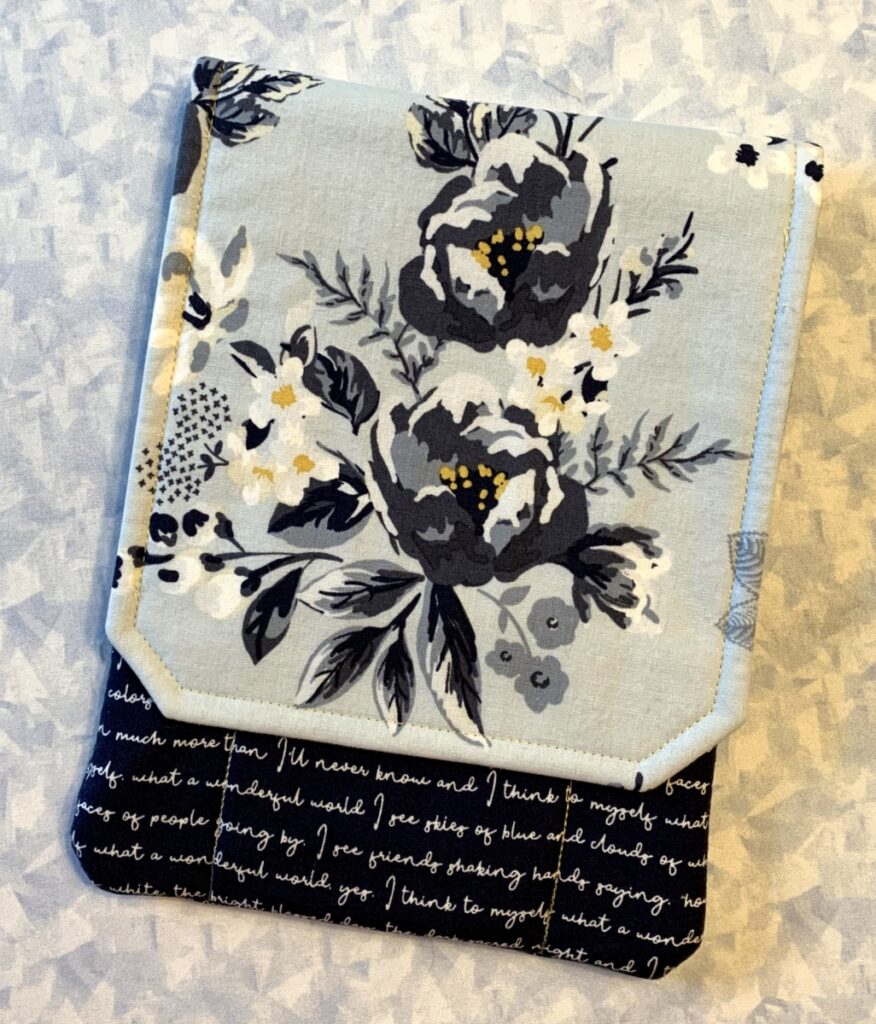
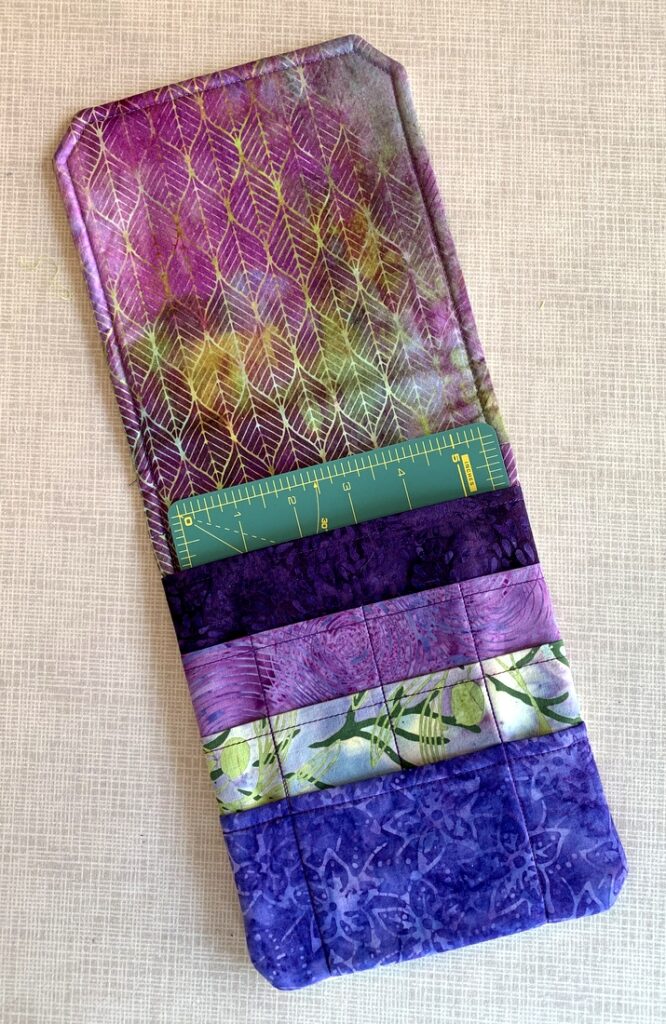
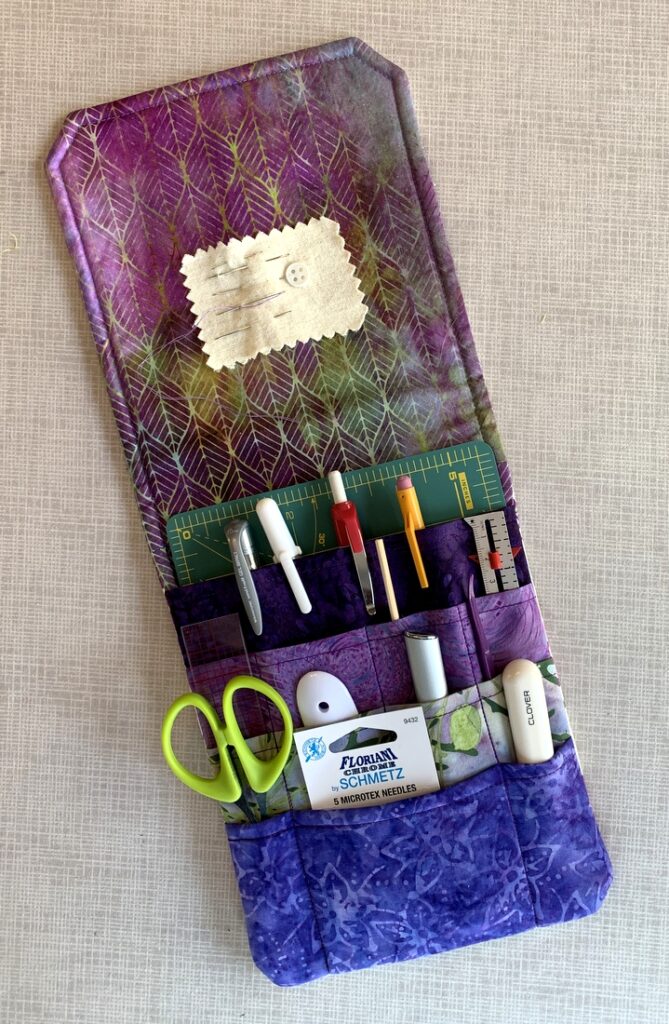
This is a quilter’s tool caddy, using the pattern Travel Case by Pearl Pereira of P3 Designs. I’ve made several versions over the years, modifying the design in a few ways but most importantly by adding a fourth pocket so the caddy holds more:
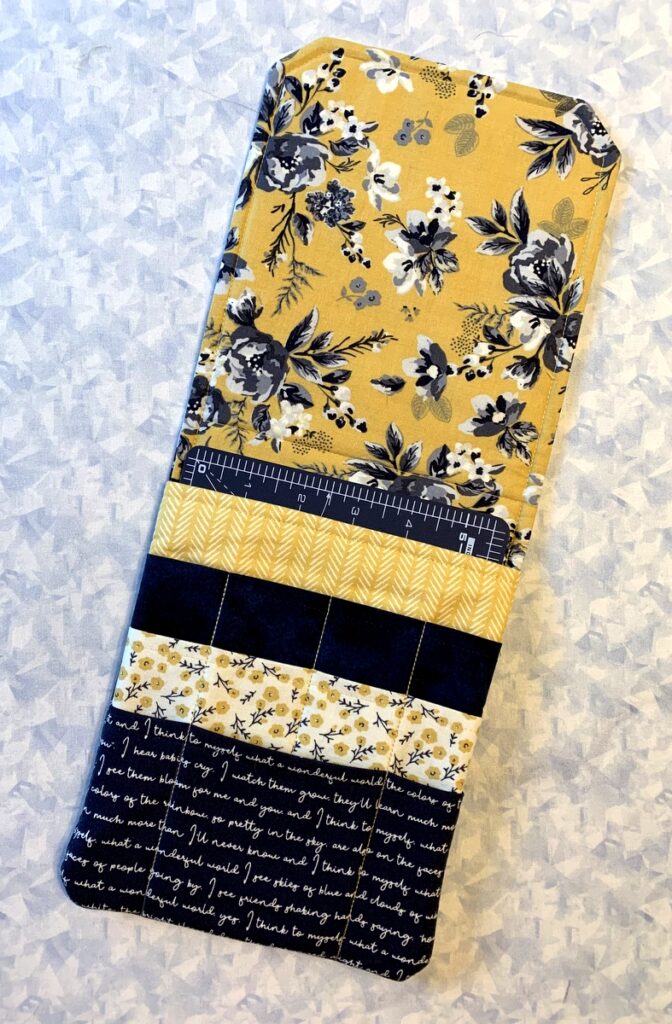
The tool caddy is one of four accessories to go with my current Junior Billie Bag-in-progress. I’ll finish it soon along with three other accessories that go with it — a rotary cutter coat, a scissors case, and a fabric box that I use as a threadcatcher. I’m so enjoying the fabrics — most of them from the Gingham Foundry line by Riley Blake that came out in 2021.

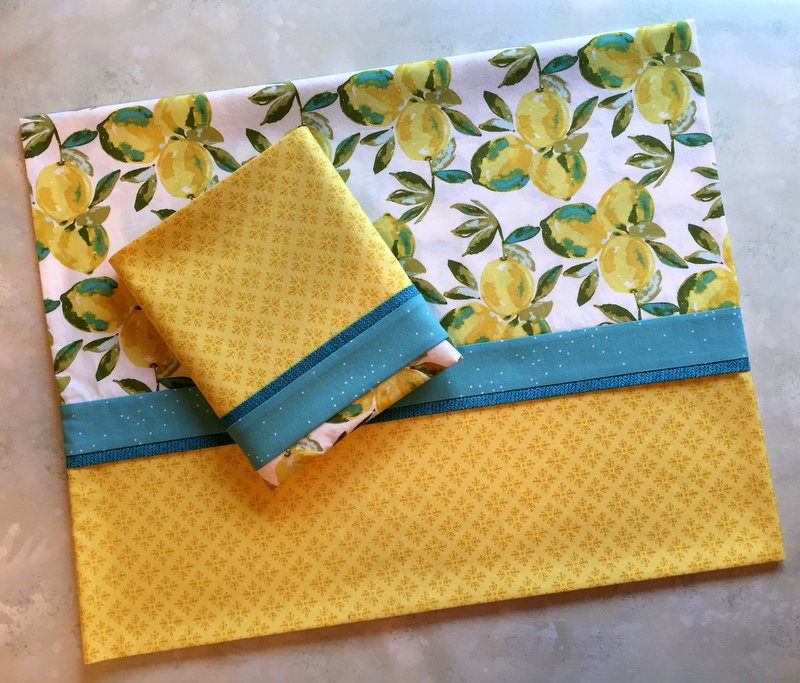
You may remember I used the same fabric last October in a pair of pillowcases made for the Portland White House. I just finished a second pair for my twin Diane, who arrives on Saturday for a two-week visit. Ordinarily she would be surprised by seeing them wrapped up with a ribbon in the guest bedroom but she reads my blog so as soon as she sees this post she’ll know they await.

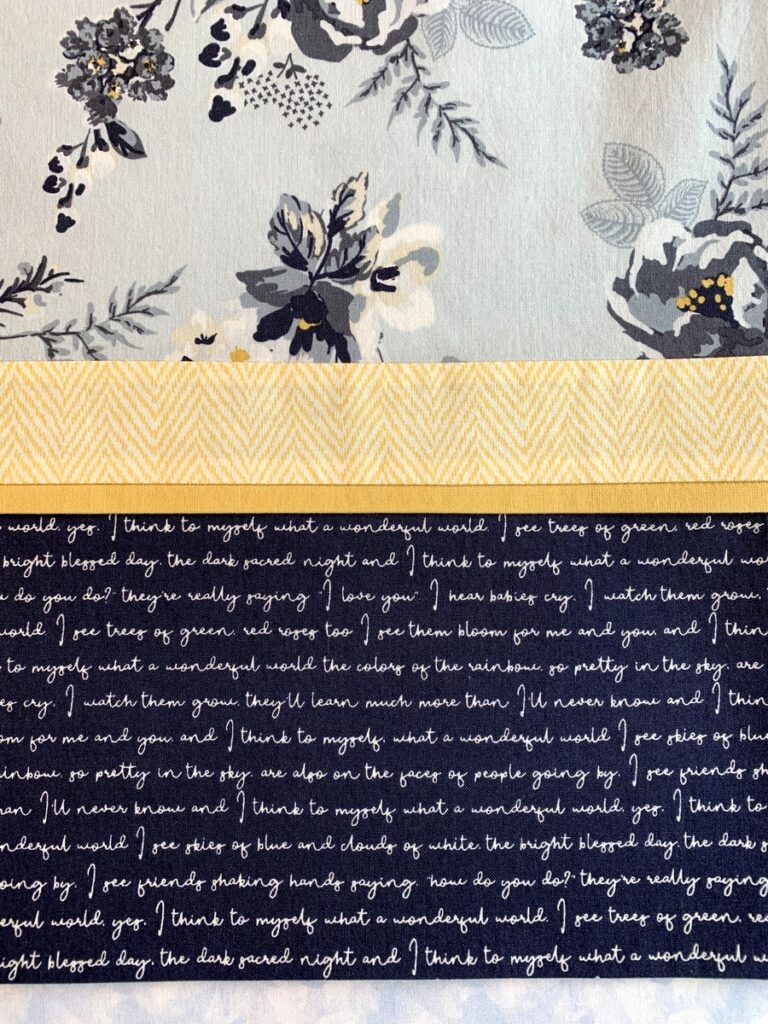
I couldn’t resist fussycutting the text print on the band so that the refrain “I think to myself what a wonderful world” appears on the top and bottom lines of the band:

A bit obessive-compulsive? Umm, yes.

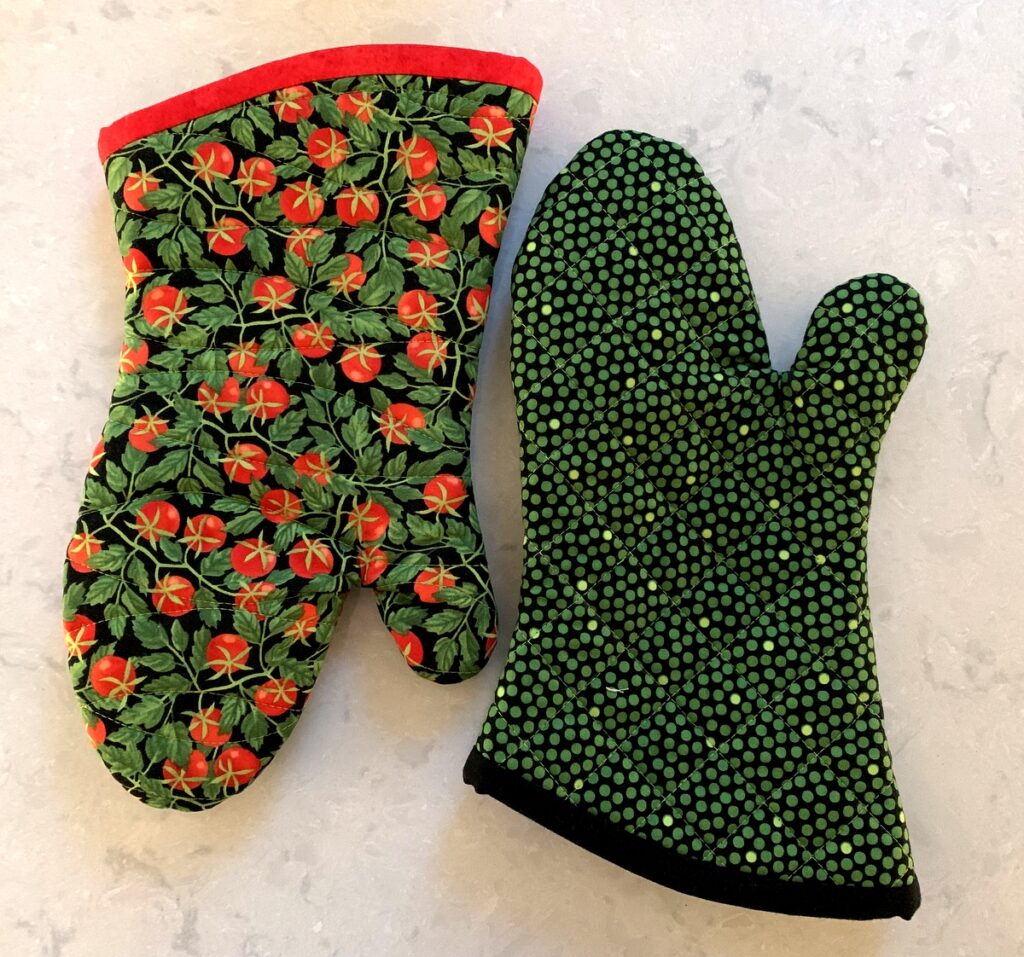
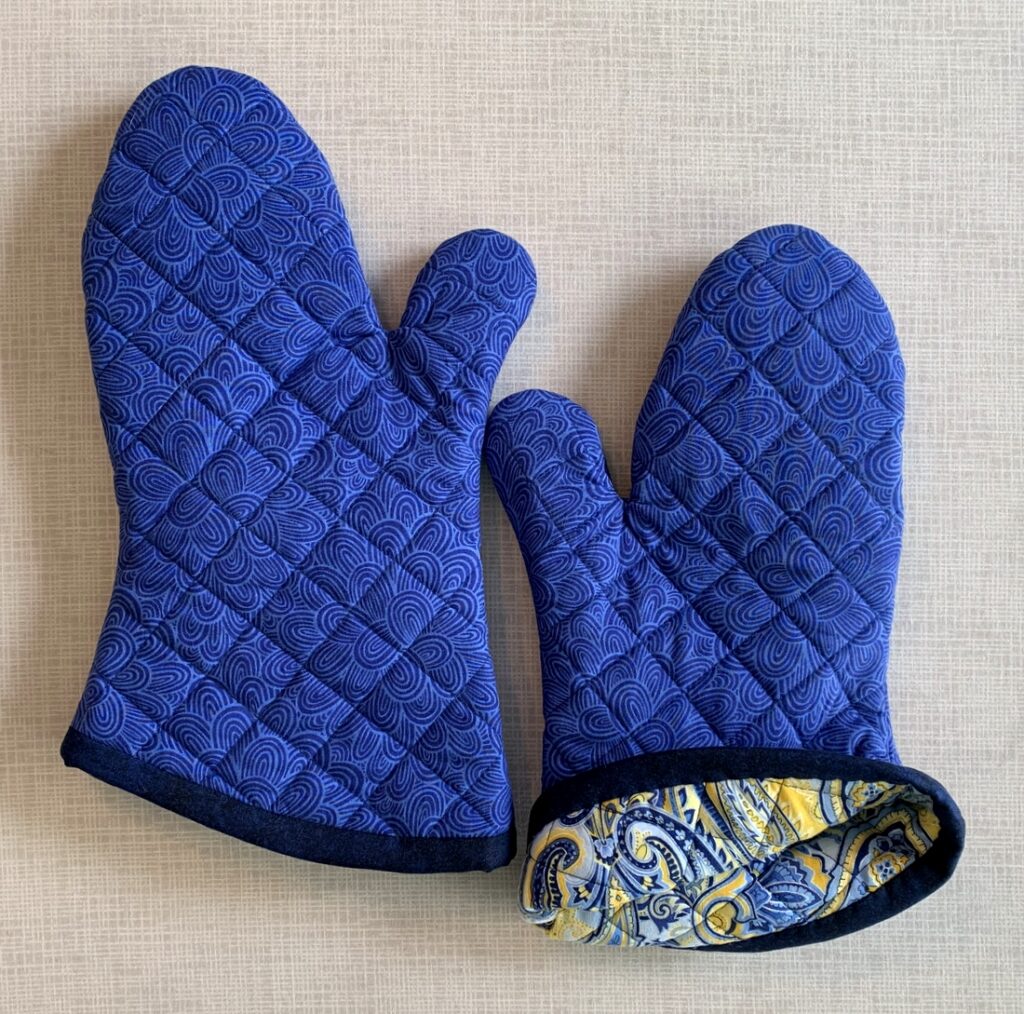
I also made myself a new oven mitt (from my own tutorial) but got two in the bargain:

I had cut out the fabric and batting weeks ago for the mitt on the right; the materials were stacked in my sewing room closet just waiting for me. I can’t remember why I got out the tub that my oven mitt supplies are stored in but when I did I was surprised to find there was a mitt inside that was almost finished! All I needed to do was tack the red band down and turn the mitt right side out. I adore that tomato print and thought I had used the last of it. Now I well and truly have.

So much for accessories. What about quilts? Well, I have two quilts I started last year that I really need to finish but I’m already dreaming about starting a new one. . .



Posted in Billie Bag, cats, family, home dec, Junior Billie Bag, oven mitts, pillowcases, roll-it-up pillowcases, rotary cutter case, sewing tool caddy, tote bags, tutorial, update | 4 Comments

First Light Designs: Best of 2022

It’s that time of year again. Cheryl Brickey of Meadow Mist Designs is inviting bloggers to share their top five posts of the year in her “Best of 2022 Linky Party.” This is the eighth consecutive year Cheryl has hosted this linky party and my fifth year participating.

Clicking on the links will take you to the original posts where you can see more photos and read about my creative process.

Number 1. Isabella’s Quilt

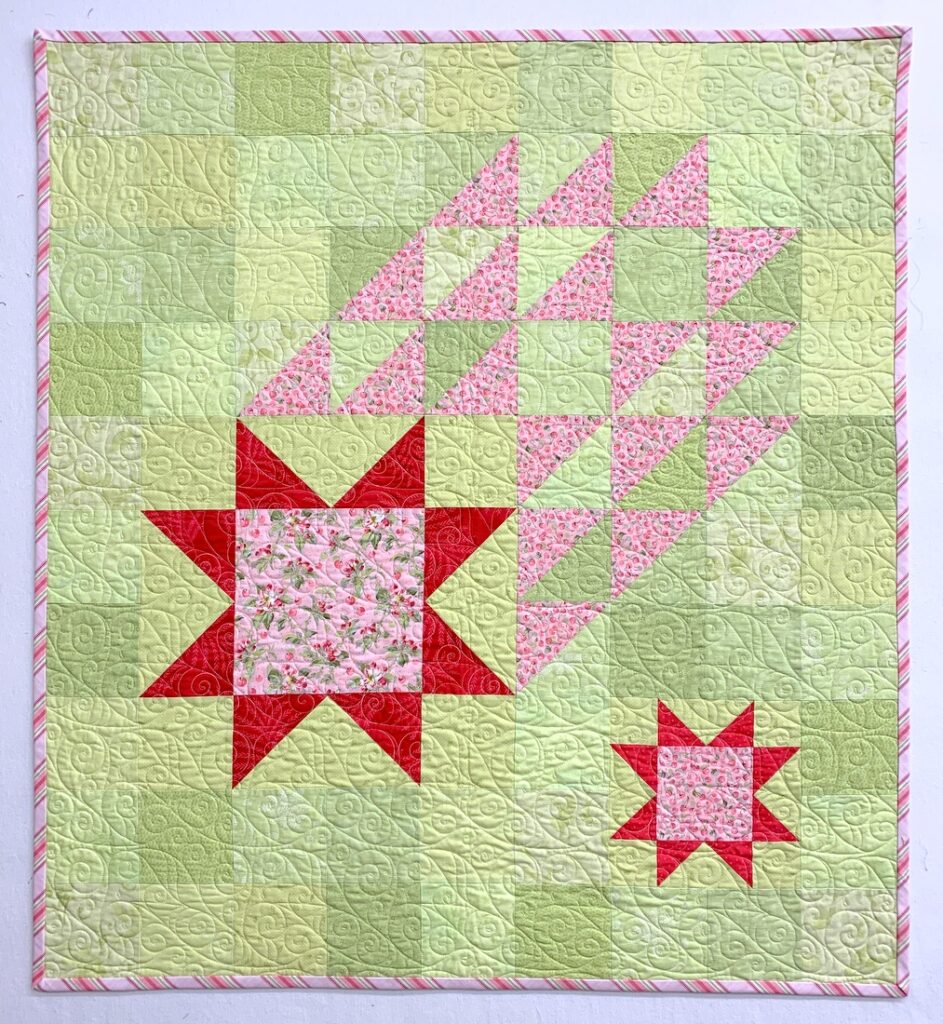
Isabella’s Quilt, 40″ x 44″ (2022)

Isabella’s Quilt, made for a new great grandchild, was adapted from the pattern Star Stream Quilt by Sally Davies of Chasing Tigers.  I chose to make only a portion of the original design, using just two stars and enlarging them for maximum graphic effect. Instead of using one fabric for the background, I used several greens from my ample stash to create a low volume effect.

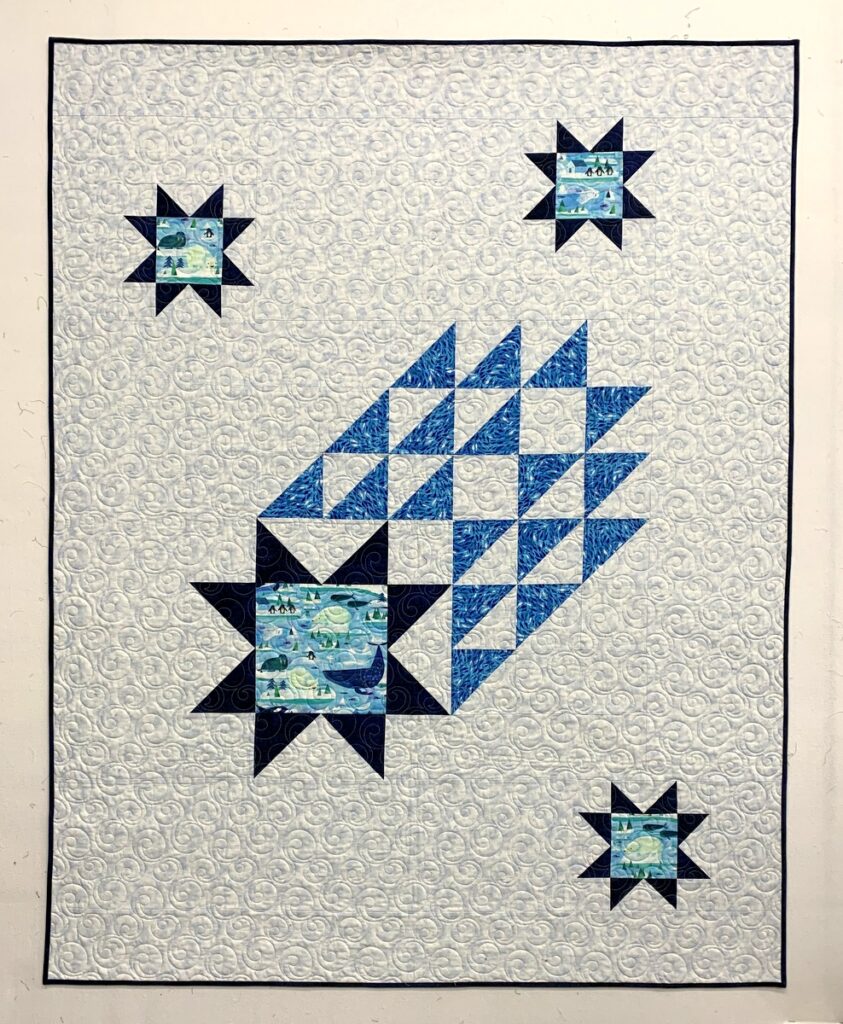
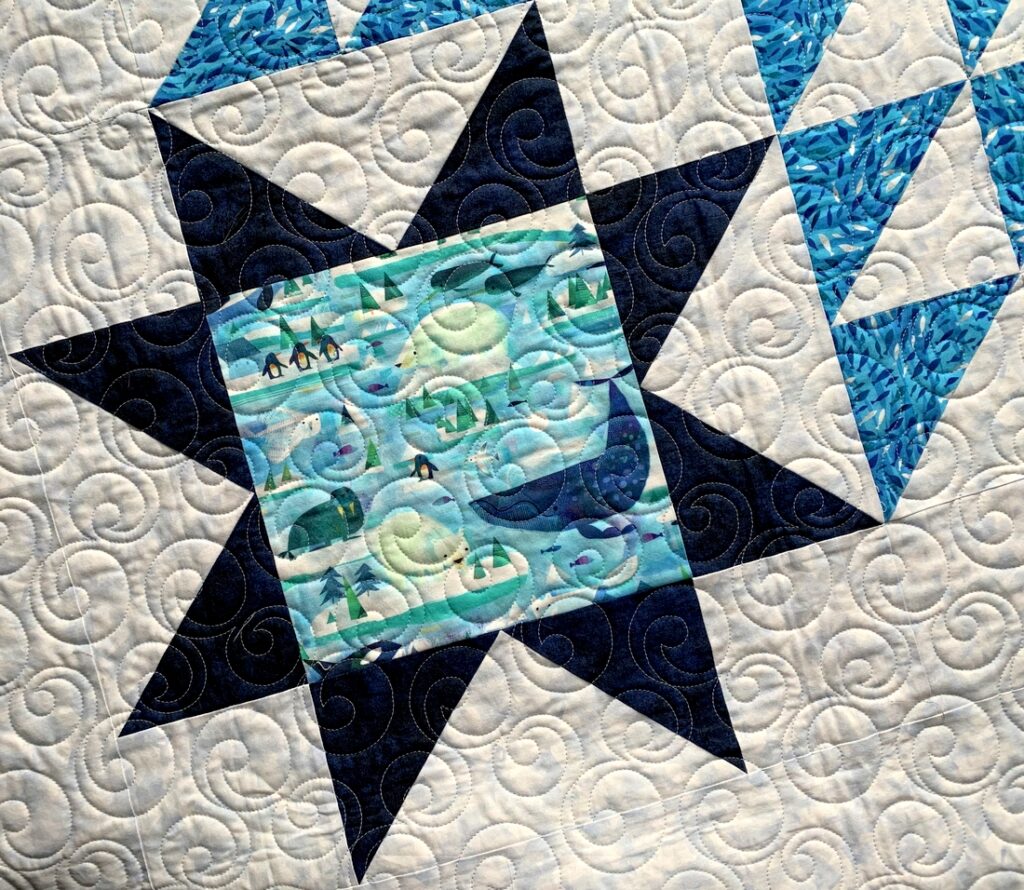
Number 2. Arctic Stars  (I liked Isabella’s Quilt so much I made a second version!)

Arctic Stars, 50″ x 63″ (2022)

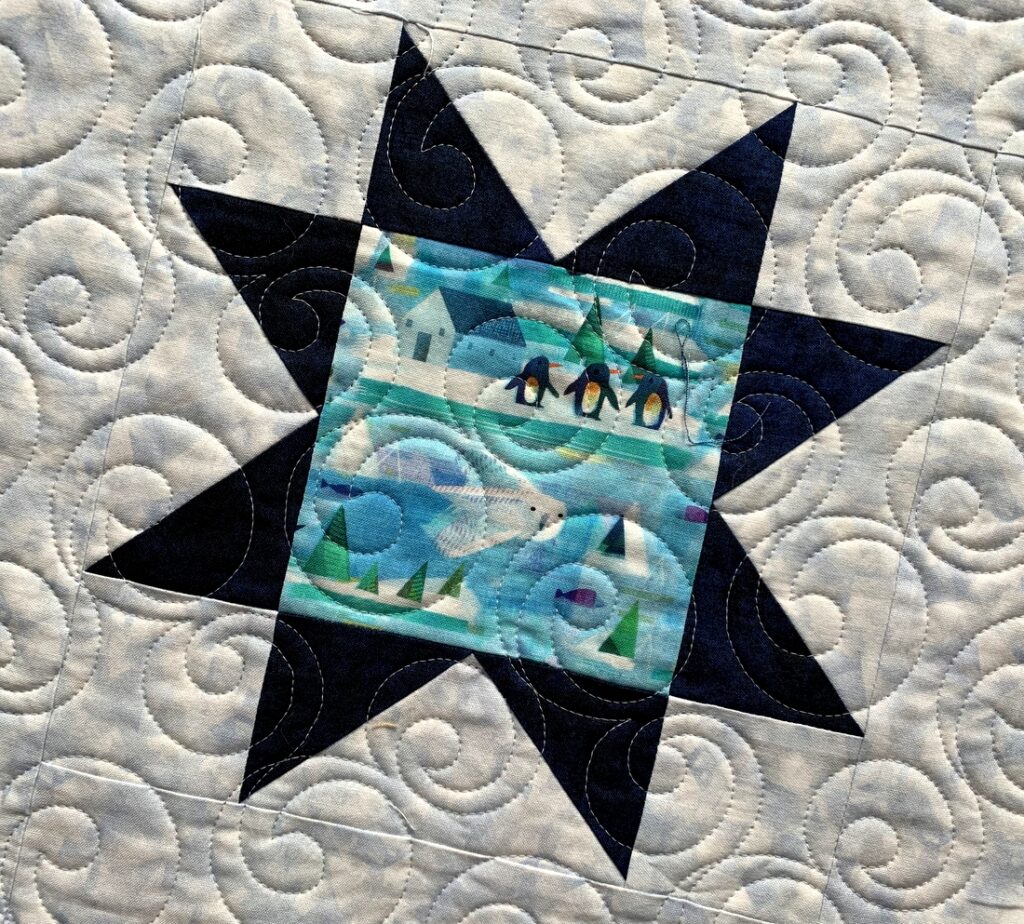
Made to be a throw size, the quilt features two additional stars, with each star containing a fussycut image from the “Icy World” line by Gareth Lucas for Windham Fabrics. Here are a couple of close-ups:

8″ Star Block in Arctic Stars
16″ Star Block in Arctic Stars

Number 3. My Eleventh (!) Junior Billie Bag (JBB)

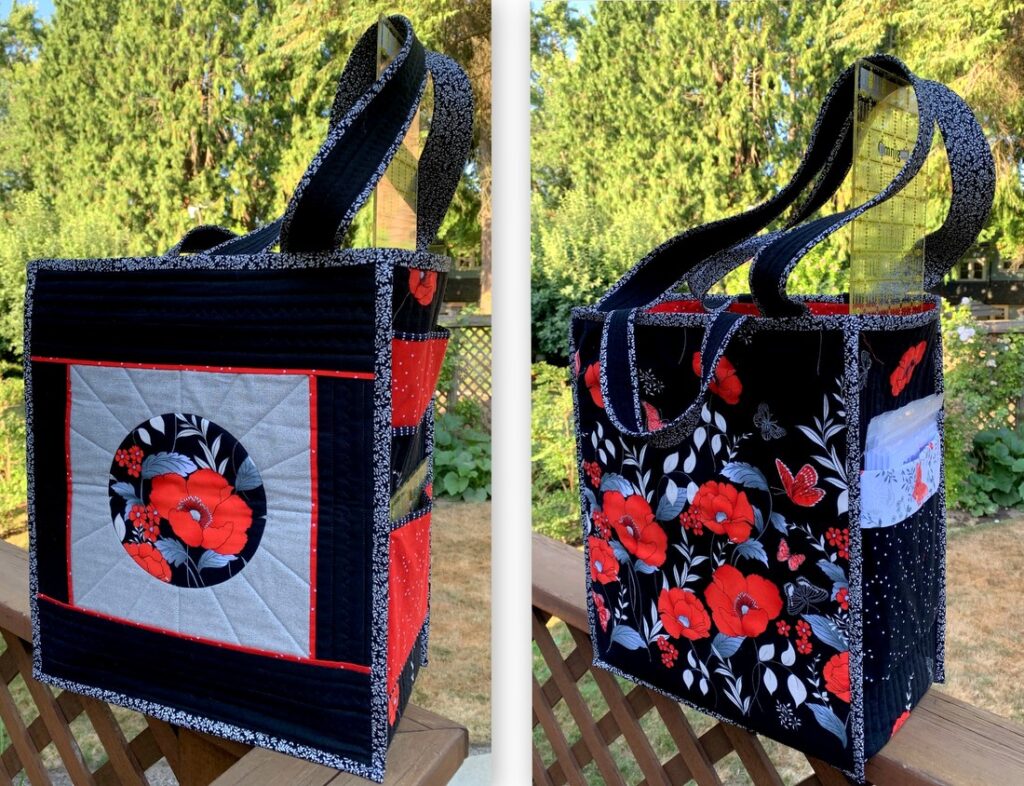
Dawn’s Latest Junior Billie Bag, the Essential Quilter’s Tote (2022)

I teach other quilters how to make this tote, making one myself in the process. That’s why I’ve made so many. To see earlier versions, click here.

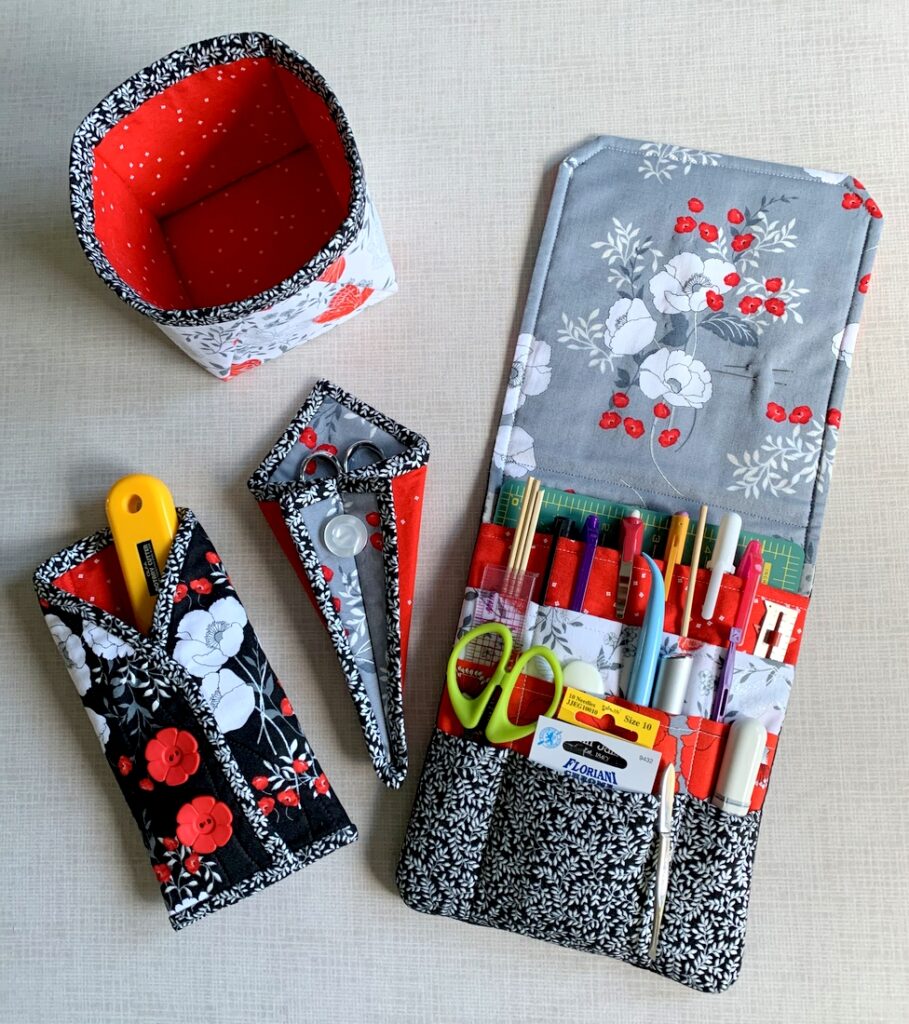
I’ve also been making accessories to accompany each JBB. Here’s my latest suite:

Dawn’s Junior Billie Bag Accessories (2022)

You’ll find tutorials for the rotary cutter coat and scissors case at these links to my website:
 Rotary Cutter Coat (Oct. 10, 2014)
 Scissors Case from First Light Designs (Sept. 5, 2018)

Number 4. Pillowcases to Make You Dream of Italy

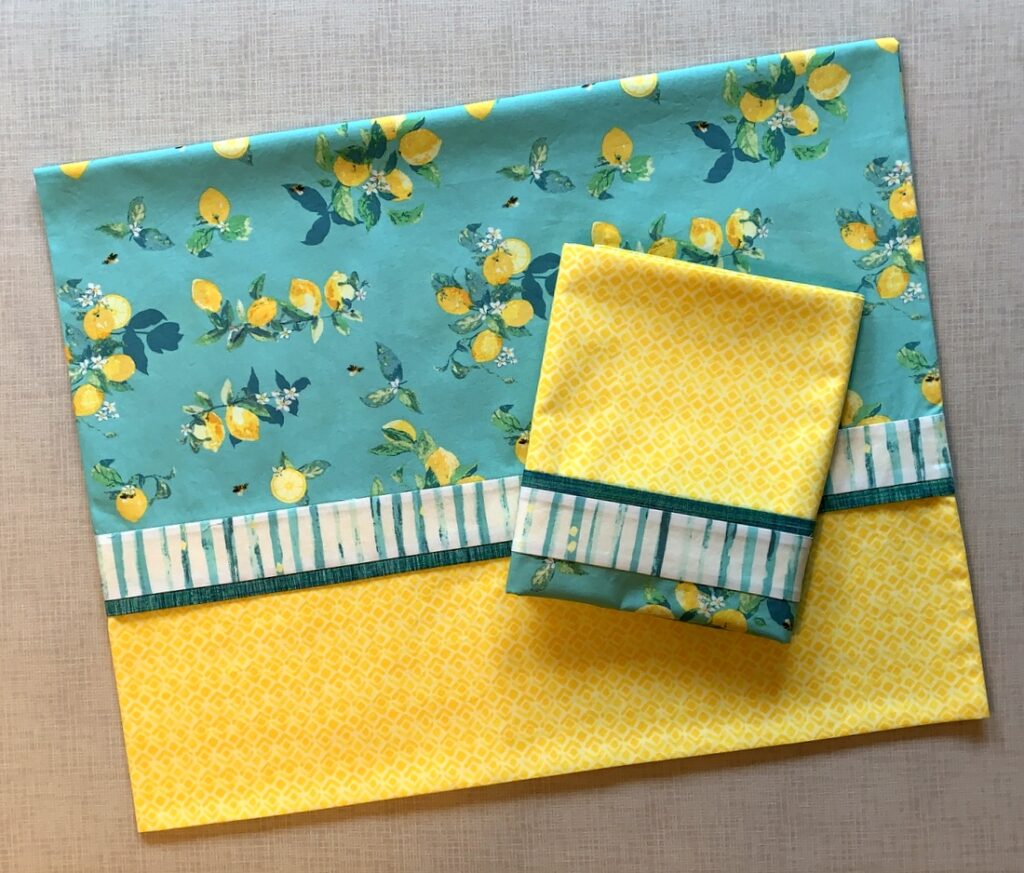
Pillowcases for the Portland White House (2022)

I love sleeping on pillowcases made from beautiful cottons. These cases were made using the “Capri” line designed by Katarina Roccella for Art Gallery Fabrics. (I used the burrito or roll-it-up method for the pillowcases, using my own tutorial which you can find here.)

Number 5. Holliberry Circle

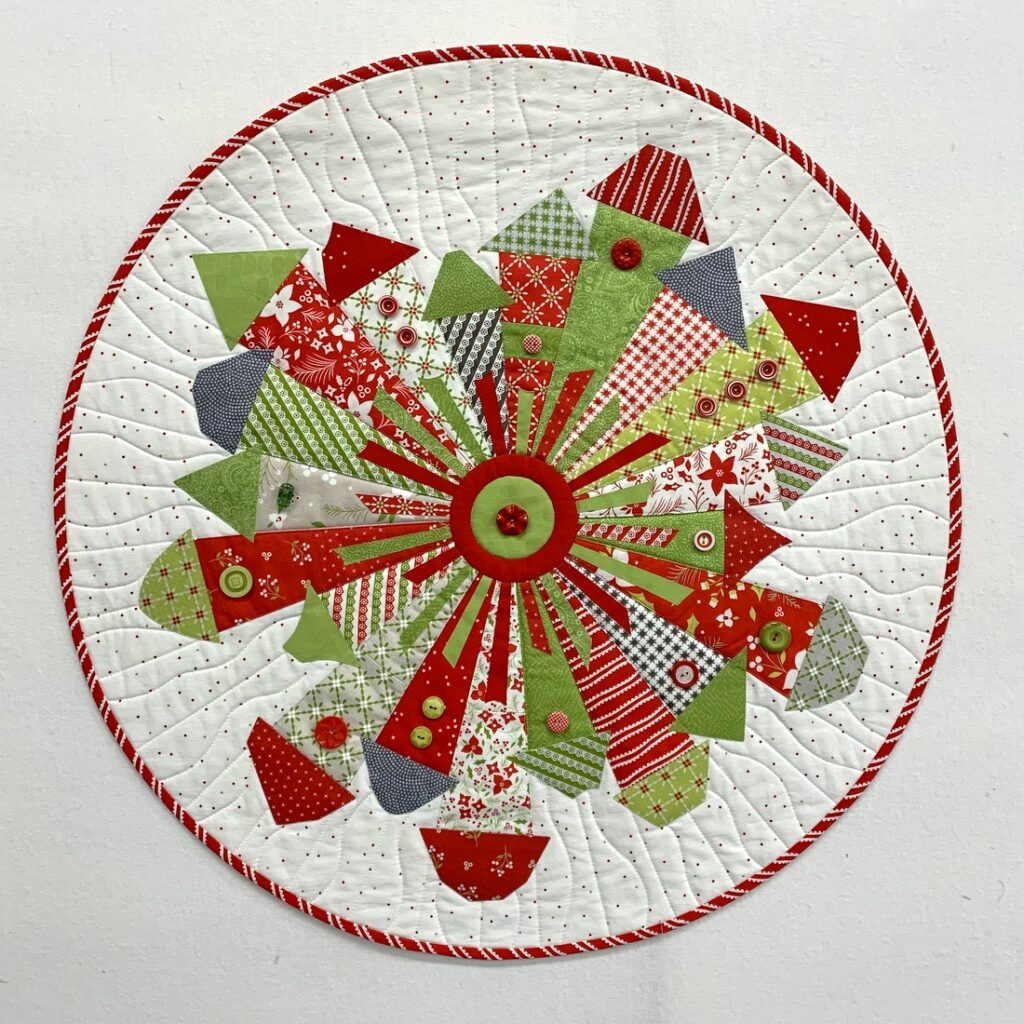
Holliberry Circle, 25″ in diameter (2022)

My very first finish of 2022 was this mini quilt using the delightfully whimsical pattern Dresden Neighborhood by Kim Lapacek of Persimon Dreams. I used scraps from Corey Yoder’s “Holliberry” line from 2021 plus a few other red and green fabrics culled from my stash. I embellished the quilt with a few strategically placed vintage buttons. The link above the photo will take you to the post in which I explained (with lots of photos) how I converted my little quilt from a square to a circle.

Thank you so much for visiting First Light Designs. And thank you, Cheryl, for getting the party going. Be sure to check out the top five posts of the other quilting/blogging partygoers. If you’re a quilter, you can join Cheryl’s Best of 2022 Linky Party, too. The link is open until January 2.

All the best in 2023!


Posted in baby quilt, Billie Bag, home dec, Junior Billie Bag, roll-it-up pillowcases, rotary cutter case, sewing tool caddy, tote bags, tutorial, update, wall hanging, wonky Dresden neighborhood | 7 Comments

It Was Inevitable

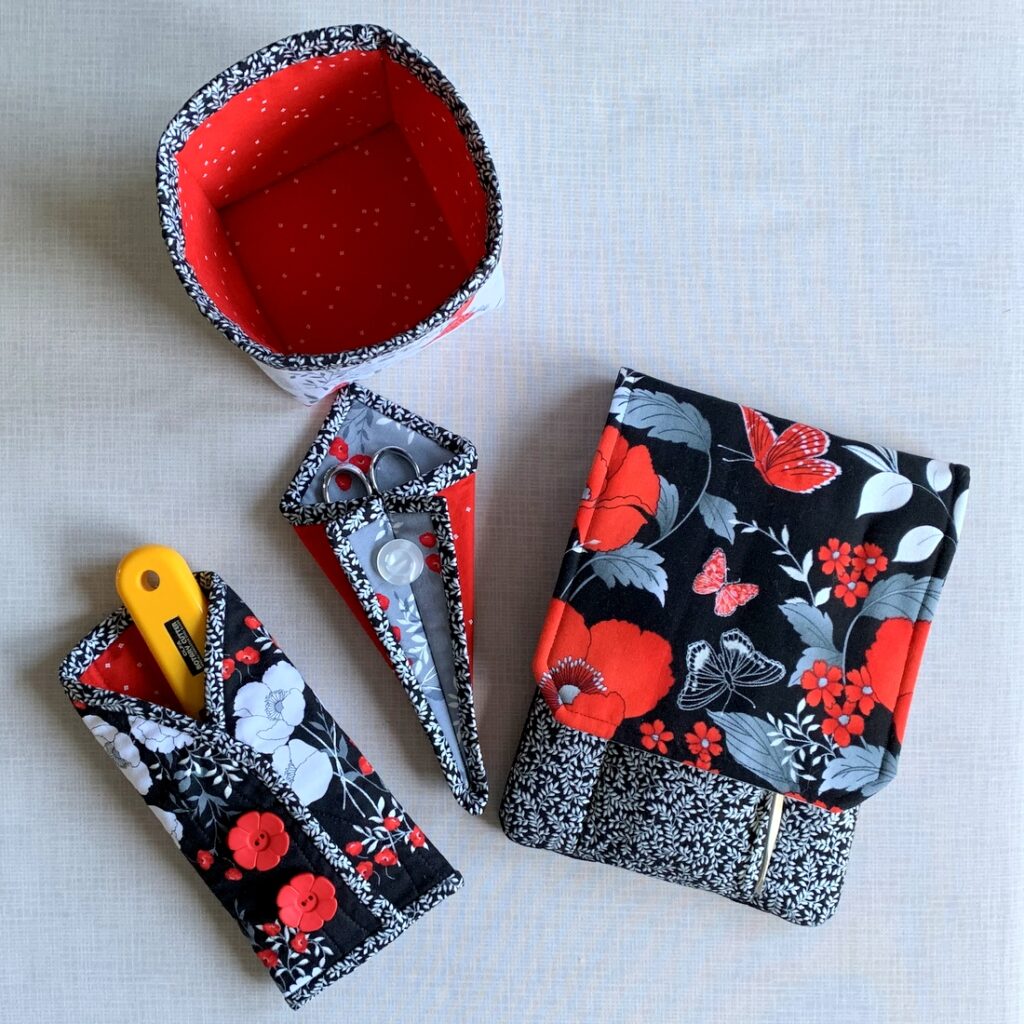
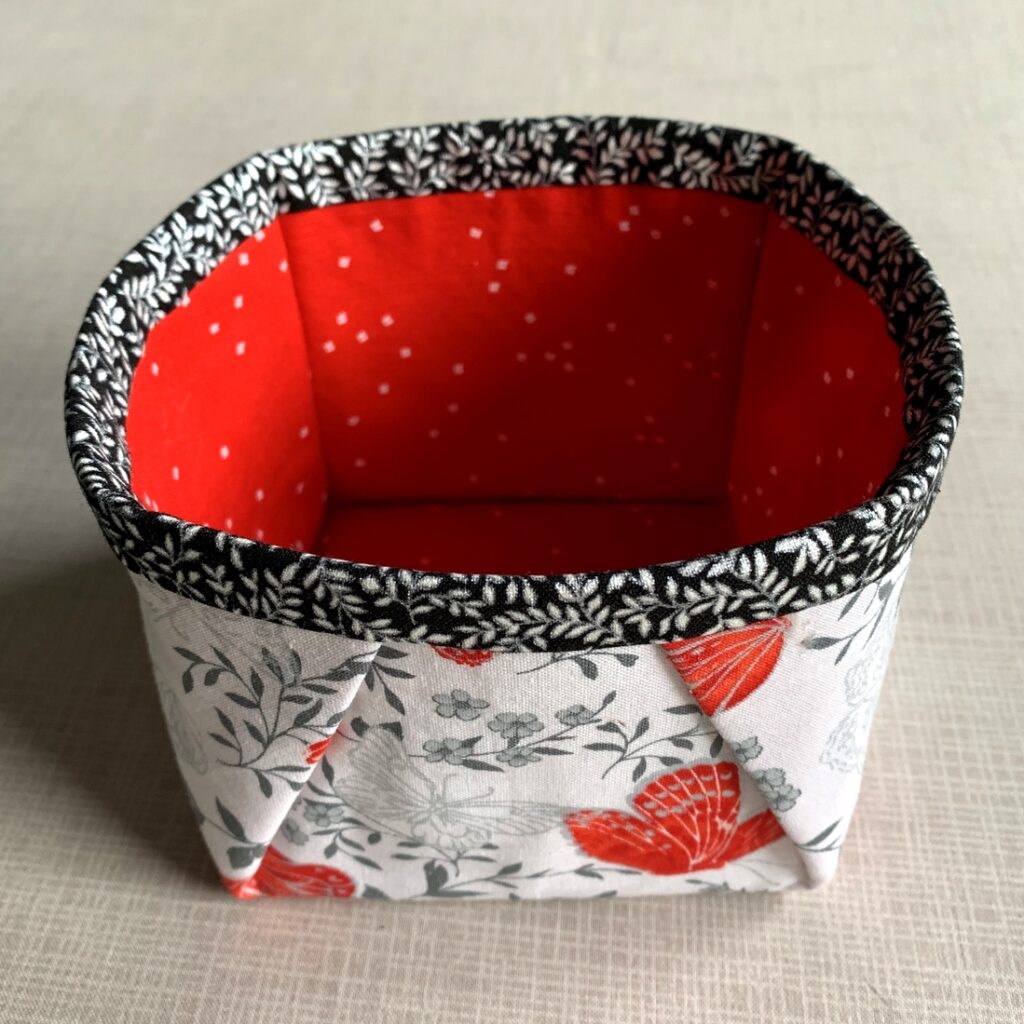
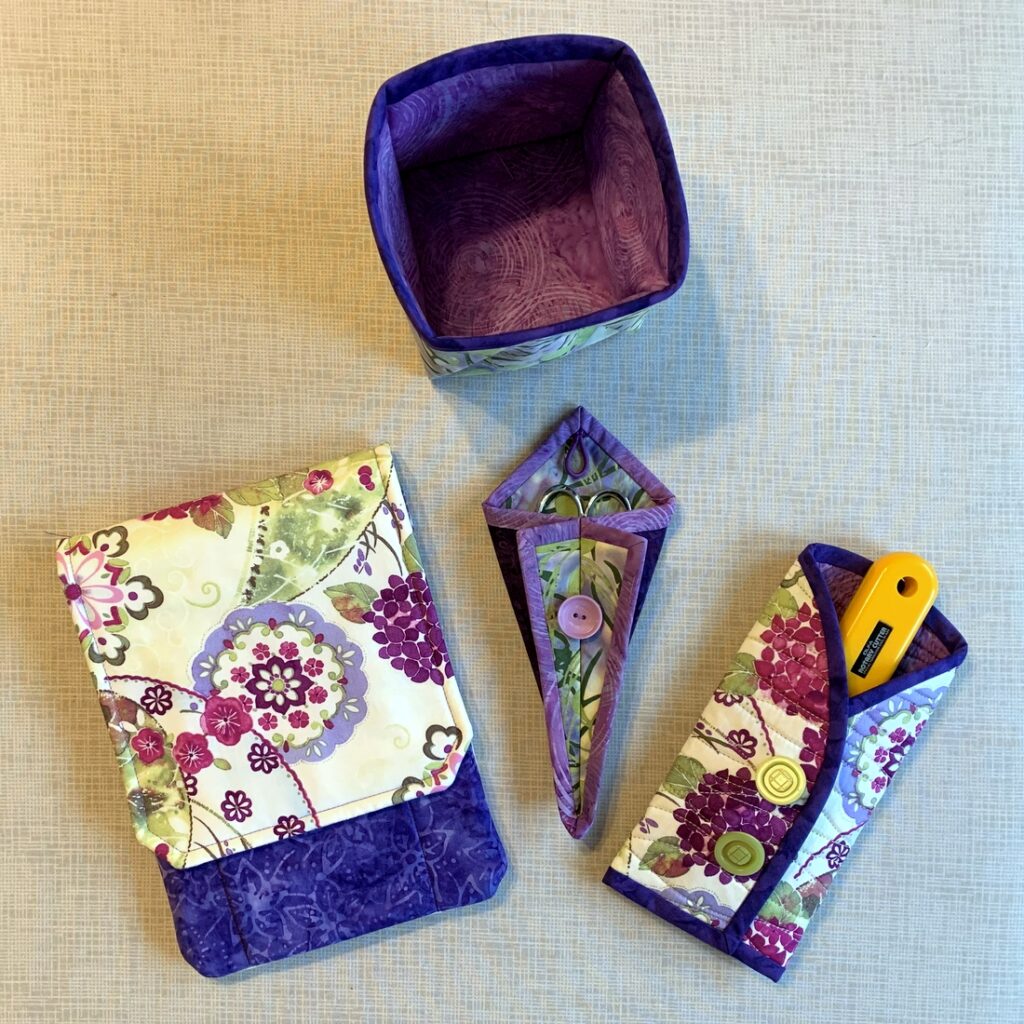
Having recently finished my 11th Junior Billie Bag, it was inevitable that I would make a suite of accessories to go with it:

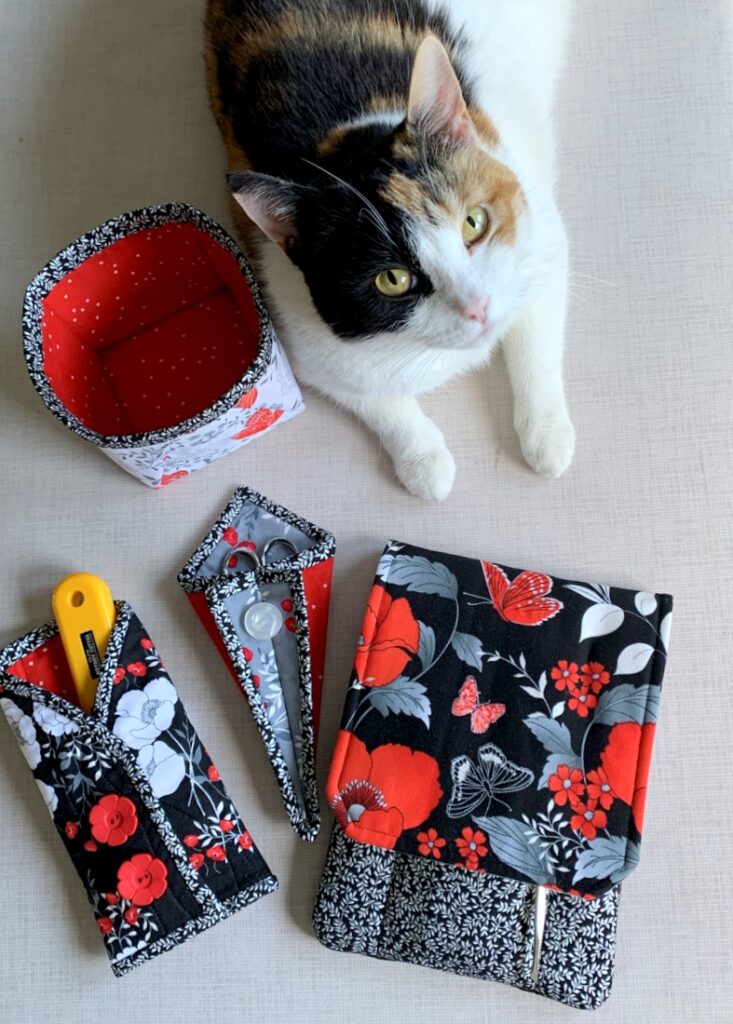
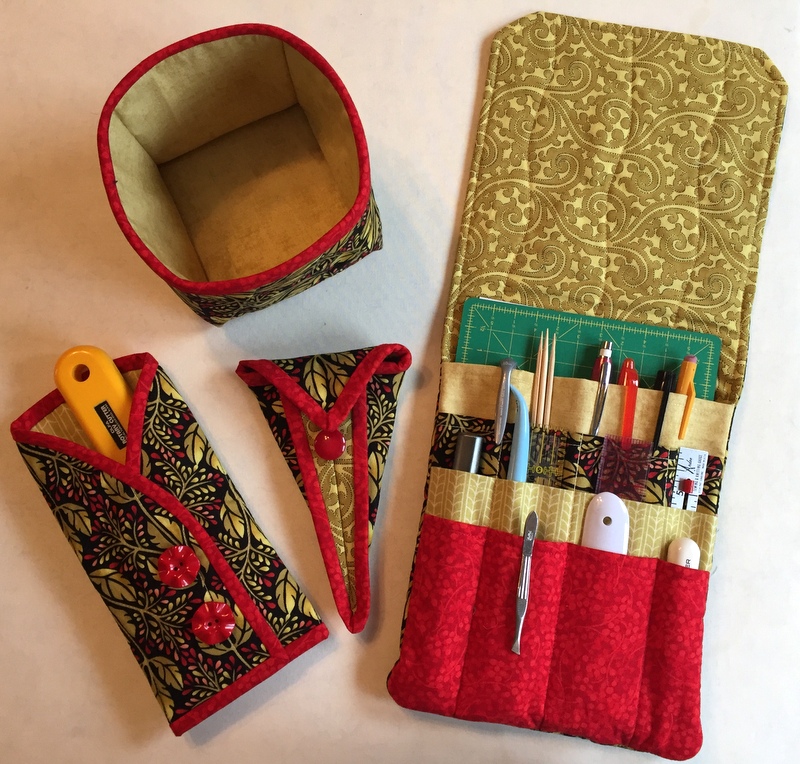
In clockwise order starting at the top, you can see a 4 x 4 fabric box (which I use as a threadcatcher), a quilter’s tool caddy (an embellished version of P3 Designs’ Travel Case pattern), a rotary cutter coat, and a scissors case. Directions for the rotary cutter coat and scissors case are on my Tutorials page.

It was also inevitable that Princess Cordelia aka Coco would photobomb my picture-taking efforts:

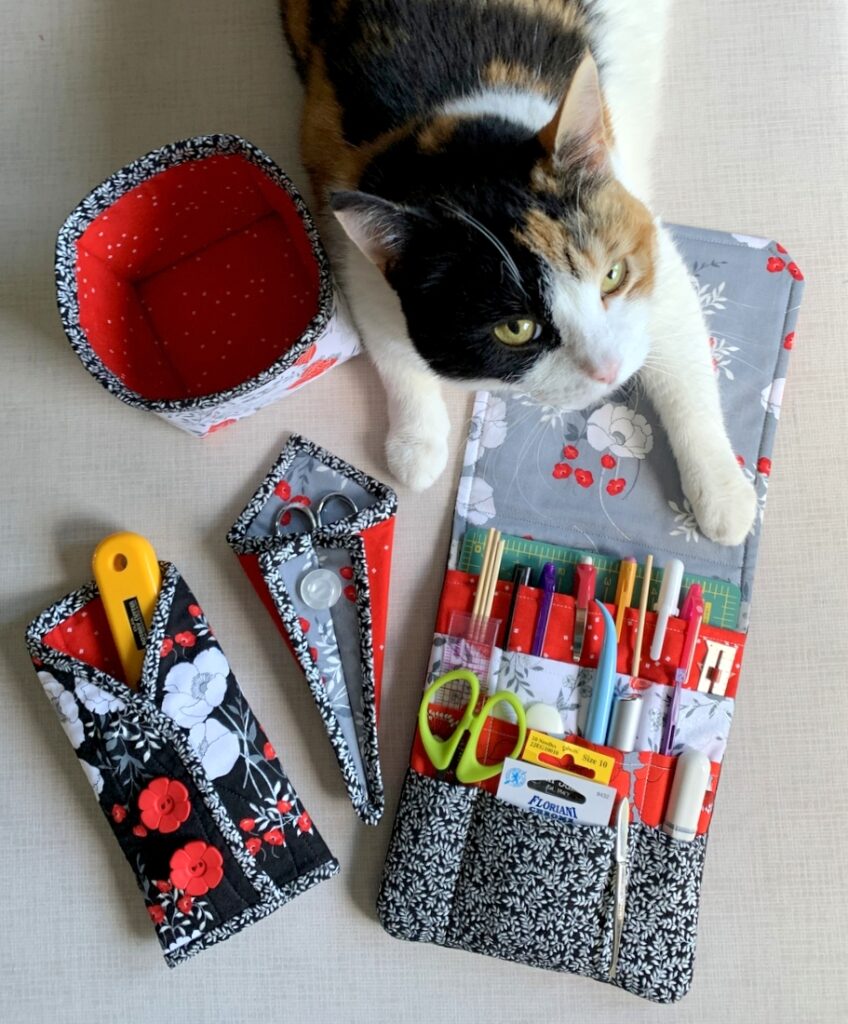
I shooed her off the ironing board so I could take a photo of the quilter’s tool caddy in its open position . . .
. . . and she returned to photobomb that as well. Notice the proprietary paw placed firmly on the tool caddy:
Here’s a better look at the threadcatcher:

I’ve devised a way to attach the binding that does not involve sewing!

This fall I’ll be teaching a class at Montavilla Sewing Center in Lake Oswego on how to make all four of these accessories. The class, called “Quilter’s Tote Accessories,” is intended as a companion to my Junior Billie Bag class but these accessories would be welcome additions to any quilter’s tote.

If you’re in the Portland metropolitan area and would like to treat yourself to some useful accessories or perhaps make gifts for your best quilting buddies, this may be the class for you. Thanks for stopping by!


Posted in Billie Bag, cats, Junior Billie Bag, rotary cutter case, sewing tool caddy, tote bags, tutorial, update | 5 Comments

10th Blogiversary Giveaway Update

The three winners of my recent giveaway — Linda, Chipper, and Bridget — had their choice of three bespoke items: a pair of pillowcases, a rotary cutter coat, or a pair of oven mitts.  Much to my surprise, all three winners chose pillowcases.

After a few back-and-forths via email with the winners, taking careful note of their color and fabric preferences, I got to work. It did take me a while to get the pillowcases made, what with teaching quilt classes, working outdoors alongside the Dear Husband to get the garden up to speed after a verrrry long and wet spring, and welcoming visiting relatives to the Portland White House.

But the cases are done, I’ve sent “sneak peeks” to the winners, and am happy to report the cases are, as they say, “in the mail.” Do you want to see what the end results are? Of course you do!

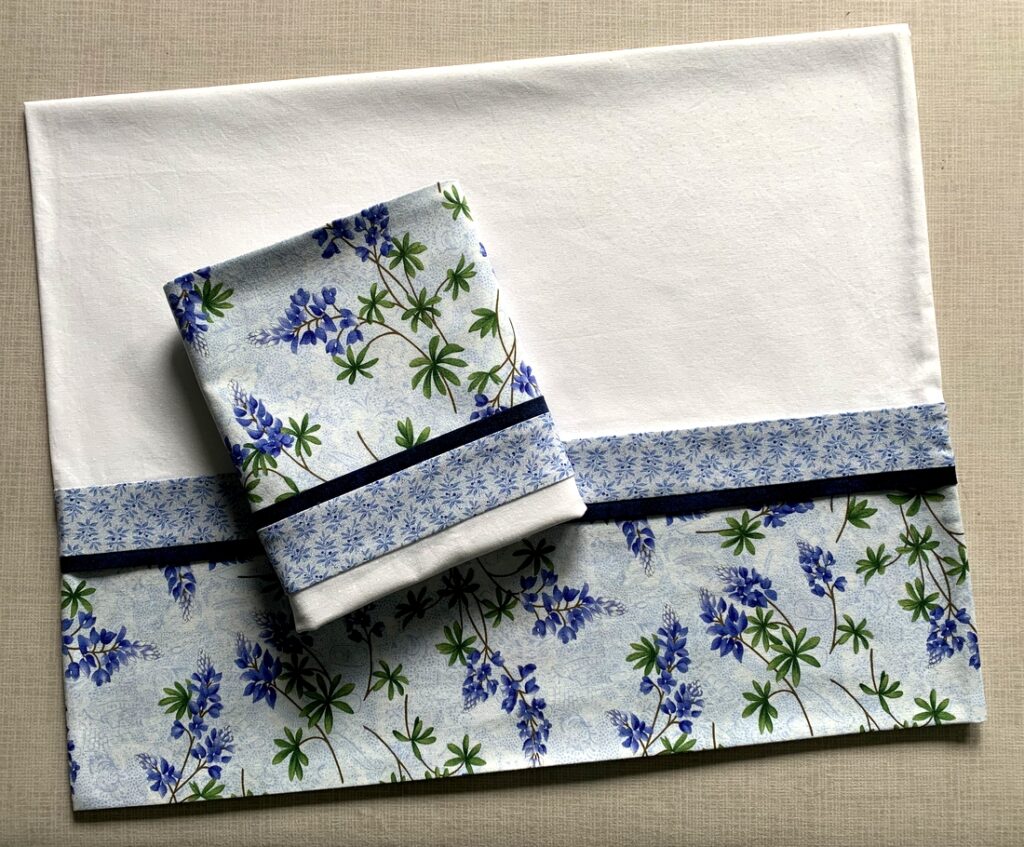
First up are Linda’s cases. As a reminder, Linda’s comment on my 10th Blogiversary post was this: “What a lovely and generous way to celebrate your blog’s anniversary! So hard to pick a favorite color combo, but pretty much any combination of blues and greens is hard to beat.” Linda’s cases contain — surprise! — blue and green:

The body of the pillowcase is a subtle white-on-white dot. Fun fact:  the fabrics were chosen to complement a stunning Double Wedding Ring quilt that Linda made — and hand quilted! — to celebrate her 40th wedding anniversary.

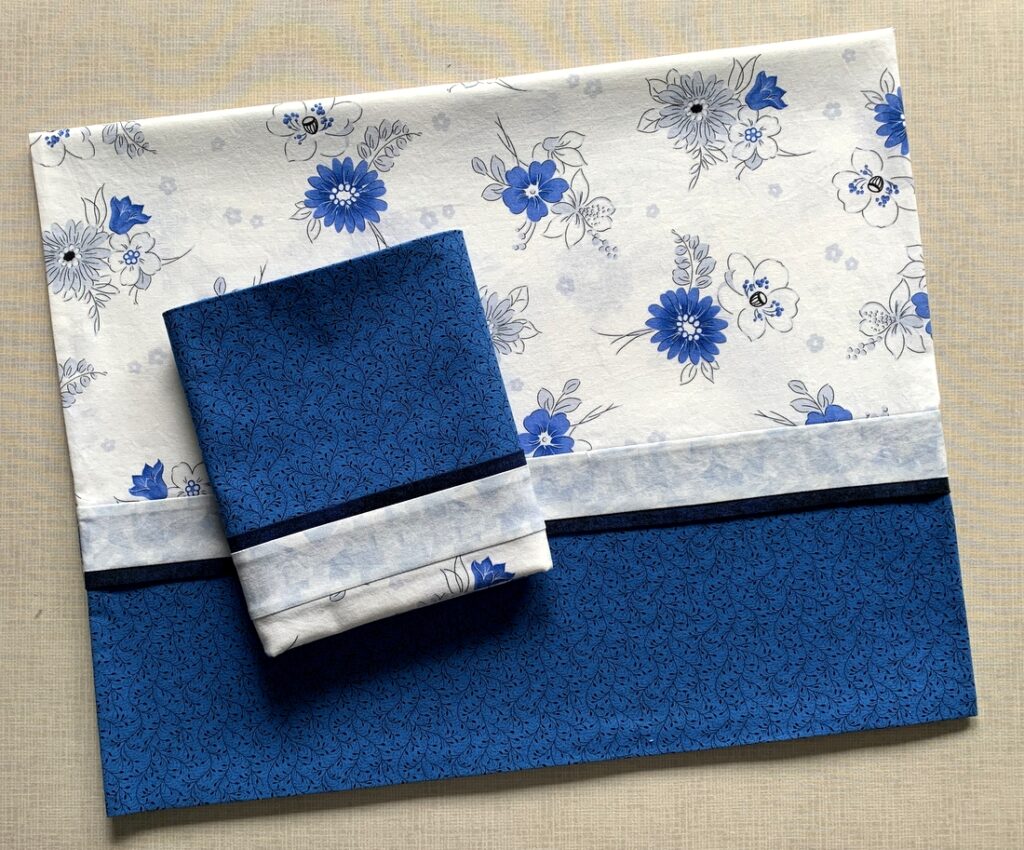
Chipper, my second winner, said “I love blue and white. Congratulations on 10 years!” Here are the cases I made for her:

Fun fact: there’s an amusing story about how I wound up with the blue and white floral fabric you see in the body of the pillowcase.

My third winner is Bridget, whose comment on my blog was this: “Ten years and I have loved so many of your posts! Congrats! I am not sure how this happened, I hate orange but right now I am liking orange and cream combos or maybe orange and yellow…um 😉 Oh, hey, maybe it is a lack of sunshine this spring! lol”

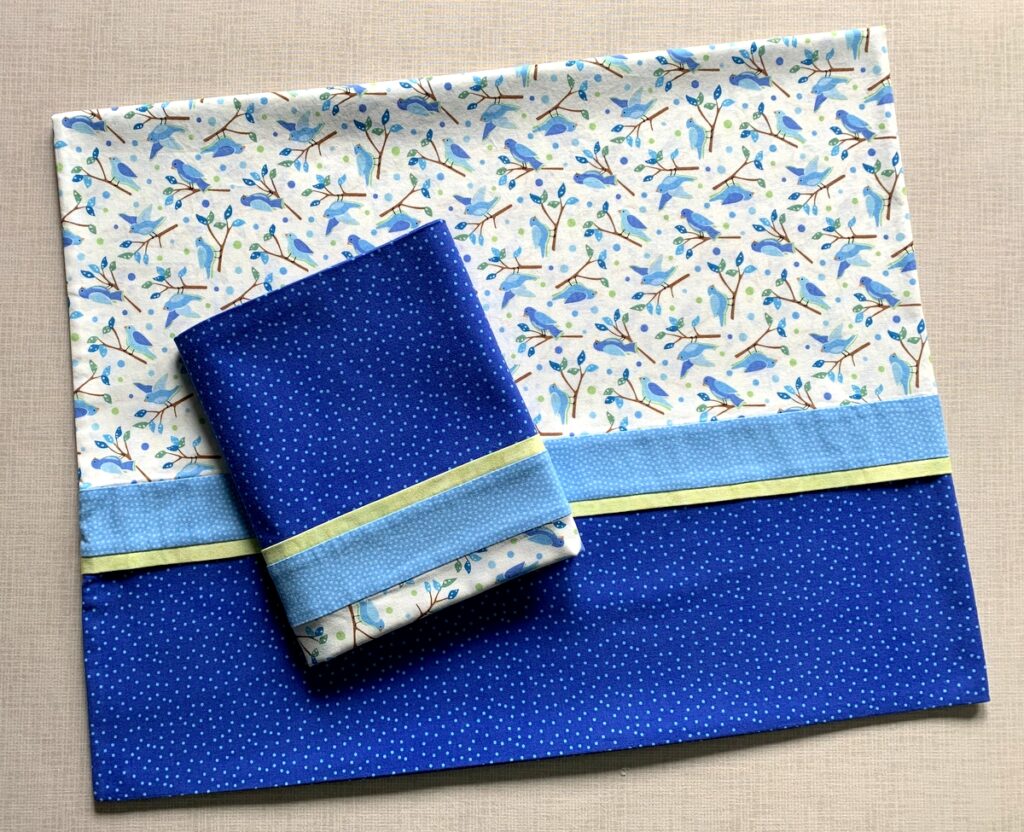
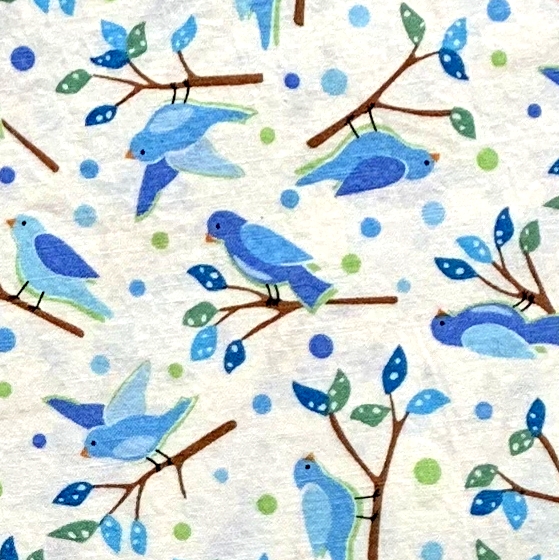
Fun fact: When I showed Bridget a few prints as possibilities for her pillowcases, she jumped on one for a very special reason: her nickname is “Birdie.” Check out her pillowcases:

And take a look at this close-up:

All of the birds have orange beaks! It was meant to be, right?!

My thanks again to all who helped me celebrate 10 years of blogging by entering my Blogiversary Giveaway. I am grateful for each and every one of you. Here’s to the next 10 years!!

Posted in family, Giveaway, home dec, oven mitts, roll-it-up pillowcases, rotary cutter case, tutorial, update | 4 Comments

Announcing the Giveaway Winners

I’m popping in to announce the three winners of the giveaway connected to my 10th Blogging Anniversary aka 10th Blogiversary. I asked people entering the giveaway to tell me about their favorite color combination. Using a Random Number Generator found online, I was able to identify the the three winners very quickly. And here they are . . .

Linda B., who wrote, “What a lovely and generous way to celebrate your blog’s anniversary! So hard to pick a favorite color combo, but pretty much any combination of blues and greens is hard to beat.”

C. Cullen, who commented, “I love blue and white. Congratulations on 10 years!”

Bridget, who said, “Ten years and I have loved so many of your posts! Congrats! I am not sure how this happened, I hate orange but right now I am liking orange and cream combos or maybe orange and yellow…um 😉 Oh, hey, maybe it is a lack of sunshine this spring! lol”

Ladies, I will email you to find out which giveaway item you would like me to make for you — a pair of standard or kingsize pillowcases, a rotary cutter coat, or a pair of quilted oven mitts. I’ll also ask you to give me an idea of your color preferences for your item of choice so I can send you photos of some fabric combinations to consider.

My thanks to each and every person who left a comment on my blog. It was fun to read about your favorite color combos. And many of you wrote such nice things about my blog! I am so very grateful for your interest and support. You all are the reason I reached my 10th blogiversary.

In my post announcing the giveaway, I noted that family members could leave comments but would be ineligible to win. My sister Reigh left this comment: “I wanted to win oven mitts in blue and yellow! First time it’s ever been a disadvantage to be your sister! Oh well, I wouldn’t change a thing. Love you!” Dearest Reigh, your wish is my command. You couldn’t win the giveaway but you’ll still get your oven mitts. Love you, too!


Posted in family, Giveaway, home dec, oven mitts, roll-it-up pillowcases, rotary cutter case, tutorial, update | 6 Comments

Giveaway Extended!

I’ve decided to extend the giveaway celebrating my 10th blogging anniversary (aka my 10th Blogiversary) through Saturday. I’ll be out of town for a few days so it makes sense to wrap things up after my return. If you meant to register for my giveaway (announced on my blog on May 1) and let it slide, you have a second chance.

I’m in Portland, Oregon so you can enter up until midnight Saturday, May 14, Pacific Daylight Time (PDT). Winners will be announced on Sunday. The giveaway is open to both domestic and international visitors to my blog.

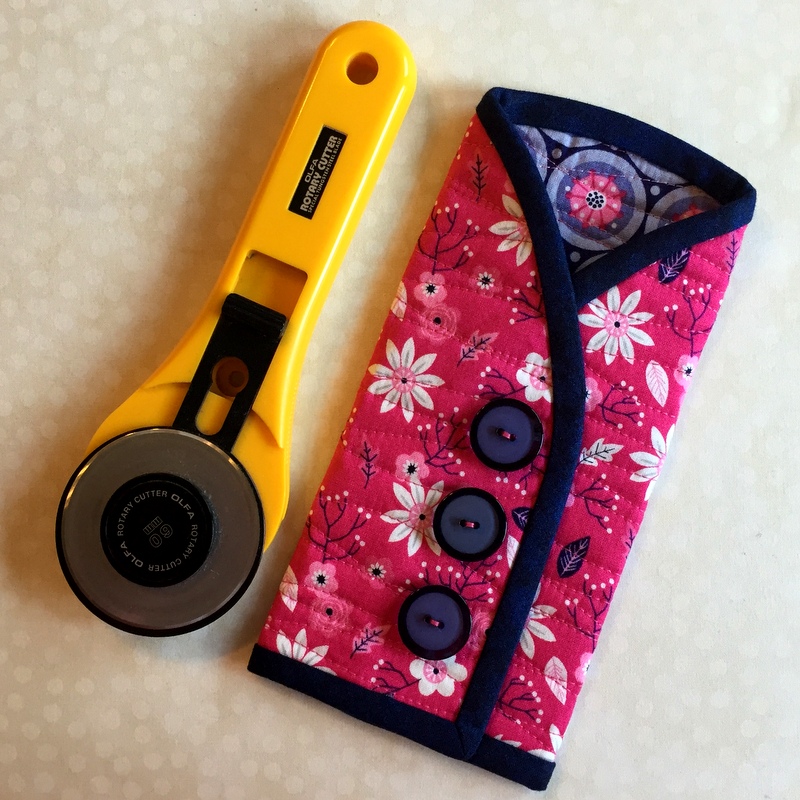
I’m giving away three prizes made by me – a rotary cutter coat (pictured above), a pair of oven mitts . . .

. . . and a pair of standard or king size pillowcases:


But wait – there’s more! The winners get to pick the item they prefer — and the fabrics. I’ll find out what colors they like and give them some choices. If the handmade items I’m offering don’t appeal to you, think about them as gifts for friends or family members. Oven mitts, in particular, make great gifts. There’s even a hashtag for that: #ovenmittsmakegreatgifts.

To enter the giveaway, all you have to do is go to this post and respond in the comment section to the question: “What is your favorite color combo?” It’s been fun to see the responses so far, many of which mirror the color combos near and dear to my heart.

I’m sorry to say I’ve spent precious little time in my sewing room of late. What could possibly take me away from My Happy Place? The answer: the White House Garden. I have been helping the Dear Husband get our front and back yard ready for planting. I have to be honest: spending time in the garden is at the very bottom of my list of things I want to do. But we’ve had such a cold and soggy spring in Portland that I feel I have to help the DH take advantage of the (fairly) dry and (partly) sunny days to make up for lost time.

My DH moves a bit slower than he used to so I’m stealing time away from my sewing room to help him do the thing that makes his heart sing. I will always be a reluctant gardener but . . . I must confess:  there is a great deal of satisfaction to be gained from getting a few feet of land freed of weeds, an overgrown bush trimmed back, a lawn and leaf bag filled and hauled to the curb. I just don’t want to make a habit of it!

I’ll be back on Sunday with the names of the winners. Good luck!

P.S. Instructions for all three prizes are included in the Tutorials page on my website, which you can find at this link.


Posted in family, Giveaway, home dec, oven mitts, roll-it-up pillowcases, rotary cutter case, tutorial, update | 3 Comments

A Blogiversary — and a Giveaway!!

Tomorrow is a big day for First Light Designs. Ten years ago — on May 2, 2012 — my very first blog post was published. (You can read it here.) What better way to celebrate my 10th blogging anniversary than by having a giveaway?

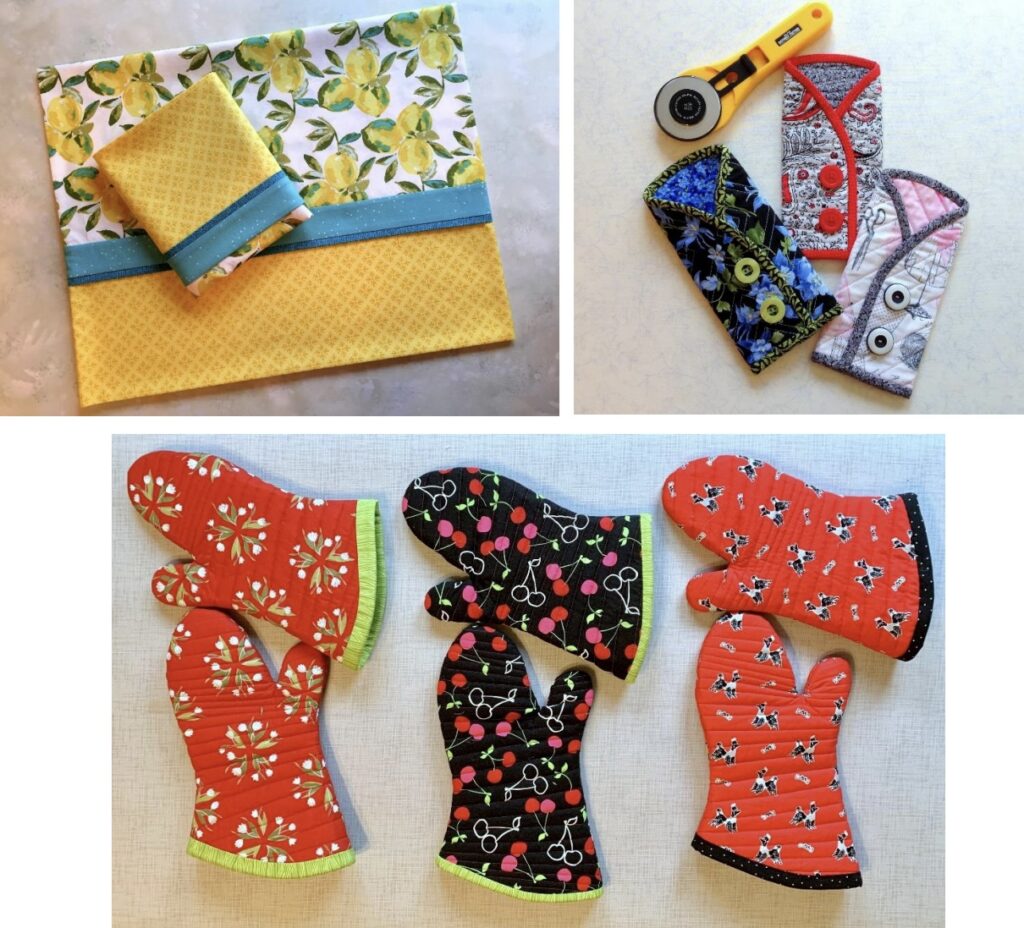
I’m going to pick three winners at random and offer each winner her (or his) choice of three prizes:  a rotary cutter coat, a pair of standard or king pillowcases, or a pair of oven mitts — all made to order by moi. Examples are shown above but they are not the giveaway items. I’ll find out fabric preferences and give each winner a choice of combinations curated from my (ahem) rather extensive stash.

To be entered in the giveaway, all you have to do is write a comment at the bottom of this post responding to the question, “What is your favorite color combo?” No need for you to subscribe to my blog or follow me on Instagram (though I would be delighted if you chose to do either. To subscribe, enter your email address above the SUBSCRIBE button on the top right side of the First Light Designs home page. To find me on Instagram, click here.)

One entry per person. I will mail anywhere in the world so international readers are welcome to enter.

Family members are invited to leave comments but are not eligible to win.

The giveaway will remain open through Wednesday, May 11. On Thursday, May 12, I’ll use a random number generator to pick three winners who will be notified via email.

Good luck, everyone! And thank you for keeping me on my blogging toes for the last 10 years. Seven hundred posts later, I’m still going strong.

P.S. If you are not one of the lucky winners, you can make your own version of these items. All are available as free tutorials on my website:

8. Perfect Pillowcases (Oct. 23, 2013)

11. Rotary Cutter Coat (Oct. 10, 2014)

21, Oven Mitts that Fit: Prequel to the Tutorial (April 13, 2021)
21, Oven Mitt Tutorial from First Light Designs, Part 1 (April 18, 2021)
21, Oven Mitt Tutorial from First Light Designs, Part 2 (April 19, 2021)


Posted in Giveaway, oven mitts, roll-it-up pillowcases, rotary cutter case, tutorial, update | 45 Comments

JBB Accessories

A year ago at this time I had just finished teaching a class at Montavilla Sewing Center on the one and only Junior Billie Bag, which I like to call “the quintessential quilter’s tote.” I wanted to test my idea for a new Junior Billie Bag Accessories class and had offered my students a bonus class on making four accessories to go along with their newly finished totes.

My idea was to have the students do advance work on all four projects and then finish them up in the space of a four-hour class. Good thing the class was a freebie, as it turned out I had vastly underestimated the time it would take to complete each project. Fortunately, by the time class ended the students were well on their way and would be able to complete their projects at home.

I was making accessories along with my students in order to demonstrate some of my tips and techniques so I too went home with unfinished projects. One year later, my accessories are finally finished:

At the top is a 4″ x 4″ x 4″ fabric box, which makes a wonderful threadcatcher. On the bottom left is a tool caddy based on the Travel Case pattern by Pearl Pereira of P3 Designs. In the middle is a little scissors case, and on the right is a rotary cutter coat.

I selected the fabrics you see above because they go so well with a Junior Billie Bag I made a couple of years ago for my dear friend Vickie R.:


Naturally these latest accessories were made with Vickie in mind, and I am happy to say they are now in her possession.

Here’s a look at the inside of Vickie’s tool caddy:


I made some modifications to the original pattern, adding a fourth pocket and making the case a little less wide (I’ll explain why in just a bit). The 6″ x 8″ mini cutting mat made by Olfa fits perfectly inside the case. Vickie will choose which of her tools she wants to put in her case; I put some of my own in just for this photo shoot:

As you can see, it holds a lot! Mine is loaded with even more.

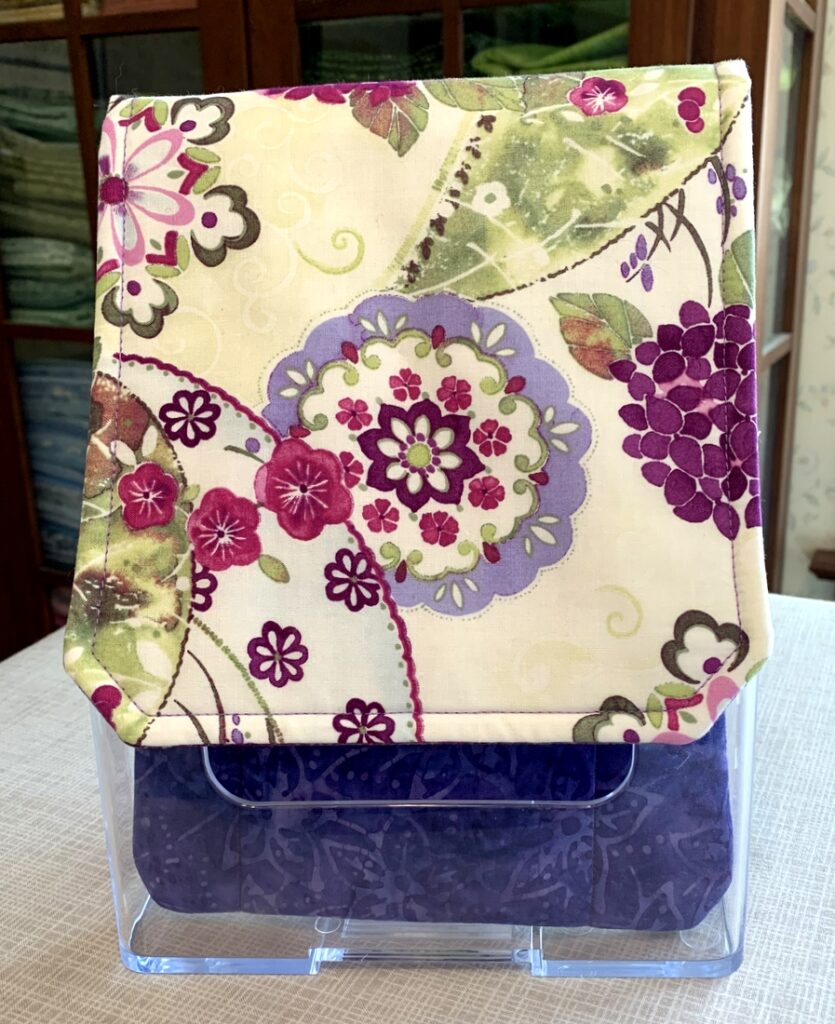
The reason I made the travel caddy a bit narrower than the pattern calls for is to make it fit better in this hard plastic brochure holder:

With the flap turned back, all of Vickie’s favorite tools will be right at her fingertips and easy to see. (A huge “thank you” to my guildmate Becky B. for introducing me to the brochure holder.)

That class in February 2020 was one of the last ones I taught before the coronavirus pandemic brought a screeching halt to in-person classes. I miss teaching so much and will savor the day when classes resume. There’s a list of quilters who want to make their own Junior Billie Bag, and I trust some of them will want their own suite of accessories to go with it. If so, I will be ready for them!


Posted in Billie Bag, Junior Billie Bag, rotary cutter case, tote bags, tutorial, update | 8 Comments

Tutorial: Scissors Case from First Light Designs

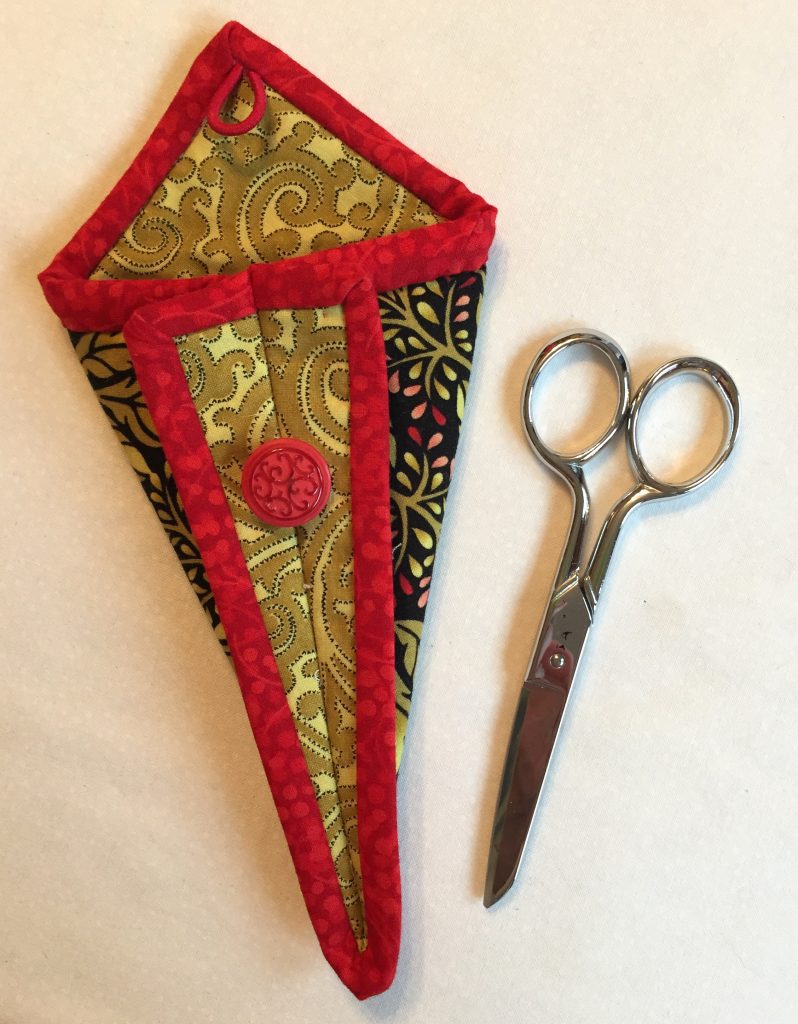
These safe and stylish scissors cases look complicated but they are surprisingly easy to make. Each case is made from a little quilt sandwich that’s bound, folded in half on the diagonal, and stitched with one seam. If you’ve ever bound a quilt using double-fold binding (also known as French binding), you’ll have no trouble making one of these cases. They make wonderful gifts as well as delightful additions to your own sewing basket.

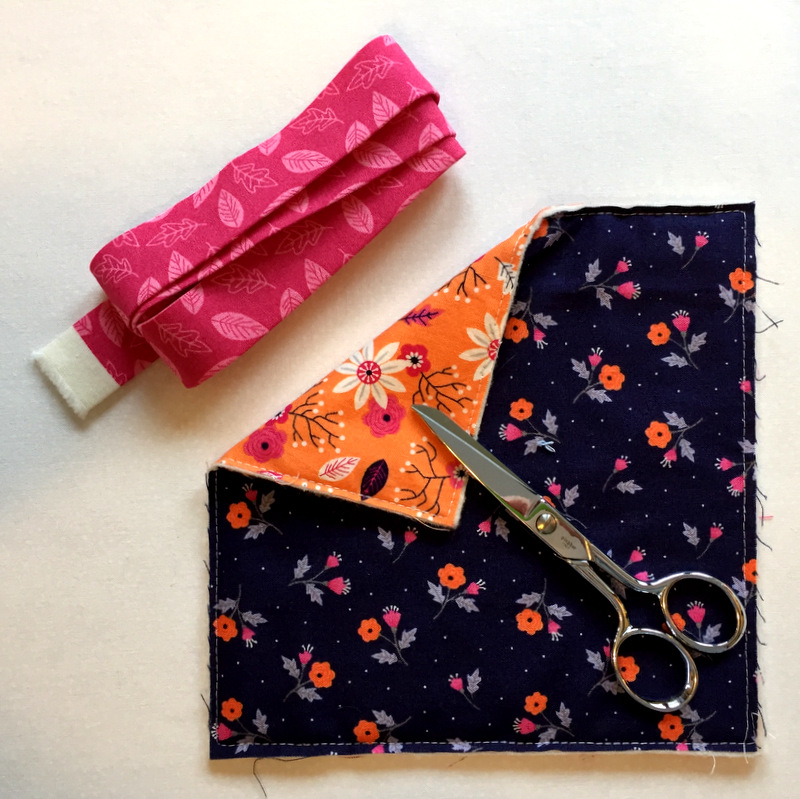
All you need are two squares of contrasting fabric, one square of batting, and a length of 2″-wide binding (straight grain or bias, your choice) in a third fabric:


Bits of ribbon, small pony tail elastic bands, and vintage buttons combine to make charming fasteners. These are completely optional, however. Even though I usually put a loop and button on my scissors cases, I tend to leave the top flap open so I can easily see if the scissors are there when I look into my quilter’s tote.

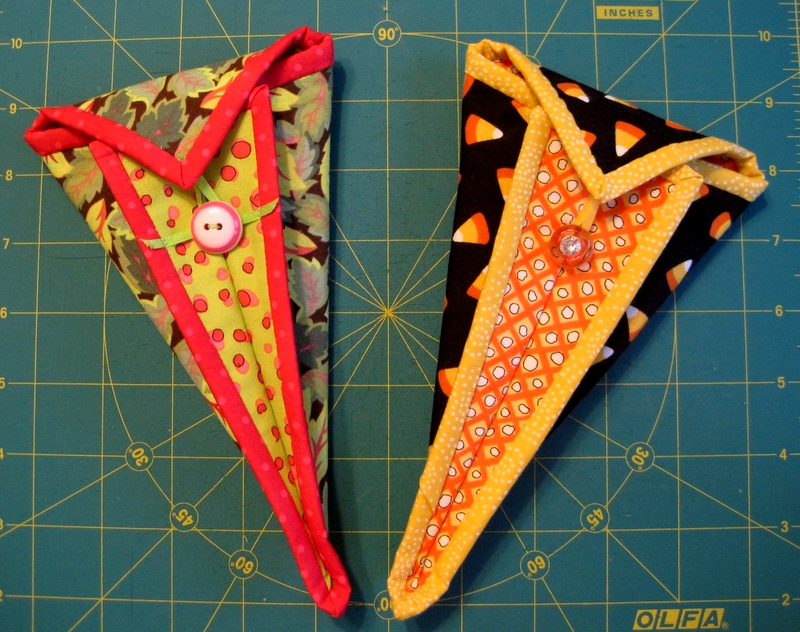
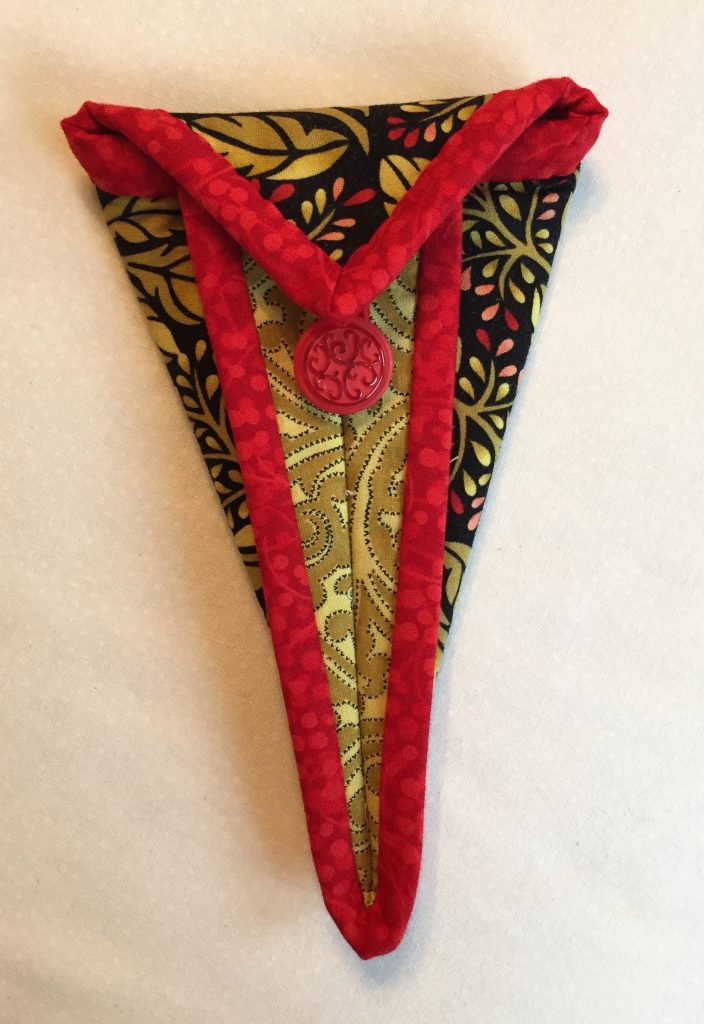
If you start with 7″ squares, you’ll wind up with a scissors case that measures about 5″ x 10″. This case was made with 6″ squares and measures about 4″ x 8″ opened . . .

. . . and about 4″ x 6¼” closed:

I like this size best for my 5″ Ginghers.

(If you’re not sure what size square you need for the scissors you have in mind, experiment with squares cut from sheets of paper. Fold the paper using the instructions below as a guide. Insert your scissors into your paper “case” and test the fit.)

This tutorial is for the slightly larger case using 7″ squares but can easily be modified for the 6″ size.

Scissors Case from First Light Designs

Finished size: about 5” x 10” (from top point of flap)

Materials
(2) 7” squares of cotton
(1) 7” square of light to medium weight batting
36” of binding fabric cut 2” wide and pressed in half lengthwise
Optional: small ponytail elastic band or 4” length of ⅛” – ¼” wide satin or grosgrain ribbon
Optional: button
Optional: ¼”wide Steam-a-Seam fusible web

Recommendation: use a walking foot for construction

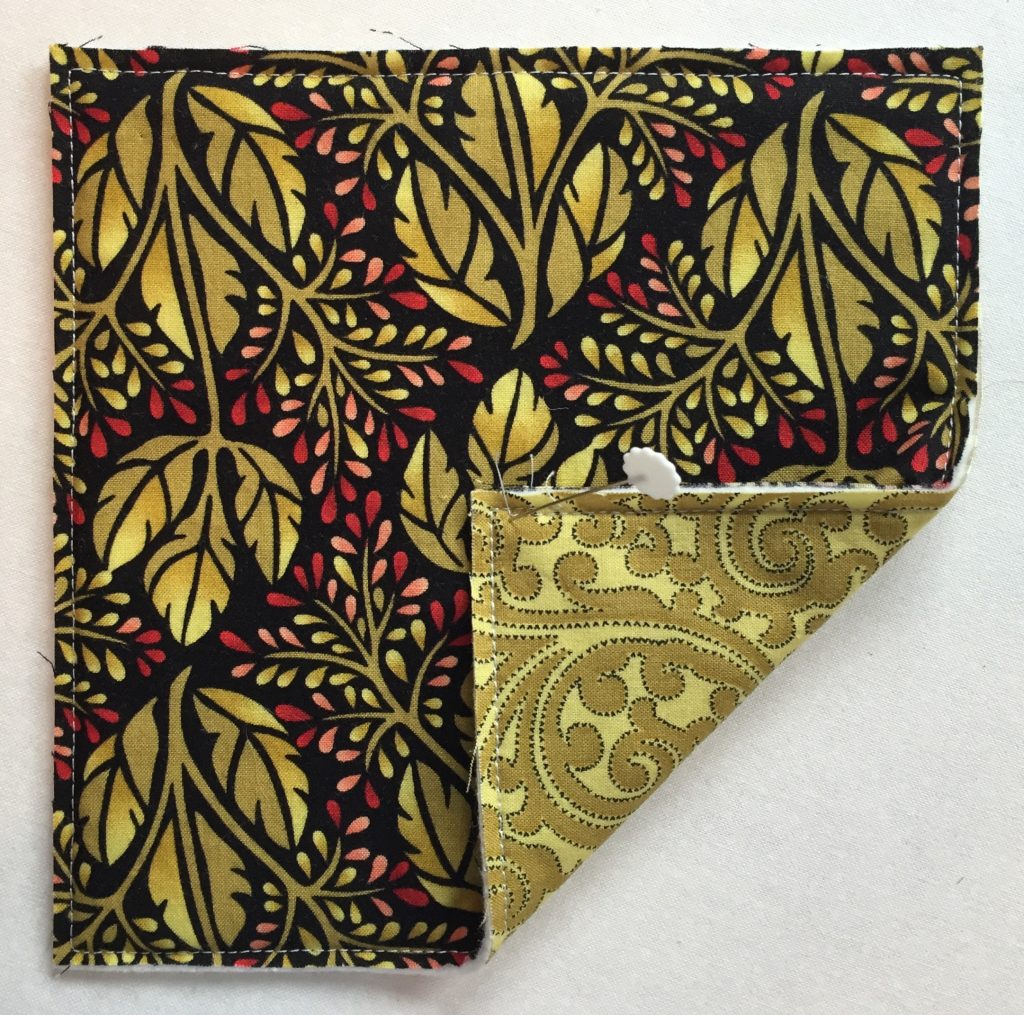
Step 1. Layer the cotton squares and batting as for a quilt and stitch ⅛” from the outside edges to hold the layers together:

In the photo above, the darker print is the outside of the case and the two-toned gold fabric is the lining.

If using a loop and button closure, stitch a loop in one corner on the lining side, keeping stitching inside the seam allowance:

I used a small ponytail elastic on this case but you could also use narrow ribbon as I did in the two cases at the top of this post.

Step 2. Still working on the lining side, position the binding strip halfway down the side from the loop:

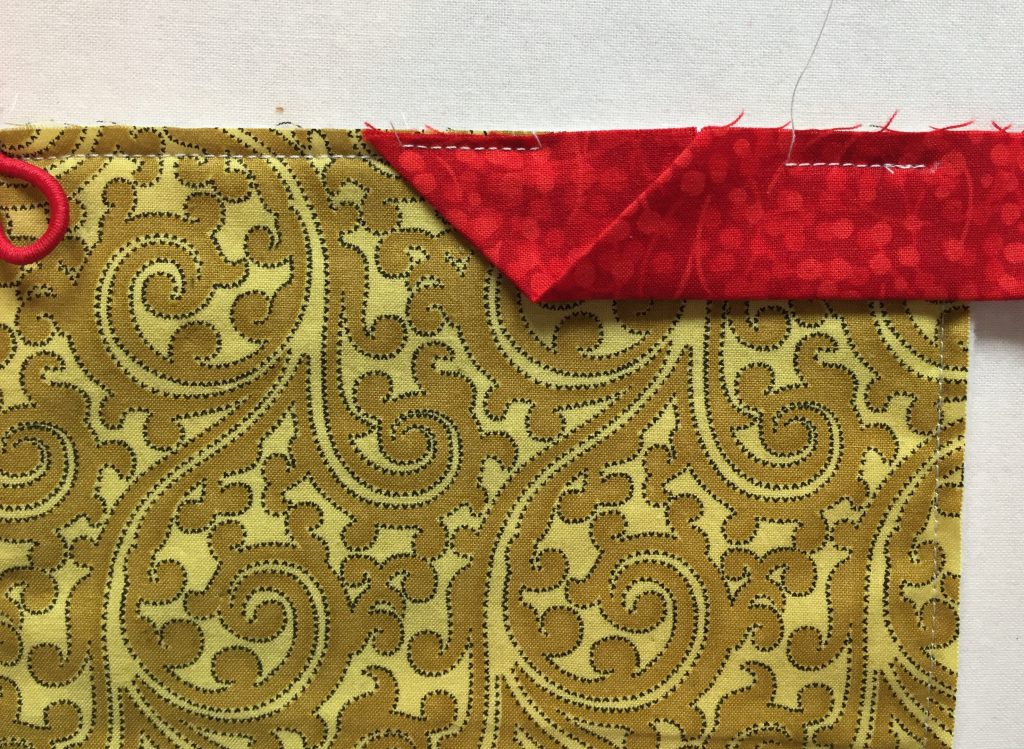
Note how the edge of the binding has been folded at a right angle and how I added a few stitches inside the seam allowance to secure the binding to the edge of the quilt sandwich.

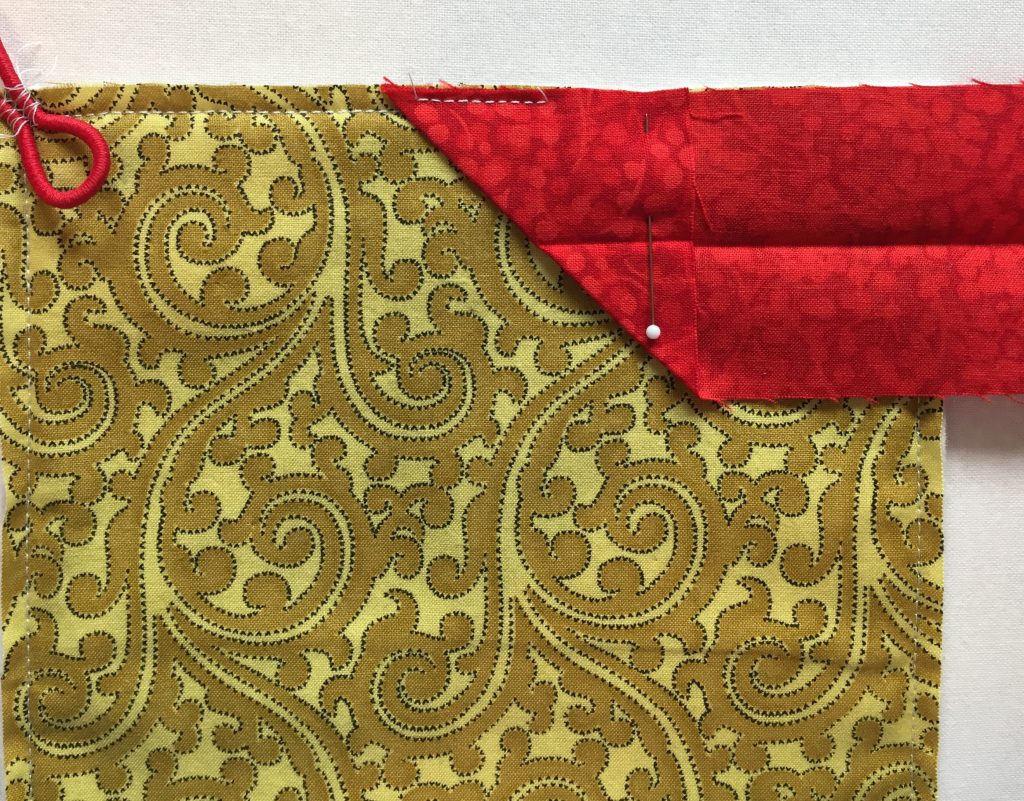
Step 3. Leaving enough room to tuck the other binding tail into the fold, begin stitching the binding with a scant ¼” seam, stopping ¼” from the end in order to miter the corner:

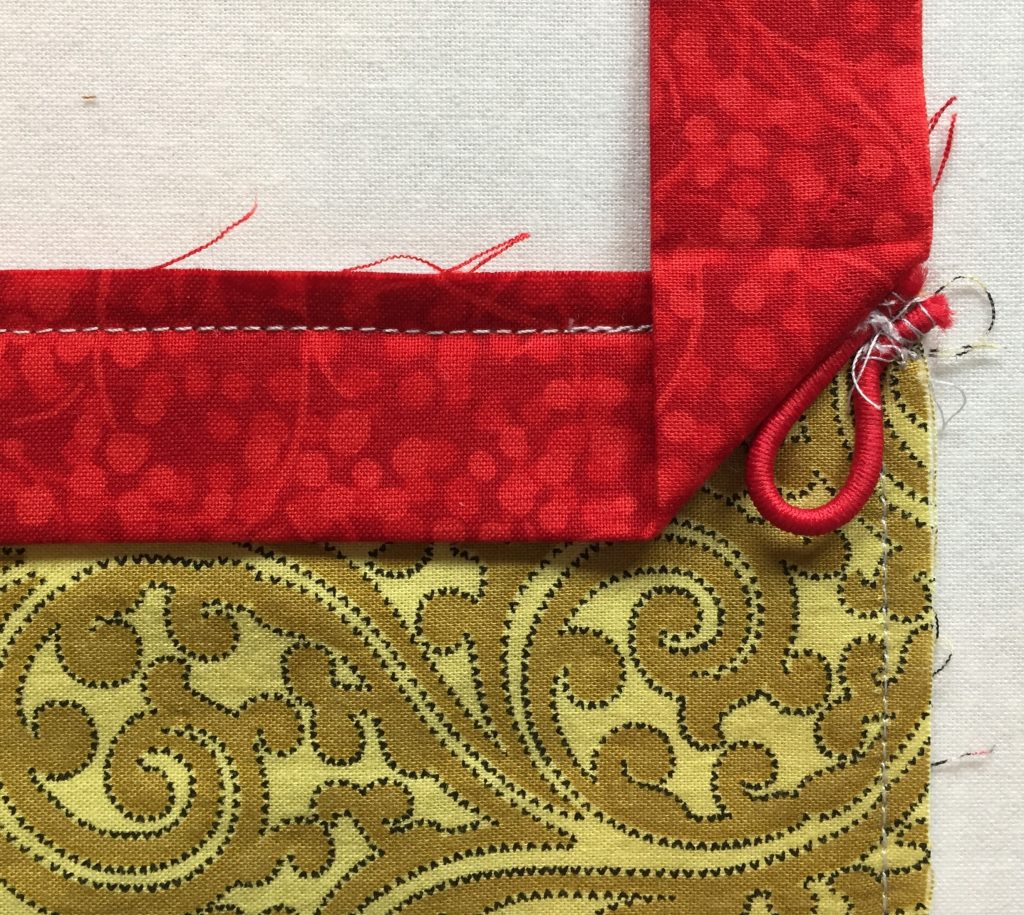
When you come to the fourth corner, be careful not to catch the loop in the binding seams when you miter that corner:

Step 4. Tuck the left tail into the fold of the right tail . . .

. . . and finish stitching the seam, starting and ending a few stitches beyond the original stitching.

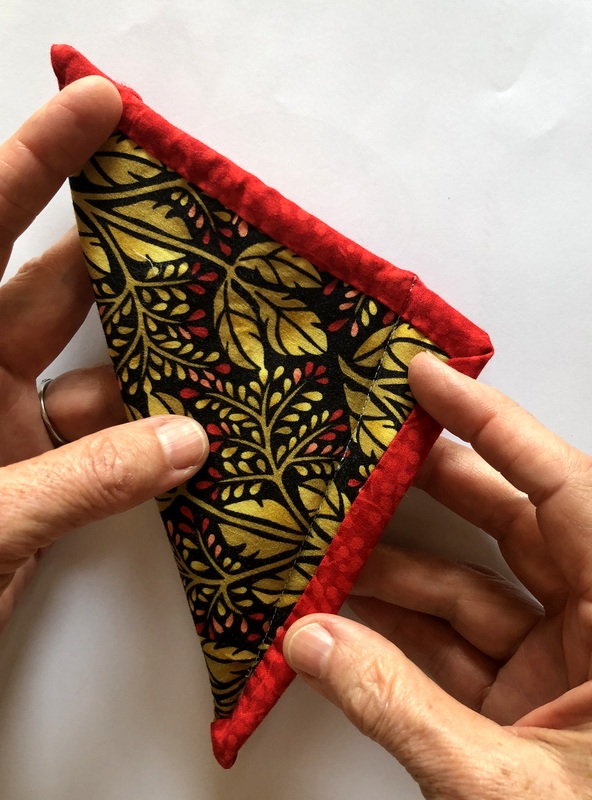
Step 5. Turn the binding to the right side and stitch by hand or fuse in place using ¼”-wide Steam-a-Seam 2 (not Steam-a-Seam 2 Lite). If using fusible web, take care not to melt ponytail elastic with hot iron!

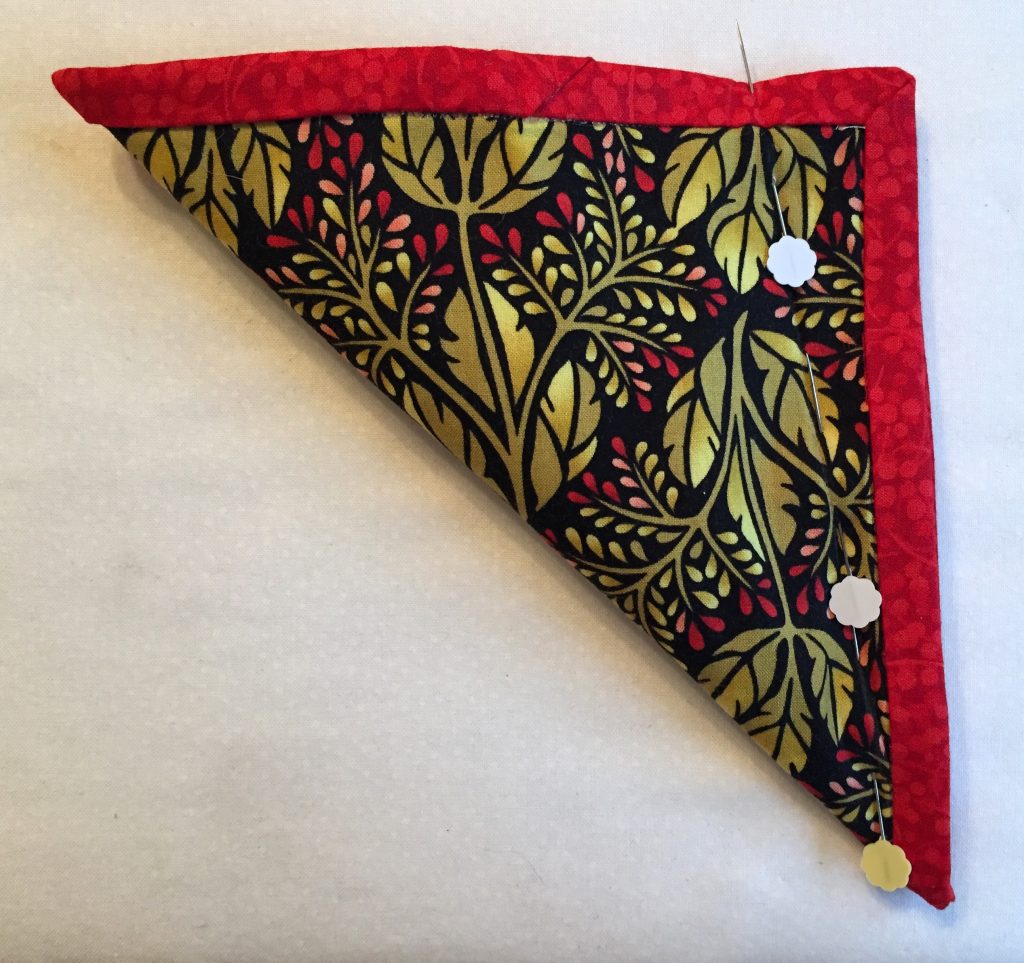
Step 6. Fold the case in half diagonally and mark a stitching line 1¼” in from the upper right corner, tapering to the bottom as close to the binding at the bottom as you can get. (Note: loop is in the upper left corner). The pins in the photo below show the stitching line:

Stitch, backstitching at both ends:

Note that you stitch through the binding at the top of the seam and taper down toward the corner with the stitching ending right next to the binding. Try using a zipper foot for this line of stitching if the walking foot skips stitches. The stitching will not show when the flaps are folded back. (If using 6″ squares, mark your stitching line 1″ in from the right edge rather than 1¼”.)

Open up the seam and press flat as shown below. Sew button on seam line (test placement by holding top flap down to see where loop is in relation to button).

Voilà! Ready to use:


Posted in rotary cutter case, tutorial, update | 7 Comments

It’s Party Time!

Cheryl at Meadow Mist Designs is hosting a Best of 2017 Linky Party, inviting bloggers to highlight their top five posts of the year. It’s a fun way to look back over the last 12 months and identify some of the high points.

My top five are below, in reverse order. Clicking on the links will take you to the original posts.

5. Dutch Treat. Although I didn’t finish this quilt till June, I started it in January during an epic snowstorm that kept me and many Portlanders indoors for several days.

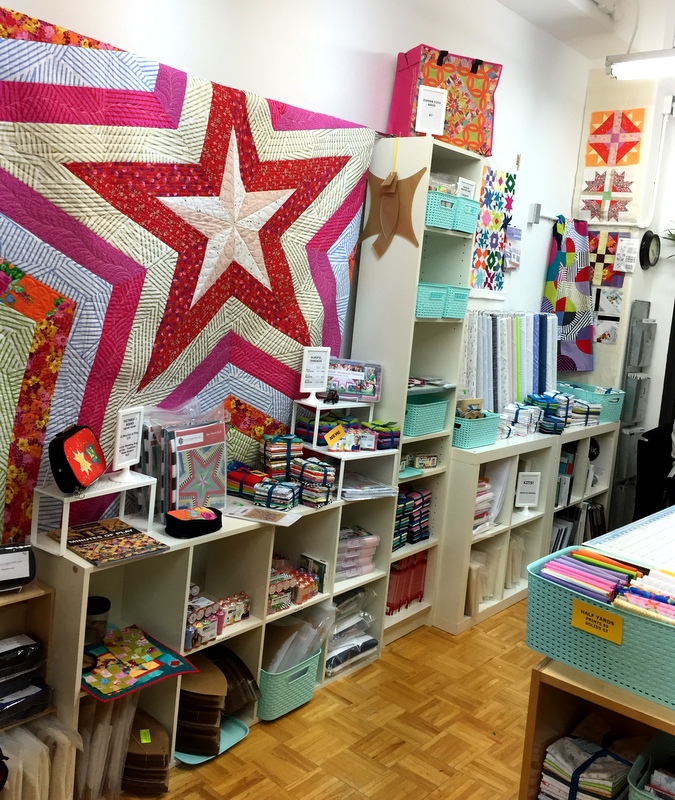
4. NYC and VFW. A trip to New York City with my twin sister in March combined many of the things I love in life: family, travel, theater, museums, and quilting. The quilting part? A visit to the Manhattan shop of Victoria Findlay Wolfe:


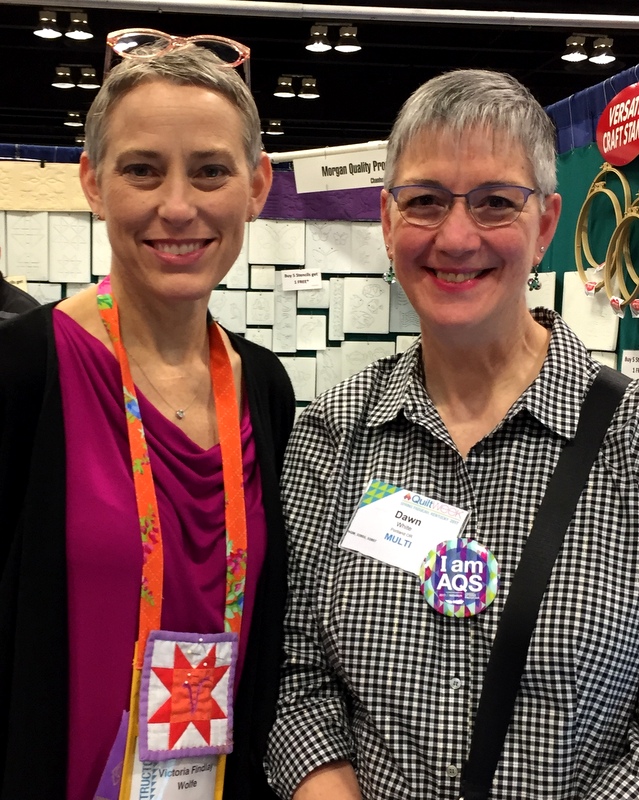
Victoria didn’t happen to be there that day but I had the pleasure of meeting her the following month in Paducah, Kentucky during AQS Quilt Week:

3. Terrazzo Tiles and Piccolo Terrazzo Tiles. Using the free pattern Mini Mod Tiles by Sew Kind of Wonderful, I made two versions:

The larger one was made by “supersizing” the original pattern, using the larger of the two curved rulers Sew Kind of Wonderful designed for cutting curves. I wrote a tutorial showing how I did it.

2. Junior Billie Bag. This was the first of two JBBs I made in 2017:

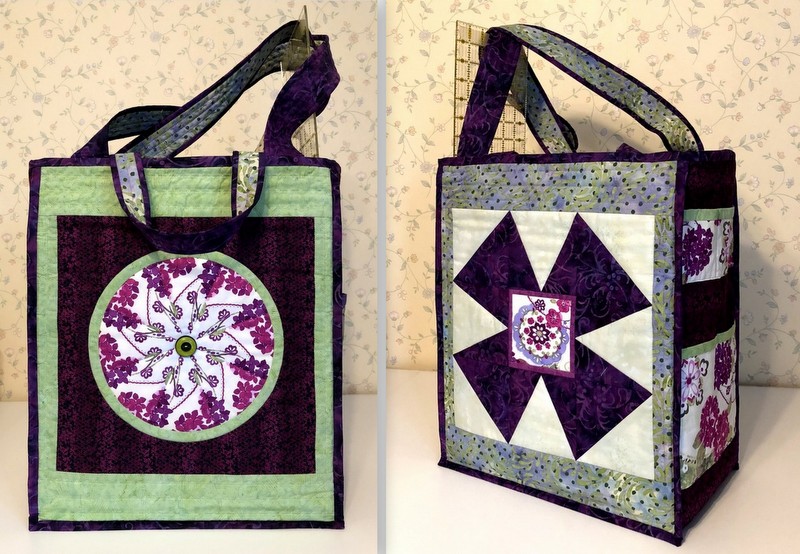
Designed over 20 years ago by Billie Mahorney, it’s a fabulous quilter’s tote personalized by each maker, starting with the design on the front and back panels and ending with the pockets inside and out. Two years ago Billie turned the teaching of her design over to me, and I make a bag every time I teach a class. This may be my favorite of the eight I have made so far.

Without consciously planning to, I wound up making a suite of accessories to go with my Junior Billie Bag:

(See the rotary cutter coat in the lower left corner? I wrote directions for it in 2014 and it remains my most popular tutorial. Every now and then when I see a huge spike in the number of views on my website/blog, I know it’s because someone provided a link to the tutorial.)

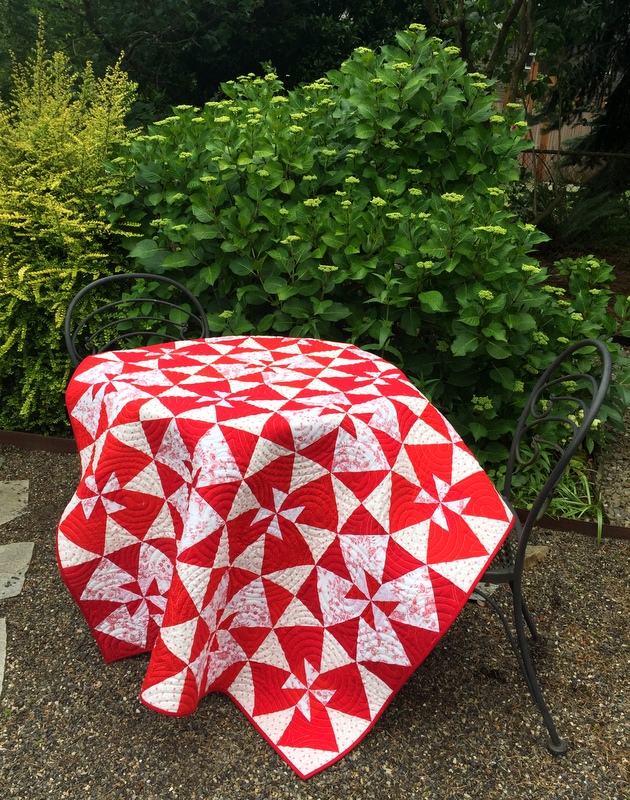
1 . Where It’s @. Much to my surprise and delight, this quilt won a second place ribbon at the Northwest Quilting Expo in Portland, Oregon in September:

The design is Rewind by Karla Alexander of Saginaw Street Quilts. I started the quilt in a class with Karla in Sisters, Oregon in July 2016. Getting a ribbon was honor enough but the award came with a check for $500. My first reaction? “Think how many yards of fabric I can buy with that!”

Well, this has been a nice little trip down memory lane. Do you want to join Cheryl’s party, too? The link is open until January 2. Be sure to check out the top five posts of the other quilting/blogging partygoers. And thank you for checking out mine!


Posted in Billie Bag, family, Junior Billie Bag, Northwest Quilting Expo, QCR Mini, Quick Curve Ruler, Quilter's Affair, rotary cutter case, sewing tool caddy, tote bags, tutorial, update, windmill block, wonky Greek key | 5 Comments