Monthly Archives: September 2014

NW Quilting Expo: Bridges of Portland Challenge Quilts

Last Friday four friends and I spent the entire day at the 14th Annual Northwest Quilting Expo. It’s a three-day event, and we could easily have gone back and spent another full day. What a great show! More than 600 quilts were on display, along with a half dozen special exhibits and, of course, an enticing vendor mall.

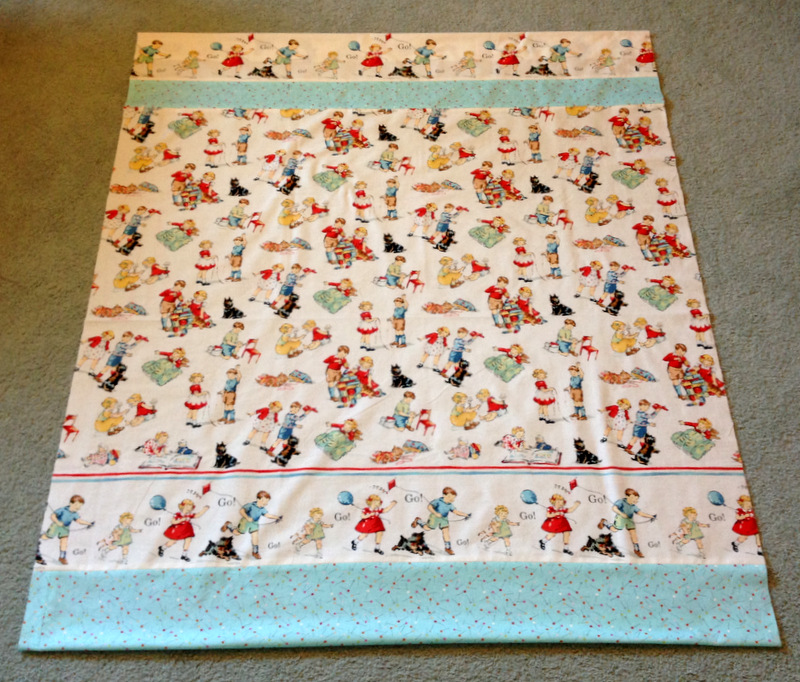
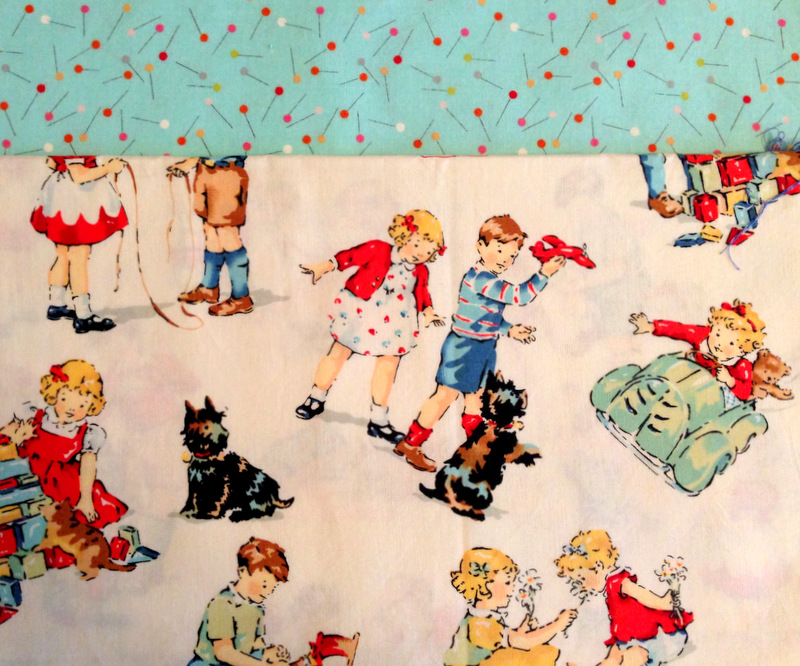
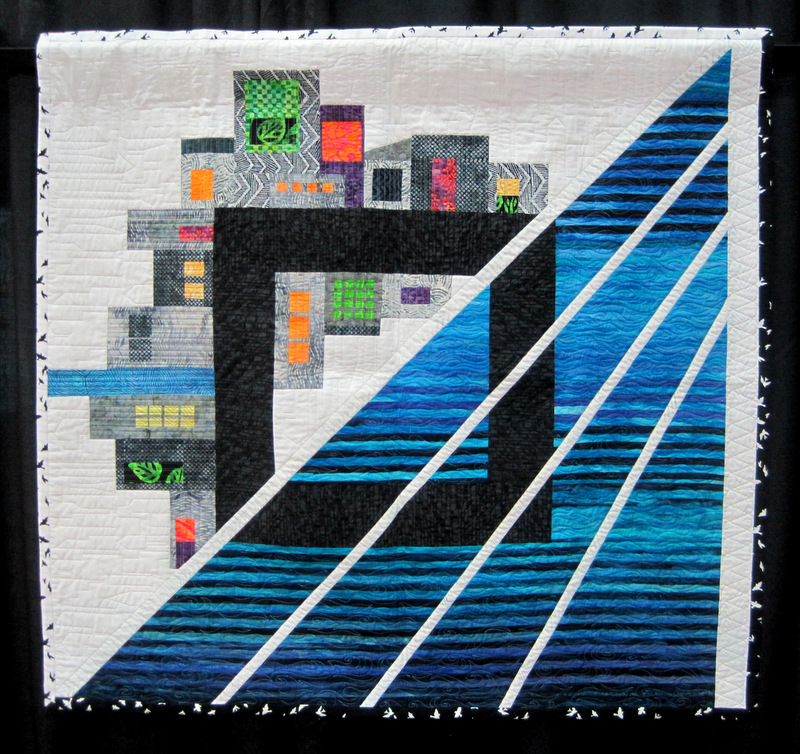
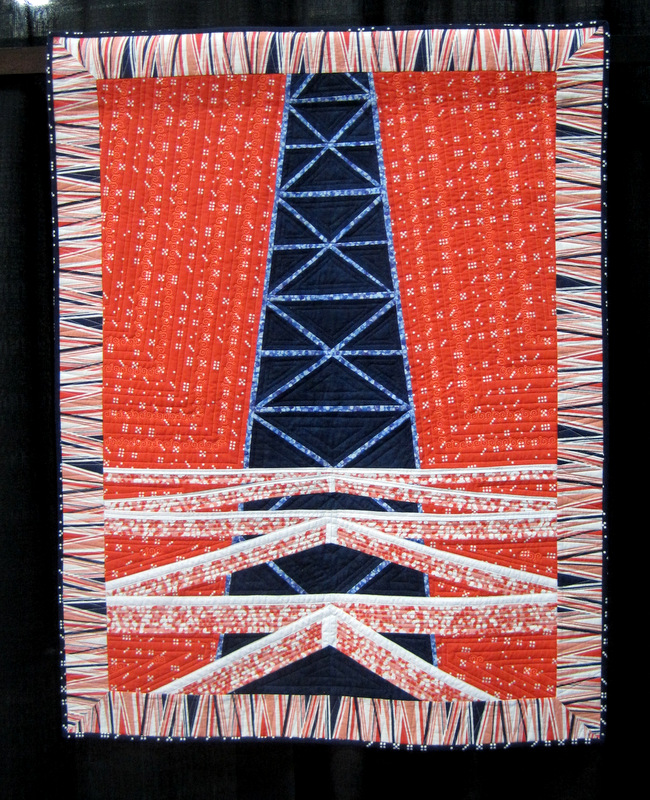
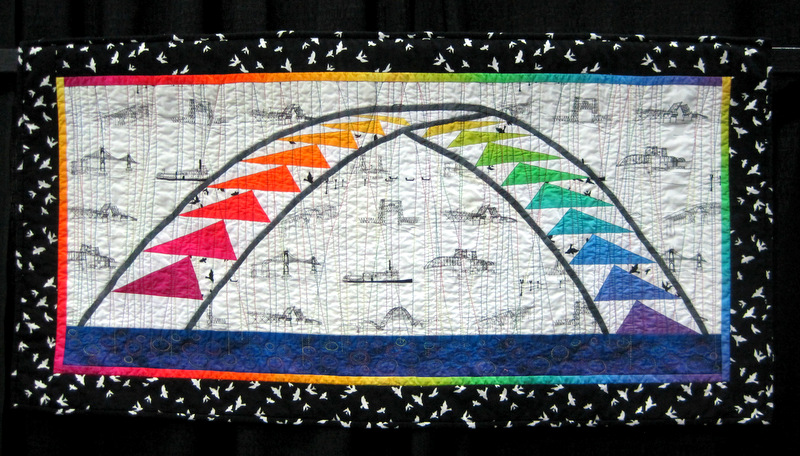
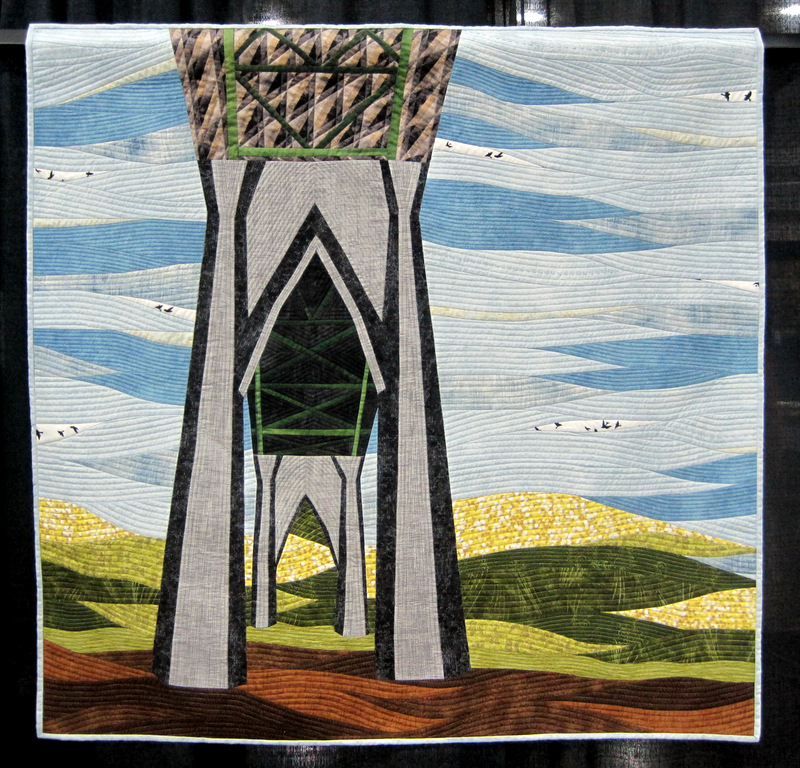
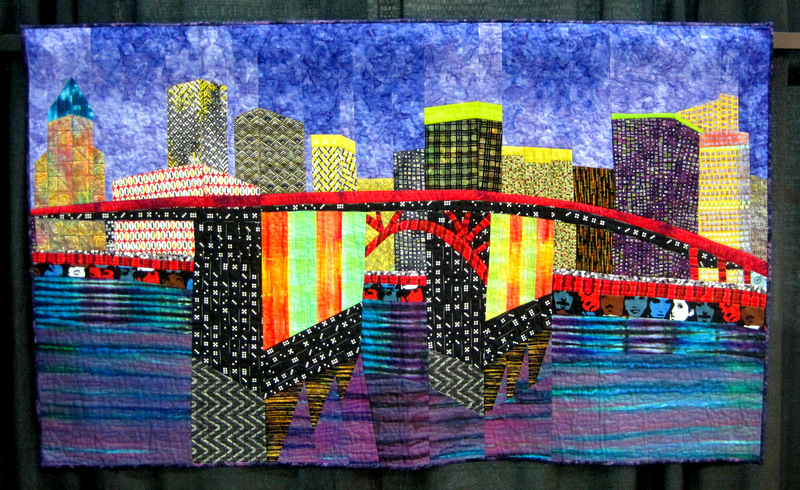
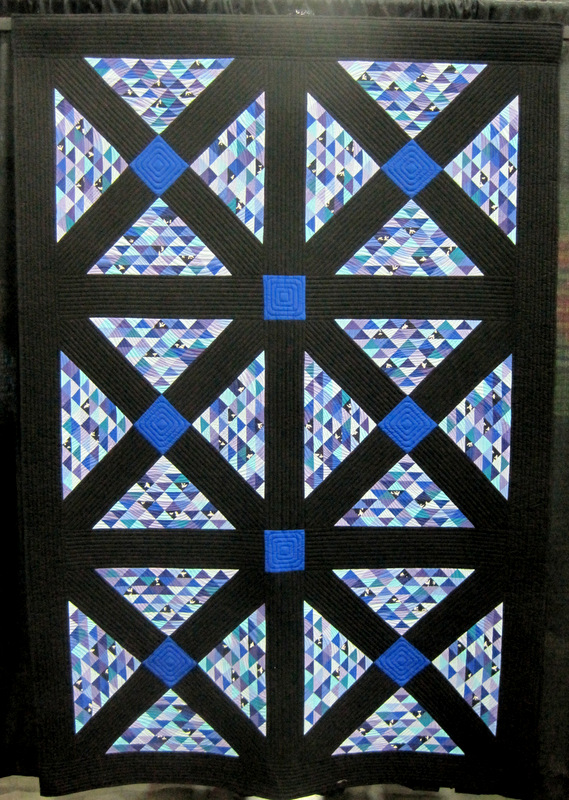
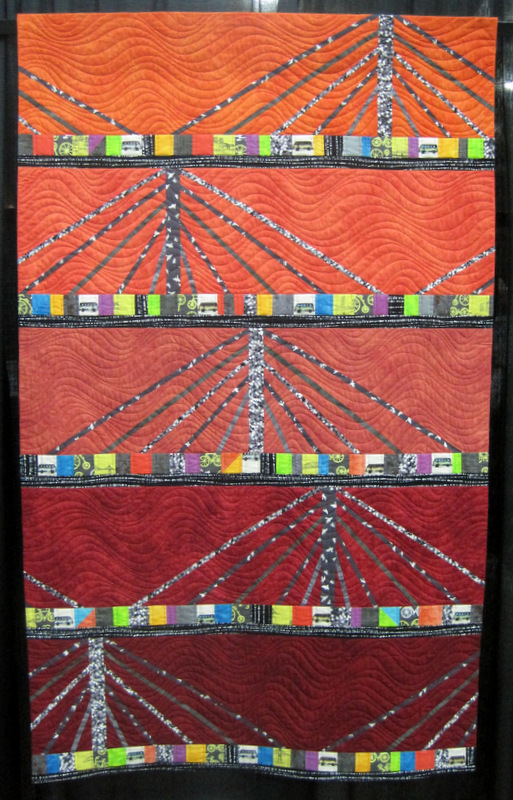
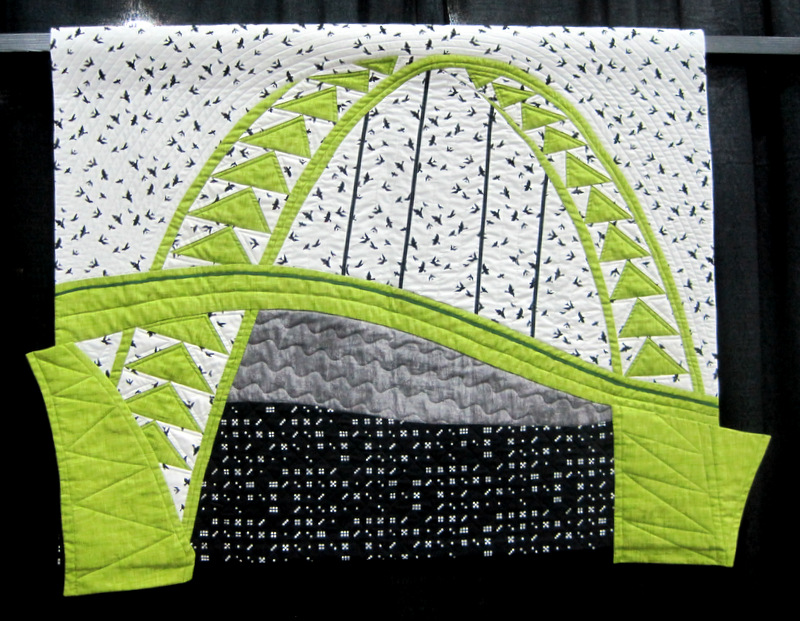
One of the eagerly anticipated displays was the Portland Bridges NOW exhibit sponsored by the WestSide Modern Club. The club was started in 2012 by Geri Grasvik, owner of the Pine Needle Quilt Shop in Lake Oswego. At a meeting of WestSide Modern last year, Geri issued a challenge for quilters to create modern quilts inspired by the 12 bridges of Portland. The quilts had to include one or more fabrics from the Waterfront Park line designed for Michael Miller Fabrics by Portland’s own Violet Craft.

By the time the deadline arrived, 42 quilts had been submitted. Some of the makers are friends and guild mates. Others I know of by reputation. I am completely in awe of their imagination, creativity, and talent.

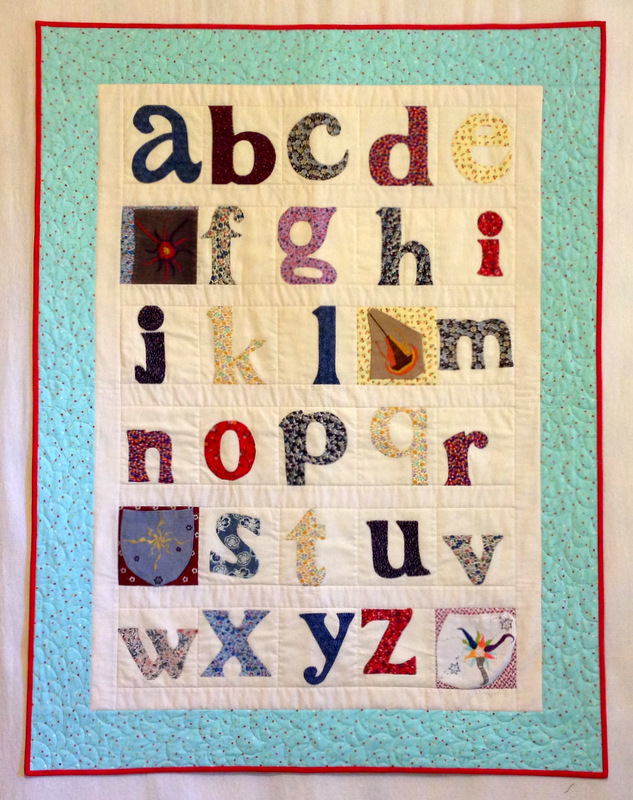
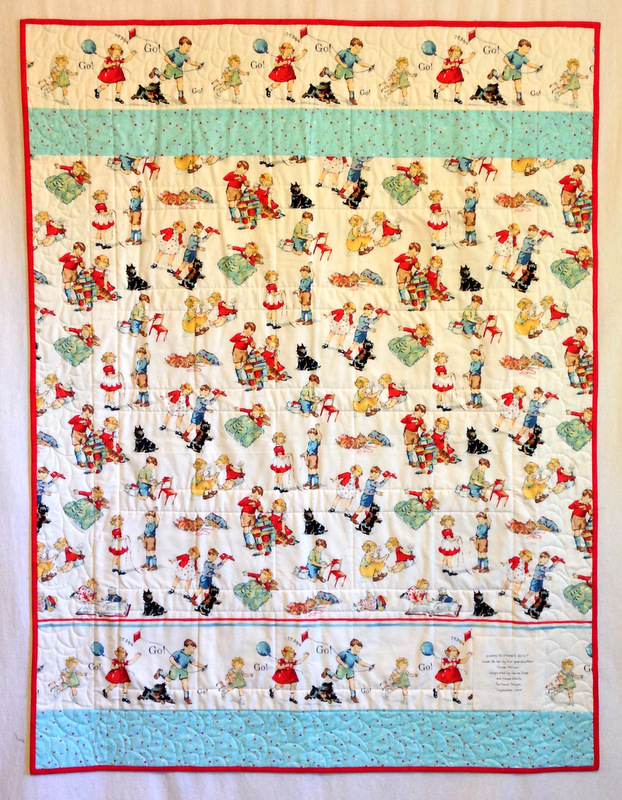
Here, in no particular order, are a few of the quilts on display:

Bridge Challenge, Matching Expectations! by Virginia Hammon
Matching Expectations! by Virginia Hammon


Bridge Challenge, Sunset Under the Morrison Bridge by Judy Liebo
Sunset Under the Morrison Bridge by Judy Liebo


Bridge Challenge, Gothic Beauty by Gerri Thompson
Gothic Beauty by Gerri Thompson


Bridge Challenge, Somewhere Over the Fremont by Peggy Friedl-Yee
Somewhere Over the Fremont by Peggy Friedl-Yee


Bridge Challenge, A Path to St Johns, Carol Wilborn
A Path to St Johns by Carol Wilborn


Bridge Challenge, Fremont Modern by Sally Mayer
Fremont Modern by Sally Mayer


Bridge Challenge, Morrison Bridge at Night by Lisa Crnich
Morrison Bridge at Night by Lisa Crnich


Bridge Challenge, Stumptown Steel, Beth Wells
Stumptown Steel by Beth Wells


Bridge Challenge, Tilikum Crossing by Jolene Knight
Tilikum Crossing by Jolene Knight


Bridge Challenge, The Latest and Greatest by Valri Chiapetta
The Latest and Greatest by Valri Chiapetta


Bridge Challenge, Cathedral Park, AnnMarie Cowley
Cathedral Park by AnnMarie Cowley


Bridge Challenge Burnside Bridge by Connie Brown
Burnside Bridge by Connie Brown


Bridge Challenge, Celery Green Crossing, Barbara Isom (Fremont)
Celery Green Crossing by Barbara Isom


Bridge Challenge, Linda Dyer's quilt
Bridge Lift by Linda Dyer

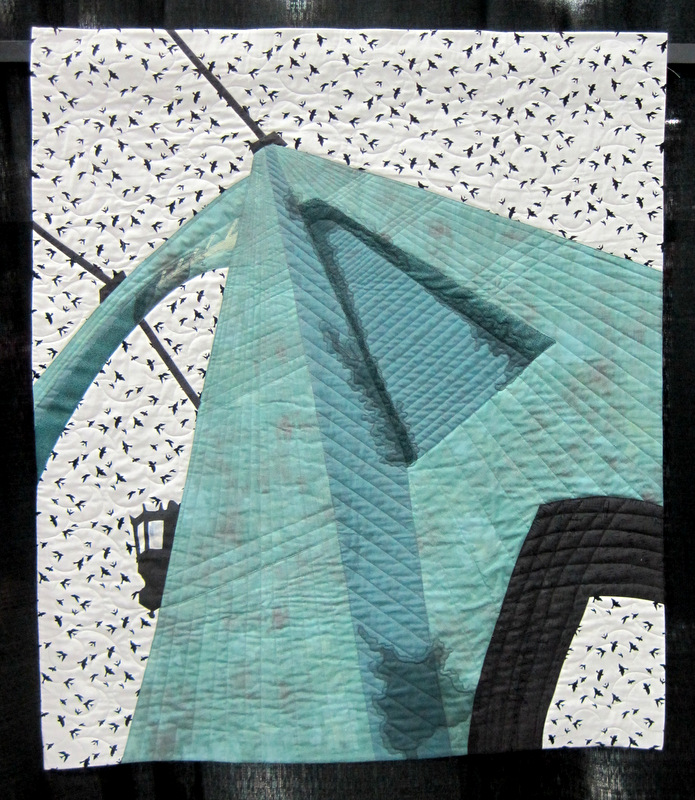
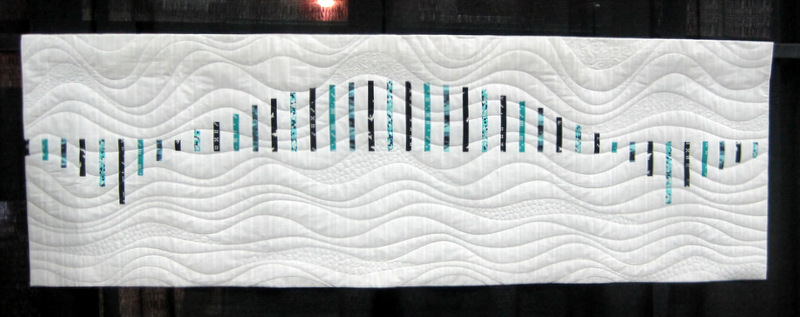
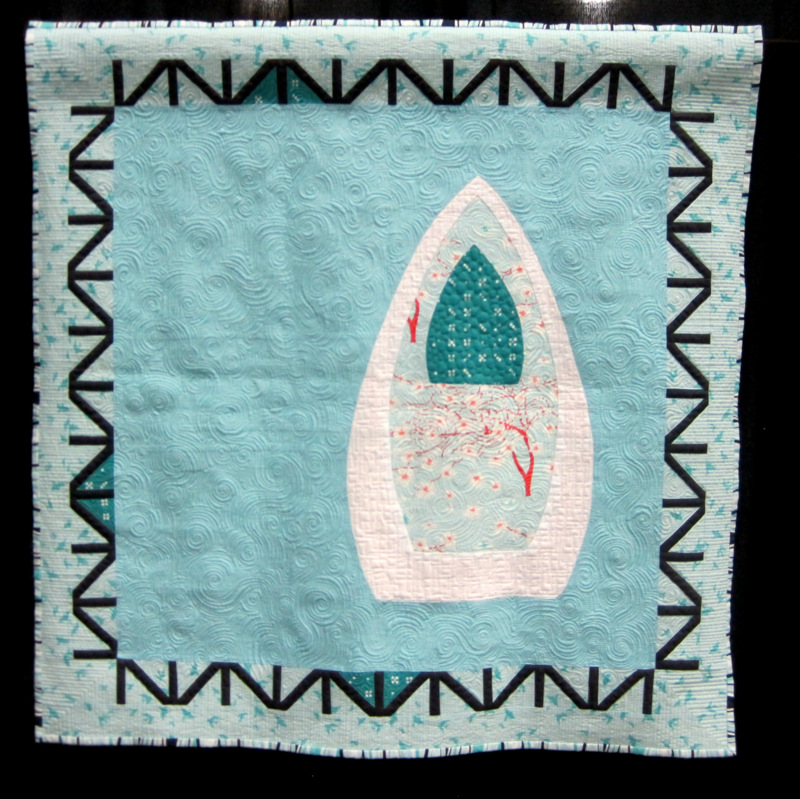
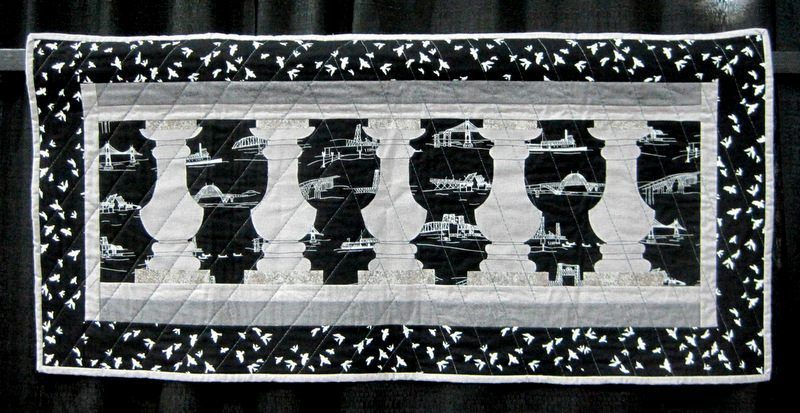
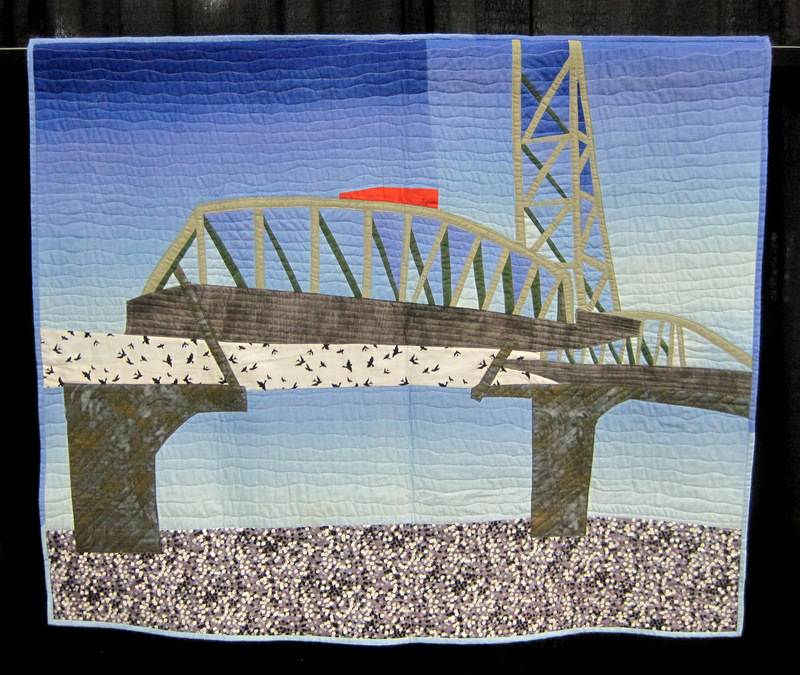
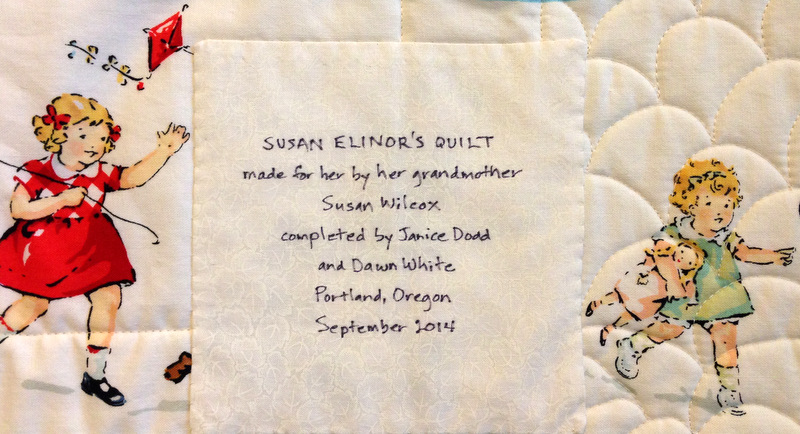
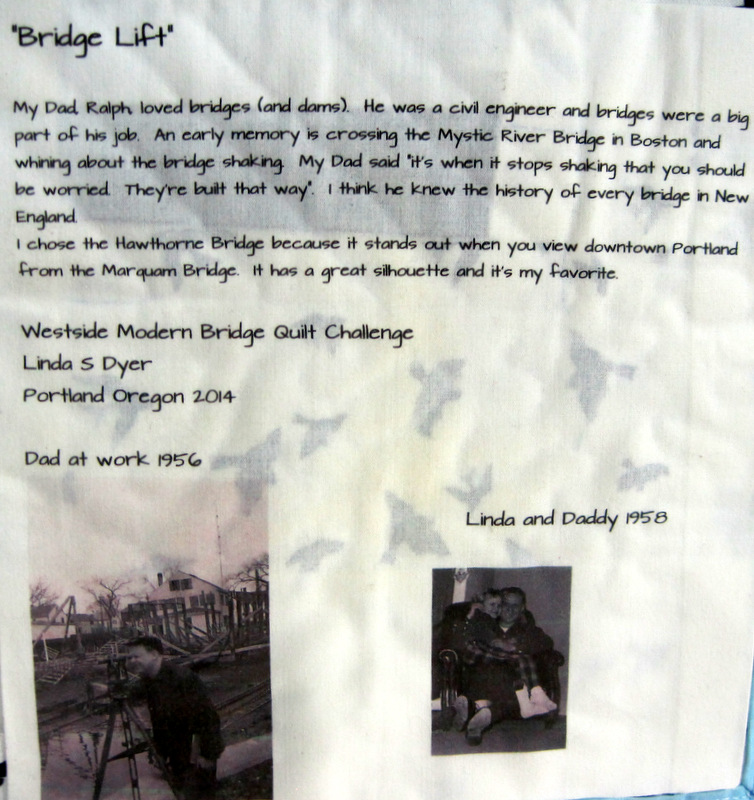
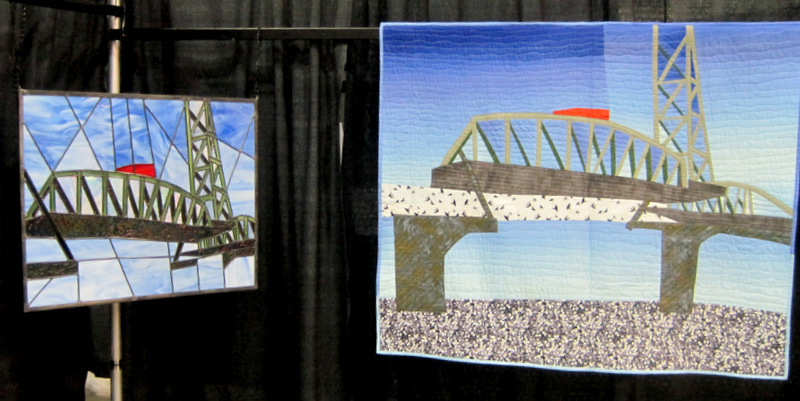
The label on the back of the quilt is part of Linda’s bridge story:

Bridge Challenge, Linda Dyer's label
Linda’s Label


What’s more, Linda made a second version of her quilt — in stained glass:

Bridge Challenge, Linda Dyer's stained glass
Bridge Lift by Linda Dyer (Stained Glass)


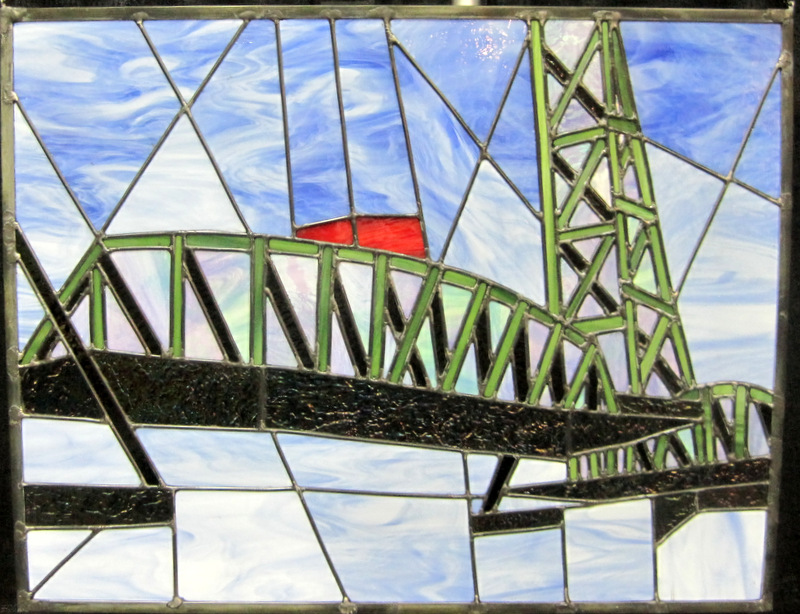
Here are her two creations, side by side:

Bridge Challenge, Linda Dyer's side by side
The Hawthorne Bridge in Glass and Fabric


All in all, a terrific show. And guess what? The quilts will be seen by an even bigger audience! The exhibit will be on display in December at Portland International Airport.


Posted in update | 10 Comments

Rotary Cutter Case

A couple weeks ago the Pine Needle Quilt Shop, where I teach, held its annual fall Open House. I was on hand to promote my upcoming classes and share a sewing project or two. It’s always fun to talk to customers, fondle the newest fabrics in the shop, and visit with the other teachers. Local luminaries Violet Craft, Christina Cameli, and Rachel Kerley are joining the ranks of Pine Needle teachers this fall. I’m in good company!

One of the sewing projects I showed off at Open House was a rotary cutter case I designed a couple of years ago. I made up a few samples, which we gave away as door prizes:

Rotary Cutter Cases

These cases are also good for eyeglasses but I prefer them for rotary cutters. Don’t they look like little coats?

They make great gifts. And the holiday season is fast approaching. Hmmm . . . I’m thinking a tutorial is in order (and maybe even a giveaway!). What do you think, readers? Would you like to know how to make an eyeglasses case or rotary cutter coat?


Posted in Giveaway, rotary cutter case, tutorial, update | 17 Comments

Susan Elinor’s Quilt

We did it! My neighbor Janice and I completed the alphabet quilt started by Janice’s good friend Susan, who did not live long enough to finish it herself. Susan was making this quilt for her baby granddaughter, also named Susan. She had all the letters of the alphabet appliquéd by hand onto 6″ squares of muslin but, sadly, died of ovarian cancer before she could sew the blocks together and finish the quilt. That labor of love fell to Janice, who enlisted my help.

Over the last couple of weeks Janice and I got together to determine a layout for the blocks and to choose sashing and binding fabrics. I wrote about the process in this post and this one.

Allow us to present Susan Elinor’s quilt:

Susan's quilt, front
Susan Elinor’s Quilt, 39″ x 50

Don’t you love how the red binding frames the quilt and draws your eye to the red letters?

In this close-up you can see the simple free-motion design quilted in the border:

Susan's quilt, detail
Quilting and Binding Detail


The back of the quilt features a print from the Dick and Jane early reader books — a playful nod to the alphabet letters on the front and very much in keeping with the vintage calicos Susan had chosen for her appliquéd blocks:

Susan's quilt,back
Back of Susan’s Quilt


The last step was sewing on the label:

Susan's quilt, label
The Label on Susan’s Quilt


Actually, there was one more step. Janice bought some little finger puppets and toys to put in the four blocks on the quilt containing pockets made from clothes Susan’s daughter Lea wore as a little girl. Look how cute these are!

Susan's quilt pockets filled
A Fun Surprise in Every Pocket

This is how the quilt looks with the pockets filled:

r
Susan Elinor’s Quilt is Extra Special


Susan Elinor is one year old. She will miss the joy of growing up knowing her grandmother but she will have the joy of wrapping herself in a quilt hand-stitched with love by her grandmother. This quilt will be presented tomorrow to Lea and little Susan at the memorial service celebrating Susan’s life.


Posted in baby quilt, family, update | 11 Comments

An Update on Susan’s Quilt

The baby quilt that my neighbor Janice and I are finishing on behalf of her late friend Susan is coming along nicely. The quilt will go to Susan’s granddaughter and namesake, Susan Elinor, who just turned one.

In my last post I showed you the blocks that Susan appliquéd by hand onto muslin squares. Here are those squares set off with simple muslin sashing:

Susan's quilt blocks with sashing
Susan’s blocks, sewn together

In addition to the 26 alphabet blocks, four blocks contain embroidered pockets made from clothing worn by Susan’s daughter Lea (baby Susan’s mother) when she was a little girl.

I pulled several pieces of fabric from my stash so that Janice and I could audition the border fabric together:

Susan's blocks with border possibilities
Auditioning the Border Fabric

We both liked the same fabric best — the aqua print on the middle left side (Sew Stitchy by Aneela Hoey for Moda Fabrics).

Here’s the quilt top with the border strips added in that fabric:

Susan's blocks with borders
The Winning Border Fabric


Next we looked at fabrics for the back. The print we chose is absolutely perfect for an alphabet quilt: it’s based on the Dick and Jane early reader books from the last century. It’s a directional design printed across the width of fabric so I inserted some strips of the aqua print border fabric to make the back long enough. Take a look:

Backing Fabric
Fun with Dick and Jane

Oh dear, that picture is not in focus. Here’s a better look at the fabrics:

close up of backing fabrics
Dick and Jane (and Spot!)

According to the selvage, the fabric above was released in 1999. It’s called “go! with dick and jane” by Nicole de Leon for Alexander Henry Fabrics. It’s obviously been in my stash for a while.

Next up: quilting. I’m going to stitch-in-the-ditch around the alphabet blocks and free-motion quilt a loop-de-loop design in the borders. Janice and I both like the idea of finishing the quilt with red binding. She is going to do the handwork on the quilt (binding and label), and our plan is to have our project completed by the end of the week.

I hope you’ll check back in a few days to see it!


Posted in baby quilt, family, update | 7 Comments

A Labor of Love

My neighbor Janice asked me to help her finish a quilt started by her dear friend Susan. Susan was working on an alphabet quilt for her baby granddaughter when she lost her battle with ovarian cancer last month. Knowing she wouldn’t be able to complete the quilt in the time she had left, Susan asked Janice to finish it.

Susan had hand-appliquéd the 26 letters of the alphabet onto 6″ squares of muslin. She had also appliquèed four pockets onto print squares; the pockets came from clothes that belonged to her daughter when she was a little girl.

The first thing Janice and I did was lay the blocks out in a 5 x 6 grid, with the four pocket blocks interspersed among the 26 alphabet blocks. We’re pretty sure that’s what Susan had in mind because she had already sewn the first row together:

Susan's blocks
Susan’s Blocks


The fabrics in the alphabet blocks are vintage calicos. The letters seem to have been randomly placed in the muslin squares, rather than centered, giving the blocks a delightfully whimsical appearance. Janice and I decided to separate the rows with sashing strips made from muslin, add muslin sashing strips all around the quilt, then finish it with a 3″ or 4″ border made from calico prints similar to the ones Susan used in her blocks. With a 4″ border, the quilt should finish at about 36″ x 51″.

A couple of the letters — j and m — were really too close to one edge of the squares they were attached to so I added strips of muslin and trimmed the blocks. Here is the m block, before and after:

Susan's m block, before and after
Repositioning the Letter


Susan had hand-stitched the first row together with ½” seams. Her stitches were so even I had to look closely to confirm that they were indeed done by hand! I opted to take the stitching out so that all the blocks can be sewn with ¼” seams. That will really help with the letters that are close to the edges of the muslin squares.

Here is the first row with its muslin sashing added:

Susan's quilt, first row
The First Row


This quilt will help tie three generations of women together. I feel honored that Janice has asked me to help her finish it.


Posted in baby quilt, family, update | 12 Comments