Monthly Archives: December 2014

Be It Resolved

ball drop times square
The Ball in Times Square (2007)


I’ll bet you think I’m making resolutions for 2015. Nope, not at all. I made a resolution just yesterday, and I have until the ball drops at midnight in Time Square tonight to fulfill it. That only gives me till 9:00 pm, as I live on the west coast some 3,000 miles from New York City.

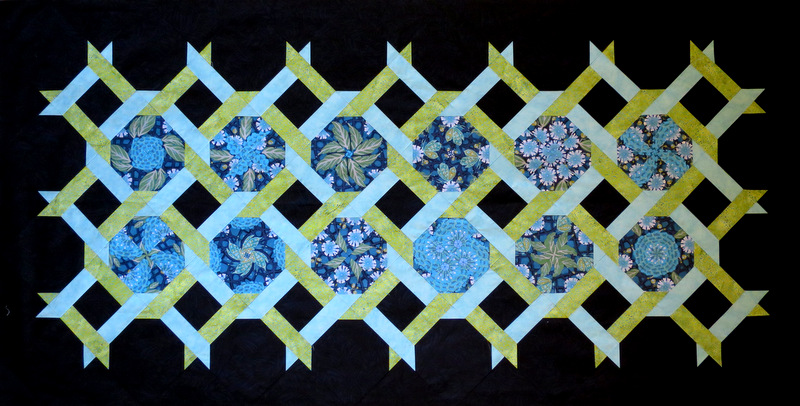
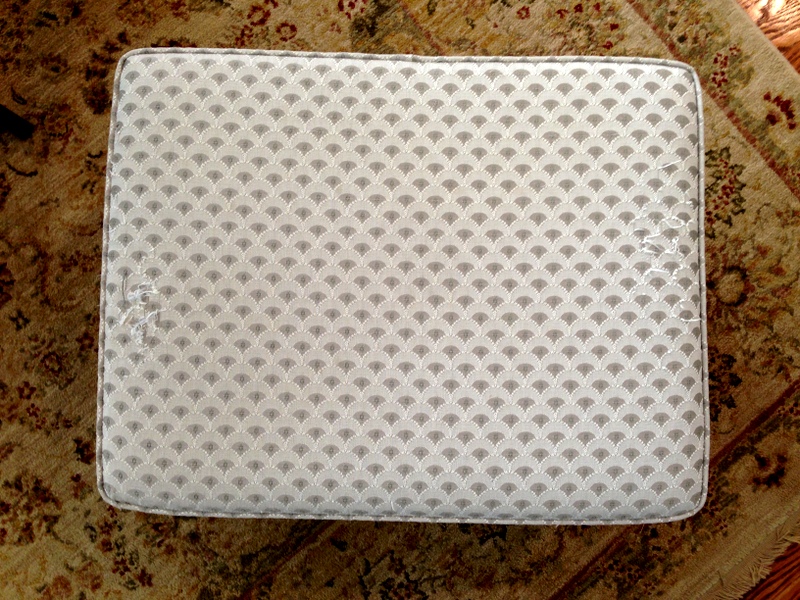
So what about that resolution? Well, in February of this year I finished a quilt top that had been lingering in my stack of unfinished objects (UFOs) for five years. This is the one:

2014-2 Checkerboard Square 2
Top Measures 75½” x 92½”

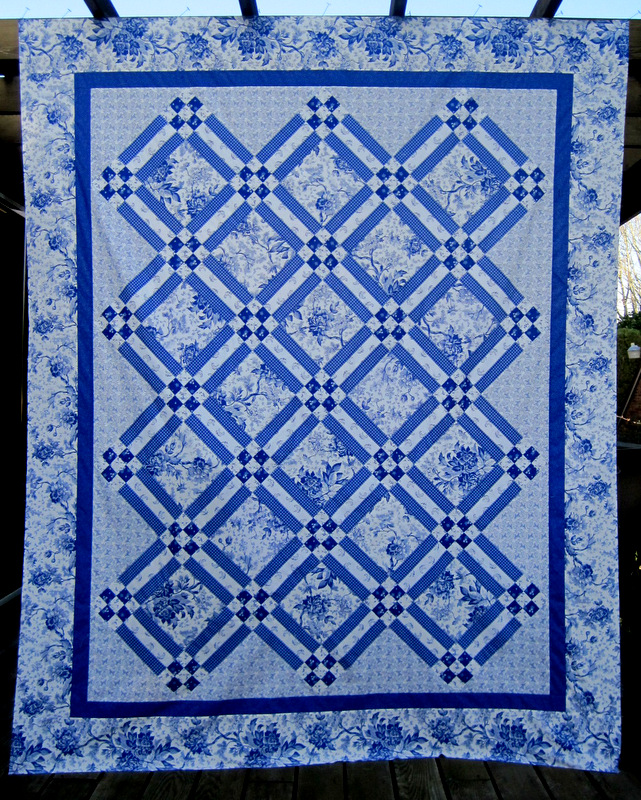
The pattern is Checkerboard Square by Alex Anderson, and the fabrics are from her line called Never Enough Romance for P&B Textiles.

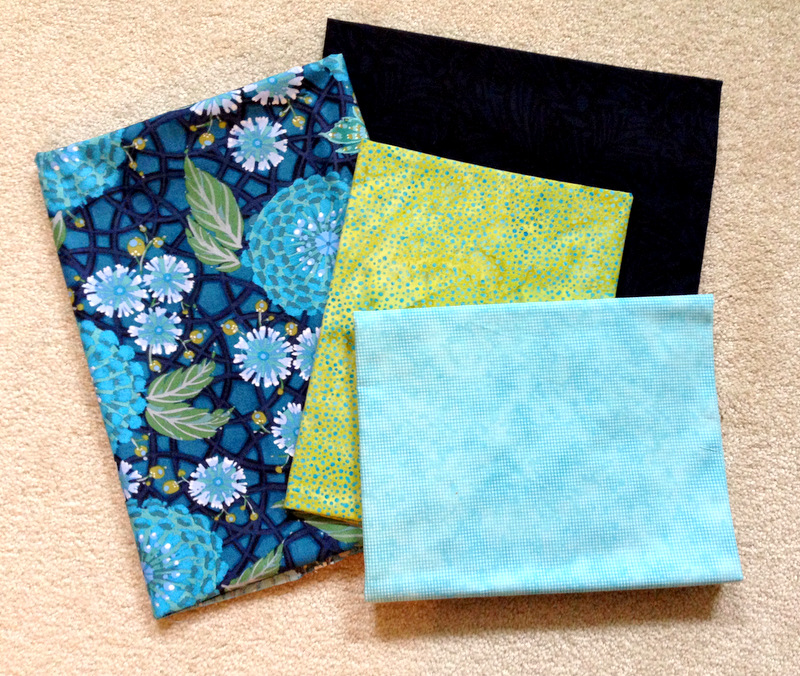
My plan back in February was to make a pieced backing from the leftover fabrics and finish the quilt right away. Instead, I got caught up in other projects and, well, you know how that goes . . . no longer a UFO, now a WIP (work in progress). And a WIP it remained until yesterday, when I was reviewing my 2014 blog posts to see what I had accomplished during the year. I saw my post of Feb. 2 with the picture of this quilt — and I resolved then and there to piece a backing before the year ended.

goose in the pond block
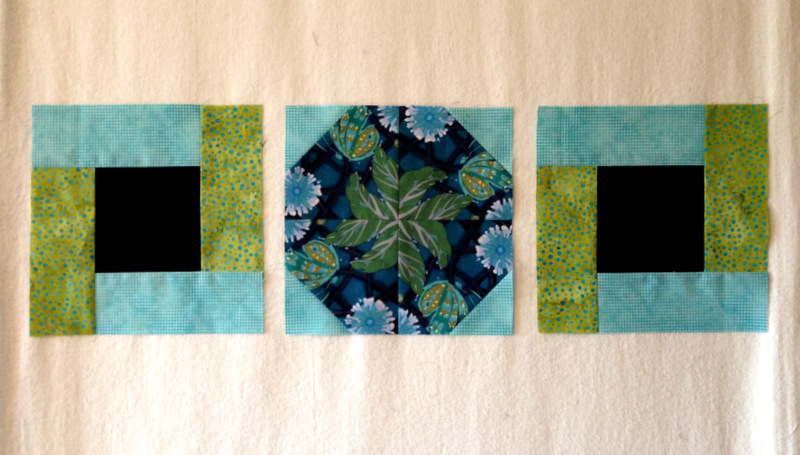
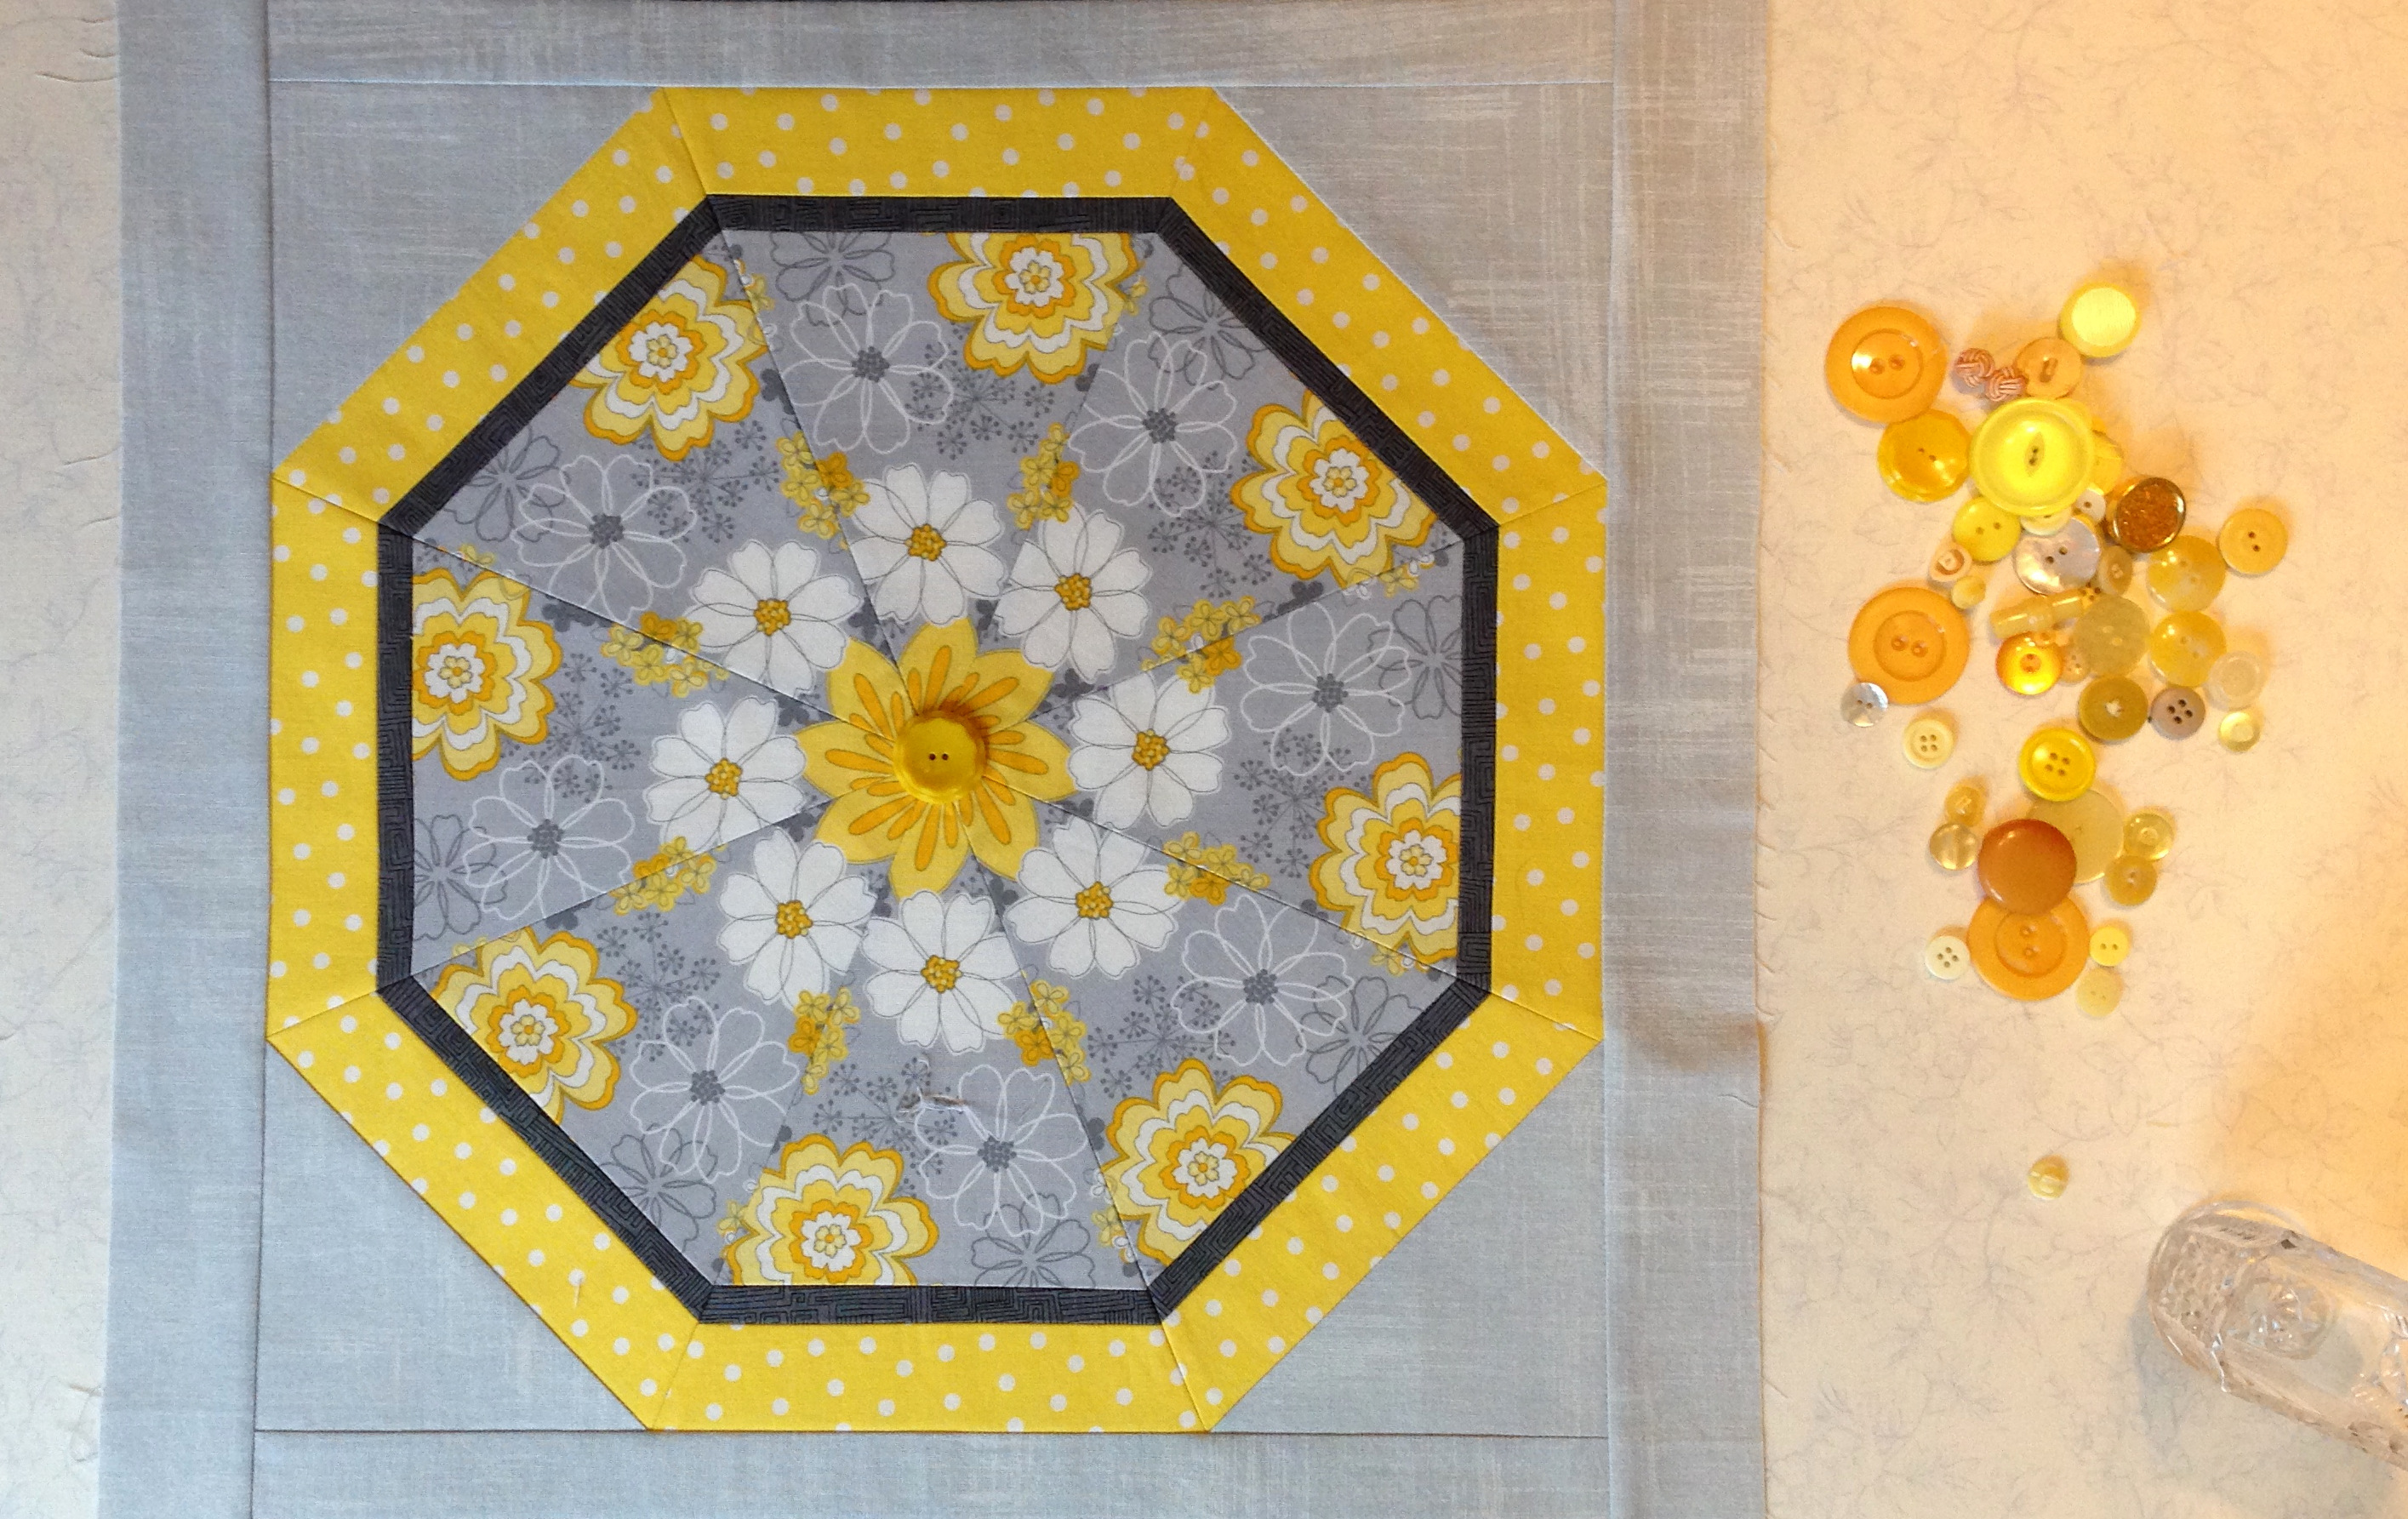
Because of the amount of fabric I had left over, I decided to incorporate a very large Goose in the Pond block into the backing. It’s one of my very favorite traditional blocks, despite the fact that I’ve never made one before. (On my quilt bucket list is a red and white quilt, and the odds are good that I will choose this block when I’m ready to make it.)

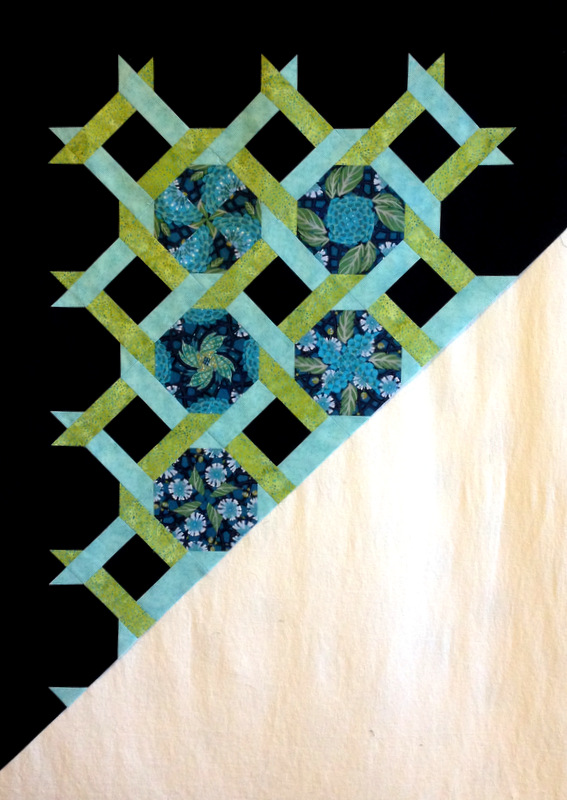
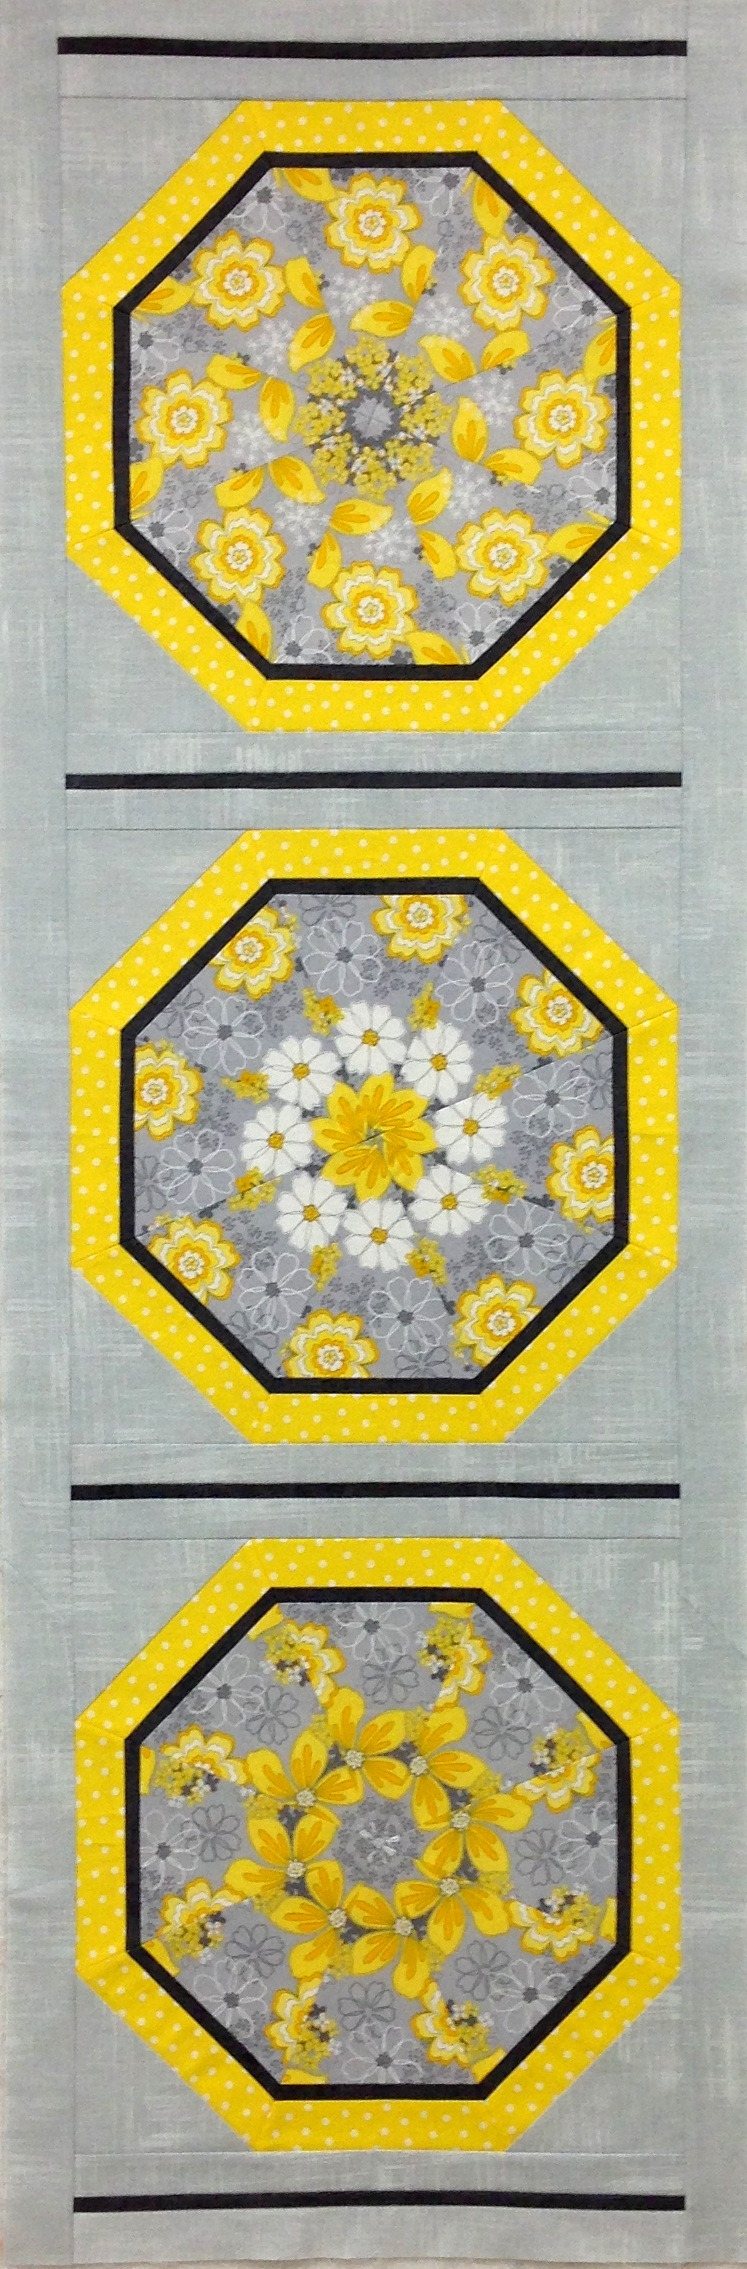
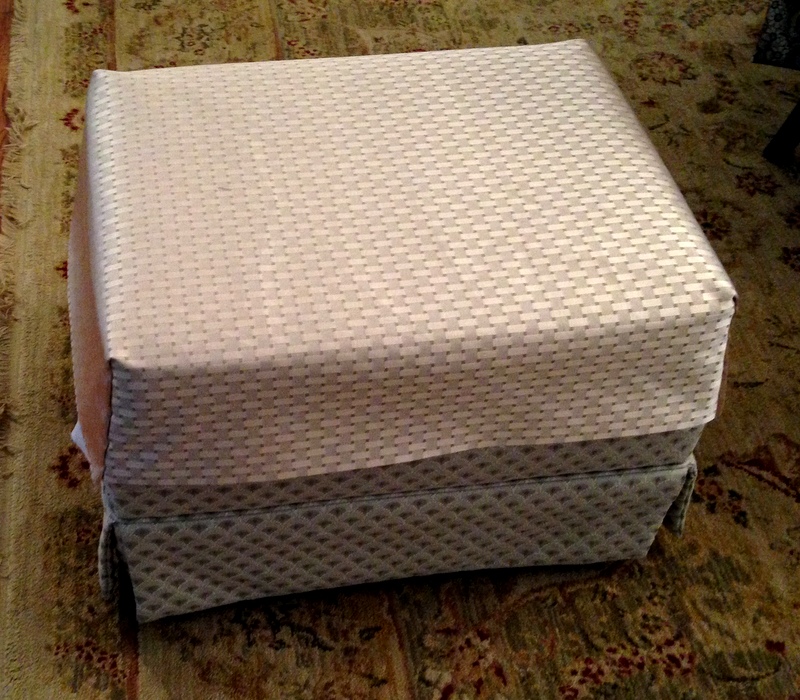
Here is my jumbo Goose in the Pond block with two rows of sashing around it:

goose in the pond
Quilt Back in Progress

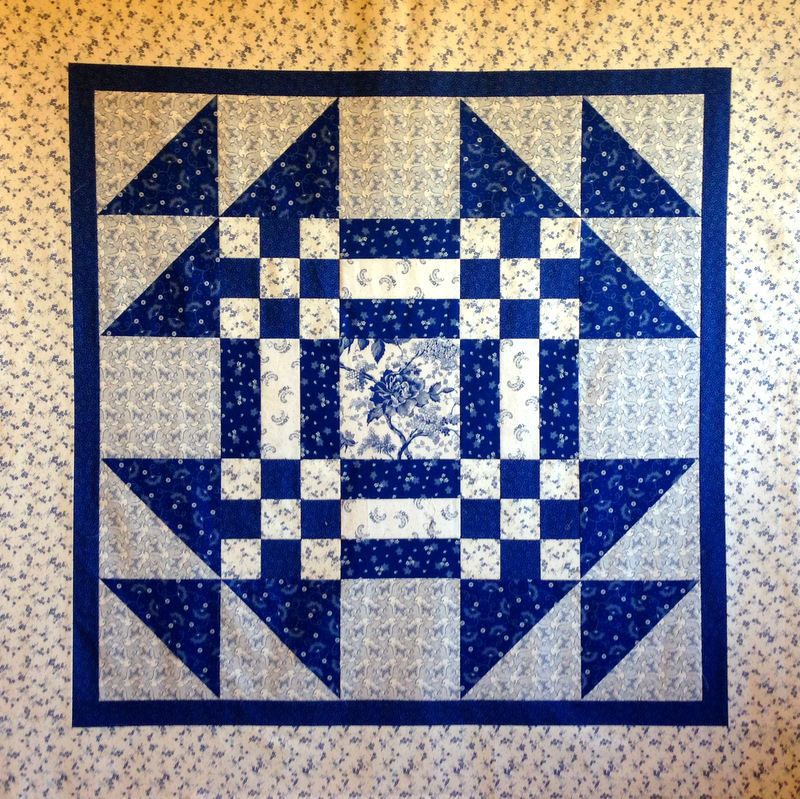
My Goose block finished at 37½” square. With the two rows of sashing, it now measures 50″ square. What I have here could easily be a quilt in its own right but I am committed to finishing it as a backing . . . this evening.

By the time the ball drops in Time Square tonight, I plan to be sitting in the TV room with a glass of champagne in one hand, my little cat Theodora in my lap, and my Dear Husband sitting next to me.

Thank you for stopping by my website/blog in 2014. I hope to see you next year!


Posted in update | 11 Comments

4-Patch Twist Update

It’s still in progress but here’s a shot of the bed runner quilt I’m working on:

Olivia Twist 1
Dawn’s Variation on 4-Patch Wonder with a Twist

Can you believe all the blocks came from the same focus fabric? I never tire of making these faux-kaleidoscope blocks. It’s so much fun to see the amazing variety of images created by stacking four repeats and cutting them into squares. For more information on the fabrics I used and the two simple blocks that created the interlocking twist design, see my previous post.

Right now my quilt top measures 34½” x 68″ but it’s going to be a little bit longer because I want more of a drop over the sides of the bed. I haven’t decided yet whether to simply add strips of background fabric to the short ends or incorporate a pieced element with color.

Hmmm. Maybe I should sleep on it.


Posted in 4-Patch Wonder, bed runners, faux-kaleido quilts, kaleidoscope quilts, snowball blocks, update | 4 Comments

Updating an Old Favorite

Recognize this quilt?

2011-9, It's All in the Twist, 57x65
It’s All in the Twist, 57″ x 65″ (2011)


It’s one of my favorites: It’s All in the Twist, made from my 4-Patch Wonder with a Twist pattern. The original quilt has been on display at the Pine Needle Quilt Shop for quite a spell. It was high time, I decided recently, to make a new version, so I started on one last week using these fabrics I showed you a couple of weeks ago:

fabrics
Pleasing Fabric Combo


The floral focus fabric is from a line called A Garden for Olivia designed by Lida Enche for In the Beginning Fabrics. I thought it would serve up some interesting and beautiful four-patch kaleidoscope blocks (I call them 4-Patch Wonder blocks) — and I was right. I paired the focus fabric with an aqua blender, also from In the Beginning Fabrics, and two batiks from my stash. The dark batik may look solid black in the photo but it’s actually a navy and black print.

The quilt design is deceptively simple: it starts with a snowball block and an alternating block, both finishing at 6″ square. When the blocks are joined together, you see snowballs surrounded by interlocking ribbons. Take a look at this 4-Patch Wonder snowball block between two alternating blocks:

4-Patch Wonder 1
Two Simple Blocks


Now see what happens when the blocks are butted up against each other:

4-Patch Wonder 2
Making the Connection


The illusion is complete when rows are sewn together. This is how far I’ve gotten doing just that:

4-Patch Twist in progress 800
4-Patch Twist in Progress


Isn’t that pretty?

This is my favorite part of quiltmaking: when you start sewing the rows together and can finally see if the reality matches the picture you had in your head when you chose the fabrics and settled on a design.

I’m departing from the original quilt in one other respect: instead of a throw, I’m making a bed runner. It seems to me the quilt world has been very slow to embrace the concept of bed runners. In 2014 I stayed in hotels seven times, ranging from my home state of Oregon to as far away as New York and Florida, and in every single one the beds were accented with bed runners.

It’s an idea whose time has come. I’m jumping on board! How about you?


Posted in bed runners, faux-kaleido quilts, kaleidoscope quilts, snowball blocks, update | 4 Comments

Tutorial: Necktie Notions Case

As promised in my last post, here is a quick and easy method of making a little carrying case out of a man’s necktie. My inspiration is an eyeglasses case I bought years ago at a holiday sale. I wish I knew the name of the crafter, as I would certainly credit her if I could.

A case made from a necktie can hold an item about 4″ to 6″ in length. But how wide an item? Ah, that totally depends on the width of the tie. The wider the tie, the wider the item it can hold. The case you see below, made to hold my friend Vickie’s special seam ripper/stiletto tool, came from a tie that measured about 2½” at the widest point:

necktie notions case 4

It would also hold a pair of 5″ sewing scissors, with some batting tucked into the bottom to protect it from the tips of the scissors:

necktie a
For this tutorial I worked with a vintage tie that measured about 4″ at the widest point — wide enough to serve as a carrying case for my cell phone:

tie 12
Here’s what you need to make a case:

— a man’s necktie
— sewing scissors
— a seam ripper
— a hand sewing needle
— thread to match the main tie fabric
— a snap fastener
— a decorative button

1. Trim the tie so that it measures about 15″ from the cut end to the tip:

tie 1
2. On the inside of the tie, use a seam ripper to remove the stitching that holds the edges together:

tie 2Two reasons for that: first, to remove the stitching where the tie is tacked to the lining, and second, to see if there is interfacing or other fabric inside the lining that would keep an item from sliding easily in and out of the finished case.

With this particular tie I needed to remove the narrow strip of interfacing that went down the middle:

tie 3
3. Hand stitch the edges back together to within a couple inches from the top, using a single thread and taking large stitches, since they won’t show when the case is finished.

4. Fold over a generous 1½” at the bottom of the tie as shown:

tie 5
5. Bring the folded bottom edge of the tie up near the top and adjust it to fit the item you are planning to put in the case:

tie 6

I tested mine by slipping my cell phone inside the case, making sure there was room to close it by pulling the flap down:

tie 7
6. Place a straight pin on each side to hold the layers in place:

tie 8
Using a single thread and starting at the fold on the lower right side (see the point of the stiletto in the photo below), hand stitch up that side, across the top (skip the spot along the top middle where the folded edge has no tie fabric underneath it — just slip the needle through the fold so the thread doesn’t show), and down the left side to the fold:

tie 9
7. Sew the two pieces of a snap on as shown . . .

tie 11

. . . and finish the case by sewing a decorative button on the outside flap:

tie 12
As the Barefoot Contessa would say, “How easy is that?”


Posted in update | 3 Comments

Necktie Notions Case

Many years ago, at a holiday craft fair in Portland, I bought an eyeglasses case made from a vintage tie. I’ve been using it ever since to hold my 5″ scissors, having stuffed some batting at the bottom of the case to protect it from the tips of the scissors.

Fast forward to September. I was at the Northwest Quilting Expo (“Portland’s original quilting and sewing festival”) browsing the vendor mall when I spotted some beautiful and unique seam ripper/stiletto tools made by Rick Luoma of Auburn, Washington. (Rick and his wife Julie own offthewallquilt.com, selling products online and at quilt shows.)

Rick makes the handles out of acrylic or wood, and each is one of a kind. I bought one with a purple handle for my friend Vickie S., whose birthday was coming in November. I decided to make a special case for it from a necktie, using my modified scissors case as my guide. Of course the necktie had to be purple, too, because it’s Vickie’s favorite color:

necktie notions case
A quick sweep of my button collection yielded the perfect little button for the outside flap. It has a little rhinestone in the center — just the right amount of bling. The case actually closes with a snap, sewn on the inside:

necktie notions case 2
The tool itself is quite wonderful: it has nice heft and is very comfortable to hold. The seam ripper at one end and stiletto at the other have stainless steel handles that tuck into the ends of the holder:

necktie notions case 3

necktie notions case 4

As for the necktie notions case, it couldn’t have been easier to make — it’s all sewn by hand. Would you like to know how to make one? In my next post, I’ll show you!


Posted in update | 3 Comments

Sun Flowers

Last week was remarkable for the amount of time I didn’t spend in my sewing room. The week was completely taken up with appointments, errands, holiday shopping and decorating, a couple of parties, and — it must be admitted — way too many Scrabble games.

At least I got the blocks put together for my Season to Taste table runner:

2014-12, Sun Flowers
Sun Flowers, 18″ x 56″

I’m making a version of Season to Taste for each of the four seasons. This one is the summer version, and I’m going to call it Sun Flowers. The pale gray background fabric (from the Painter’s Canvas line by Laura Gunn for Michael Miller) reminds me of a summer sky at first light.

The kaleidoscope blocks went together very easily but I am unhappy that the centers of the middle and bottom blocks don’t match exactly. It appears a couple of the repeats were just a smidge off when I cut through the eight layers of my focus fabric. With a kaleido block, being off even a sixteenth of an inch can make a difference.

Since Sun Flowers is destined to be a wall hanging, I’m going to place a vintage yellow button in the center of each kaleidoscope block. I auditioned a few buttons in my collection:

kaleido block with buttons
Middle block
kaleido with buttons 2
Bottom Block

I’m going to pretend that adding the buttons was a design choice rather than a ploy to cover my cutting error. You won’t tell anyone, will you?


Posted in kaleidoscope quilts, update | 7 Comments

Planning Ahead

Our wonderful two-week visit with family in Atlanta is coming to a close. On Monday morning I’ll be back home in Oregon, in my sewing room, and I’m already thinking about what I want to work on.

Remember this kaleidoscope block that I made back in June?

photo
Last month I made two more blocks. Here are the three of them together:

three kaleido blocks
I’m going to make them into a table/runner wall hanging using my Season to Taste pattern. I’ve made a fall and spring version; this will be the summer version. Just before leaving for Atlanta two weeks ago I ordered some more of the yellow polka dot fabric — it should be waiting for me when I get home.

Also on my mind are these luscious fabrics:

fabricsI have a plan for them but will make a test block or two before sharing it.

I’ve been in home dec mode this last couple of weeks so it will be good to get back to quiltmaking!


Posted in family, kaleidoscope quilts, update | 3 Comments

Fabric Facelift

The ottoman in the master bedroom at my twin sister Diane’s house got a facelift, a new custom cover I made for it:

ottoman 1
The original upholstered cover fell victim to the claws of Diane and Ed’s dear departed cat Alex. The newly slipcovered ottoman looks right at home in front of an easy chair in her bedroom:

ottoman 2
Here’s a view that includes a peek at Midnight in the Garden, the quilt I gave Diane for her 60th birthday:

ottoman 3
The newly covered ottoman actually has a fraternal twin (hey, just like me!):

Custom ottoman slipcover by Dawn White

This is the slipcover I made four years ago when I was visiting Diane over Thanksgiving. My goal was to make this look like an upholstered piece, since I’m not a fan of slipcovers. It was a real seat-of-the-pants project, since I had never made a slipcover or upholstered anything. When I started working on the new one, all I had to do was look at the old one to refresh my memory on how I had made it. No need to reinvent the wheel!


Posted in family, home dec, update | 2 Comments

A Home Dec Project for Diane

Every year when I visit my twin sister Diane over the Thanksgiving holiday, I work on a home dec project for her. It’s a small way to repay the generous hospitality she and her husband Ed show my husband Charlie and me on these annual visits.

This year I’m making a slipcover for an ottoman that goes in the master bedroom. This is what it looks like now:

1

Ed and Diane’s dear departed cat Alexis (Alex for short) liked to sharpen her claws on the ottoman, and she left the evidence behind:

2
Alex  was an equal opportunity kneader. She managed to work her magic on both sides of the ottoman:

3
On my visit last year, Diane and I found this lovely basketweave fabric which we thought would be perfect to recover the ottoman with:

4
This year we found the perfect trim for it — 50% off — at Frugal Fabrics:

5
Today I got the fabric measured and cut. Here is the top with boxed corners pinned and ready to sew:

6
Tomorrow I will get out my trusty old Elna sewing machine (bought in 1975), which now lives at Diane’s house, and will start sewing. It will be good to sit in front of a sewing machine again!


Posted in family, home dec, update | Comments Off on A Home Dec Project for Diane