Category Archives: mitered corners

Day for Night

Another UFO bites the dust! That’s right, I have a finished quilt to present to you: Day for Night, begun in June 2012, finished today. It measures 56″ x 69″.

2013-9, Day for Night, front

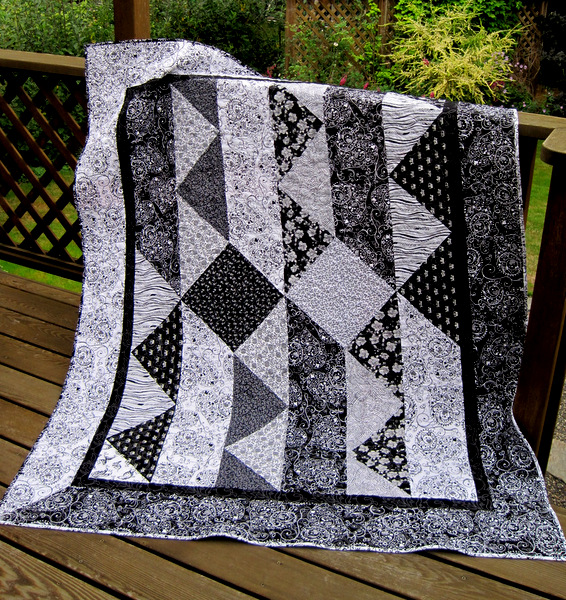
I made the top in a couple of afternoons last year, when I was in the mood for something fast and fun. You can read about it here.

Why did it take so long to finish? One reason is that I hadn’t decided what to put on the back. I often use leftover blocks and strips on my quilt backs but in this case I had given them to one of my nieces for a sewing project. This summer I finally pulled a whimsical black-and-white print from my stash, pairing it with a dotted fuchsia for a jolt of color:

2013-09-16 02.24.22

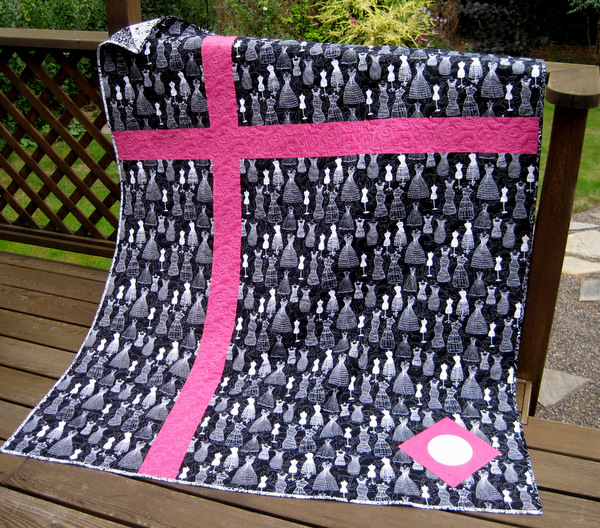
That’s the label you see in the lower right-hand corner. I fused it to a square of the fuchsia fabric and set it on point to echo some of the blocks on the front.

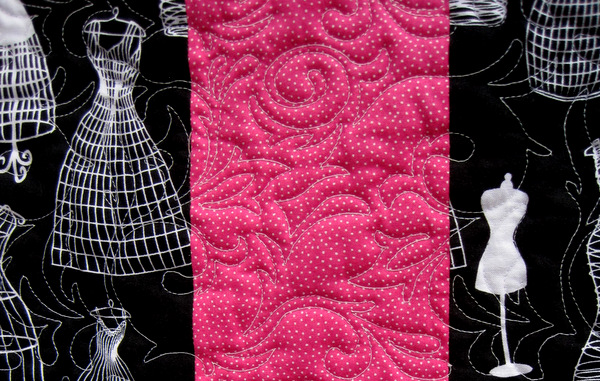
Nancy Stovall of Just Quilting quilted a swirly edge-to-edge design that blends in perfectly on the front and complements the whimsy of the backing fabric. Here’s a close-up of the back:

2013-9, Day for Night, back, quilting detail
Did you happen to notice that the binding is two different fabrics? I wanted to play with the black-white/positive-negative theme by binding the quilt with fabric that’s the reverse of the fabric right next to it. This was a fun challenge because I had to figure out how to miter the corners where the black and white fabrics meet:

2013-9, Day for Night, binding detail
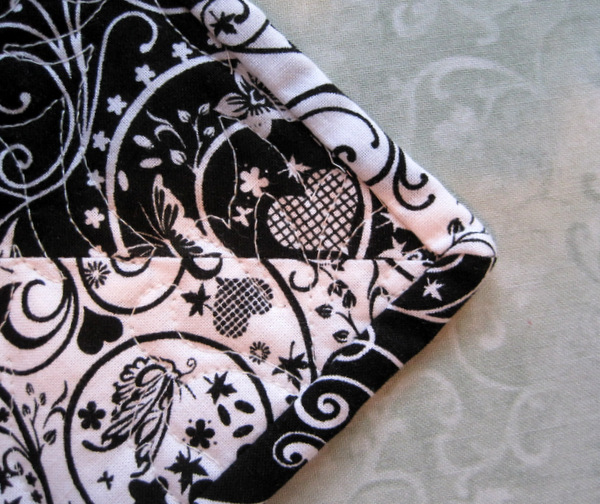
With double-fold binding (also known as French binding), quilters make it a point to avoid having a seam in a mitered corner but in this case it was deliberate.

I expected that the seam joining the black and white fabrics would be on the diagonal. Turns out the seam needs to be on the straight of grain. Not only that, when the binding strip is folded on the quilt edge to form the miter, the seam needs to be exactly on the edge that is even with the raw edges of the quilt:

Camera Uploads22
I trimmed the seams to 1/8″. There’s a little extra bulk in the corners but it wasn’t a problem. In fact, now that I know how to do it, I may make another quilt in the future in which the binding fabric changes at the mitered corners.

All in good time, though. I have a few other UFOs and WIPs to tackle first.


Posted in mitered corners, update | 7 Comments

Make Mine Mitered: A Tutorial on Table Napkins

This tutorial is for a 19″ square napkin with a ¼”-wide hem and mitered corners. Here’s a look at the corners from both sides:

For two napkins, you’ll need ⅝ yard cotton fabric 42-44″ wide. Wash and iron fabric.

Supplies
acrylic ruler with 45° angle marking
sewing stiletto (I use a bamboo skewer)
removable marking pen or pencil (I like the Frixion pens)

1. Trim selvages from fabric. Cut a 20″ square.

First Light Designs tip: trim ¼” from one of the sides that is parallel to the selvage. This reduces the crosswise width by a quarter inch. Why this step? The crosswise grain has more give than the lengthwise grain. With repeated use and washing, the napkin will relax along the crosswise grain. Trimming the fabric at the beginning compensates for that bit of stretch. To identify the crosswise and lengthwise grains, give the square a gentle tug in both directions; you should be able to tell immediately which side has more give. (Of course, you can cut the napkins 19¾” x 20″ initially but somehow I find trimming a 20″ square easier.)

2. At the ironing board, align 45º marking on ruler with top right edge of napkin as shown below. With a removable marking pen or pencil make a mark 1½” in from the edge of the napkin (not the edge of the ruler):

See the pink dot I made with the Frixion pen? It’s exactly an inch and a half in from the corner.

3. Bring point of fabric in to meet the mark and press:

4. Fold raw edges a generous ½” down and press all the way around. The pressed edges should form a miter at each corner:


5. Bring the raw edge in to meet the fold and press about 2″ in from the corner:


6. Fold again, forming a ¼”-inch miter. Press fold in place, again about 2″ in from the corner. Repeat for all corners. Do not press all the way around. Do not insert any pins yet.


7. Open up folds at each corner and trim a ¼”-square from the point of fabric. (You don’t need to use pins to hold the folds open before trimming; I did it here for photography purposes only.)


8. Place a pin at each corner to hold the miters in place:


9. Starting in the middle of any side, bring raw edge in to meet fold, fold again to form ¼”-inch fold, and finger press in place. The finger-pressed area is at the left edge of the photo:


10. Move to the sewing machine. Set stitch length at about 12 stitches to the inch (2.4 on computerized machine). Insert needle right next to the fold and begin stitching. Stop every couple of inches to make the two folds that form the quarter-inch hem.


11. As you approach the corner, remove the pin and use the point of a stiletto to hold the fold in place as you stitch toward the corner. Pivot when the needle is at the point the two folds meet. Remove second pin and continue stitching. When you get to the starting point, change stitch length to almost zero. Stitch three or four tiny stitches. Bring threads to the back and cut close to the line of stitching. Give the napkin a final press to set the stitches.


Add a pretty napkin ring, and you’re ready to set the table!


Posted in mitered corners, table napkins, tutorial, update | 5 Comments