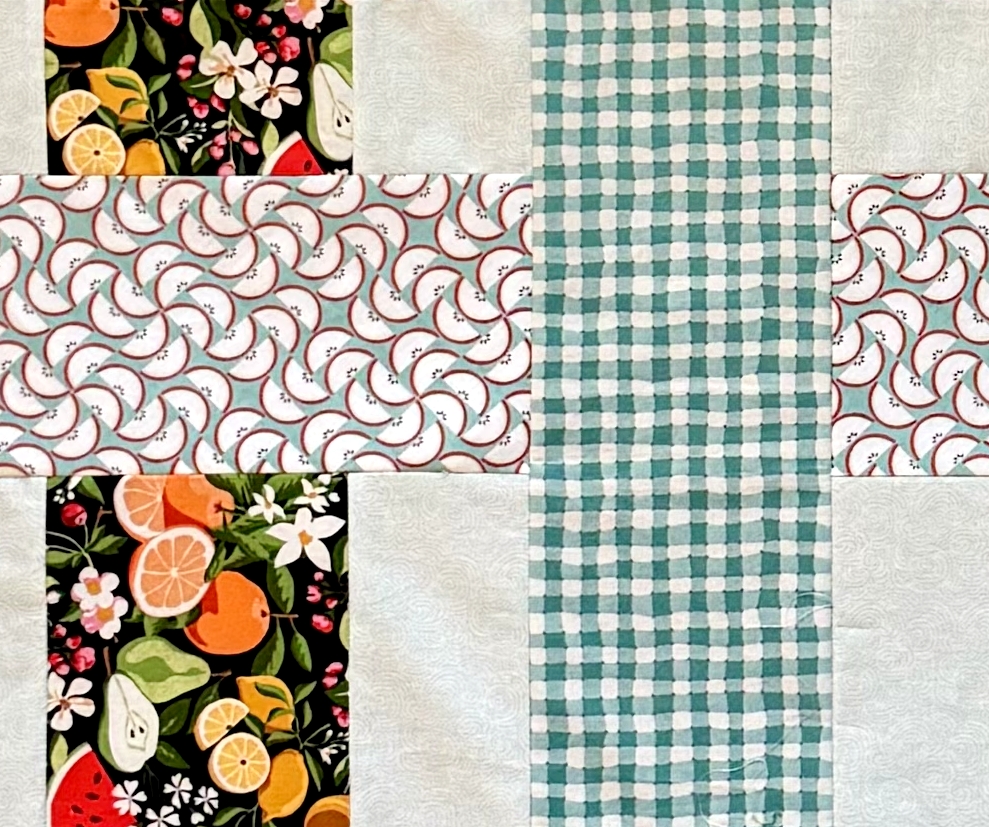
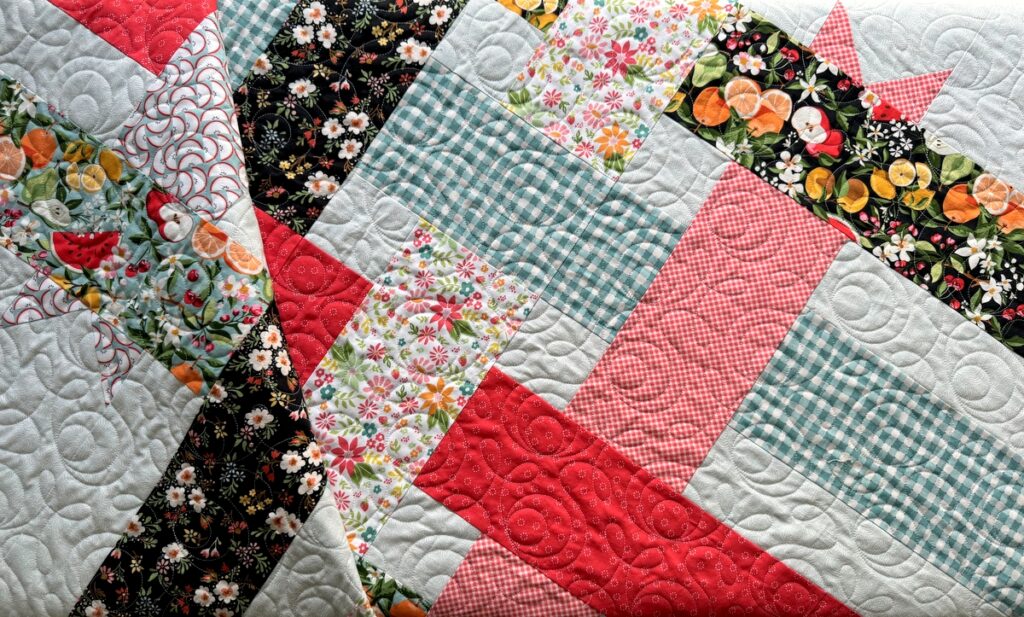
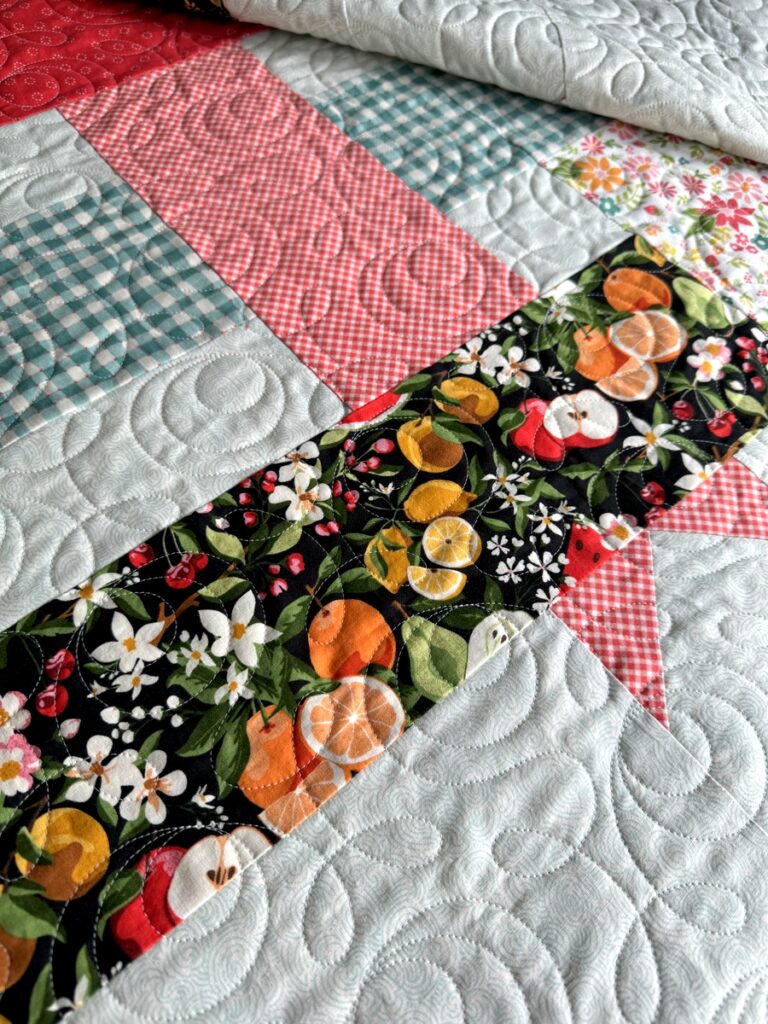
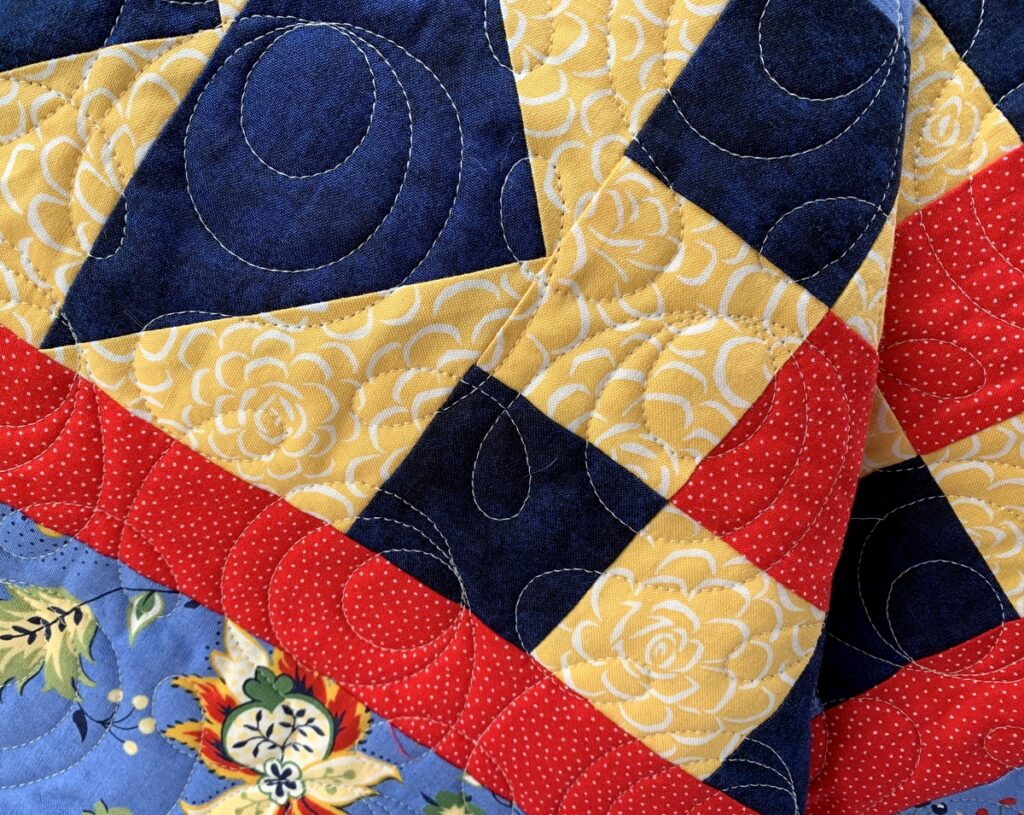
Category Archives: Ribbon Box quilt

Wonderful World

Aren’t these blocks cute? They’re 8″ Sawtooth Star blocks framed with long skinny navy triangles that make the blocks twist and turn. The star blocks date back to 2021 when I bought prints from the “Gingham Foundry” line by Riley Blake — the very prints you have seen most recently in my third version of the Ribbon Box quilt pattern:

I never got beyond the first few star blocks in 2021, probably because I didn’t have a project in mind and wasn’t sufficiently thrilled with the Sawtooth Star blocks to continue making them. But there they were in my project box nestled in with the Gingham Foundry fabrics.

Then it occurred to me that I could put those orphan blocks on the back of my quilt. The idea to make them twist and turn came about through a bit of serendipity. One of my quilt students is making a t-shirt quilt and had seen a photo of one made with blocks that twisted right and left. I knew about the technique because I had taken a class almost 20 years ago — and still had the book:

Published in 1996 by Chitra Publications, Twist ‘n Turn is now out of print but I have seen a few copies for sale on the Internet (eBay, Etsy, Amazon). I finished a quilt in 2006 using this technique but now I was having trouble wrapping my head around the directions. How could I help my student if I couldn’t figure this out? The solution was to make some test blocks at home. I’m so glad I did. Not only is the process clear to me now, I wound up with blocks that I could use on the back of my quilt. Win-win!

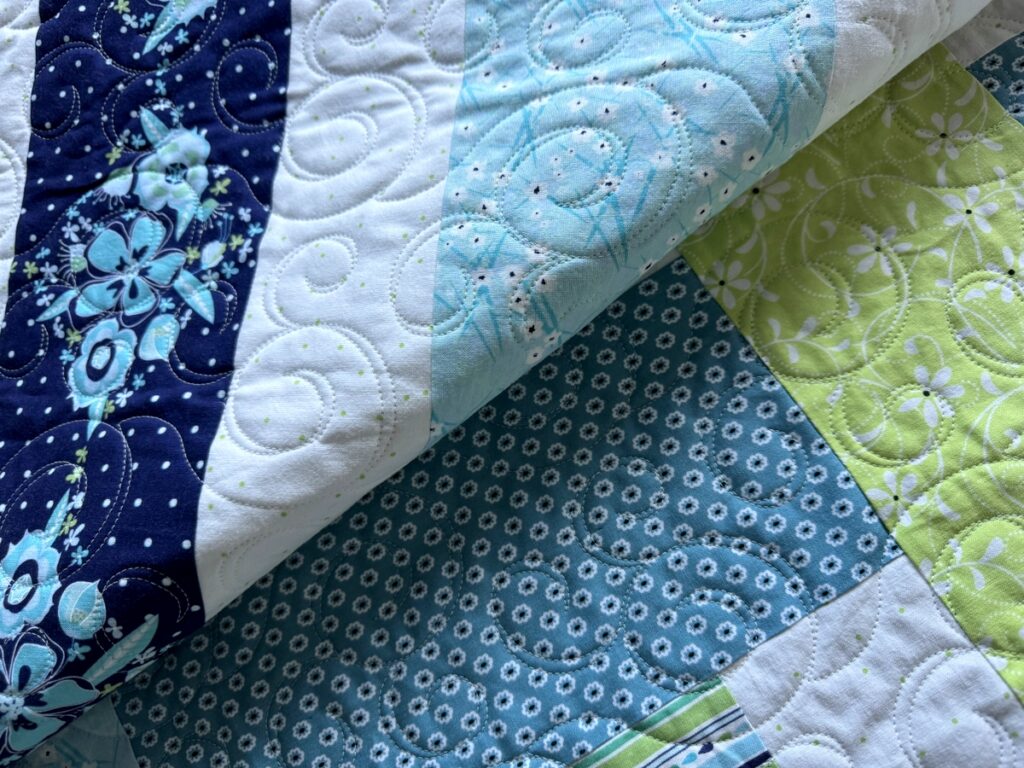
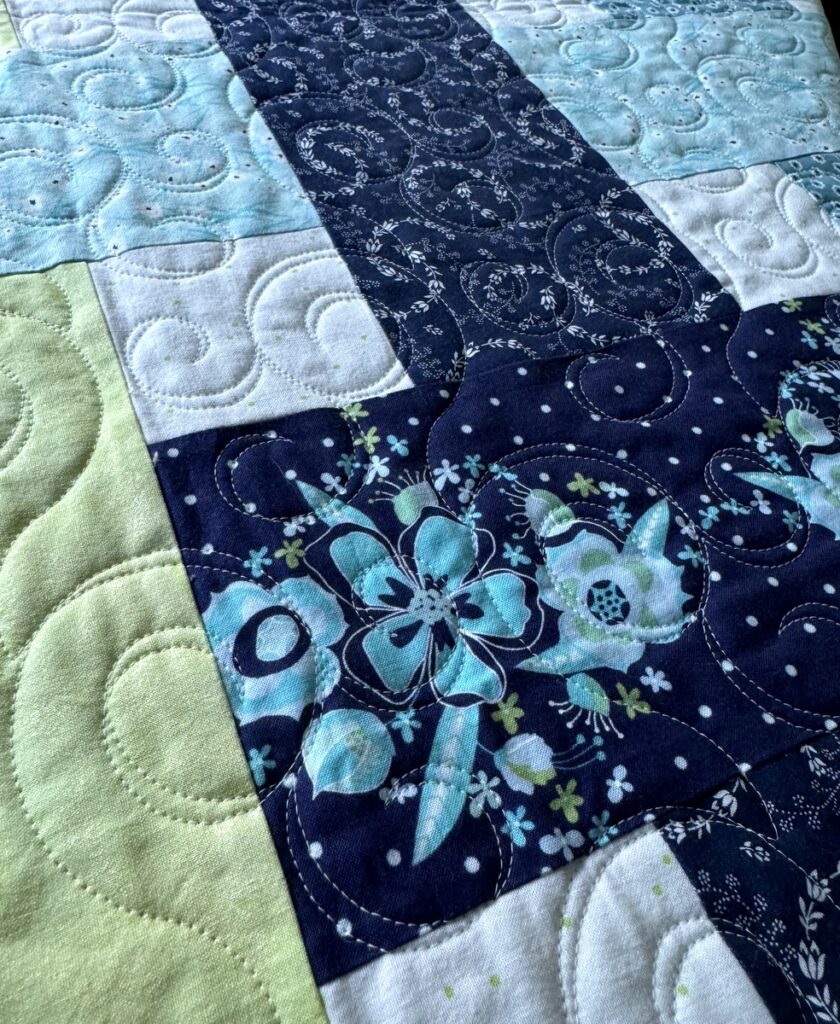
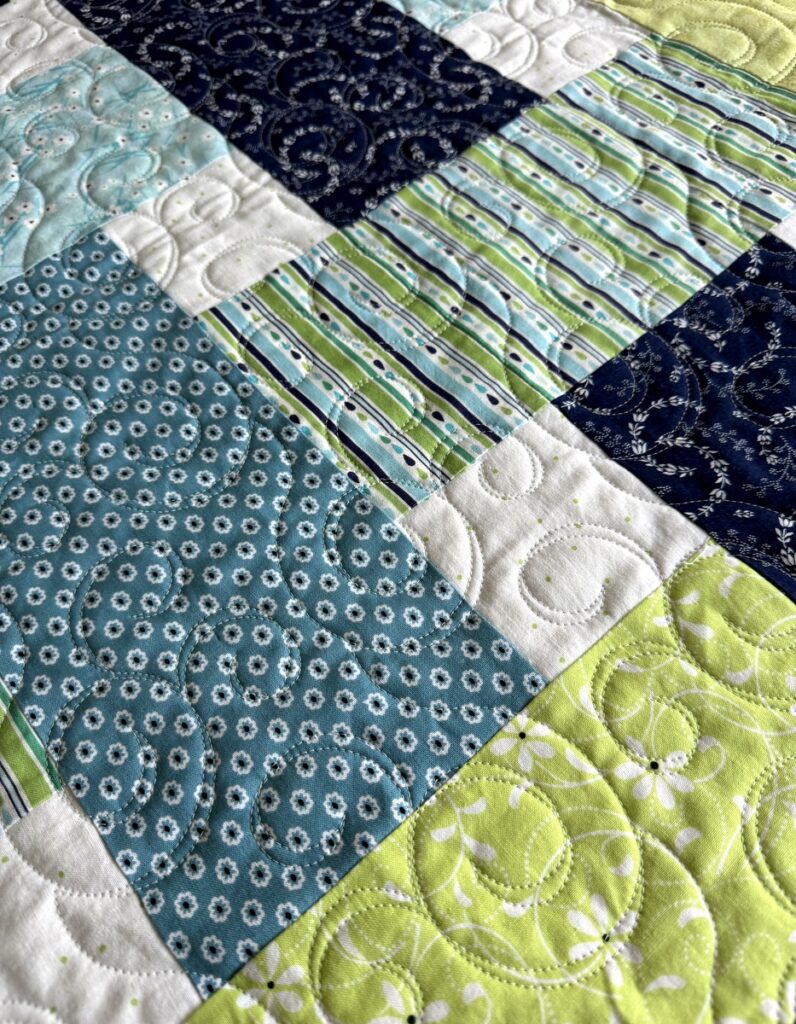
Here’s my completed quilt backing:

It seems to me those stars are dancing their way across the quilt back.

By the way, are you wondering about the title of this post? One of the fabrics in the Gingham Foundry line — and in my quilt top — is a text print featuring the lyrics to the song “Wonderful World:”

Isn’t that the perfect name for my quilt?


Posted in Ribbon Box quilt, update | 4 Comments

Could This Be Love?

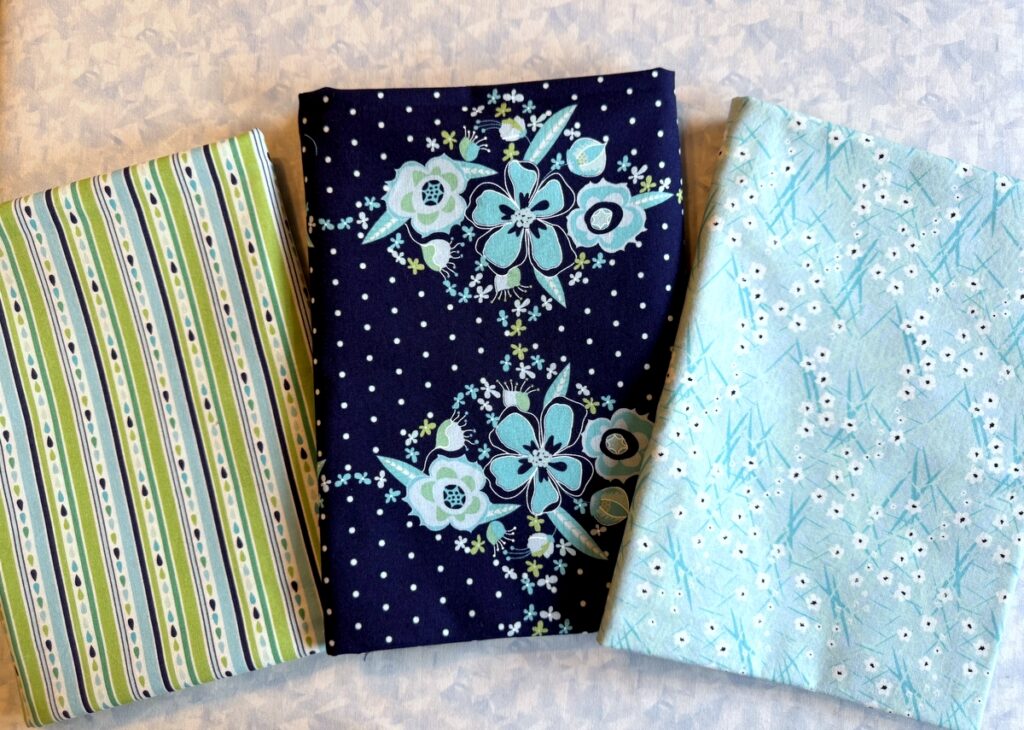
Speaking of the Ribbon Box quilt (which I was in my most recent post), remember when I reported developing a fondness last month for “Flower Garden,” one of the lines on the Cloud 9 Fabrics website featuring the Ribbon Box quilt pattern? As a reminder, these are the eight prints in the Flower Garden line:

You can guess what happened: I succumbed to temptation, went online, and ordered a yard each of six prints. I chose not to order two of them, knowing I had options in my stash to replace them with.

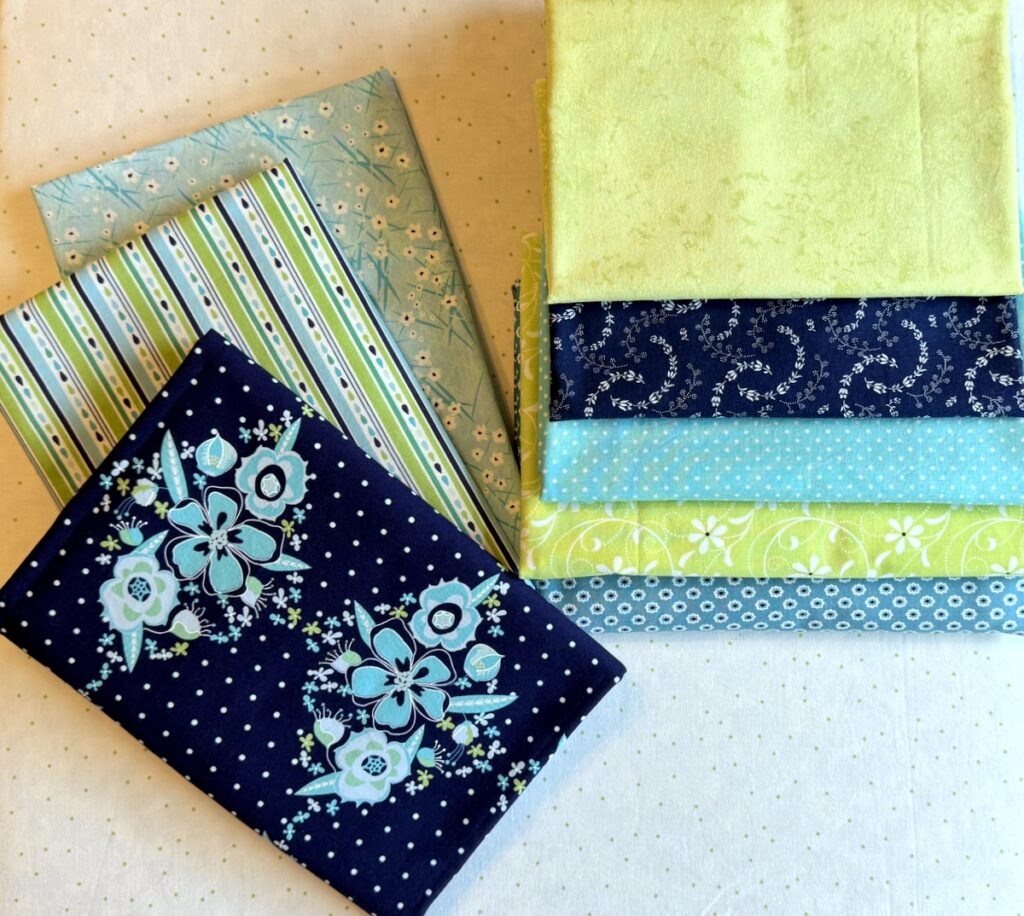
The fabrics arrived in due course and . . . well, maybe I’m not as much in love with them as I thought I would be. See, this is one of the dangers of buying fabric on the Internet. I generally buy fabric that I can see and touch. I want to know exactly what the colors look like in real life as opposed to what I see on my computer screen. But every now and then a line of fabric that has captivated me online is not to be found in a local quilt shop. Then I might take a leap of faith and order fabric sight unseen. Such is the case with Flower Garden.

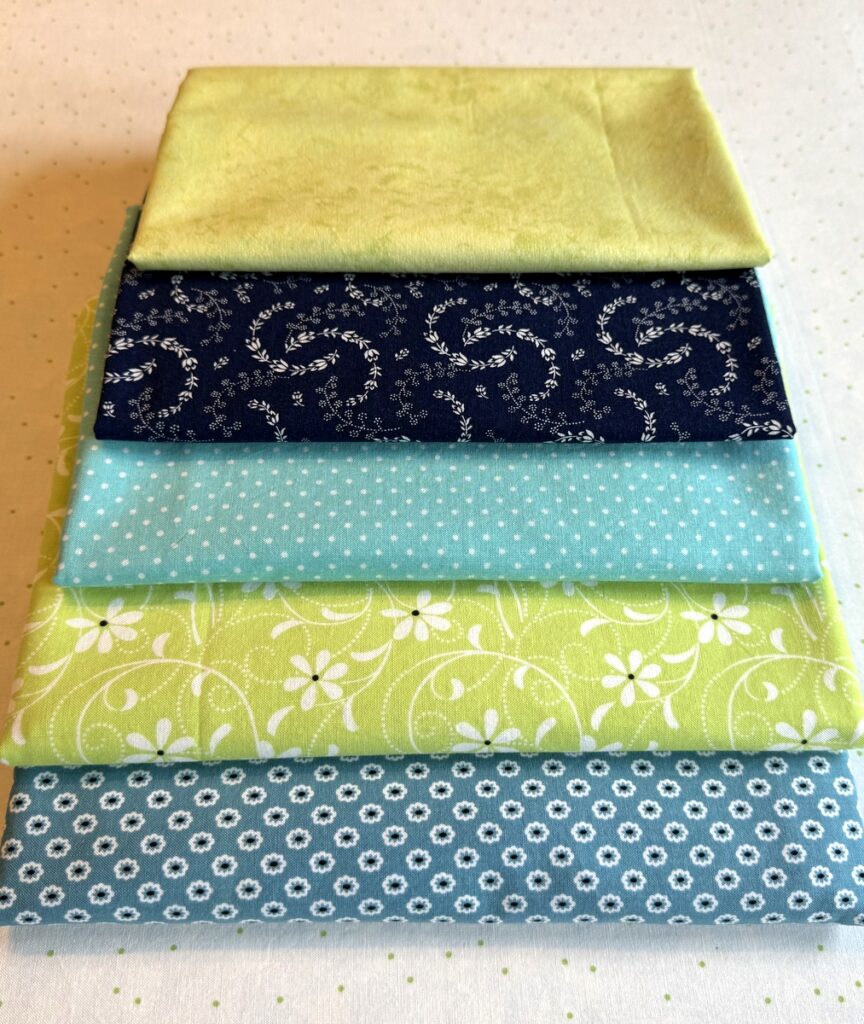
Take a look at five of the six fabrics I ordered:

These fabrics turned out to be much darker than pictured on the website. See the two fabrics in the second row? What I thought was a coral background on the one on the left is actually a dark orange and what I thought was a gold leaf print on the one on the right is actually a darker mustard-y color.

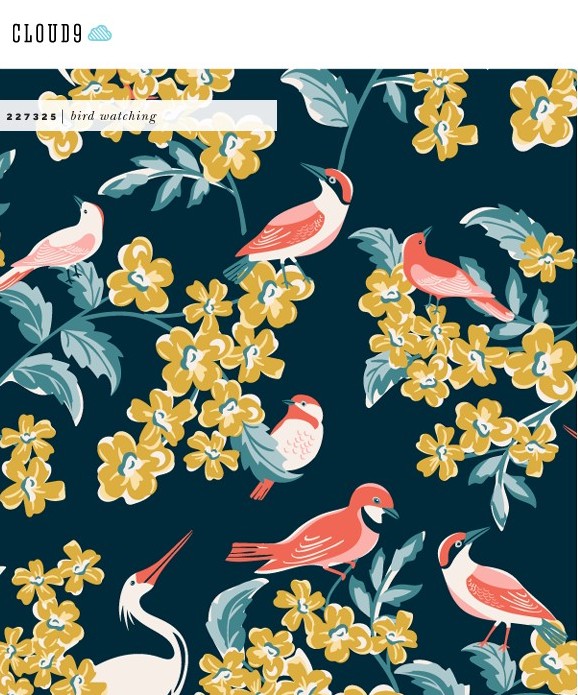
Here’s a shot of the main focus fabric featuring birds and cranes on an indigo background:

The colors in this piece are also deeper but wow, the design is really spectacular. And I have to say the companion prints look great with it. Just imagine the possibilities for fussycutting birds and cranes.

Wouldn’t these images make lovely inset circles? Playing around with some circles I had previously cut in freezer paper, I auditioned a bird and a crane . . .

. . . and then two birds and a crane . . .

. . . and then three birds and no crane:

The companion prints to the main focus fabric could easily be combined to make a striking quilt or table runner or wall hanging. I’m going to ponder about what to make with these fabrics. If you have any ideas, I’d love to hear them.

In the meantime, I’ll see if I can learn to love these fabrics just a bit more. Do you ever buy fabrics online and then find they don’t live up to your expectations?


Posted in Ribbon Box quilt, update | 3 Comments

What Have We Here?

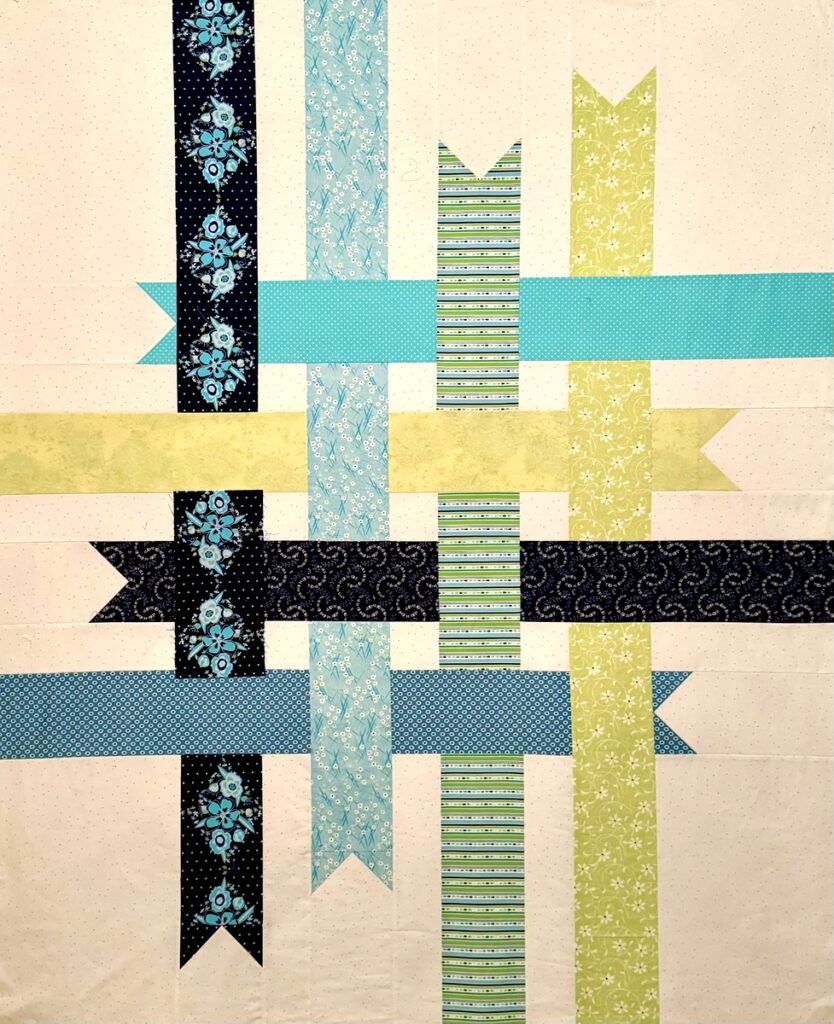
Can it possibly be?  A third version of the Ribbon Box quilt??

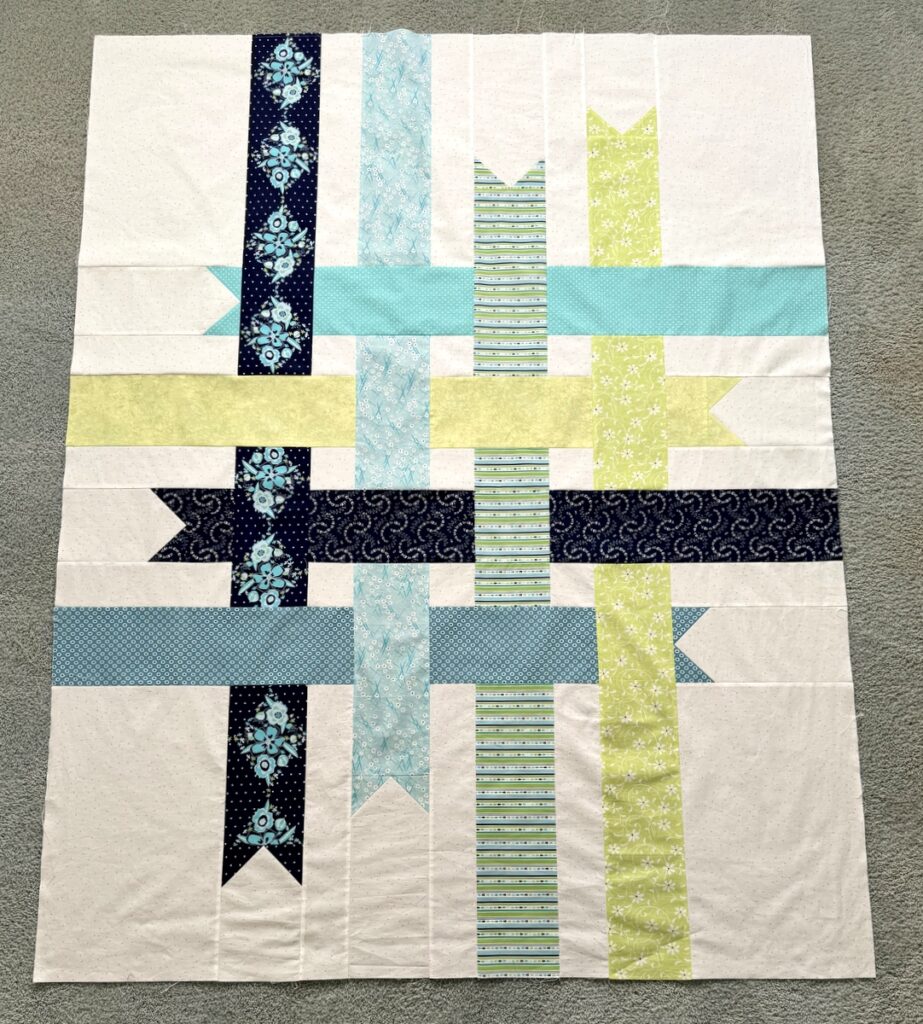
Yes, friends. This is what I have been up to lately. Last month, after completing Beribboned, my second version of the free Ribbon Box pattern from Cloud 9 Fabrics, I was working on a blog post describing how I eliminated several seamlines by sewing the quilt top together in three sections rather than nine rows and how I changed the original pattern’s dimensions (45″ x 59″) to come up with a larger quilt top (51″ x 65″). But I ran into difficulty with my post-in-progress because I hadn’t taken enough notes during the construction of Beribboned to complete the post to my satisfaction.

What to do? Why, make another version, of course. And I had just the fabrics in mind. In 2021 Riley Blake Fabrics came out with a lovely line called “Gingham Foundry” designed by My Mind’s Eye. Montavilla Sewing Center in Lake Oswego, where I teach, carried several fabrics from the line and I quickly scooped them up.

The Gingham Foundry line was anchored by the large-scale floral on a dark blue background (first vertical ribbon in the photo above) but the design that made my heart sing — quite literally! — was this text print featuring the lyrics to “What a Wonderful World:”

The song, with words and music by George David Weiss and Bob Thiele, was made famous by the one and only Louis “Satchmo” Armstrong, who recorded it in 1967. Others have recorded it but Satchmo’s version is by far the most well known.

I loved the idea of incorporating the text print in a Ribbon Box quilt. This was my initial fabric pull:

I added another print from the Gingham Foundry collection that I found online last year and pulled two other fabrics from my stash, a dusty blue polka dot and a gold tone-on-tone blender. Here are my fabric choices already cut into strips or rolled up to measure roughly 5″ wide, laid out in my planned setting:

After looking at that photo, I could see that the gold blender (fourth vertical strip) was much too strong so I rummaged around in my drawer of large scraps and found a softer shade of gold that seemed just right. Lo and behold, there was just enough of it to make a ribbon.

Here are the eight ribbon prints cut into 5½”-wide strips and laid out on my ironing board. The replacement gold fabric is on the upper right. I labeled the stacks 1V, 2V, 3V, 4V for vertical and 1H, 2H, 3H, 4H for horizontal (though somehow I got horizontal rows 2 and 3 reversed in this photo):

I also cut my background fabrics and labeled them by size:

This really helped in the assembly of the sections. Now take a look at the three sections, ready to be sewn together:

Notice anything unusual?

In vertical rows 1, 3, and 4, I have inserted what I call “placeholders,” scraps of fabric sewn with the back side showing. Once the three sections are sewn together, I’m going to replace those seamed pieces with single strips of the appropriate ribbon fabric to keep the flow of the fabric designs uninterrupted. In my next post I’ll show you how I did that. Do come back to see!

Posted in Ribbon Box quilt, update | 1 Comment

It’s a Wrap: Beribboned

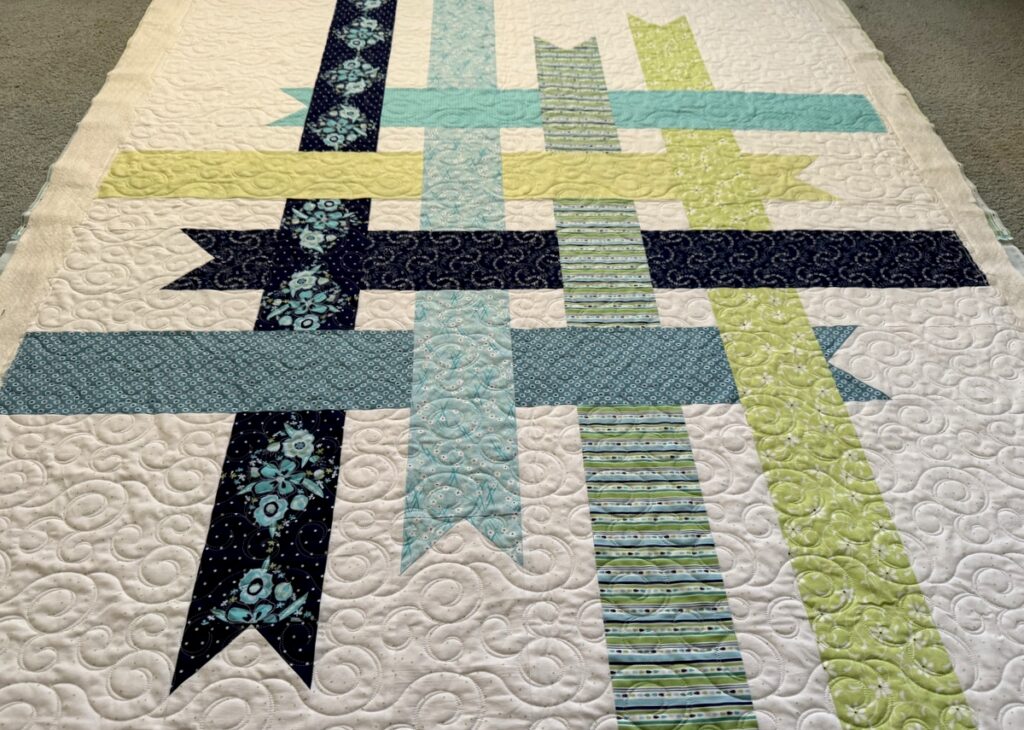
Beribboned is complete — and I am so happy with it!

I finished tacking down the binding yesterday and added a label to the simply pieced back:

A close-up of the label:

(I took a lot of photos while making the label so I can show you in a future post how I made my trademark round label and added a ring around it.)

When I make a label with an outer ring, I sometimes stitch in the ditch around the seam if the quilting motif suggests it might not be too obvious on the front. In the next photo you can see the circle on the front . . .

. . . but I know it will totally blend into the overall quilting when the quilt is laundered.

You can probably tell all of the above shots were taken indoors. It’s rainy in Portland today but there was a break in the clouds and even a spot of sun so my visiting twin sister Diane and I quickly headed to the back yard for a photo op in good light:

If you look in the lower left corner of the quilt you can probably see the circle where I stitched the label on the back — but I’m guessing you wouldn’t have noticed it if I hadn’t pointed it out.

Beribboned is based on a free pattern called Ribbon Box from Cloud 9 Fabrics. I knew it was the perfect pattern to display three fabrics from Mo Bedell’s “Party Dress” line for Blue Hill, fabrics that have been in my stash for close to 15 years. The other five fabrics in the ribbons were also from my stash, as was the background and binding fabric.

Right now Beribboned measures 51″ x 65″ but it will shrink a bit after going through the washer and dryer, which is where it’s headed shortly.

Did I mention that Beribboned was inspected by Coco, who also likes it very much?


Posted in cats, family, Ribbon Box quilt, update | 6 Comments

Adding to My Stash

After writing at length in my last blog post about a line of fabrics seen online that I was using as an example in critiquing the Ribbon Box quilt pattern, the most surprising thing happened:  I fell in love with the fabrics! The line I’m referring to is “Flower Garden” by Heather Dutton of Hang Tight Studio.

I had seen snippets of the eight fabrics in the line because they were cut into 5″-wide ribbons in the version of the Ribbon Box quilt you see here . . .

. . . and I was curious to see more of the focus fabric — a directional print with birds and flowers on a dark background. So I went to the Cloud 9 Fabrics website and looked it up. Oh my! There’s so much more to the print! Take a look:


You can see the full line displayed at this link to the Cloud 9 Fabrics website:
https://cloud9fabrics.com/wp-content/uploads/2022/11/Flower-Garden-catalog.pdf

In addition to photos of the fabrics, there’s a lovely write-up about Heather Dutton describing her style as bridging “the gap between retro and contemporary design with a touch of whimsy mixed in” and noting her inspiration for creating this particular line.

Friends, the more I looked at the fabrics, the more I coveted them. Before I knew it, I had ordered the focus fabric and five of the companion prints through three online sellers. The fabrics should be arriving in the next day or two.

While I could make yet another version of the Ribbon Box quilt using these fabrics, I have another pattern in mind. I need to wait till all the fabrics have arrived before making a final decision.

Surely I’m not the only one who has succumbed to such temptation . . .


Posted in Ribbon Box quilt, update | 7 Comments

Thoughts on the Ribbon Box Quilt Pattern — Part 2

This post is a follow-up to my post of Sept. 23 titled — no surprise — “Thoughts on the Ribbon Box Quilt Pattern — Part 1.” I’ve been procrastinating in writing Part 2 because it involves being critical of the directions for cutting and sewing the quilt. There’s just no way around the criticism, though, which I hope will be regarded as constructive. My motivation in pointing out what I see as problematic and explaining what I did differently is meant to help quiltmakers who are as enamored of the design as I am and want to make their own versions. (It’s also a guide for me because I do see at least one more Ribbon Box quilt in my future!)

Let me remind you that Ribbon Box is a *free* pattern from Cloud 9 Fabrics. How wonderful is that? This link will take you to the website where you will see the quilt made up in four different versions featuring fabric lines by designers for Cloud 9. You can view and print a five-page pdf pattern of any of the four versions. For this post I’m referring to the version made with “Flower Garden” fabrics by Heather Dutton of Hang Tight Studio because the fabrics show up the best in the photos I’m taking to illustrate what I did.

The first photo (page 1 of the pattern) shows you the finished quilt:
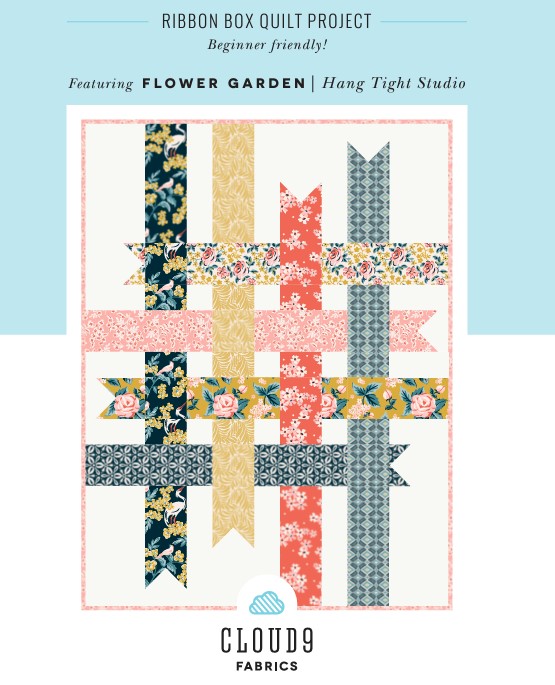
Note that each ribbon is presented in three sections because of the interweaving of the other ribbons.

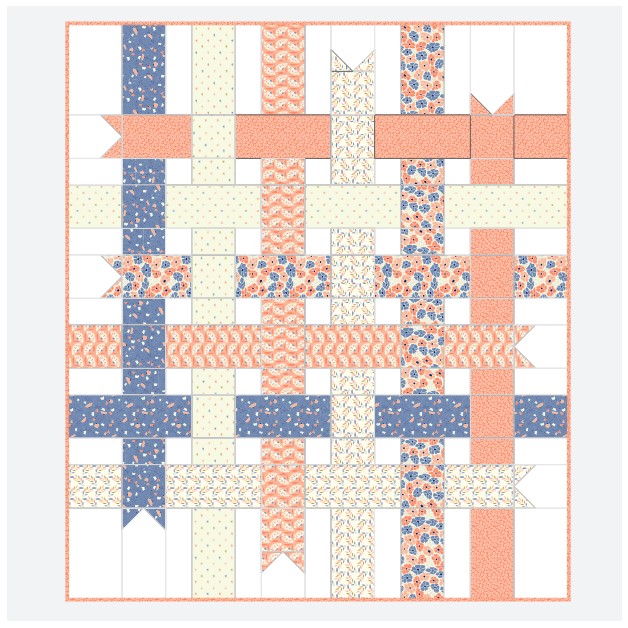
The next photo (page 4 of the pattern) shows you how the quilt is constructed in nine horizontal rows:
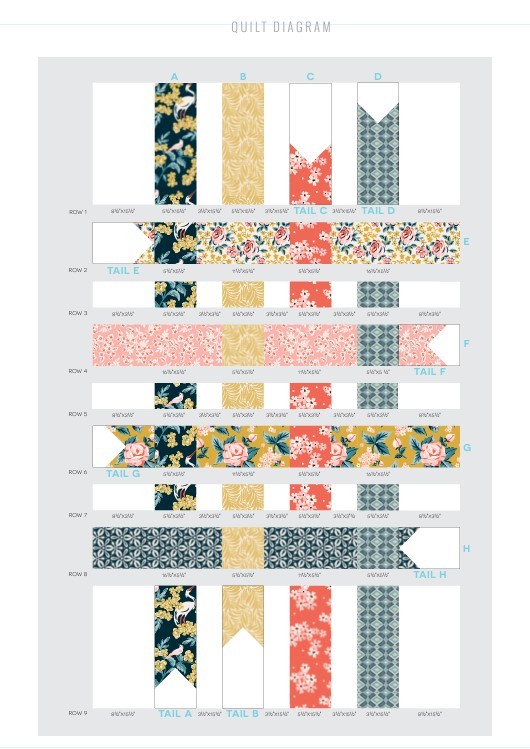
I did NOT construct my quilt this way! I realized while reviewing the directions that piecing the quilt in rows would create several seams where they didn’t necessarily need to be and I could see that these seams would disrupt the flow of the design printed on the fabrics if care weren’t taken to match the design. It’s important to note that this disruption happens only in the vertical rows — Rows A, B, C and D.

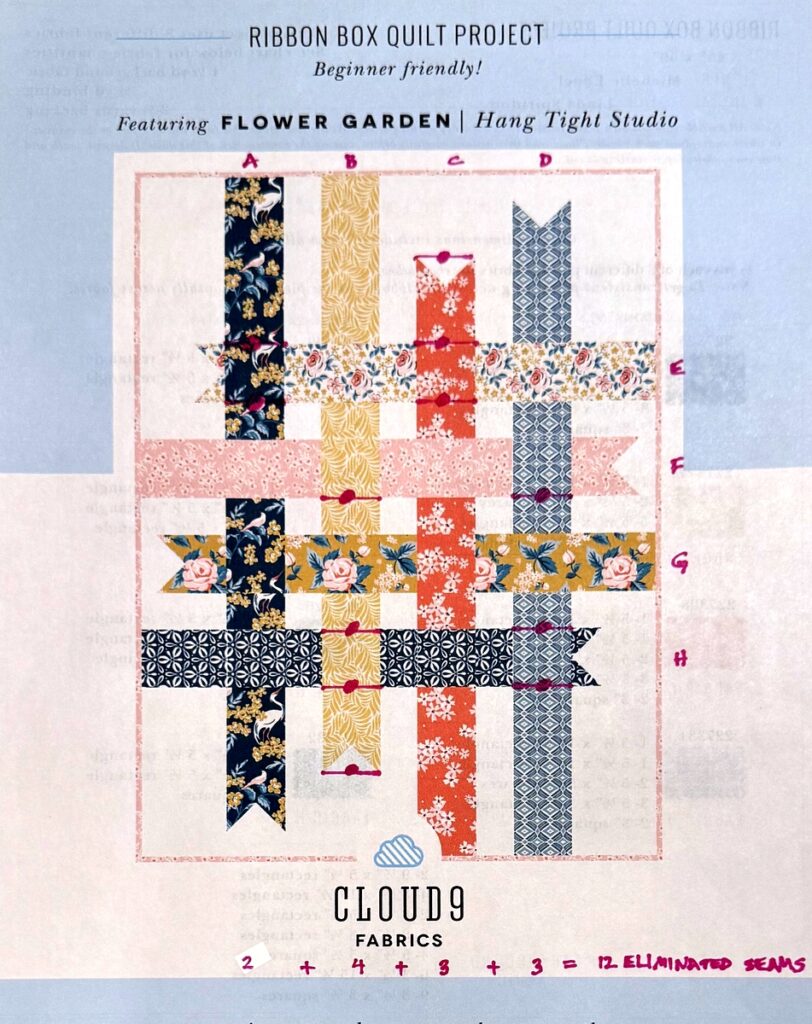
In the next photo look at the circles I’ve drawn with a pink Sharpie and you can see where I eliminated 12 seams: two in Row A, four in Row B, and three each in Rows C and D:
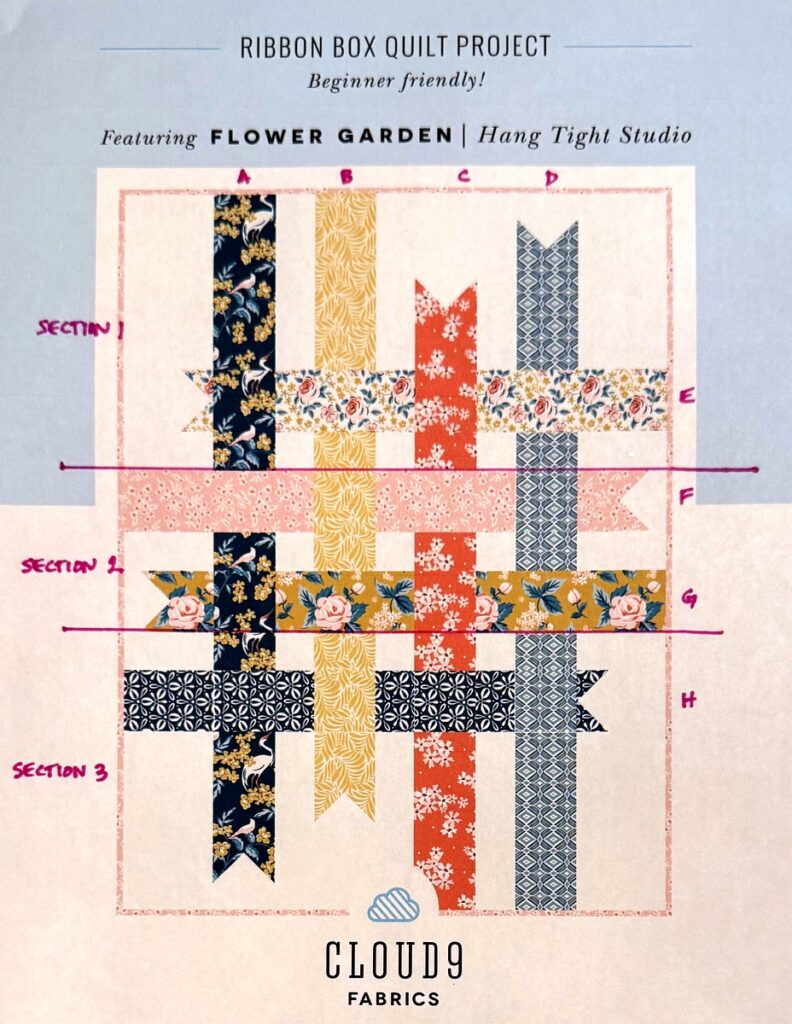
In the next photo I show how I constructed my first version (the Picnic Quilt) in three sections, rather than in nine rows (much more detail on this in a subsequent post!):
Now let’s think a bit about fabrics. If you were auditioning fabrics for a Ribbon Box quilt, it might seem smart to choose fabrics for the vertical rows (A,B,C,D) that are small scale random prints (i.e. non-geometrics, non-plaids, non-checks for which seamlines would not be immediately noticeable) or perhaps solids or blenders that read as solid. But maybe you have a medium to large-scale focus fabric that you want to highlight by putting in one of the two longest ribbons, vertical rows A and D. In that case, you want to eliminate as many seams as possible to preserve the design, right?

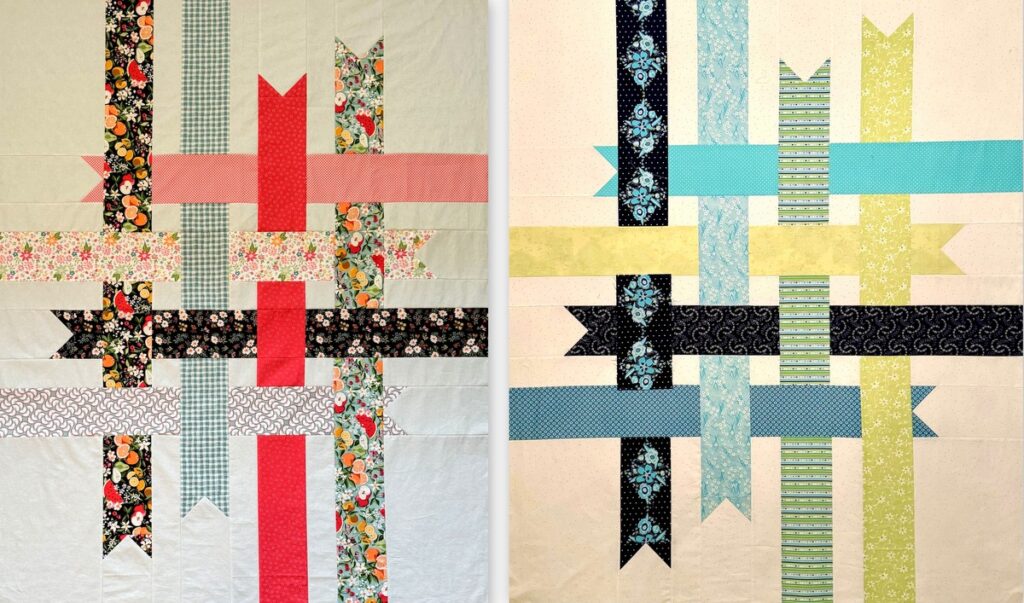
Years ago I took a design class in which the instructor said most people look at the upper left section of an image first and then their eyes follow a Z pattern ending in the lower right corner. Perhaps that’s why I tend to put my favorite block or my favorite print in the upper left corner of my quilts. In both of my Ribbon Box quilts I put my main focus fabric in vertical Row A:

With this mind, let’s examine the ribbons in the Cloud 9 version featuring “Flower Garden” fabrics. First take a look at that gorgeous focus fabric in Row A (first vertical ribbon):

It features a large white crane and a small pink bird surrounded by foliage. At the top of Row A in the first section of the ribbon, the crane’s head has been cut off. In the second section of the ribbon the crane is missing the middle of its body. Only in the third section of the ribbon is the crane presented intact. Wouldn’t it have been better if the crane were intact in all three sections? And wouldn’t it have been more pleasing to the eye if the crane were in the center of the ribbon because it’s the largest element in the fabric?

Now look at Rows B and C (second and third vertical ribbons). Row B is a small-scale random print in gold that isn’t much affected by seamlines. Row C is a medium-scale random floral on a coral background; it’s interrupted just a bit by seamlines but maybe not enough to try to change. Oh but Row D! It’s a geometric print and the interruption in the flow of the design by four seamlines is not only obvious but very distracting. I would have been able to eliminate three of the seams and would probably have matched the design in the other seam. In addition, I would have cut the strips for Row D in such a way that the elongated diamond was centered in the strip.

Now for the horizontal rows:

Notice how nicely balanced the medium-scale roses are in the first horizontal row (Row E). Row F (small print) and Row H (geometric) both look fine. As for Row G, I would have centered those lovely cabbage roses in the strip rather than having them ride along the bottom.

But honestly, these are not things I would have necessarily noticed had I not made my first version of Ribbon Box. Speaking of which, let’s take another look at that quilt, the one I call the Picnic Quilt:
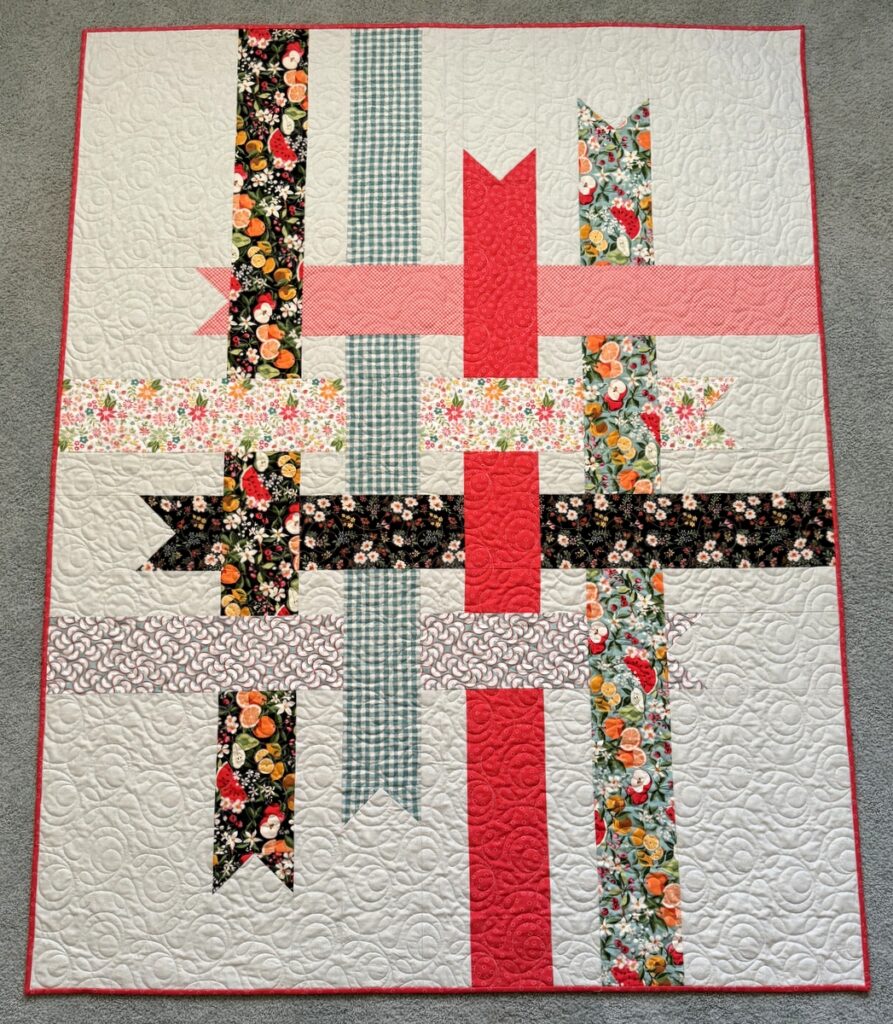
As noted above, my favorite bold print is in the upper left section of the quilt (Row A) and its companion print in a different colorway is in the other long ribbon (Row D). In both Row A and D — the first and fourth vertical rows — the top and bottom sections on both rows were cut in one piece (not counting the pointed ends of the ribbons). In the middle section of Row A, I matched the design in the two rows. I showed this in Part 1 but here it is again:
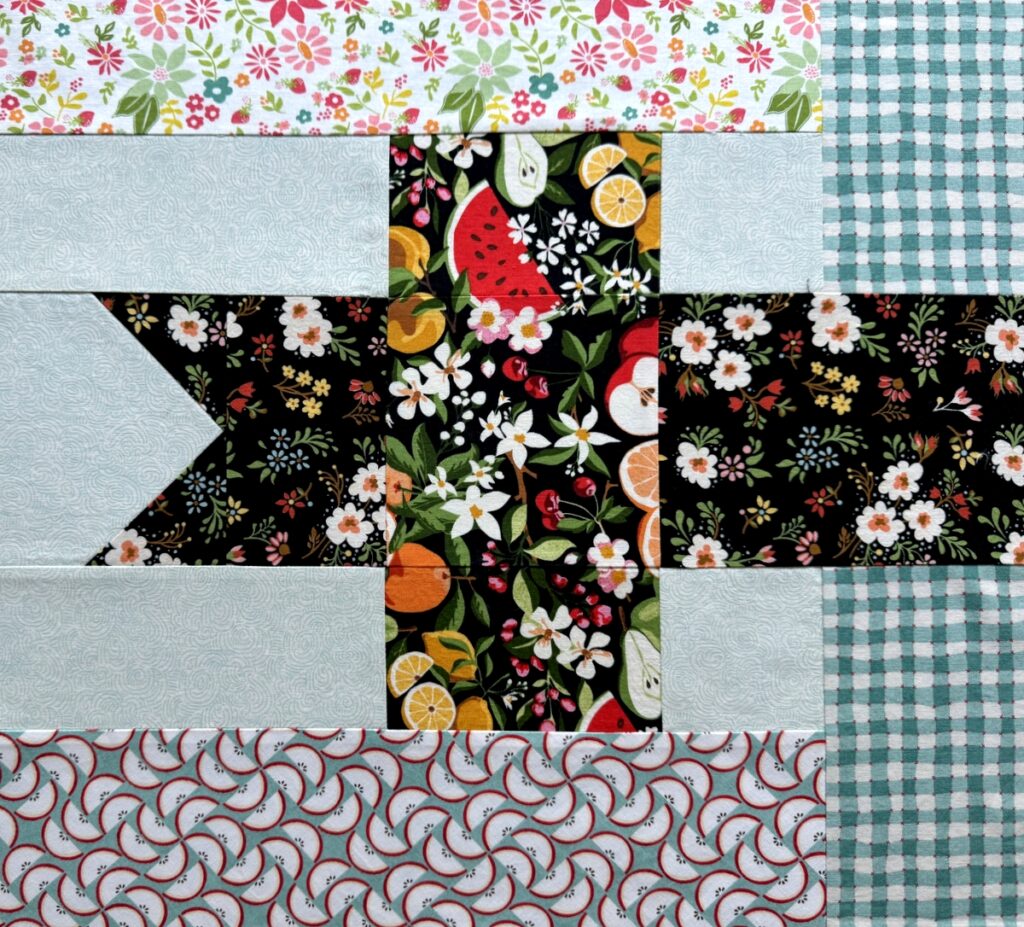
In Row D, I matched the design in one seam and was able to eliminate the remaining seam. Here it is again:
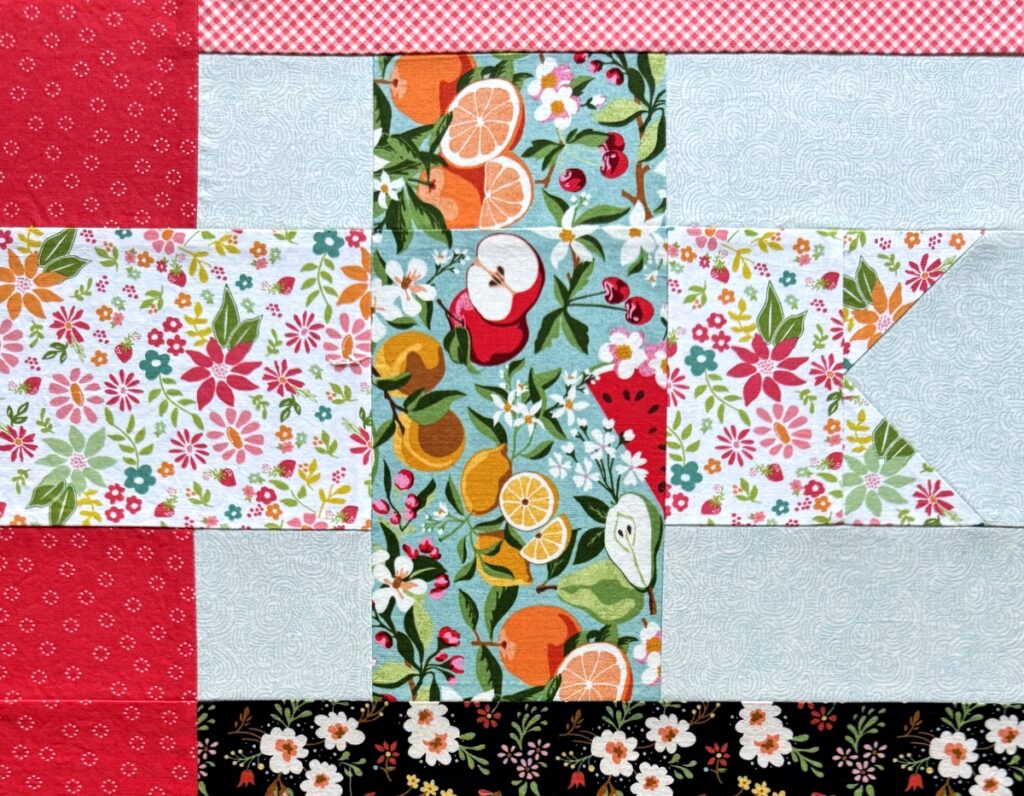
Matching the designs was a pain, although it was worth it in my book. But I did come up with an alternative construction method in my second version, which I will get to in a subsequent post. You won’t want to miss that!

The point I want to make here is that the strips of fabric in my Picnic Quilt were cut mindfully in a way that showed the design of each fabric to its best advantage — at least in the mind of the quiltmaker (yours truly).

And here’s one more thing I wish I had mentioned in Part 1 about choosing fabric:  If you are working with a directional print, you’ll have to decide before cutting whether the ribbon is going to be horizontal or vertical in your quilt because it will make a difference in whether you cut on the crosswise or lengthwise grain (which takes us back to the issue I have of starting with 1/3 yard cuts for every ribbon, which I wrote about in Part 1).

Are you still with me? I hope so! It means you are interested in making your own version of the Ribbon Box quilt and, like me, want to show your carefully curated fabrics in their best light. So please come back for Part 3 in which I show you how I sewed my second Ribbon Box quilt together and in so doing managed to eliminate a few more seams.


Posted in picnic quilt, Ribbon Box quilt, update | 3 Comments

Quilting Loveliness

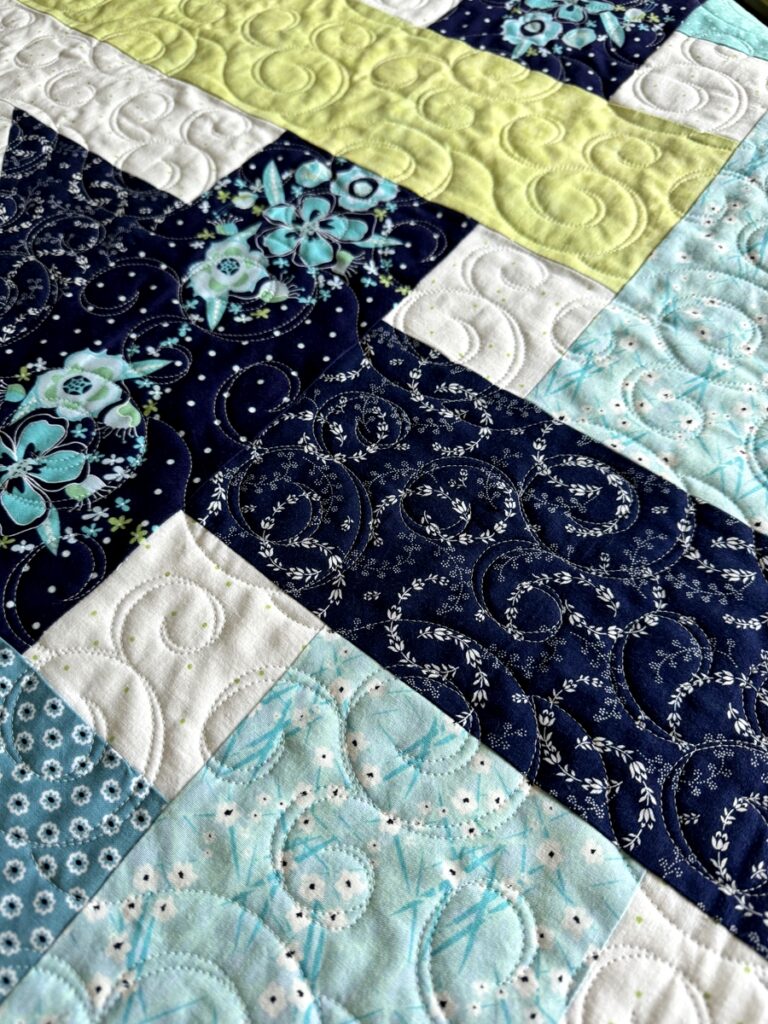
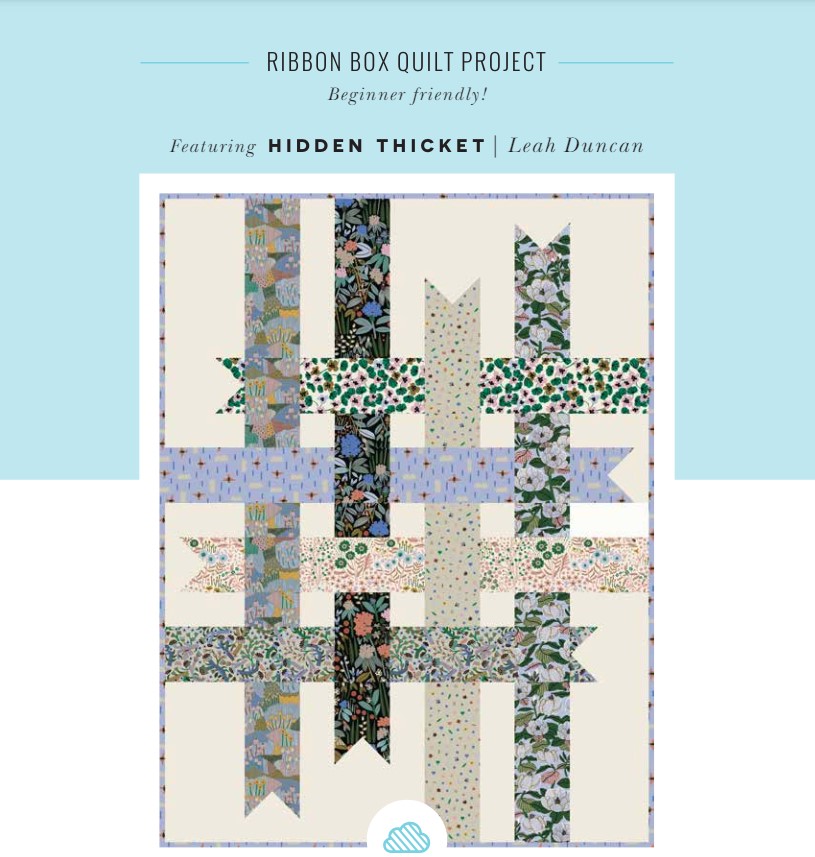
My second Ribbon Box quilt is back from the quilter. Friends, I am thrilled with the result! For those of you new to my blog, Ribbon Box is a free pattern from Cloud 9 Fabrics. It was designed to showcase eight fabrics from a single line but of course any pleasing combination of eight fabrics can be used. Before I show you the entire quilt, let me tease you with a few close-ups:

When it came time to pick a quilting motif, I knew immediately there was only one possible choice:  “Embellish” by Quilts Complete. Karlee of SewInspired2Day used it on my first quilt finish of the year, Celebrating Spring, so it was fresh in my memory.

I often choose loopy quilting designs on quilts with lots of straight lines but I had another reason for choosing Embellish. Can you guess what it is? I’ll give you a hint. In the next photo you can see all eight fabrics I used for my ribbons:

Now take another look at the quilting. Do you see what I see? Yes — ribbons!

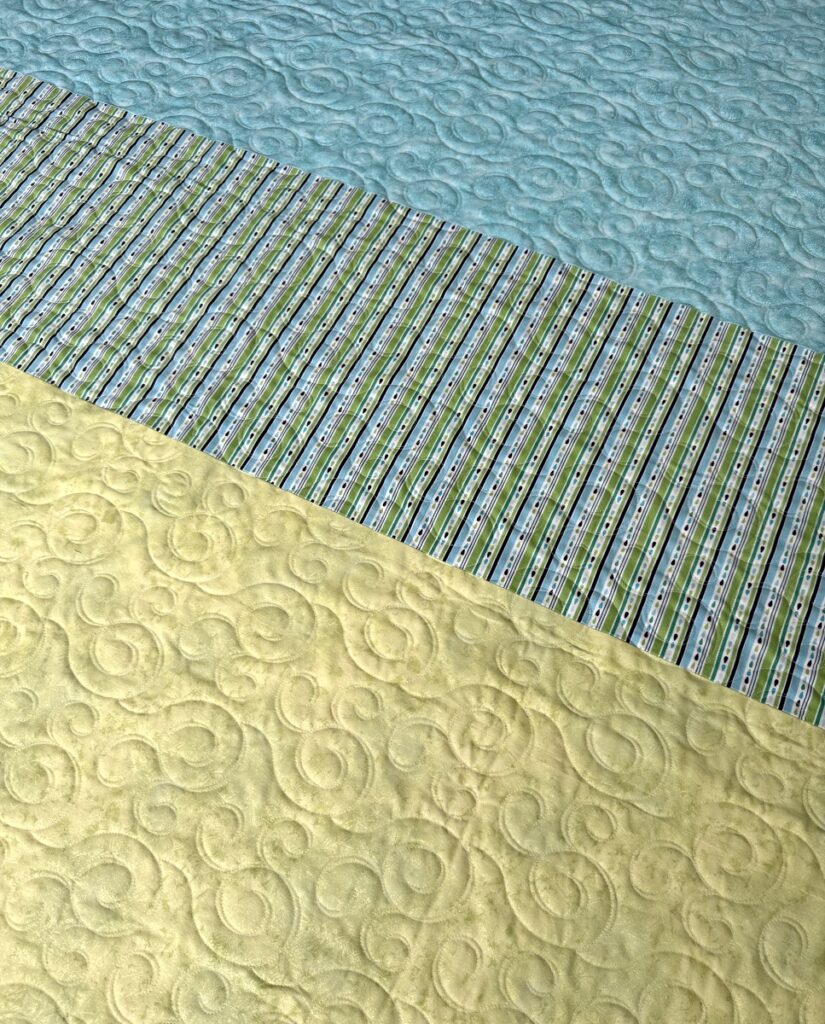
The simple pieced back — just three fabrics — shows off the quilting design nicely:

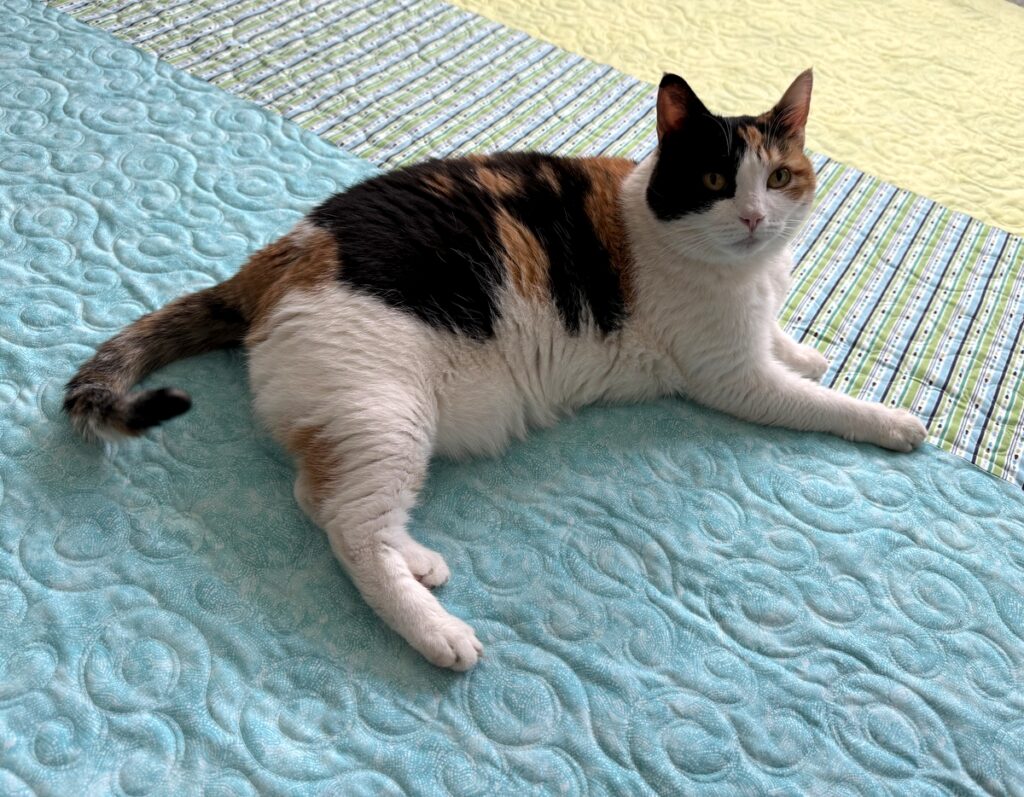
Coco seems to approve:

Either that or she just enjoys flopping on whatever I’m working on.

The Dear Husband and I have been so busy working outside — it’s time to put the summer garden to bed — that I haven’t even trimmed the quilt yet but I hope to get that done and move on to the binding and label this week. I think I’m going to bind the quilt in an indigo blender by Maywood to set off the two dark prints — the floral print that was my focus fabric and the vintage indigo vine print:

By the way, when I chose Embellish as the quilt motif, the name I needed to give this quilt popped into my head immediately:  Beribboned.


Posted in Ribbon Box quilt, update | 3 Comments

It’s A Wrap: The Picnic Quilt

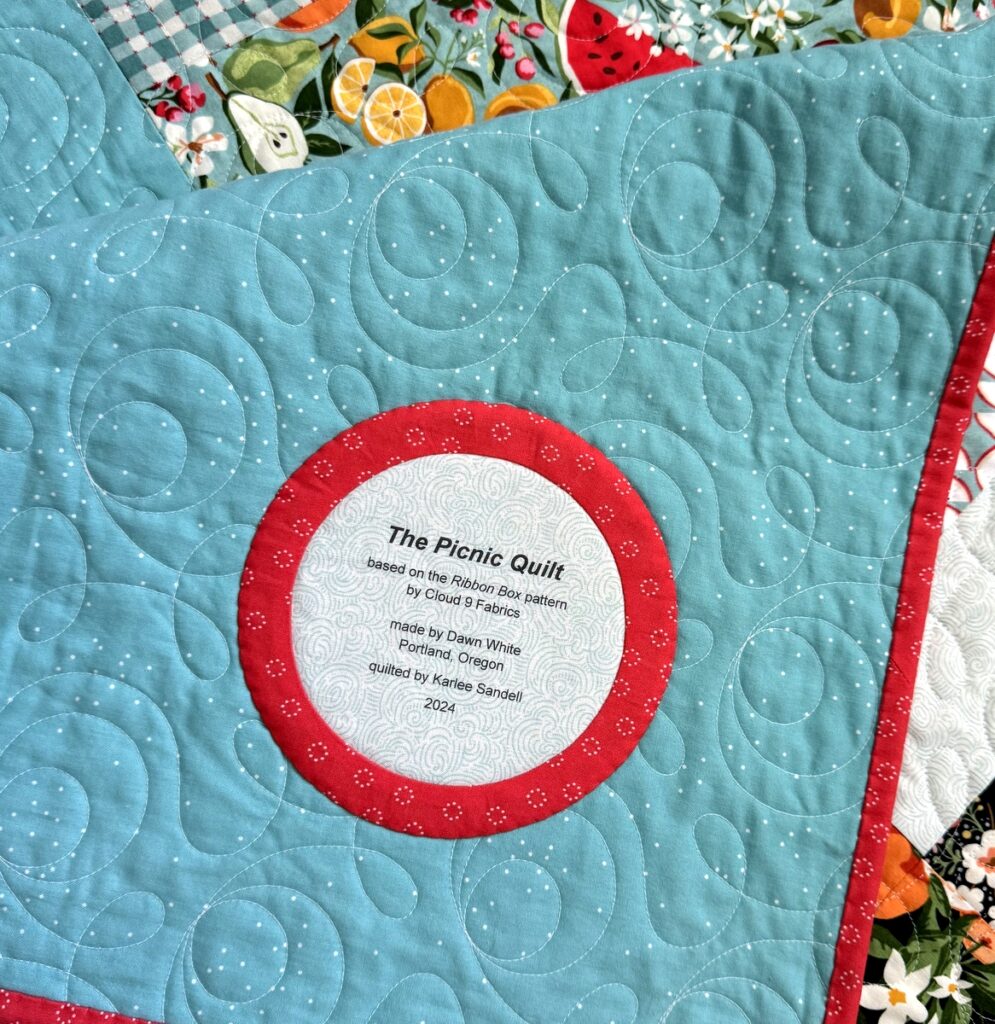
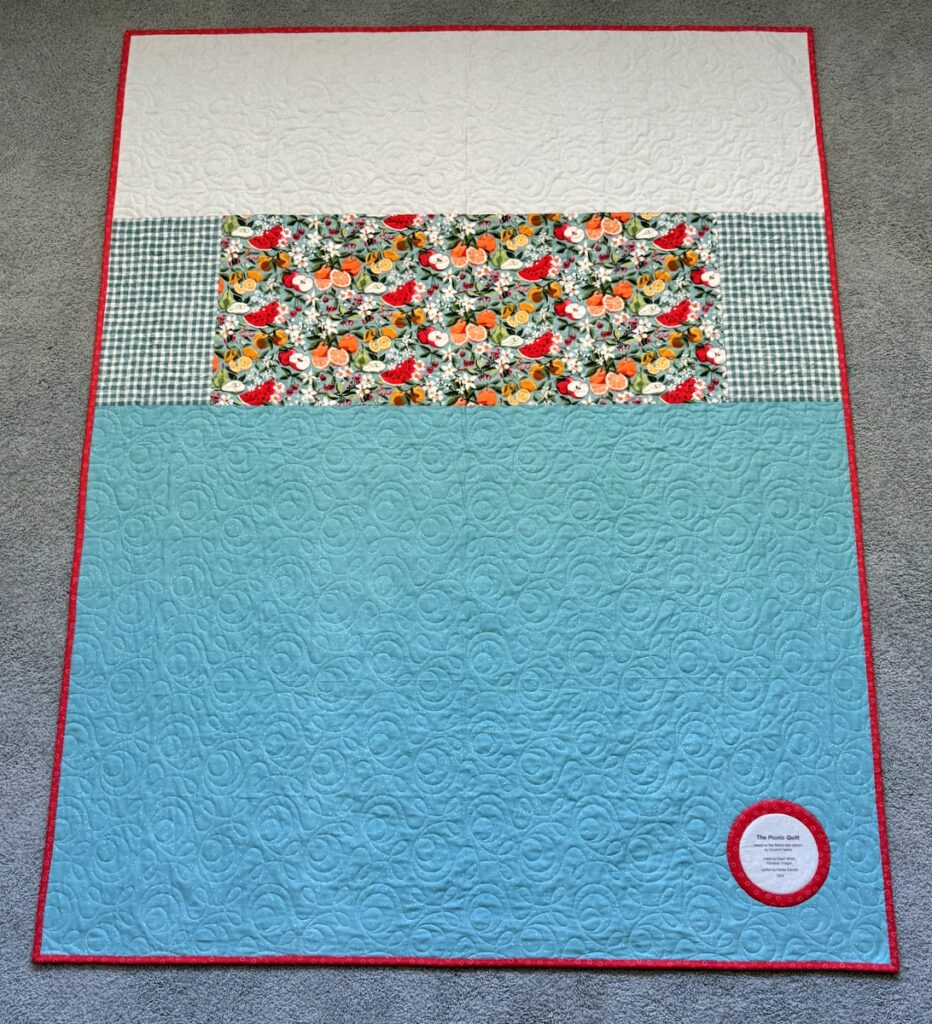
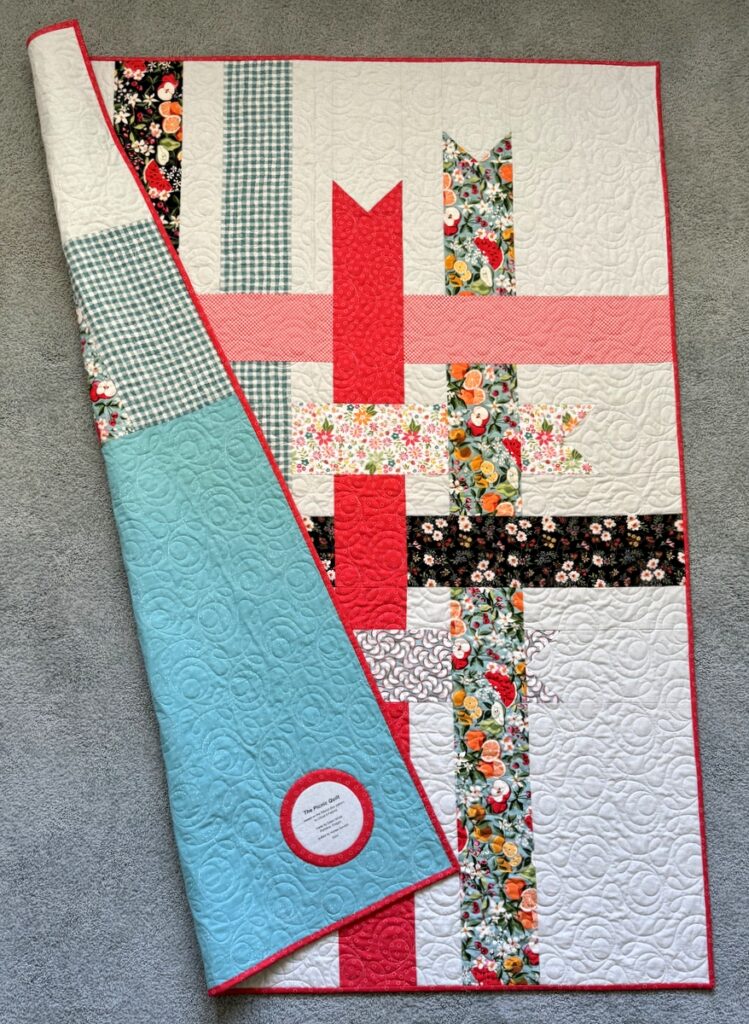
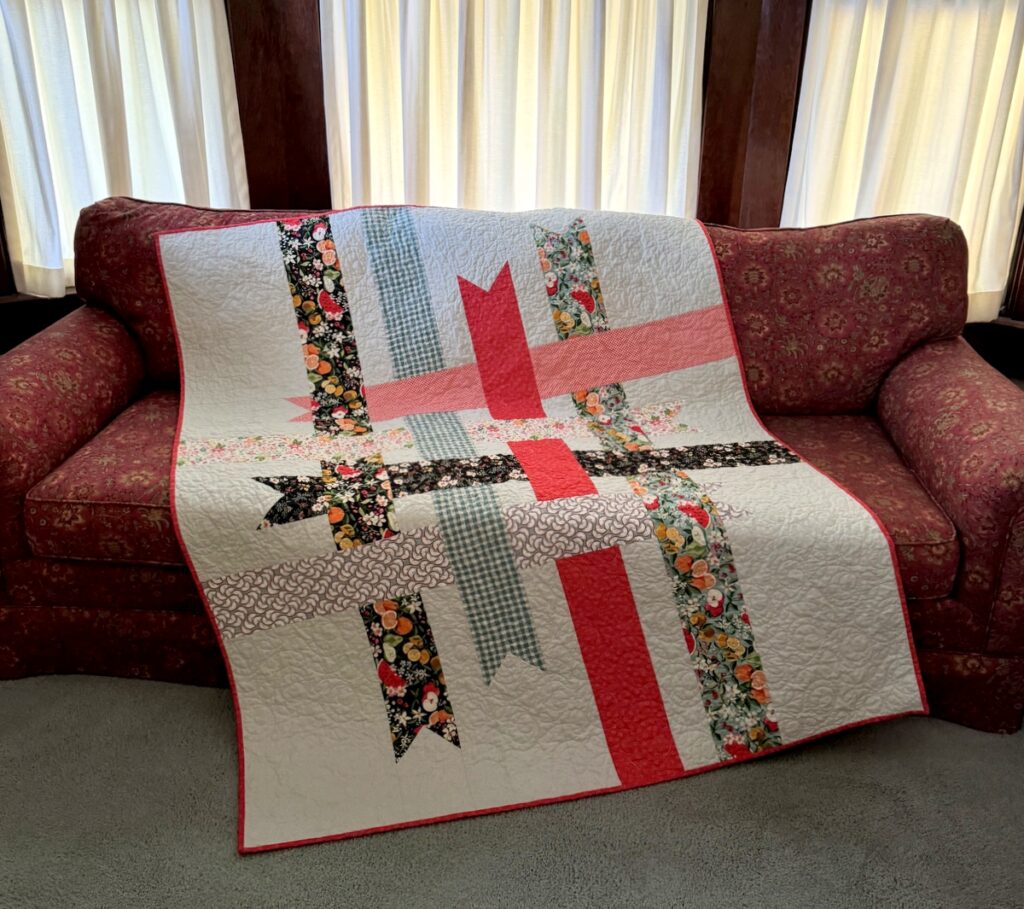
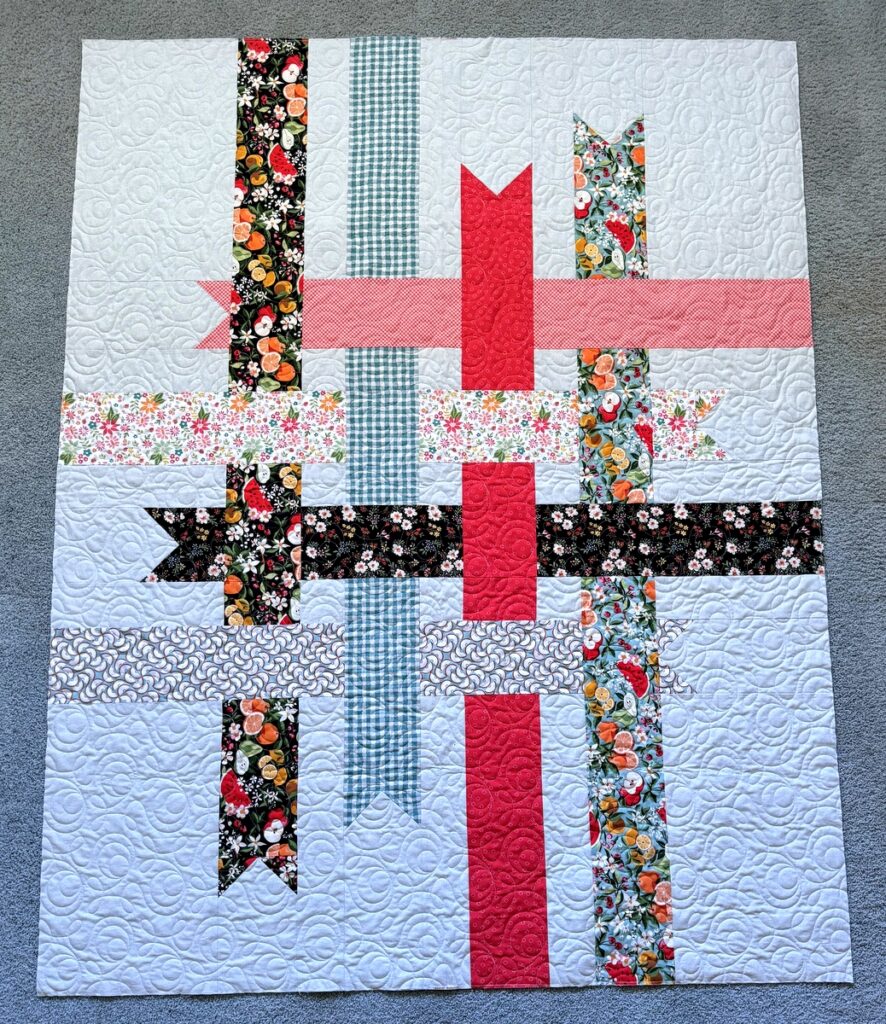
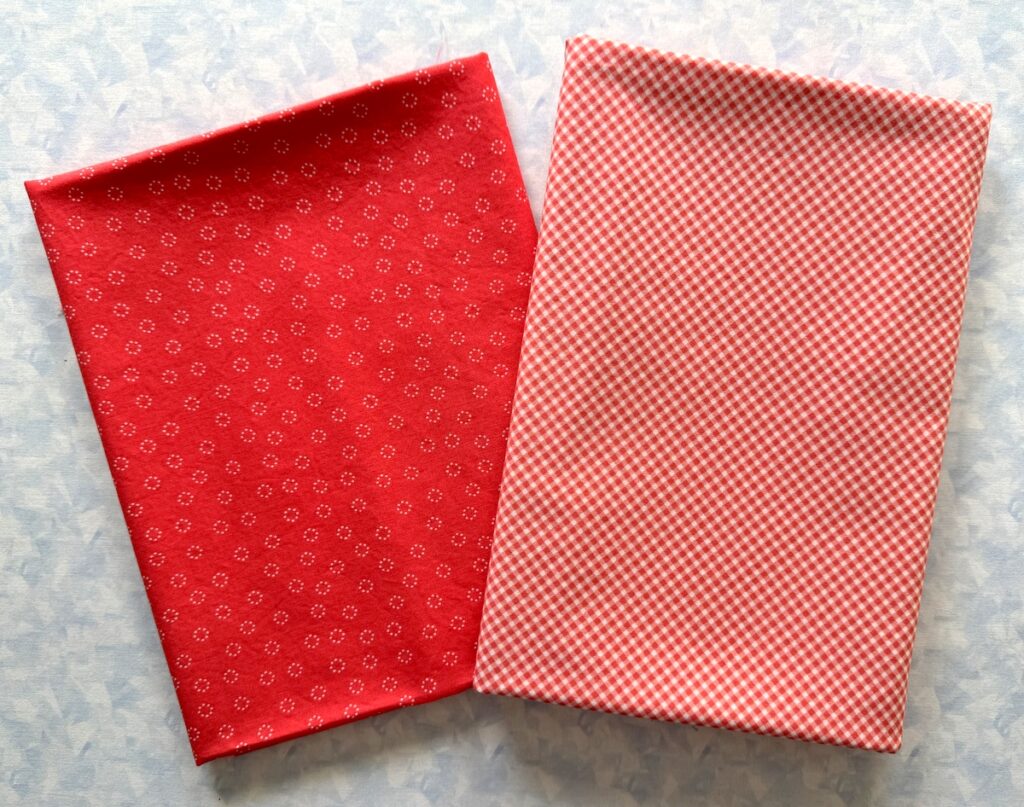
I call it the Picnic Quilt but you know the design better as the Ribbon Box quilt, a free pattern from Cloud 9 Fabrics. It’s bound with the same fabric that you see in the prominent red ribbon which reads as a solid although it’s a print containing small random white circles. You can see the print better in this next shot of the label:

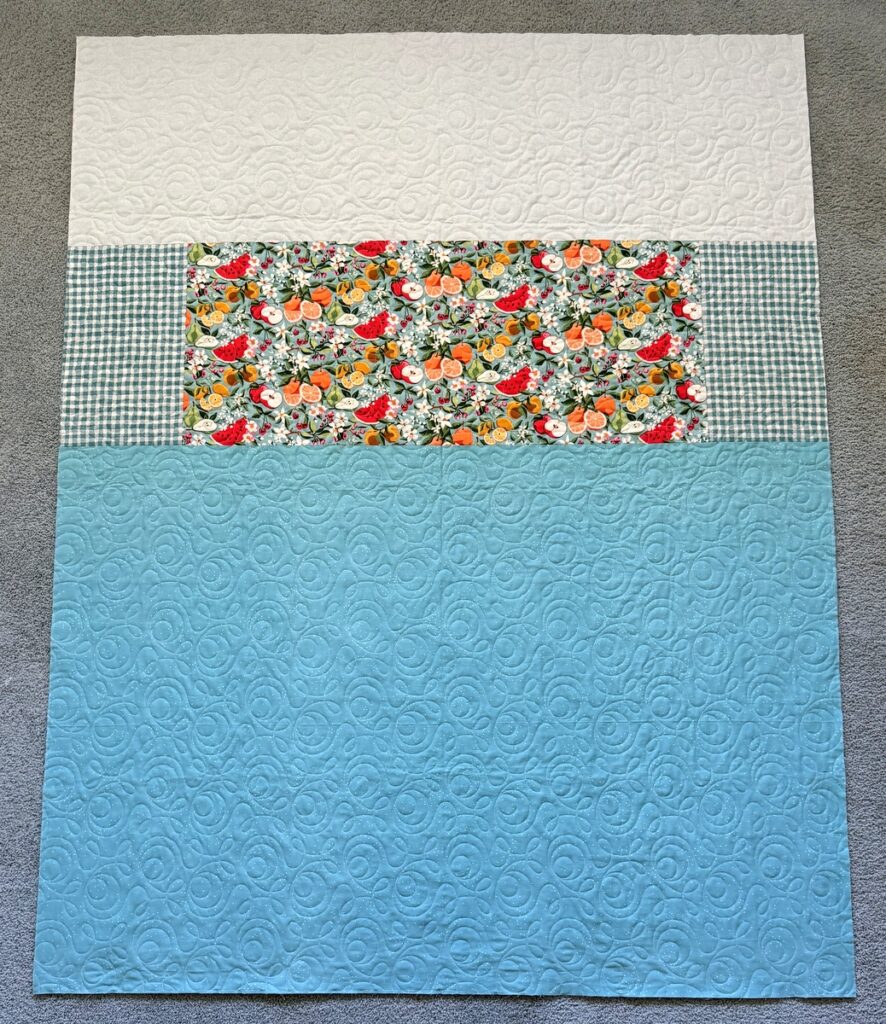
A couple views of the back of the quilt, very simply pieced:

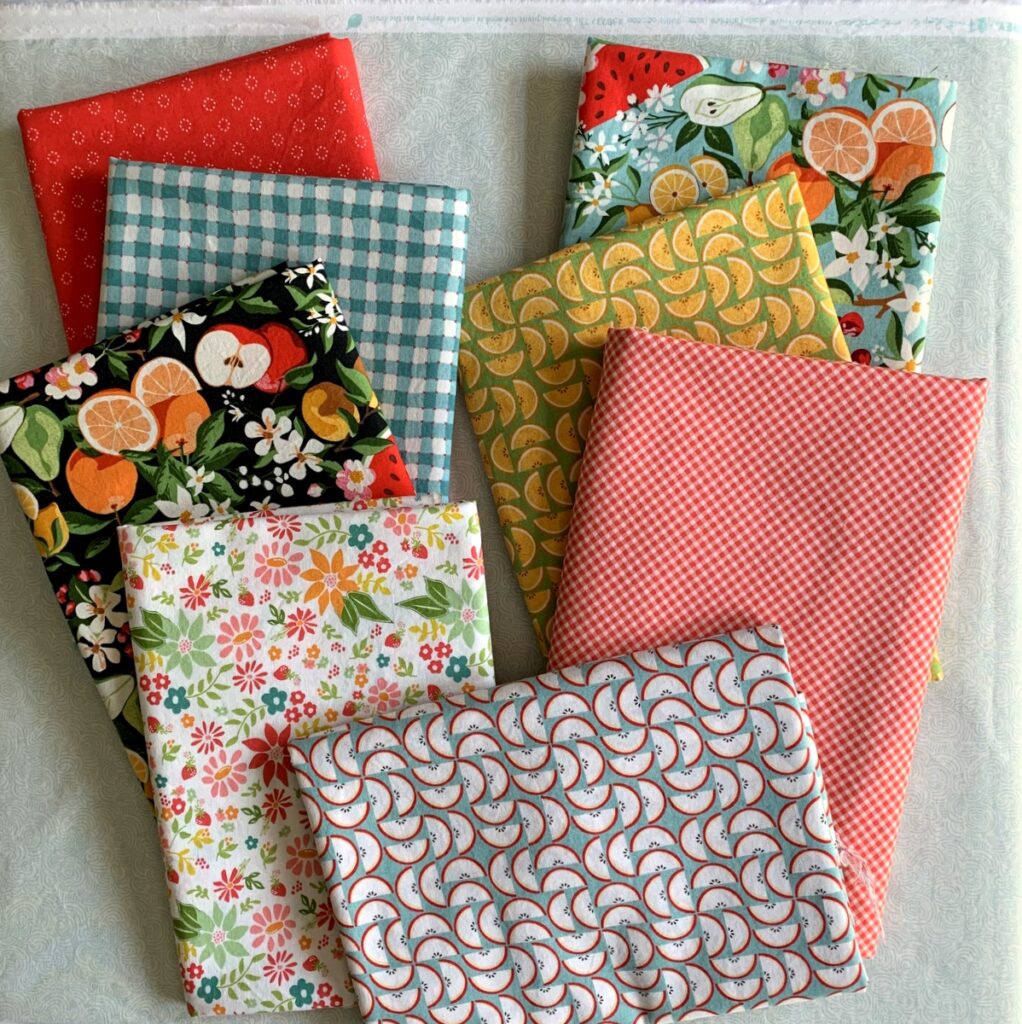
I used fabrics from BasicGrey’s “Fruit Loop” line and Sherri and Chelsi’s “Pink Lemonade,” both lines for Moda Fabrics. The back includes a large piece of aqua “Sprinkle” fabric from Cotton+Steel that’s been in my stash since 2015, judging from the information on the selvage.

The Picnic Quilt measures 50″ x 64″ after laundering. Here’s a shot of it all soft and puckery from its trip through the washer and dryer:

The Picnic Quilt is ready to throw over a lap or snuggle under for a nap. I think I’ll give it a test run!


Posted in picnic quilt, Ribbon Box quilt, update | 3 Comments

Thoughts on the Ribbon Box Quilt Pattern– Part 1

That’s my second version of the Ribbon Box quilt — and it’s at the quilter’s as I write this! Having made two versions (so far), I have some very specific recommendations for those of you who are thinking of making your own version. Let me say this up front:  I think you should go for it! It’s a striking contemporary design featuring interwoven ribbons.

What sets Ribbon Box apart from other quilt patterns featuring ribbons is the trimmed ends, adding a touch of elegance. The simplicity of the design allows the eight fabrics used for the ribbons to stand out against the background fabric. Once you have the fabric strips cut and the ribbons arranged to your liking, sewing the pieces together goes pretty quickly. But as much as I like this design, I have some major issues with the fabric requirements as well as the way the fabrics are cut and sewn.

Before I lay out those issues, here’s some background information:  Ribbon Box is a free pattern from Cloud 9 Fabrics. It’s part of Cloud 9’s Super 8 Quilt Series:  quilt projects that use eight prints from a single line. This link takes you to the Cloud 9 website where you can see four versions of Ribbon Box featuring different lines of fabric by designers for Cloud 9. For each version you can enlarge the cover photo, view a pdf, and print the five-page pattern. The quilts finish at 45″ x 59″. (Note: I added 3″ all around on my two versions for a finished size of 51″ x 65″.)

So . . . here comes my first recommendation:  Don’t cut your fabrics yet! In fact, don’t even buy your fabrics until you’ve read this post.

Here’s why:  the pattern calls for each ribbon to be cut from a third of a yard of fabric. That’s a strip of fabric cut 12”by WOF (width of fabric, measured from selvage to selvage, giving you roughly 40″ of usable fabric after the selvages are removed). From each 12″-wide strip you cut at least one and in some cases two 5½”-wide strips which are then subcut into rectangles and squares.

I have three major problems with using ⅓-yard cuts. The first is that multiple strips cut from a single 12″-wide piece of fabric will not contain the same part of the design printed on the fabric. That won’t make much difference in a small random print but it will certainly make a difference in a large scale print. The three longest ribbons require a second 5½” strip cut.

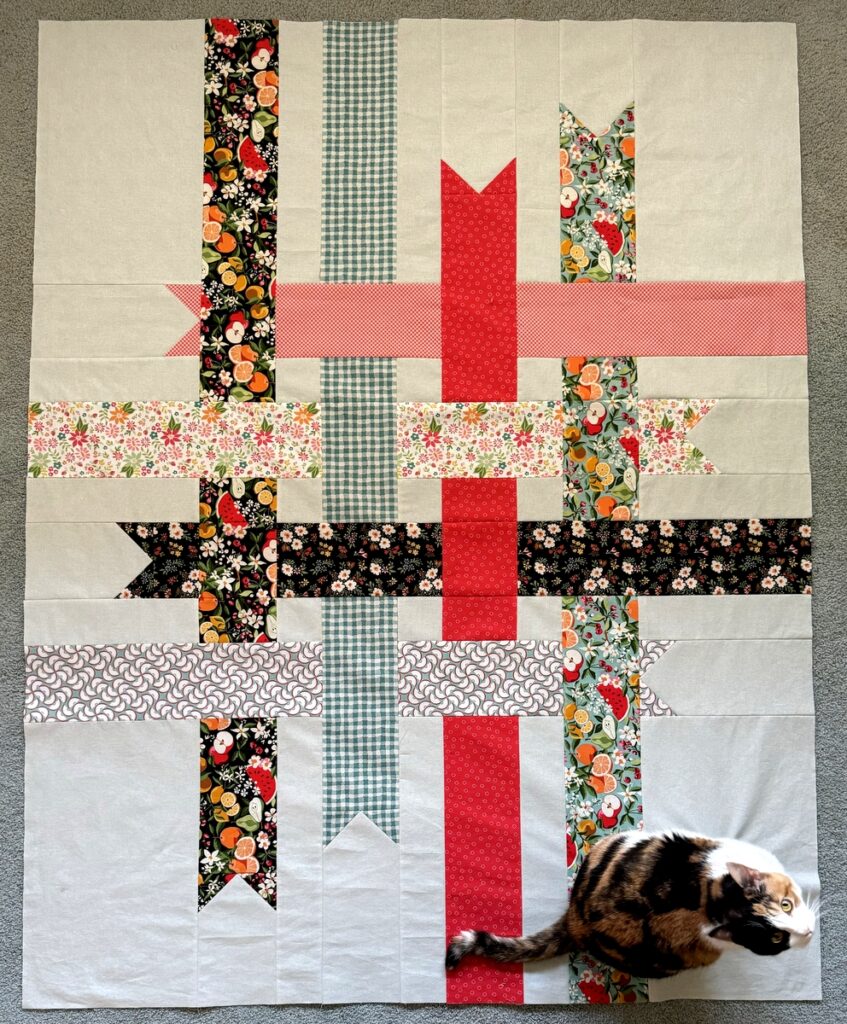
The second problem is that cutting 5½” strips without considering the design on the fabric may leave you with a strip of fabric that doesn’t show the print to best advantage. Take another look at my quilt top at the top of this post. The first vertical ribbon was obviously fussycut from my main focus fabric. Ditto with the third horizontal print, in which the white floral garlands on a navy background are evenly balanced in the strip. That’s because I learned from making my first version that attention needs to be paid to what elements of the fabric design wind up in each 5½” strip (more on that below).

The third problem is that some prints look better cut on the lengthwise grain (parallel to the selvages) than on the crosswise grain (selvage to selvage). Obviously you need more than 12″ of fabric if you want to cut on the lengthwise grain. You also need more than 12″ if you want to match a particular element on a crosswise grain so that each segment of ribbon looks like it was cut from one continuous strip.

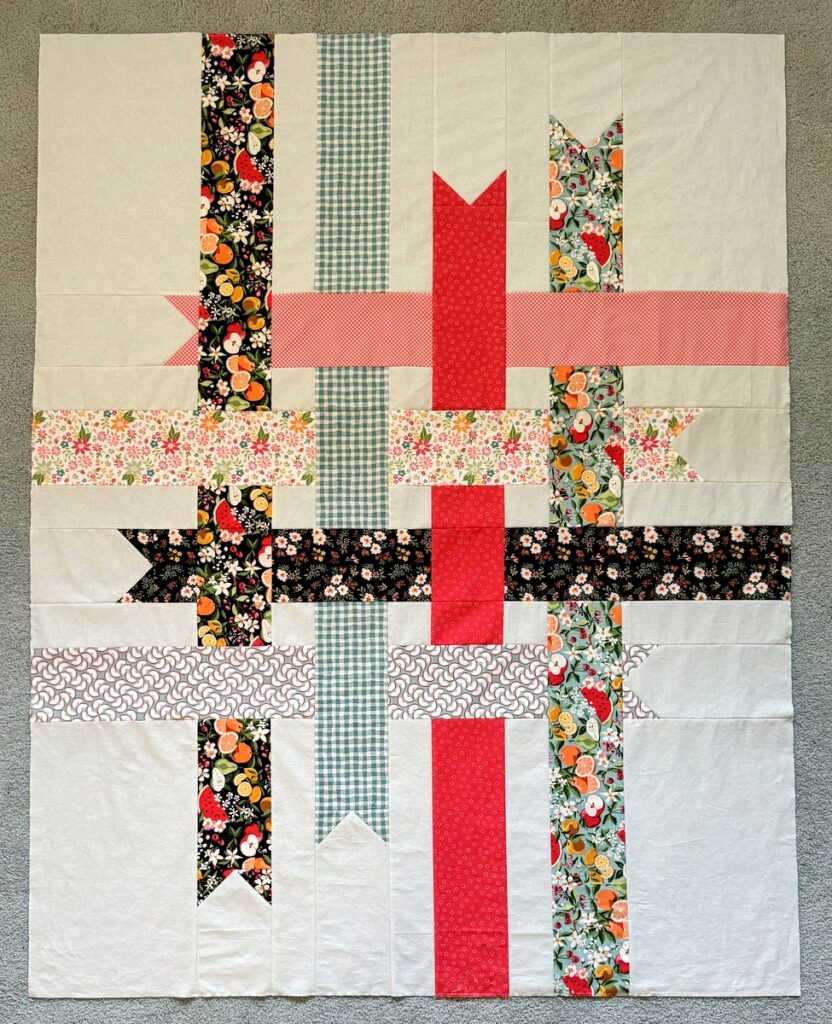
Let me show you some examples. In my first version, the Picnic Quilt, shown here . . .

. . . look at the first and fourth vertical ribbons. Notice how the watermelons and apples are positioned in the center of the ribbons? I did that deliberately because they are the boldest element in the fabric design and I wanted them to stand out. I needed multiple cuts from each of the fabrics to get the repeat design I wanted, especially because the prints are directional.

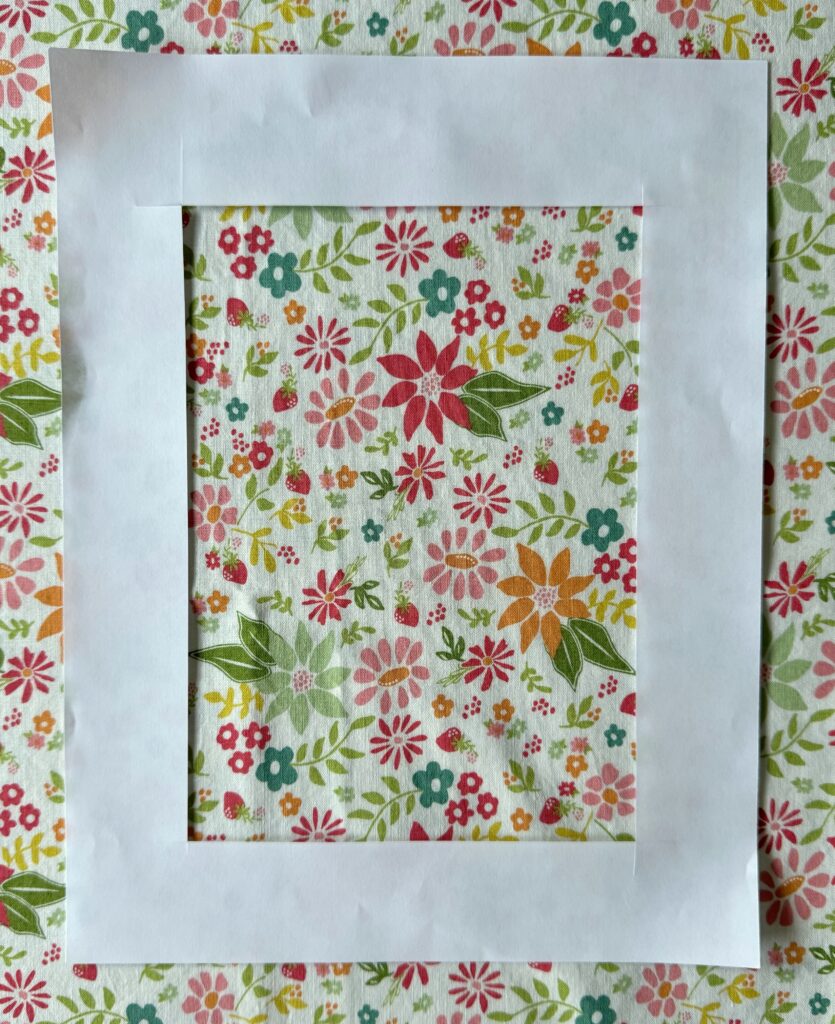
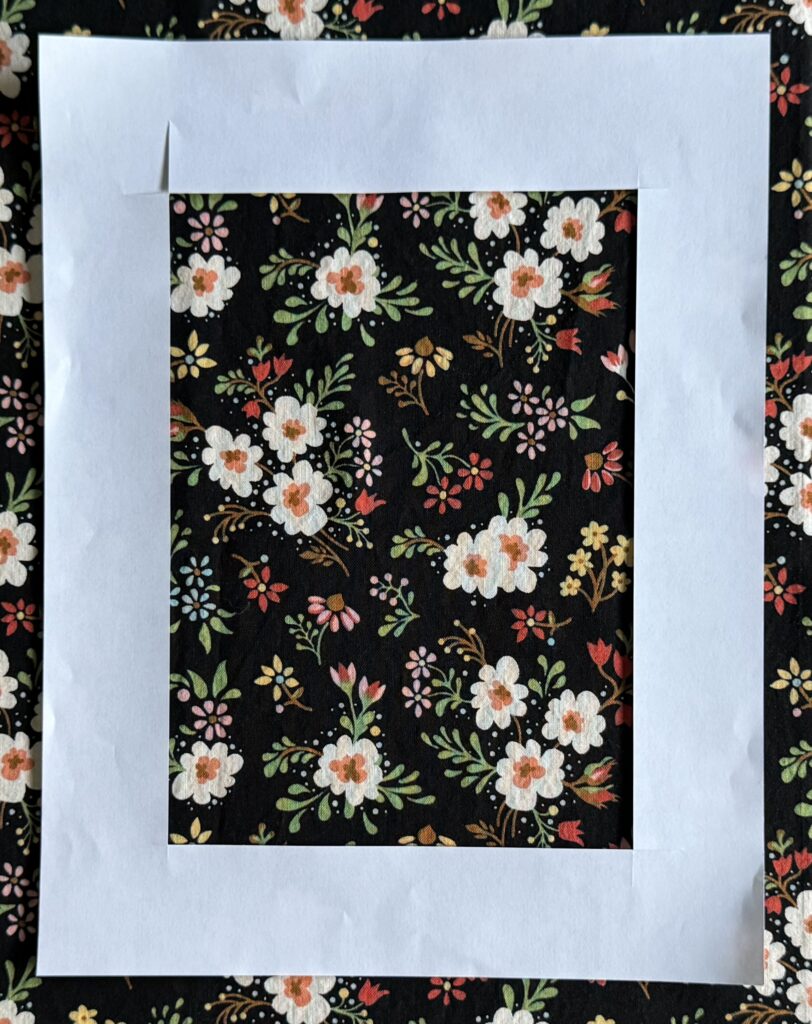
Now look at the second horizontal ribbon, a smaller floral print. You’ll see that three flowers in the print — orange, red, and green — are larger than the others. After cutting a strip at random and then seeing how off-balanced it looked on my design wall, I cut another one in which the red flower (the boldest) runs across the center of the ribbon. I also recut the smaller black print (third horizontal ribbon) so that the clusters of three flowers are balanced on both sides of the ribbon. Both of these fabrics were cut on the lengthwise grain because the images fit better inside a strip that would finish at 5 inches. How did I know that? I cut a 5½”-wide window in a piece of 8½” x 11″ paper so I could audition the fabrics:

These changes were much more pleasing to my eye.

Next look at the second vertical ribbon, made from a slightly uneven check. You really have to be careful with checks, plaids, and small geometric prints! I cut the fabrics for this ribbon on the lengthwise grain because it was easier to keep the plaid lines even. Finally, look at the fourth horizontal ribbon with the sliced apple print. I cut the fabric on the bias for this one because I didn’t like the effect of the print cut on the straight of grain. The bias cut gives added movement to the quilt and I found the effect fun and playful. (I starched the fabric before cutting strips to help stabilize the bias edges.)

Here’s a close-up of those two ribbons:

The reason I was able to make these changes in my fabric strips is that I started out with a yard of each ribbon fabric. I rarely buy less than a yard of any fabric, figuring that anything left over can go into another quilt or on a quilt back. That flexibility allowed me to choose the design elements in each print that I wanted to highlight.

Some of you may be thinking right about now that I have been vastly overthinking my approach to making these quilts. And you may be right. I can be quite obsessive-compulsive at times. On the other hand . . . When I am asked why I quilt, I invariably answer, “It’s all about the fabric.” I love beautiful fabrics and I love putting them into quilts that showcase their beauty. So while it is certainly much more economical to buy 12″ cuts of fabric for the ribbons in Ribbon Box, it may not give the best result.

In Part 2 I’ll share my piecing techniques, which resulted in eliminating 12 seams.

By the way, I finished binding the Picnic Quilt a couple of days ago. All that’s left is the label. Photos coming soon of the finished quilt!


Posted in picnic quilt, Ribbon Box quilt, update | 3 Comments

Quilted, Trimmed, and Ready to Bind

I’m a happy quiltmaker — delighted with the beautiful quilting that Karlee of SewInspired2Day did on my Picnic Quilt and ever so pleased with the quilt motif I chose, a contemporary design by Urban Elementz called Ginger Snap. I was looking for something with circles and loops to soften all of the diagonal and horizontal seams in the quilt top. Not only does Ginger Snap fit that bill, it is also somewhat reminiscent of the whorls in the background fabric:

To top it off, Ginger Snap is a playful, happy design perfectly in keeping with the cheerful fabrics in the quilt. I had Karlee use the same design on Going Places, the car quilt I made for my twin last year. Here’s a close-up of the quilting on that one:

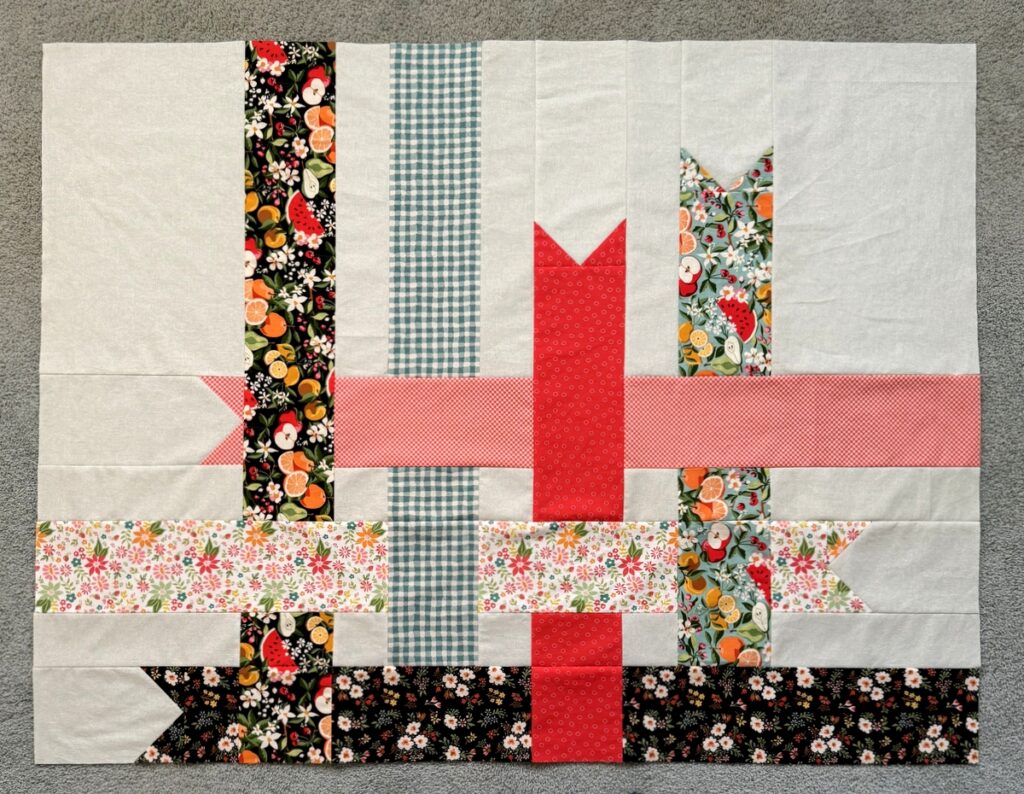
But back to the Picnic Quilt. Here’s a look at the entire top:

And here you can see the simple pieced back:
While it was under construction my plan was to bind the quilt in the red and white gingham check used in the top horizontal ribbon. The fabric design is printed on the diagonal so I wouldn’t need to cut my strips on the bias. Once I saw the completed top, though, I knew the quilt needed to be framed with the bolder red print:
For those of you who have seen my posts about the Ribbon Box quilt and have downloaded the free pattern from Cloud 9 Fabrics, let me remind you that I am working on a post with some specific recommendations regarding quilt construction — but I am adding recommendations about fabric amounts because I think that the 1/3 yard noted for the ribbon fabrics may not be enough. It really depends on the designs on the fabrics. All will be revealed. Thank you for your patience!


Posted in picnic quilt, Ribbon Box quilt, update | 3 Comments