This weekend I made three and a half pairs of pillowcases. Two of the pairs are gifts so I can’t show them off until they’ve been delivered. The third pair is for the Portland White House. And the single case? On a whim I made it today to take with me when I go away to Quilt Camp in the fall.
I haven’t made pillowcases in a couple of years. Would you believe I had to go to my own tutorial to be reminded of a couple key steps?
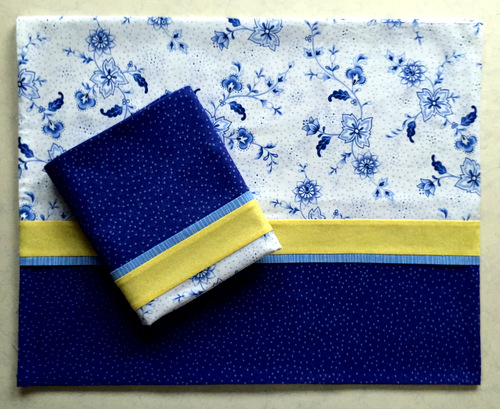
As you can see, these cases feature a contrasting accent strip and a narrow folded flange. What you can’t see is that there are no exposed seams on the inside of the cases, first because of the “roll it up” method that encases the raw edges of the bottom band in a seam and then the French seam that finishes the case.
That blue and white floral print (Blue Palace by Johnny Karwan for Clothworks Textiles) has been in my stash for about six years. Regular readers who know of my fondness for accumulating fabric — witness my last post — will be glad to know I am using at least some of it!
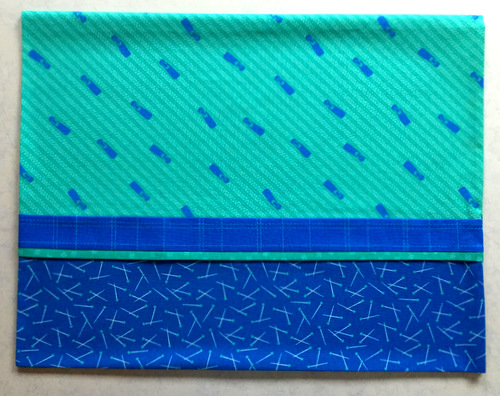
Last year I bought a few pieces of fabric from a fun line called Sewing Box by Gina Martin for Moda. It features zippers and snaps and straight pins — very whimsical. Here’s the pillowcase made from that fabric:
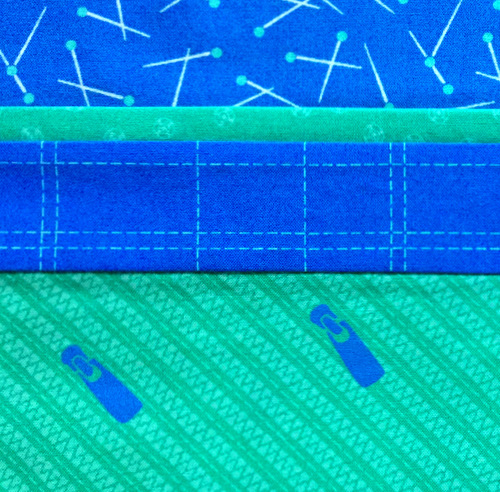
The snaps on the folded flange fabric are just a quarter of an inch in diameter. Take a closer look:
If you haven’t made pillowcases before, I recommend you give it a try. They make wonderful gifts, and it’s always a pleasure to sleep on one you’ve made yourself. I’m sleeping on a new one tonight.
My husband Charlie and I depart later this week for Atlanta for an extended visit over Thanksgiving with my twin sister Diane and her husband Ed. I usually make a pair of pillowcases as a hostess gift but this year, at Diane’s request, I made a pillowcase for her five-year-old grandson, Edward, a frequent overnight guest at his grandparents’ home.
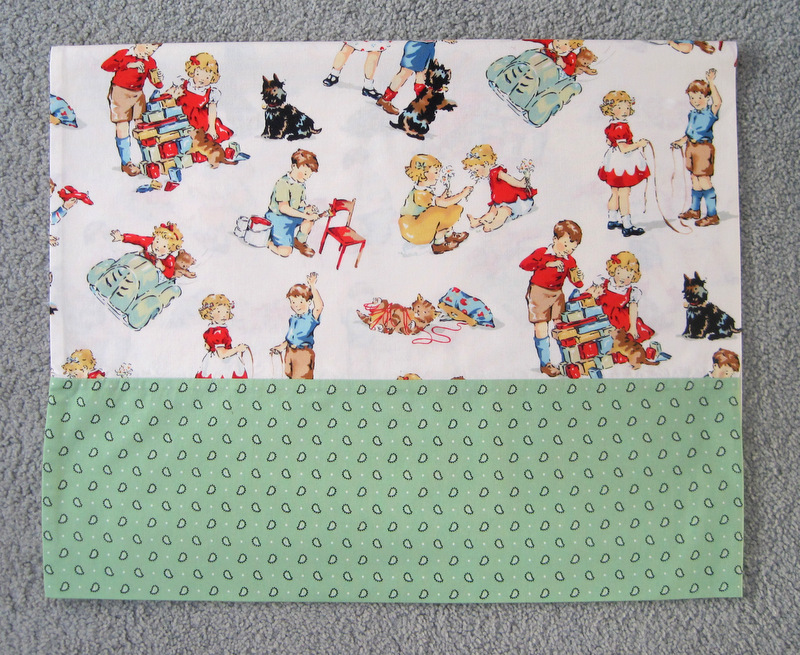
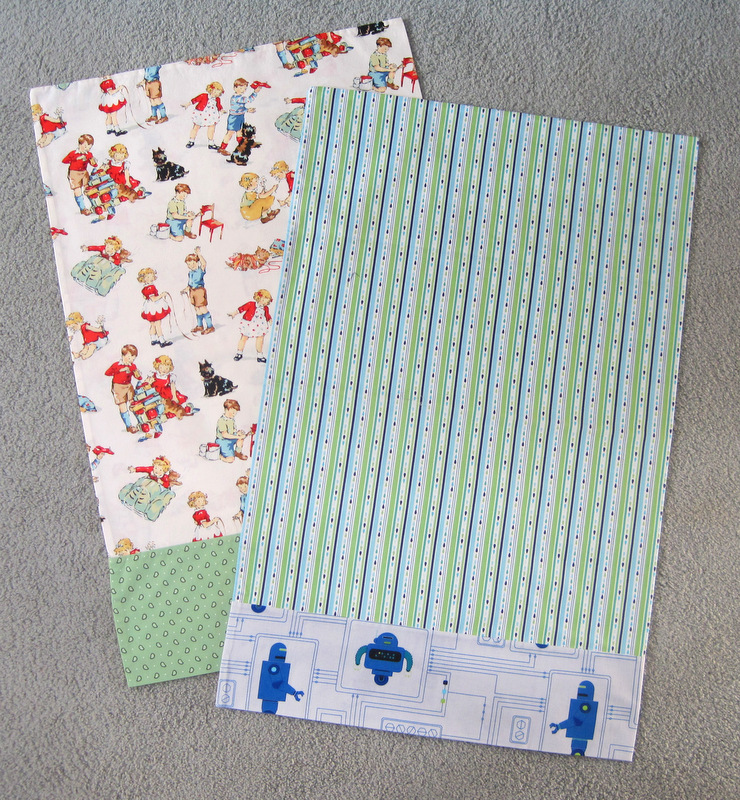
Diane was captivated by the fabric I had used a few weeks ago on the back of Susan Elinor’s quilt. The fabric features vignettes of Dick and Jane and Spot, those charming characters from the early reader books I remember as a kid growing up in the 1950s. Now Edward is learning to read, and Diane loved the idea of the same fabric in a pillowcase he could sleep on at his grandma’s house.
Luckily, I had just enough fabric left to make one pillowcase. I paired it with a simple paisley print for the band:
Fun with Dick and Jane (and Spot)
Diane knows about this pillowcase but she doesn’t know yet that I made Edward a second one:
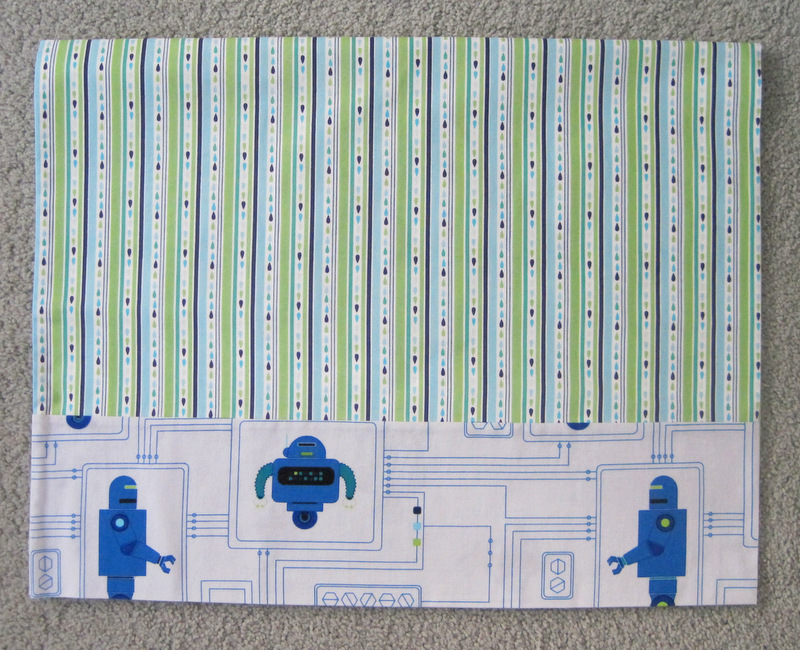
Robot Love
What little boy doesn’t like robots? I adore these fabrics, part of the Mechanical Genius line by designer Mo Bedell that came out a couple years ago.
“Hey, it’s good to be Back Home Again.” Do you remember the song by John Denver? It came out in 1974, so you have to be Of a Certain Age to know it. We are indeed home after a delightful two-week stay in Atlanta with my sister Diane and her husband, made even more delightful by the arrival of our sister Reigh and her husband a couple days before Thanksgiving.
I managed to squeeze in a couple of little sewing projects for my sisters the last week I was there. Reigh said she would love to have a runner for the pub table in the dining area off her kitchen, and Diane said she would love a new set of pillowcases for the guest room on the main floor. My arm didn’t have to be twisted: it meant a trip to a local quilt shop!
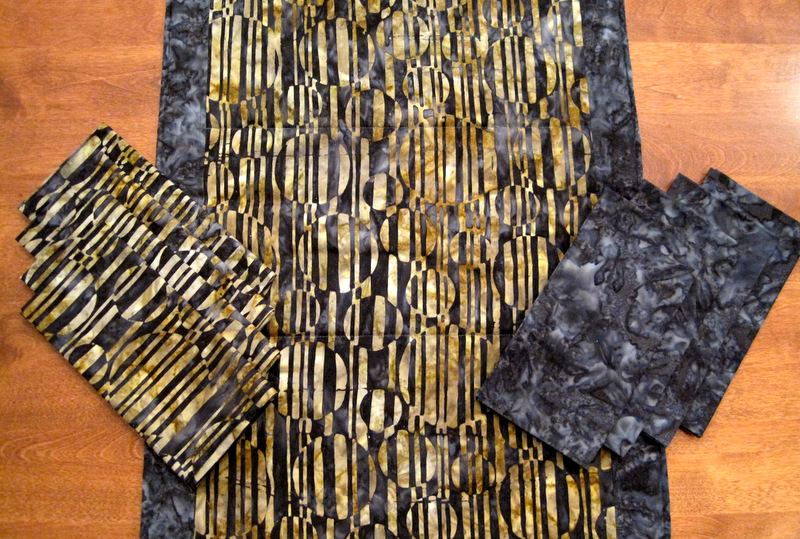
Off we went to InTown Quilters in Decatur, Georgia, where both Diane and Reigh selected batiks for their projects. Reigh has a lot of brown and blue in her kitchen and dining area, with touches of yellow and gold. The colors in this simple table runner should go very well with her décor:
Reigh bought enough fabric for me to make two sets of napkins, four in each set.
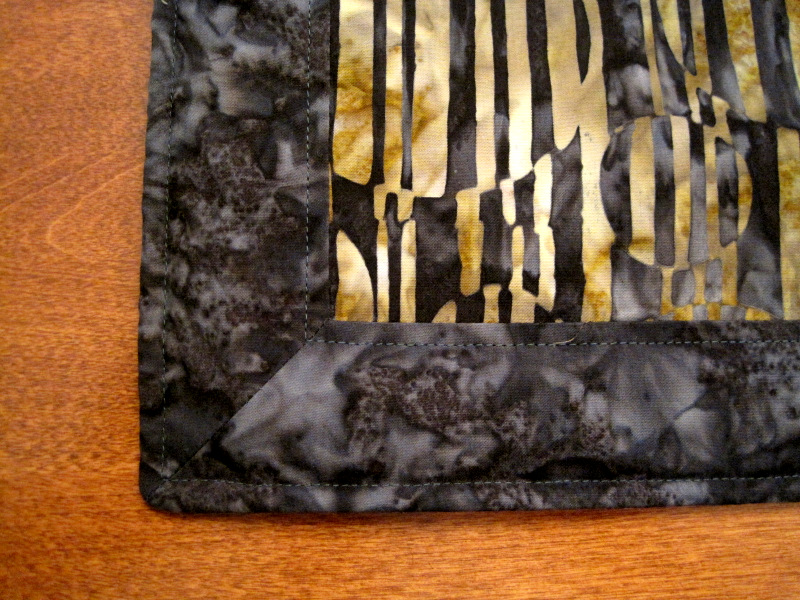
Because the design of the runner is so simple — just a rectangle of fabric with four borders — I mitered the corners to give it a little something extra:
I used low-loft batting and did some very basic topstitching to finish it. Reigh has promised to send me a photo of the table runner when she gets back home so I can show you how it looks in its designated spot.
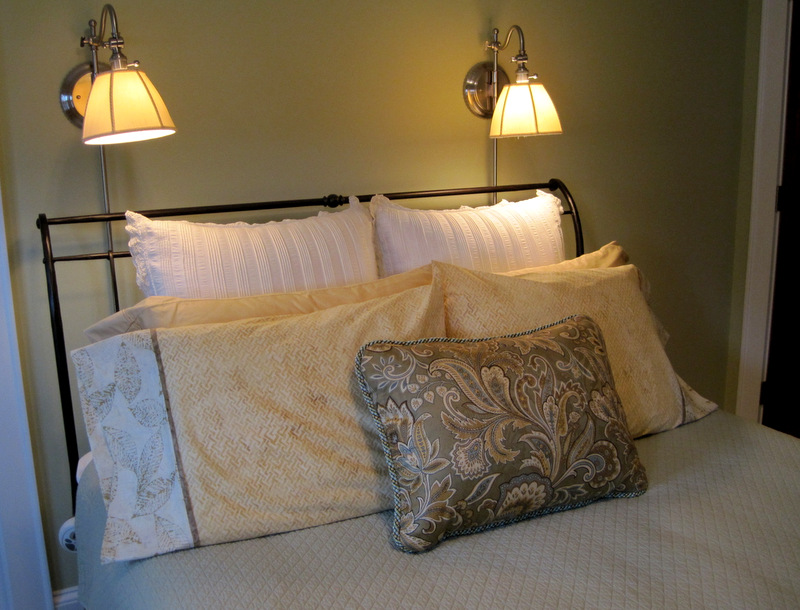
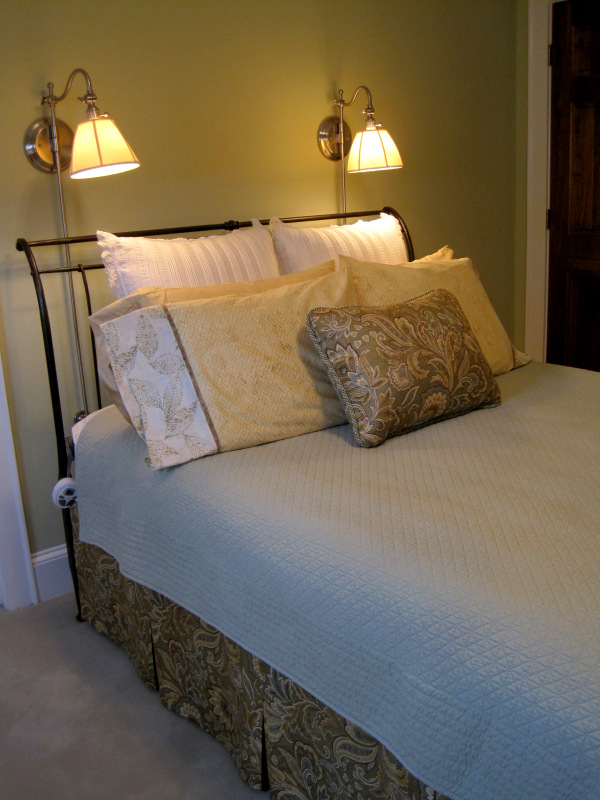
Here are the pillowcases I made for Diane’s guest room:
Here’s another view that includes the pleated bedskirt I made last year during my annual Thanksgiving visit:
I love the way the gold fabric in the pillowcase picks up the gold in the bedskirt.
Reigh and Diane joke about shackling me to the sewing machine when we are all together but the truth is I am in my element when creating something with fabric.
I’ve been making pillowcases since 2005, when my quilt teacher Billie Mahorney first showed me how to make a “Magic Pillowcase” with French seams and a nifty way of enclosing the band on the inside with no raw edges showing. You’ve probably seen directions for other versions of this pillowcase, variously called the Burrito Pillowcase, the Hot Dog Pillowcase, or the Roll-it-Up Pillowcase.
Over the years I’ve made dozens of pillowcases — for friends and family, for charity, and for the Portland White House. Over the years I’ve tweaked Billie’s method, fiddling with seam allowances and incorporating ideas gleaned from here and there, winding up with what I think is the perfect pillowcase. Try my version and let me know if you agree!
Perfect Pillowcases from First Light Designs
Finished size: @ 20″ x 31″ for standard/queen cases, 20″ x 37″ for king size cases
Fabric requirements for one pillowcase Pillowcase body: 3/4 yd cotton (for king case, 1 yd)
Bottom band (goes at open end of pillowcase): 1/2 yd cotton
Accent strip: 4″ strip cotton
Flange (folded strip): 2″ strip cotton
Preparation Wash and iron fabrics first. Why is this important? Two reasons. First, fabric does not come off the bolt evenly wrapped. If you don’t wash and iron it first, the fabric won’t be on the straight of grain when you cut it (and this will become obvious the first time you wash and dry it). Second, fabric comes with sizing, the chemical finish that gives it a crisp feel; washing removes the chemicals and makes the pillowcase ready to sleep on when it’s completed.
When you wash, dry, and iron fabric and then fold it so that the selvages meet, the cut ends (perpendicular to the selvages) rarely line up evenly, and you lose a bit of fabric when you trim the edges. The fabric requirements above take this into account.
Sewing supplies
Sewing machine with ¼” foot or other open-toed foot
New sewing machine needle (I recommend size 80/12 sharp)
Standard sewing supplies (thread, scissors, straight pins, measuring tape, seam ripper)
Rotary cutting equipment (large mat, rotary cutter, rulers short and long)
Point turner or other tool for gently poking out corners
Cutting instructions WOF = width of fabric, usually 42″ – 44″ before selvages are removed
Pillowcase body: cut one piece 25″ x WOF. (For king case, cut one piece 31″ x WOF.)
Bottom band: cut one piece 13″ x WOF
Accent strip: cut one strip 2″ x WOF
Flange: cut one strip 1¼” x WOF
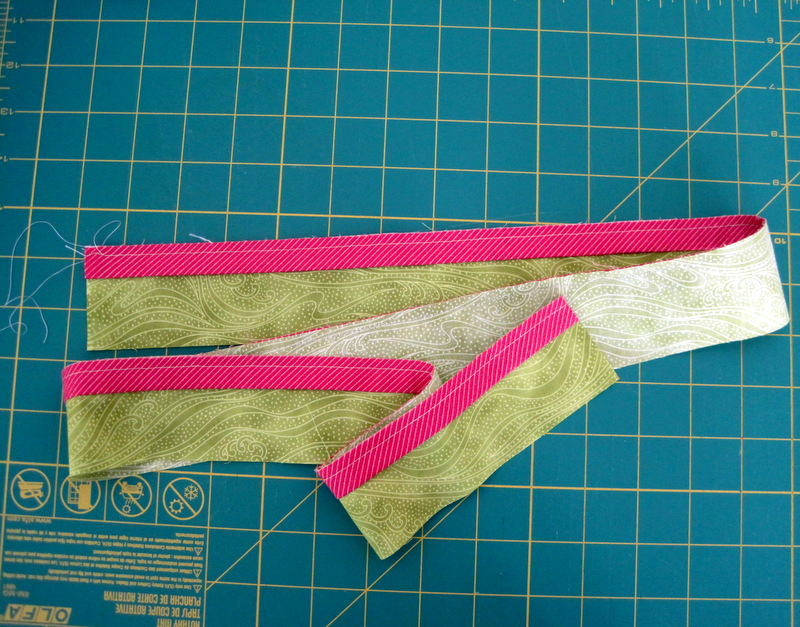
1. Fold flange in half lengthwise, wrong sides together, and press. With right sides together, align the raw edges of the flange along one long edge of the accent strip and machine baste with 1/8″ or 3/16″ seam.
Accent Strip with Flange Attached
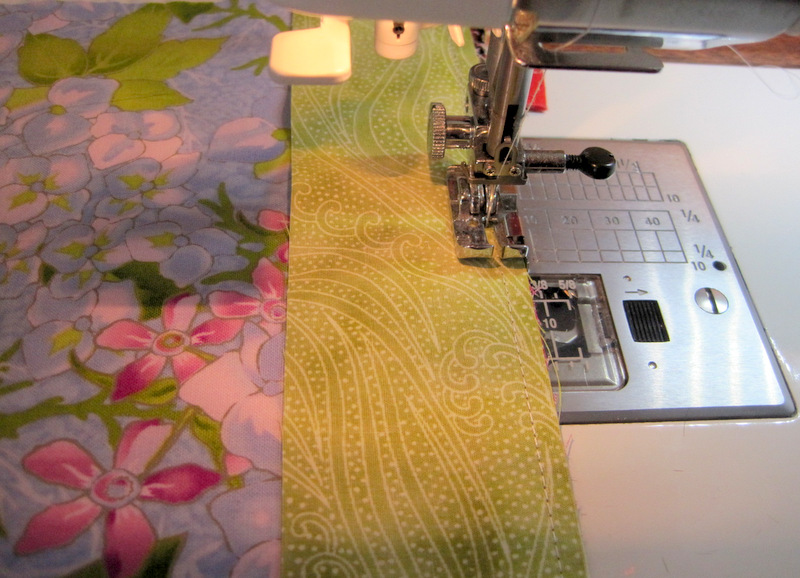
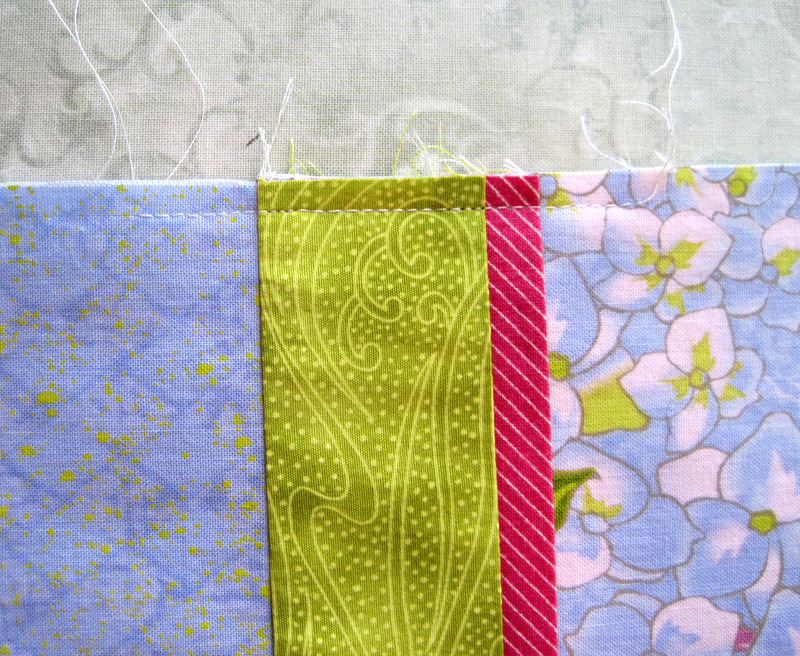
2. With right sides together, sew the flange edge of the accent strip to one long edge of the bottom band. Note that the basting stitches are in the seam allowance to the right of the seam you are sewing. (Don’t worry if the bottom band, accent strip, and flange are slightly different in length — you’ll trim them evenly in Step 3.)
sewing accent strip to bottom band
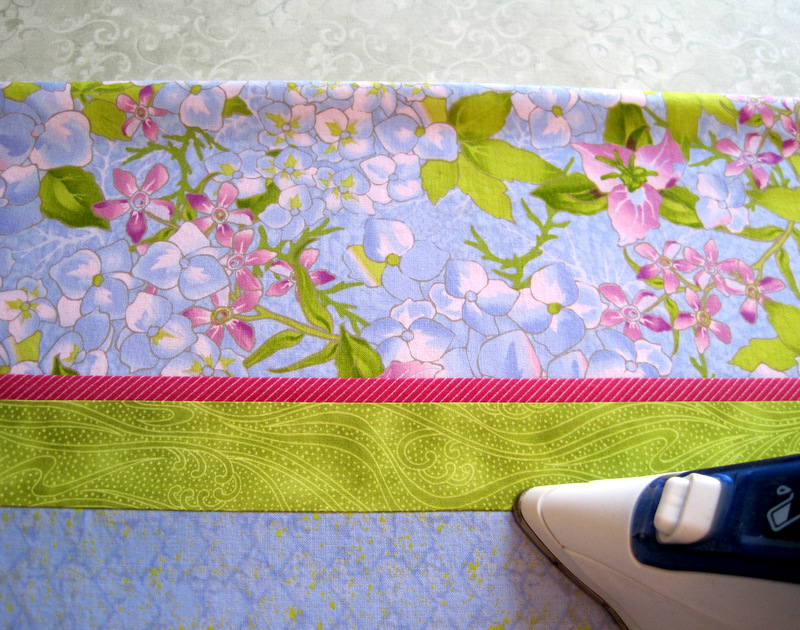
Press the line of stitching to “set the seam.” From the front, press the seam toward the accent strip, turning the flange toward the bottom band.
Pressing the seam
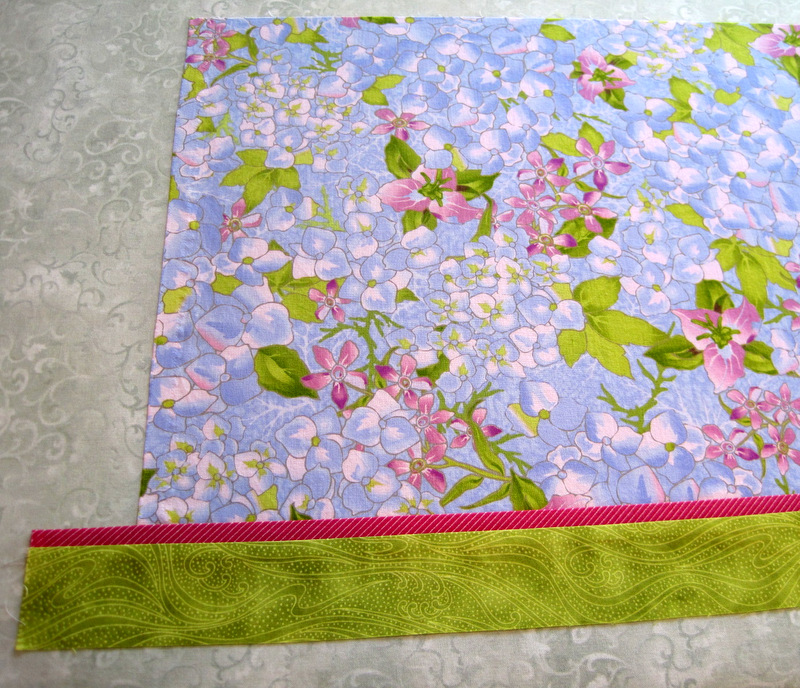
3. Fold the band/accent/flange unit in half as shown below and arrange it on a large cutting mat so that the fold is on the left and the selvages are on the right. Make sure the fold is next to one of the inch marking lines on the mat. Measure 20¼” from the fold — you should be within an inch or so of the selvage edges — and align an acrylic ruler on the 20¼” mark:
Measuring 20 1/4″ from the Fold at Left
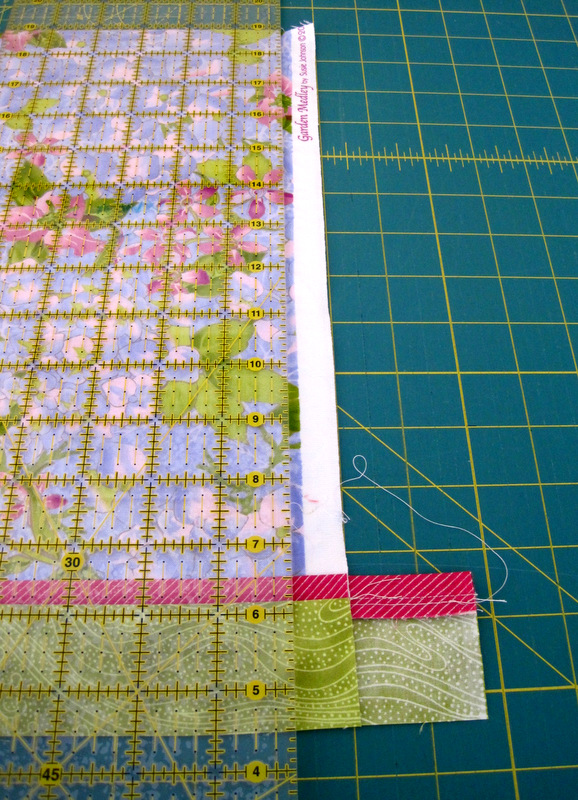
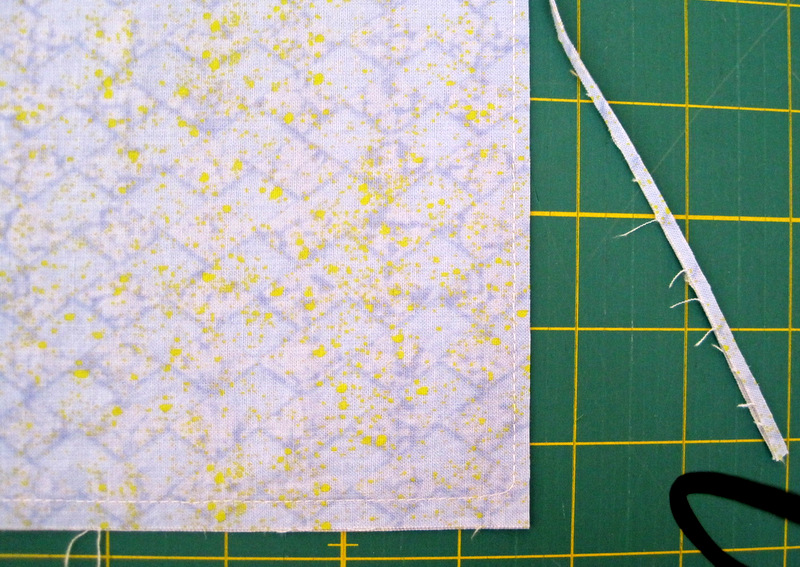
Trim the selvages. Your band unit should be 40½” wide.
Ready to Trim Edges of Band Unit
4. Trim the selvages from the pillowcase body in the same way, measuring 20¼” from the fold. The pillowcase body should also be 40½” wide. With right sides together, pin one end of the pillowcase body to the other long edge of the accent strip (the edge without the flange). Machine baste with a 1/8″ or 3/16″ seam. Do not press this seam.
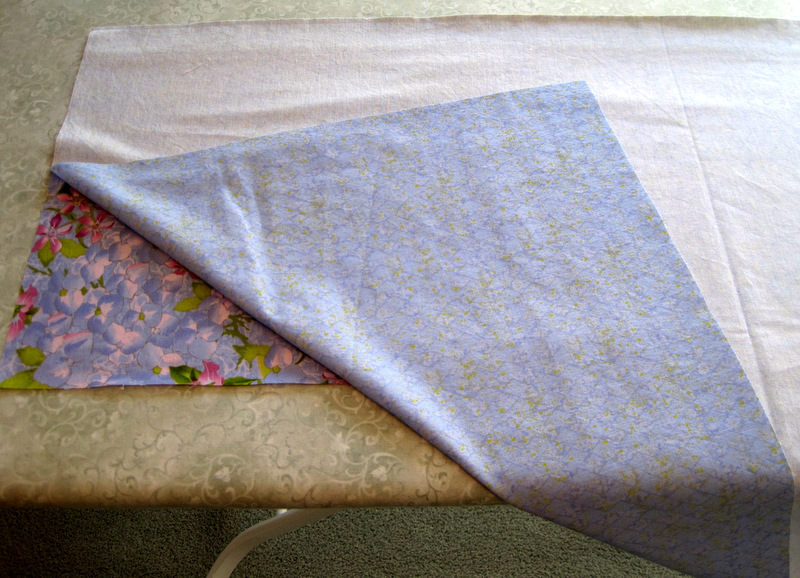
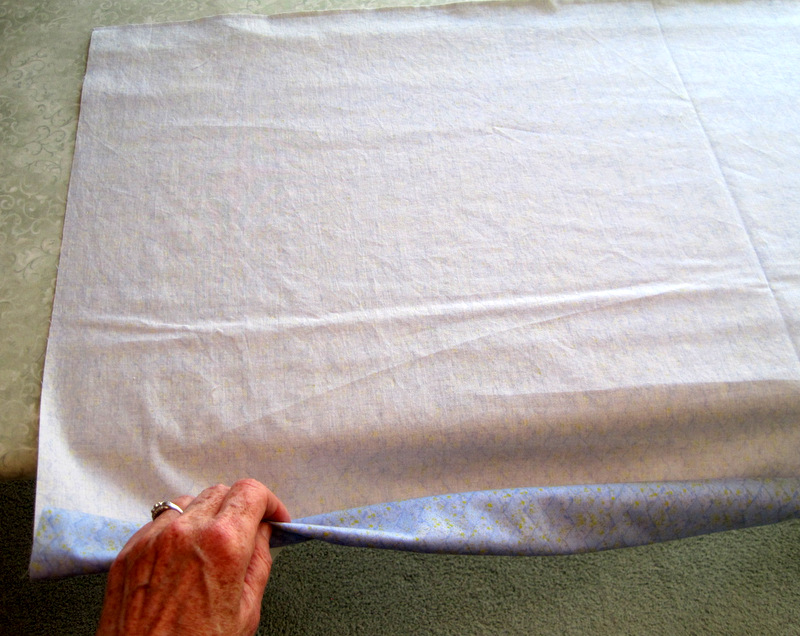
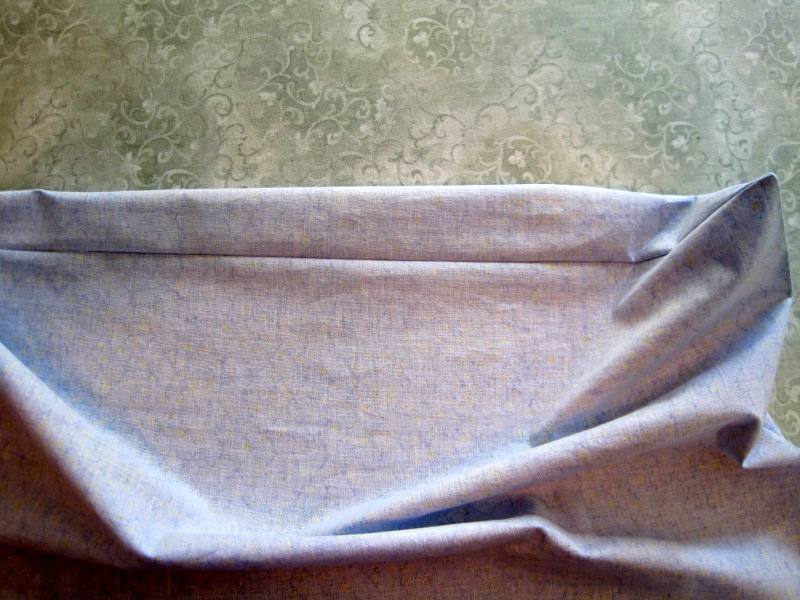
5. Lay the pillowcase on a flat surface (I like to use my ironing board) with the seam you just stitched at the top. The band should be underneath and the pillowcase body on top (right sides together):
Almost Ready to Roll!
This is where the magic comes in. Let the edge of the pillowcase body dangle off the edge of the ironing board. With both hands grasp the end that is dangling and start rolling it from the bottom toward the top:
Rollin’, Rollin’, Rollin’
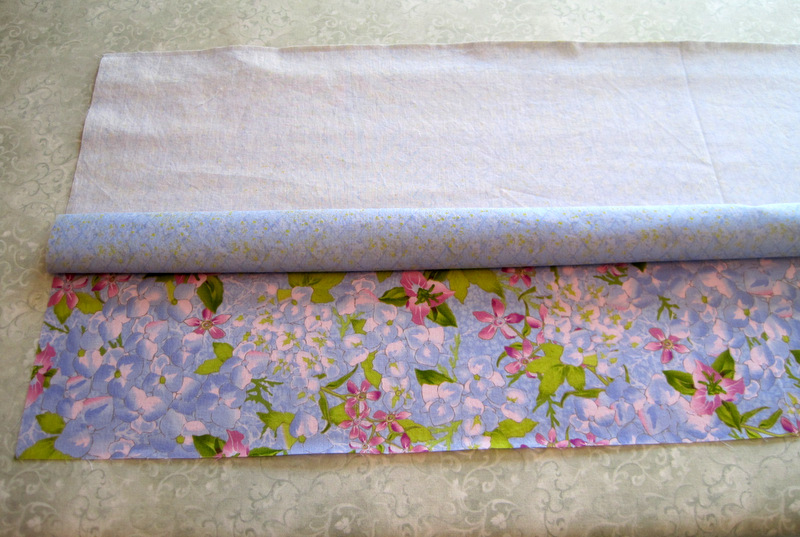
Stop when the roll is in the middle of the band unit:
Stop Rolling Here!
Now bring the bottom of the band unit up and over the roll and align it with the top of the unit:
Bringing Raw Edges Together
Pin the layers together along the top and stitch with a ¼”seam, backstitching at the beginning and end of the seam. You now have a tube with two open ends.
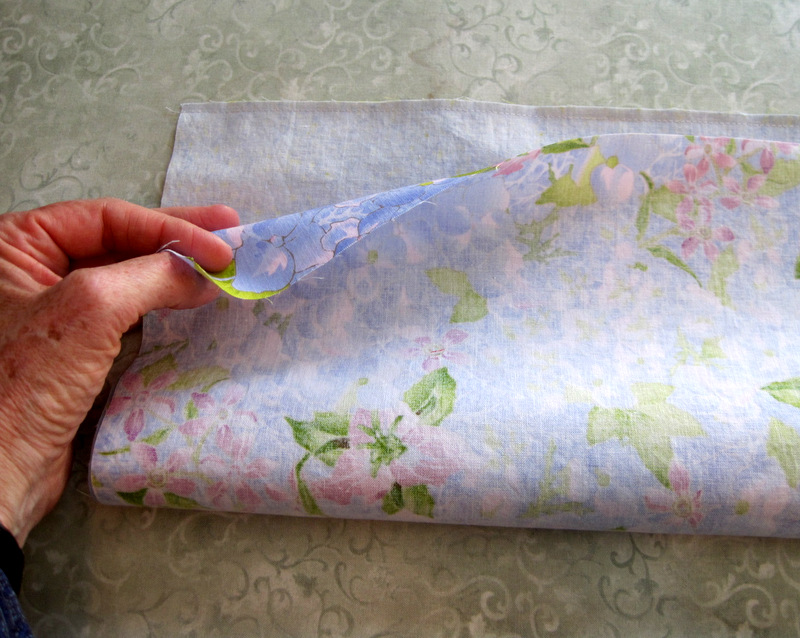
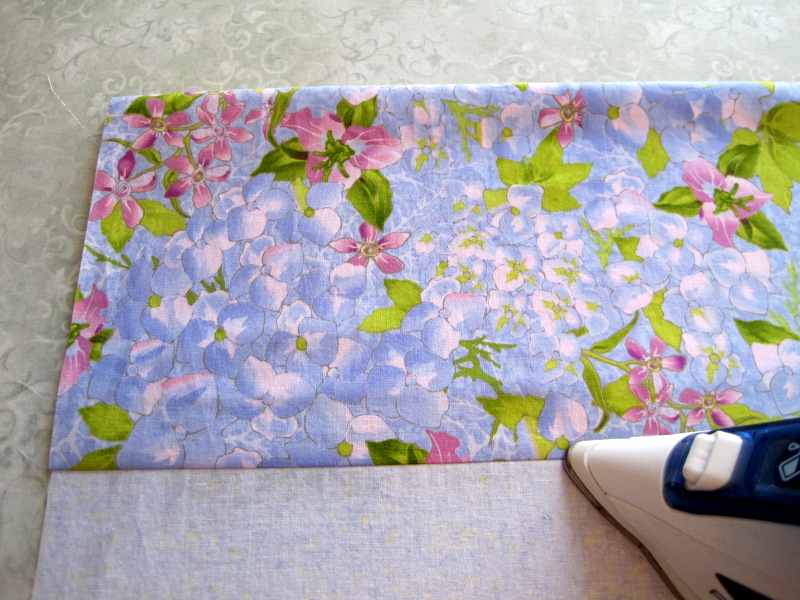
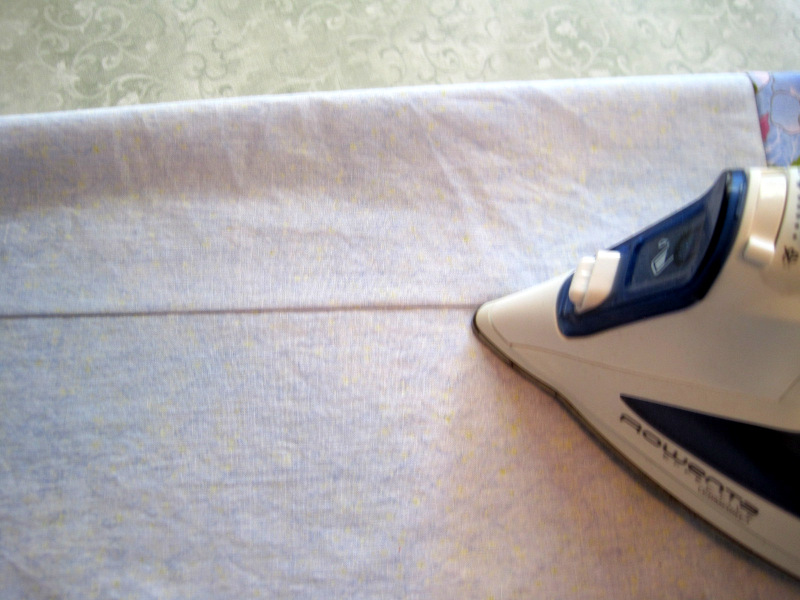
6. Pull the rolled up case out from either end and shake it out flat. Press the bottom band first from the wrong side of the case (don’t press all the way to the fold) and then from the front. Be sure to smooth the fabric away from the seam on both sides before you use the iron to make sure you don’t wind up with folds of fabric at the seamline.
Pressing Band from the BackPressing Band from the Front
Still with me? Good! Now it’s time to finish the pillowcase with French seams, a sewing technique in which raw edges of fabric are enclosed in a seam and then that seam is enclosed in a second one. French seams are often used on lightweight and sheer fabrics. Using them on regular weight cotton adds a bit of bulk, especially in one corner, but it gives you a beautifully finished pillowcase inside and out. Over time I’ve discovered a couple of trimming and pressing techniques that minimize the bulk.
7. Fold pillowcase in half with wrong sides together. Pin the raw edges and sew a ¼” seam, backstitching at both ends. I find it easiest to start at the fold at the top of the pillowcase and end at the bottom of the band. Slow down when you get to the band unit, as you are stitching through several layers of fabric. (This is why it’s smart to start out with a new sharp needle in your sewing machine.)
Note: before I sew the seam I match the seams on the band unit and machine baste them:
basting before stitching
8. Using a rotary cutter and ruler, trim the seam to 1/8″. (This step trims off the small loose threads that can get caught when you sew the second seam and also allows the second seam to be narrower — hence less bulk.)
Trimming Seam to 1/8″
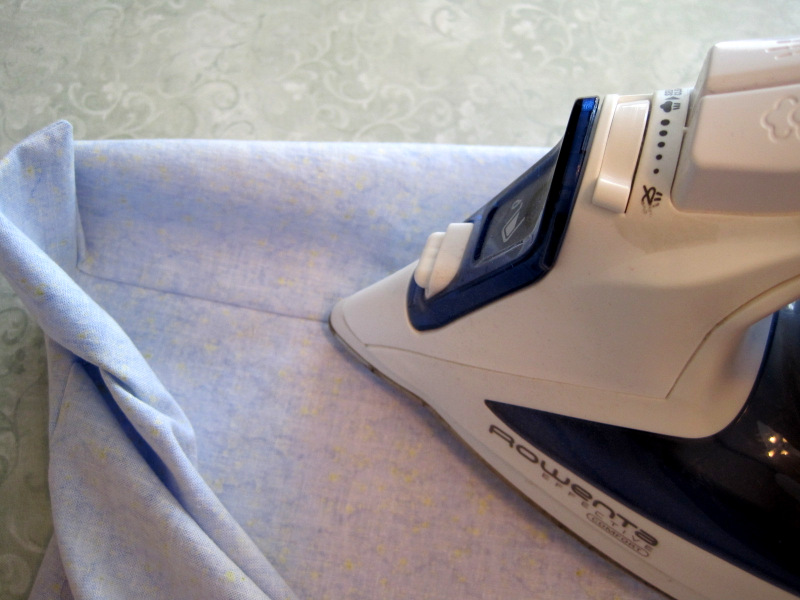
After trimming the seam, turn the pillowcase inside out and gently poke out the corners with a point turner. Before you press the edges of the pillowcase, press the seam to one side to flatten it. Look carefully at the next pictures to see what I mean:
Pulling Top Seam DownUsing Tip of Iron to Flatten Seam
See how I have pulled the top seam down a couple of inches from the top edge? I can flatten that seam by pushing it to one side (it doesn’t matter which way) with just the point of the iron. It’s not really clear from these pictures that I am holding the heel of the iron well off the pillowcase so only the point of the iron is touching fabric. I can get the point of the iron to within a couple inches from the corners.
Now do the same thing with the side seam. Pull the side seam toward you on the ironing board, making sure fabric underneath is flat. Use just the tip of the iron to flatten the seam by pushing it to one side:
Flattening side seam with tip of ironGetting as Close as Possible to the Corner with Tip of Iron
Now press the entire pillowcase with the seam in its proper position at the outer edge. You should find that the seam can be pressed flat without any excess fabric forming folds at the seamline. Another way of getting the seam flat is to roll it between your fingers but I find this to be a very laborious and time-consuming process.
9. Stitch another ¼” seam all the way around, starting at the top of the pillowcase and ending at the bottom of the band, backstitching at the beginning and end. Go slowly where the flanges meet — going a stitch at a time, if necessary — to help your machine sew through the layers of fabric.
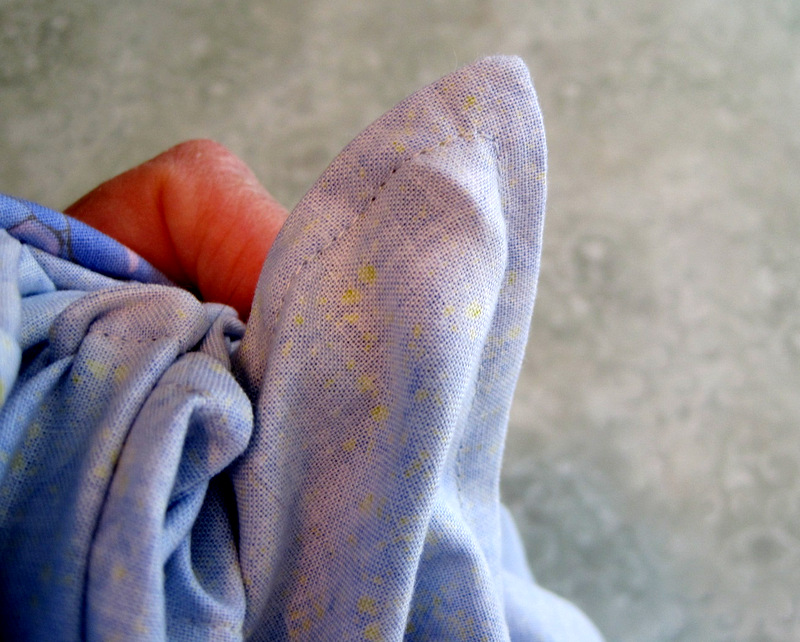
Turn the pillowcase right side out and gently poke out the corner at the fold using the point turner. The other corner is the slightly bulky one; you’ll need to manipulate it with your thumb and finger until it forms a gently rounded right angle when it’s turned to the right side. This is what it looks like on the inside . . .
Corner from the Inside
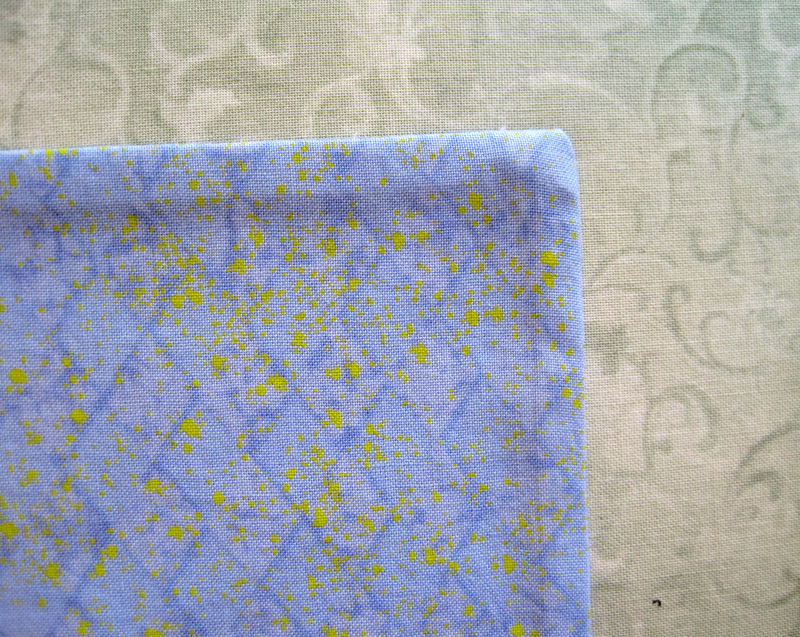
. . . and this is what it should look like on the outside:
Slightly Rounded Corner from the Outside
Use the same pressing technique described above in Step 8 to flatten the seams. Give the pillowcase a final press. Voilà!
A Pair of Pillowcases for the Portland White House
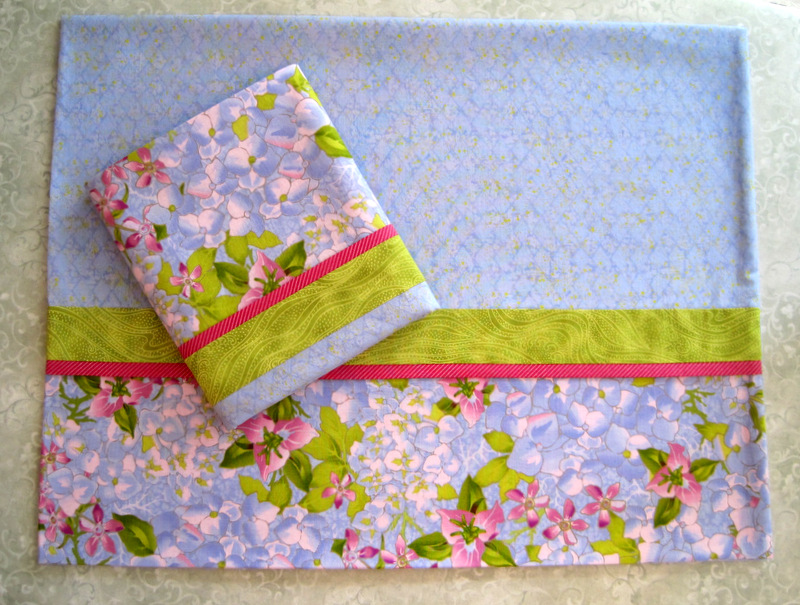
Today I stole a couple of hours that I should have spent doing other things and made a set of pillowcases for the Portland White House:
Pretty Pillowcases
I just love these fabrics. The green strip is a blender from Kona Bay and the other three fabrics are from the Garden Medley line by Susie Johnson for RJR. Aren’t they dreamy?
Here is another set of pillowcases I made recently:
Another Set of Pillowcases
These cases were pictured in my previous post but didn’t show up very well. The two main fabrics are from the Gentle Flowers line by Quilt Gate. As my sister Diane would say, “Elegantly simple . . . and simply elegant!”
I’ve spent the last week and a half with my two youngest granddaughters, nine and twelve, first in San Francisco where they live with their mom, then in Ashland, Oregon for three days, and now in Portland, where they will stay with their grandpa and me until Friday.
We have a lot planned for our five days in Portland! One of the things on my wish list was to help the girls make their own pillowcases. They were all for it, which made their granny very happy. Today was the day. Each girl picked her own fabric from my (ahem) considerable stash. Twelve-year-old Bonnie selected a vibrant turquoise mini-dot for the body of her pillowcase and a lilac floral for the band. Beatrice, age nine, chose a lime green fabric with fuchsia blossoms for the body and a fuchsia vined print for the band.
Bonnie worked in my sewing room:
Bonnie, with pillowcase in progress
Beatrice sewed on the smaller machine that I set up in the spare room across the hall:
Beatrice, with pillowcase in progress
After a break for lunch in the garden . . .
lunch al fresco
. . . we headed back to the sewing room. I taught the girls the roll-it-up method for pillowcases, which encloses both ends of the band in a single seam. The girls finished their cases with French seams, so there are no raw edges showing anywhere.
They did a beautiful job! Here is Bonnie with her finished pillowcase: