Kitchen Remodel: The Glass-Fronted Cabinet

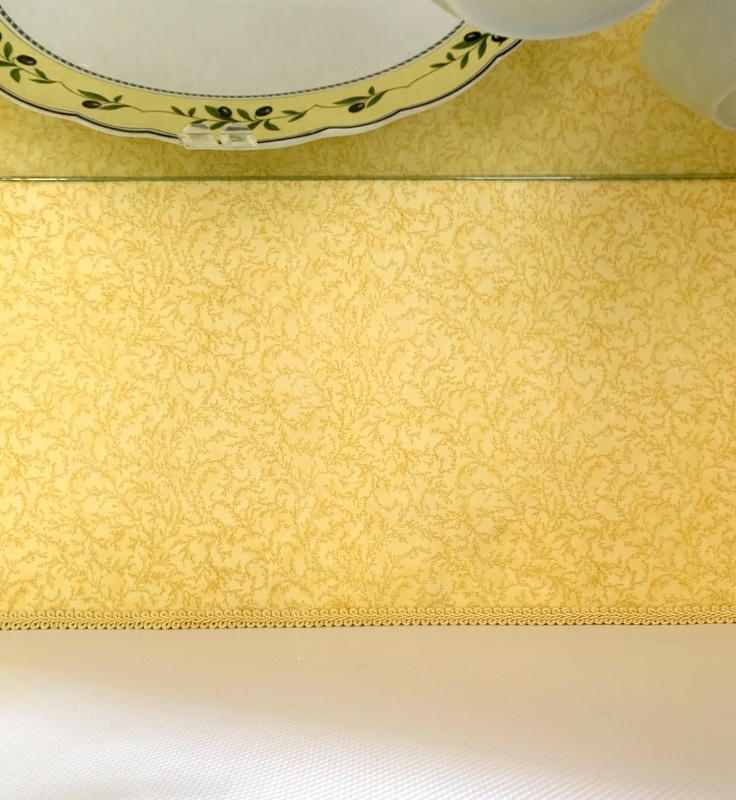
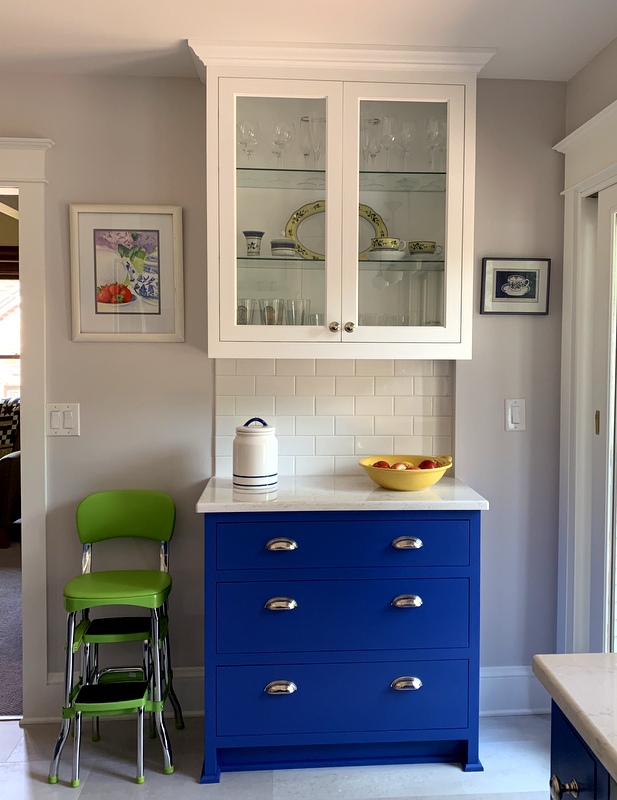
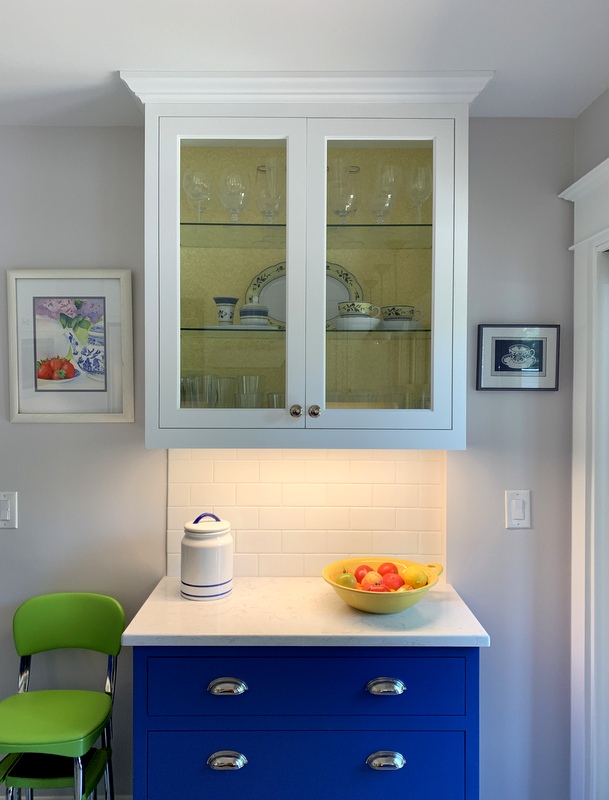
When I showed you pictures of my newly remodeled kitchen last week, I mentioned there was something I wanted to do to the glass-fronted cabinet. Today I did it:


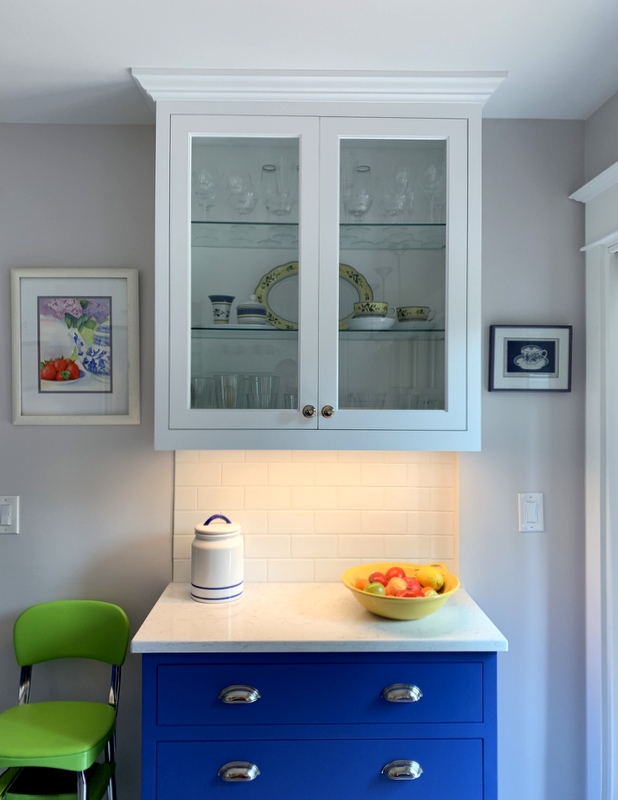
Do you see what I did? Here’s the before picture:


Yes! I covered the back of the cabinet! It needed something. The clear glassware didn’t show up well against the white walls and the spots of color from the dishes on the middle shelf didn’t add enough pizzazz.

I was originally planning to use a scrap of wallpaper left over from another room. It was the right shade of yellow but it was too formal for the kitchen:


My twin sister Diane suggested I use fabric. Of course! With medium-weight interfacing fused to the back, it would have just the right amount of body to attach to the back wall. I had what I thought was the perfect fabric in my stash but when I went to fetch it all I had were scraps. Fortunately, there was enough yardage of another tone-on-tone print to do the trick.

I cut the fused fabric and interfacing slightly oversize. After fusing them, I trimmed the sides with a rotary cutter to fit the back of the cabinet. Nice raw edges with no raveling, thanks to the interfacing. I applied double-sided tape to the back of the fabric at the top edge and pressed it into place with my fingers.

I figured the glass shelves would hold the sides in place, and they do. Along the bottom edge I glued a piece of braided trim, also from my stash, to provide a nice finished look:

Am I pleased with the outcome? You bet!


Posted in family, home dec, kitchen remodel, update | 13 Comments

Tammy’s Dahlia

Back in November of last year – my gosh, where does the time go? – I received an email from a woman in Canada named Tammy asking if I could help her track down a dahlia quilt pattern. She included photos of a quilt that her mother-in-law, then 89, had given her in the 1990s. Tammy’s mother-in-law thought she might have received the quilt as a wedding gift when she got married in 1952 and that her husband’s sisters might have made it.

Here’s a photo of a block with sashing strips and cornerstones:
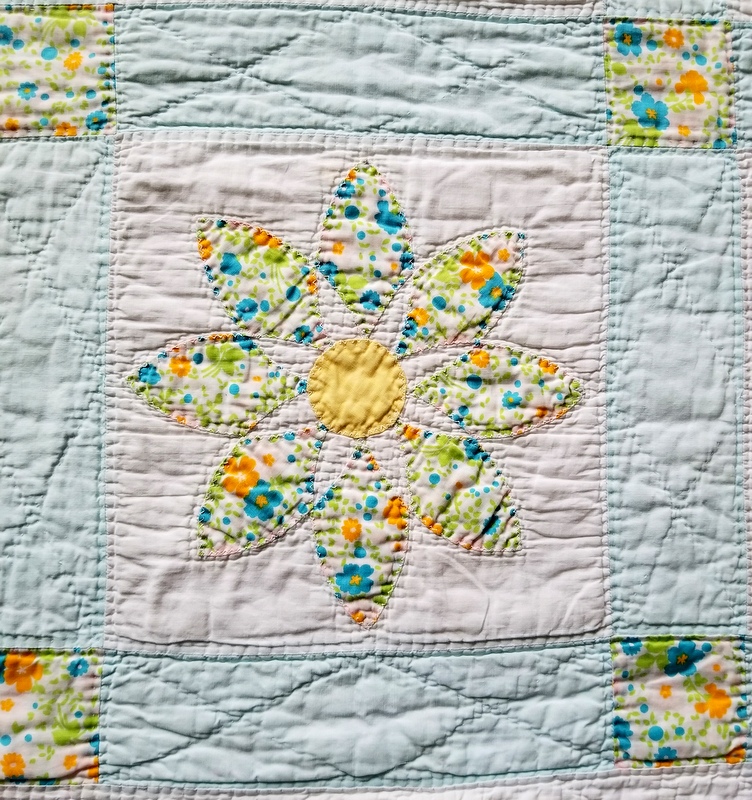

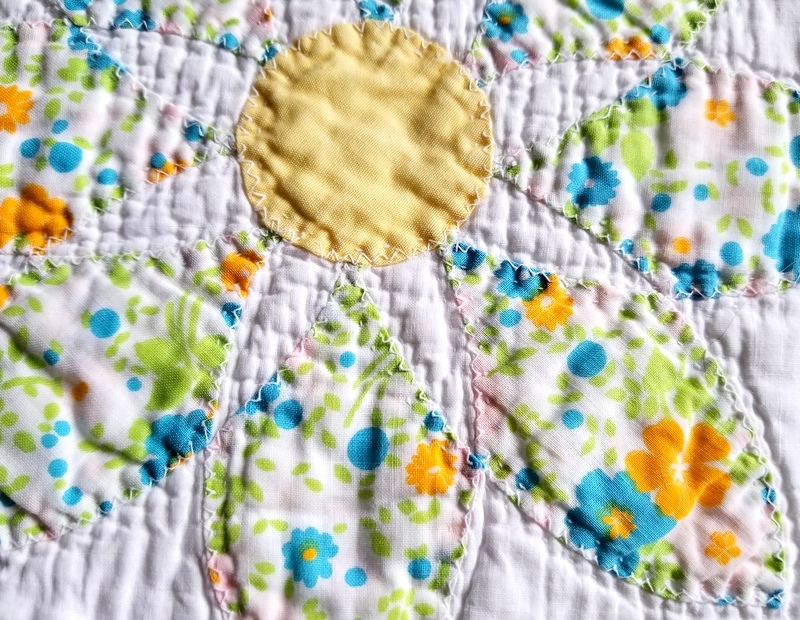
The block measures 10½” square and the dahlia blossom measures 9½” from tip to tip. You can see that the appliqué pieces were turned under and zigzagged in place by machine. Here’s a detail of the appliqué:

Tammy searched the Internet and Pinterest as well as several quilting websites and blogs but could not find the exact pattern. She did find somewhat similar blocks like the Friendship Dahlia and the Star Dahlia but no block in which the white “star” formed between each of the printed fabric petals is the background of the block rather than actual pieces appliquéd in place.

She reached out to me because she had seen my posts on a mystery quilt my husband’s niece inherited. It turned out to be a Star Dahlia quilt but Tammy thought I might have come across her version during my quest. Tammy is not a quilter herself but her birth mother is and would love to make a quilt using this block. That was a great incentive to help.

If I couldn’t find the exact block, I thought, perhaps I could create it. Having embarked in early 2018 on a huge needleturn appliqué project – Hazel’s Diary Quilt – I thought it would be fun and useful to reproduce Tammy’s mystery block while practicing my needleturn skills. “This is just the kind of challenge I love!” I told her.

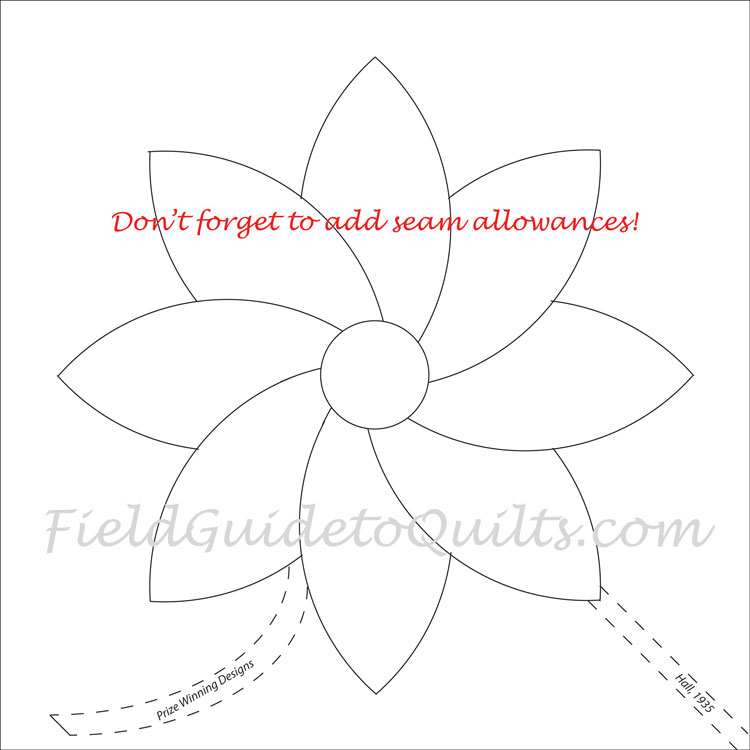
I too searched online but could not find a block exactly like the one in Tammy’s quilt. I did find a couple of dahlia blocks that seemed to match the outline of what I was already thinking of as “Tammy’s Dahlia.” The Friendship Dahlia Diagram on FieldGuidetoQuilts.com was a good start:
I also found a lovely version on Barb’s Block and Border blog of a Friendship Dahlia quilt made by her mother in the 1950s using a pattern in Aunt Martha’s Favorite Quilts: 17 Quilt Patterns Pieced and Appliqued, first published in 1935.

In both versions I could see that if the lines of the petals were continued to the center circle, the block would look very much like Tammy’s Dahlia. Using the software program EQ7 (in which I am not very proficient), I attempted to draw the design . . .
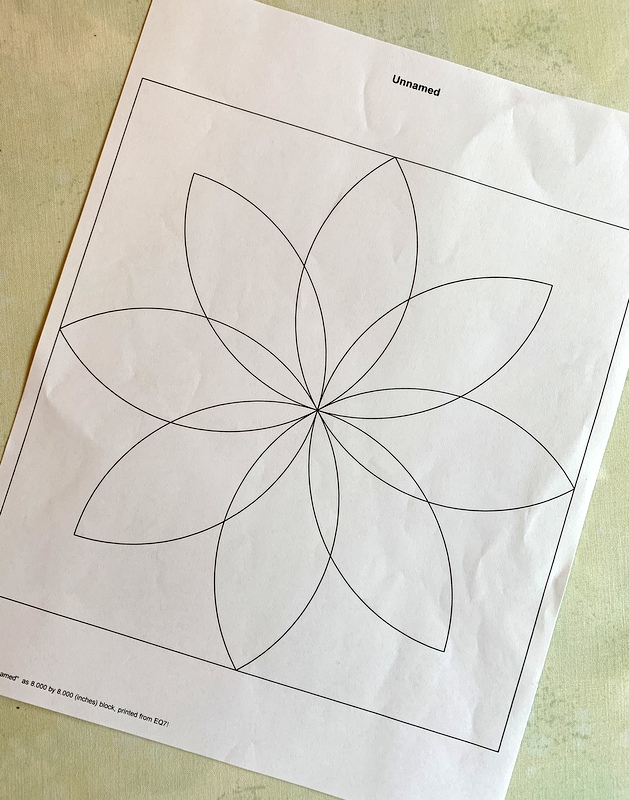
. . . and then created a mock-up using “fabric” made of paper. What I mean is that I photocopied a piece of fabric (in this case a print from Fig Tree that I’ve been hoarding), cut out the shapes, and glued them onto freezer paper:
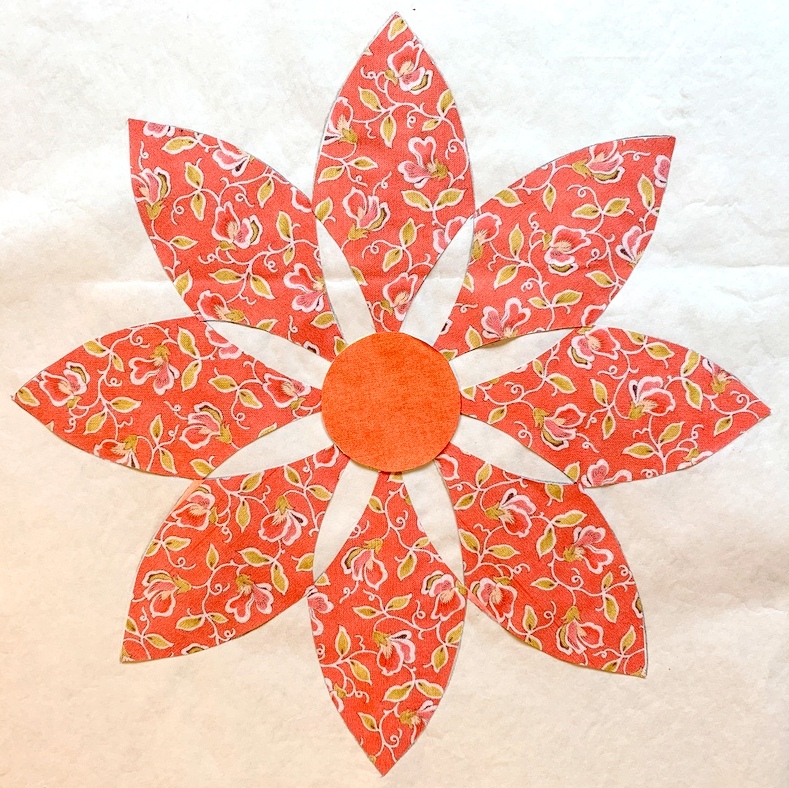
Right away I could see that the white star shapes were too narrow compared to Tammy’s version. Every few weeks I would head back to the computer and play around with the software. Here are just two more of numerous versions I worked on:
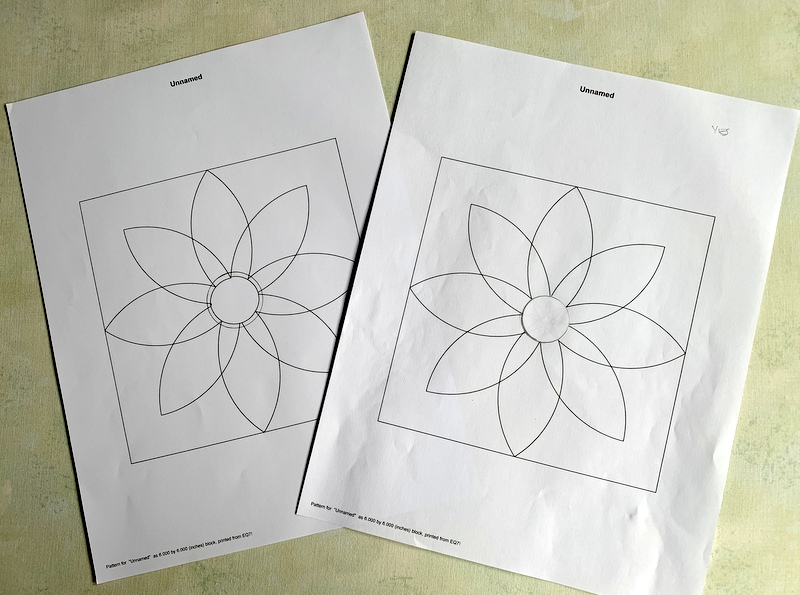
And here is my first test block made using actual fabric:
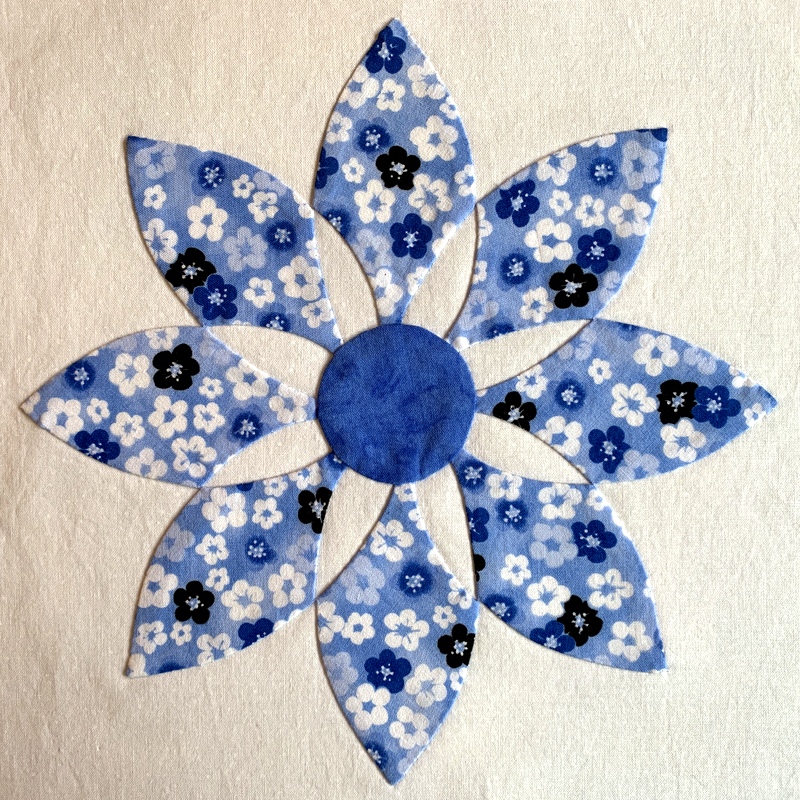
This block measures 9½” from tip to tip so it’s the same size as the one in Tammy’s quilt, sized for a quilt block that finishes at 10½” square.

My second test block measures 11″ from tip to tip, sized for a 12″ finished block:
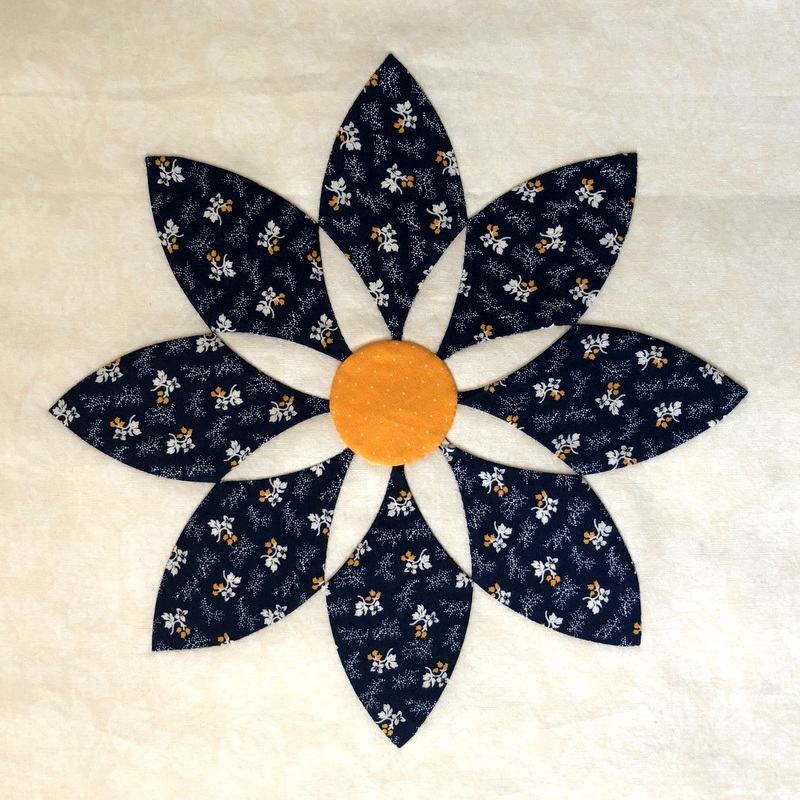

Both blocks turned out reasonably well but I wasn’t satisfied. I wanted the inside tip of the petal to come to a point like some of the ones in Tammy’s quilt. It’s tricky because the curves of the inner point are convex rather than concave. Just a couple days ago I made a test petal — and nailed it!
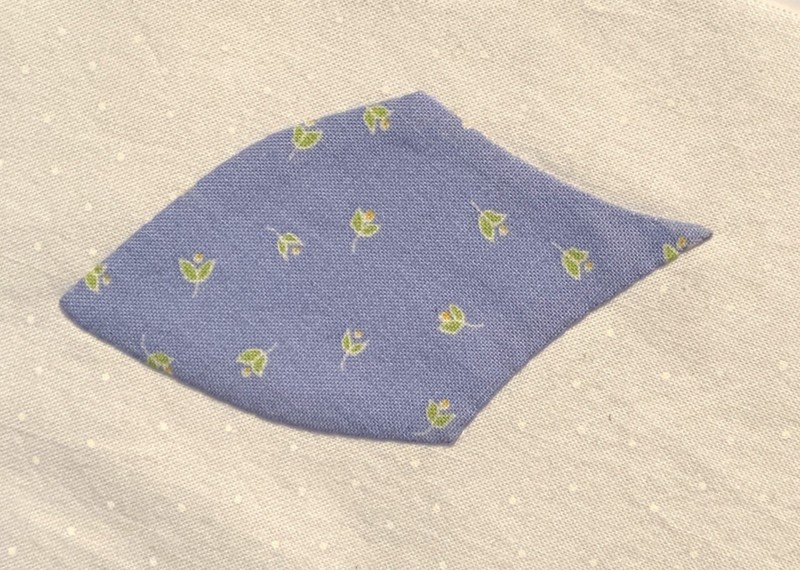
I sure couldn’t have done that a few months ago.

Tammy has been wonderfully patient while I worked on this project in fits and starts. Now that Hazel’s Diary Quilt is off being quilted, I am at last free to turn my attention back to Tammy’s Dahlia and, with the help of a graphic artist, finish this project in the next few weeks. I am so looking forward to the day when I can forward the pattern to Tammy and she in turn can give it to her birth mother.

I’ll be sure to show you the final product. If there is interest, I will post the pattern on my website as a free download.


Posted in appliqué, family, Hazel's Diary Quilt, needleturn appliqué, update | 13 Comments

Kitchen Remodel: An Update

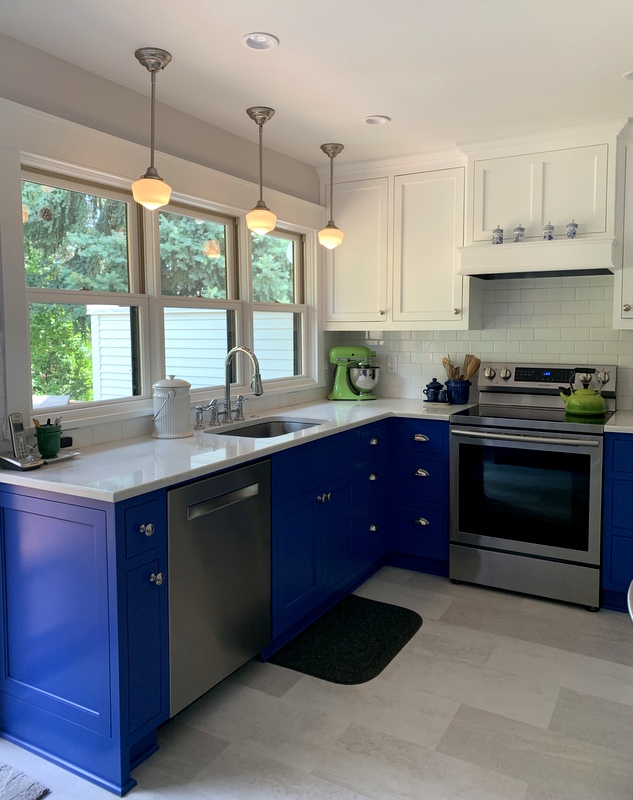
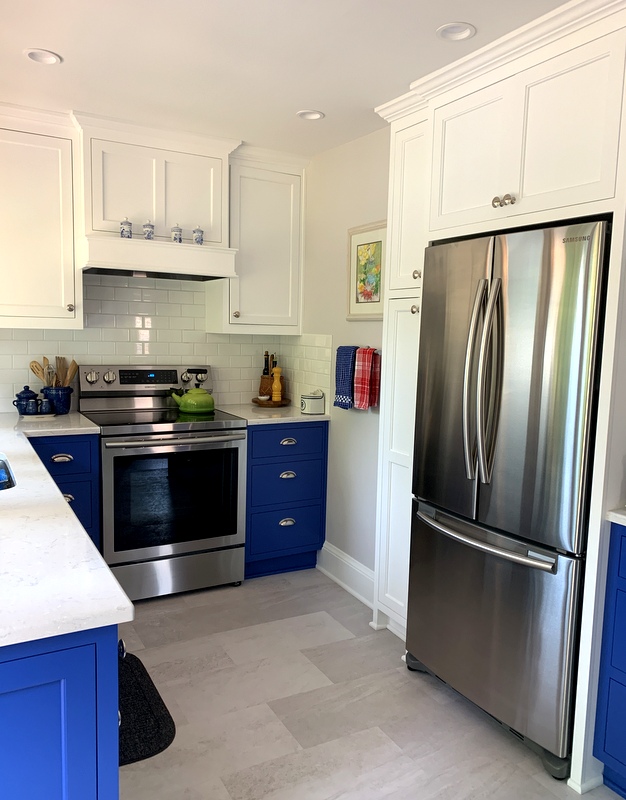
It’s been a couple of months since I posted photos of our kitchen remodel. It was almost complete by mid-June and for all practical purposes it’s complete now, although there are a couple of technical issues to resolve regarding a lower cabinet. I’m still planning to do a “before and after” post but for now I’ll show you pictures of the kitchen so you can see some of my decorating choices.

Here’s the view looking toward the southeast corner:

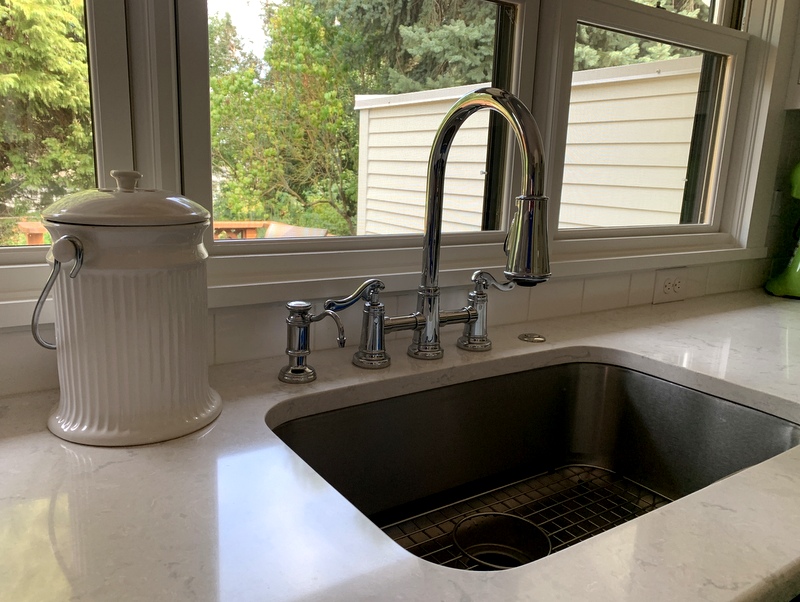
The kitchen faucet was one of the very first things I bought and I was a little nervous about how big it seemed:

My husband and I were on the same page about wanting hot and cold faucets rather than one faucet that has to be adjusted to hot and cold. Once installed the fixture seemed to fit just fine. The first soap dispenser I chose was so wobbly I sent it back and the replacement almost looks like it’s part of a kitchen faucet set.
Opting for a single sink was such a good decision. Our old sink was divided. It’s so much easier to wash large pots and pans in this one, and anything not going into the dishwasher gets washed and dried and put away.

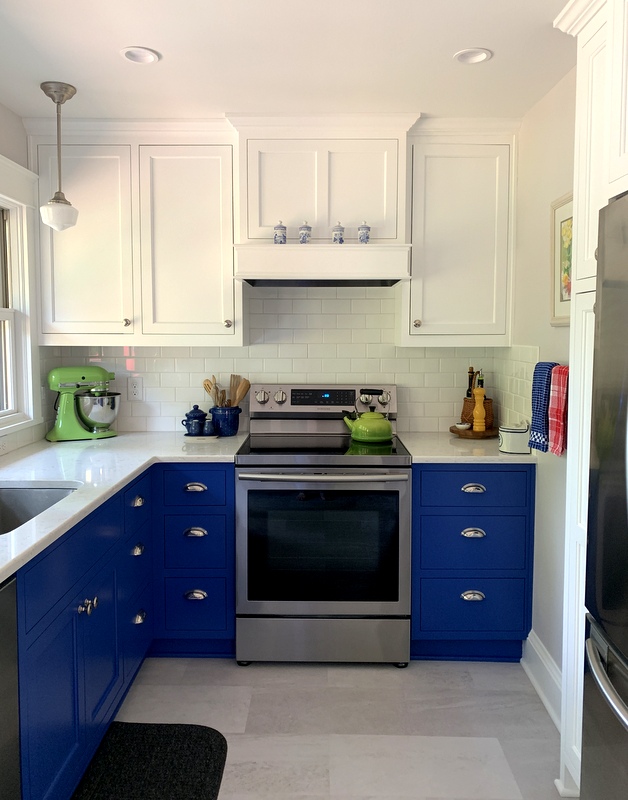
Here’s a straight shot of the south wall:

You can probably tell from this photo that my blue and white color scheme is punctuated by splashes of primary colors.

Looking toward the southwest corner:

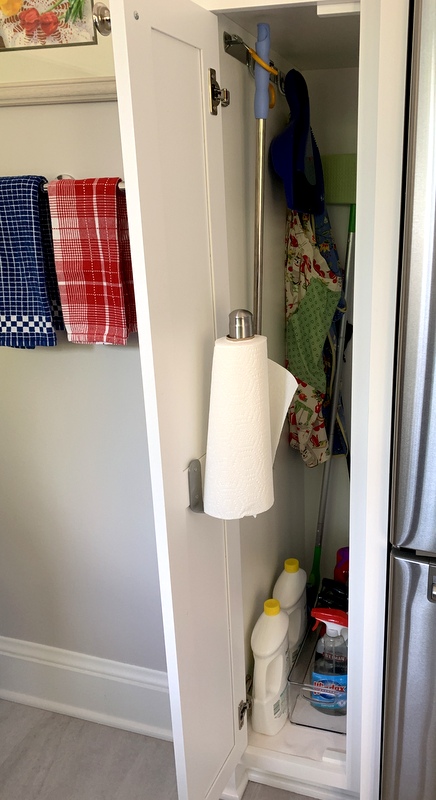
Here’s a peek into the broom closet to the left of the fridge:

Notice the paper towel dispenser mounted on the inside door? One less thing taking up space on the kitchen counter!

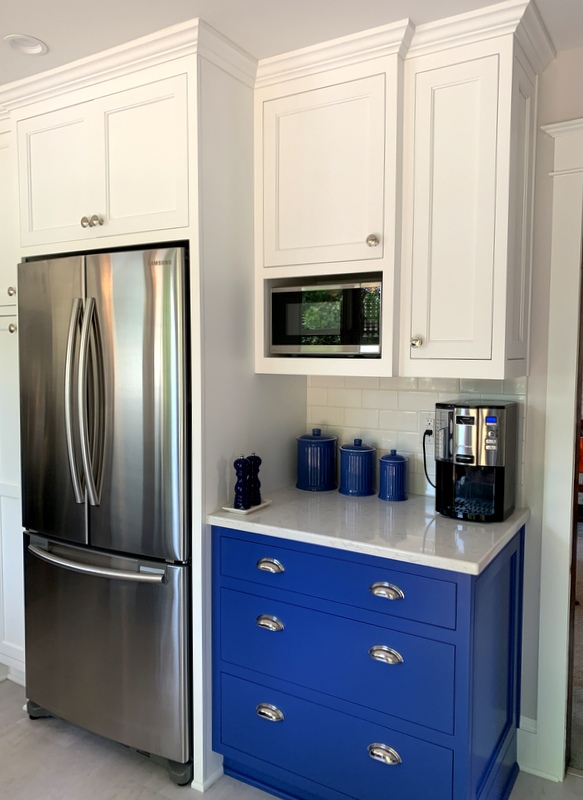
The rest of the west wall:

The blue ceramic canisters were chosen not just for their color. They are shaped along the lines of the white ceramic composter to the left of the sink (see second photo).

Circling around to the north wall:

There’s my new cookie jar. And how do you like the retro-style kitchen step stool? It arrived in a flat box a few weeks ago but didn’t get assembled until last night, which tells you something about the timing of this post. It’s a happy coincidence that the green of the step stool is repeated in the watercolor above it.

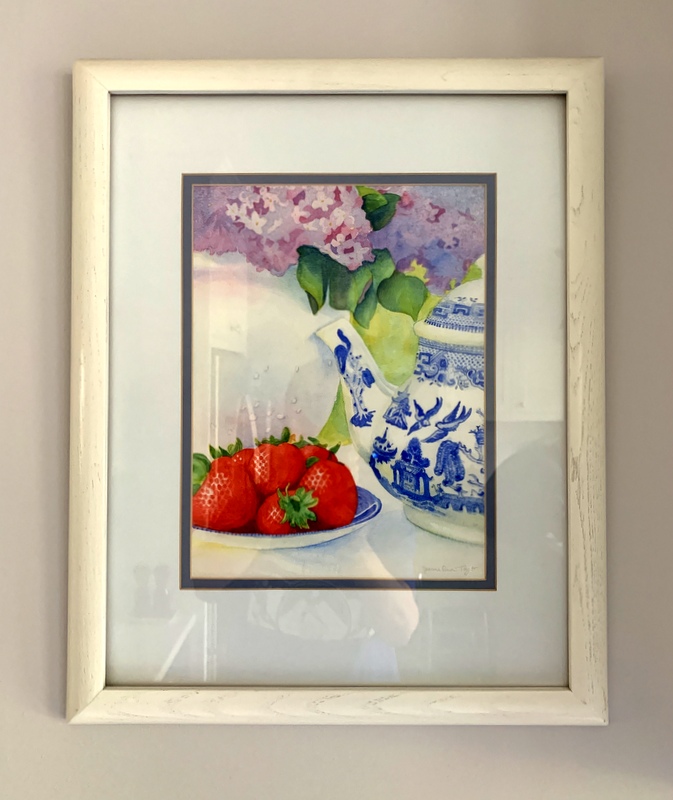
Speaking of which, I must tell you that the three pieces of artwork in my kitchen are by my talented daughter-in-law, Jeanne Ann White. Here’s a close-up of the original watercolor to the left of the glass-fronted upper cabinet . . .


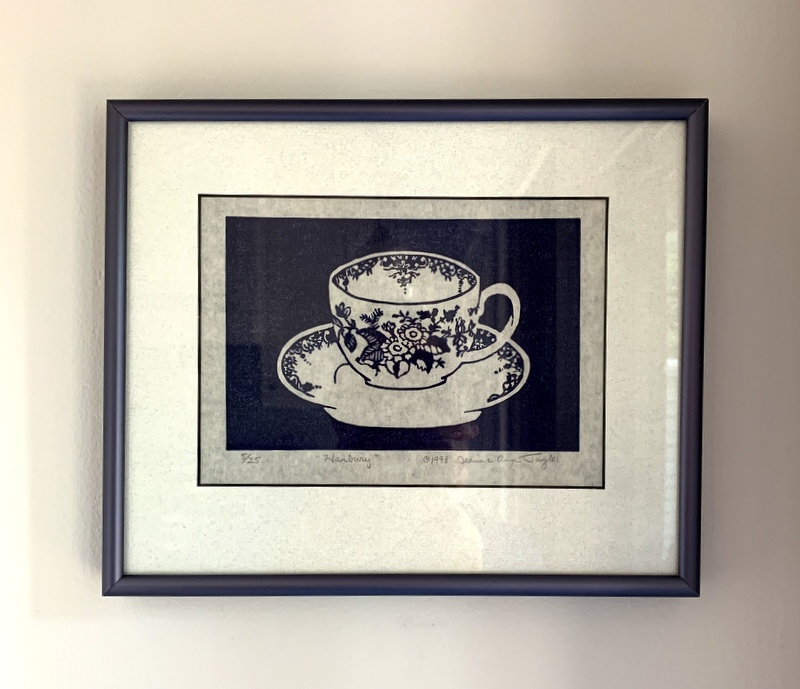
. . . and the linocut print on the right side of the upper cabinet . . .


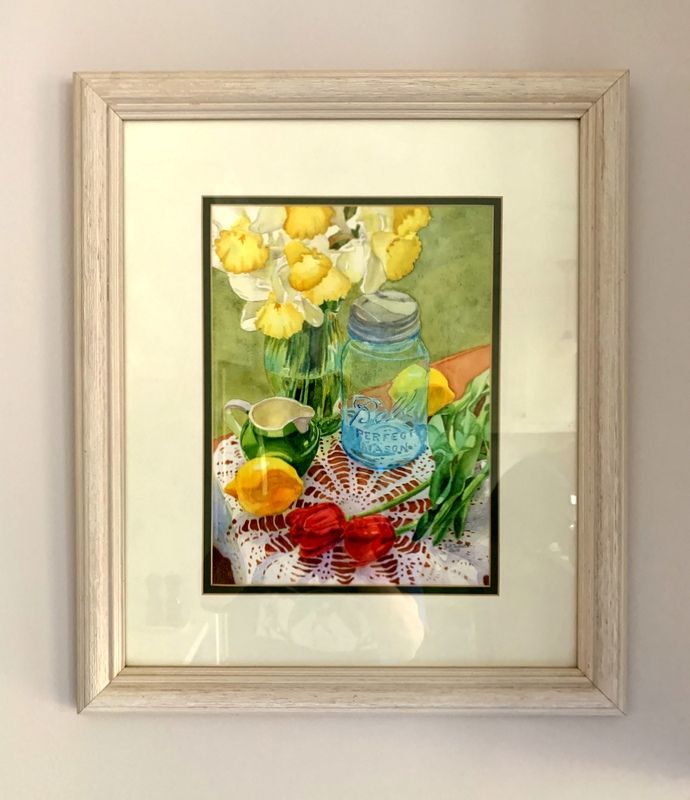
. . . and the original watercolor to the left of the refrigerator:

I love what Jeanne Ann’s artwork adds to the kitchen!

So what’s left? Well, in addition to the aforementioned cabinet issue — happily not noticeable in any of these photos — I still plan to make a tailored valance for each window. That project was put on hold while I labored on my Hazel’s Diary Quilt top. And I have something in mind for the glass-fronted cabinet I think you’re going to like.

Before I embark on those, I have a certain project to finish up that I’ve been working on periodically for months but haven’t written about yet. Although not connected in any way to Hazel’s Diary Quilt, it does involve needleturn appliqué. I hope you’ll check back in with me to see what it’s all about.

Thanks for stopping by the Portland White House to see my new kitchen!


Posted in appliqué, family, home dec, kitchen remodel, needleturn appliqué, update | 17 Comments

Hazel’s Diary Quilt: A Red Letter Day

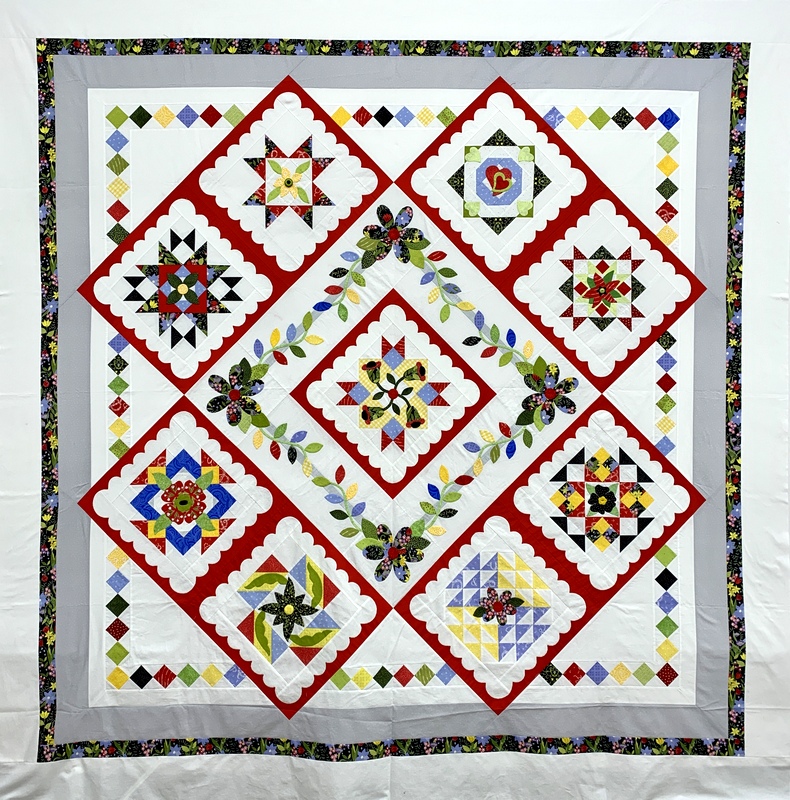
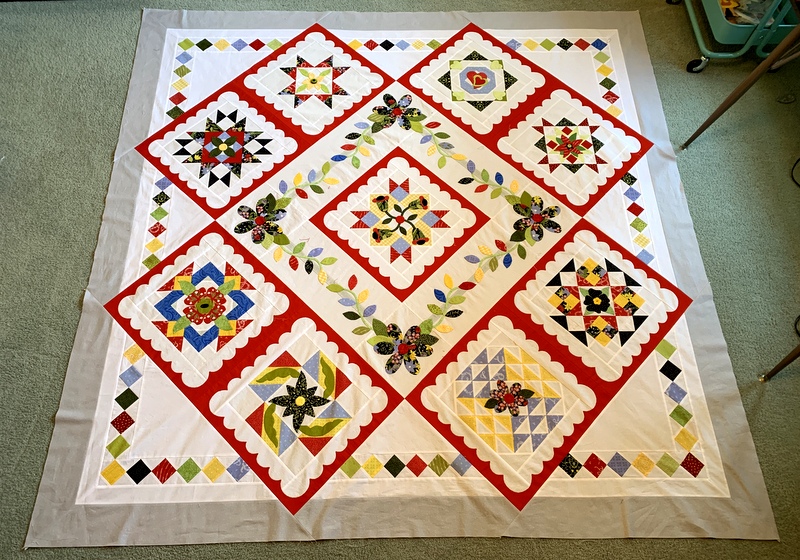
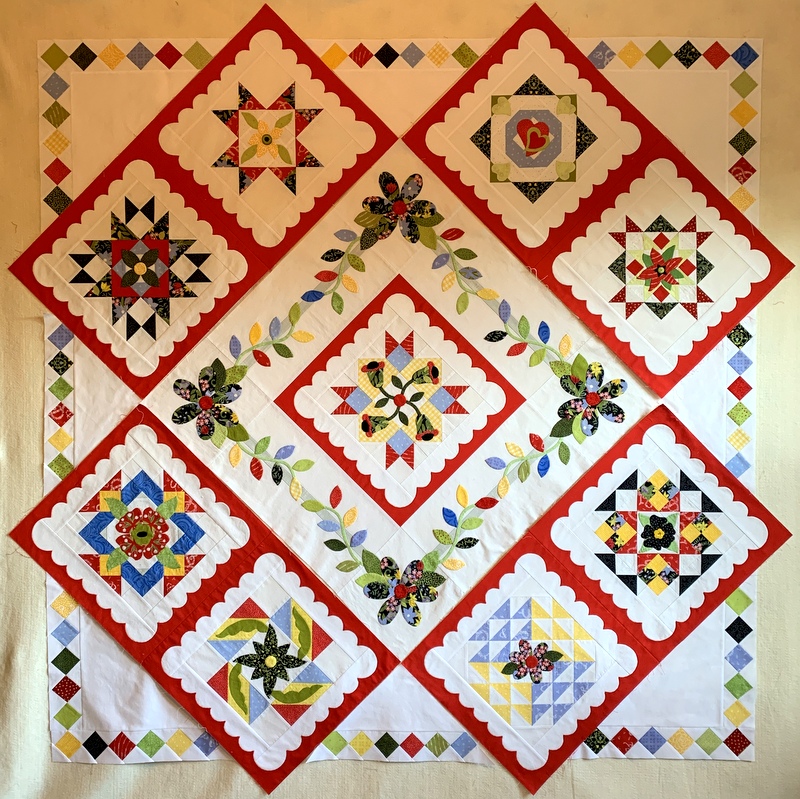
My version of Hazel’s Diary Quilt top is finished — all 97½ square inches of it! Take a look:

I actually finished it on Wednesday. No room or wall in my house is big enough to lay the quilt out flat so I photographed it yesterday at Montavilla Sewing Center in Lake Oswego, where I teach, because the design wall there is just tall enough to hold the quilt.

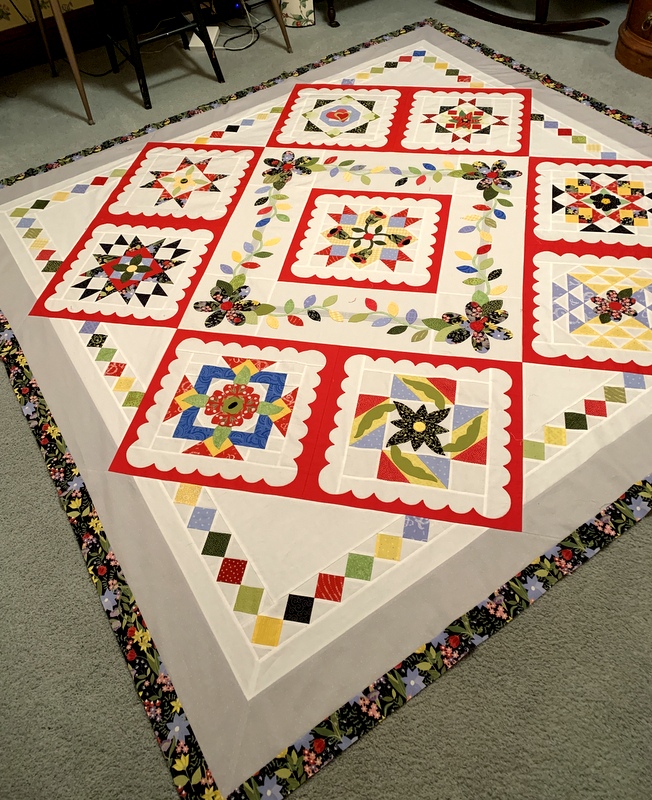
Here are some shots at home as the quilt top neared completion. I was standing on a desk to take this one:

I really appreciate how the grey border calms down the bright colors in the interior of the quilt.

Shelly Pagliai’s original design calls for a narrow white border followed by a double border of scrappy squares that finishes at 3″ and then another fairly narrow white border. I skipped the first white border and added a strip of my main focus fabric in place of the scrappy squares:

Think of how much time I saved! That wasn’t why I did it, though; I had planned to use a floral border there from the very beginning. I cut my final white border 6″ wide, thinking I might trim an inch or two off after it’s been quilted.

And speaking of being quilted . . . the quilt top and back were delivered this morning to the longarm quilter. I’m excited about being done with the top and very excited about the prospect of someone else quilting it for me!


Posted in appliqué, Hazel's Diary Quilt, needleturn appliqué, update | 15 Comments

Dogs and Cats and Pillowcases, Oh My!

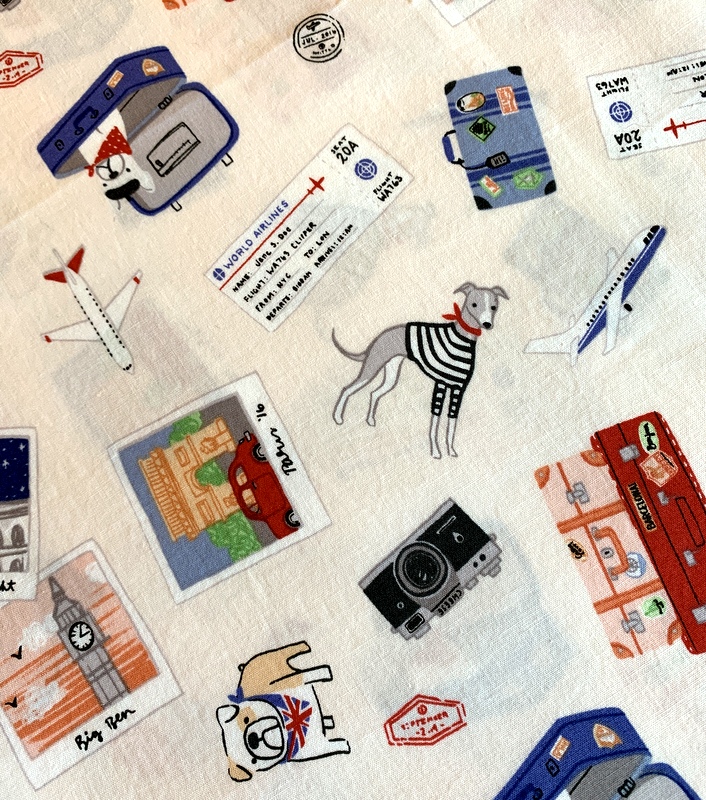
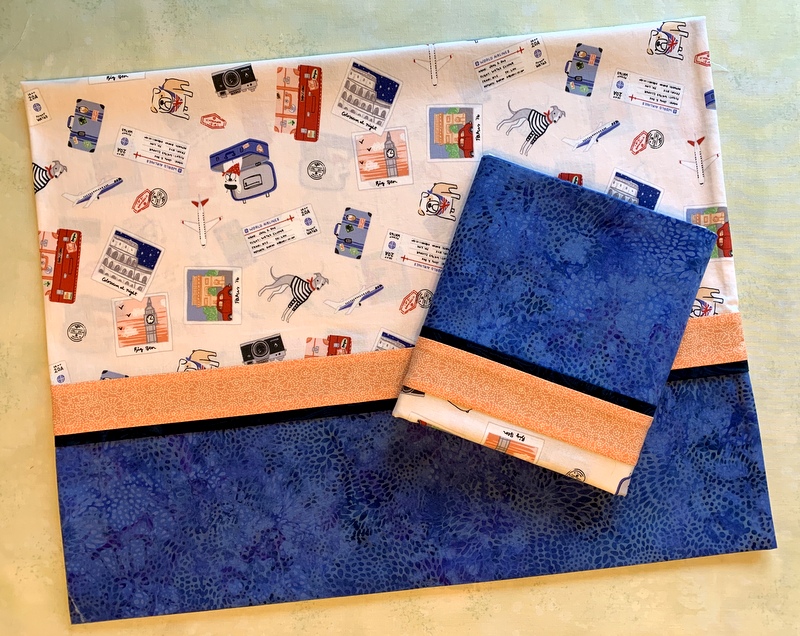
When I spotted this whimsical travel-themed fabric at a quilt shop in central Oregon last year, the first person I thought of was my friend Anna. Anna loves animals (especially dogs), France, and world travel — probably in that order.

Several years ago Anna sold her home in Portland and moved to Paris to live. Imagine that! It was a dream she had had for many years. I knew her through a mutual friend but had not seen her for some time when we ran into each other on the street just weeks before her departure. We stayed in touch after this chance meeting and a few years later, when Anna proposed a short-term house swap, my husband and I jumped at the chance.

In 2015 Charlie and I spent three weeks at Anna’s apartment in Paris taking care of her sweet cat Buddy . . .


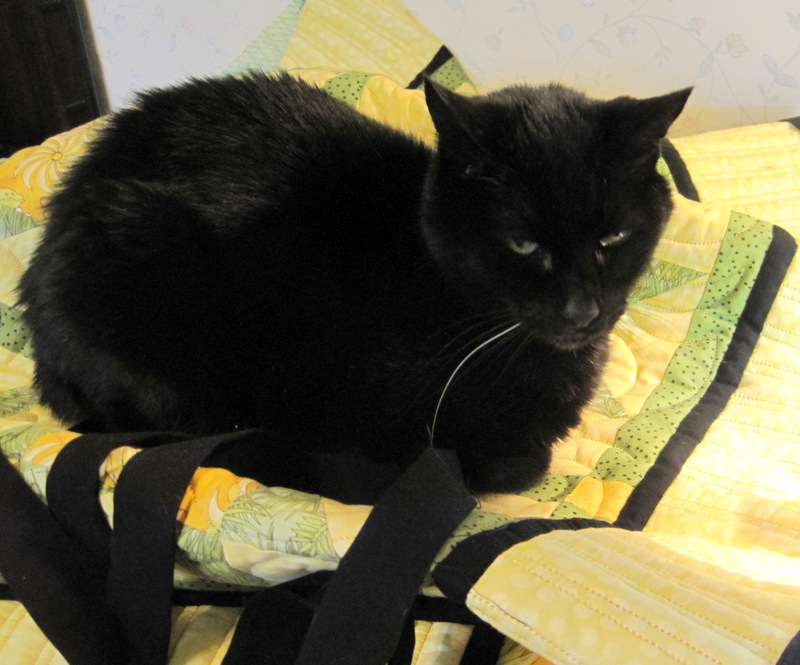
. . . while Anna stayed at our home in Portland taking care of Empress Theodora:

The arrangement worked out splendidly. And I was lucky enough to go back to Paris in the fall of the same year with my twin sister, petsitting for Anna while she went to the United Kingdom to visit her beau, an American who had spent his professional life working in Europe.

Anna subsequently married her beau and they bought a house in France’s Loire Valley which they share with Buddy and two rescue dogs. So you can see how this fabric seems to have Anna’s name written all over it. (In fact, the travel documents on the fabric are in the name of Jane S. Doe but we can use our imaginations.)

I decided to make a pair of pillowcases with the fabric and send them to Anna in France. Months came and went while the fabric stayed in my stash. Then I learned Anna was coming to Oregon this summer for her 50th high school reunion. In no time at all I had made a pair of pillowcases, which were waiting for Anna when she arrived last week:

I tried to tone down the cuteness factor by choosing a rather masculine batik for the cuffs of the cases. After all, husband Joe has to sleep on them too!

(For those who might be interested, the fabric is from the line “Jetset Europe” by Anne Bollman for Clothworks Fabrics. I used my own tutorial to make the pillowcases.)


Posted in cats, family, Paris, roll-it-up pillowcases, tutorial, update | 7 Comments

Hazel’s Diary Quilt: Two Important Updates

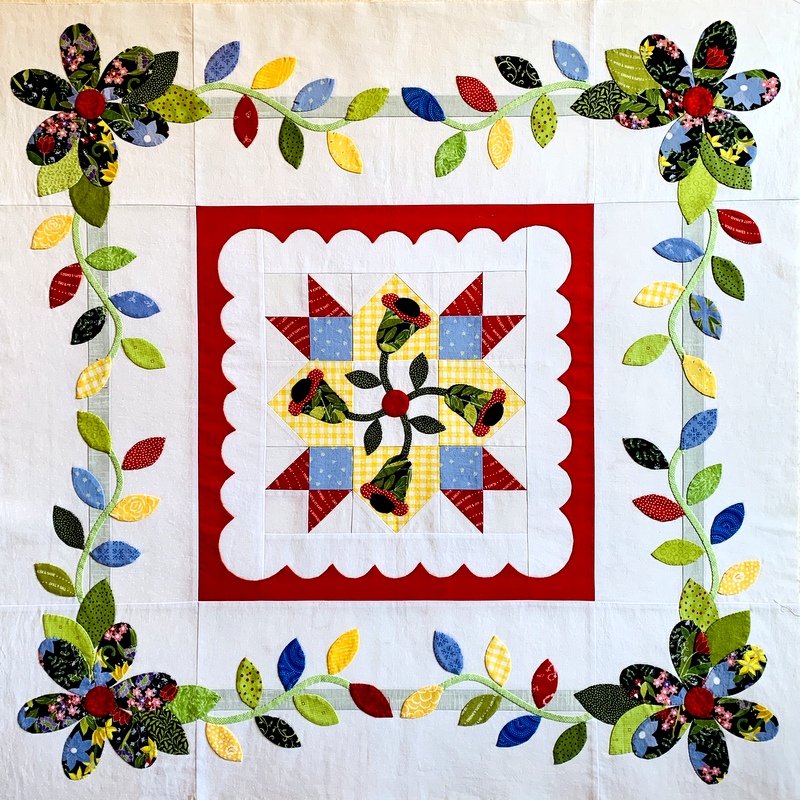
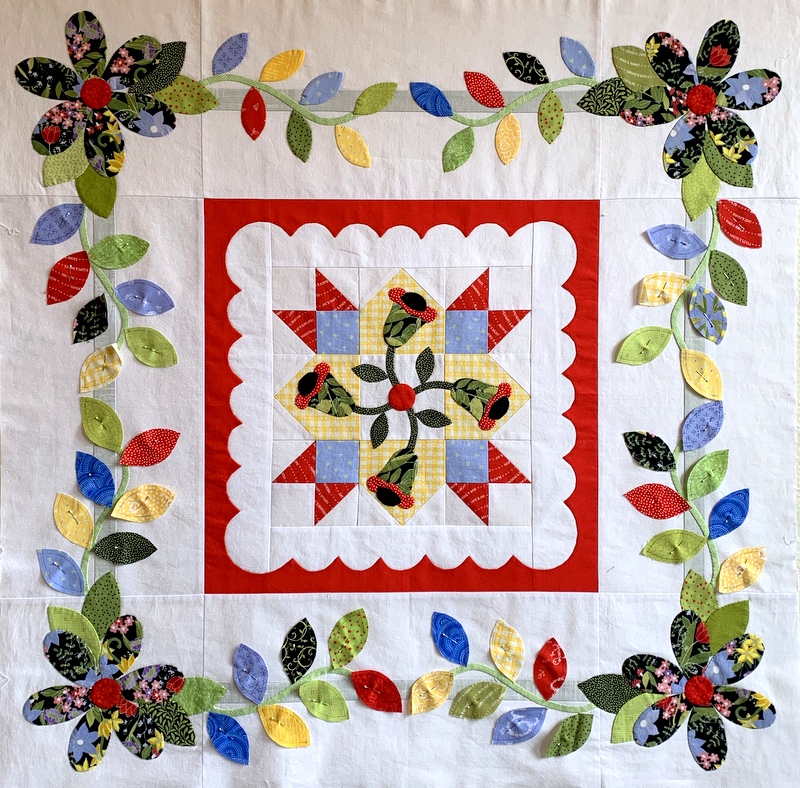
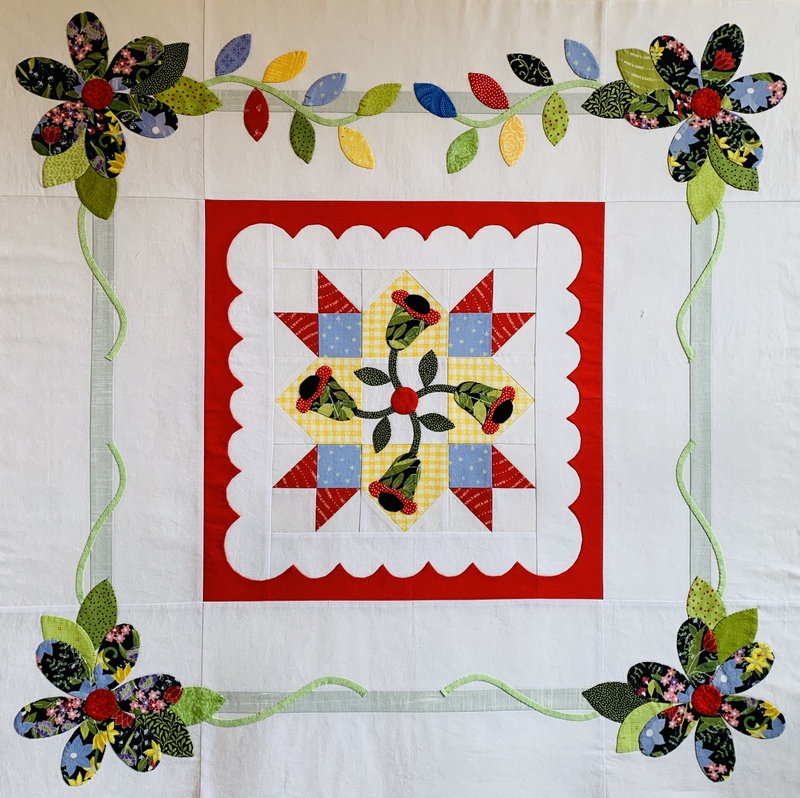
The first piece of big news is that the center medallion is done! Take a look:

The appliqué around the outer edges of the medallion includes eight vines, 24 petals, four circles, 12 leaves around the petals, and 56 leaves along the stems. That’s 104 pieces total. That doesn’t include any of the appliquéd pieces in the center of the block — but then, who’s counting?

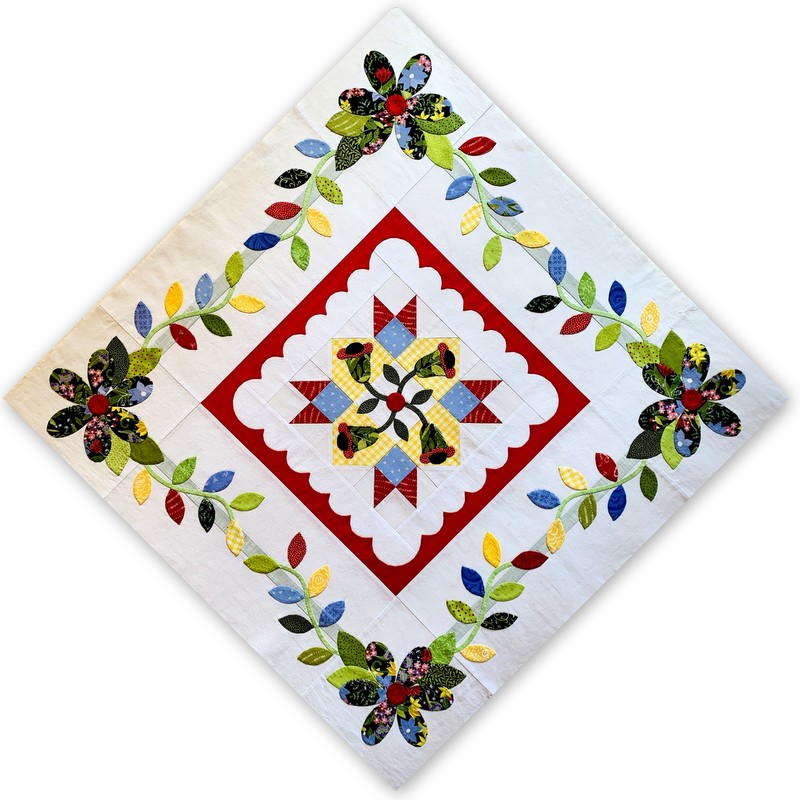
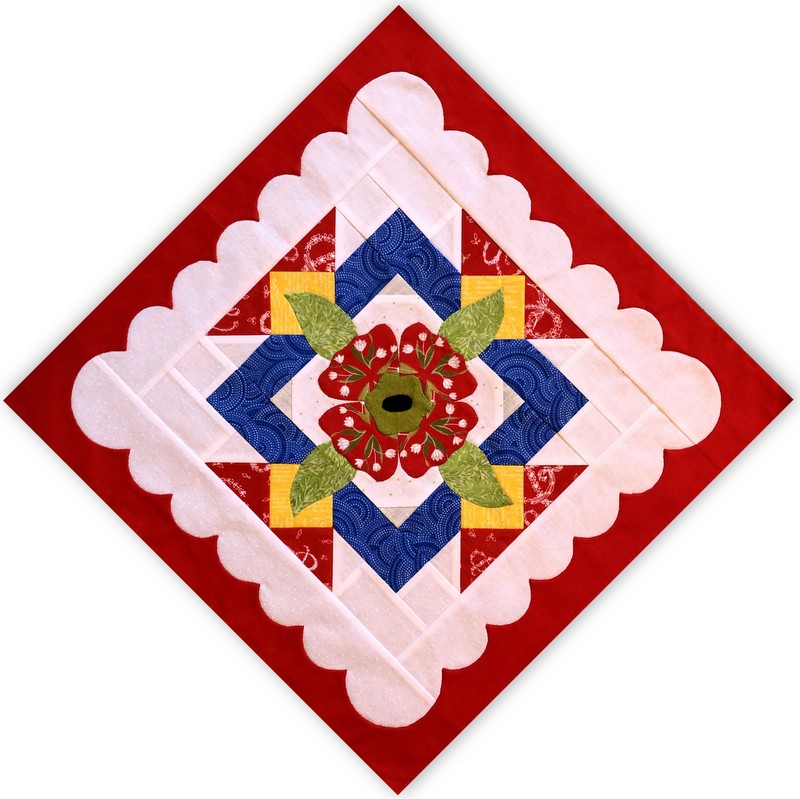
Here is the medallion on point, as it will be in the finished quilt:


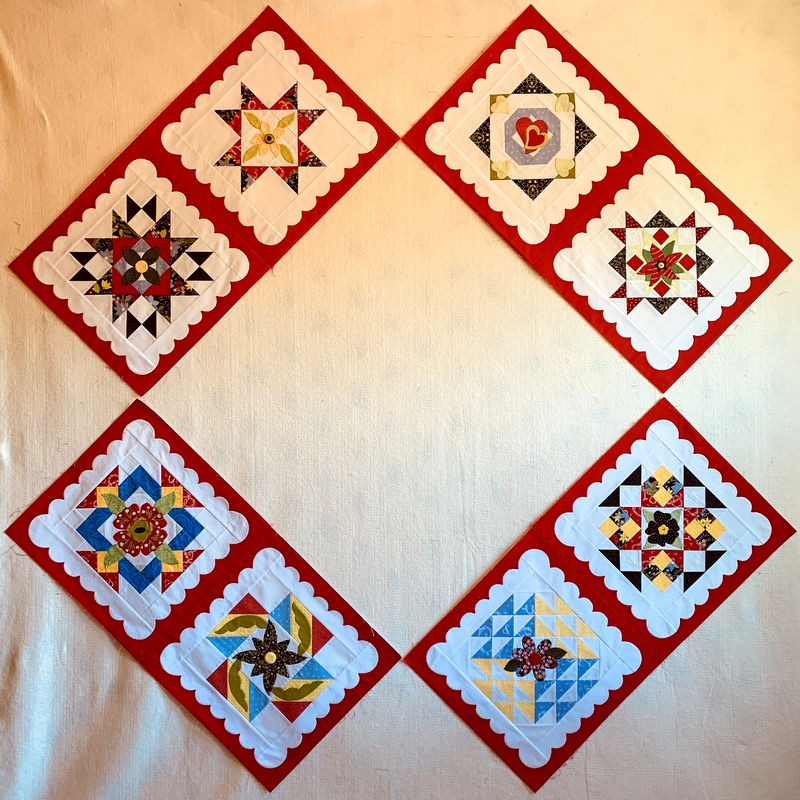
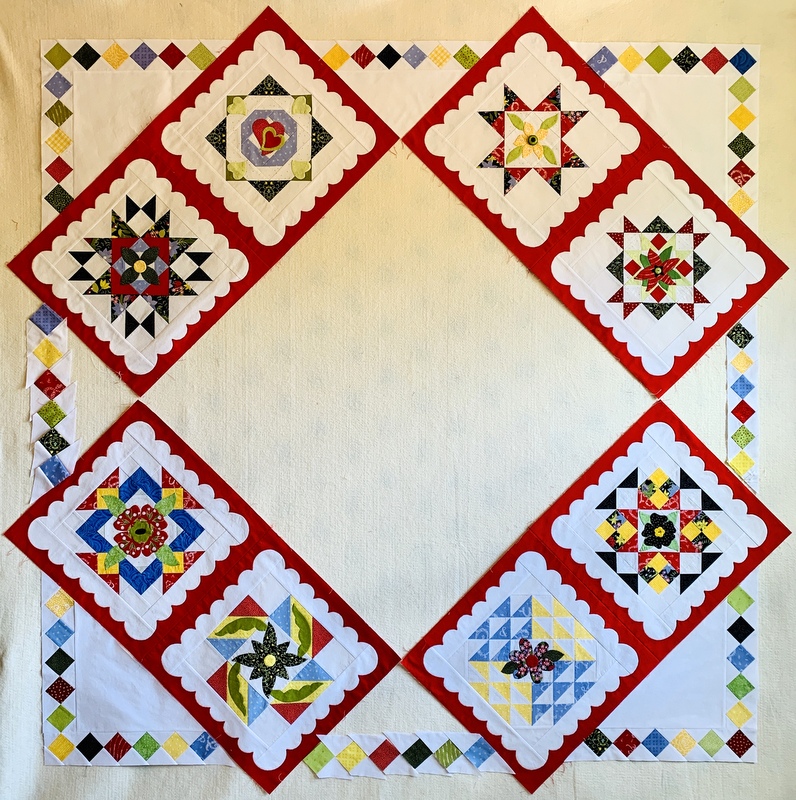
The second piece of news is that I changed the layout. Not a huge change but a significant one. After writing a couple weeks ago about positioning the boldest block in the bottom left quadrant, a couple of my readers suggested trying it in the upper right position. I knew that wasn’t going to happen because I had auditioned that block in every possible position and was happy with its final destination. Still am. No, the change was prompted by my daughter-in-law, Jeanne Ann, who pointed out there was no blue in the upper right side of the quilt.

What I wound up doing was switching the position of the top two blocks. Here’s the “before”. . .

. . . and here’s the “after”:

(Boy, the time of day the photos were taken sure affects the colors.)

Now all four quadrants have a light blue in the background of one of the blocks. The two blocks at the top are the smallest visually in that they take up the least amount of space inside their blocks so it was important to position the remaining “heavier” blocks at the bottom.

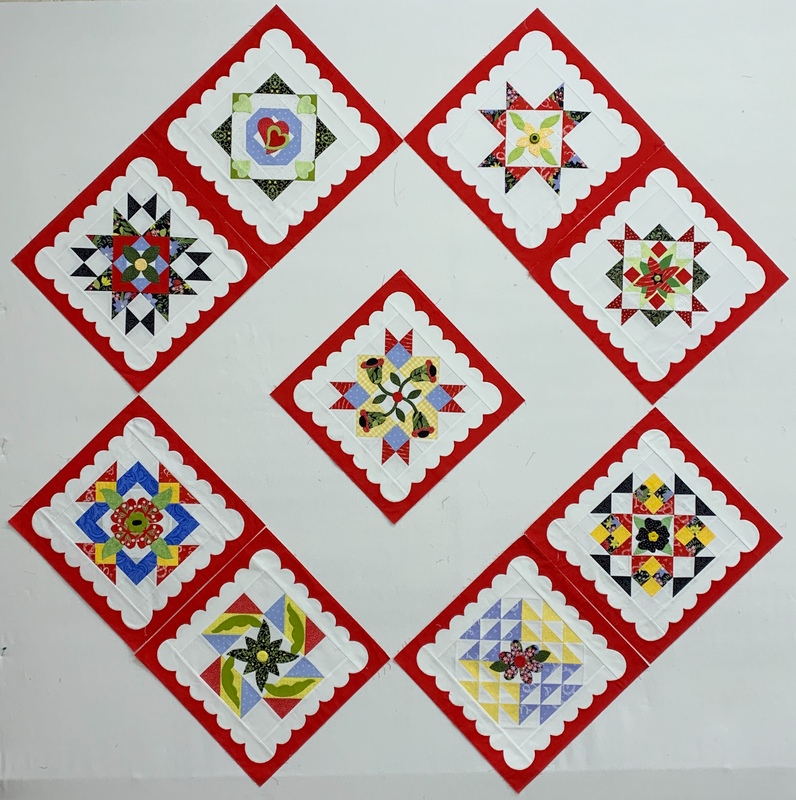
Now take a look at the revised blocks with the center medallion in place and the setting triangle diamonds complete:


I was hoping to have the top complete by the end of July. Not going to happen, as there are mere hours left in the month. I do think I can have it done by next week, though. Now comes the big push!


Posted in appliqué, Hazel's Diary Quilt, needleturn appliqué, update | 9 Comments

Hazel’s Diary Quilt: Fuzzy Quilt Math

I’m working on the squares that go in the setting triangles on my Hazel’s Diary Quilt. Of course I made it harder on myself by departing a bit from designer Shelly Pagliai’s design by adding a sixth on-point square (let’s just call them diamonds) in each corner block.

I assumed that if I added a sixth diamond in the center triangles, the strips would line up properly with the ones in the corners. Nope. The first strip of six diamonds was over an inch too long. Back to the drawing board. I figured that increasing the seam allowances by ⅛” would take care of the difference. My next test strip was the one on the middle right side. It turned out to be about a half-inch too short. (Yes, I will be remaking that one. The bottom center and left center strips haven’t been sewn yet; the diamonds are in place to show my fabric and color choices. I can already see a couple of changes to be made.)

Take Two for the top middle strip: I trimmed the squares to 2⅜” instead of the original 2½” and then simply took a full quarter-inch seam allowance rather than my usual scant quarter-inch. When I put my strip up in the center top of the quilt, it lined up perfectly with the strips in the corners. And only you and I know that those six diamonds are just a skosh smaller than the ones in the corners. I’ll bet if I hadn’t told you, you wouldn’t even have noticed, right?

And what about those appliquéd leaves in the center medallion that I wrote about in my previous post? The good news is I am well past the midway point. The bad news is that it’s slow going. I’m just not very speedy when it comes to needleturn appliqué. By the time I get to the last leaf (#56) in the medallion, I hope to report I’ve cut my stitching time in half.


Posted in appliqué, Hazel's Diary Quilt, needleturn appliqué, update | 9 Comments

Hazel’s Diary Quilt: Leaf It to Me

The first 14 leaves have been appliquéd on the center medallion of my version of Hazel’s Diary Quilt:

My, what a difference they make! They add motion and color to what is already a pretty lively block. Since I used a large floral for my four corner blossoms, I’m using smaller prints for the leaves so they don’t compete too much with the flowers.

I realized early on that I would have to be very careful with color placement of the leaves, all because of one particular block, Coal Miner’s Granddaughter:

This was the third block I made and at the time I was very concerned that the medium blue I had chosen was too bright. (I actually considered making a new block but I worked so hard on that appliquéd flower in the center that I was bound and determined to keep the block in my quilt!)

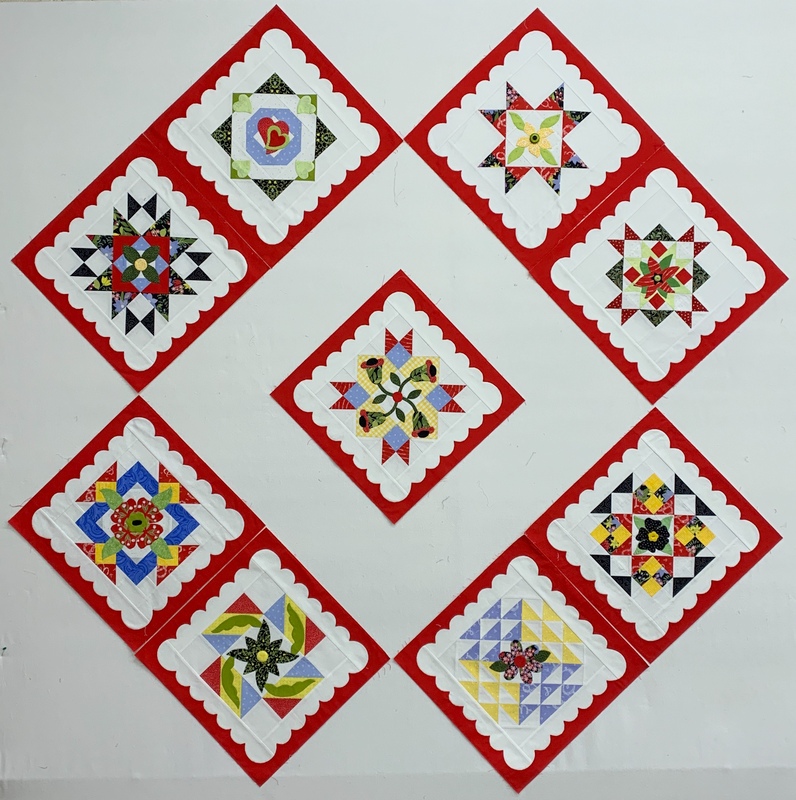
When it came time to lay out the eight blocks that surround the center medallion I deliberately put the bold block on the lower left side, hoping to minimize its impact:

The obvious solution would have been to put the bold block in the center medallion but I reserved that spot for my favorite block, Fair Weather. My thought was to use smaller spots of the bright blue fabric elsewhere in the quilt to balance the bold block.

Here’s the center medallion with the leaves on the remaining three sides pinned into place . . .


. . . and here it is on point surrounded by the outer eight blocks:

You’ll see a bit more of the bold blue in the setting triangles (still to come) which include 2″ finished squares set on point. So what do you think? Is my strategy working?


Posted in appliqué, Hazel's Diary Quilt, needleturn appliqué, update | 14 Comments

Hazel’s Diary Quilt: Medallion Update

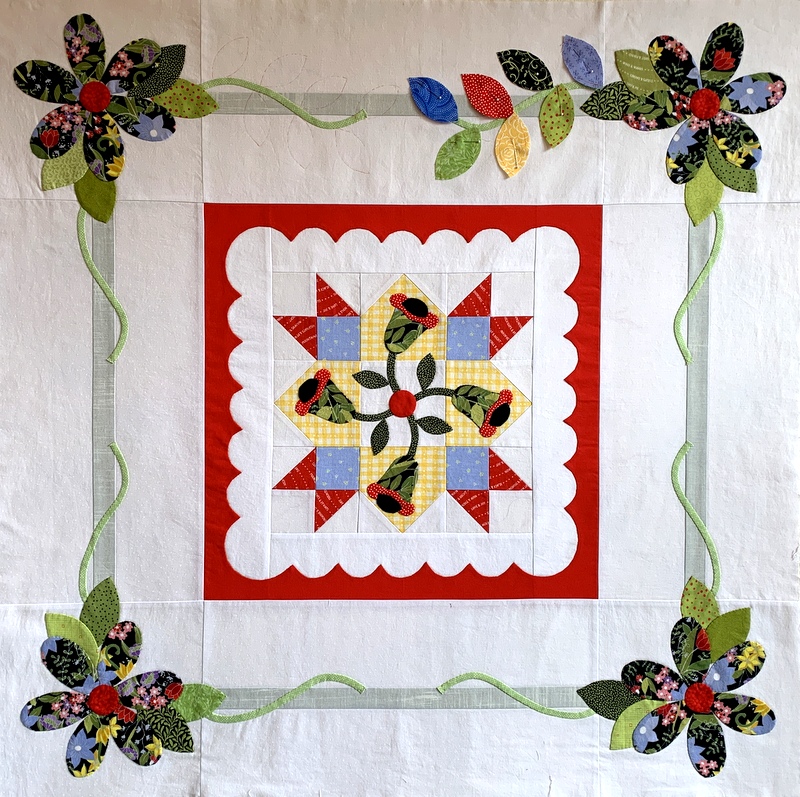
The center medallion in my Hazel’s Diary Quilt may not be progressing swiftly but it is progressing nicely. The four corner blossoms are in place and now I’m busily cutting out the leaves that adorn the vines. I’ve even got the first set pinned in place:

The goal here is to have the leaves look randomly scattered in terms of color but in fact I’m planning the exact placement very carefully. I’ll explain why in my next post.

Needleturning the leaves should be a very enjoyable experience because I finally have the technique down of turning the points. It took me a long time to master that swiping stroke with the needle when you get to the tip of a leaf and start down the other side. Now that I have the hang of it I’m eager to practice it.

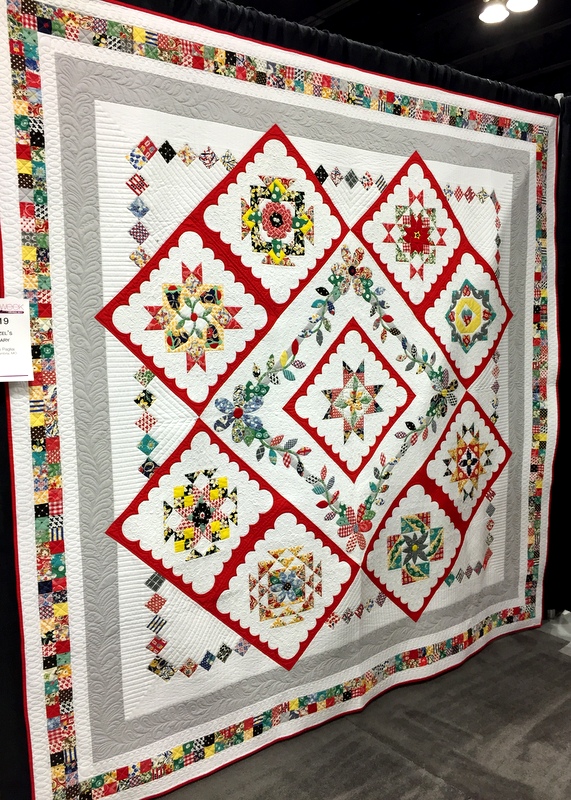
I’m also thinking ahead to the next step: setting triangles with lots of little squares set on point. To show you what I mean, take a look at designer Shelly Pagliai’s original quilt:

I’m thinking about making a small adjustment to the setting triangles that will require even more squares on point. Let’s see if I can figure out the quilt math . . .


Posted in appliqué, Hazel's Diary Quilt, needleturn appliqué, update | 6 Comments

Stitching and Crafting Along

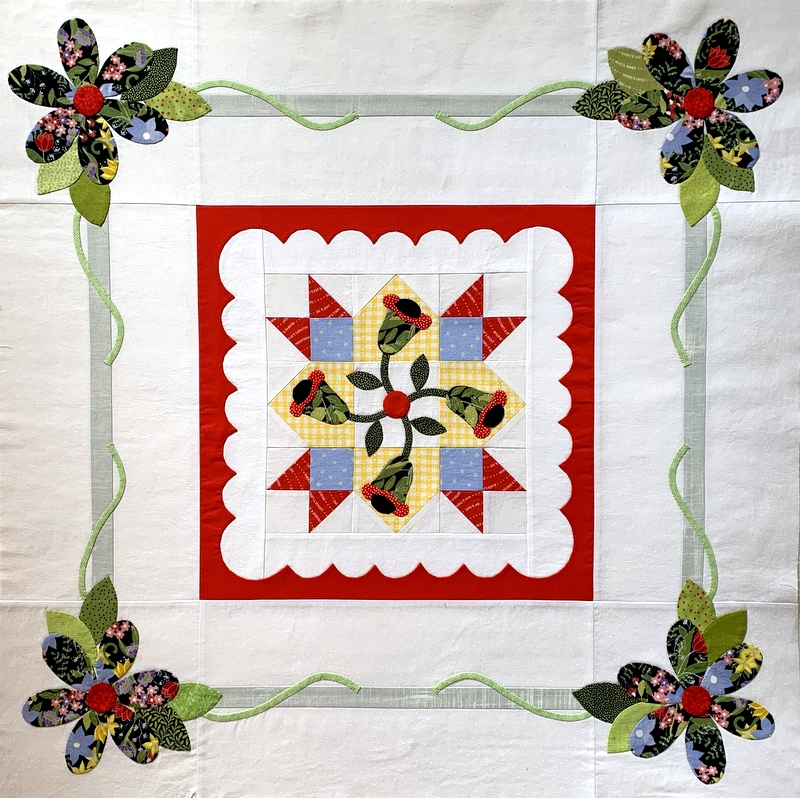
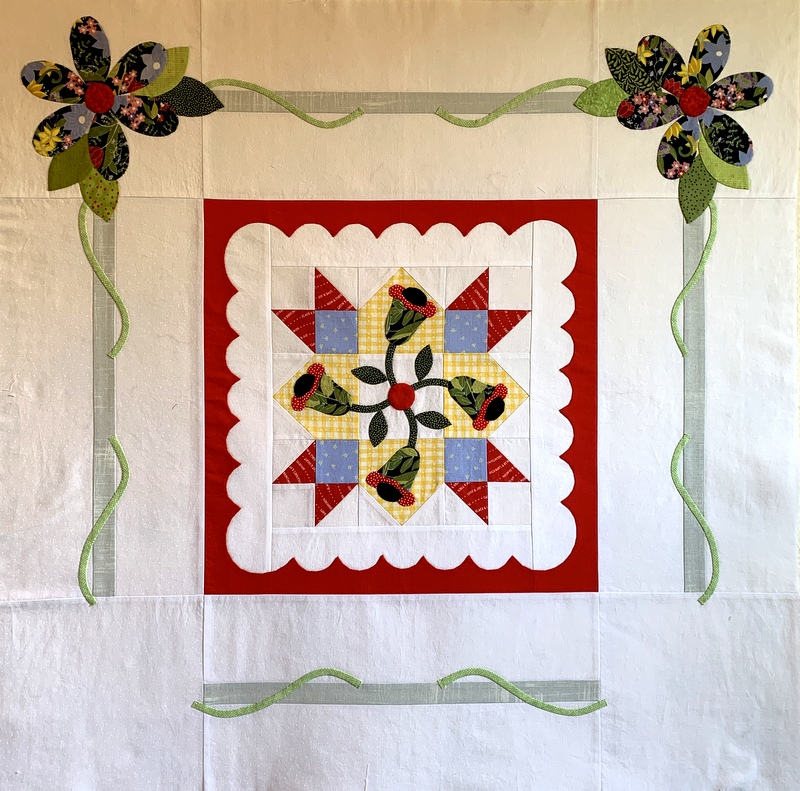
I had hoped to complete all the appliqué in the center medallion of Hazel’s Diary Quilt by now. Here’s how far I’ve gotten:


Yes, I have a ways to go but I’m pretty excited by the way the medallion is coming together. For reference, the center block including the red scallop measures 18″ square and the entire medallion measures 36½” square. It will be on point in the finished quilt. There will be flowers in each corner and leaves along the vines.

What’s happened in the two weeks since my last post? My husband Charlie and I took a road trip to Ashland, home of the Oregon Shakespeare Festival, in the southern part of the state. There we rendezvoused with Charlie’s daughter Barbie and our granddaughters Bonnie (19) and Beatrice (16) for a family vacation. They live in San Francisco and Ashland just happens to be the halfway point between our two homes. Despite being saddled with summer colds, Charlie and I had a great time with the three Bs. We saw a couple of plays, enjoyed strolling around the charming town of Ashland, and did a little shopping.

We brought Beatrice back to Portland with us as she was accepted into Oregon Ballet Theatre’s intensive summer training program for the month of July. She is in class six days a week — that’s pretty intensive! We are so delighted that she can be with us for part of the summer. We always look forward to Bonnie and Beatrice’s summer visits. Bonnie couldn’t come this year because she’s working two jobs at home. She’s so grown up now; she even has her driver’s license!

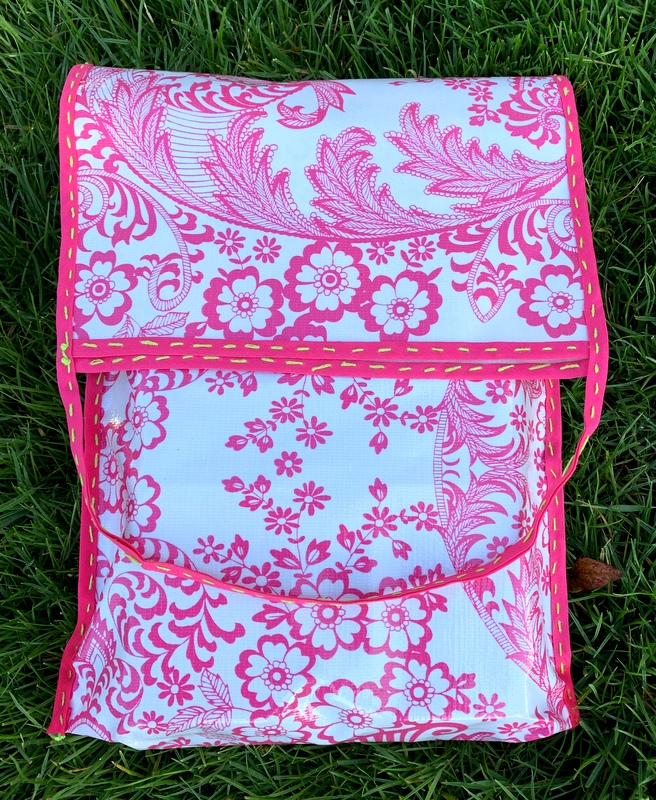
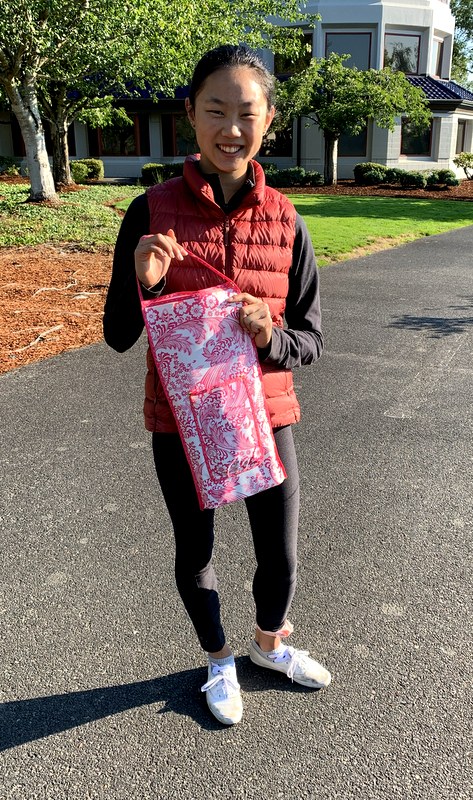
I took my appliqué project to Ashland to work on and managed to apply a few leaves and petals. Barbie was much more productive. She completed a lunchbag for Beatrice while we there — completely by hand and without a pattern. She’s very creative that way. Take a look:


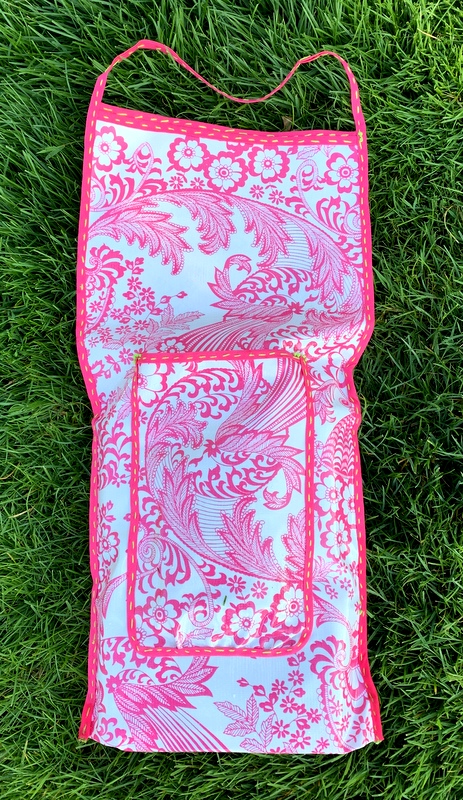
The bag is made of oilcloth. Barbie enclosed the raw edges with double-fold bias tape that she stitched on to the oilcloth with lime green embroidery floss. She sized the bag to hold three plastic containers: one for a sandwich, one for fresh vegetables, and one for fresh fruit. Then she added a pocket on the outside to hold granola bars:

A ballerina dancing several hours a day needs a substantial lunch!

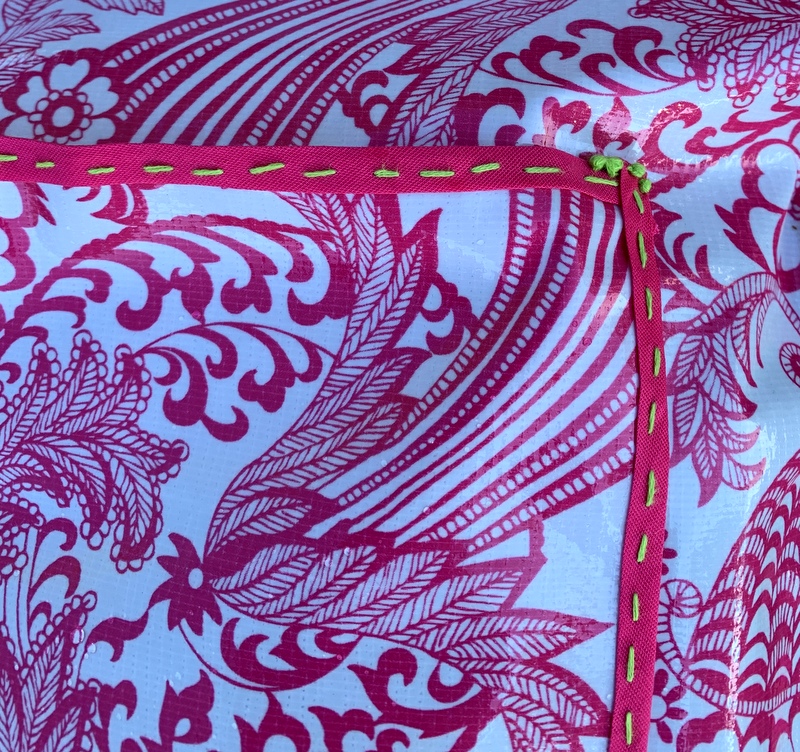
Look at the cute detail of French knots where the ends of the bias tape meet:

Here’s Bea on arrival at OBT for her first day of classes:

Back to Hazel’s Diary Quilt: I hope to show you my completed medallion very shortly. If I’m to finish my quilt top by the end of July (my stated goal), I need to pick up the pace.


Posted in appliqué, family, Hazel's Diary Quilt, needleturn appliqué, tote bags, update | 7 Comments