Idyllic Block — Supersized

What’s going on here?


Simply this: I supersized Corey Yoder’s Idyllic block. As designed, her block finishes at 14″ square. I enlarged it to finish at 21″ square. Why? Curiosity more than anything else — plus the fact that I bought enough of these fabrics to play around a bit.

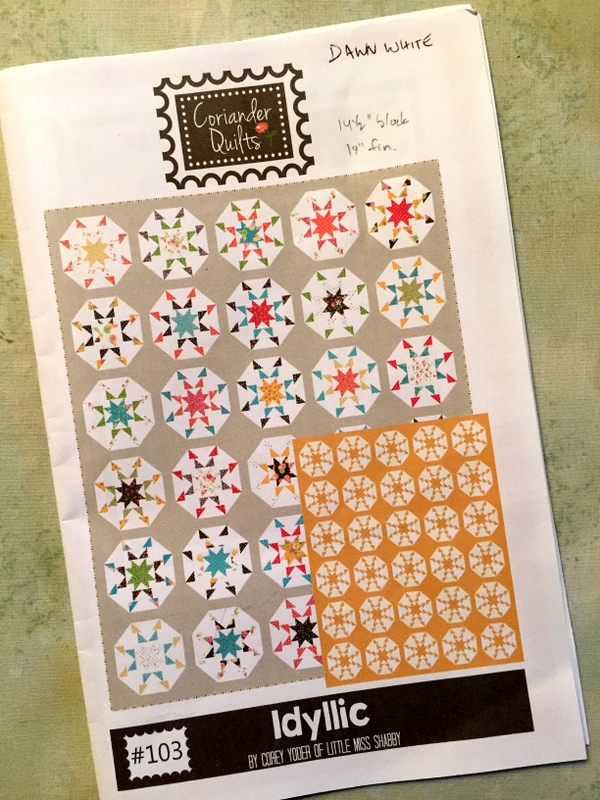
One of the things I love about this pattern is that it can look traditional or modern depending on fabric choices. Take a look at the pattern cover:

The scrappy version pictured above looks quite traditional to my eye whereas the two-color version has a modern vibe. I figured it would look even more modern if the blocks were larger.

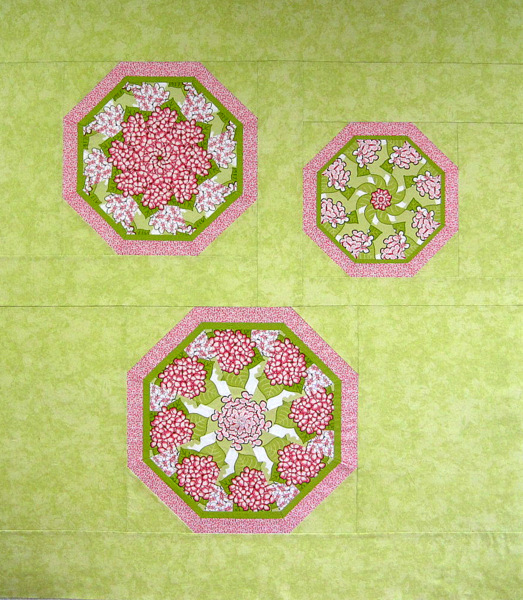
That got me to thinking about a kaleidoscope quilt I made as an experiment a few years ago using three different size blocks:

(This quilt top eventually became a baby quilt for a darling great niece. You can see the finished quilt here.)

What, I wonder, would Idyllic look like as a quilt with three sizes of blocks? I know how to find out . . .

But here’s the thing. Each Idyllic block has three sets of Flying Geese units in it. Two are the same size and one is smaller. The proportions need to remain consistent. If I make a block halfway between the ones I’ve already made, it needs to finish at 17½” inches square. That would make the smaller Flying Geese unit finish at 1⅞” x 3¾”.

Do I really want to go there?


Posted in Idyllic, kaleidoscope quilts, update | 7 Comments

Hazel’s Diary Quilt: Canasta (Block 3)

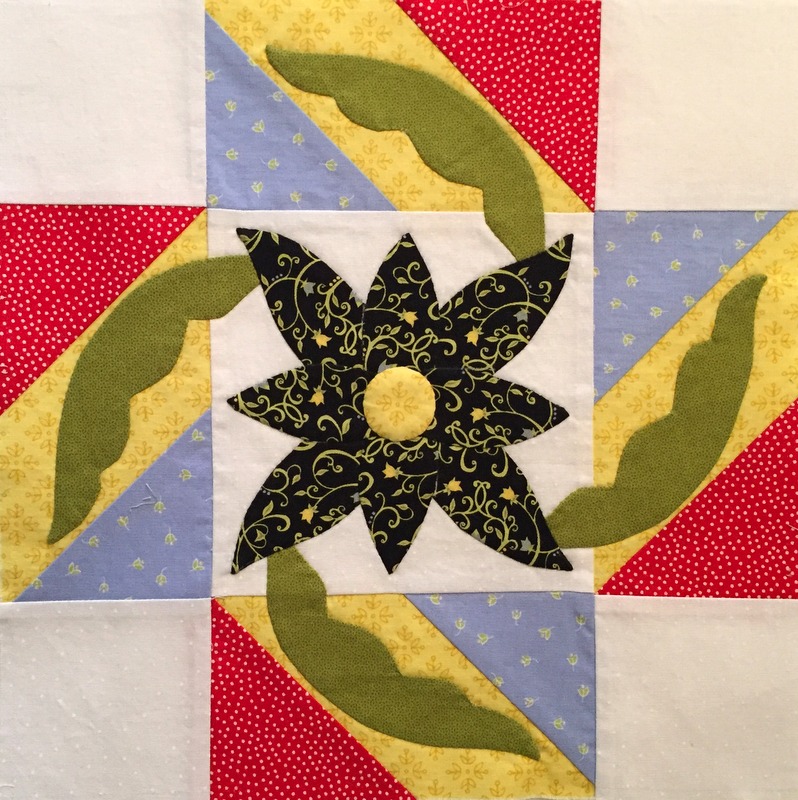
I just finished Canasta, my second block in Hazel’s Diary Quilt, the sampler quilt I embarked upon last month:


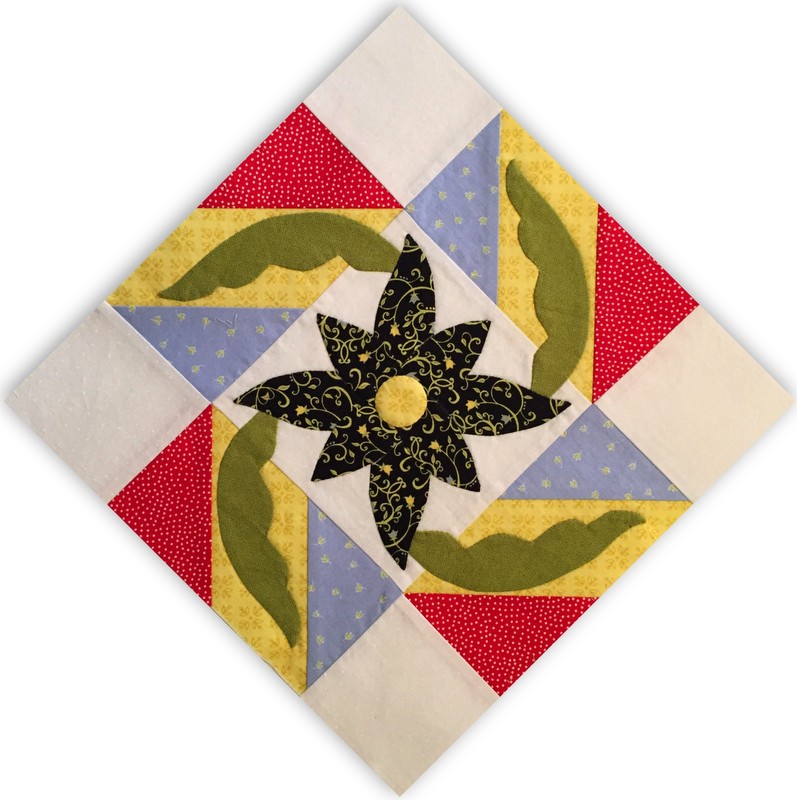
Here’s my block on point, as it will be in the finished quilt:

Why the name Canasta? If you look at it carefully you’ll see that it’s based on the traditional block called Card Trick. The designer, Shelly Pagliai of Prairie Moon Quilts,  started with traditional blocks like Card Trick, tweaked some of them, and added appliqué designs.

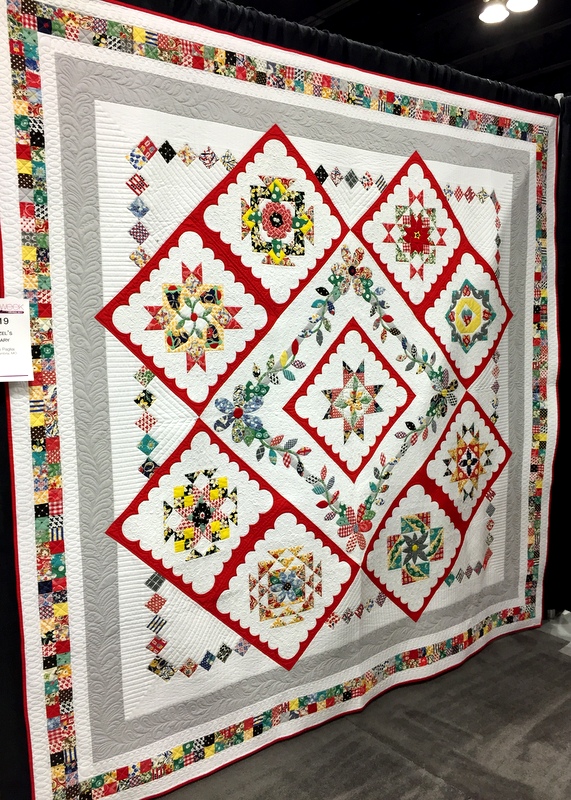
The result is a strikingly dramatic and original quilt:


That’s Shelly’s quilt. Isn’t it a beauty? Not only is it strikingly dramatic, it’s also challenging. The biggest challenge for me comes in the huge amount of appliqué, which I am choosing to do using the needleturn method.

I’ve taken a few needleturn appliqué courses in years past, including one last summer, but have never followed up with a project. Since beginning this quilt, I felt like I really needed a refresher so I signed up for a class online taught by Mary Sorensen through iquilt.com, part of the American Quilter’s Society. Mary Sorensen is a superb teacher.

That said, the green leaves in Canasta gave me absolute fits. I don’t know how many times I tried to make the leaves as Shelly designed them, with deep indentations in the scalloped side. Finally I realized I’m just not skilled enough yet to sew them properly. I altered the leaf template to make the scallops less pronounced and was finally able to appliqué them onto my block.

The yellow circle in the middle of the flower is much lighter than the black petals in the background so I interfaced it first, which precluded sewing it on via needleturn appliqué. Instead I basted around the fabric circle, pulling the raw edges tight around a template. Then I cut a tiny circle out of batting and tucked it under the circle before appliquéing it in place. It looks rather like a covered button.

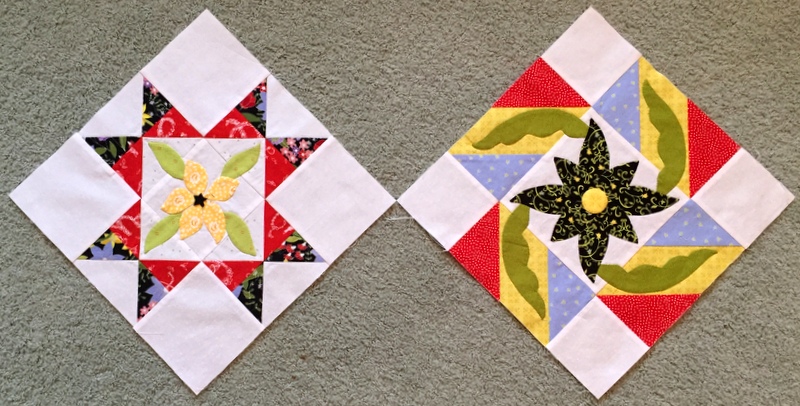
Here are my first two blocks, Missouri Farm Life and Canasta, side by side:

Now measuring 12½” square, these blocks are ready for their sashing strips, which will increase their size to 18½” square.

Next up: the block Shelly named Coal Miner’s Granddaughter. My goal is one block a month. If I stay on track, I’ll have a finished quilt top by the end of the year. I might even be an old hand at needleturn by then!


Posted in appliqué, Hazel's Diary Quilt, needleturn appliqué, update | 7 Comments

Sidetracked!

Many of you know I started two long term quilt projects recently. One is a sampler quilt with lots of hand appliqué that’s going to take me the better part of a year to make. The other is Cascade, the curved braid quilt designed by Victoria Findlay Wolfe. Cascade is a scrappy design calling for a multitude of fabrics. In preparation I bought quite a few quarter-yard cuts and fat quarters. That’s something I rarely do, preferring to buy bigger cuts of yardage. In this case, I had chosen colors for my version of Cascade that aren’t well represented in my stash: lots of neutrals and muted golds and greys.

Two days ago a new muted gray fabric with a subtle gold metallic finish came into my local quilt shop and I quickly snapped up a quarter yard of it for my version of Cascade. Then a funny thing happened. I went back to the shop yesterday and bought a lot more.

The reason? Idyllic, a quilt pattern by Corey Yoder of Coriander Quilts. I bought her pattern last year and have been casting fond glances at it ever since, trying to decide what fabric I might use. When I laid eyes on that piece of fabric, I could see it in this quilt.

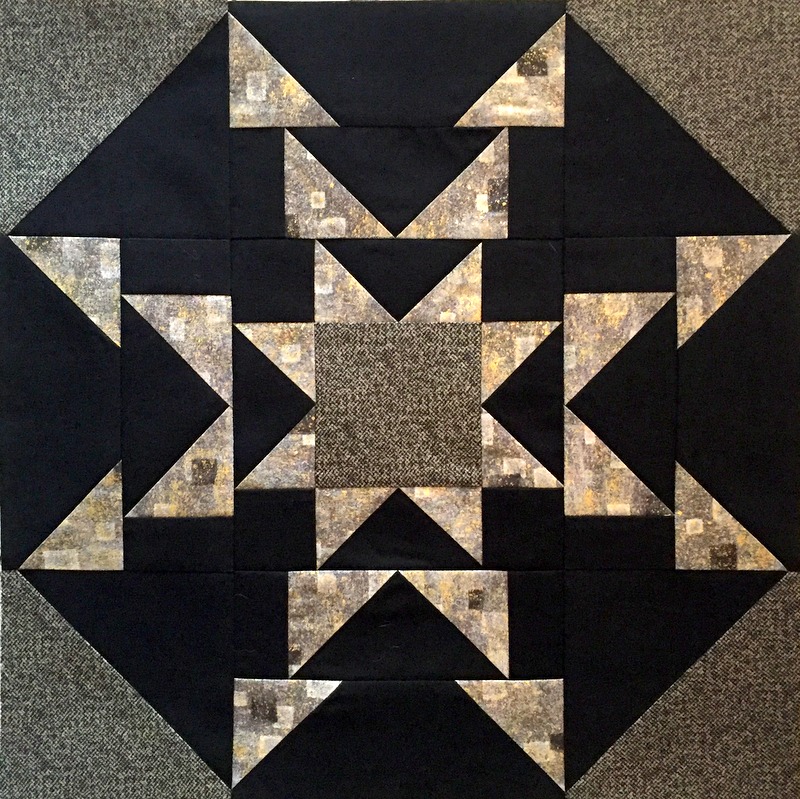
Here’s my test block:

Isn’t that striking? The block measures 14½” unfinished. At this point I have no idea where I’m going with this but I sure like what I see right now. I could potentially make star points for other blocks using scraps from cutting curves for Cascade or I could make an entire quilt using just the three fabrics you see here.

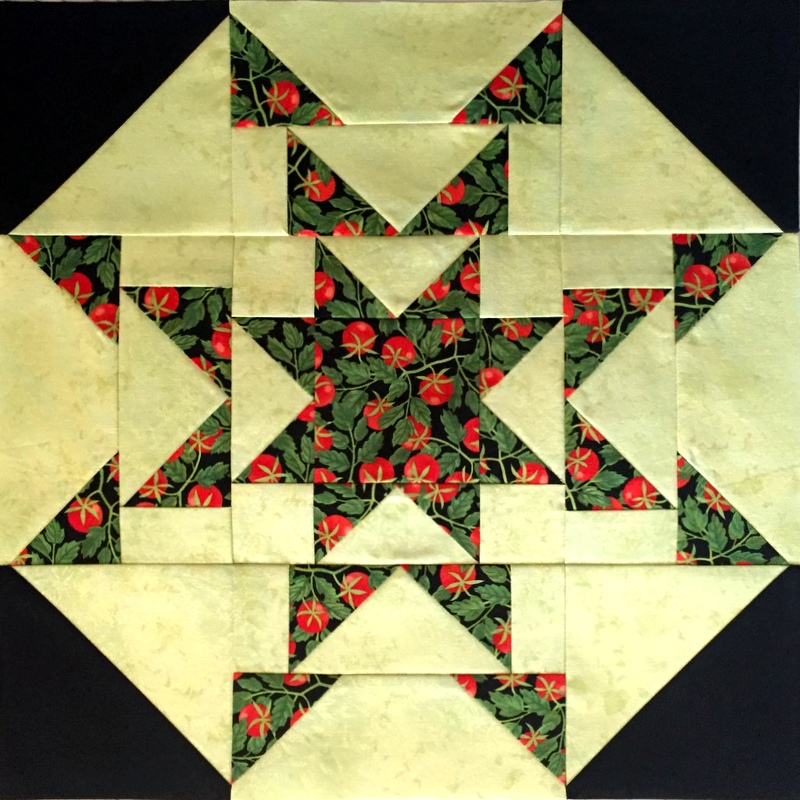
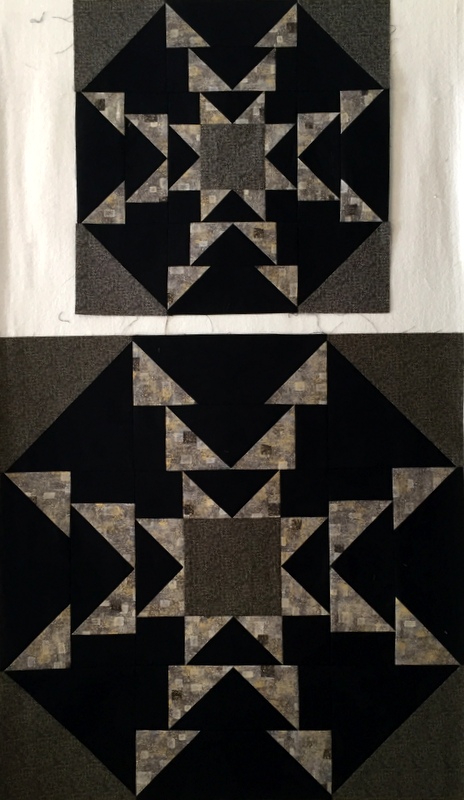
Could these fabric choices represent a seismic shift in my color sensibilities? Maybe . . . maybe not. You see, just a few days ago I made an earlier test block of Idyllic using a color combination you would more likely expect from me. Take a look:

Completely different look and feel, right? One of the things I love most about quilting is how color and fabric can completely change the look of a quilt.

I like both of these blocks a lot but it’s the neutral version on top that’s calling to me.


Posted in curved braid quilt, Idyllic, update | 10 Comments

It’s Valentine’s Day!

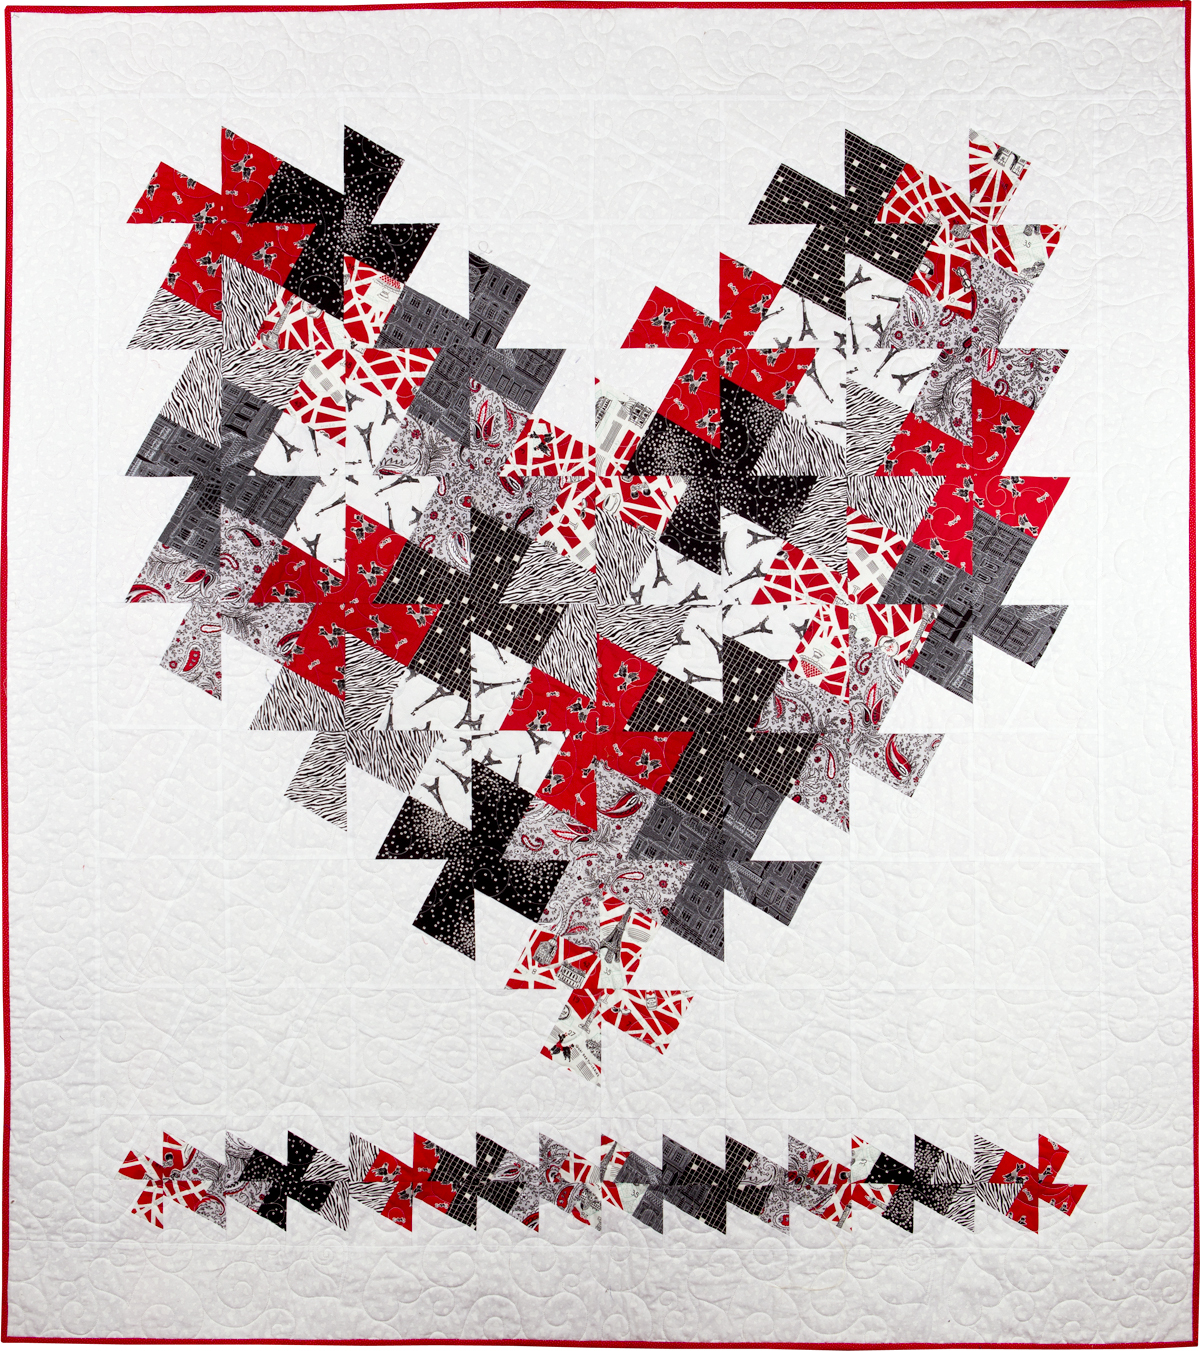
I Love Paris, 58″ x 64″ (2012)

Here’s a look back at a quilt I made six years ago. At the time I had two Lil’ Twister templates (by CS Designs) that make interlocking pinwheels. The larger template made pinwheels much bigger than I wanted so I figured out how to mark a 6½” square ruler to make my own template. Some time later I discovered a template that size was actually available.

The smaller template made 3″ blocks, creating a perfect little shelf for my heart to sit on. I used several Paris-themed fabrics, which helped me choose a name for the quilt.

My initial post about I Love Paris can be found here.

A tutorial to make the quilt shown can be found here.

I hope you have a lovely Valentine’s Day. If the hints I dropped are successful, my valentine will give me a (small) box of chocolate covered caramels. They go very well with champagne.


Posted in Paris, twister, update | 5 Comments

Cascade: the Second Wave


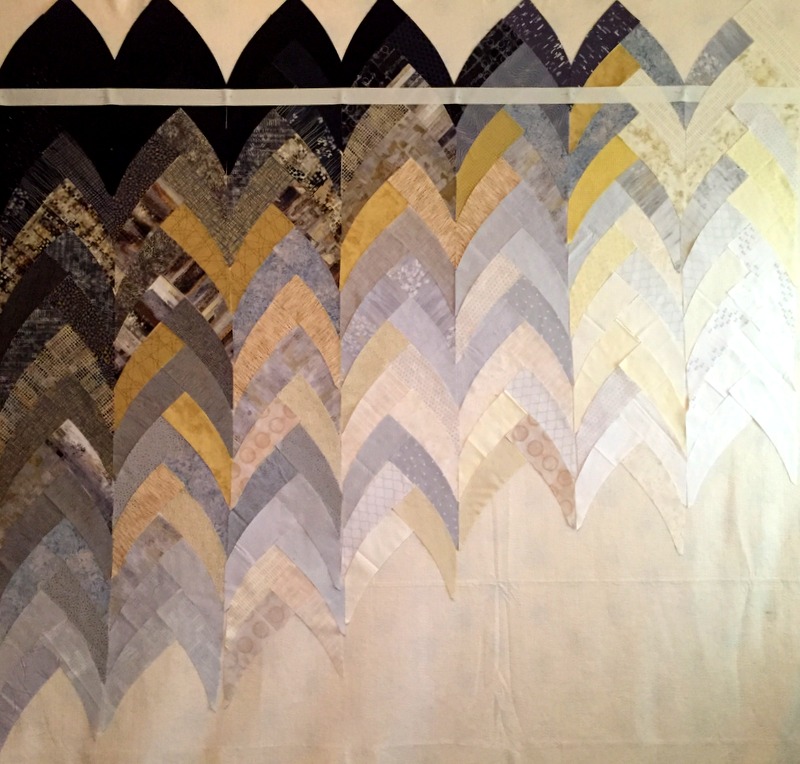
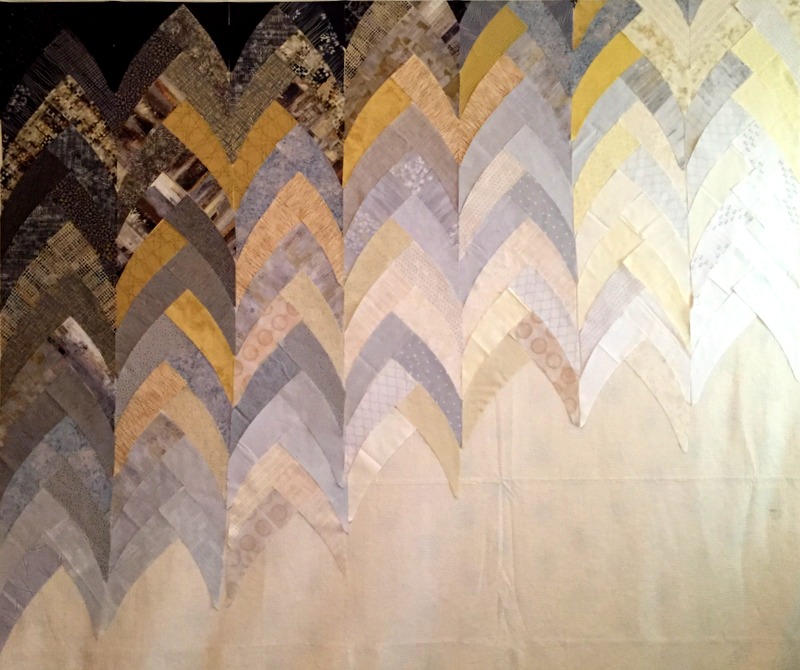
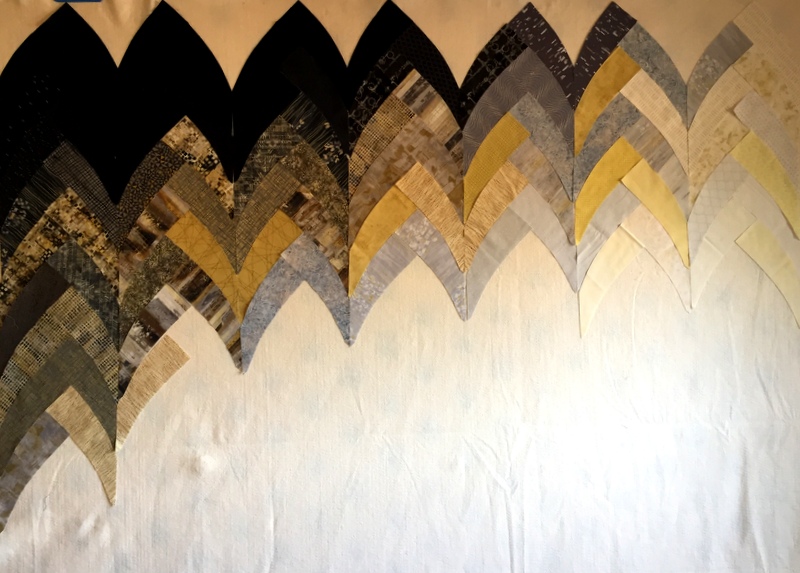
You’re looking at slightly under half of the curved braid strips making up one of the  projects now on my design wall. The design is Cascade by Victoria Findlay Wolfe of vfwquilts.com and the curved braid strips were cut using her acrylic template.

I’m calling this “the second wave” because I’m putting the curved strips up on my design wall in three sections. (You can see the first wave and read about my initial efforts here.) The second wave isn’t complete but I thought you might like to see how far I’ve gotten.

This is an experiment in gradations of value and color that is taking me far outside my comfort zone on so many levels. Right now I’m working with medium light to light strips but very soon the strips will start getting darker. The lower half of the quilt, especially on the right hand side, will be quite dark.

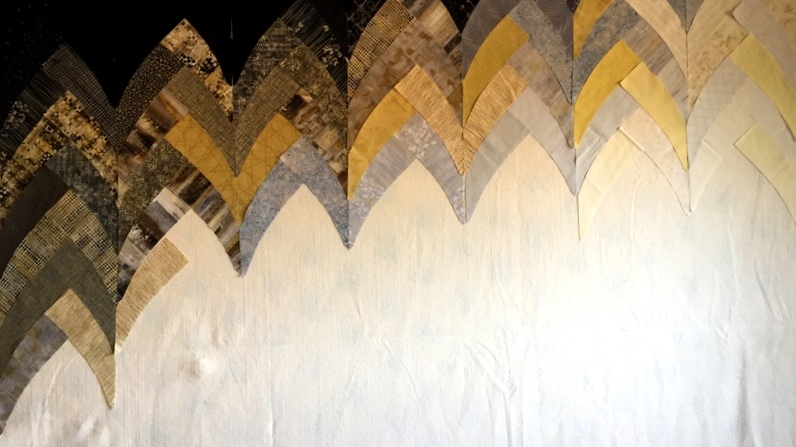
See that strip across the top of the photo above? That’s a piece of grosgrain ribbon pinned where the quilt top will be trimmed after the curved braid strips are sewn together. It helps me visualize what the top of the quilt will look like, something like this:

The position of several strips has changed since these photos were taken a couple of days ago. I’m finding the placement of gold and grey strips especially challenging. I will persevere . . . slowly . . . trusting that by the time the third wave is up I’ll be happy with the outcome.

While I ponder the placement of curves in this very modern quilt, I’m continuing to work on Hazel’s Diary Quilt, the lovely traditional sampler quilt designed by Shelly Pagliai that I recently started. I’m getting ready to appliqué flowers and leaves to the center square of a block called Canasta.

Needleturn appliqué — now that’s a good project to have on hand as the coverage of the winter Olympics commences. Will you be watching the Olympics? If so, will you have handwork to carry you through the commercials?


Posted in curved braid quilt, Hazel's Diary Quilt, needleturn appliqué, update | 6 Comments

Marvelous Marsupials

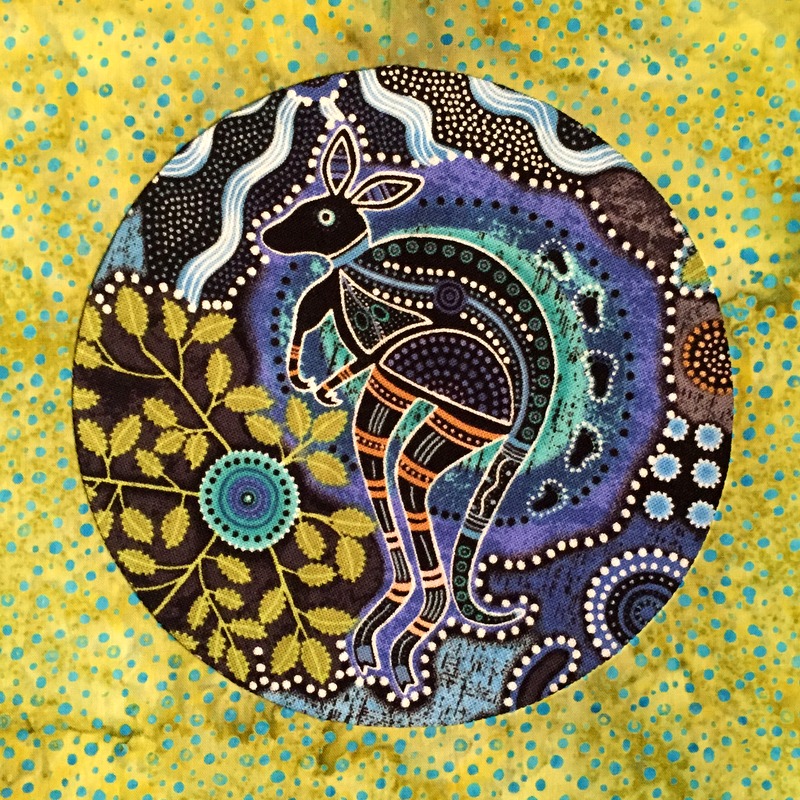
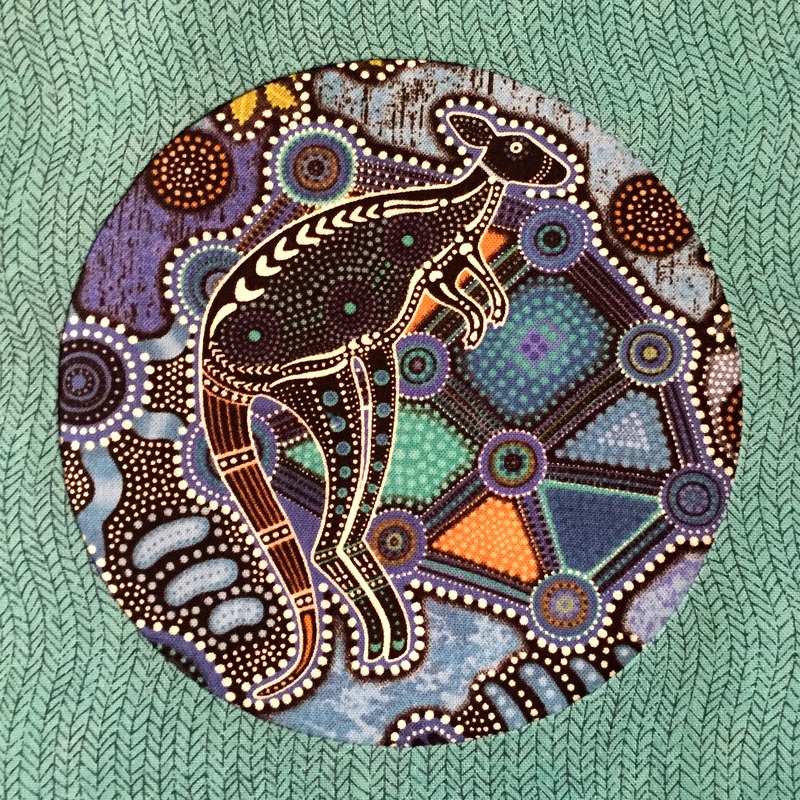
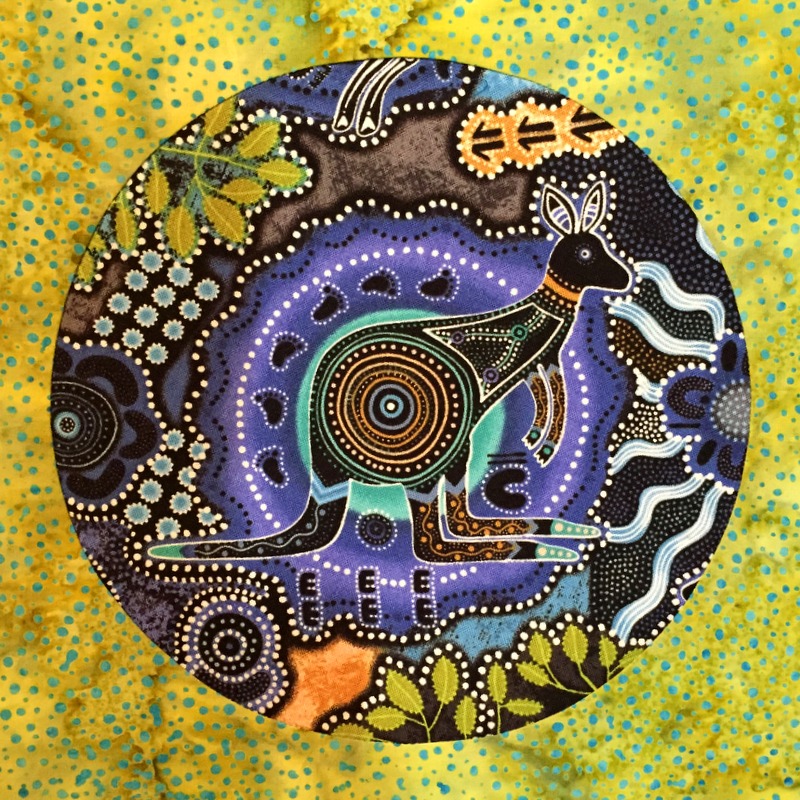
For the last few years I have studiously avoided the lure of aboriginal fabrics. We all know I don’t need another fabric obsession. But I caved in the other day and bought a length of fabric from the “Walkabout II” line by Paintbrush Studios featuring five stylized kangaroos hopping around on a background that included greens and blues. How could I possibly resist?

I decided to put the kangaroos into a wall hanging using my own Full Moon Rising pattern. I’ll be teaching a circles workshop for a quilt guild later this month and figured it would be a good idea to revisit my favorite way of making inset circles.

Here’s another one of those marvelous marsupials:

The two circles above are 5″ in diameter: The one below is 6½” wide:


And here is a look at my completed quilt top, 16″ x 59″:

This little quilt already has a name: Hip Hop.


Posted in update, wall hanging | 7 Comments

Hazel’s Diary Quilt: Missouri Farm Girl (Block 1)


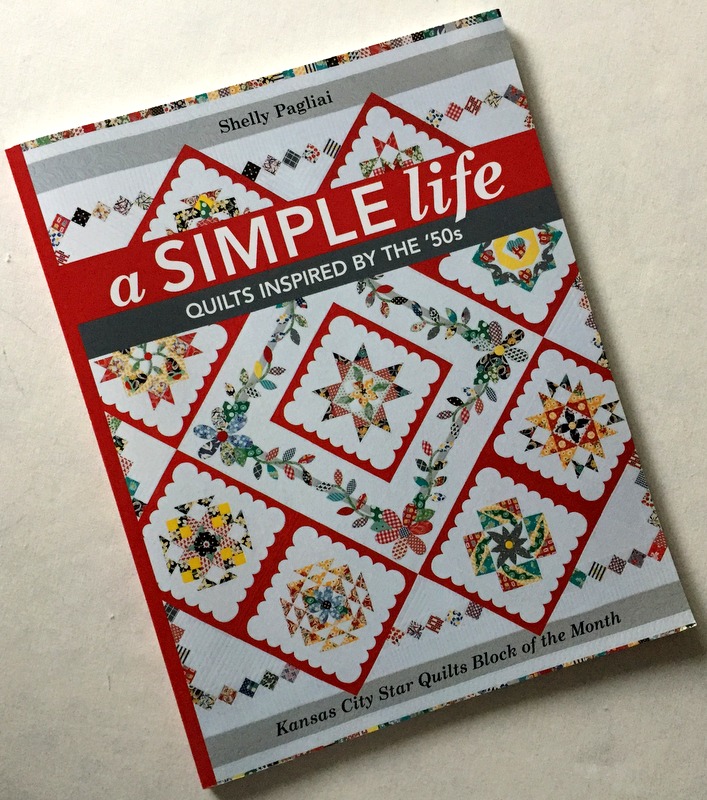
I have embarked on my second new project of the year, a sampler quilt called Hazel’s Diary Quilt from the book A Simple Life: Quilts Inspired by the ’50s by Shelly Pagliai of Prairie Moon Quilts. The book is a lovely tribute to Shelly’s mother, Hazel, who received a little red diary as a Christmas gift in 1950 when she was 14. Over the next few years Hazel faithfully recorded events in her life as a teenage girl growing up in rural Missouri. Her last entry was written the night before her wedding in October 1954. The book includes excerpts from Hazel’s diary with commentary by Shelly that puts the entries into historical context.

Included in the book are directions for seven quilts, a quilted tablecloth, and an embroidered dresser scarf. I’ve chosen to make the medallion quilt you see on the cover of the book. It’s a daunting project because it involves a lot of appliqué. Since one of my goals in life is to work on my needleturn appliqué skills, this project seems made to order. Am I up for the challenge? We shall see!

While the original Hazel’s Diary Quilt was made with vintage fabrics that evoke the 1950s, I am building my quilt around a new line called “This and That” by Jill Finley of Jillily Studio. In general I’ll be following Shelly’s color scheme of primary colors on a white background with black accents.

I have now pieced and appliquéd the first block. Before I show it to you, please take a look at the entire quilt:
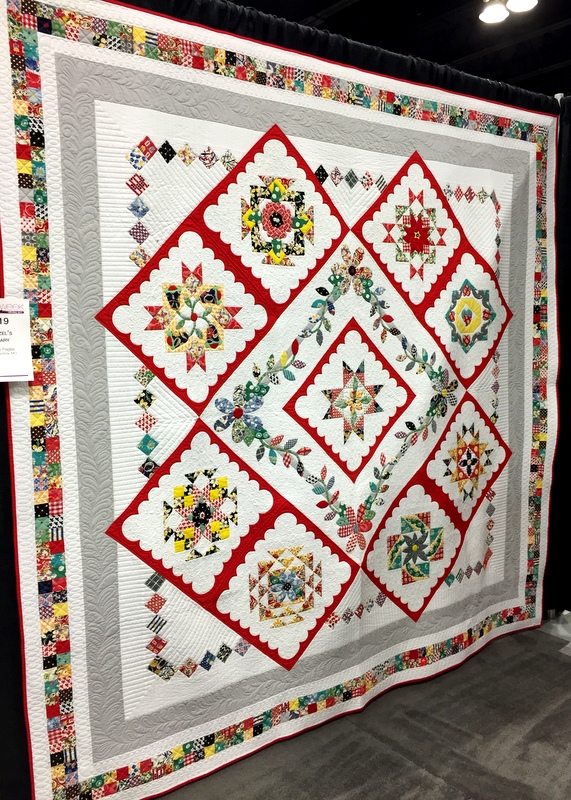

This is Shelly’s quilt, which I was thrilled to see in person at the spring 2017 quilt show in Paducah, Kentucky put on by the American Quilter’s Society. You can see that the quilt is made of nine blocks set on point. Each block is surrounded by a scalloped border, and the block in the middle of the quilt is part of a center medallion that includes appliquéd vines, flowers, and leaves. The quilt measures 95″ square. Not only did Shelly design and make the quilt, she also machine quilted it. I am in awe.

Block 1, Missouri Farm Life, is based on the traditional Missouri Star block and includes an appliqued wildflower in the center. Here is Shelly’s Block 1:

The star design finishes at 12″ square but the block actually finishes at 18″ square with the addition of the sashing strips and scalloped border.

When a block is set on point, especially a star block, it changes the look. I decided I wanted my block on point to look like Shelly’s original block so I rotated the design 45 degrees before I made it.

Here’s how I did that. First I drew a rough sketch of the rotated block on graph paper:
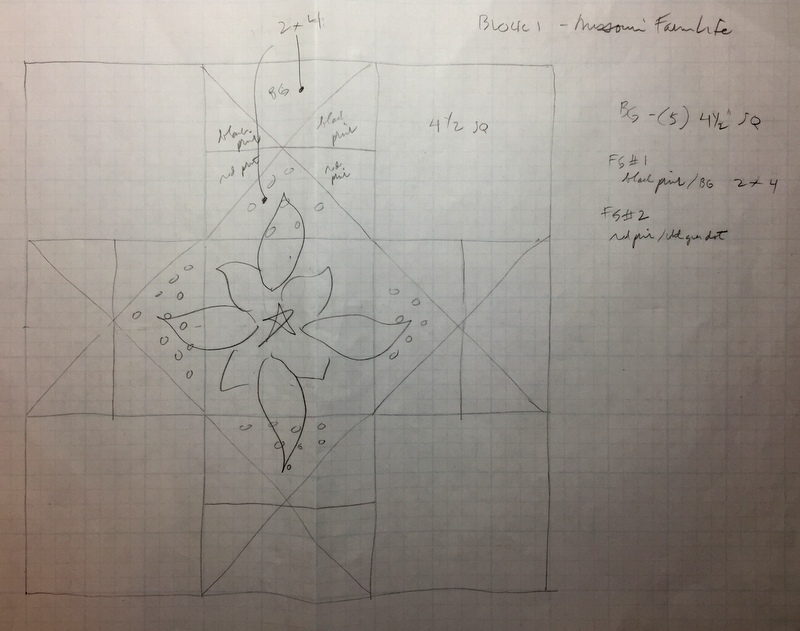
(Thank you, Billie Mahorney, for teaching me how to draft quilt blocks!) Then I created the block in EQ7, a quilt software program:

The printed design measures 6″ square — half of the actual finished size — which makes it easy to measure individual components of the block. When I realized that the proportions of the rotated star were slightly different from the original star, I drew the original block in EQ7 to make it easier to compare measurements. Here are the two versions side by side, with the original on the left and the modified version on the right:
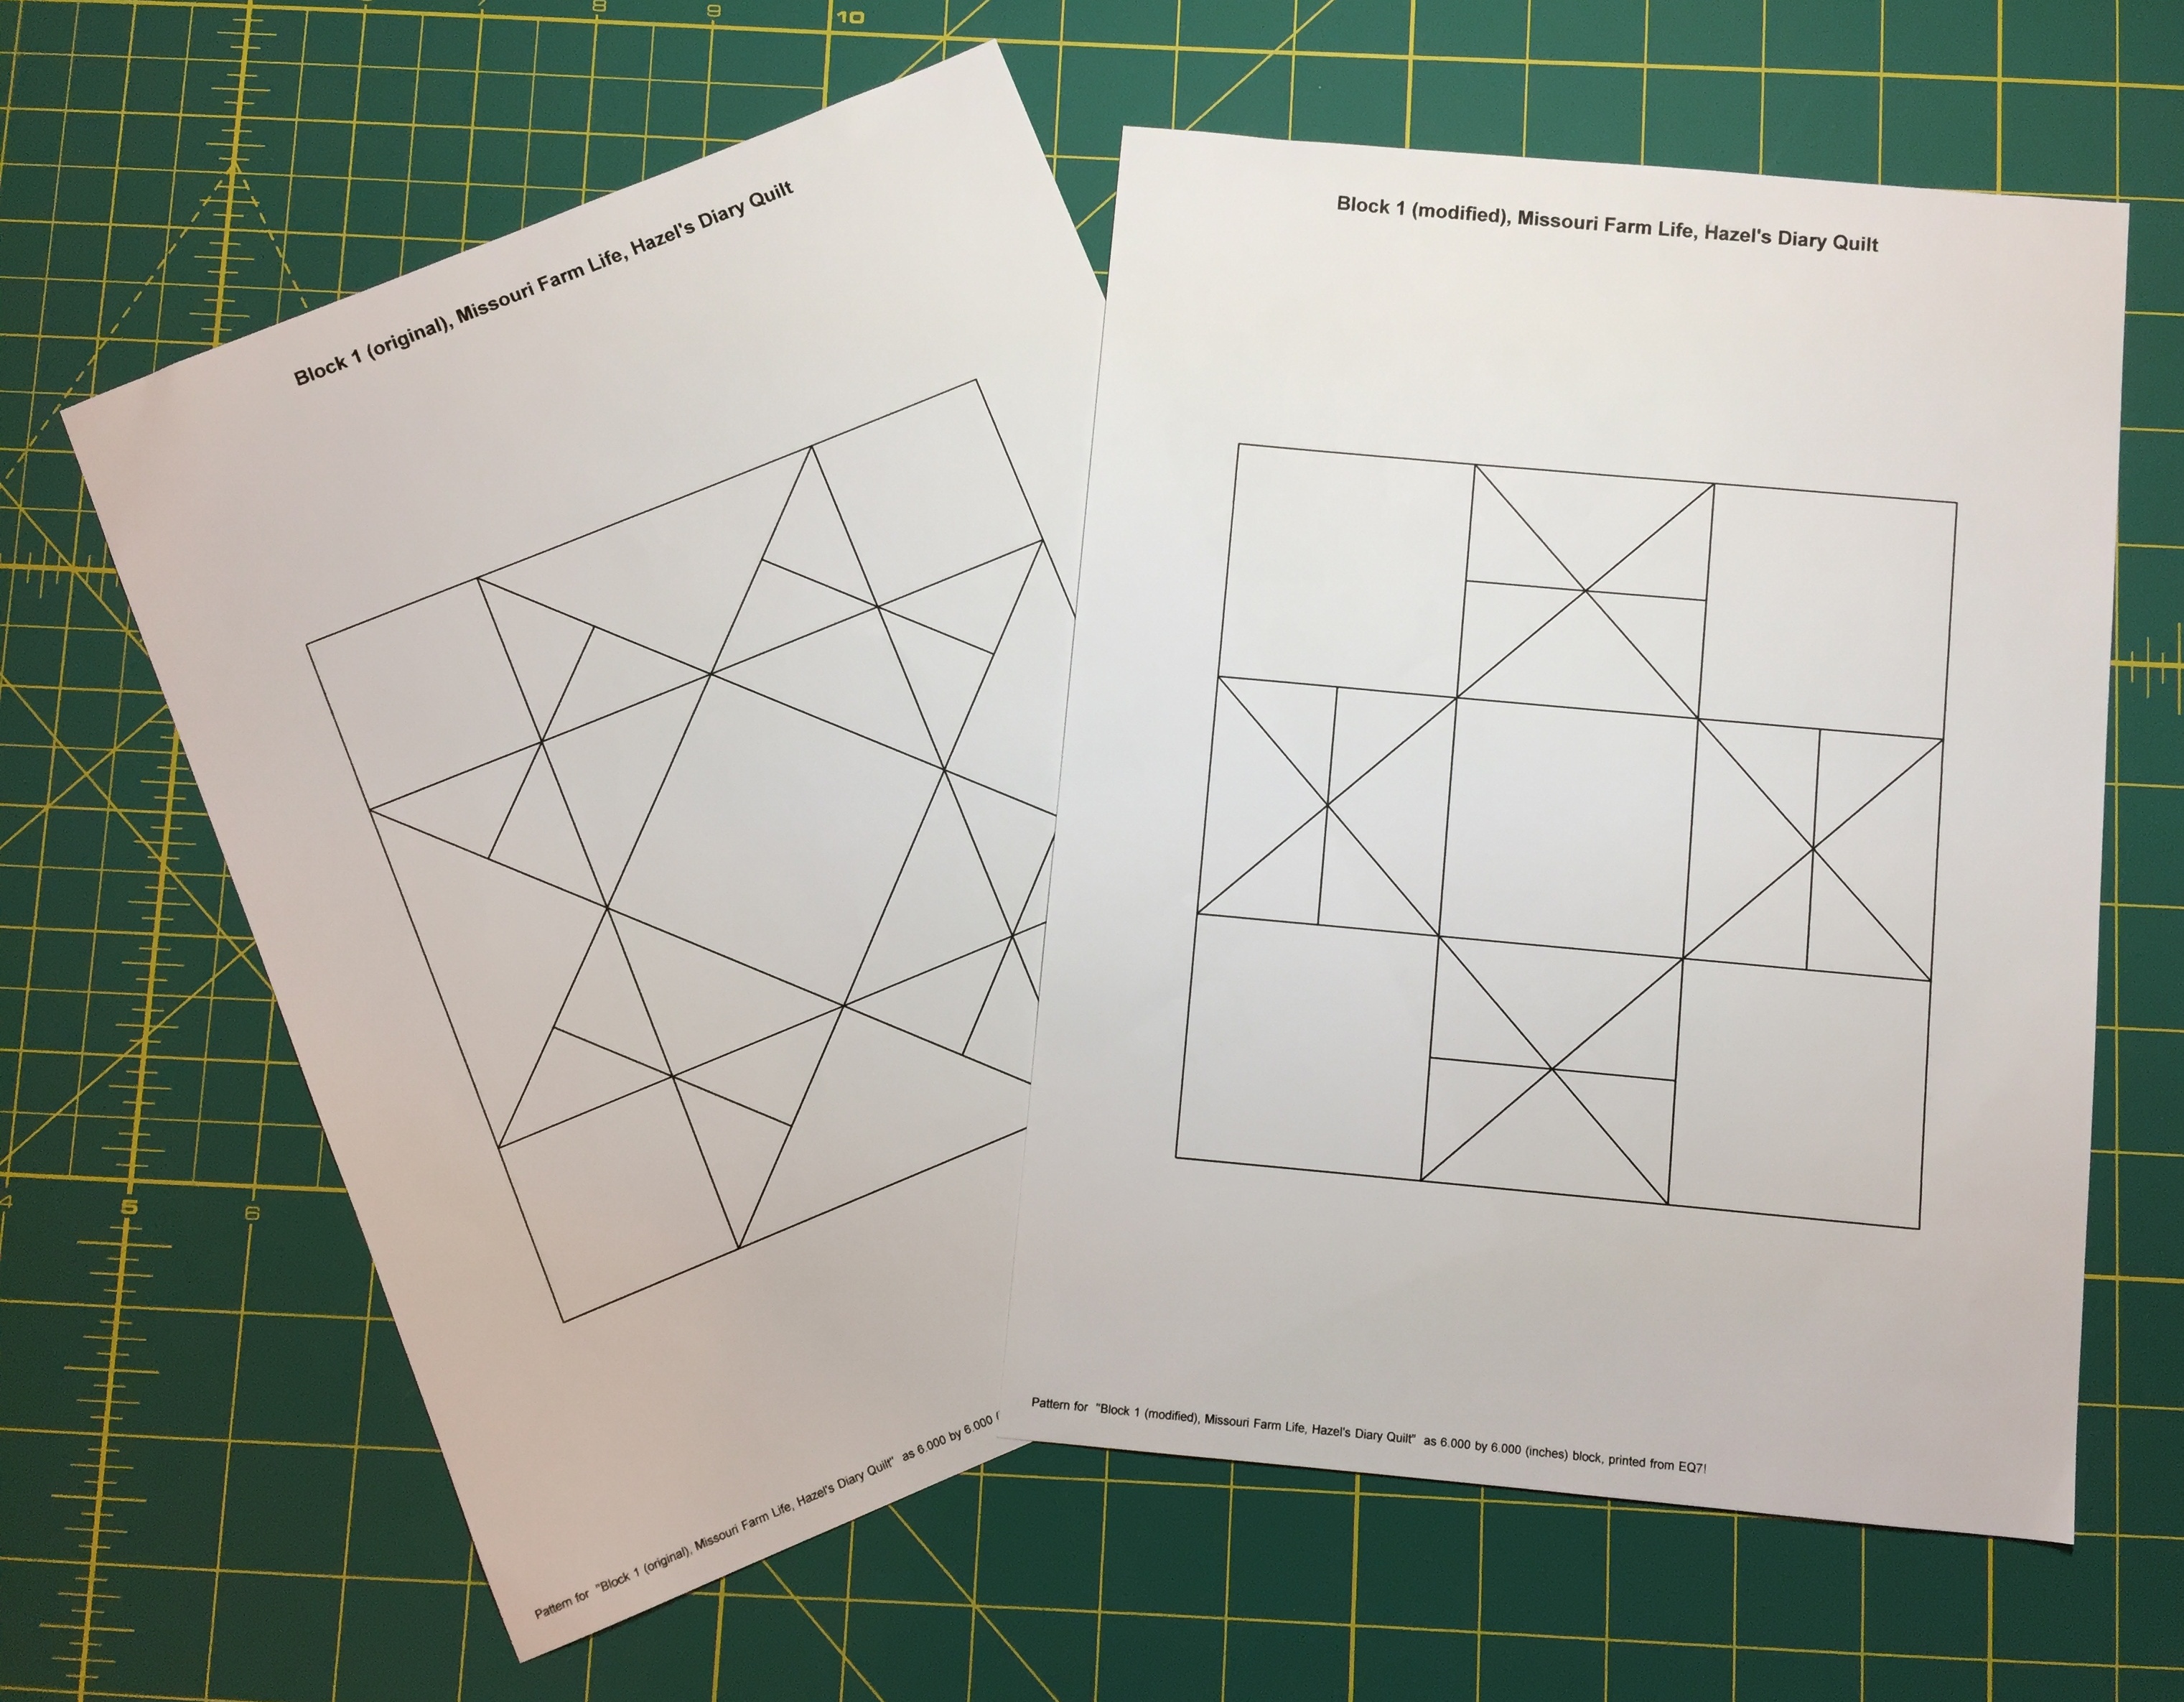
Shifting the orientation of the block also meant it needed to be sewn differently. Seeing the two versions side by side helped me determine the best way to construct my blocks and the proper size to cut the pieces. Since the center of my modified block is slightly smaller than the original, I knew I would also need to change the dimensions of the appliquéd wildflower in the center. A little quilt math revealed that my wildflower needed to be 92% of the original size.

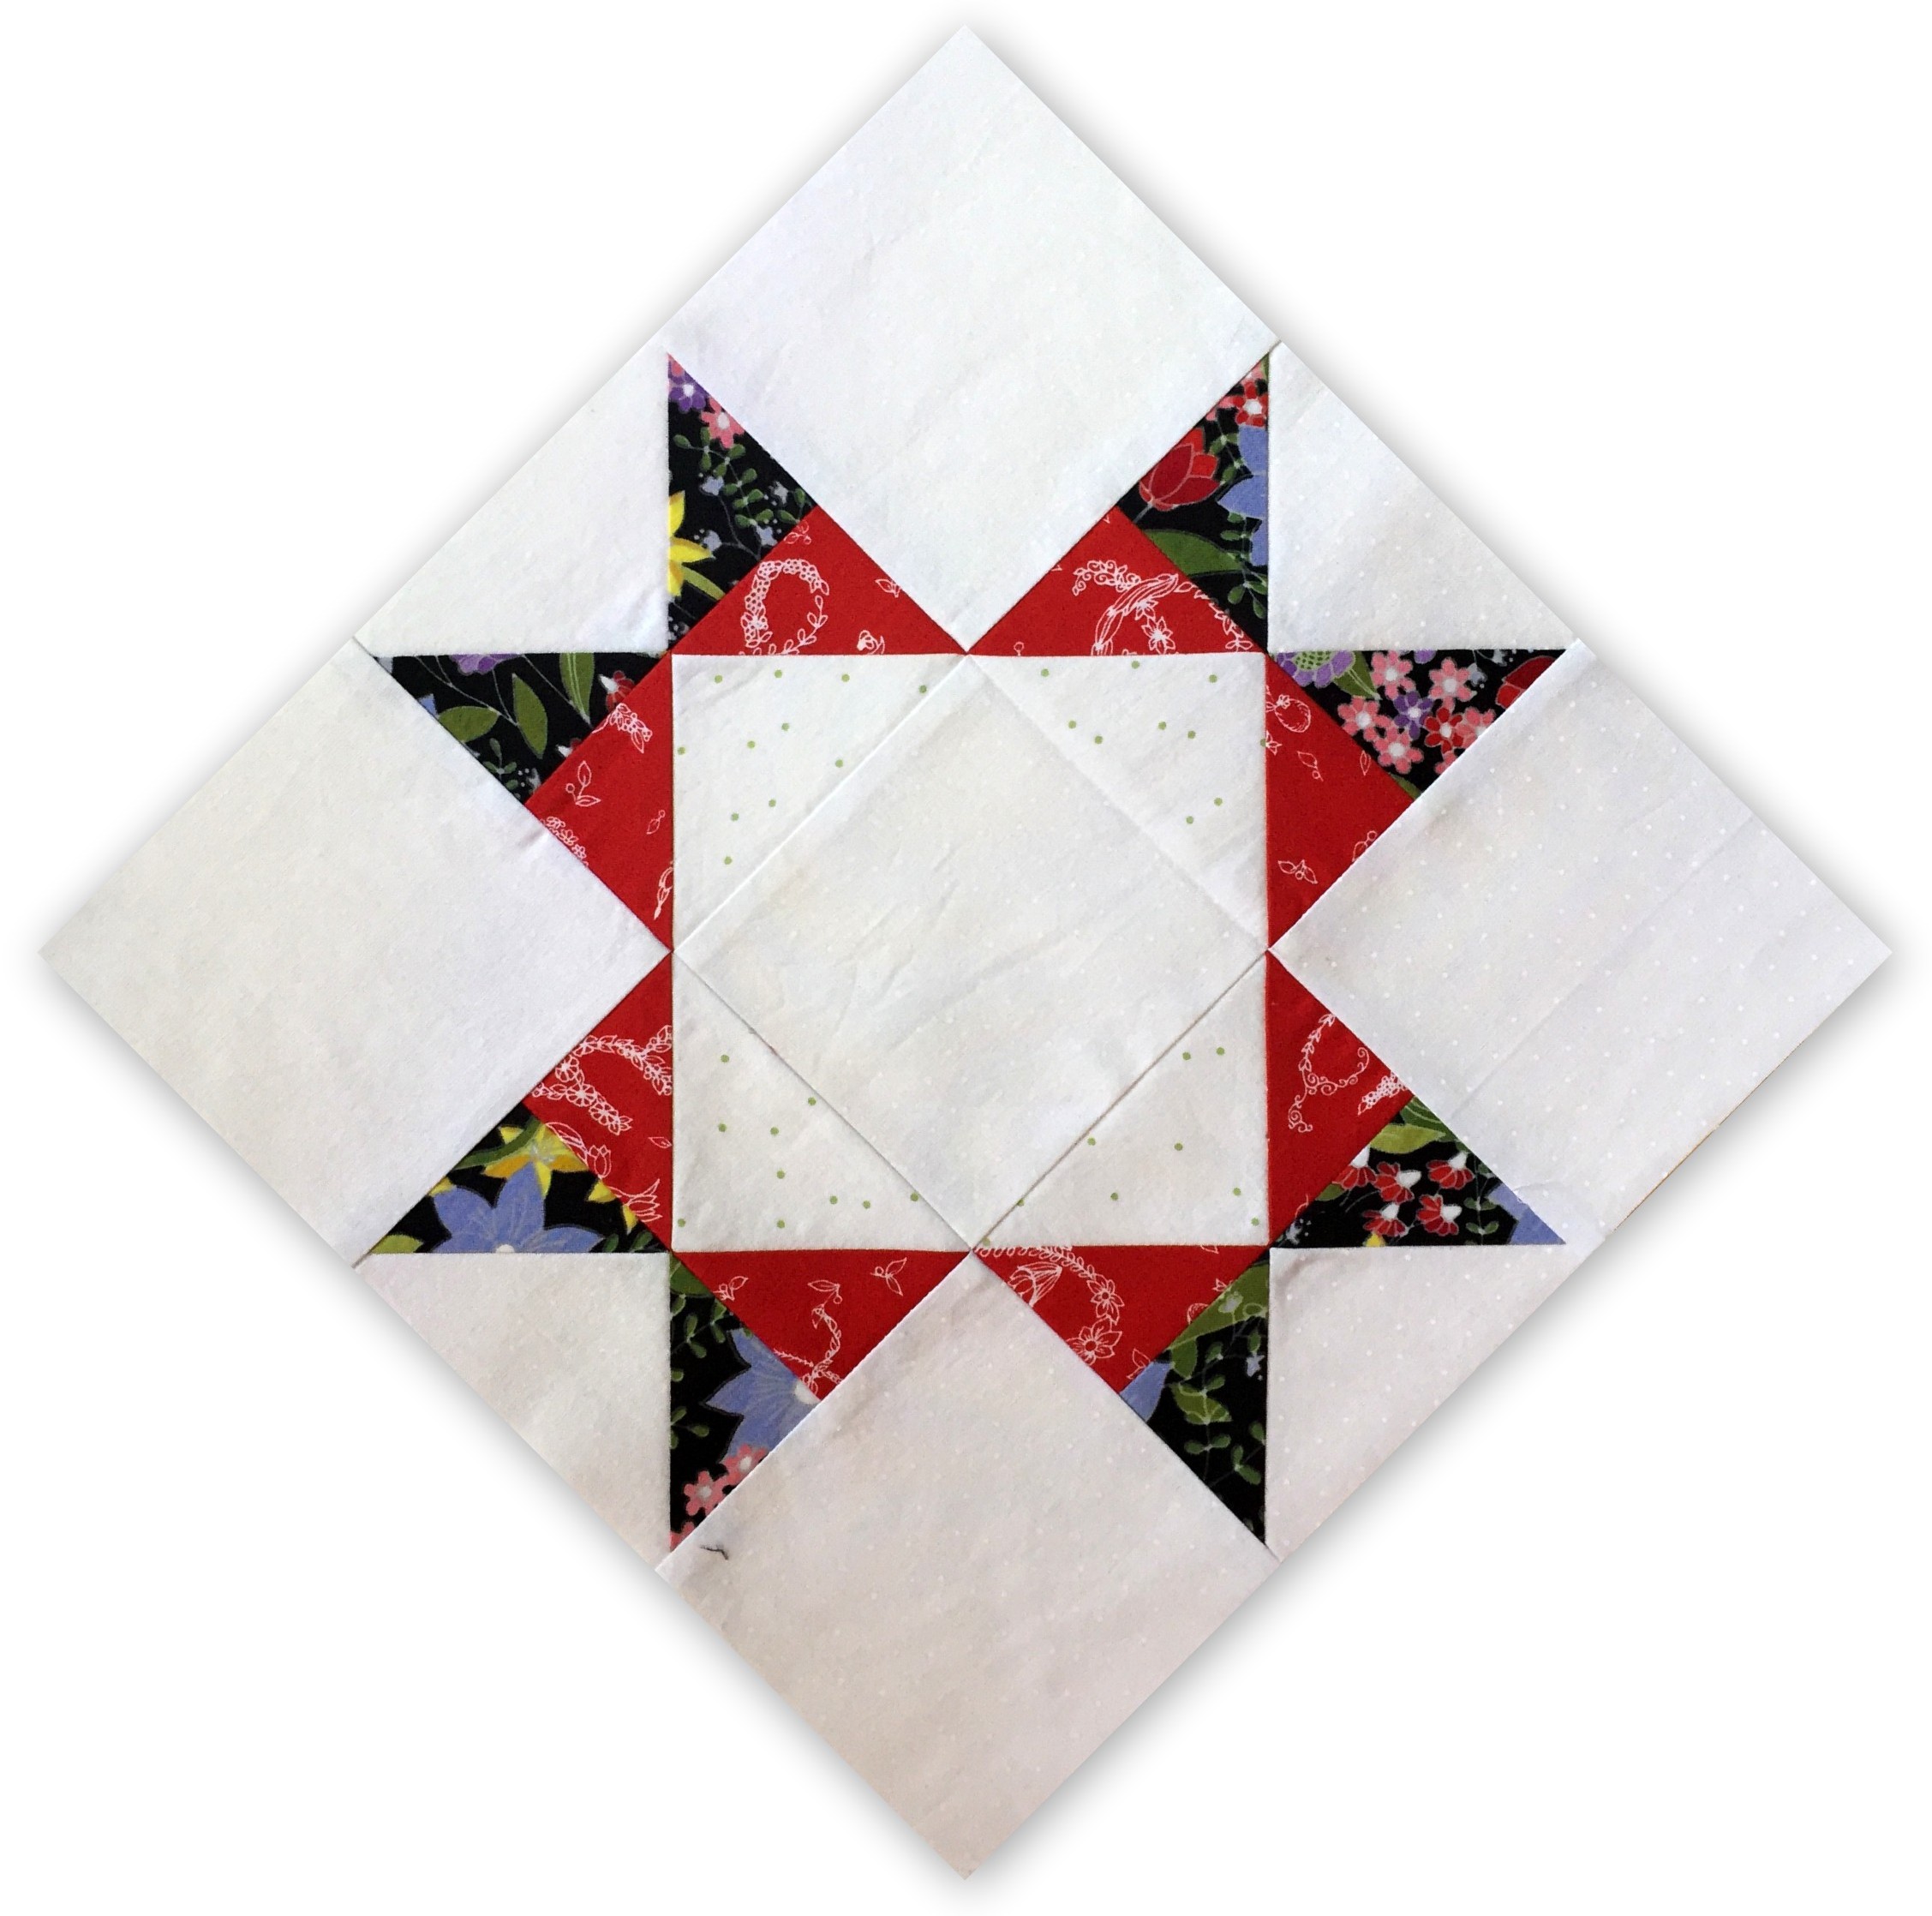
Here’s my Missouri Farm Girl block (without the appliqué) as constructed . . .


. . . and here it is turned on point:

Now, here it is with the appliqué:
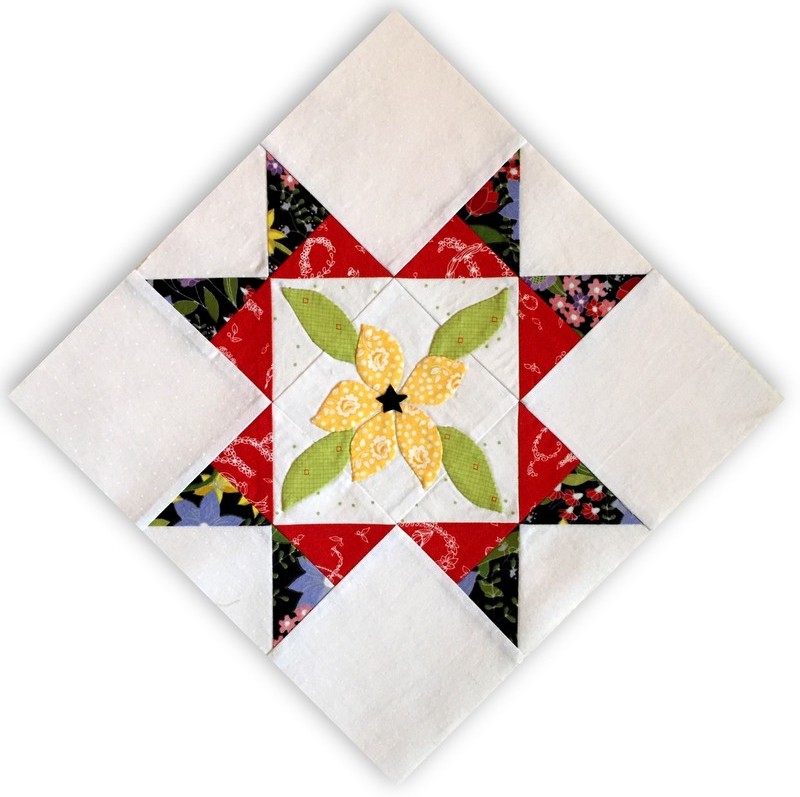
 

Isn’t that pretty?

I must confess that tiny black star in the center has not yet been appliquéd. I need a lot more practice before I tackle something that small and intricate. I did appliqué the petals and leaves using the needleturn method. Not perfect by any means but I think my skills will improve as my quilt progresses.

That’s why I’m also going to wait to appliqué the scalloped borders on all the pieced blocks as well as Block 2, the appliquéd blossoms and leaves in the center medallion. Instead I will move on to Block 3, a charming design called Canasta based on the traditional Card Trick block.

I’m off to a good start!


Posted in appliqué, Hazel's Diary Quilt, needleturn appliqué, update | 3 Comments

Taming the Beast


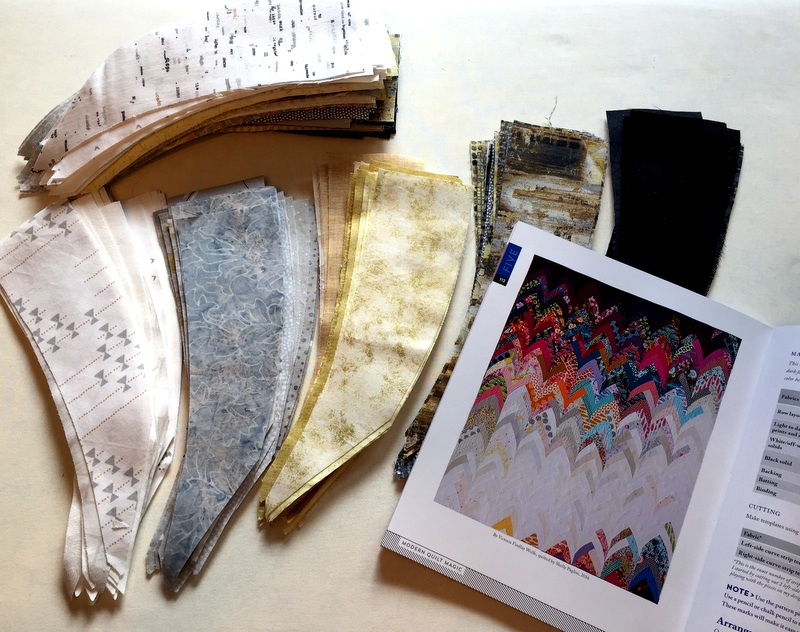
“The Beast” is the temporary name I have affectionately given one of my new projects: a quilt based on Victoria Findlay Wolfe’s pattern Cascade (from her new book Modern Quilt Magic). Curved braid strips are cut from a template and then arranged to form a gradated wash of color.

Several challenges have presented themselves.

My color choices. As you can see in the photo above, Victoria’s quilt is a riot of color. I’m using a restricted palette of black, grey, gold, and white. Why this combo? I was drawn to a small group of fabrics at my local quilt shop that contained golds and greys and liked them enough to build a quilt around them. Normally I gravitate toward primary colors and floral prints so this is a quite a stretch.

Already I’m having trouble arranging the golds and greys because they don’t naturally blend with each other in the same way that, say, charcoal and medium grey do. Value is probably going to be more important than color in the long run. We’ll see.

Finished size. I wanted to make the twin size (72″ x 90″) but am going with a slightly smaller version that should finish around 63″ x 80″ or so. That decision was made because my design wall isn’t tall enough to accommodate all the curved braid strips. My sewing room and the spare room across the hall (“the Annex”) where my design wall hangs are on the second story of my Craftsman home, where the walls measure 81″ floor to ceiling.

I did replace my old design wall (a twin-size flannel sheet) with a queen-size batt. I finally have the luxury of a design wall that’s nice and wide. It’s also quite a bit longer than 81″ but the excess is rolled up at the bottom of the wall.

Layout, Part 1. Before sewing begins, every single curved braid strip in Cascade must be arranged on the design wall. There are two reasons for this. First, the placement of each curve is critical because of the carefully planned gradation. Second, the strips are sewn together from the bottom up. (I initially rebelled at this notion. Sewing from the bottom up seems so counter-intuitive. There must be a way to sew from the top down, I told myself. Well, there is a way but it involves partial seams. On curved pieces. Not a good idea, although I did seriously entertain it for a few minutes.)

Even with the adjustment to a shorter length, the curved strips will extend beyond the bottom of the design wall when I lay out the last rows. Think of all those ¼” seams that haven’t been sewn yet. Fortunately, the excess batting at the bottom of the wall can be unrolled onto the carpet to accommodate the bottom strips. Keeping Coco the cat away from them will pose another challenge. (Talk about taming the beast!)

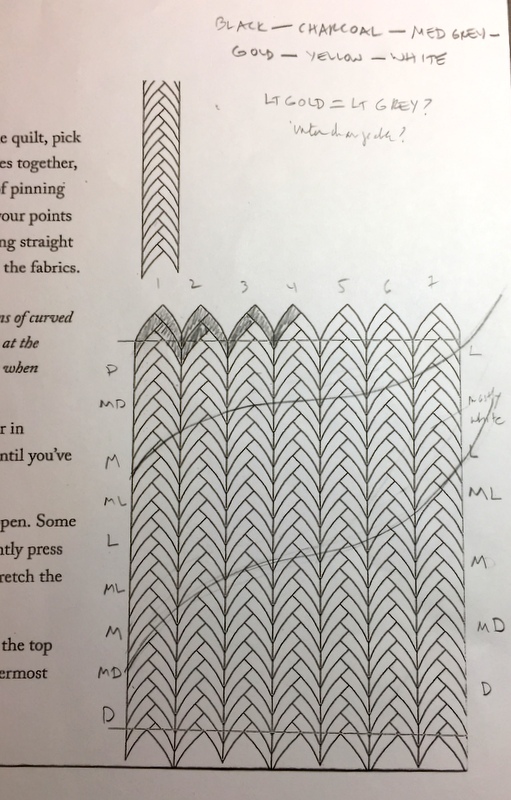
Layout, Part 2. As if all that weren’t enough, I’ve thrown myself an added curve, so to speak. Look at Victoria’s quilt again in the photo above. See how most of the dark fabrics are concentrated in the upper left? I want my quilt to be visually weighted on the bottom right, so I’m reversing her layout. My quilt will still gradate from dark to light to dark again but the bottom half will be mostly medium darks and darks.

I’ve divided the quilt into three sections, roughly according to this diagram:


I think of the sections as waves. The letters on either side refer to value, ranging from D for Dark to L for Light. This is what the first wave looks like at the moment:

Look again at the diagram. See the horizontal lines at the top and bottom? The quilt top will be trimmed along those lines. I cropped the photo to give you an idea of what the top of mine will look like:


This could change dramatically before you see it again. That’s because of another challenge: every time I walk by the design wall, I pause to change the position of a curve . . . or two . . . or three. Then I have to stand back — employing “the 10-foot rule”– to see if the change was a good one. I’m still auditioning fabrics, too. I found three small pieces in a tub of scraps just yesterday that are being added to the mix. Some of the ones I initially chose have been eliminated.

I’m excited about where this is headed. It’s just going to take a while to get there.


Posted in curved braid quilt, update | 8 Comments

Old Fabric Crushes

I happened across one of my posts the other day written in October 2012, a little over five years ago when my blog was in its first year. I was writing about three fabric groupings in my stash that I was wild about even though I hadn’t yet decided yet what to make with them. What a pleasant surprise to discover that I have, in fact, used all three groupings!

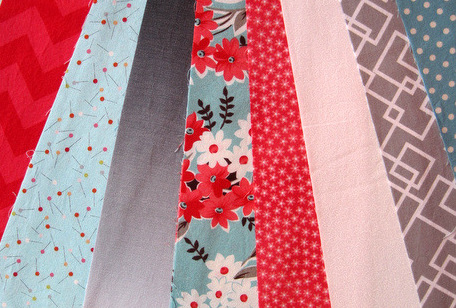
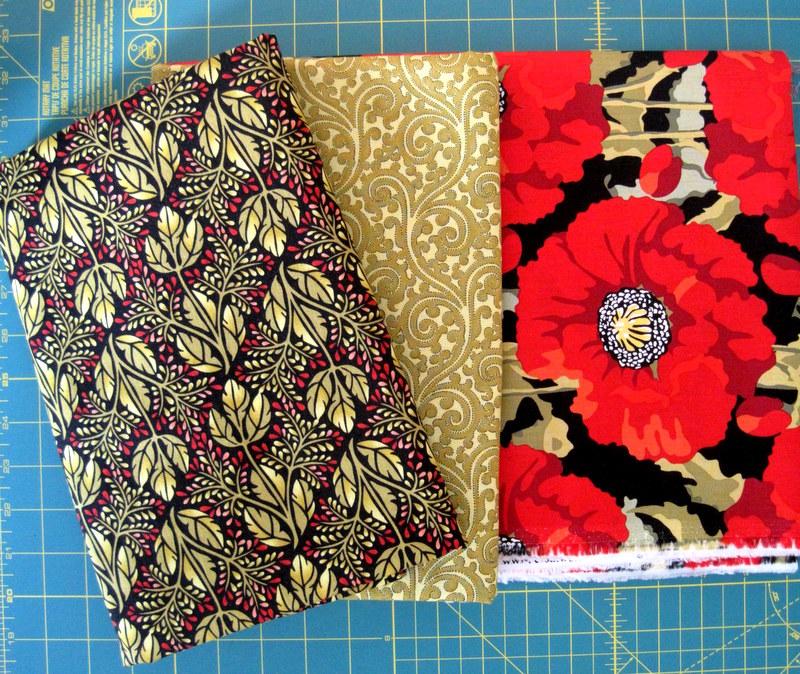
The first was this one, a mix from several lines anchored by the red and aqua floral print in the center from Denyse Schmidt’s line, “Flea Market Fancy,” reissued earlier in 2012:

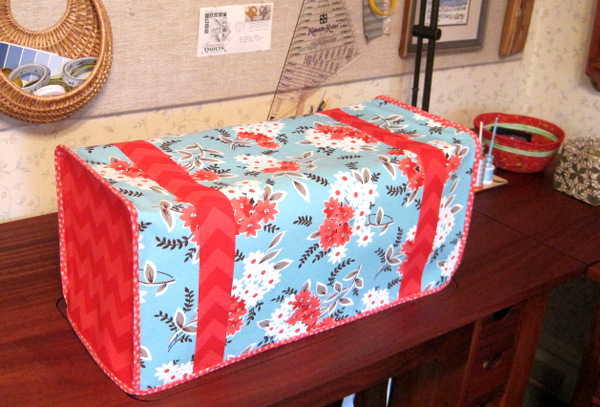
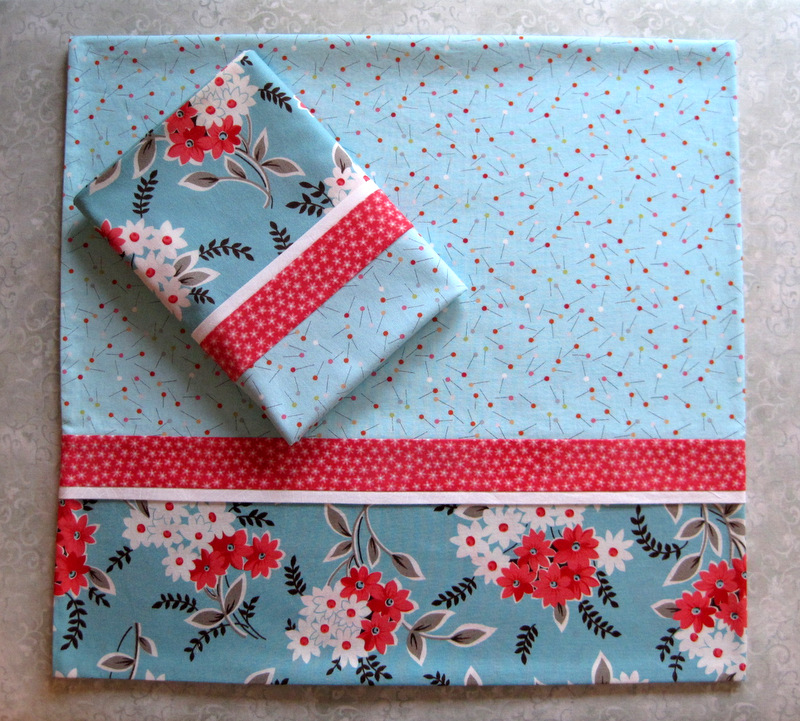
Several of the fabrics wound up in this sewing machine dust cover . . .

. . . and this set of king-size pillowcases, both made in 2013:


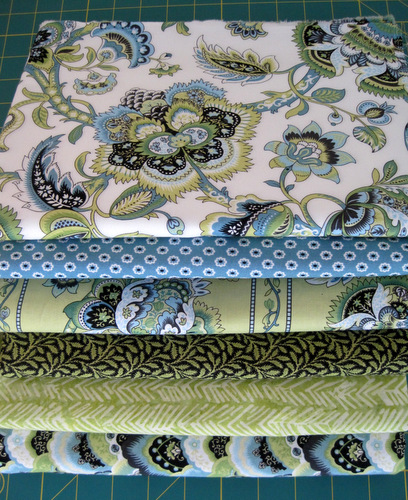
The second group was this one, primarily from the “Ainsley” line by Northcott Fabrics:

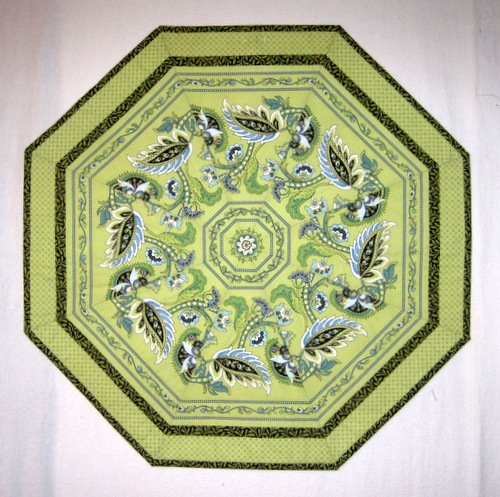
From this group came a small project, a kaleidoscopic table topper made in 2014 . . .


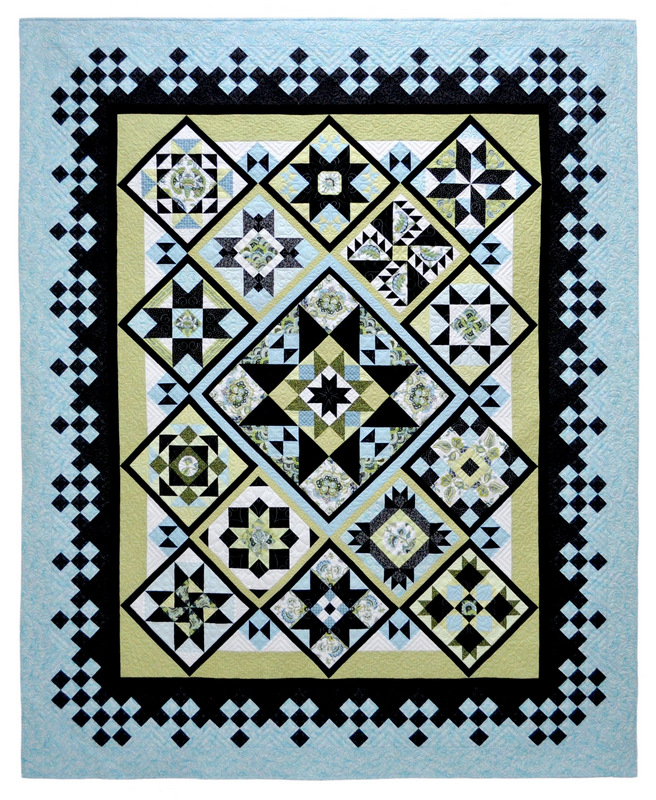
. . . and a large project, my queen-size sampler quilt Catch a Falling Star, completed in 2015:

The third group was from the “Scarlet” line by Pamela Mostek for Clothworks:


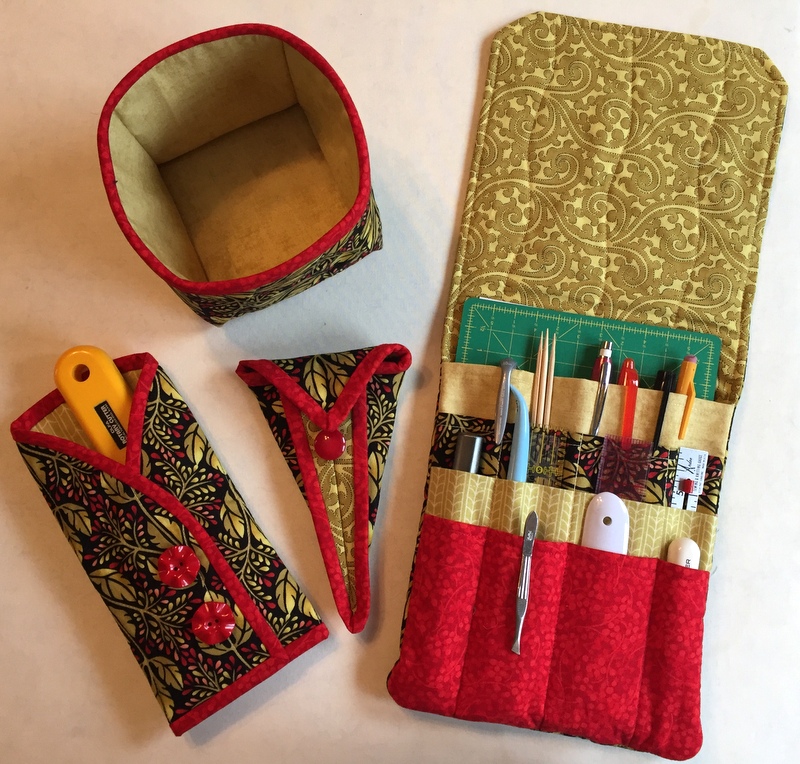
These fabrics remained in my stash until 2017, when I used them to make my current Junior Billie Bag . . .


. . . and matching accessories:


Now when I see a new group of fabrics I just can’t live without, I’ll remind myself that the fabric in my stash is indeed getting used. I’ll just need three additional lifetimes to sew my way through all of it. Can you relate?


Posted in Billie Bag, home dec, Junior Billie Bag, kaleidoscope quilts, Reach for the Stars sampler quilt, roll-it-up pillowcases, sewing machine cover, sewing tool caddy, table topper, update, windmill block | 5 Comments

First Week, First Finish of 2018

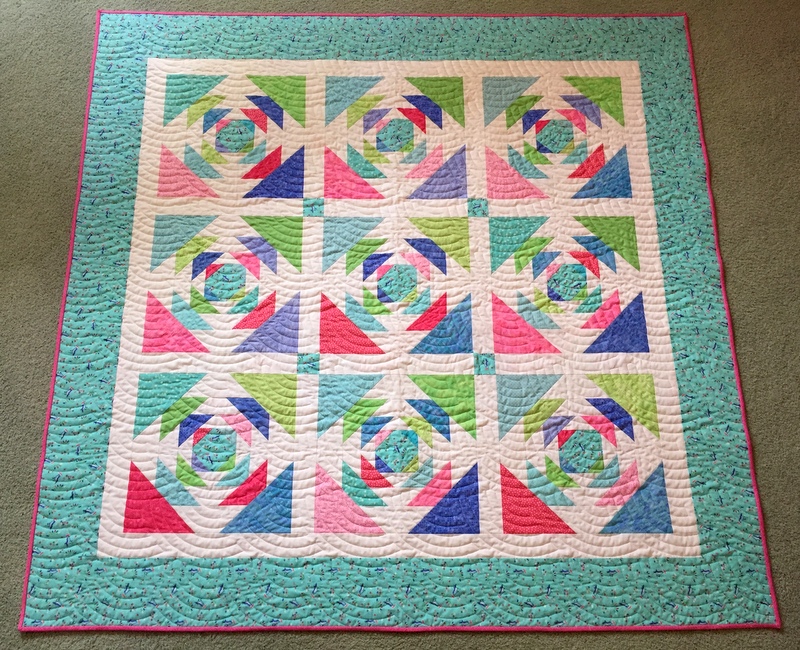
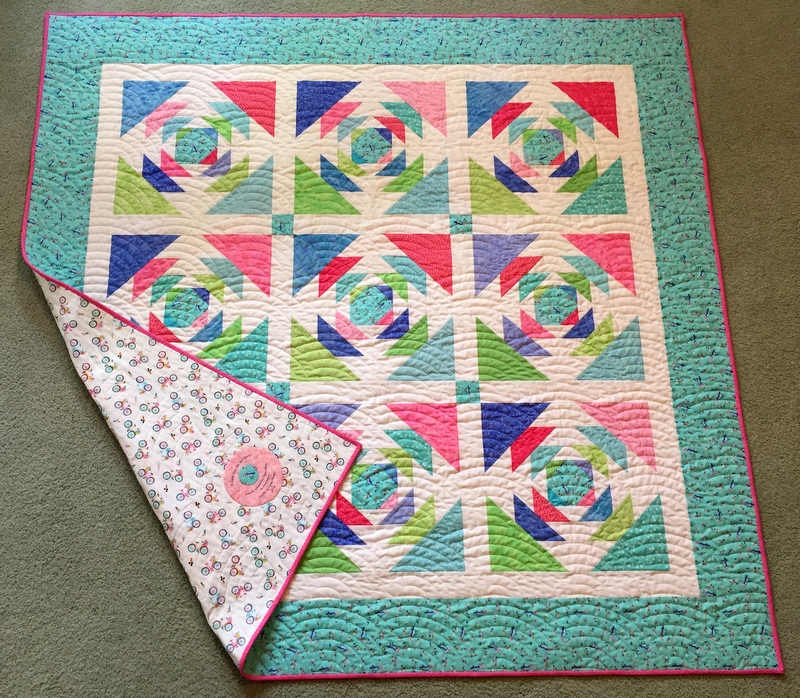
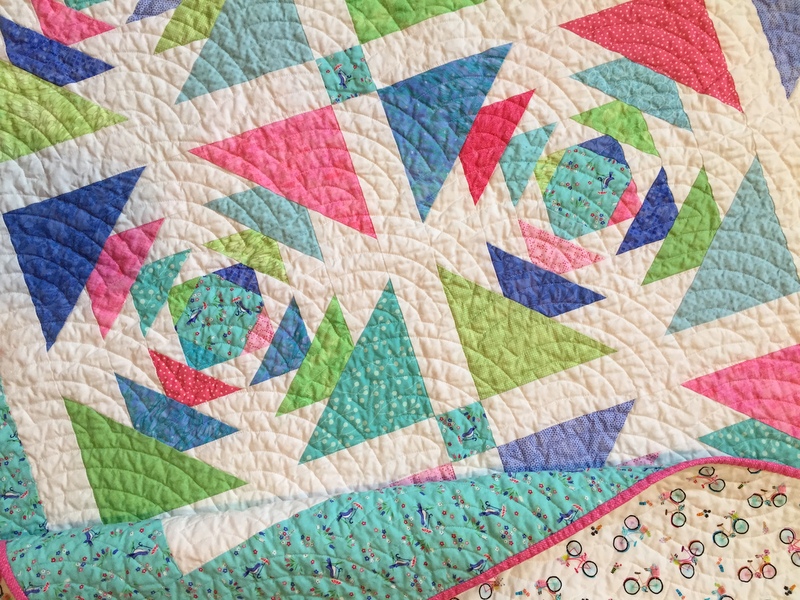
Ah, how nice to end the first week of the year with a quilt finish. May I present . . . Bluebirds for Bethany:

Bethany (fourth of my six granddaughters in birth order) is a wife and mother of three little boys age five and under. The boys received quilts made by their great granny (me) when they were babies. I wanted Bethany to have her very own quilt, one that reflects her gentle personality, and I wanted it to be unabashedly feminine. Why? Because she is surrounded by menfolk! Even the family dog is male.

This quilt fits Bethany to a T. I already knew she loved the color scheme and fabrics because she commented on a smaller version I made last year as a baby quilt. I had more than enough pieces left over to construct another quilt. It was meant to be.

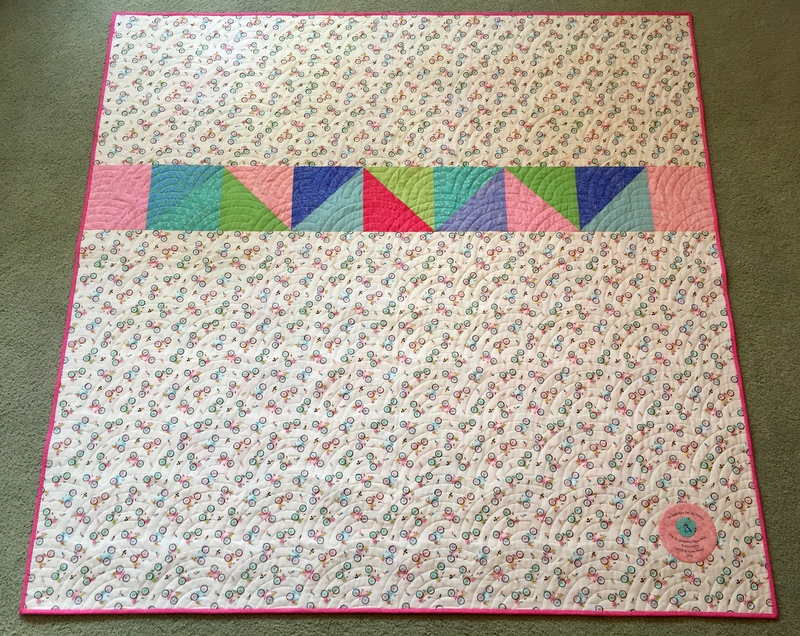
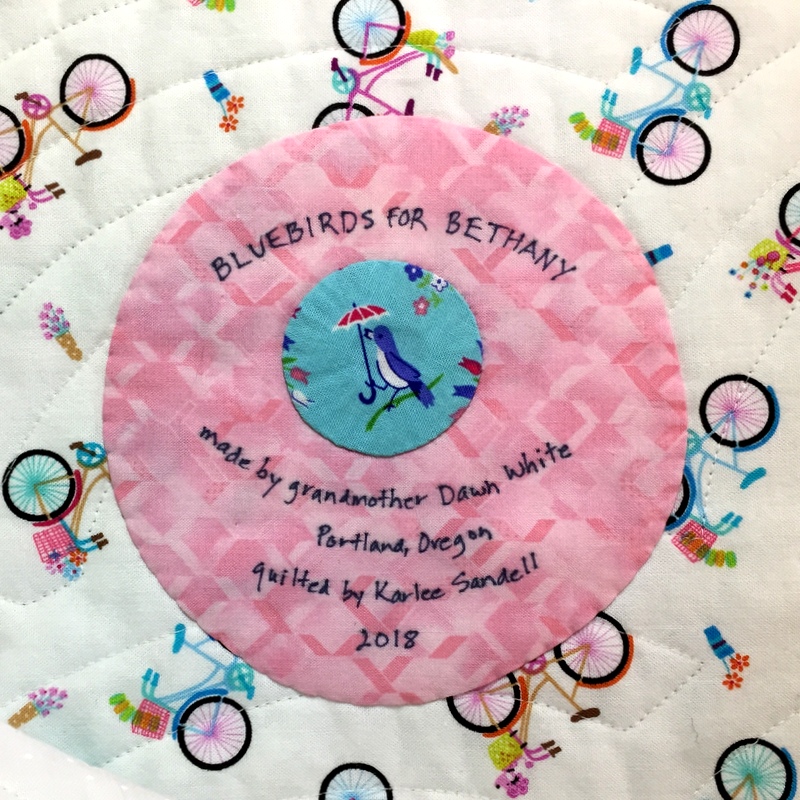
On the back of Bethany’s quilt I added a strip of half-square triangles and a very special label:

Here’s a close-up of the label:


I am so delighted with how this quilt turned out. I asked longarm quilter Karlee Sandell of SewInspired2Day to quilt it using the time-honored Baptist Fan motif. It’s a motif one sees frequently on quilts made as far back as the mid-19th century. Those quilts, of course, were quilted by hand. Today’s longarm quilters use digitized versions to great effect.

Notice how the curves of the fans soften the sharp angles of the pineapple blocks? That was one of my reasons for choosing the motif. Karlee did a beautiful quilting job, as usual, with an extraordinarily fast turnaround. (Thank you, Karlee!)

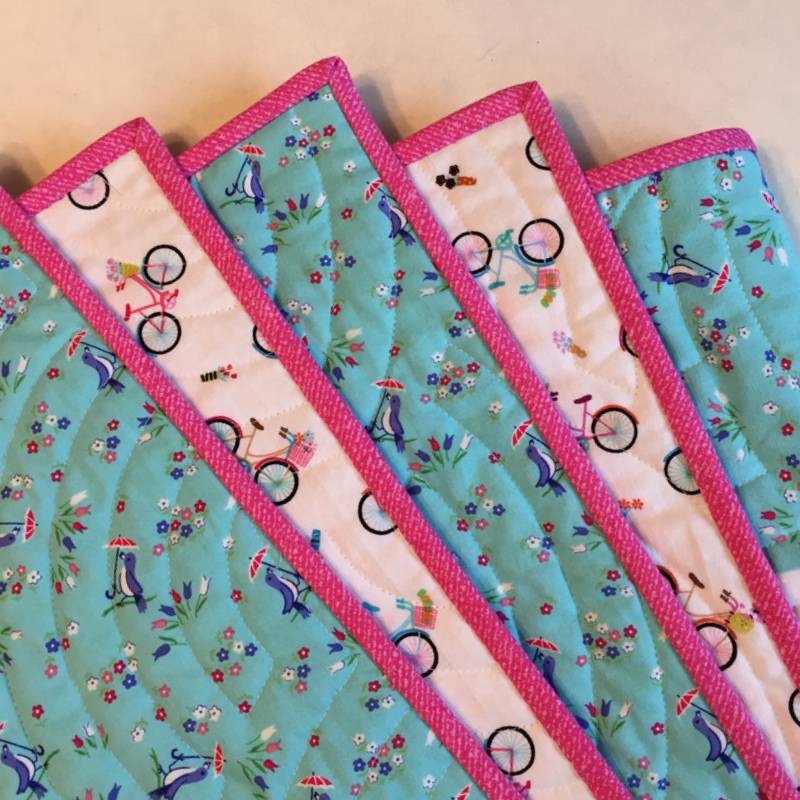
I chose a bright rose fabric for the binding, cutting it on the bias to show the crosshatch design to better advantage:

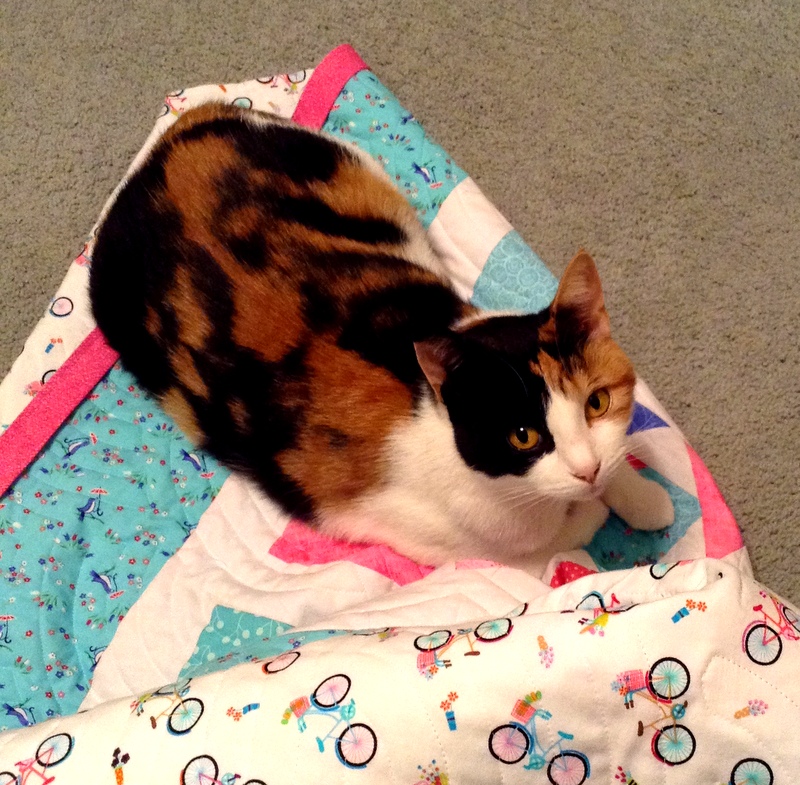
Stitching the binding to the back of the quilt by hand was hampered to some degree by a certain calico cat who thinks a quilt draped across a lap is a fort to burrow under:


I tried to schedule my binding sessions around Coco’s catnaps. As you can see, I wasn’t always successful.

Once the quilt was bound and labeled it went into the washer and dryer to give it that old-fashioned crinkly look and feel:

Now all I need to do is tie this quilt up with grosgrain ribbon and deliver it!
Finished size (after quilting, trimming, binding, and laundering): 57″ x 58″
Block design: from Karin Hellaby’s book Pineapple Plus
Focus fabric on front: Birdies by Pam Kitty Morning for Lakehouse Dry Goods
Background fabric: Kimberbell Basic White 8210 (white dots on white)
Other fabrics (from my stash): various blenders in blue, aqua, pink, and green
Focus fabric on back: bicycle toss by Gail Cadden for Timeless Treasures, #Gail-C 2794


Posted in family, pineapple quilt block, update | 8 Comments