Happy Leap Year!

Isn’t it nice to have an extra day in the month? I could sure use an extra day more often than once every four years. How about you? Think of all the Unfinished Objects we could cross of our lists!

I have several UFOs that I would dearly love to work on but I’m still playing catch-up with baby quilts (and greatly enjoying the process). Two down, two to go.

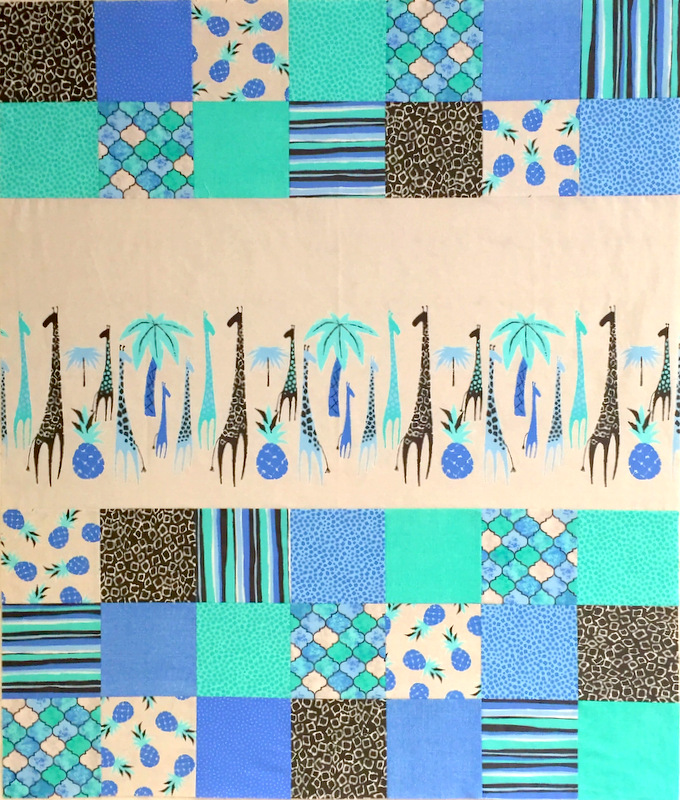
This top, one of two featuring abstract giraffes from the Migration line by Michael Miller Fabrics, went off to longarm quilter Sherry Wadley recently . . .

giraffe baby quilt top #1

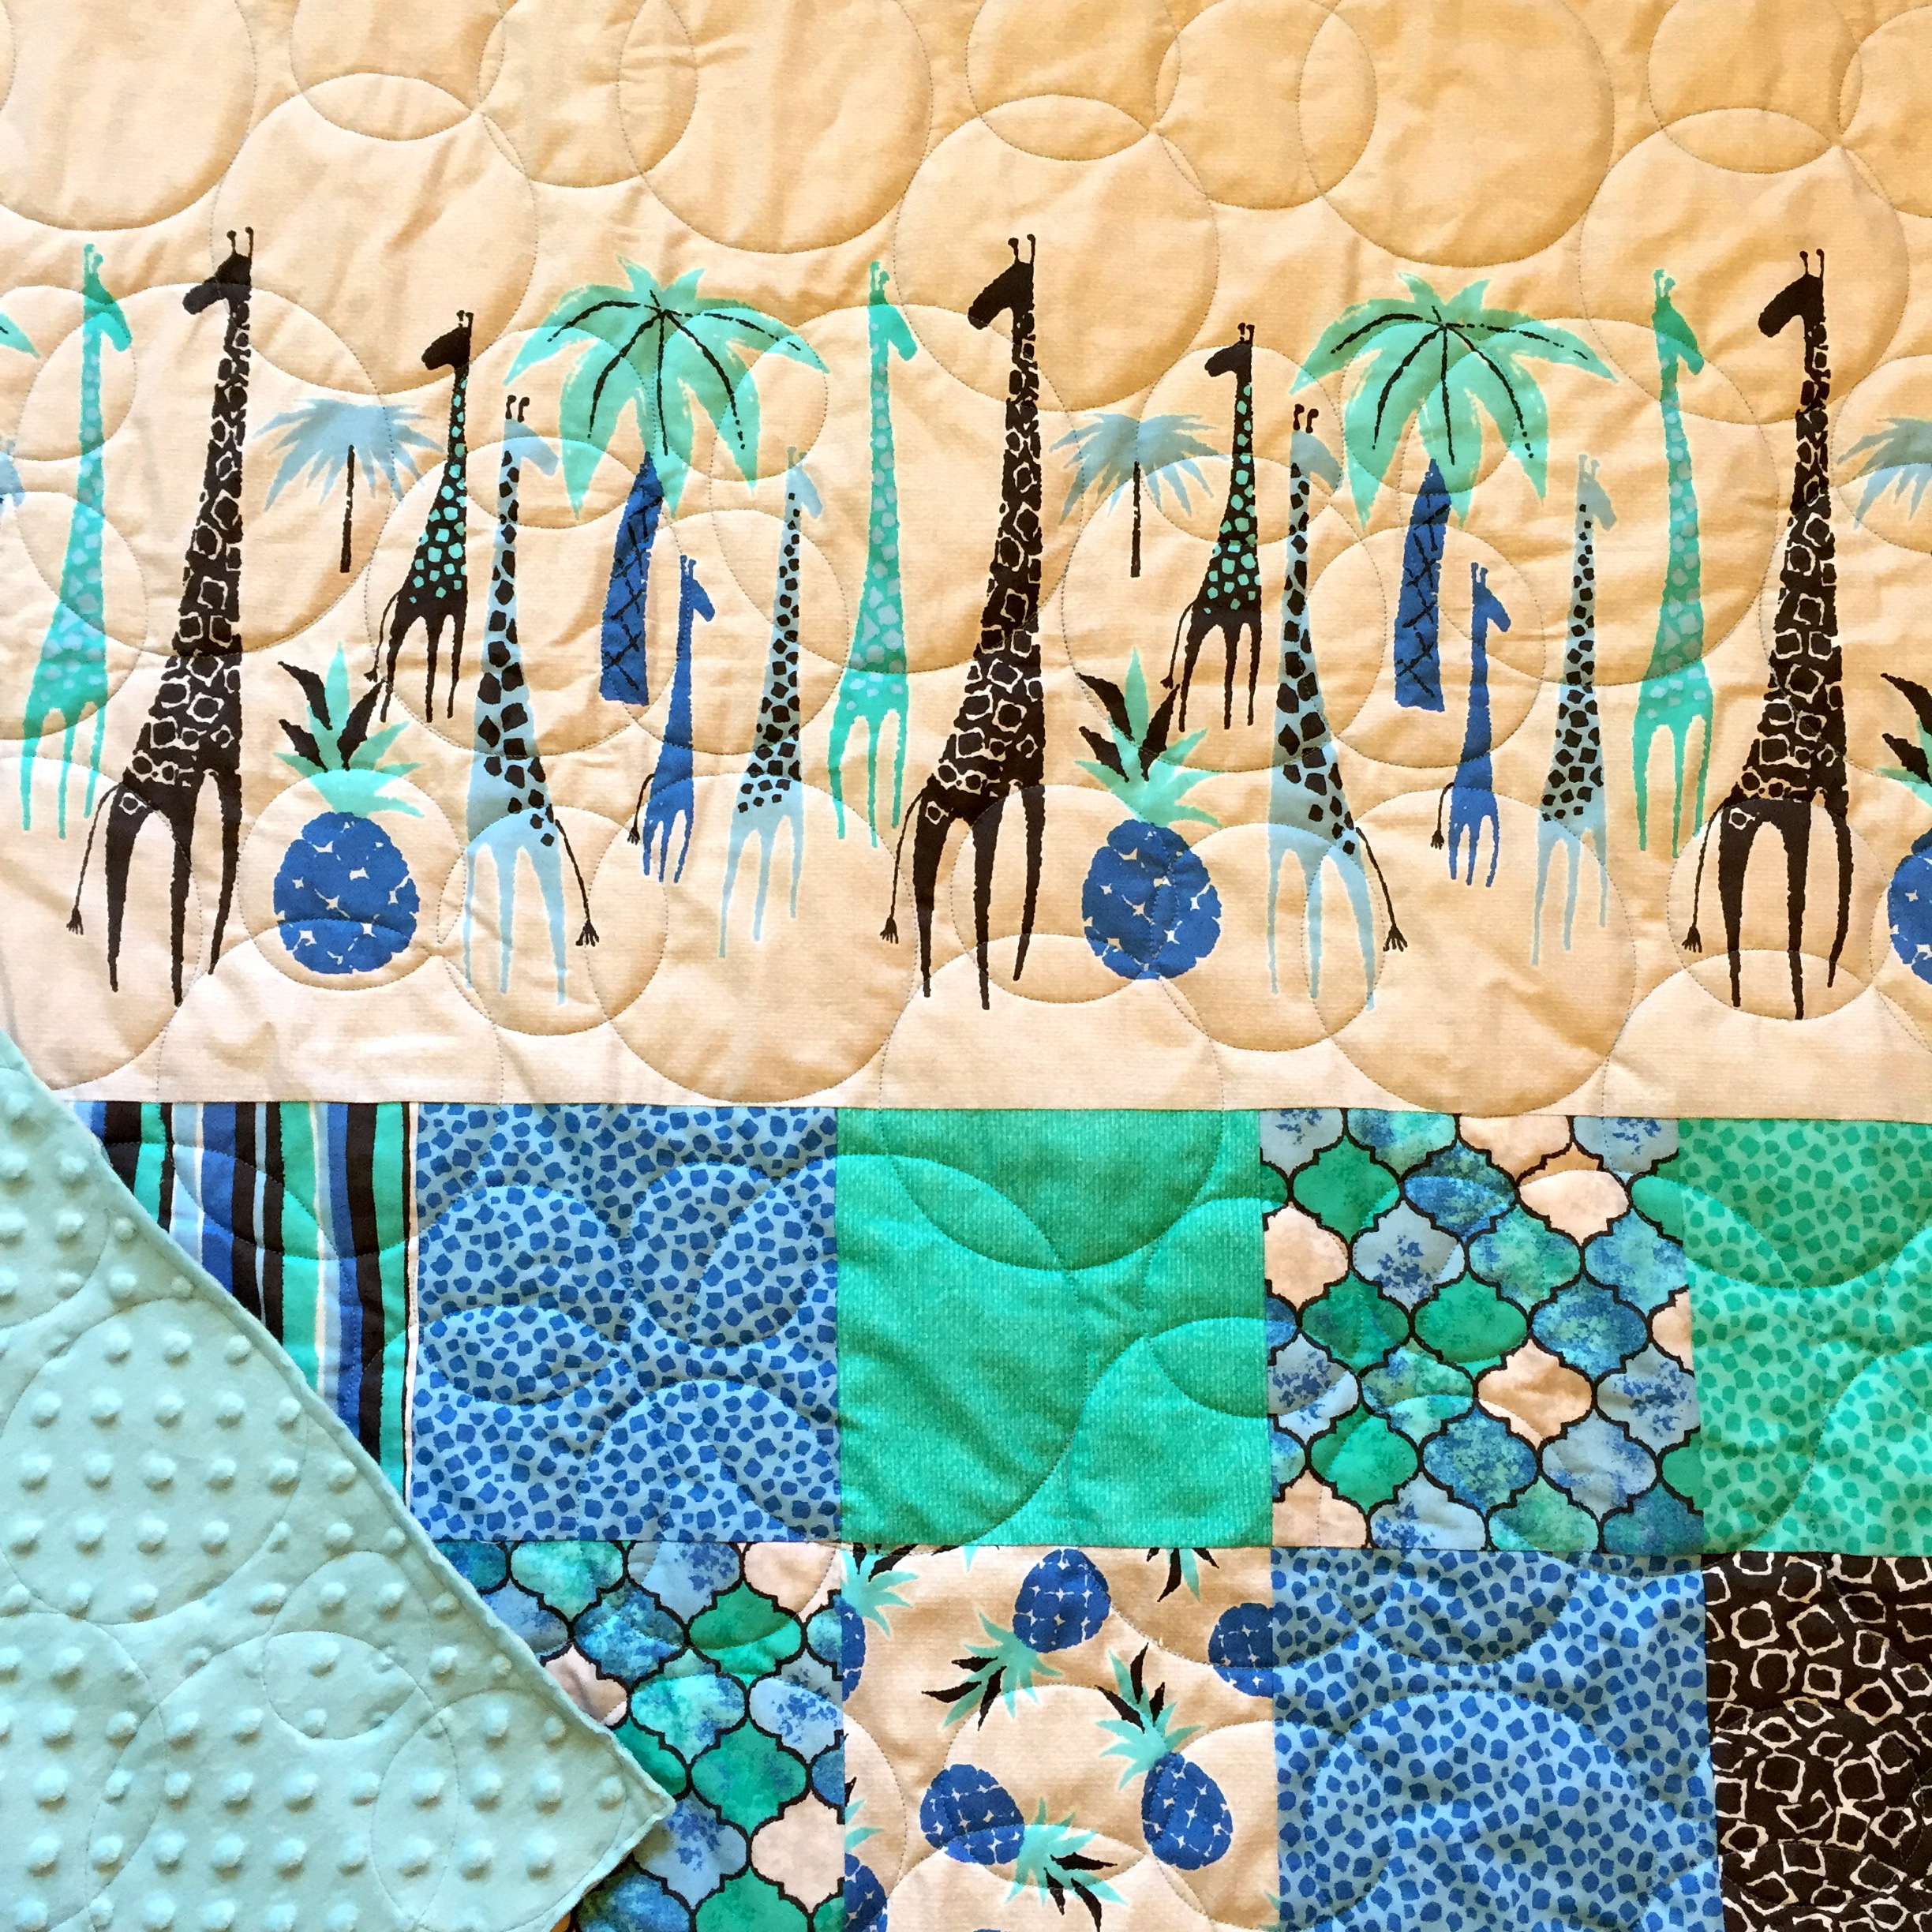
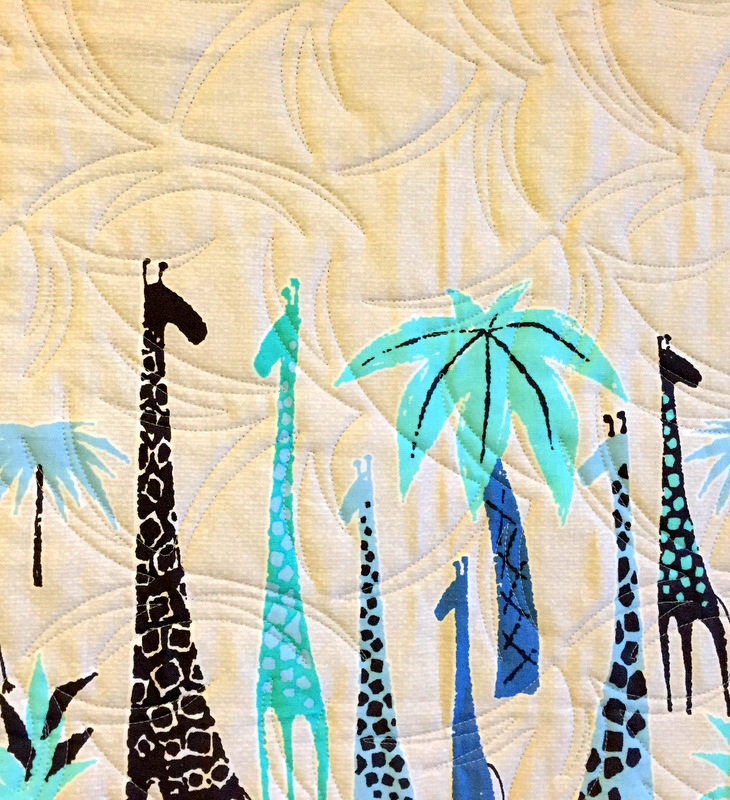
. . . and came back with circles all over it. Here’s a partial view:

giraffes and bubbles

Don’t those circles remind you of soap bubbles floating in the air? Such a happy motif for a baby quilt! (That’s Minky on the back — first time I’ve ever used it.)

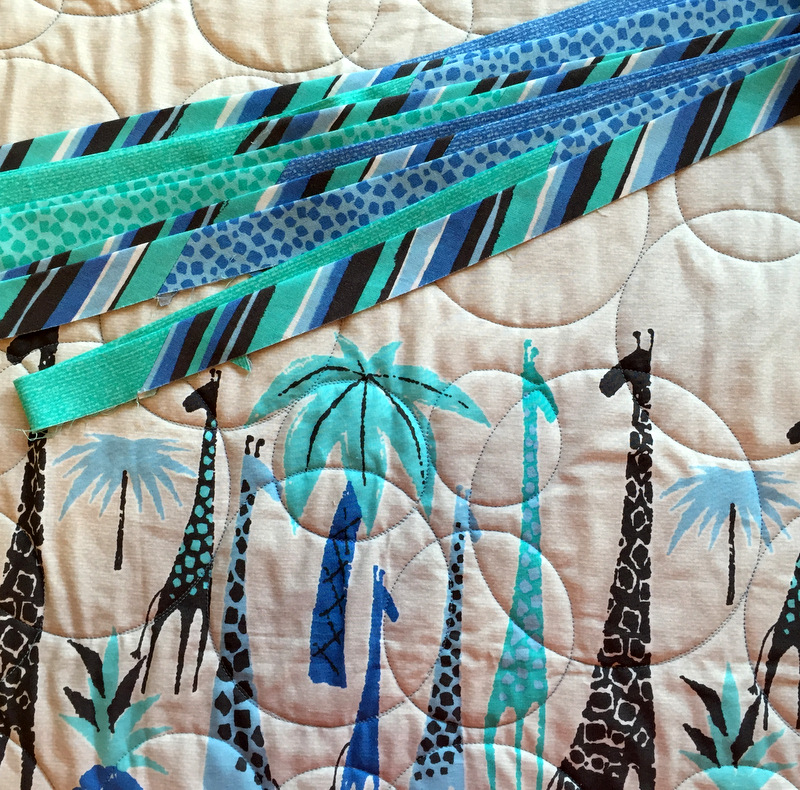
What little fabric I had left from making both tops is going into a scrappy binding:

circles and scrappy binding

Sherry also quilted the other giraffe quilt, which you can see here.

I’ve already picked a design and cut out the fabric for the third baby quilt:
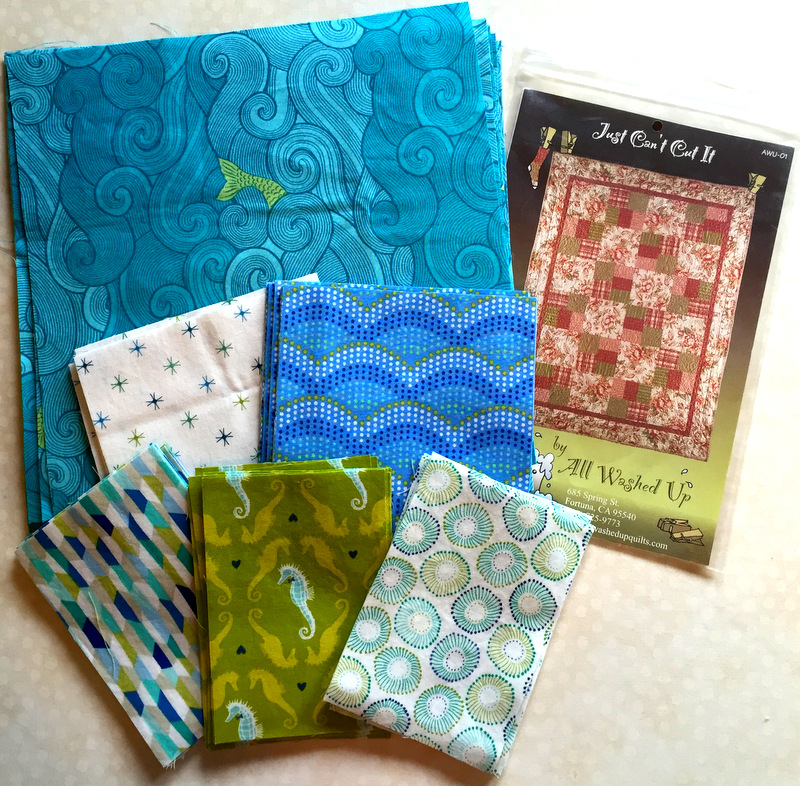
baby quilt to be
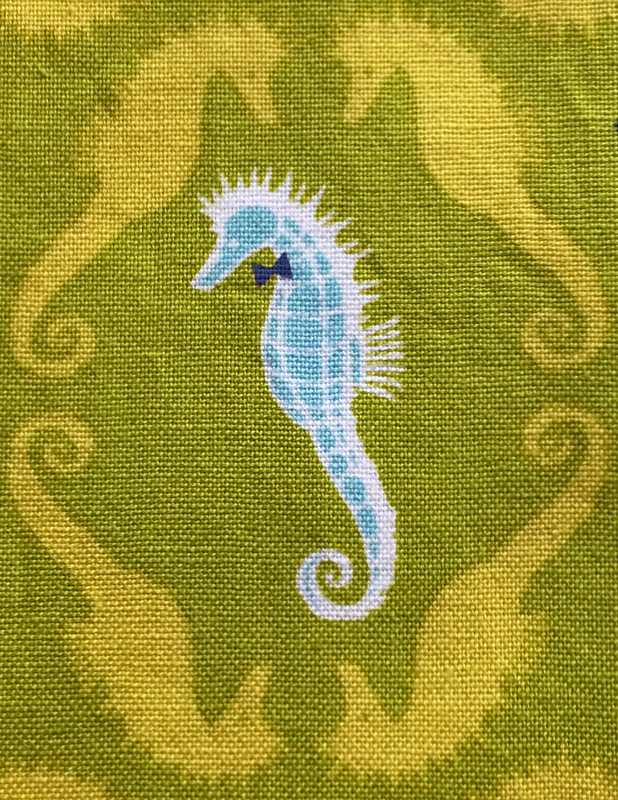
Five of those six fabrics are from Into the Deep, a new line designed by Patty Sloniger for Michael Miller fabrics. It’s a wonderfully whimsical line featuring jellyfish and waves and sea anemones and seahorses wearing bowties. Seahorses wearing bowties? Irresistible!

dapper seahorse

The pattern I’m using, Just Can’t Cut It by All Washed Up Quilts, is one of my “go to” patterns for baby quilts. I reduce the block size from 12″ to 9″ for baby quilts. The quilt top before borders will measure 36″ x 54″ if I use a 4 x 6 block setting or 45″ square if I use a 5 x 5 block setting. Right now I’m leaning toward the 5 x 5 setting.

Just looking at the fabrics makes me smile. This quilt is going to be fun to make!


Posted in baby quilt, bowties, update | 5 Comments

Quick Curves, Large and Small

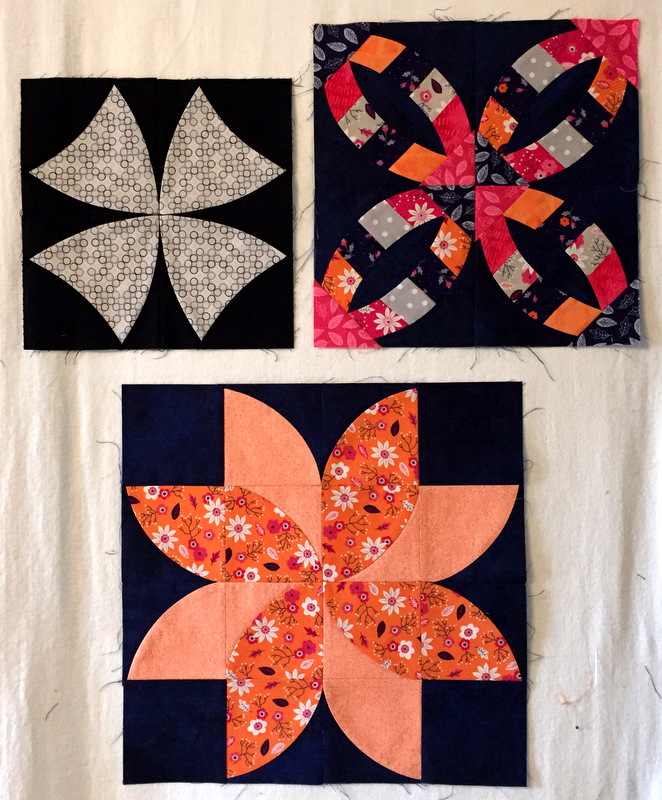
3 test blocks qcr
Dawn’s Quick Curve Ruler Test Blocks


In preparation for teaching a recent class called “Secrets of the Quick Curve Ruler,” I made several test blocks, including the ones you see above. One block was made with the original Quick Curve Ruler from Sew Kind of Wonderful and two were made with the new QCR Mini.

The idea of successfully sewing concave and convex curves together without pins was what compelled me to try out the Quick Curve Ruler a few years ago, and I quickly became a fan. The original ruler produces curves based on a 15″ circle while the Mini makes curves based on a 9″ circle. Can you tell from the photo above which blocks were made with which ruler?

The talented women behind Sew Kind of Wonderful (founder Jenny Pedigo and her sisters Helen Robinson and Sherilyn Mortensen) launched the QCR Mini a few months ago along with new designs for the original ruler and a new book as well. Too many choices! But isn’t that what makes the quilting world go ’round?

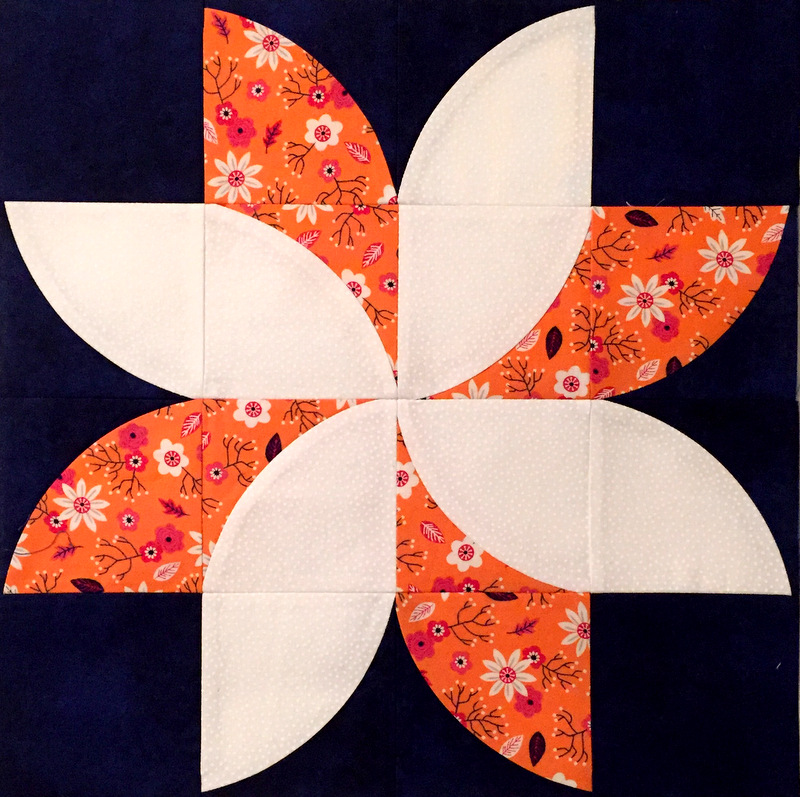
The directions that come with the QCR Mini include a pattern for a table runner. The block for that design also makes a mini version of the free Fun Poinsettia pattern offered on the Sew Kind of Wonderful website. The first test block I made with the QCR Mini was the mini Fun Poinsettia:

Mini Fun Poinsettia block
Mini Fun Poinsettia Block, 14″ Square Finished


I knew right away this block would find its way into a quilt. I’ve since made four more blocks, including the one at the top of this post, and have an idea for a unique setting.

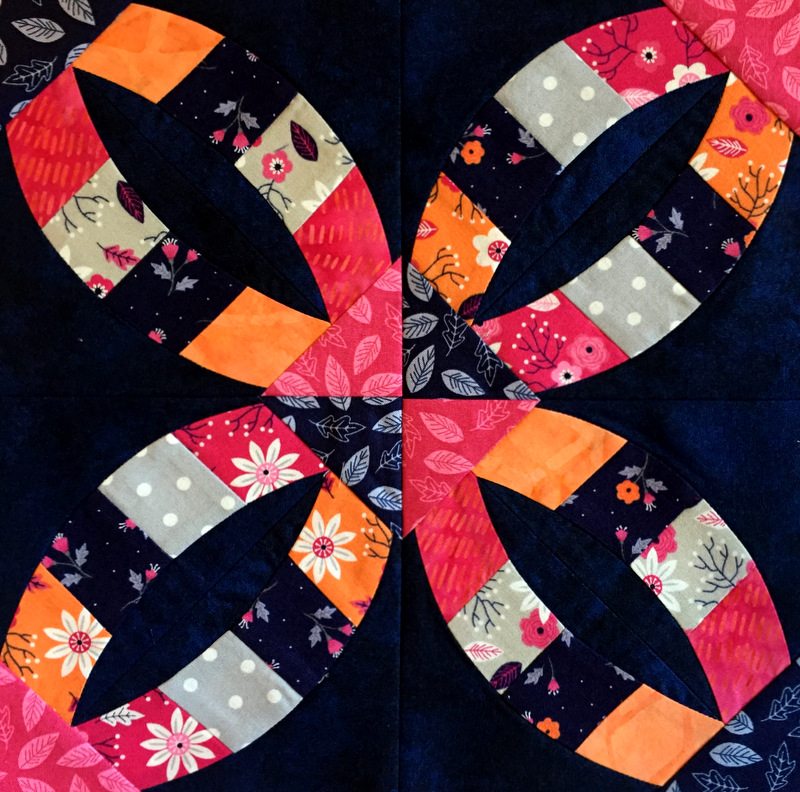
The second QCR Mini test block, cropped in this photo to look like its 11″ finished size, is from the new Mini Rings pattern:

Mini Rings block 800 11.5 in
Mini Rings Block, 11″ Finished


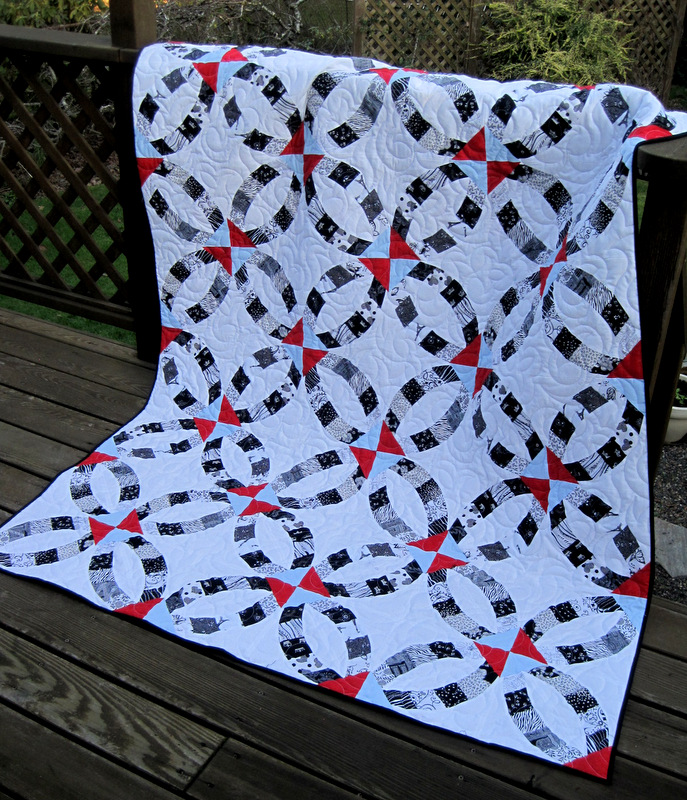
I will definitely make this pattern, although not in the fabrics you see above. I have plenty of strips left over from the black and white fabrics I used for the full size pattern, Metro Rings, in this quilt (Honeymoon in Paris) made in 2013:

2013-12, Honeymoon in Paris
Honeymoon in Paris (56″ x 75″), 2013


I’ll cut the strips down for the size needed for the Mini. My Honeymoon in Paris quilt went to a good friend who actually did honeymoon in Paris (a charming story — I’ll tell you about it sometime) so I am motivated to make another one to keep.

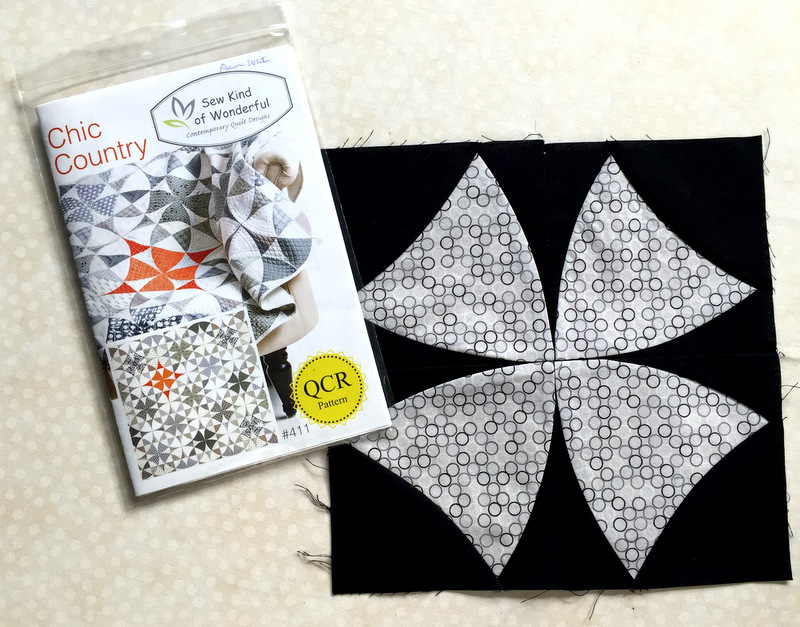
Of the test blocks, the last one was from the new pattern Chic Country, based on the traditional Winding Ways block:

Chic Country test block
Dawn’s Chic Country Test Block, 9″ Finished


The Chic Country block finishes at 9″ square, making it the smallest of the Sew Kind of Wonderful blocks I’ve experimented with.

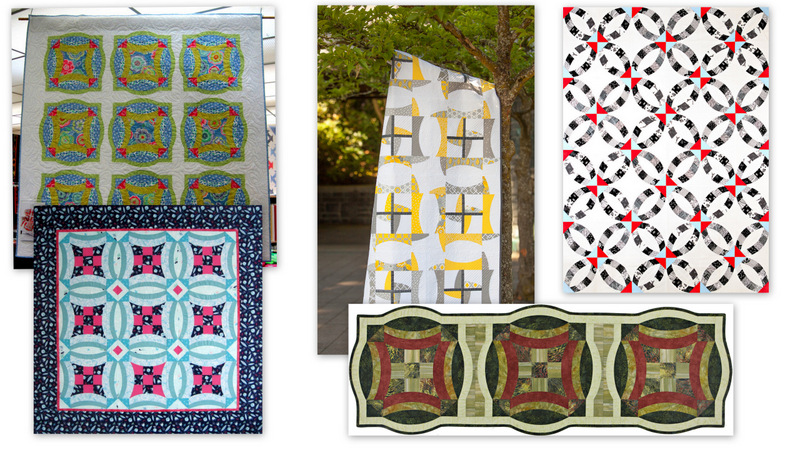
While I love the look of this quilt and have seen a few smashing versions on social media, I didn’t find the process of making the block enjoyable. Since quiltmaking, for me, is all about fun — and fabric, too, of course — I’ll stick to the blocks I do enjoy making.

Here’s a collage of the quilts I’ve made so far using the Quick Curve Ruler:

mug shots

I trust there are many more in my future!


Posted in QCR Mini, Quick Curve Ruler, update | 7 Comments

Traveling in Style

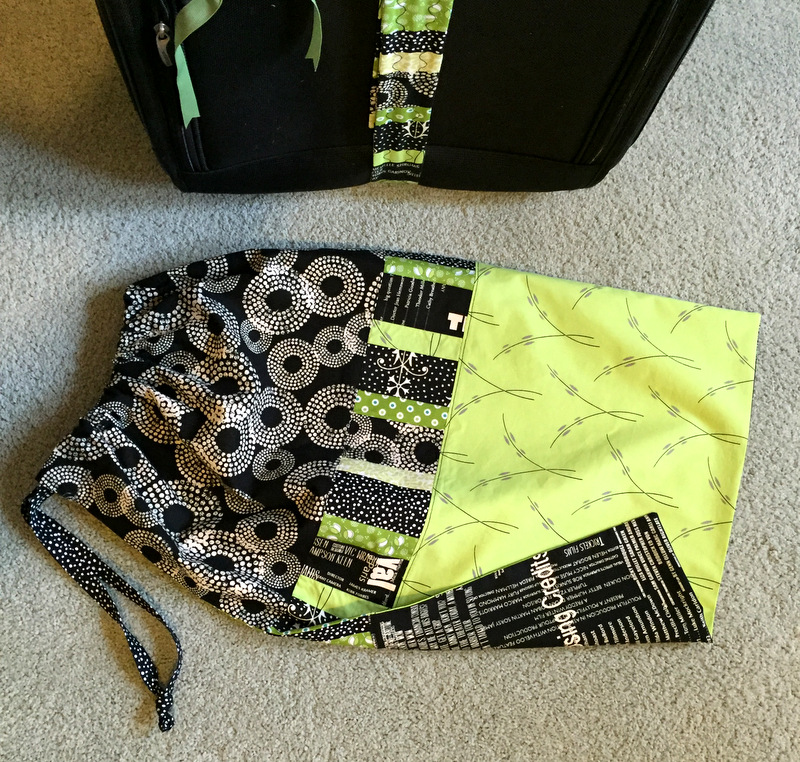
luggage strapIn the not-too-distant future, my husband and I will be taking a little trip. I’ll be traveling in style, thanks to my good friends Peggy and Vickie R., who made me some terrific travel accessories for my birthday.

Knowing my favorite color is green, Peggy made a striped luggage strap using black and white prints to set off the greens. I can see myself at the airport now, waiting in Baggage Claim as dozens of nearly identical black bags roll off the conveyor belt onto the carousel. Won’t I be the envy of all when my bag comes into view?

And look at this matching lingerie bag:

lingerie bag 2It’s generously sized. When not traveling, I can use it as a tote bag to transport small quilts to my guild meetings for Show and Tell.

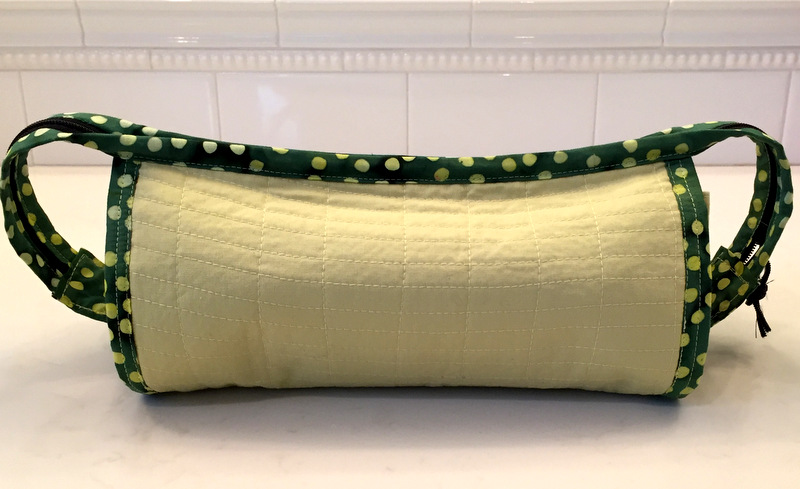
Vickie R., who also knows my favorite color, surprised me with this Sew Together Bag:

2016-02-05 15.29.19

When I opened up the bag, it was like cutting into a sweet juicy watermelon. Look at the lovely pink interior:

2016-02-05 15.24.25

And just look at all those compartments!
The Sew Together bag was designed for sewers and quilters. It’s the perfect size for stashing any number of sewing notions and quilting tools but it’s also well suited for makeup and toiletry items. How convenient to have all of those items corralled in one container.

I love my handmade gifts and can’t wait to use them on my next trip. Thank you, Peg and Vickie!


Posted in tote bags, update | 6 Comments

My Wall of Quilts

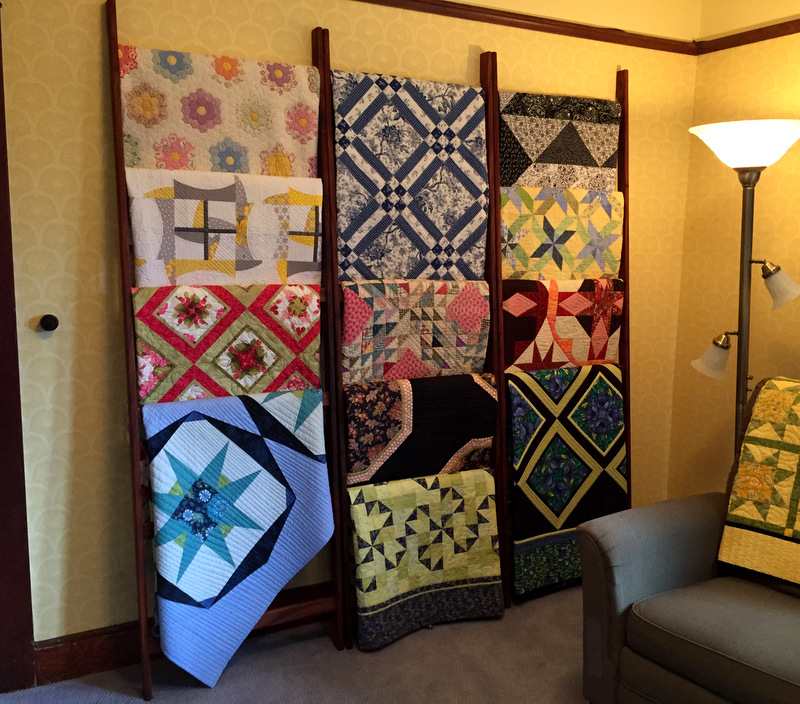
dawn's quilt wall

The quilts displayed on this wall in our TV room replace a piano that I donated a few months ago. I had bought a secondhand piano 20-some years ago. Having taken lessons as a kid, I thought I would relearn how to play. That never happened, not because I didn’t want to but because I preferred to spend my free time sewing, especially when I was still working. Retiring in 2008, I plunged headlong into quiltmaking. The piano, alas, remained unplayed.

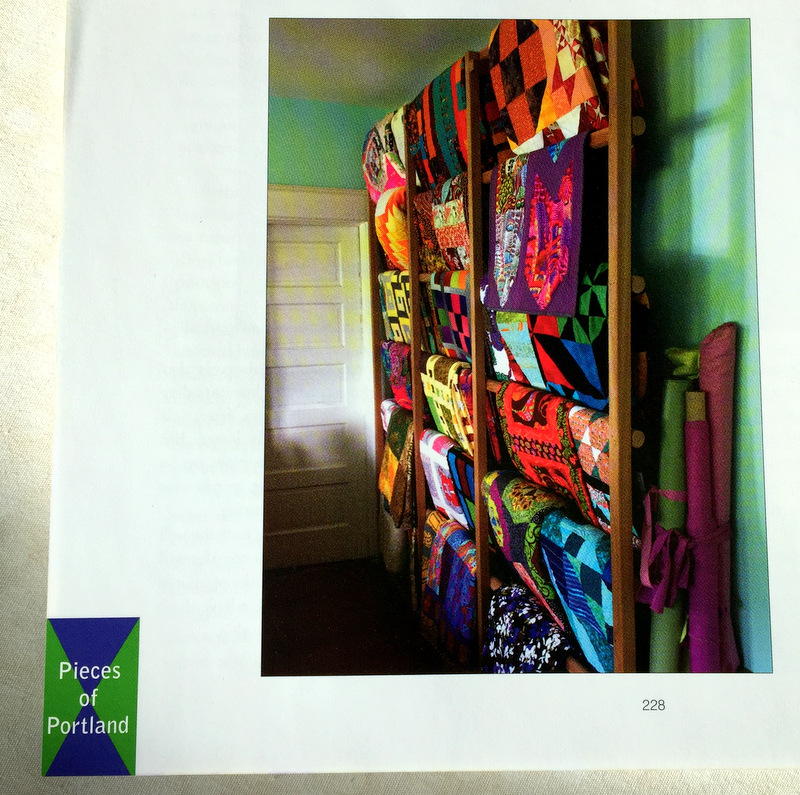
With the piano gone, my inclination was to increase the seating in the TV room by adding a sectional sofa. Gradually, with that expanse of wall staring at me, the notion of a quilt wall took over. I remembered a photo I had seen in Marie Deatherage and Joyce Brekke’s fabulous book Pieces of Portland (Quiltlandia, 2015). Marie’s husband, Ric Seaberg, made her a wall-size quilt rack:

marie's quilt wall

Floor to ceiling  — what an efficient use of space! Since the wall in our TV room is one of the few that doesn’t get direct sunlight, I knew it would be the perfect spot to display quilts.

I called upon master craftsman Phillip Galyon of Wooden Images. Phillip made me a custom sewing table and cabinet in 2012, and the next year he crafted a console table and stool for our remodeled master bathroom.

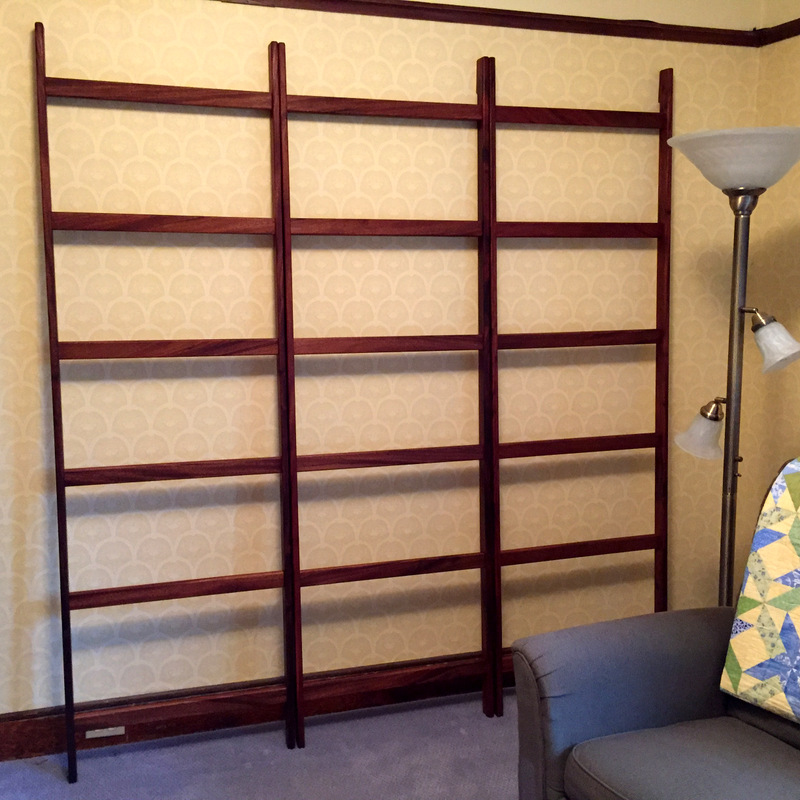
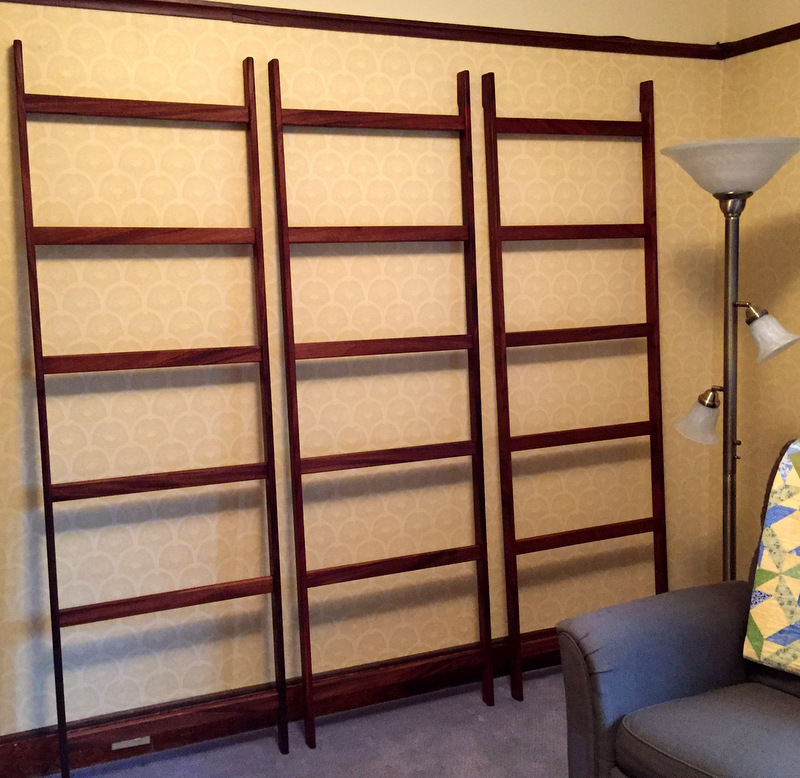
My idea for this project was a series of quilt ladders that could stand alone or be joined by pegs to form one piece. After consulting with Phillip, we decided on separate ladders that, when placed next to each other, would look like one unit. The wood of choice was African mahogany, well suited to the original dark stained wood trim in our 1913 Craftsman home.

Here are three ladders butted up next to each other . . .

quilt ladder wall 1

. . . and here they are with a couple of inches between them:

quilt ladder wall 2

As you see from the photo at the top of this post, I chose to put the ladders together — at least for now. They can easily be moved apart for a change of pace. And adding or rearranging quilts will be a breeze because of the ease with which the ladders can be moved.

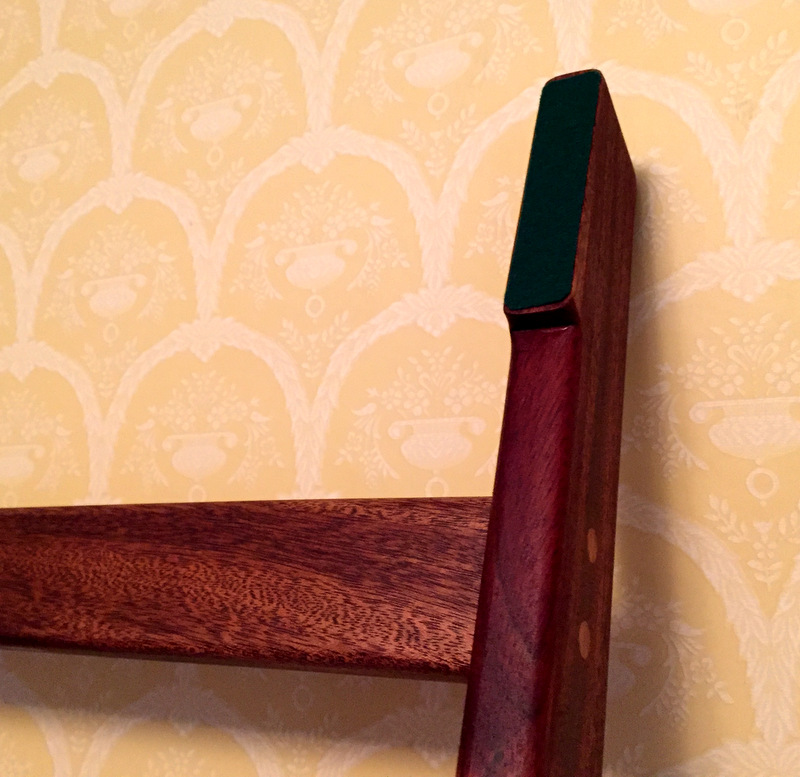
I can’t say enough good things about the quality of Phillip’s work. He angled the rungs of the ladders so the quilts would hang properly. He leveled the tops of the ladders so they would be flat across the top (level with the floor). And he added a wedge to the top of the backs so they would lie flat against the wall. Not only that, he put felt on the backs so they wouldn’t scratch:

quilt ladder, detail of back
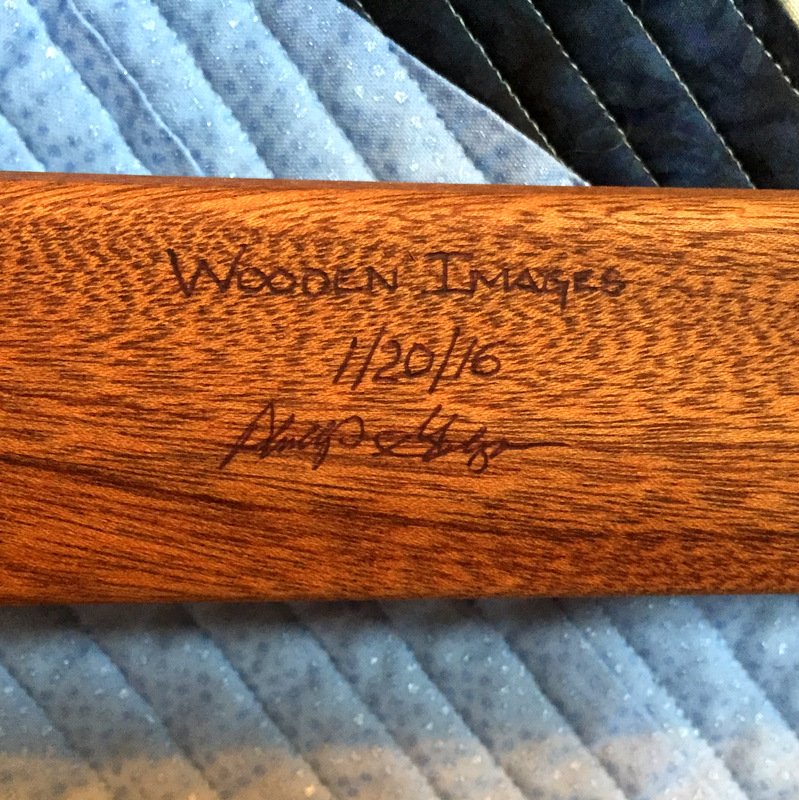
And he signed each piece on the back of the bottom rung:

quilt ladder, signature
All told, Phillip made four ladders for me. There is room for another ladder on my quilt wall in the TV room but for now the fourth ladder is in an upstairs bedroom (hung with quilts, of course).

Having this wall of ladders means that the precious quilts that have come down through my family will be on display as well as the quilts I have made myself. Some of the latter will be given away eventually, to be replaced by new ones, but for the time being I will have the pleasure of seeing them frequently.

I envision my wall of quilts as a changeable feast.


Posted in family, home dec, update | 16 Comments

Second Finish of the Year

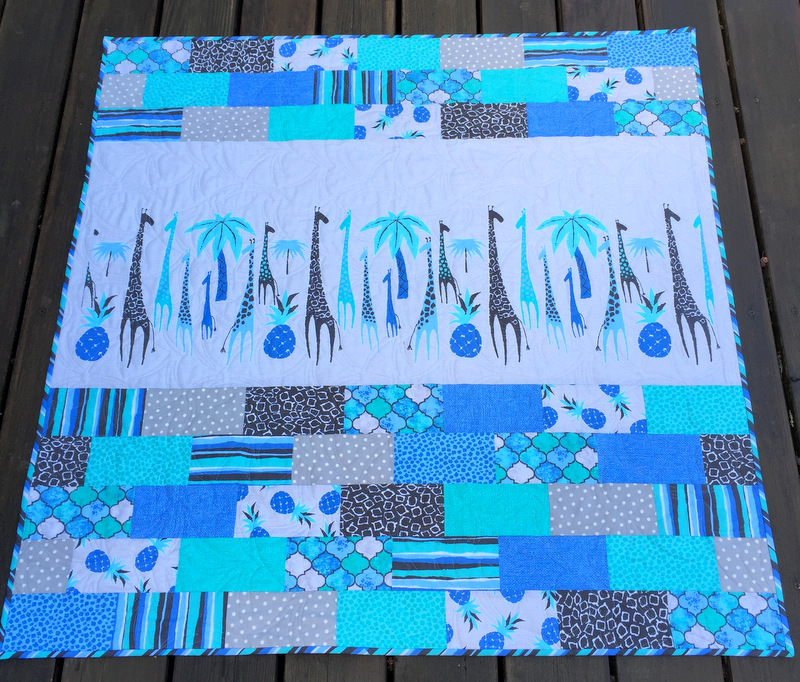
My second completed project of the year is this baby quilt:

Malachi's quilt 1.2016
Malachi’s Quilt, 42″ Square

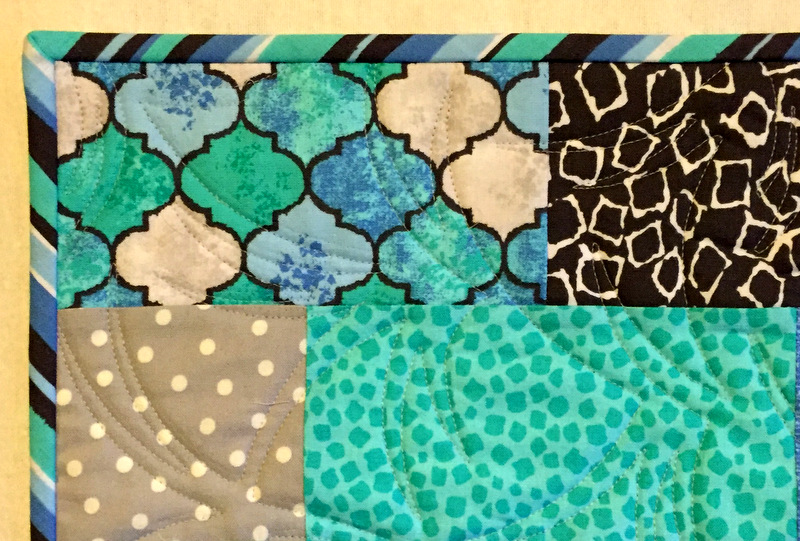
Most of the fabrics are from the Migration line by Michael Miller, featuring slightly abstract giraffes and pineapples in shades of blue, aqua, and charcoal. The line also included some blenders and an irregular striped fabric, which I cut on the bias for the binding. I just love the way the bias binding frames the quilt:

Malachi's quilt, detail of binding
Bias Binding

Sherry Wadley quilted this for me. We chose an edge-to-edge motif that beautifully echoes the spiky tops of the pineapples and the trees:

Malachi's quilt, quilting detail 1.2016
The Perfect Quilting Motif

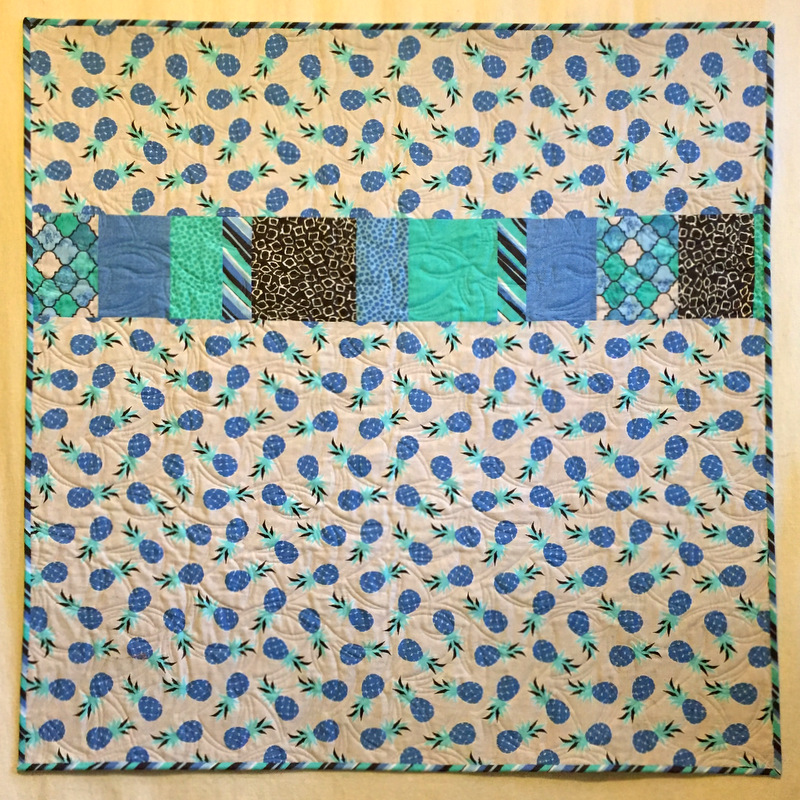
Leftover strips of fabric went on the pieced back (including the leftover bias binding strips) :

malachi's quilt, back 1.2016
Scrappy Back

The label is on now, and the quilt is being washed and dried as I write this, not only to assure that it’s clean but also to give it that wonderfully crinkled look that quilts only get when they’ve been laundered.

Malachi, for whom this quilt was made, is no longer a baby; he is a toddler. Now that he’s walking, it would please me enormously if he is allowed to drag his quilt anywhere he wants. It was made to be used and loved.

Linking up with Kelly of My Quilt Infatuation on NTT (Needle and Thread Thursday).


Posted in baby quilt, family, update | 3 Comments

A Quilty Week with No Quilting

Last week came and went so fast my head is spinning. I did something quilt-related every day — but I spent no time at all in front of my sewing machine.

A quick recap: On Sunday, Wednesday, and Saturday, I taught at the Pine Needle.

On Tuesday I gave a presentation and trunk show to the Tualatin Valley Quilt Guild. As I was driving to Sherwood Tuesday evening through a torrential downpour, I couldn’t help but think, “Who’s going to venture out on such a dark and stormy night just to see my quilts?” Happily, the answer was: almost every member of the guild. (Thank you, TVQG members, for giving me such a warm welcome!)

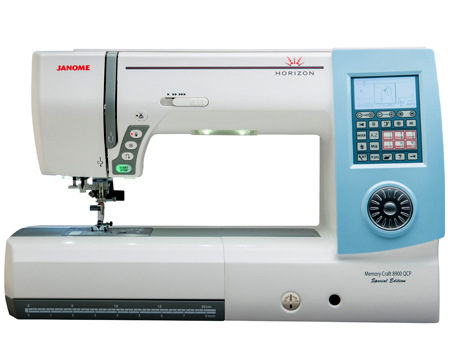
On Thursday I had a lesson on my new Janome Horizon 8900QCP sewing machine. I say “new” but I actually bought the machine last July. Janome Horizon 8900QCPIt’s taken me this long to get that lesson scheduled. I’m so glad I did because some questions I had about using the machine were very well answered, and I can’t wait to try out some new feet I purchased.

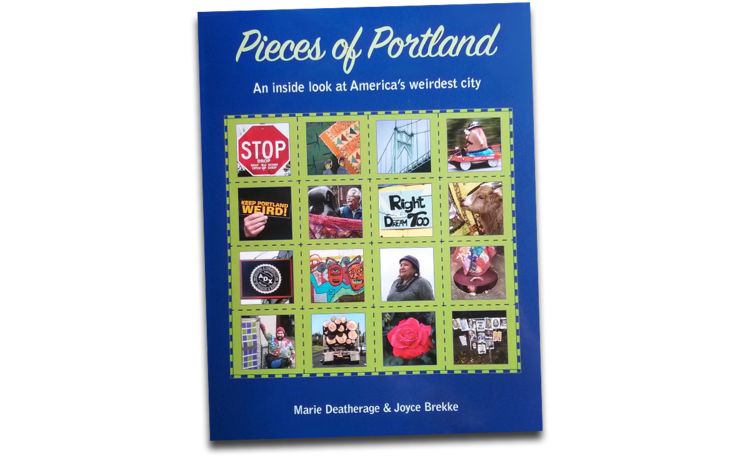
Thursday evening was the monthly meeting of the Portland Modern Quilt Guild, where a record-breaking crowd was treated to a presentation by Marie Deatherage and Joyce Brekke on their delightfully quirky book Pieces of Portland: An Inside Look at America’s Weirdest City (Quiltlandia, 2015).

pieces-of-portland-cover

On Friday I met my quilt group, the Quisters, at the Stitches in Bloom Quilt Show in Silverton, Oregon. The show is held every January at the Oregon Garden. One of my quilts has hung in the show every year since 2010 — until this year. I plum forgot to enter! We had a wonderful day together, including a celebratory birthday lunch.

Did I miss a day? Oh, yes. Monday was prep day for my classes and quilt guild presentation.

So what did I do today? I cleaned my house! Now I’m ready for the coming week, and I hope to spend lots of time in my sewing room. The first of four baby quilts in progress is back from the quilter so the very first thing on my list is to attach the binding using one of the new feet I bought for my Janome Horizon.

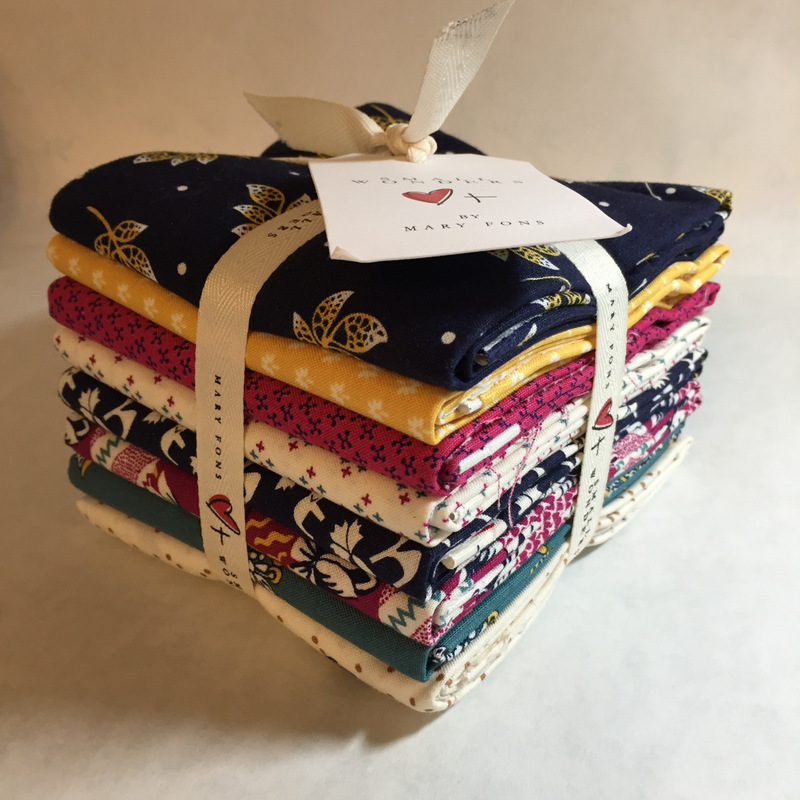
Then — and only then — I’m going to do something with this:

Small Wonders fabric bundle

This beautiful little bundle of half-yard cuts is from the debut line of fabric by Mary Fons for Springs Creative. Called Small Wonders: World Piece, the complete line of fabrics includes small-scale prints inspired by six countries. I was especially drawn to the fabrics you see above, representing India.

In fact, as soon as I saw this bundle at the Pine Needle, I knew exactly what I was going to do with it. I hope you’ll stop back in a few days to find out.


Posted in Janome 8900QCP, Quisters (Quilt Sisters), update | 5 Comments

Playing with the QCR Mini

Mini Fun Poinsettia block
This is the test block I made using the new QCR Mini by Sew Kind of Wonderful.

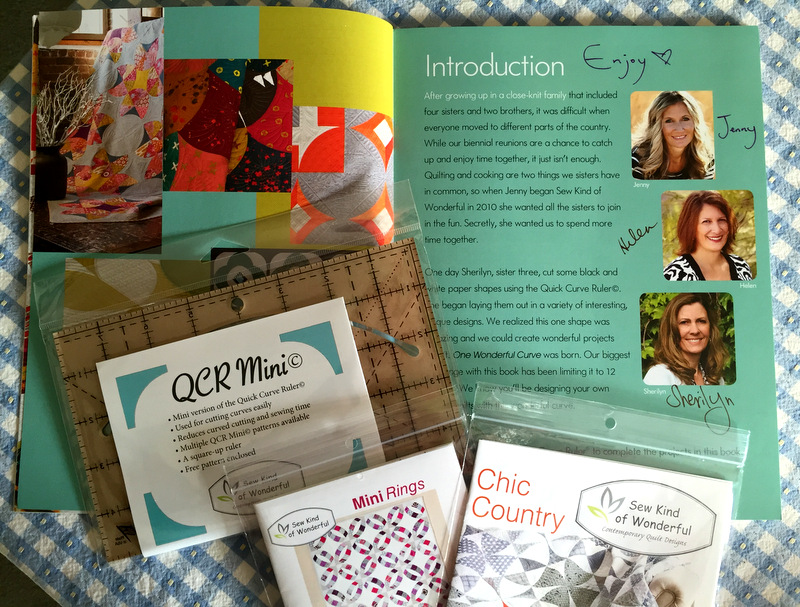
QCR Mini? That’s the new mini version of the Quick Curve Ruler that Jenny Pedigo introduced in 2011. I’m a huge fan of Jenny’s and have made several of the patterns she designed to go with her ruler. You’ve seen the results in my blog posts over the last four years.

Now joined by her sisters Helen Robinson and Sherilyn Mortensen, Jenny introduced the QCR Mini and several new patterns late last year, along with a new book, One Wonderful Curve: 12 Contemporary Quilts (Landauer Publishing, 2015), featuring designs by all three sisters.

I ordered the book, the QCR Mini, and two new patterns from the Sew Kind of Wonderful website the first day they became available. I was so excited when my package arrived that I took a picture of the goodies:

SKW book and patterns
The first block I made using the QCR Mini is the one you see at the top of this post. It’s the mini version of the Fun Poinsettia block introduced on Sew Kind of Wonderful’s blog in 2013 with a free tutorial. The original Fun Poinsettia block measures 20″ square finished whereas the block made with the QCR Mini finishes at 14″ square. That’s still a good-sized block. I’m planning to make an entire quilt with this design.

See the Mini Rings pattern in the photo above? That’s the next test block I made:

Mini Rings block 800 11.5 in

This block measures 11½” square, which means it will finish at 11″ square in a quilt.

Both test blocks were made with fabrics from the Paradise line designed by Alisse Courter for Camelot Cottons. The background in both blocks is Shadow Play in navy by Maywood.

These blocks will be on display Friday and Saturday (Jan. 15 and 16) at the Pine Needle, the quilt shop in Lake Oswego, Oregon where I teach, in conjunction with Winter Festival, the shop’s annual January Open House. I’ll be demonstrating the original Quick Curve Ruler and the new QCR Mini. If you’re in the neighborhood, please stop by.


Posted in QCR Mini, Quick Curve Ruler, update | 4 Comments

Bricks and Blocks for Babies

Back in September 2015, I made this baby quilt top, the first of four I planned to make in short order for babies in my extended family that had either arrived already or were soon to make their appearance in this world:

giraffe baby quilt top #1
Quilt Top #1 — 42½” x 50″


The fabrics are from the Migration line by Michael Miller Fabrics. The giraffe panel print was printed along both sides of the fabric, from the selvage to the fold, so I knew I would be able to make two baby quilts from one length (two half widths) of fabric. Wonderful!

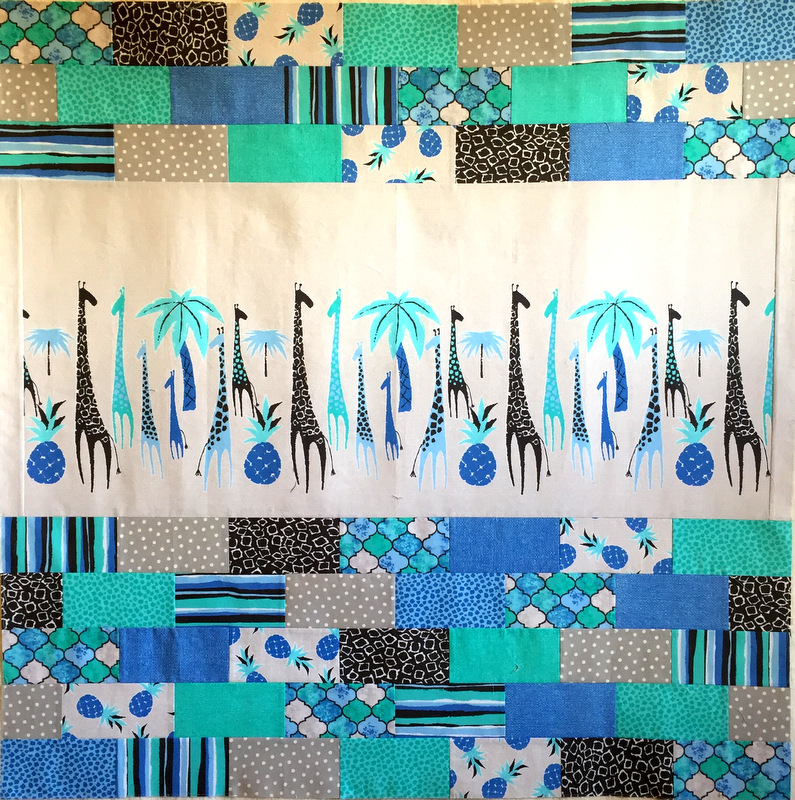
I decided to make a similar top for quilt #2 but make “bricks” instead of squares. Days passed into weeks, weeks passed into months. On January 1, I realized that four months had elapsed since Quilt Top #1 was completed. Four months! How could I let this happen?

Well! There’s nothing like a New Year to galvanize one into action. I decided to get cracking on those three unmade tops. By the end of the first week of 2016 I had finished Quilt Top #2:

baby bricks quilt top jan 2016
Quilt Top #2 — 42½” square


The next order of business in 2016 is to get these two baby quilts quilted, bound, labeled, and delivered to their rightful owners. The quilts are small enough that I could quilt them myself on my domestic machine but they will surely get finished sooner if someone else quilts them for me. This also gives me the opportunity to support the longarm quilting industry, which I am happy to do, especially as we have a plethora of talented quilters in the Portland metropolitan area.

Babies #3 and #4 — a girl and a boy — have since been welcomed into our world, and I vow to get their quilts to them in a more timely fashion. I already know what I’m doing for Baby Quilt #3. Inspiration should strike soon for Baby Quilt #4. When it does, you’ll be the first to know.


Posted in baby quilt, family, update | 2 Comments

My New Junior Billie Bag

Yes, it’s done! My Junior Billie Bag, the quilter’s tote I’ve been working on these last few weeks, is now ready to travel. It’s full of my favorite quilter’s tools and supplies — and there’s room to spare.

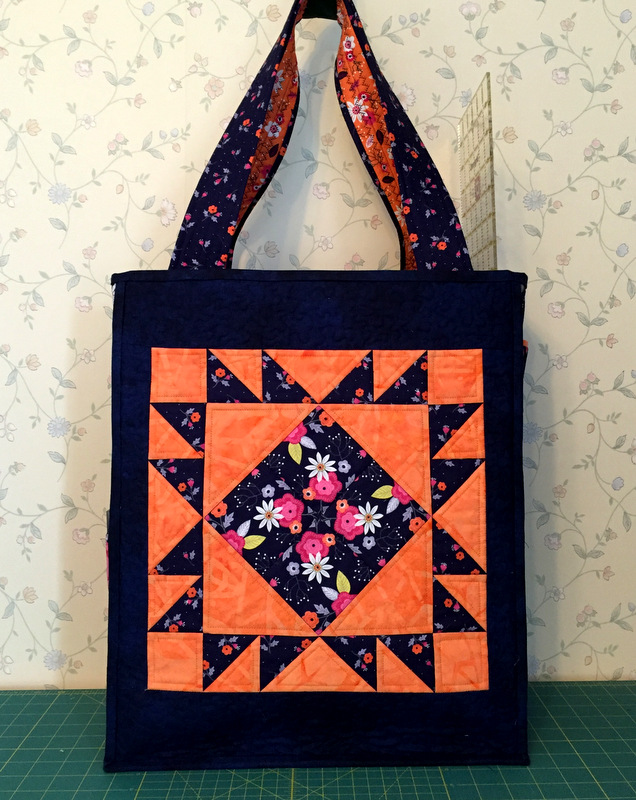
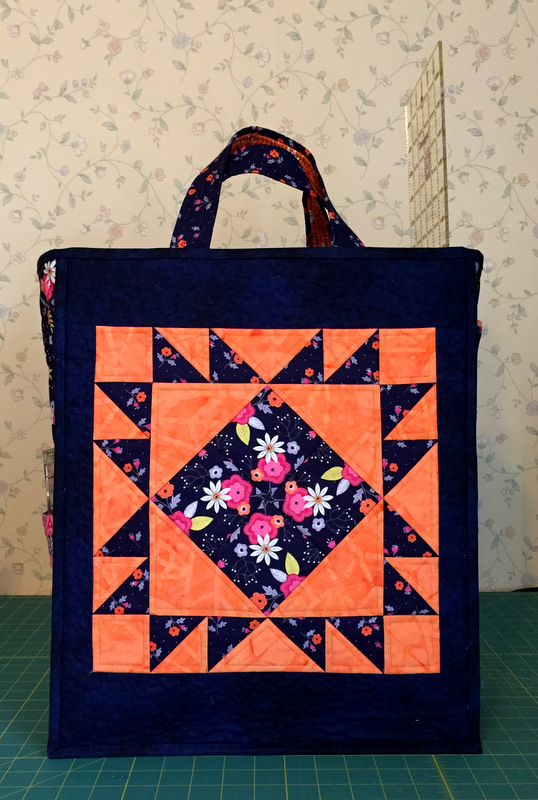
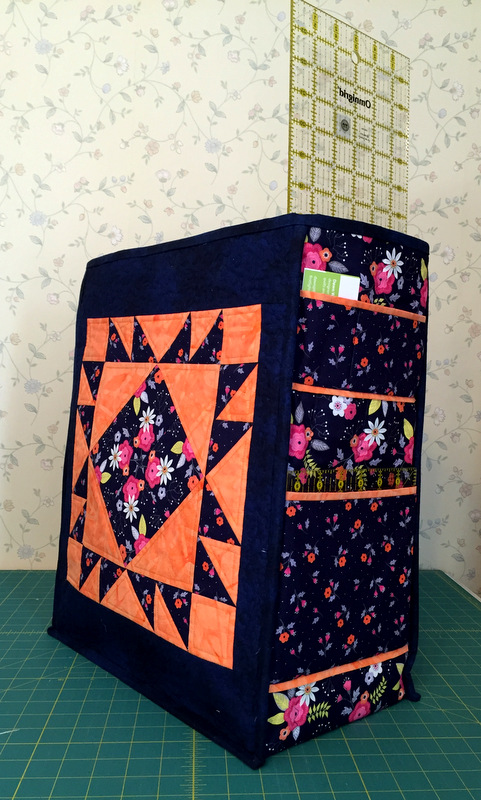
Let me show you a few pictures, beginning with the front and back. Actually, the front and back are interchangeable; I think of them as the pink side and the orange side.

Let’s start with the orange side, with the long handles showing:

Jr Billie Bag orange side 1

Here’s another look at the orange side, this time showing the shorter handles:

Jr Billie Bag short handles orange side

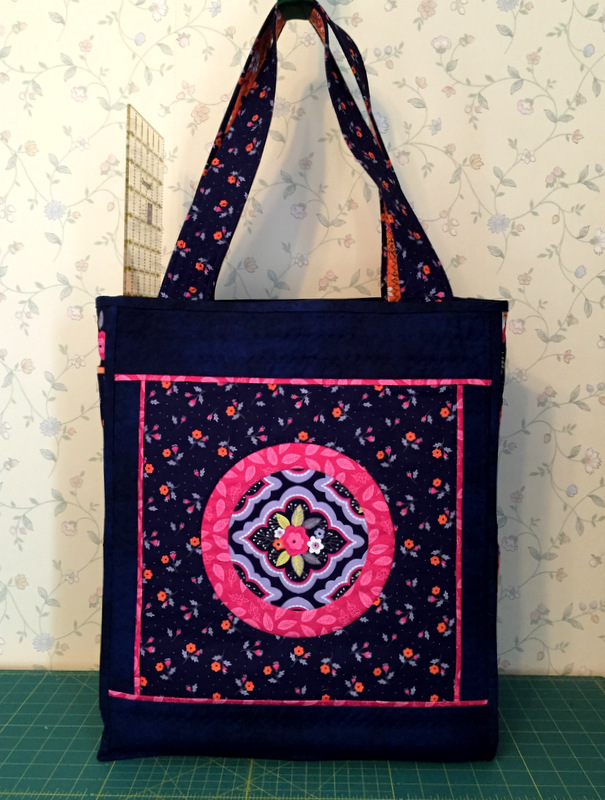
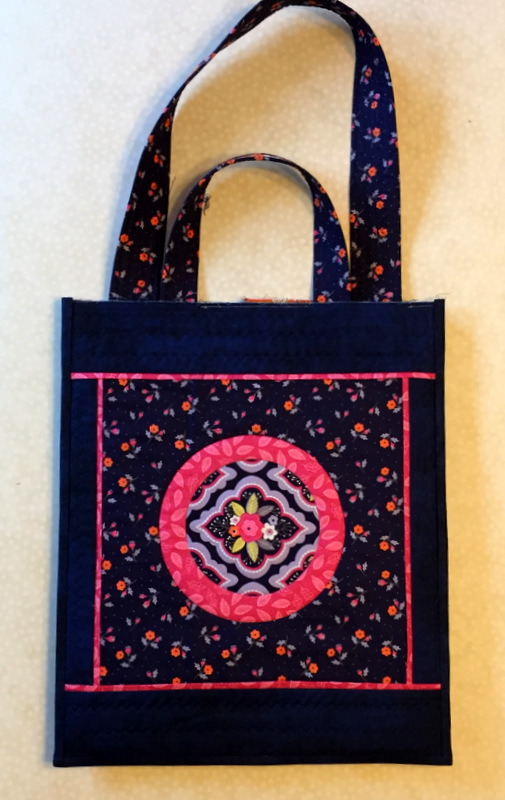
And now the pink side with long handles . . .

Jr Billie Bag pink side 1

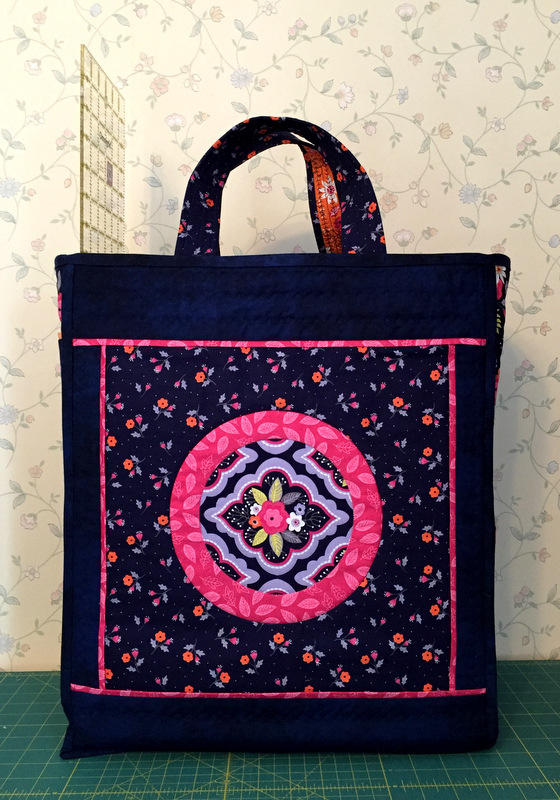
. . . and the short handles:

Jr Billie Bag short handles pink side

Having two sets of handles gives you choices in how to carry the bag — over your shoulder or in your hand.

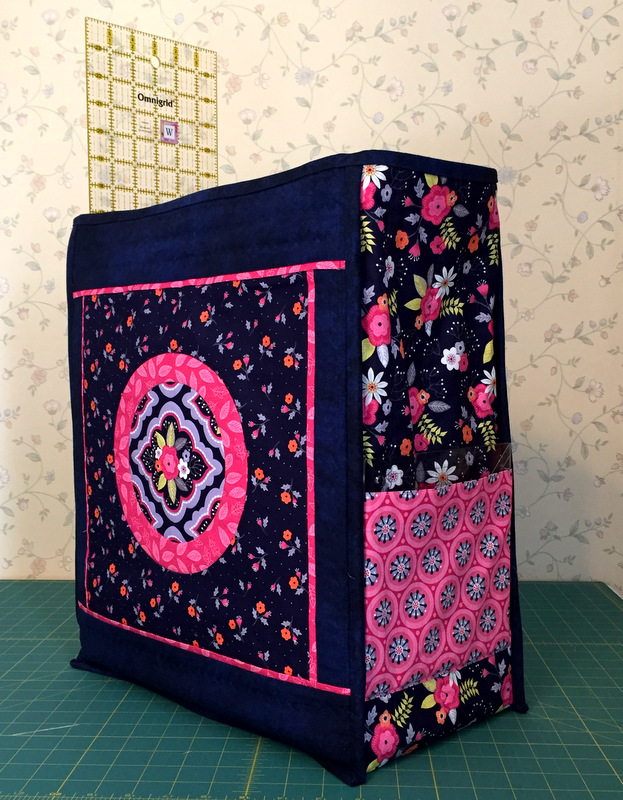
Here’s a shot of one of the side panels, the one with a single pocket:

Jr Billie Bag side view with one pocket

(That reflection you see is from a specialty ruler.)

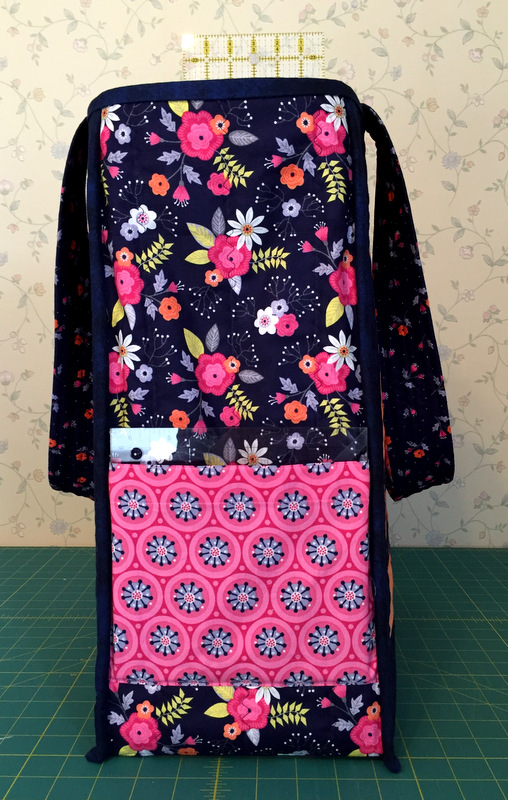
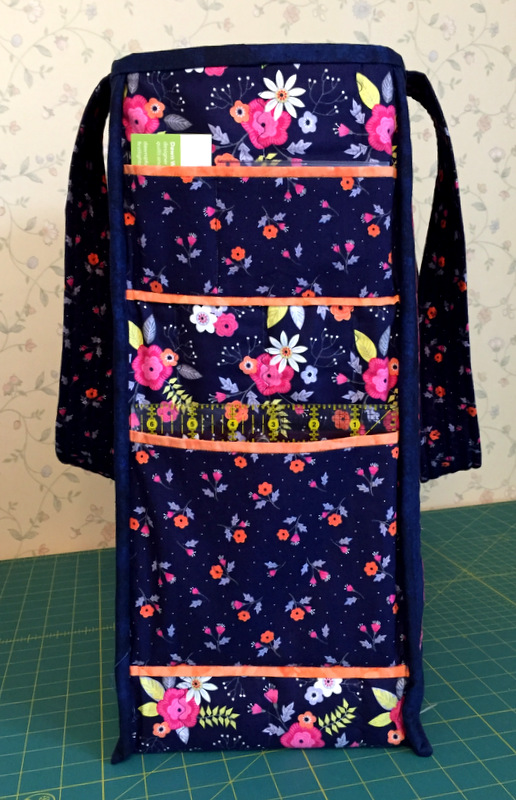
Now have a look at the other side panel. Just for fun I added contrasting bands of color at the top and bottom of the two pockets on this side:

Jr Billie Bag side with two pockets

The small pocket was sized to hold my business cards on one side and a name badge on the other. That’s one of the great features of this bag: you can customize the pockets for whatever you want to put in them.

In these three-quarter angle shots, both sets of straps are tucked inside the bag:

Jr Billie Bag three quarter angle orange side

Jr Billie Bag three quarter angle pink side
Which side do you like better, the orange or the pink?

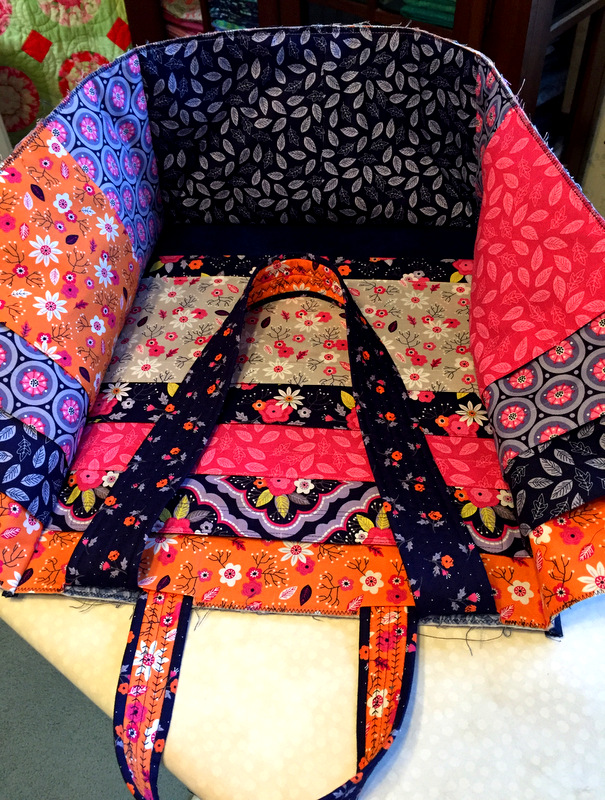
Except for the orange batik and navy Maywood Shadowplay fabric used on the front and back of my Junior Billie Bag, all of the fabrics are from the Paradise line designed by Alisse Courter for Camelot Cottons. Several more Paradise prints are inside the bag in multiple pockets. It’s hard to get a good shot of the pockets now that the bag is done; this photo shows the pockets before the bag was completely sewn together:

Jr Billie Bag inside view of pockets

(I went wild for these fabrics and bought almost the entire line, so you will be seeing more of them in future projects.)

Measuring 14″ in width, 17″ in length, and 7½” in depth, my Junior Billie Bag is a slightly downsized version of the original bag designed at least a decade ago by Billie Mahorney, a popular quilt teacher in the Pacific Northwest, now retired. You can read more about Billie and my earlier progress on the bag in these previous posts:

Dec. 29, 2015:  Billie’s Blessing
Dec. 31, 2015:  Update: Junior Billie Bag
Jan. 4, 2016:  The Third Dimension

It feels good to report a finish on this, the sixth day of the New Year.

Linking up with Kelly of My Quilt Infatuation on the eve of NTT (Needle and Thread Thursday).


Posted in Billie Bag, Junior Billie Bag, tote bags, update | 5 Comments

The Third Dimension

It’s official: my Junior Billie Bag has reached the 3D stage.

If you’ve been following me at First Light Designs, you know I’m working on a Junior Billie Bag, the quintessential quilter’s tote designed by Billie Mahorney.  A smaller scale version of Billie’s original bag, the Junior measures 14″ x 17″ x 7½” — the perfect size for toting a large (but manageable) amount of quilting supplies.

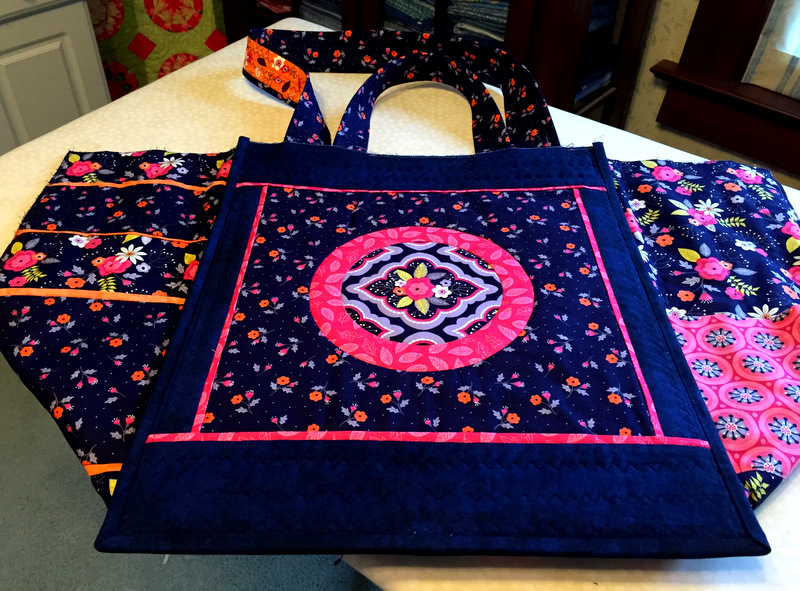
One of the panels (front or back? I haven’t decided yet) has been attached to the side panels and bottom, and the binding has been sewn on. This is what the bag looks like from the outside . . .

Jr Billie Bag flattened view
. . . and this is what it looks like from the inside:

Jr Billie Bag inside view of pockets
To paraphrase Jerry Lee Lewis, there’s a whole lot of pockets going on!

With the binding applied along this panel, my Junior Billie Bag is looking more finished. Now you can easily see how the two sets of handles come into play (although you see only half of them here):

Jr Billie Bag one side with binding sewn on

The longer straps go over the shoulder; the smaller straps make it easy to carry the bag like a satchel. The best of both worlds.

When you see this bag next, it will be completed! Before the first week of 2016 is over, I expect to have my first finish to report.

I’d say the New Year is off to a very good start.


Posted in Billie Bag, Junior Billie Bag, tote bags, update | 4 Comments