Pretty Little Things

This is Part Two of a two-part post on what I accomplished in my sewing room during 2015. Part One featured my finished quilts (unquilted tops don’t count) and can be seen here. Most everything else qualifies as a Pretty Little Thing, so let’s take a look at the Pretty Little Things I made in 2015:

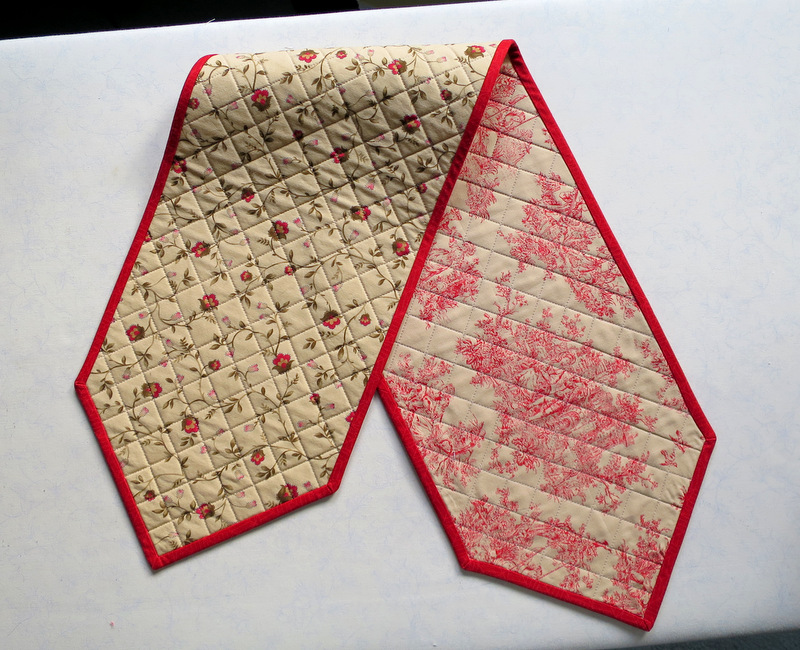
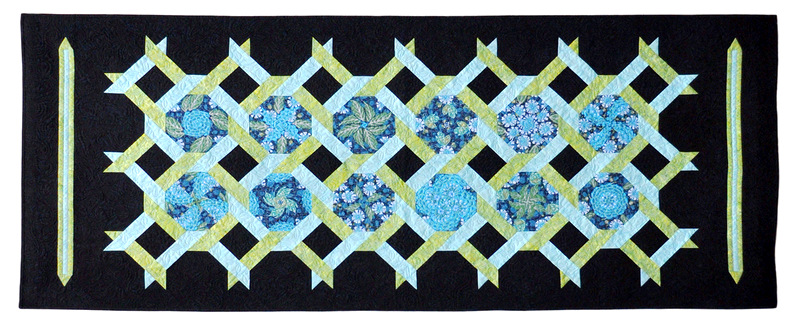
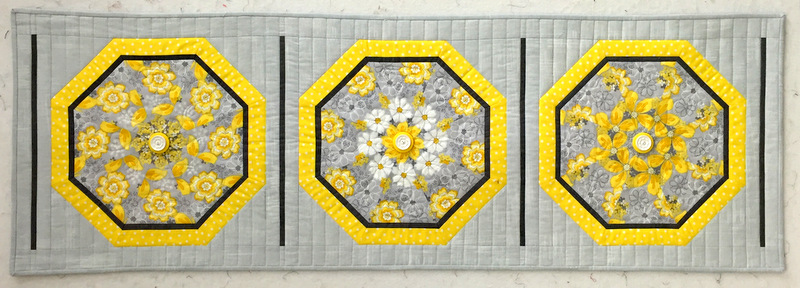
This 9″ x 41″ reversible runner was made for my sister Diane’s living room to cover a “seam” created when two small chests were placed back to back to make a larger unit:

runner completed

Here is the runner in situ in her living room in Atlanta:
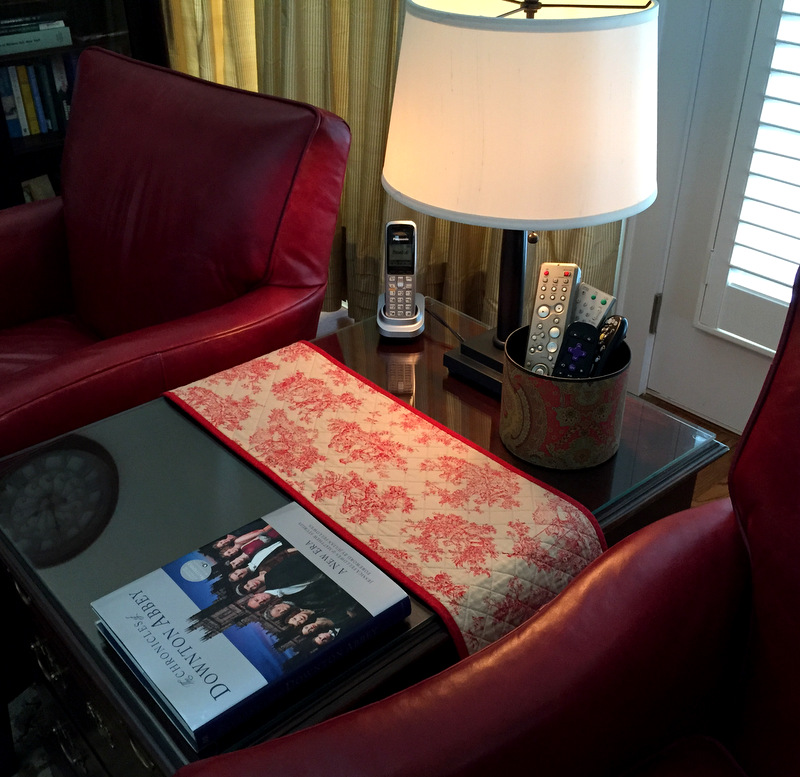
Scott find round box for remotes in place
To celebrate the spring birthdays of my friends and fellow Quisters (Quilt Sisters) Deborah and Peggy, I made these fabric baskets based on the 1 Hour Basket Tutorial from Hearts and Bees. The baskets measure about 9½” wide, 6½” tall, and 5½” deep.
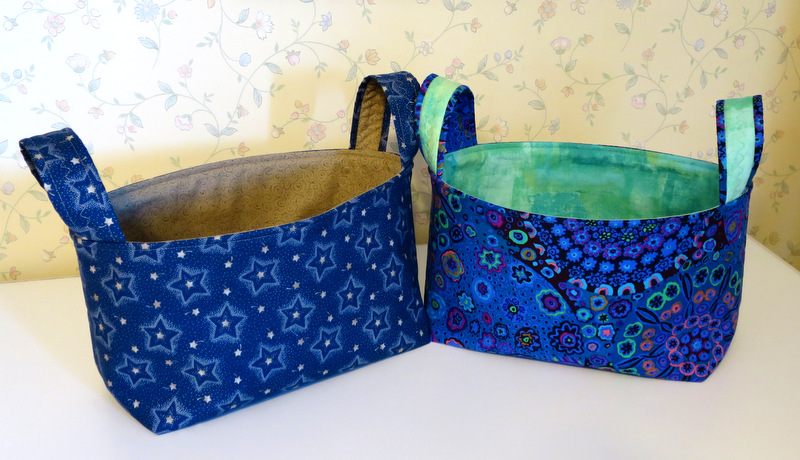
a pair of baskets
Pillowcases! I make several every year. Here are cases I made as a hostess gift for my friend Anna in Paris . . .

pcases for Anna and Joe

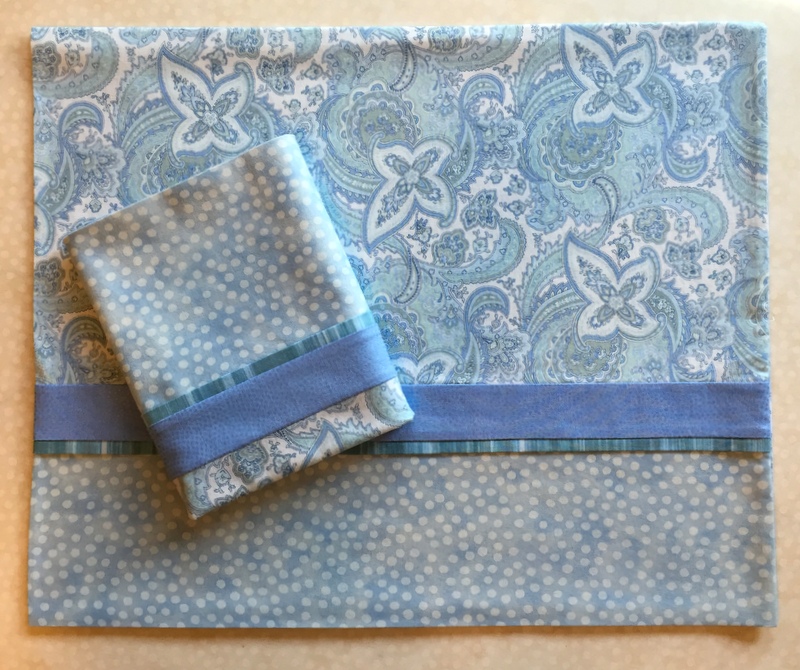
. . . and a pair made for the Portland White House:

pcases for Portland White House

Of all the pillowcases I have made for my own home, these are the ones my husband likes best.

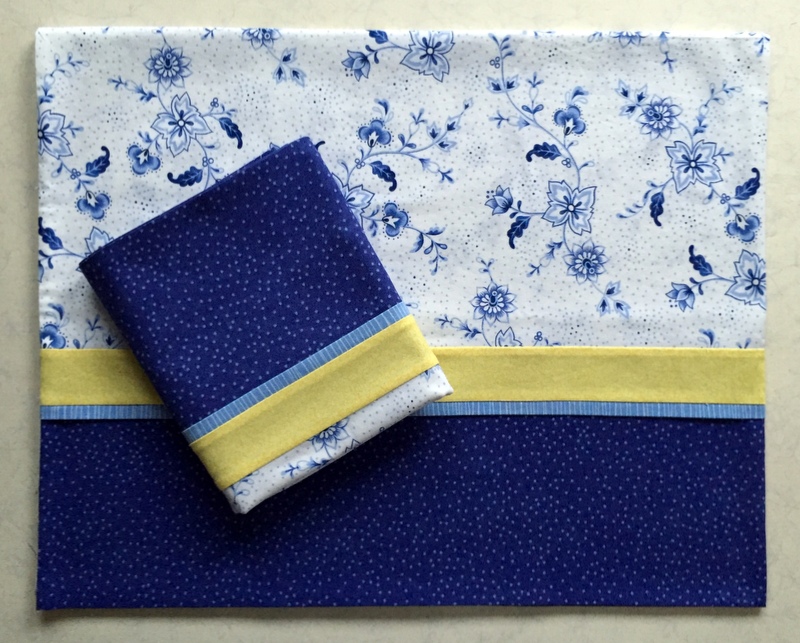
My sister Diane commissioned me to make a pair of pillowcases to give as a hostess gift to friends in Maine:
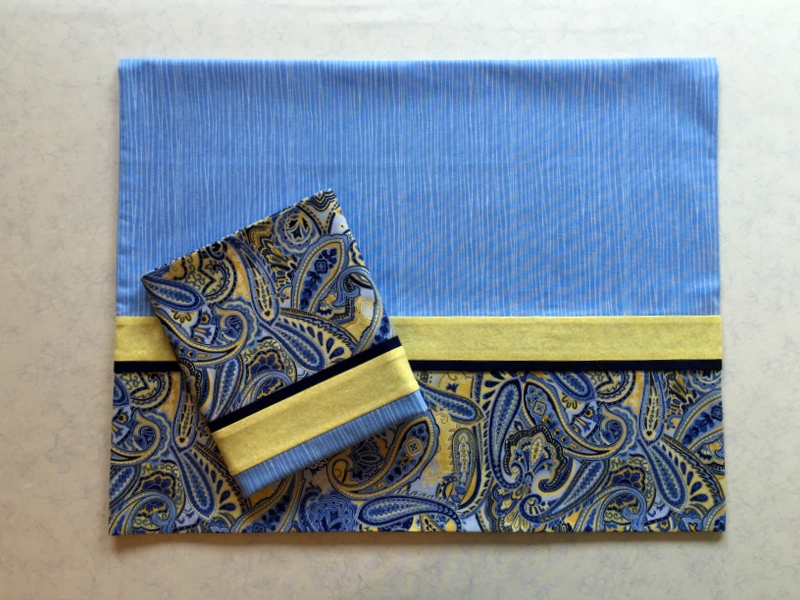
pcases for Kathy and Paul's guest house
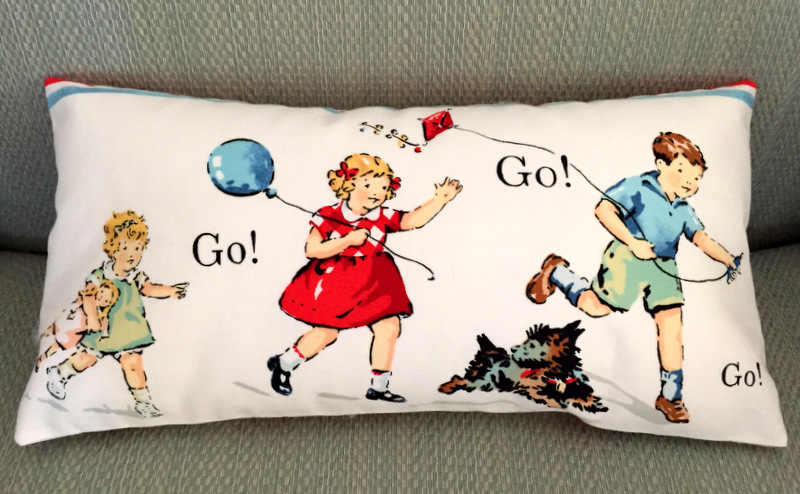
Her friends have a darling little terrier named Lucy who got her own little pillowcase (and pillow). It measures 6″ x 12″ and goes in her doggie bed:

dog pillow front

This sewing-themed fabric became a singleton pillowcase for me to take to Quilt Camp:
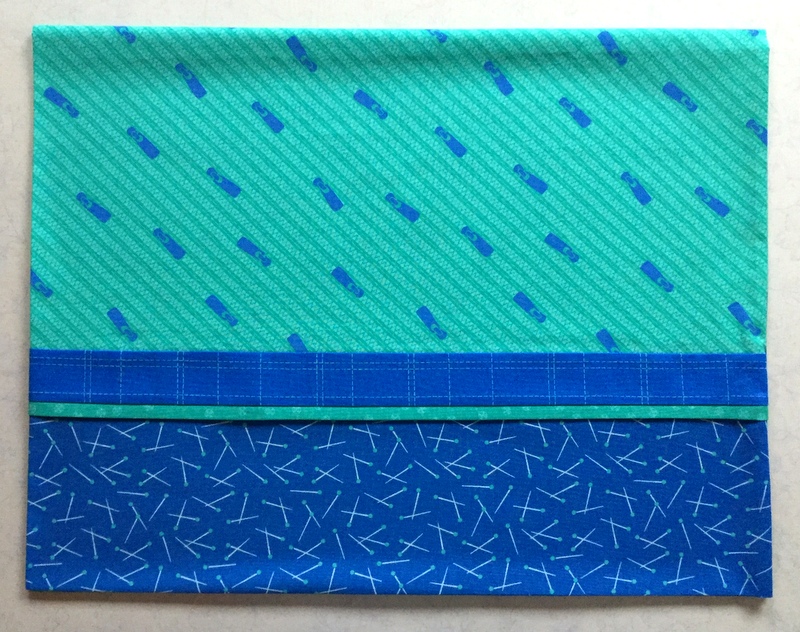
Dawn's quilt camp pcase
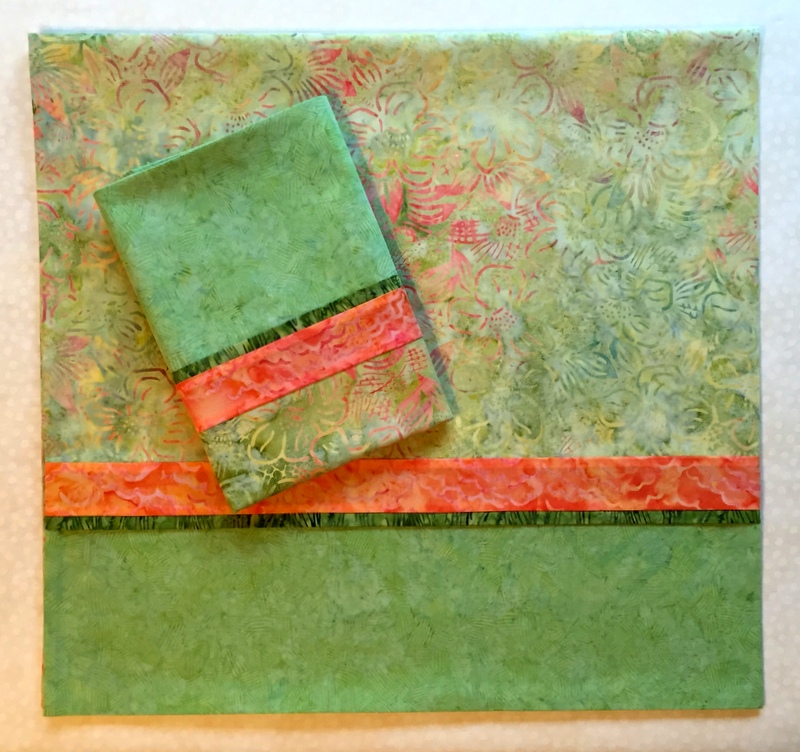
I drew my sister Diane’s name in our annual sibling draw for Christmas. When I asked her for ideas on what I could get her, she said, “Dawn pillowcases, of course!” I made her these king size pillowcases from my batik stash:
pcases for Diane and Ed
By the way, all of the pillowcases above were made following my tutorial, Perfect Pillowcases.

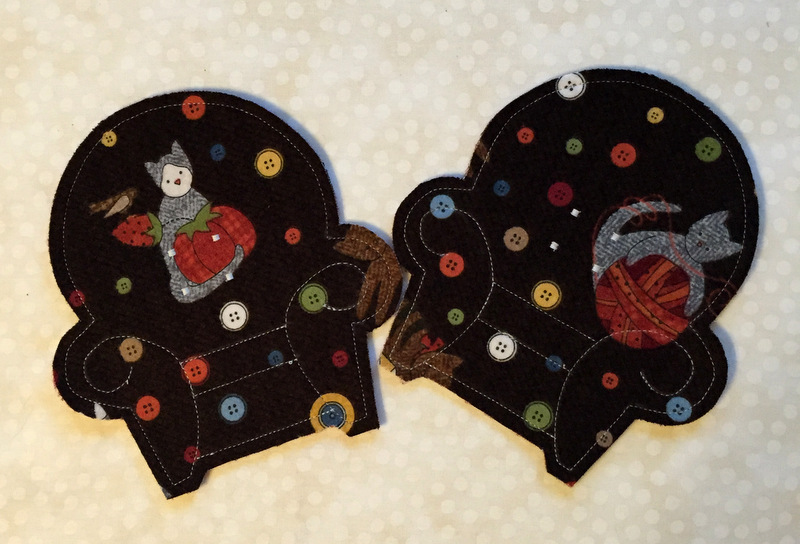
For the annual fall Open House at the Pine Needle, the quilt shop where I teach, I made these Cozy Flannel Armchair Coasters, inspired by coasters bought at a craft sale 30 years ago:

flannel coasters print

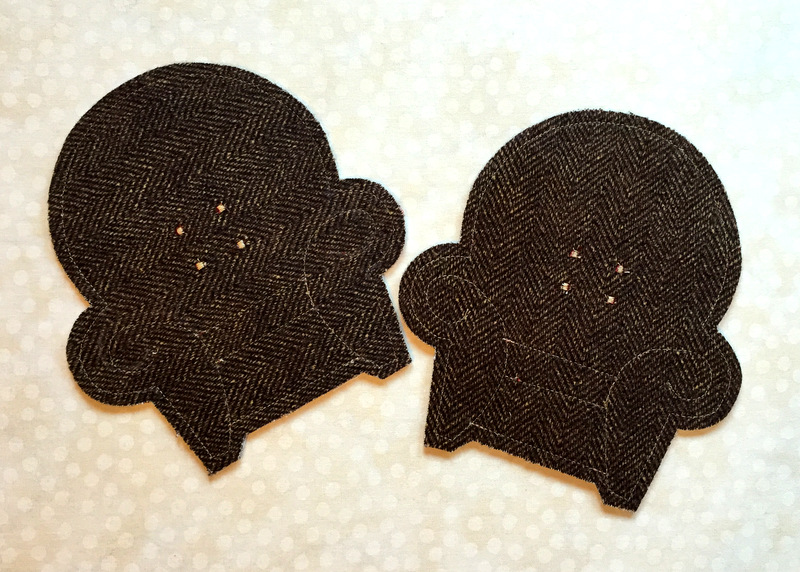
The coasters are reversible. Below are the backs of the coasters you see above. Just for fun I changed orientation of the herringbone weave:

flannel coasters brown

The coasters were a big hit so I made some more as gifts. My friend Beth got these for her birthday in her favorite colors . . .
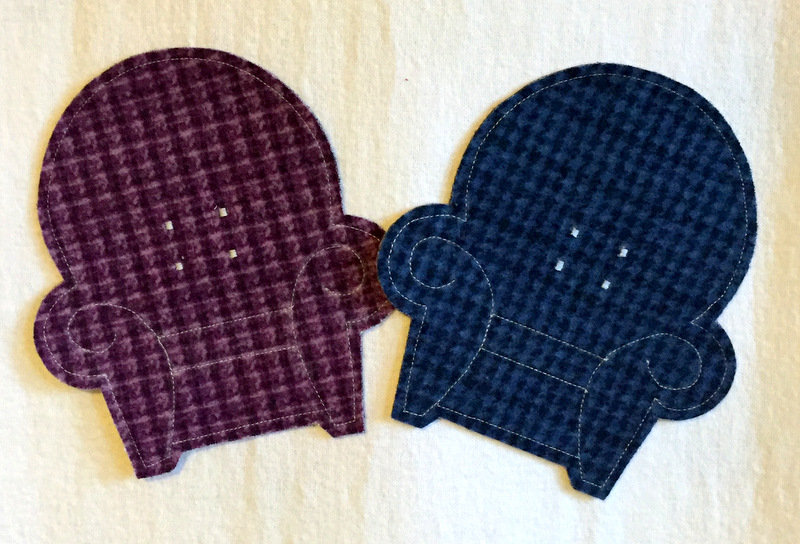
coasters teal and purple
. . . and I tucked in this set of four as part of my sister Diane’s Christmas present:
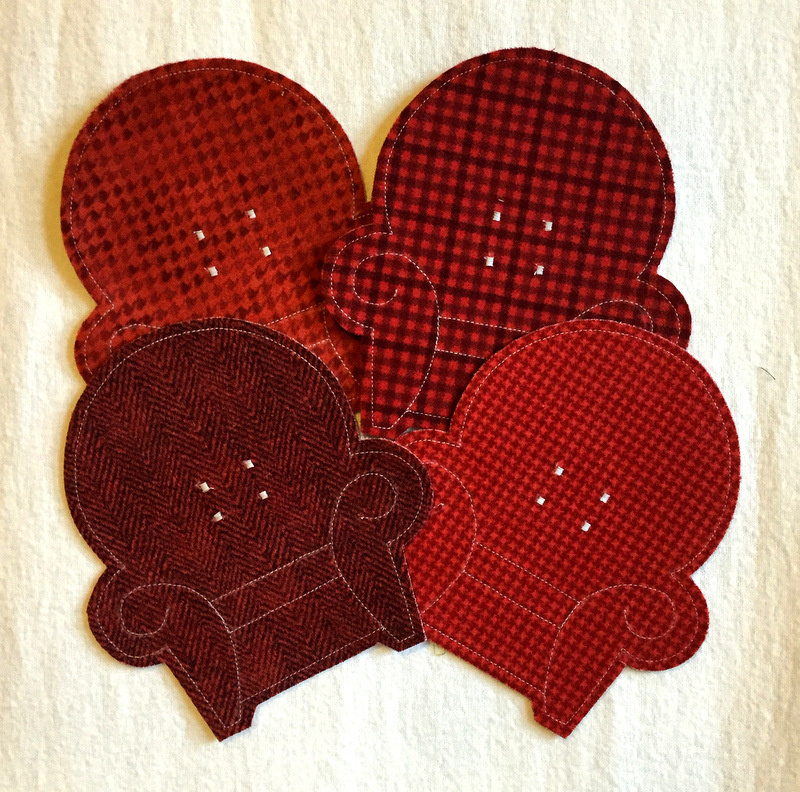
flannel coasters red
My last non-quilt project for the year isn’t small and didn’t get made in my sewing room but I’m including it here anyway. It’s the two-fabric tablecloth I made for my sister Diane’s dining room while visiting her over Thanksgiving:
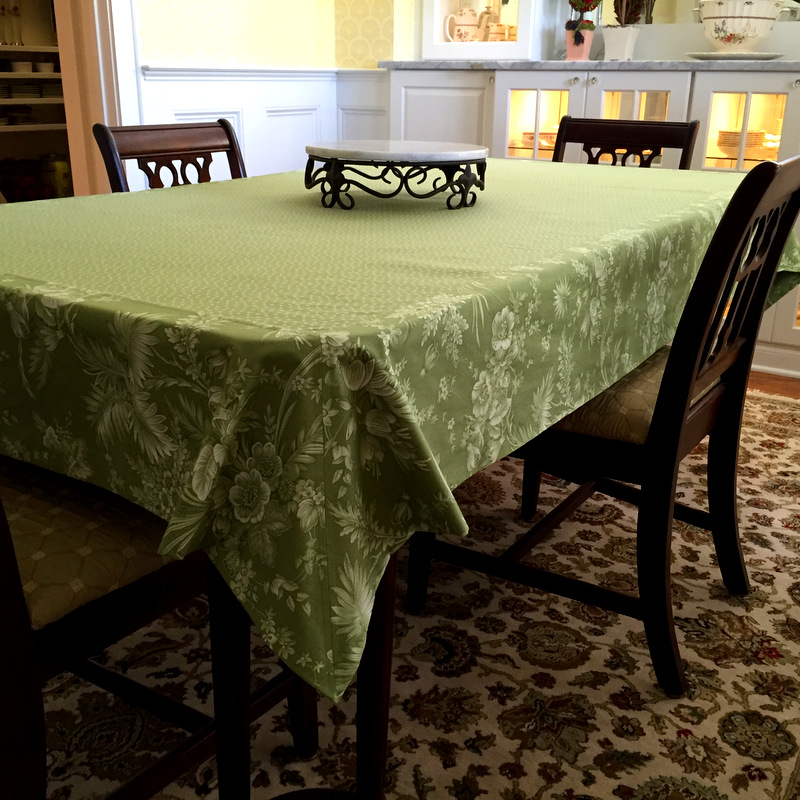
tablecloth
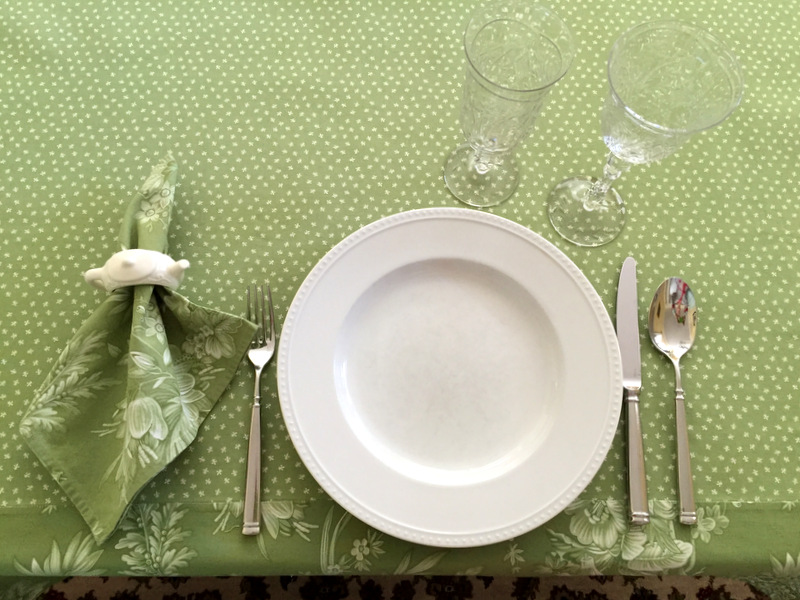
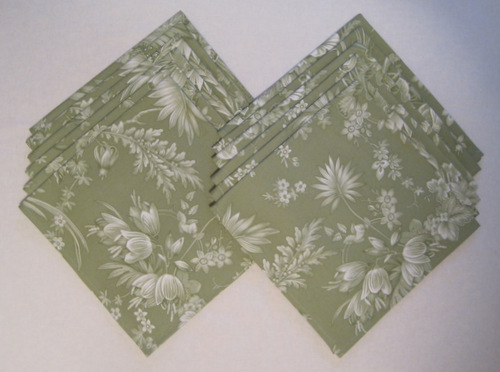
The tablecloth goes with the 16 mitered-corner napkins I made for her a couple of years ago out of the same large floral print used in the border. Here’s one of those napkins in a place setting:

tablecloth with setting

Oh, there’s a tutorial for those napkins, too: Make Mine Mitered.

How satisfying to have a visual record of what I made last year! Thanks so much for taking this look back with me. And now it’s time to head back to my sewing room and get started on my 2016 projects.

Avanti!


Posted in family, home dec, mitered corners, Quisters (Quilt Sisters), roll-it-up pillowcases, table napkins, table topper, update | 3 Comments

A New Day, A New Year

The first day of 2016 is here! It’s a time for looking ahead but also a time for looking back. Specifically, looking back at what I accomplished in my sewing room in 2015. I never accomplish as much as I think I will, especially when it comes to finished quilts, but I have to remember that I made a variety of small pieces and craft items last year in addition to quilts. It will be fun to revisit them as well.
First up, the quilts.

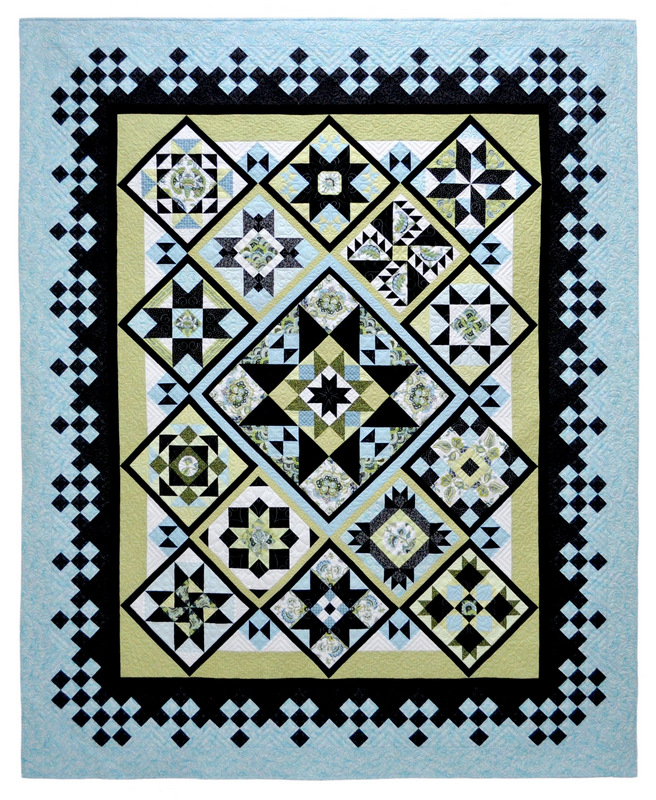
My first finish of 2015 was Catch a Falling Star, based on Terri Krysan’s star sampler, Reach for the Stars:

Catch a Falling Star (2015)

Catch a Falling Star (84″ x 105″) was quilted by Loretta Orsborn of Orsborn Specialty Quilting.

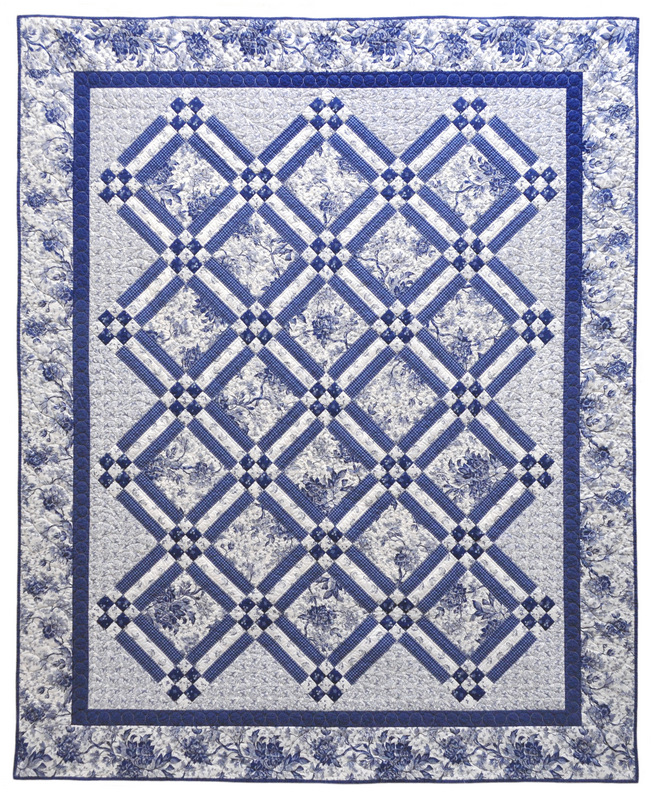
Then came Toile Story (73″ x 89″), started in 2009 but not finished till 2015. Designed by Alex Anderson and featuring fabrics she designed as well, Toile Story was quilted by Debbie Scroggy of All Quilted LLC:

Toile Story bv photo 800
Next: Olivia Twist, a 31″ x 76″ bed runner made using my own 4-Patch Wonder with a Twist pattern. It was quilted by Jolene Knight of Good Knight Quilts:

Olivia Twist bv 2

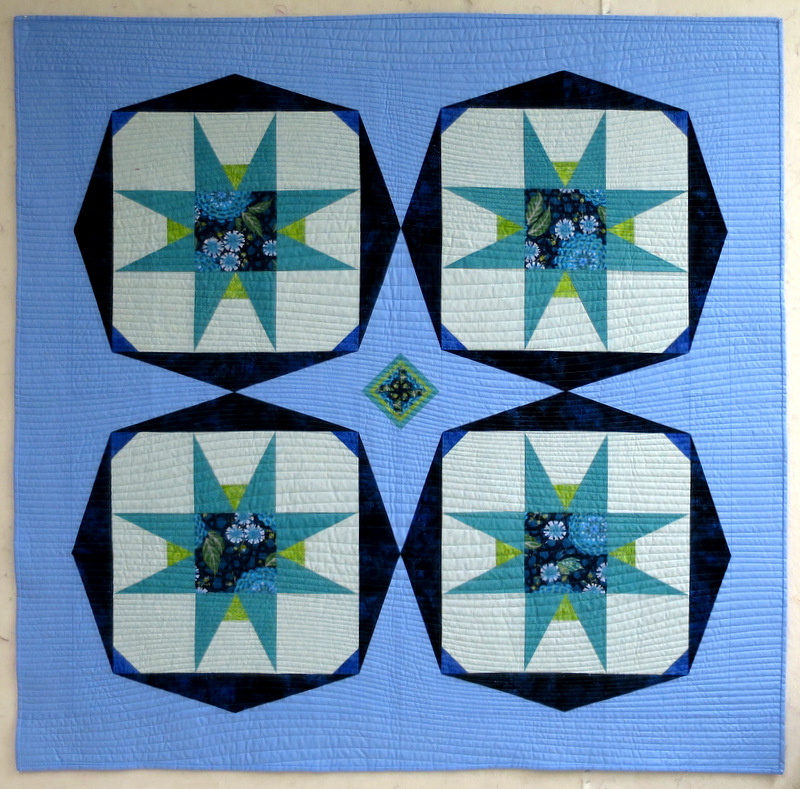
Using leftover fabric from Olivia Twist, I made Billie’s Star (56″ x 55″), an original design inspired by my favorite quilt teacher Billie Mahorney, who taught me a lot about drafting and sewing star blocks:

2015-4, Billie's Star, 55x54 (2)
Billie’s Star was quilted by Nancy Stovall of Just Quilting.

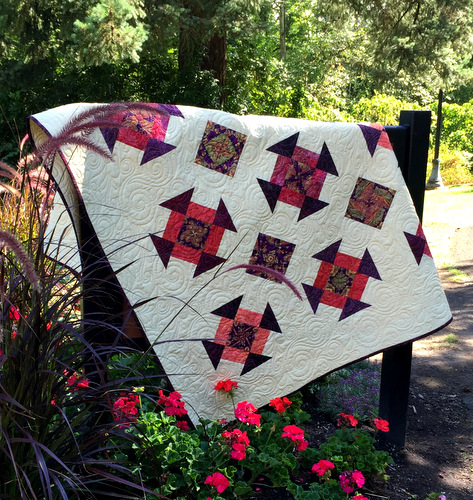
Next came Simply Dashing (58″ x 74″), a simple design that combines 4-Patch Wonder blocks (my name for four-patch kaleidoscope blocks) and Churn Dash blocks set on point. Simply Dashing was featured on the cover of the Pine Needle Quilt Shop’s fall 2015 catalog. Quilted by Debbie Scroggy of All Quilted LLC.

Simply Dashing 58 x 74
Pieced in 2014, I finished Sun Flowers, a wall hanging based on my Season to Taste pattern. It’s #9 in my series of kaleidoscope quilts and the third of four quilts I’m making to reflect the seasons of the year. It measures 18½” x 55½”:

Sun Flowers (2)


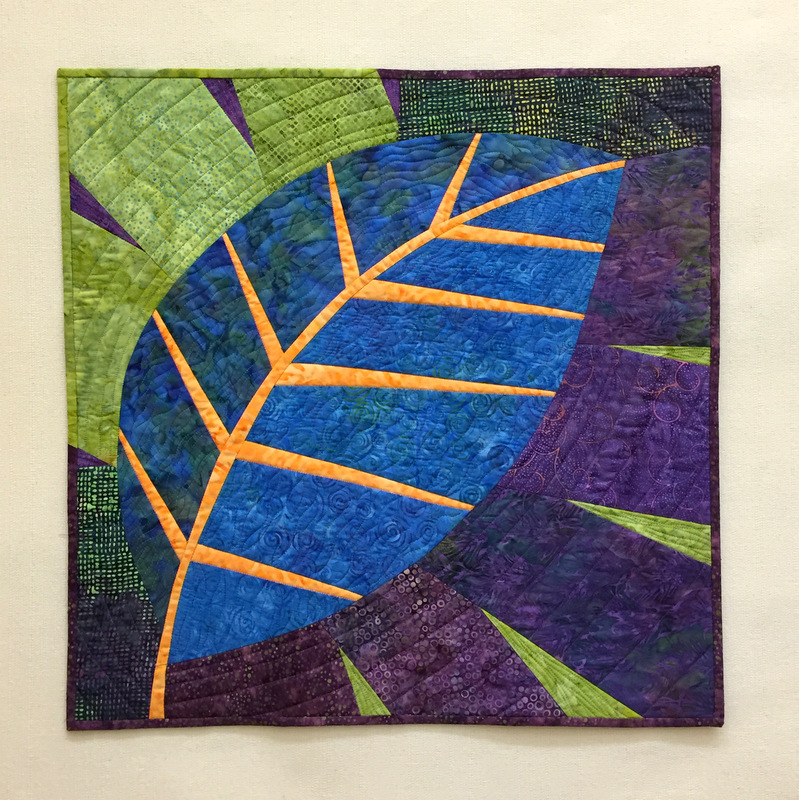
My final quilt finish of 2015 was Loose Leaf, begun in a workshop with fiber artist Pat Pauly. Made from her New Big Leaf design, it finishes at 24½” square:

big leaf, nov 2015
I quilted the last two pieces myself but was happy to have the larger quilts go out to some extremely talented longarm quilters.

In my next post I’ll show you the array of Pretty Little Things I made in 2015.


Posted in 4-Patch Wonder, bed runners, faux-kaleido quilts, free motion quilting, kaleidoscope quilts, New Big Leaf, Reach for the Stars sampler quilt, update | 3 Comments

Update: Junior Billie Bag

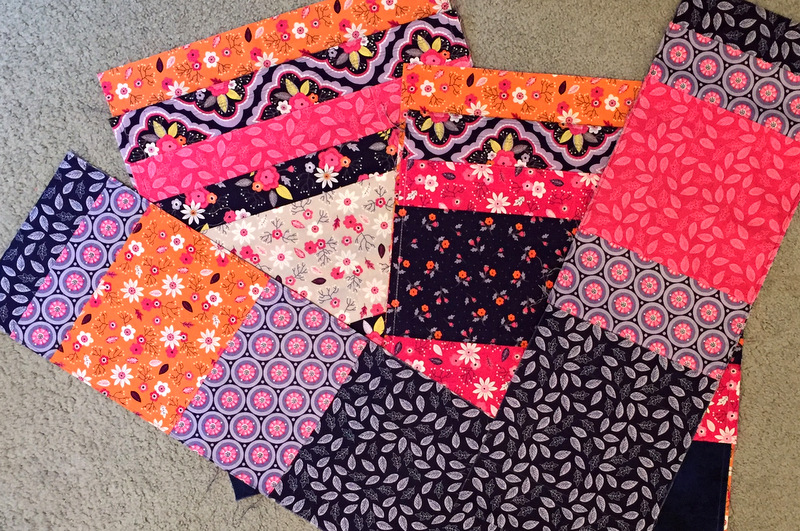
In my last post I showed you the front and back panels of my Junior Billie Bag, the quintessential quilter’s tote designed several years ago by my teacher and mentor Billie Mahorney. I also showed you the array of fabrics by Camelot Cottons that I’m using in the interior of the bag. Here are several of those cheerful prints made into pockets for my Billie Bag:

Jr Billie Bag inside pockets

A lot of pockets. A plethora of pockets! At last count: 17. And that doesn’t include the pockets that are going on the outside of the bag.

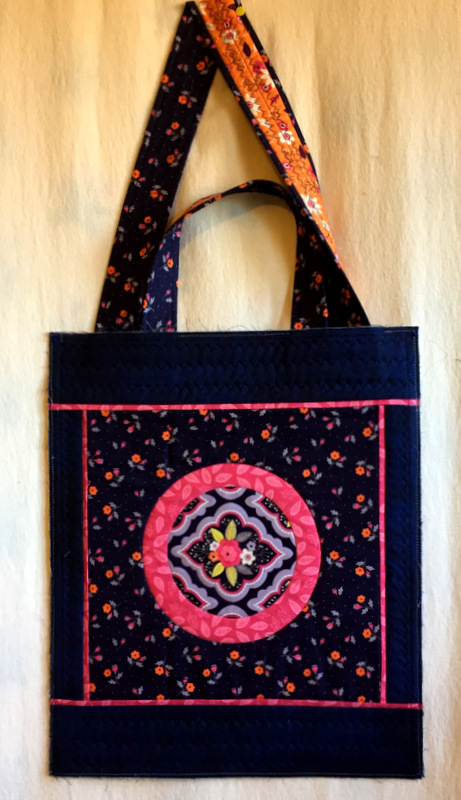
With the pockets and handles attached to one panel, it’s really starting to look like a Billie Bag:

Jr Billie Bag front

The two sets of handles make it possible to carry the bag over the shoulder or by hand, like a satchel. It’s so nice to have both options in a tote that holds a lot of supplies.

Now it’s time to sew straps and pockets to the other panel:

Jr Billie Bag back panel and pockeets

On this last day of 2015 — a cold, sunny day in Portland, Oregon — I am enjoying spending time in my sewing room working on my Junior Billie Bag. Later on, since the Dear Husband and I prefer to stay home on New Year’s Eve, I’ll make an extra special dinner and we’ll spend a quiet evening playing Scrabble, watching TV, and toasting the New Year with champagne.

Wishing you all a Happy New Year. Here’s to a great 2016!


Posted in Billie Bag, family, Junior Billie Bag, tote bags, update | 7 Comments

Billie’s Blessing

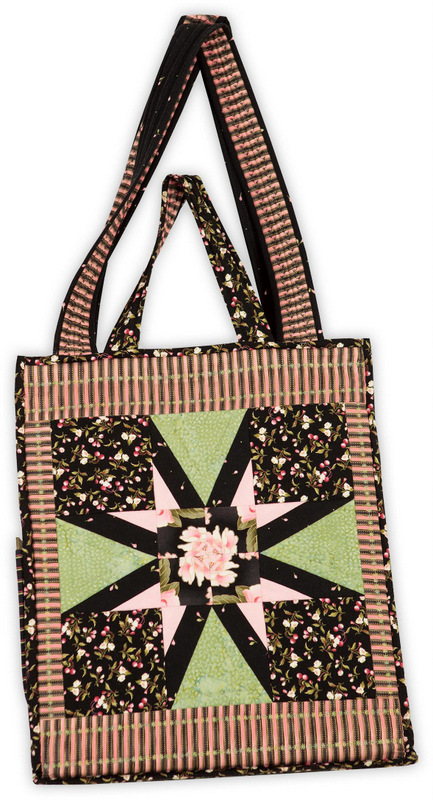
Junior Billie Bag 800
Dawn’s Junior Billie Bag, made in 2011

Back in 2009, when my favorite quilt teacher Billie Mahorney moved from Oregon to Idaho, she suggested I take over the teaching of her popular quilter’s tote. Billie, who taught at the Pine Needle Quilt Shop in Lake Oswego, named her tote “The Take It All With You Bag” but over the years it has become known among local quilters as the “Billie Bag.”

Each Billie Bag is unique because the maker can put whatever design she wants on the front and back of the bag, and the inside pockets are customized to hold the maker’s favorite quilt supplies. The bag holds an amazing amount, including a 6″ x 24″ acrylic ruler, thanks to the 7½” width of the side panels.

I had made the bag once in a class with Billie several years ago. While I loved the finished product, I found the process very challenging. Not only did I not relish the idea of making another bag, I couldn’t even imagine teaching others how. After all, I had never taught a quilt class before.

In 2011, Billie returned to the Pine Needle as a visiting instructor and offered the class again. I was so delighted she was teaching again that I signed up for her class, conveniently forgetting I had sworn never to make another Billie Bag. Good thing, too, because I thoroughly enjoyed the class and was delighted with my new Billie Bag, shown above, a slightly smaller version of the original.

By the time I made this second Billie Bag, I was teaching at the Pine Needle myself. Still, it took another four years before I felt I was ready to take on the challenge of teaching Billie’s design. I talked to Billie a few weeks ago to see where she stood on the issue. Happily, she still thinks it’s a fine idea and has given me her blessing to carry on with the teaching.

The Pine Needle scheduled a class in March and April 2016, which filled almost immediately when word got out. That’s how popular Billie Bags are! What else could the Pine Needle do but add a second class? (You can find more information on the upcoming classes here.)

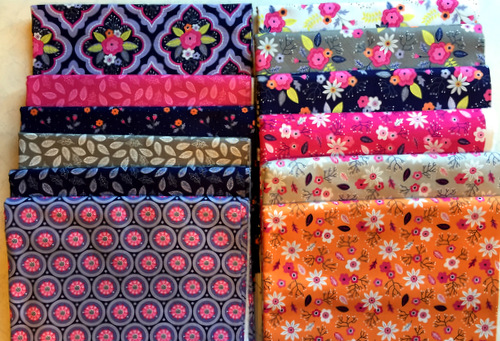
With classes now scheduled, I am in the process of making another bag to refresh my memory on the process. Billie’s original bag measures 21″ x 21″ x 7½”. I’m teaching the smaller size: 14″ x 17″ x 7½”. It’s been dubbed the “Junior Billie Bag,” and I’m making my new version from fabrics in the Paradise line designed by Alisse Courter for Camelot Fabrics. You may remember from this post last summer that I fell in love with this line of fabrics and went on a bit of a shopping spree at Hawthorne Threads:

Paradise fabrics
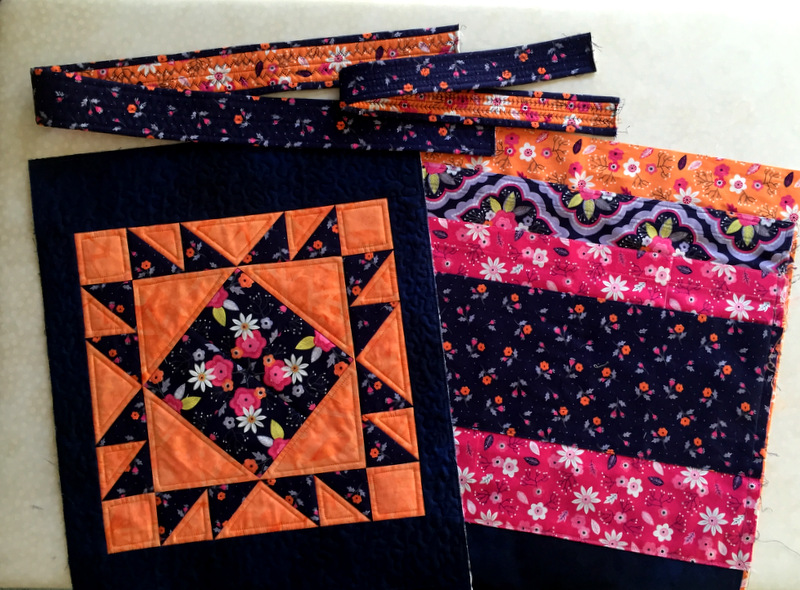
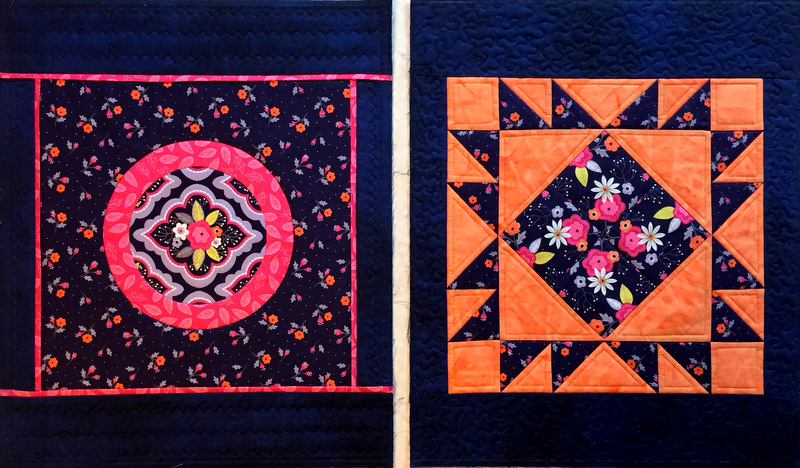
Here are my front and back panels pieced and quilted:

Jr Billie Bag front and back
The panel on the left features two inset circles, made using my favorite freezer paper method, and narrow flanges framing the 12″ block. The panel on the right contains a 4-Patch Wonder block (my name for a four-patch kaleidoscope) in the center. I used an orange batik in my stash to set off the floral fabrics.

More of the Paradise prints are being used on the inside pockets. Lots of prints; lots of pockets.

I’ll be posting pictures as my Junior Billie Bag comes together. I hope you’ll come back to see my progress!


Posted in 4-Patch Wonder, Billie Bag, Junior Billie Bag, tote bags, update | 7 Comments

“It’s a Puzzlement!”

yul brynnerIf you are a lover of musical theater, you’ll recognize that line from The King and I, the stage musical and movie based on the experiences of Anna Leonowens, a young British widow who spent five years in Siam (now Thailand) in the 1860s teaching English language and culture to the wives and children of the king.

“It’s a puzzlement!” the king repeatedly exclaims, as he struggles to understand western ways.

I know how he feels. That phrase has been on my mind since my eagerly awaited copy of Dahlia Quilts and Projects arrived in the mail a few days ago. You’ll know from my last two posts that I ordered this book after swooning over my niece’s vintage star quilt during a visit to her home in Alabama over Thanksgiving.

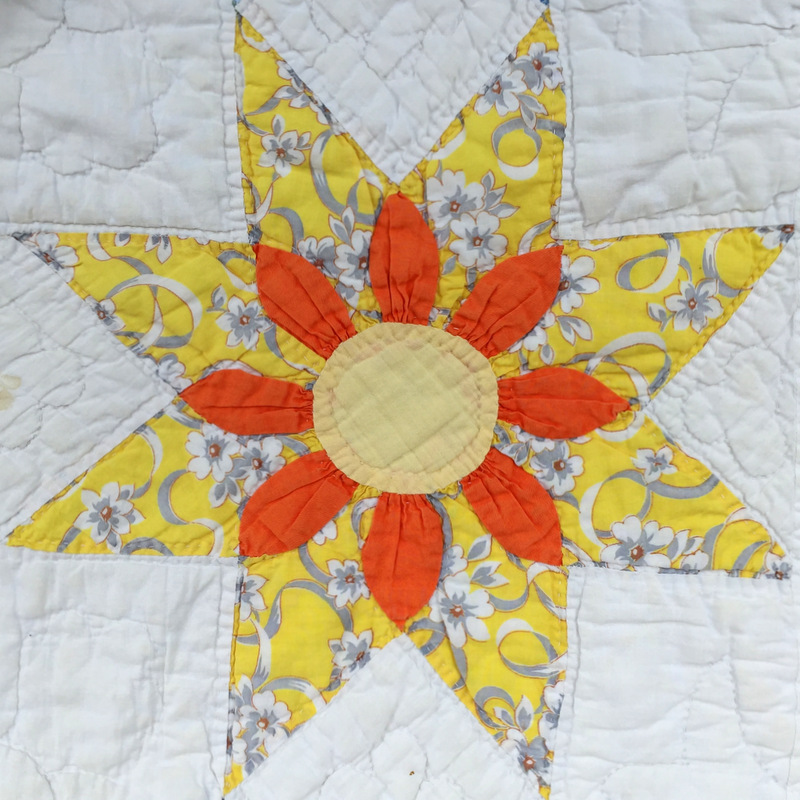
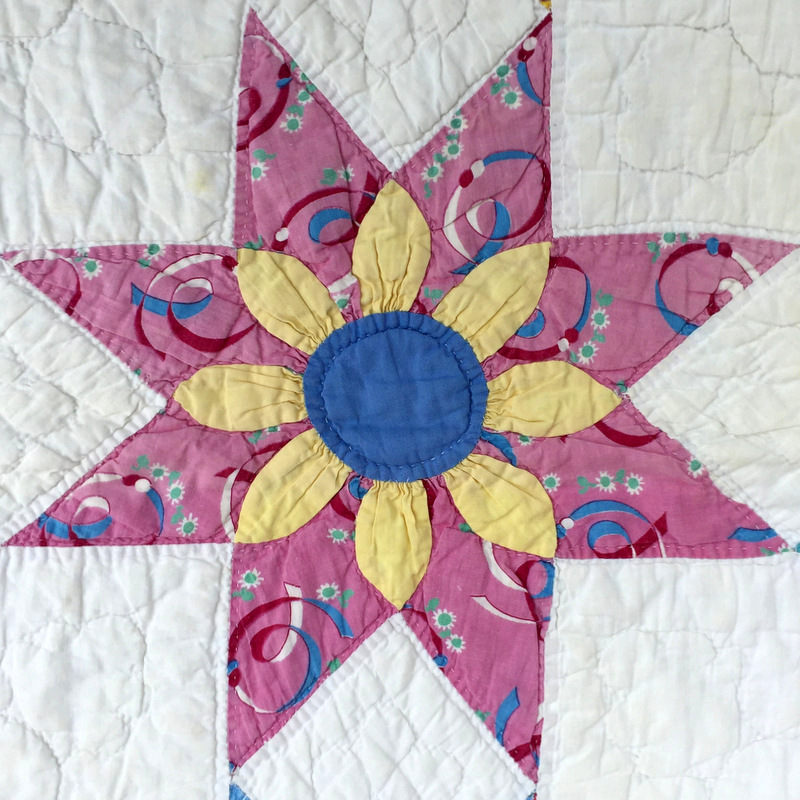
As a reminder, here is a picture of one of the blocks . . .

floral star block 7

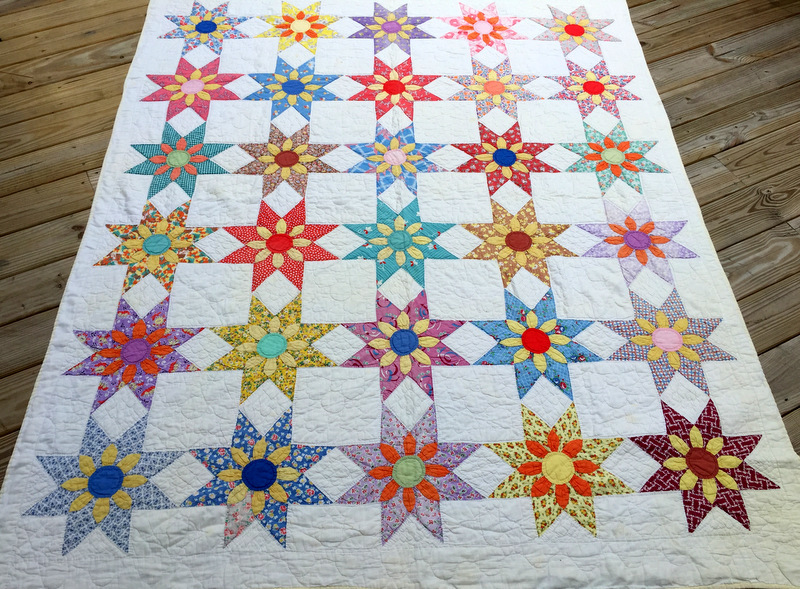
. . . and a picture of the entire quilt:

floral star quilt-001
I asked readers for help in determining the origin of the design and quickly learned that my mystery quilt is known as a Star Dahlia. One reader even provided a link to the book, published in 1995, which appears to be the only book available on star dahlia quilts.

Apparently if I lived in Pennsylvania instead of Oregon I would have been able to identify the block readily. Cheryl Benner and Rachel T. Pellman, authors of Dahlia Quilts and Projects, say the pattern has been a favorite of Lancaster County PA quilters for many years. The authors refer to the block as the Dahlia.

“The Dahlia pattern,” they write, “is based on a traditional geometric eight-point star, but it takes a distinct diversion from tradition by adding curved, puffy, gathered petals and a round center. These variations on the basic geometric design make the assembly of the patch more difficult. The compensation for that extra effort, however, is a stunning quilt in three dimensions.” The authors go on to say that their directions for making the blocks were written after consulting with several Lancaster County quilters who are competent makers of Dahlia quilts.

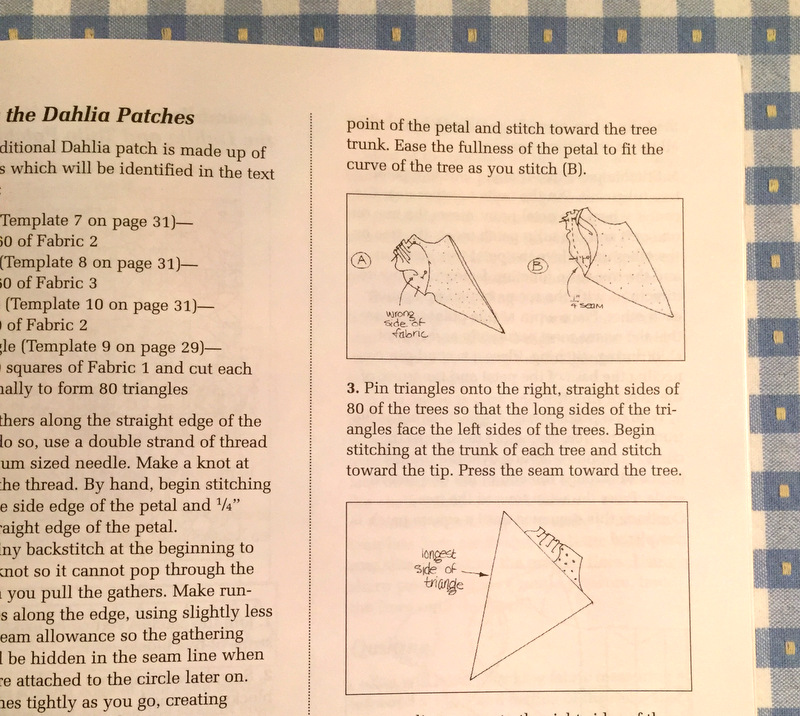
The book contains 10 projects, with many pages of templates and hand-drawn illustrations on how to stitch the components of the block together (by hand, please note). Here’s a look inside the book:

instrux in dahlia book
So — the source of my puzzlement? It is this: after reviewing all of the projects and measuring the templates for each project, the logic behind the authors’ “variations on a basic geometric design” continues to elude me.

At first glance the block looks like a basic 9-patch, made up of nine equally sized squares. Not so! There are two sizes of blocks used in the book. The measurements for the larger one call for the four corner squares to finish at 4⅜”. The middle section of the block appears to finish at 6⅛”, making the block’s finished size 14⅞”. Okay, that’s pretty close to 15″, although the instructions don’t state a finished size.

The measurements for the smaller block call for the four corner blocks to finish at 2½”. The middle section appears to finish at 3⅝”. That would produce a block that finishes at 8⅝”. Is your head starting to hurt, too? I’m one of those quilters who enjoys the challenge of figuring out the math involved but I’m not so sure about this one.

The only way I’m going to solve this “puzzlement” is to make a block — to cut out pieces according to the templates and actually put a sample block together. It will also help to dig out my protractor to determine the angle of the star points.

How I wish I could drop everything and attend to this right now! Alas, it will have to wait. Christmas is four short days away. I still have presents to buy and wrap, and the Dear Husband’s stocking is waiting to be filled. I should be dreaming of sugarplum fairies and dancing nutcrackers over the next few days but I have a feeling my head will be filled with dahlia petals and star points.


Posted in family, update, vintage quilts | 6 Comments

Mystery Solved

floral star block 2-001
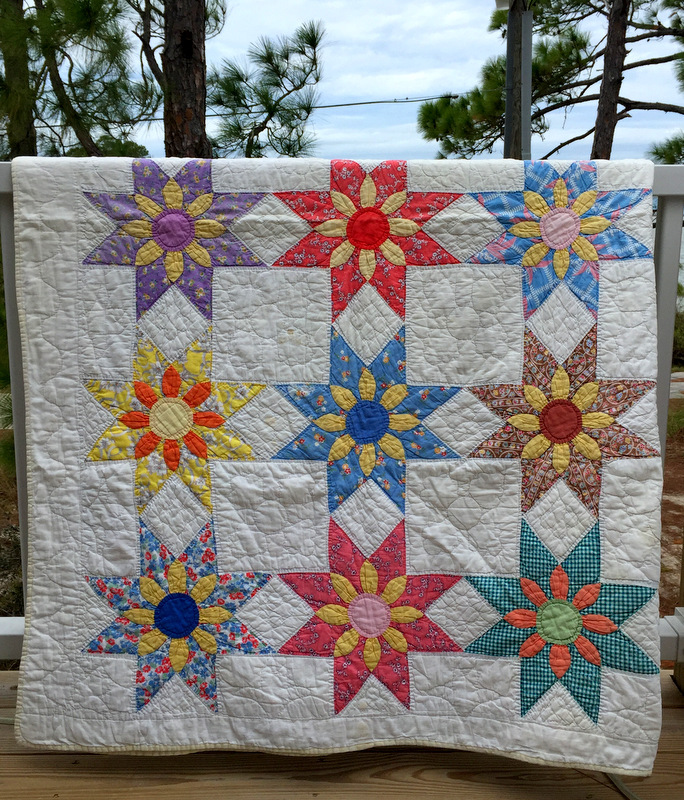
This block is one of 30 12-inch blocks in a lovely 66″ x 82″ vintage quilt I had the pleasure of examining recently at the home of my niece in Alabama. I wasn’t familiar with the block and published this post a few days ago asking if any of my readers could identify it. Within hours I had my answer. More correctly, I had my answers (as in plural).

It turns out this block goes by a few different names. Thanks to Bill Volckening, who suggested Barbara Brackman’s 1993 book Encyclopedia of Pieced Quilt Patterns as a source, I learned the names of two possible candidates: Star Dahlia and Kansas Sunflower. A quick search on my computer — ah, the power of the Internet! — was all it took to confirm that the block I asked about is indeed called Star Dahlia aka Amish Dahlia Star and also simply Dahlia. The Kansas Sunflower block is very similar, as is another block identified as Missouri Daisy.

Dahlia Quilts and Projects book coverA reader named Anne told me about a book called Dahlia Quilts and Projects by Cheryl Benner and Rachel T. Pellman that contains several patterns using the Star Dahlia block. Anne even provided a link on amazon.com, which I immediately checked. Needless to say, I promptly ordered the book. I can’t wait till it arrives in my mailbox!

A shout-out to readers Arden, Bill, Anne, and Kimberly for offering suggestions and helping solve the mystery of this beautiful block.

It’s on my “to do” list for 2016!


Posted in family, update, vintage quilts | 1 Comment

A Beautiful Mystery

Have you ever seen a block like this before?

floral star block 1-001
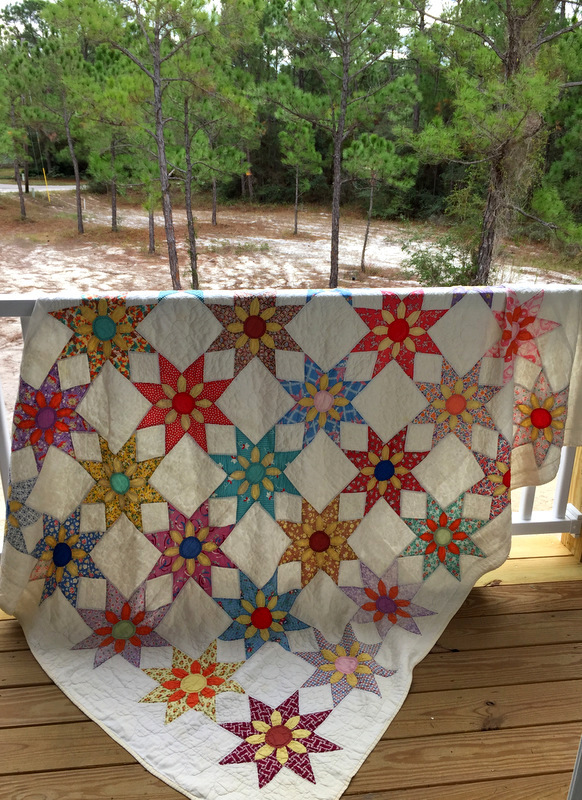
It’s one of 30 blocks in this vintage quilt:

floral star quilt-001
The quilt belongs to Rexalee, my niece by marriage. It came to her after her mother died over a decade ago but Rexalee doesn’t know who made it. It may have belonged to her great aunt or her grandfather’s second wife, both of whom died in the 1970s. It was probably made in Michigan. Other than that, its provenance is a mystery. A beautiful mystery.

My husband and I just got back from a wonderful visit with Rexalee, her husband, and their extended family. The quilt was hanging on a quilt rack in the guest room of their new home on Dauphin Island, Alabama. I had an opportunity to examine the quilt in detail and photograph it in natural light.

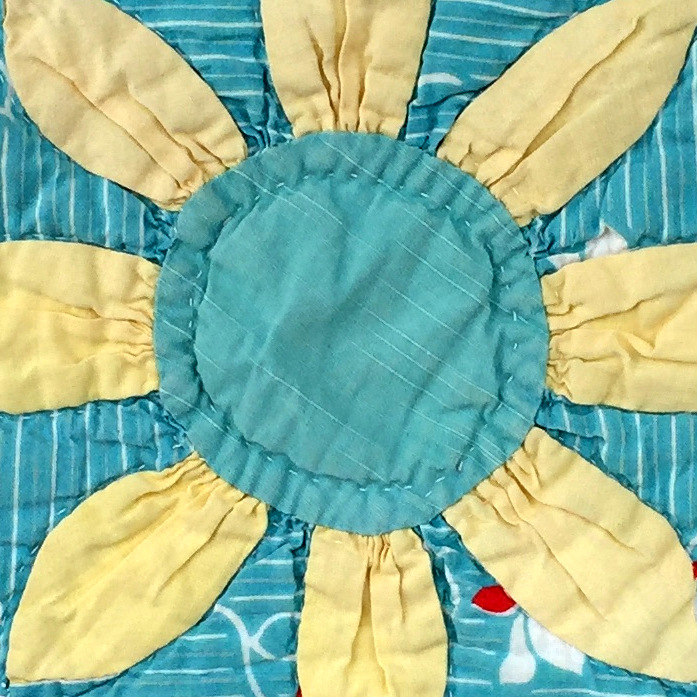
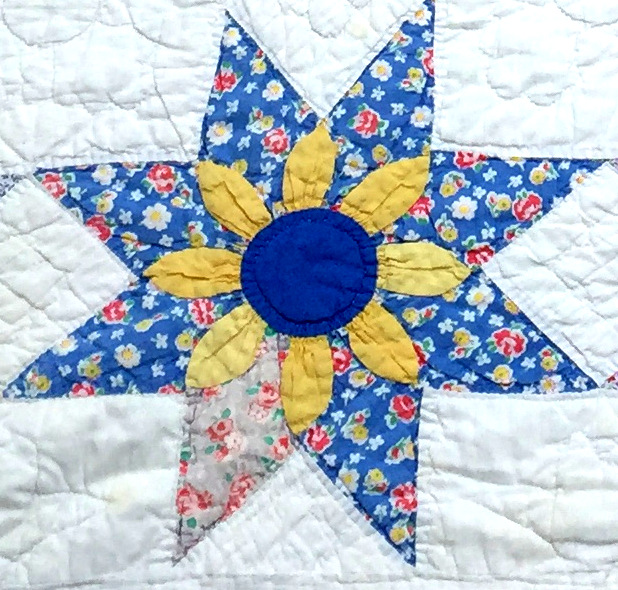
Except for the binding, which was attached by machine, the entire quilt was pieced and quilted by hand. At first I thought the petals and center of each flower were appliquéd on top of an already pieced eight-pointed star, but no: the petals and stars were joined with seams. The inner edges of the petals (where they meet the circle in the center of the flower) were gathered and, to my surprise, so were the inner edges of the star points. Unusual, no?

Here’s a close-up:

floral star block center detail
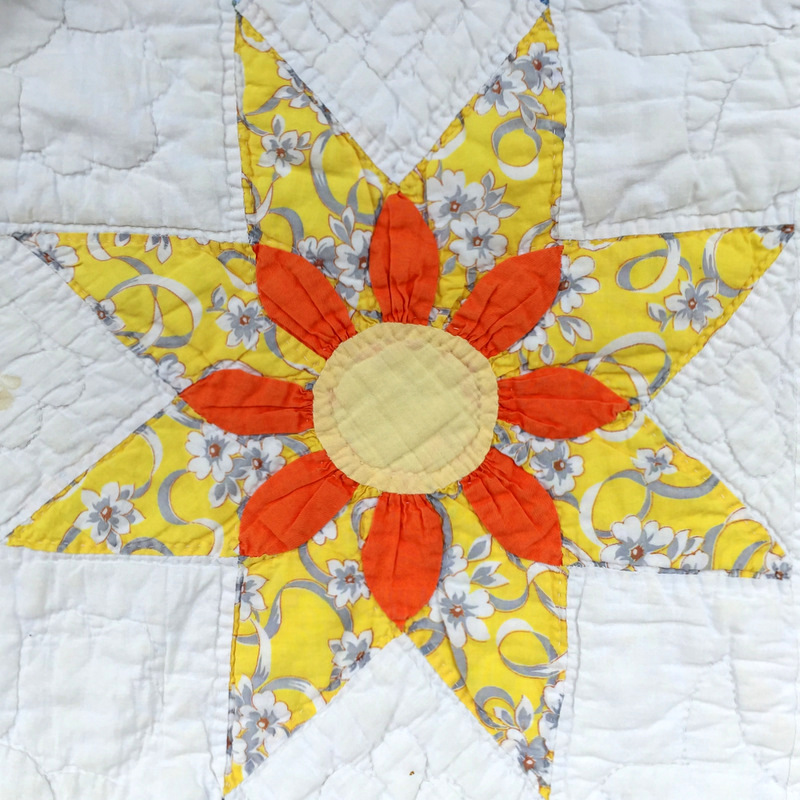
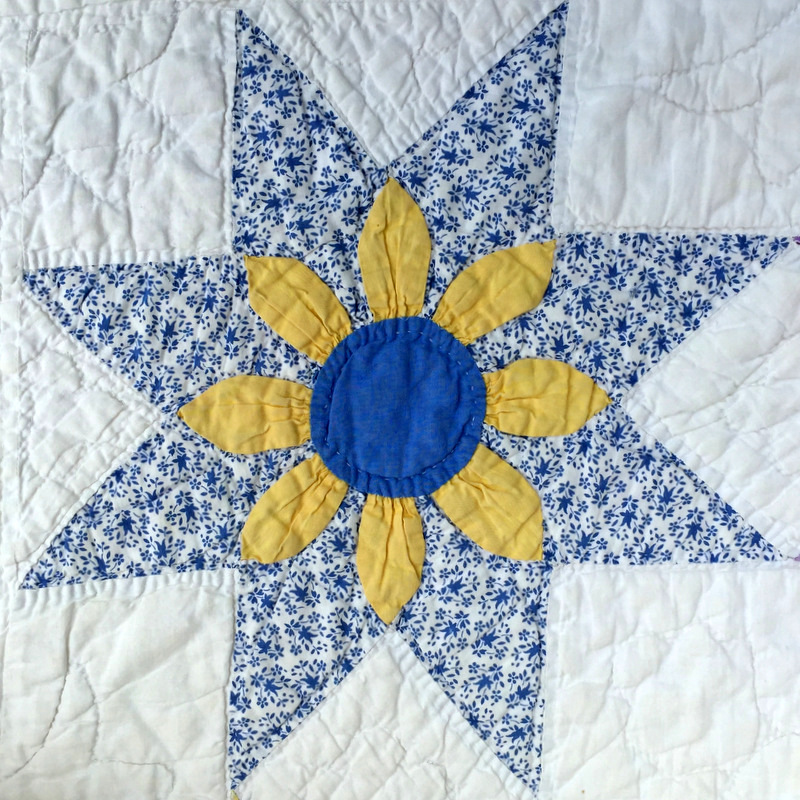
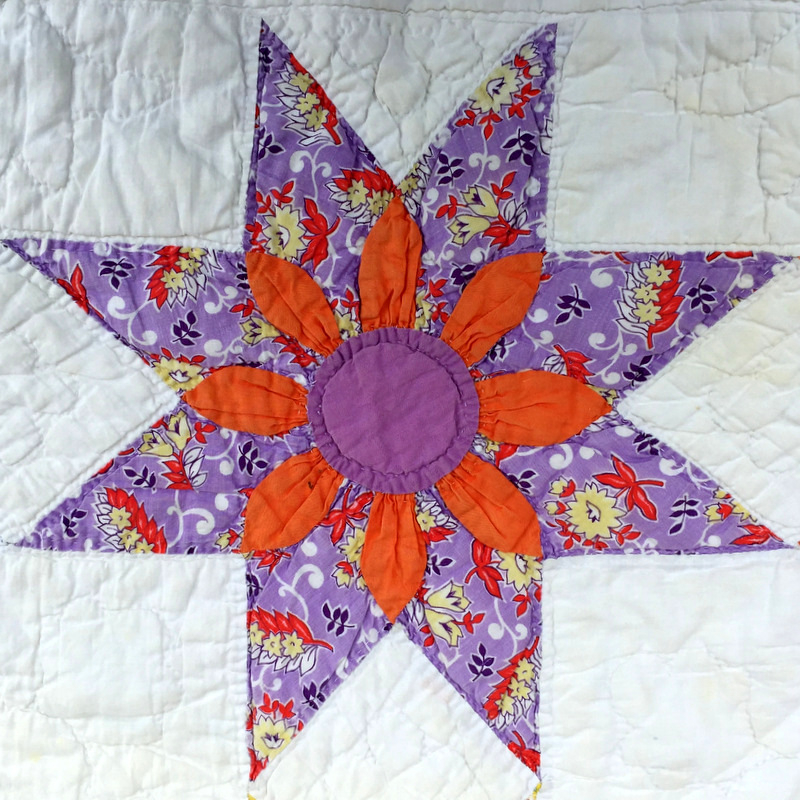
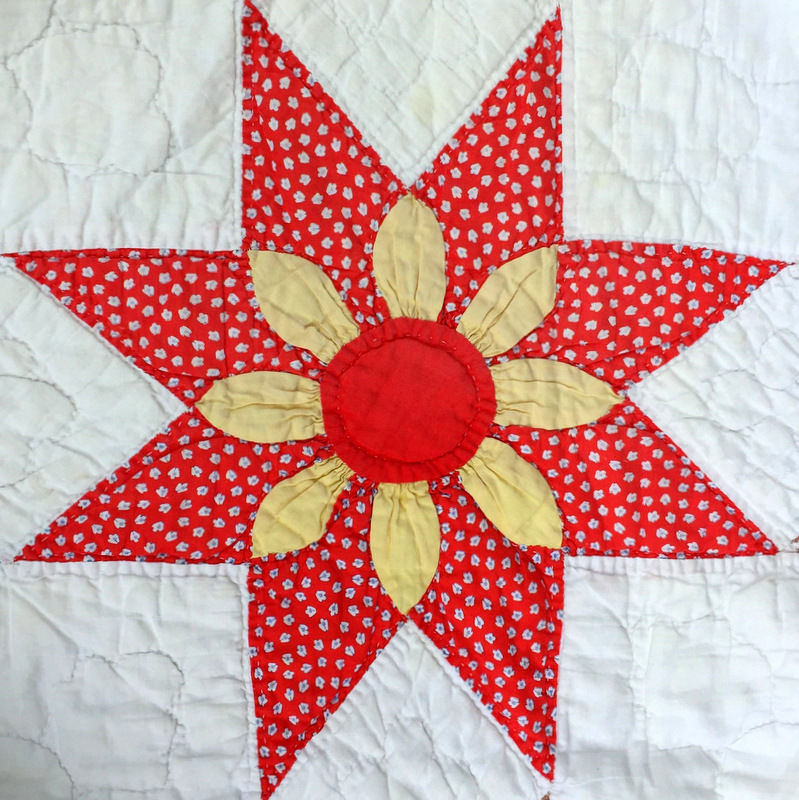
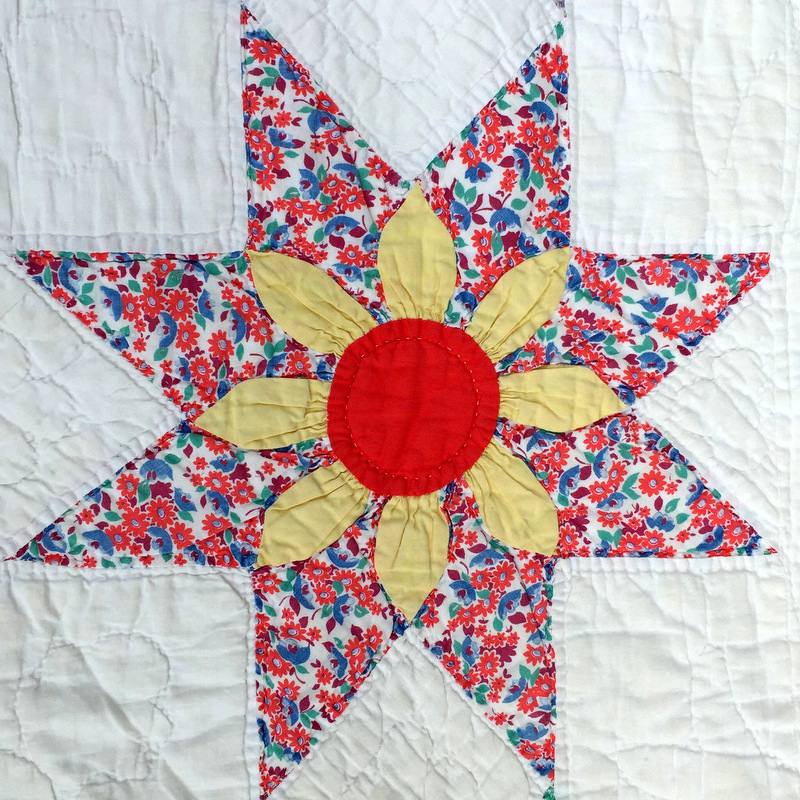
Judging by the fabrics, I’m guessing this quilt was made in the 1930s, possibly 1940s. Each of the stars is made of a different print, with the petals and center of each flower made of solids. Although the round circles in the center of each block come in a variety of colors, the petals are either yellow or orange, unifying this very scrappy quilt.

The floral prints in the star fabric are fabulous! Some have a very modern vibe. Take a look:

floral star block 7-001

floral star block 2-001

floral star block 4-001

floral star block 5-001

floral star block 8-001

floral star block 9-001

floral star block 6-001
And here’s a bit of a rogue block: a lively check instead of a floral print:

floral star block 3-001
Actually, there’s another rogue block:

floral star quilt rogue block

Did the quiltmaker run out of fabric or did she add a star point of a different fabric to make the quilt less than perfect? Even the petals look like they were made from two fabrics.

The finished size of 66″ x 82″ is another oddity. The blocks are 12″ finished. The side borders are 3″ while the top and bottom borders are 5″. Was this a conscious decision on the part of the quiltmaker or did she simply not have enough fabric on hand to make borders of equal size? (No quick trips to the nearest local quilt shop for her.)

You can see from the next photo that the batting is very thin. When I held it up to the light I could see dark flecks in the cotton batting. They could be bits of leaf or boll (the husk around the cotton blossom).

floral star quilt draped-001

I wish now I had taken pictures of every single block. The fabrics are so interesting, and I see something new with every viewing.

floral star quilt folded-001

One thing’s for sure: I want to duplicate this block. I’ll puzzle it out on my own unless there’s a pattern out there somewhere.

Can anyone help solve this beautiful mystery?


Posted in family, update, vintage quilts | 31 Comments

A Moveable Feast

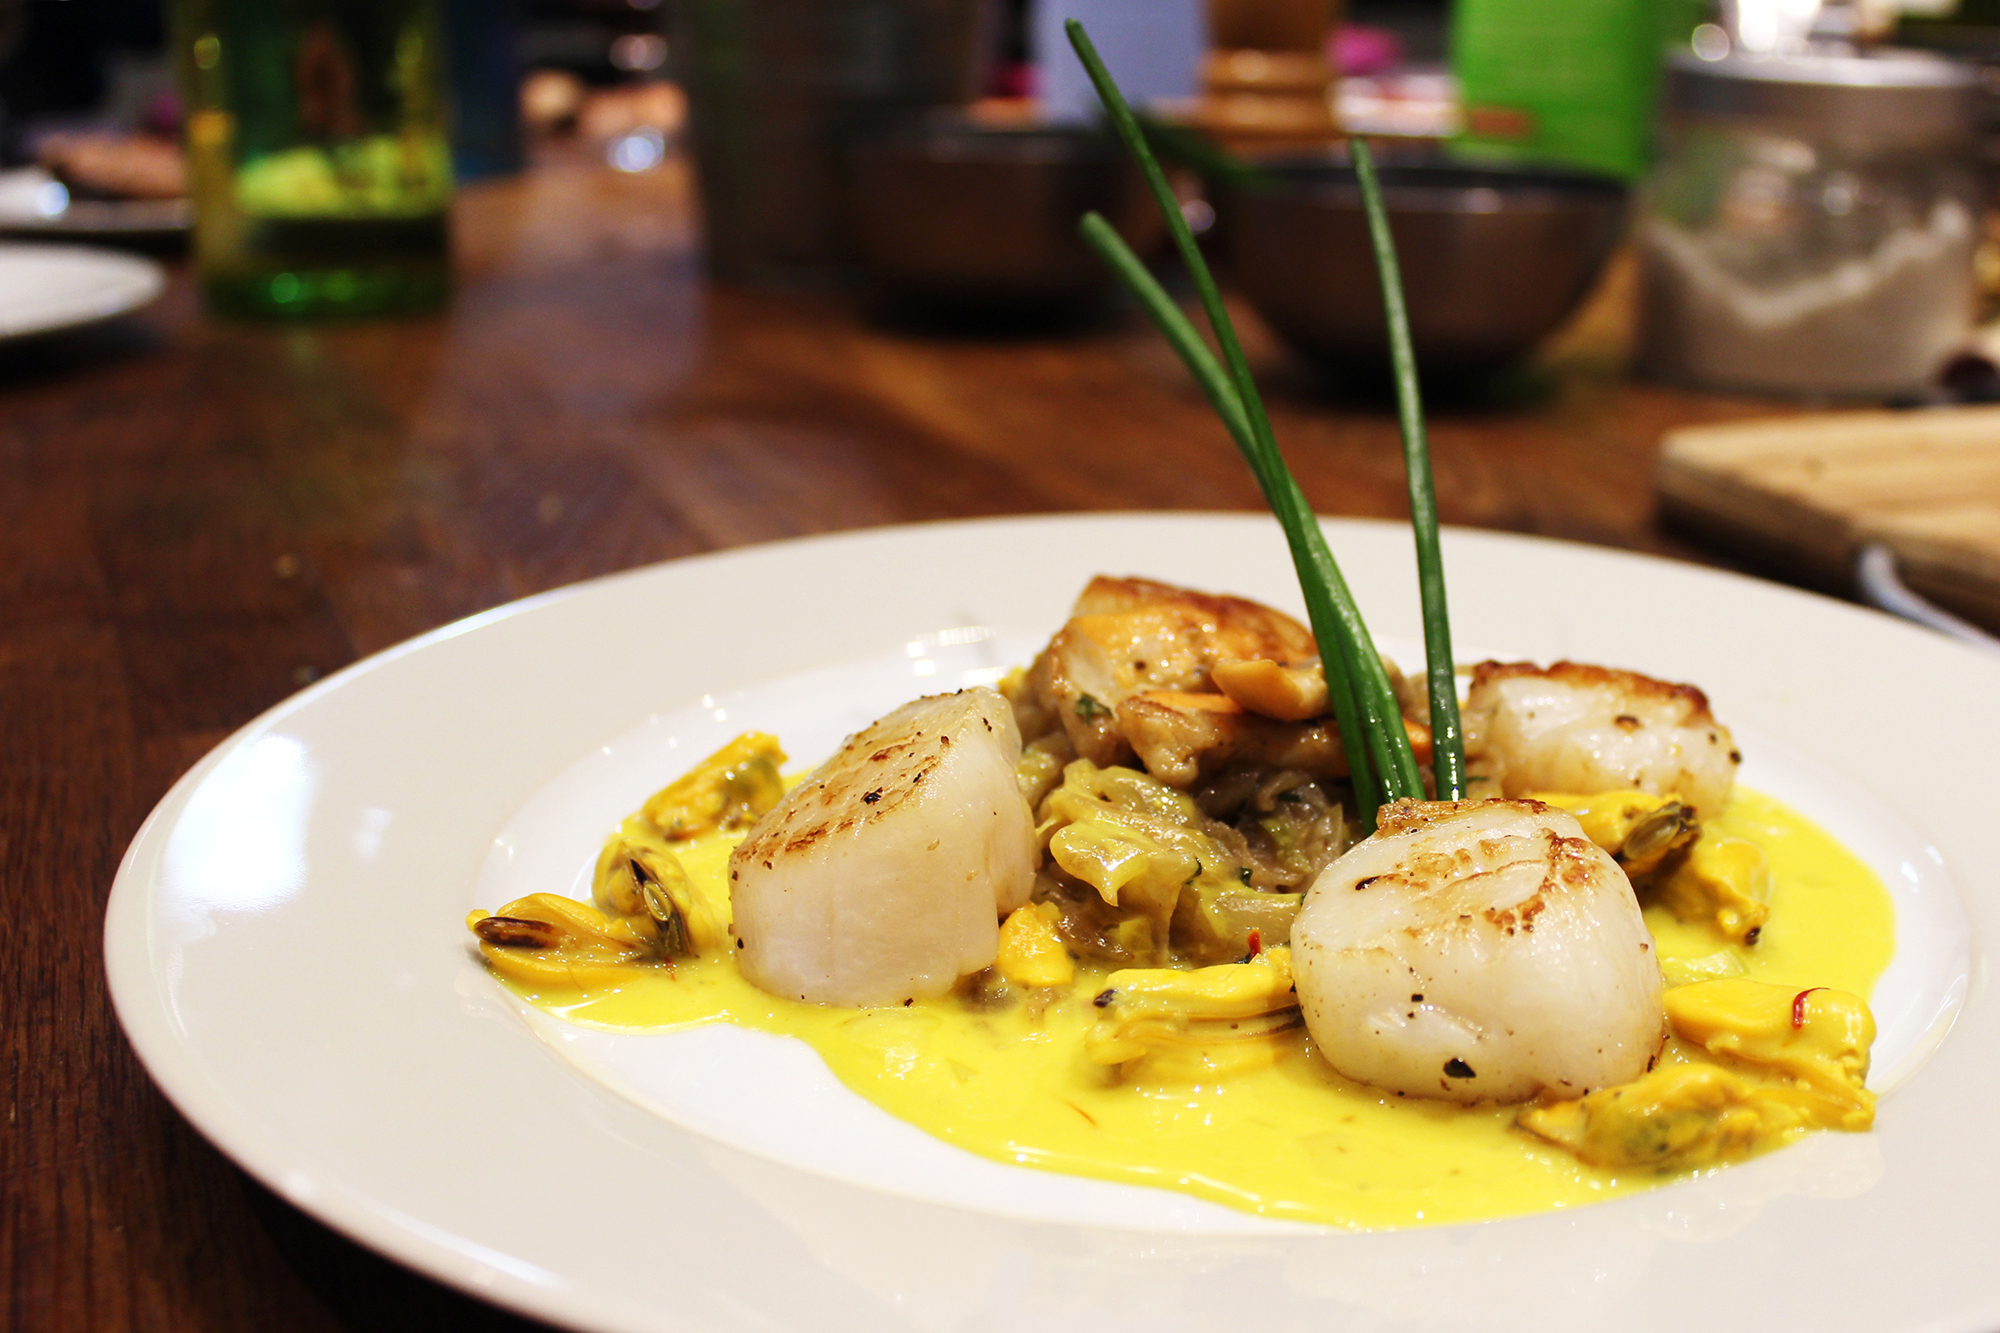
mussels and scallops

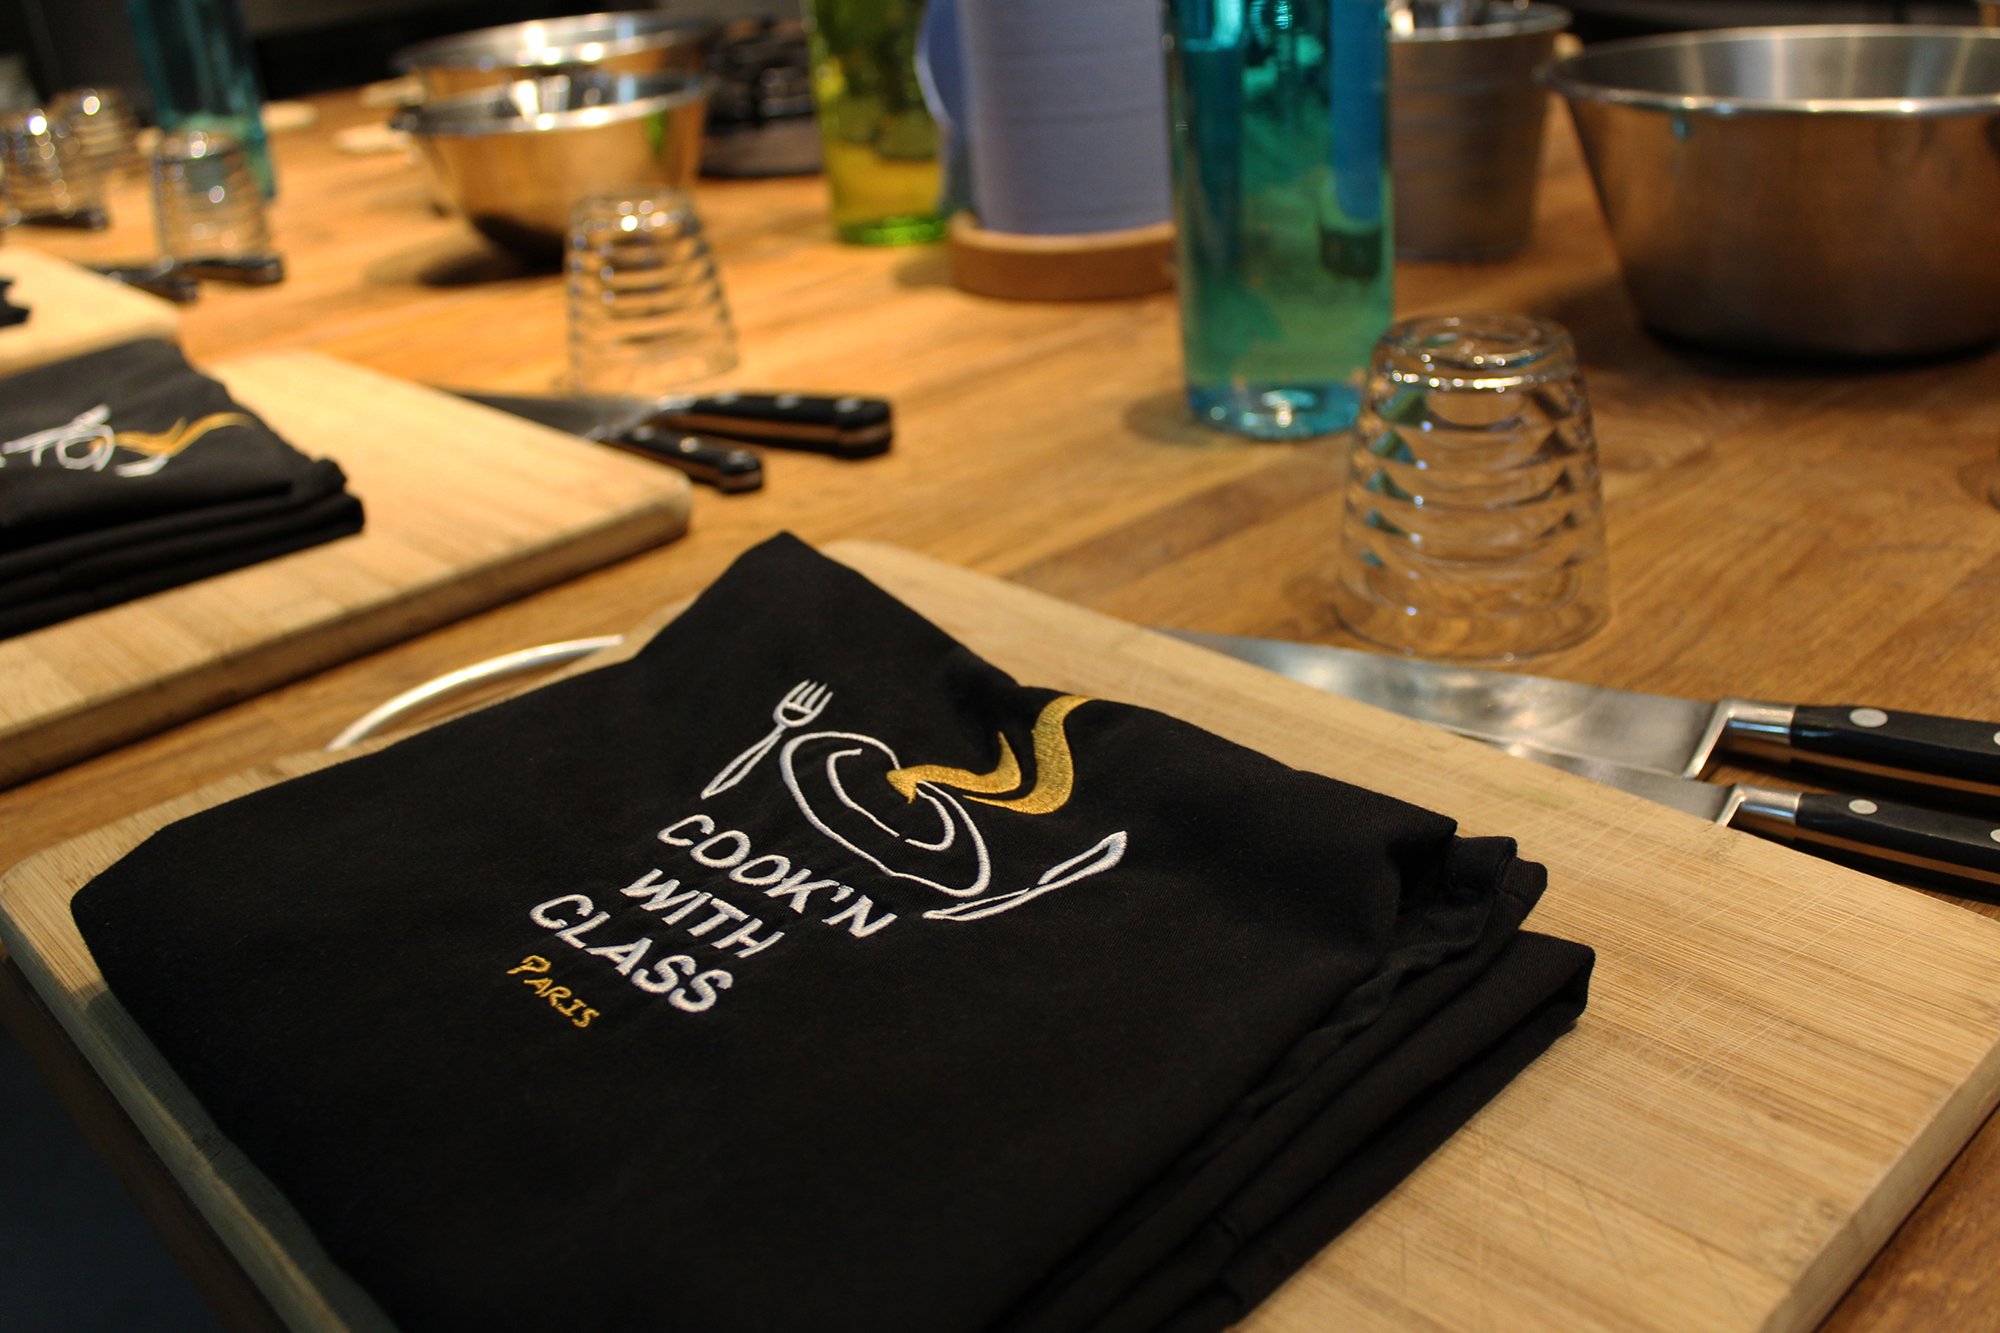
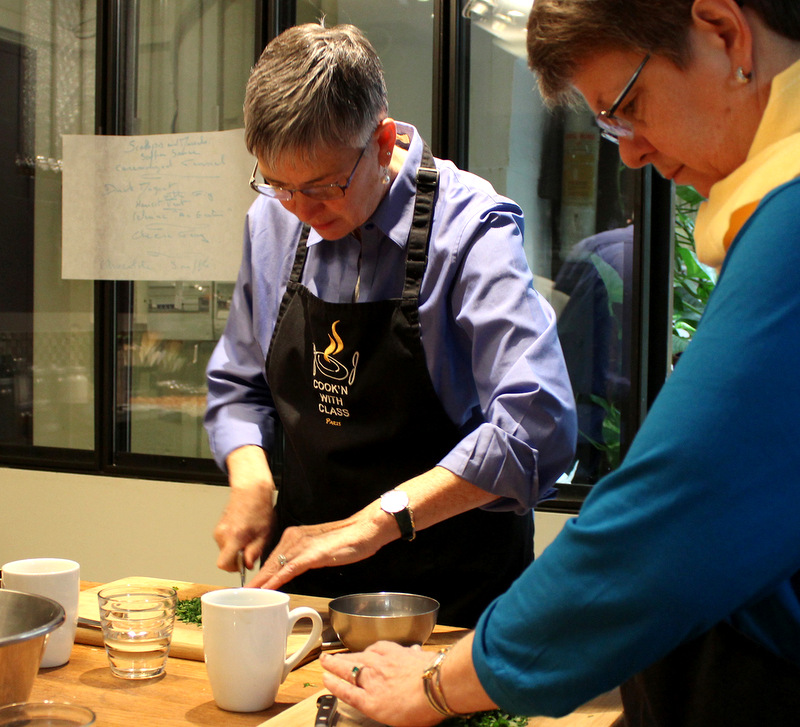
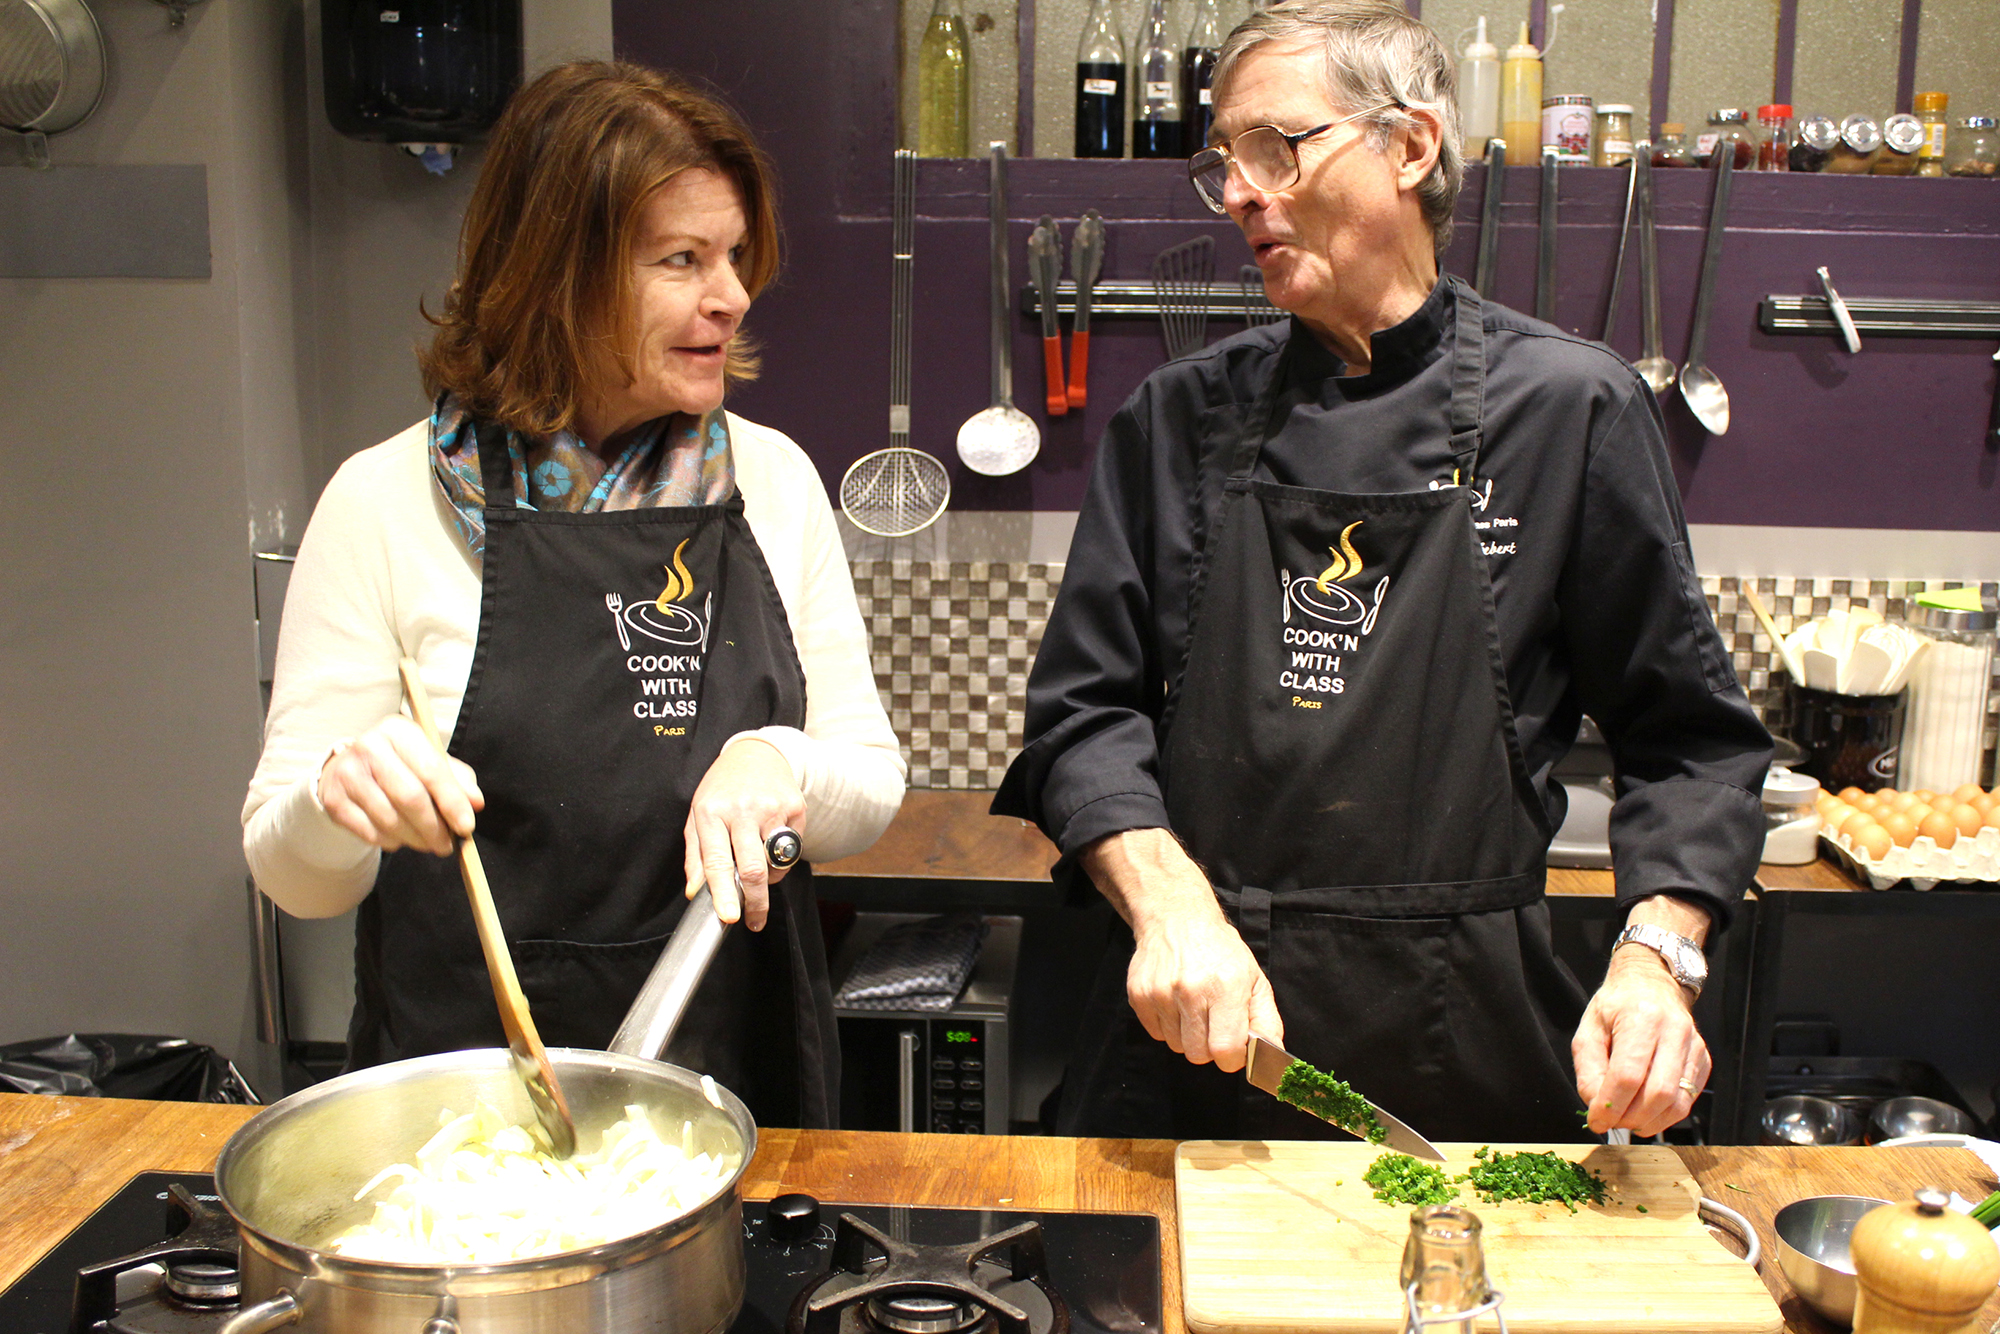
One of the high points of my recent trip to Paris with my sister Diane was the cooking class we took at Cook’n With Class, a Parisian cooking school offering classes in English to locals and tourists. Diane and I chose the Morning Market Class, in which students shop with the chef for fresh ingredients and then prepare a four-course meal back at the school.

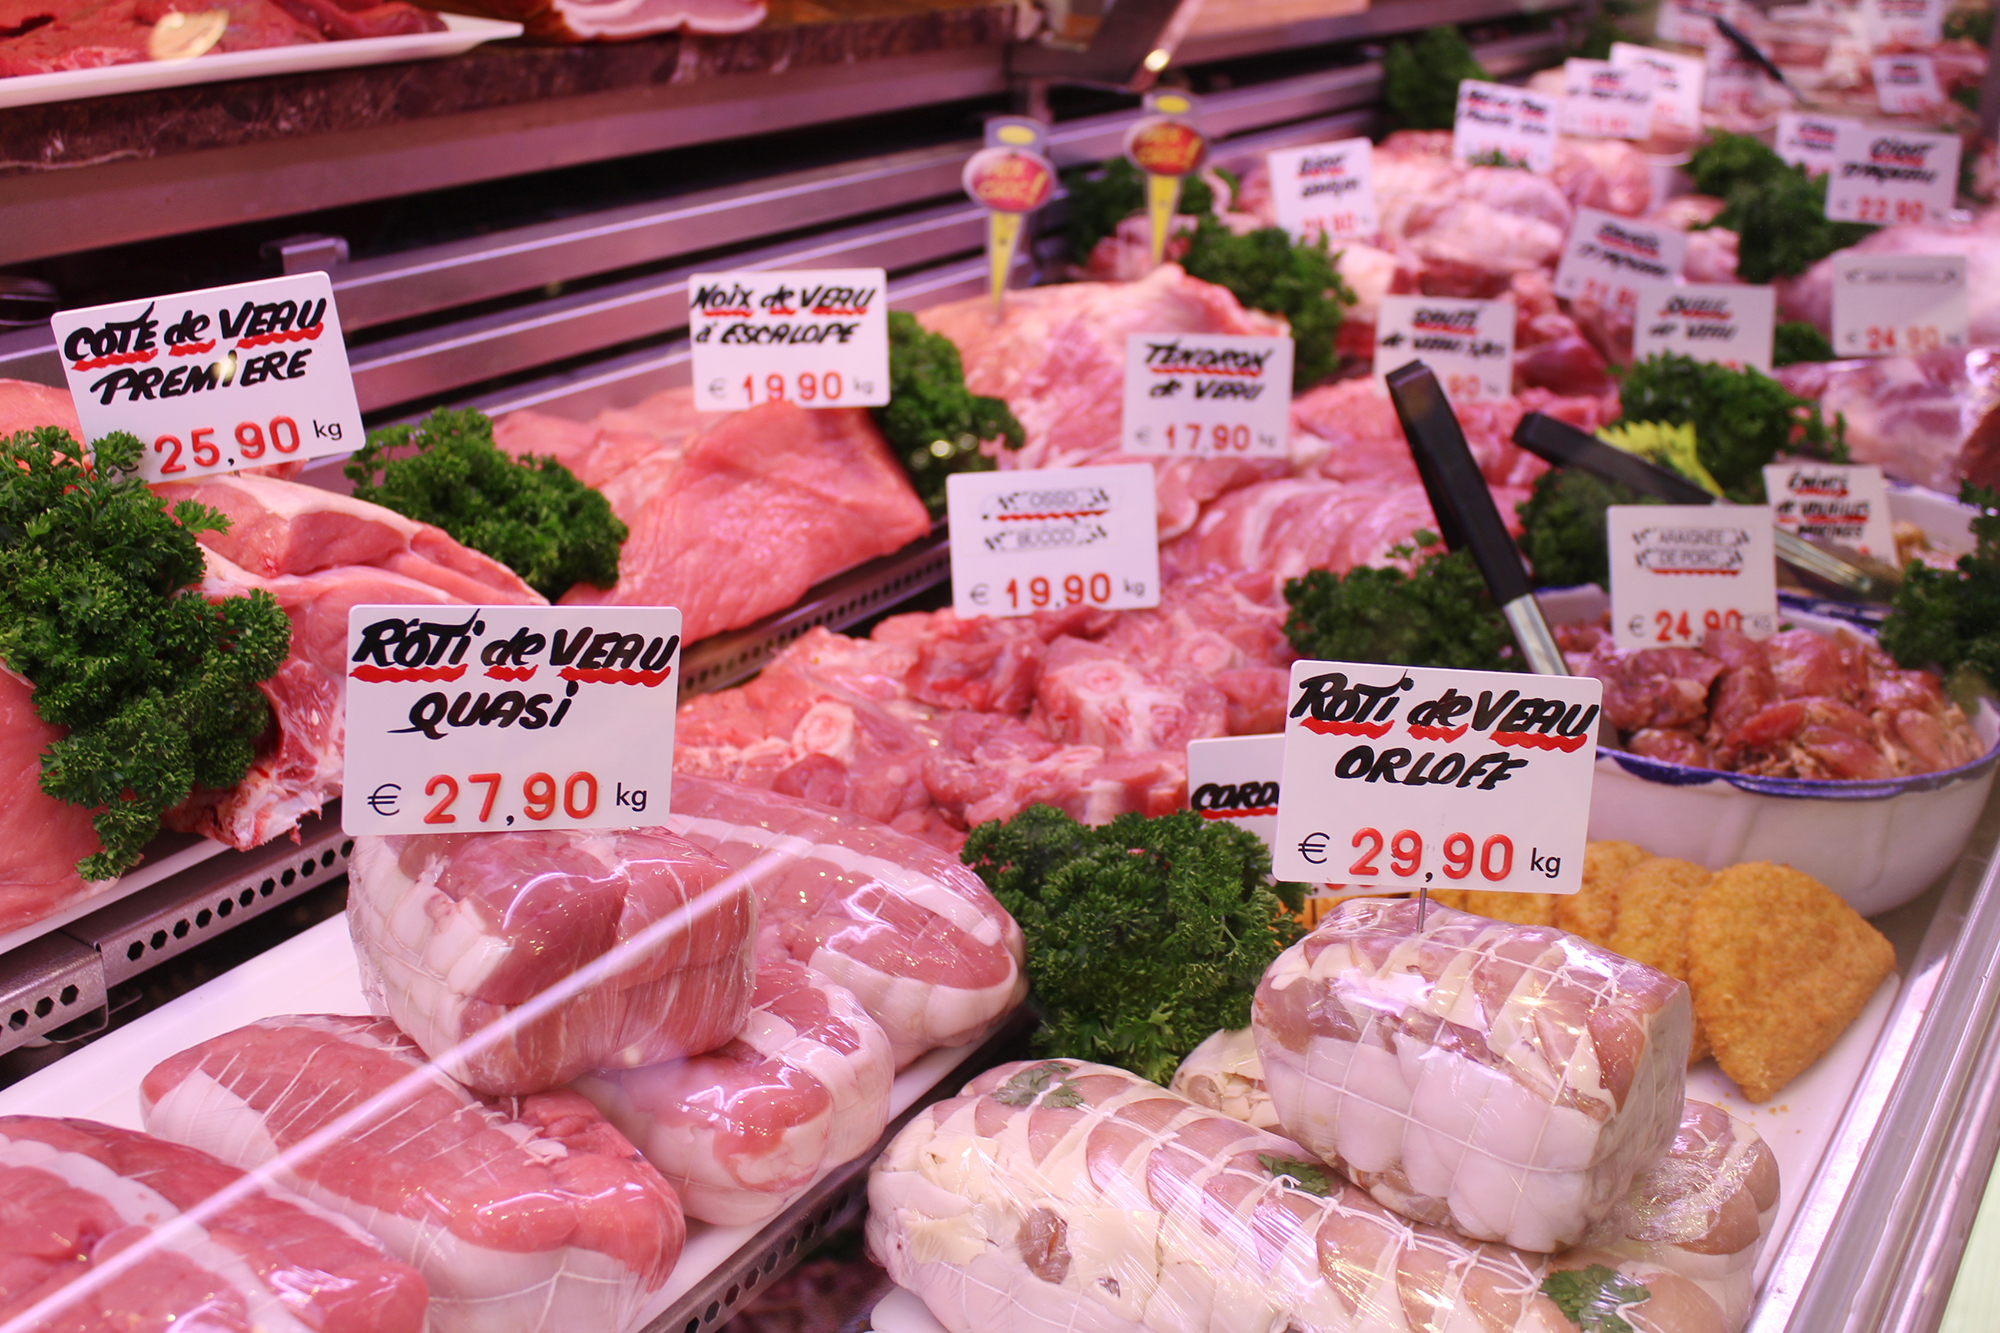
We met Chef Patrick Hebert and four other students on a very cold morning at a Métro stop near Montmartre. Chef Patrick led us to the markets, where we inspected the meat at a boucherie:

boucherie

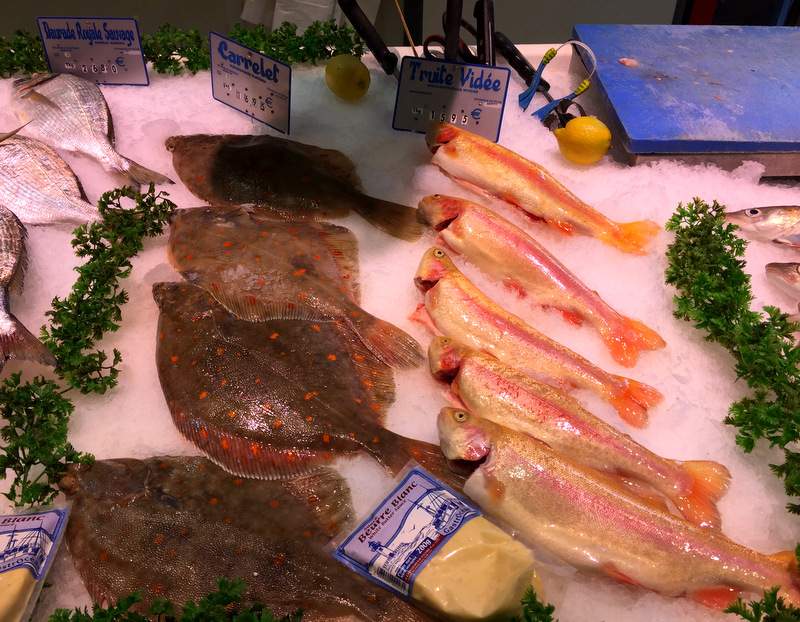
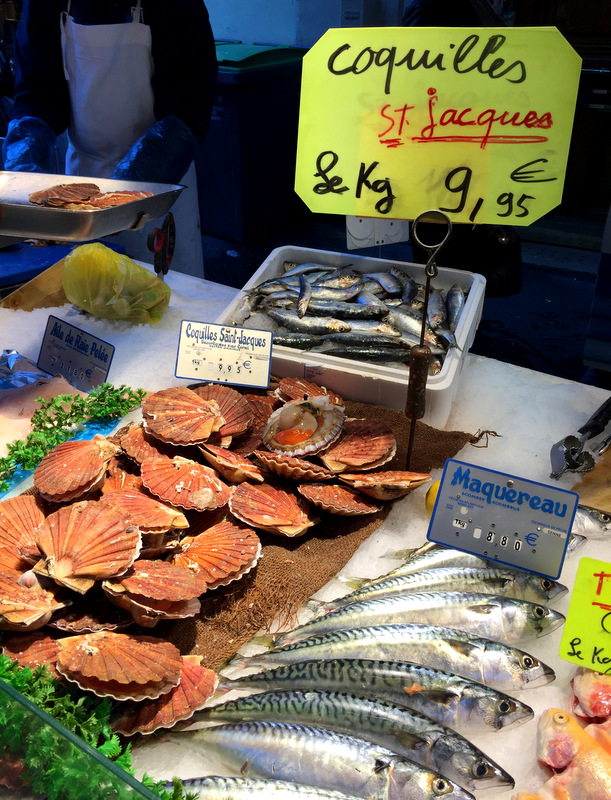
. . . the fish at a poissonier:

fish

fish 2

scallops at the market

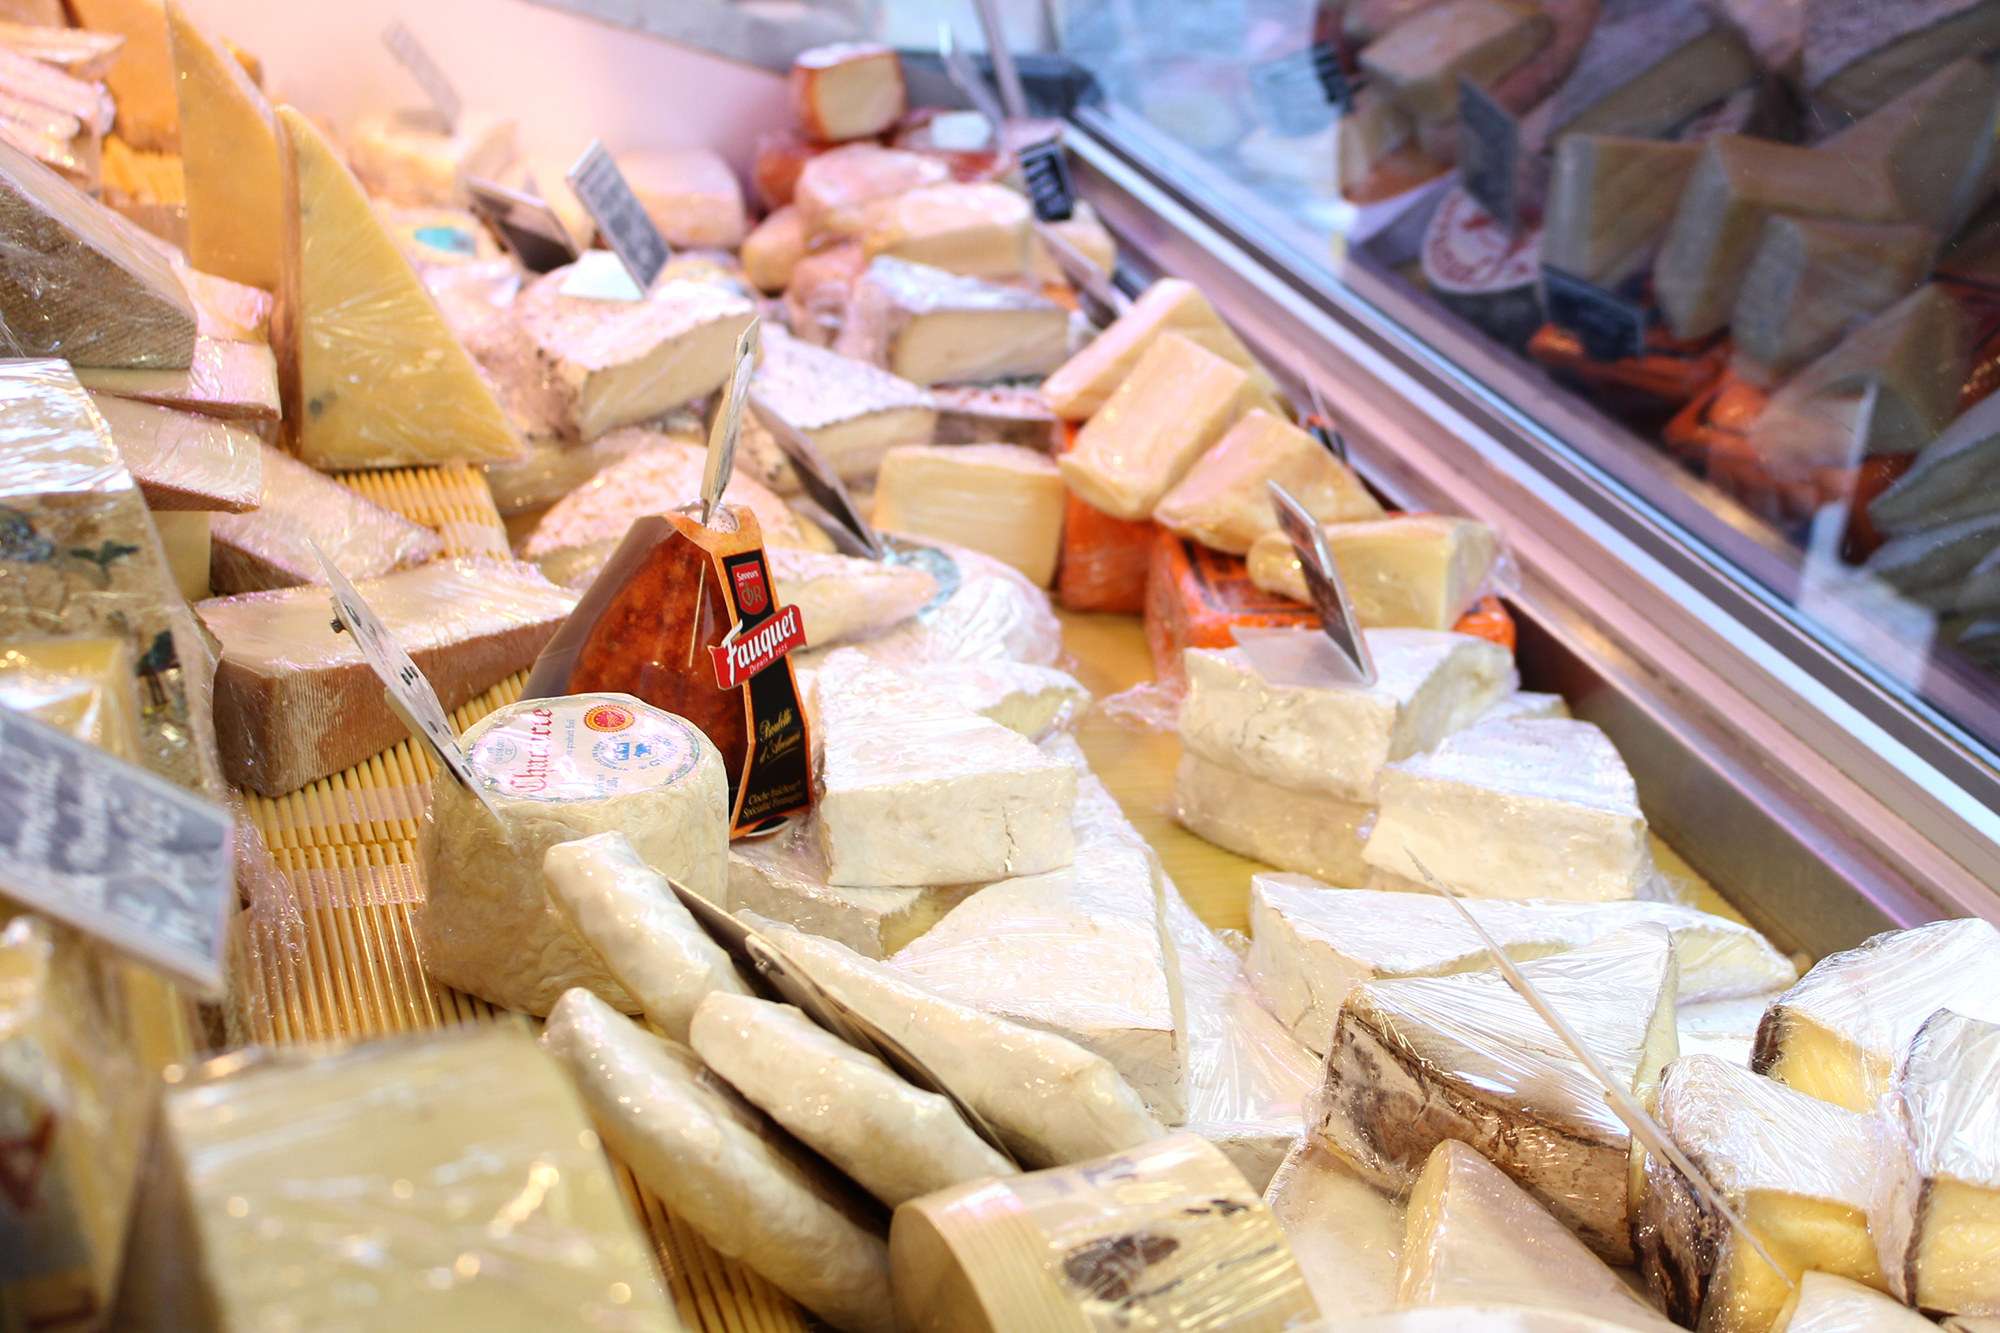
. . . and the cheese at a fromagerie:

fromagerie

Chef Patrick gave us pointers on choosing the freshest fish:

chef patrick inspecting fish

Guided by the chef’s suggestions and the food preferences of the students, the group mutually decided on this menu:

Scallops and Mussels in Saffron Sauce
on a Bed of Caramelized Fennel

Duck Magret with Figs
Haricots Vert (Green Beans)
Celeriac au Gratin

Cheese Tray

Chocolate Souffle

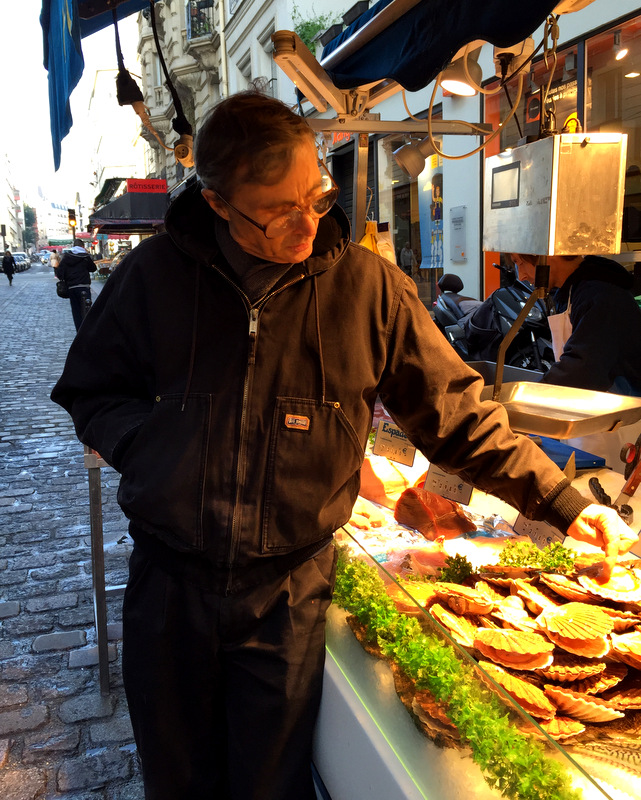
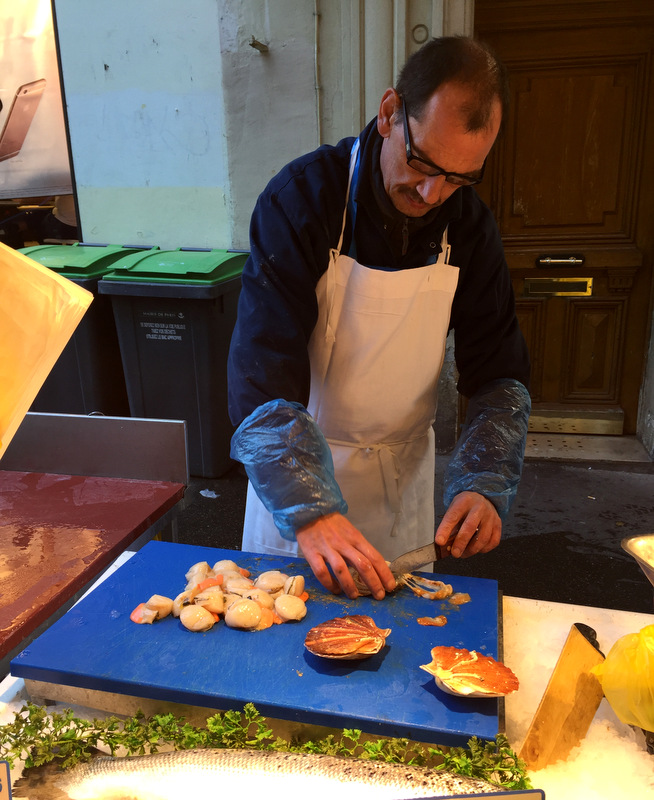
Talk about fresh fish! We watched the fishmonger shuck and clean the scallops we ate later that day:

shucking scallops
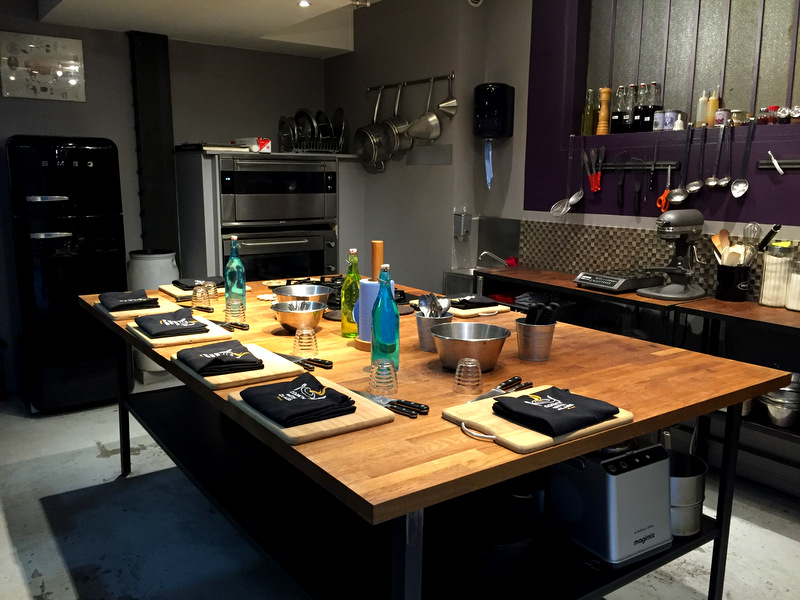
After shopping for fruit and vegetables, we headed to the cooking school to prepare our feast. The classroom was all set up, with a station for each student:

CooknWithClass classroom

cooking class station

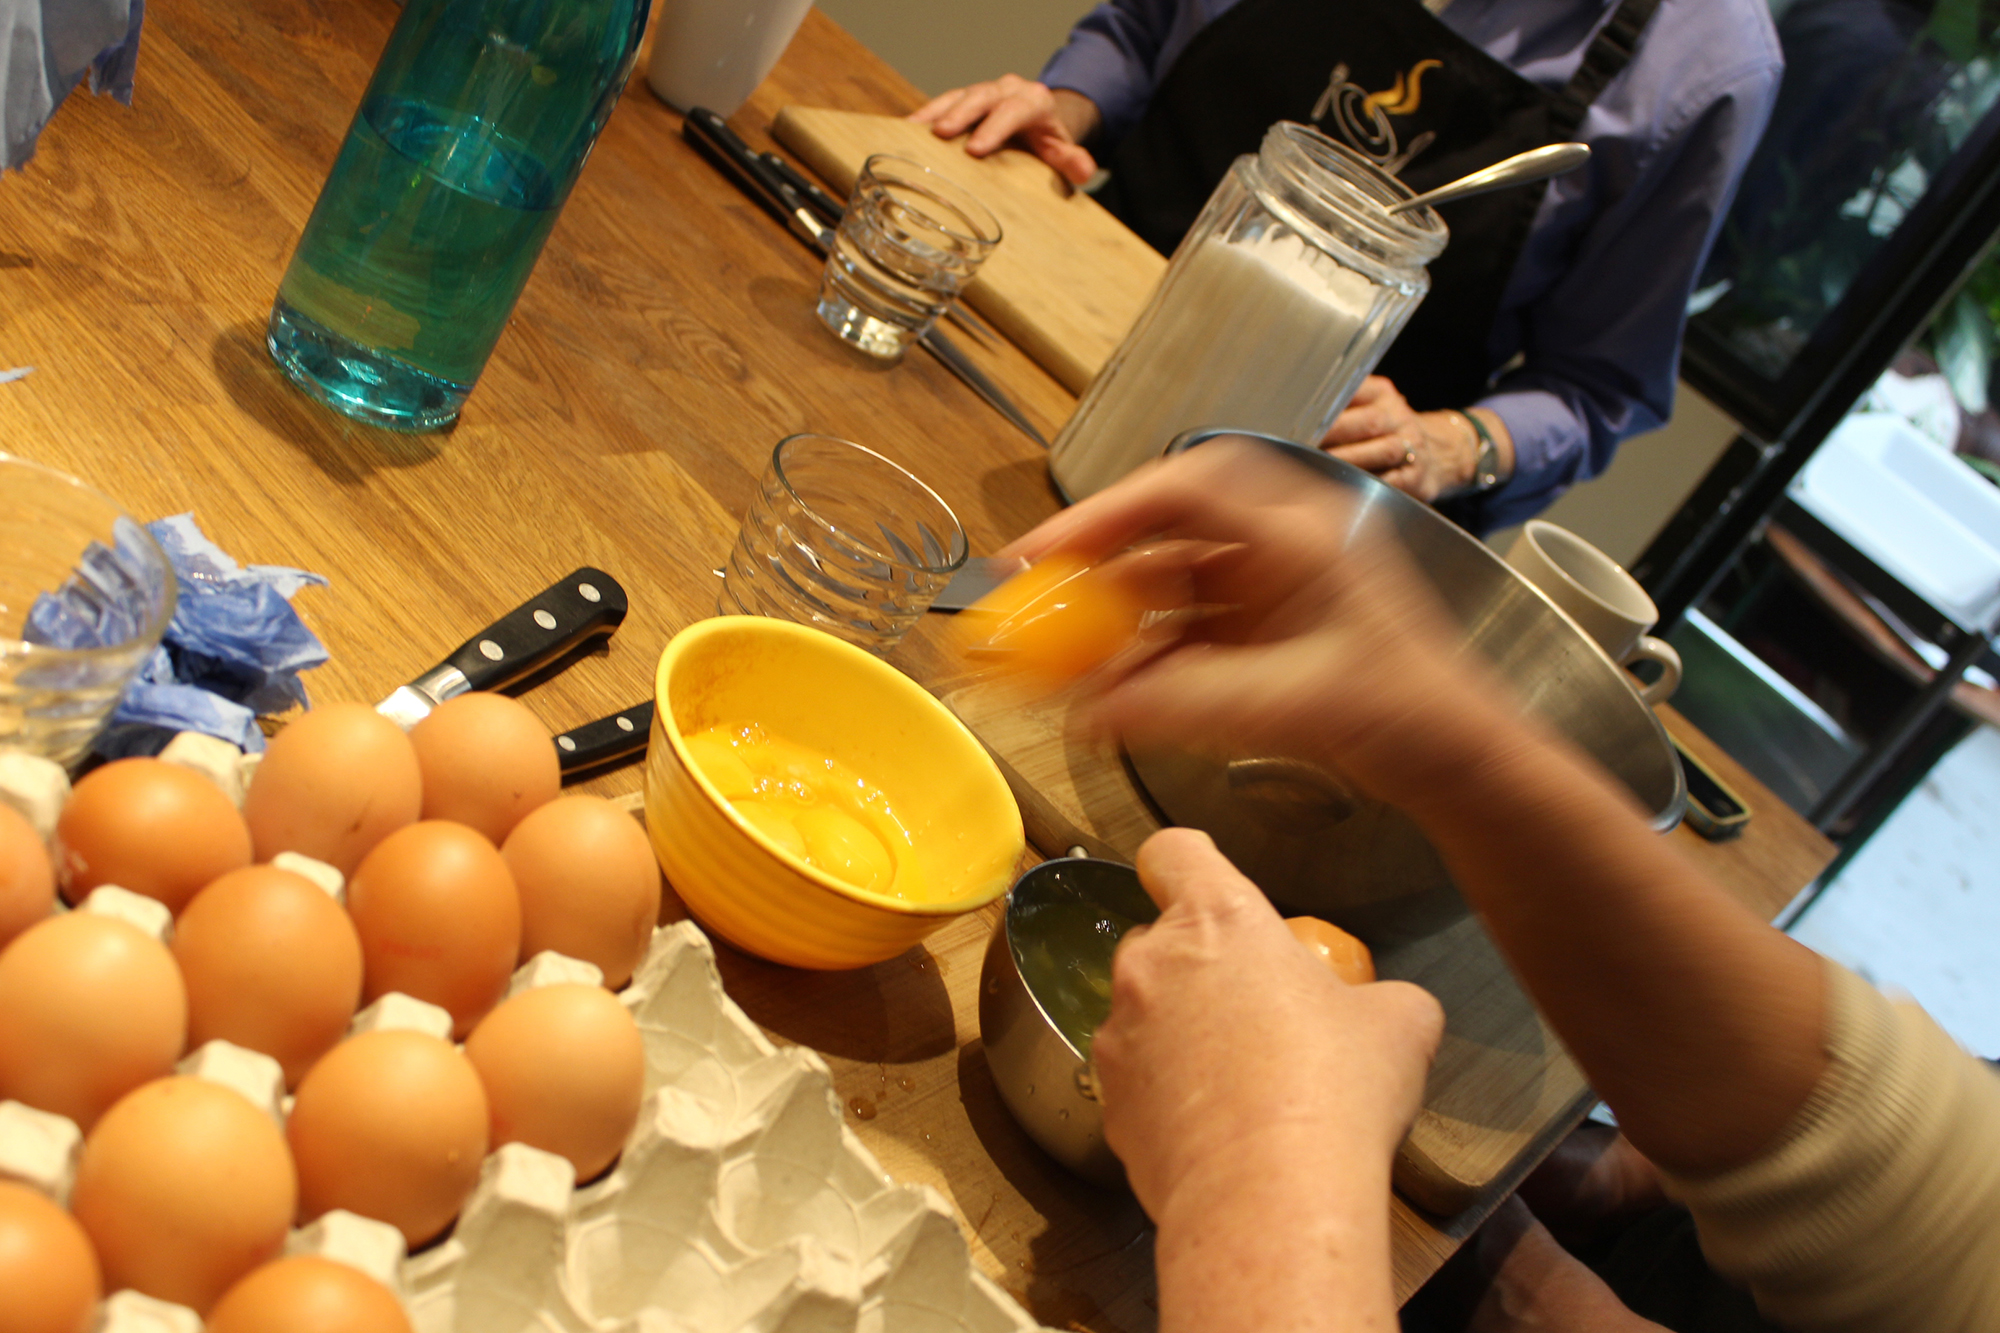
We got right to work, separating eggs for the soufflé . . .

separating eggs for souffle

. . . chopping fresh tarragon . . .

dlw and dks chopping tarragon
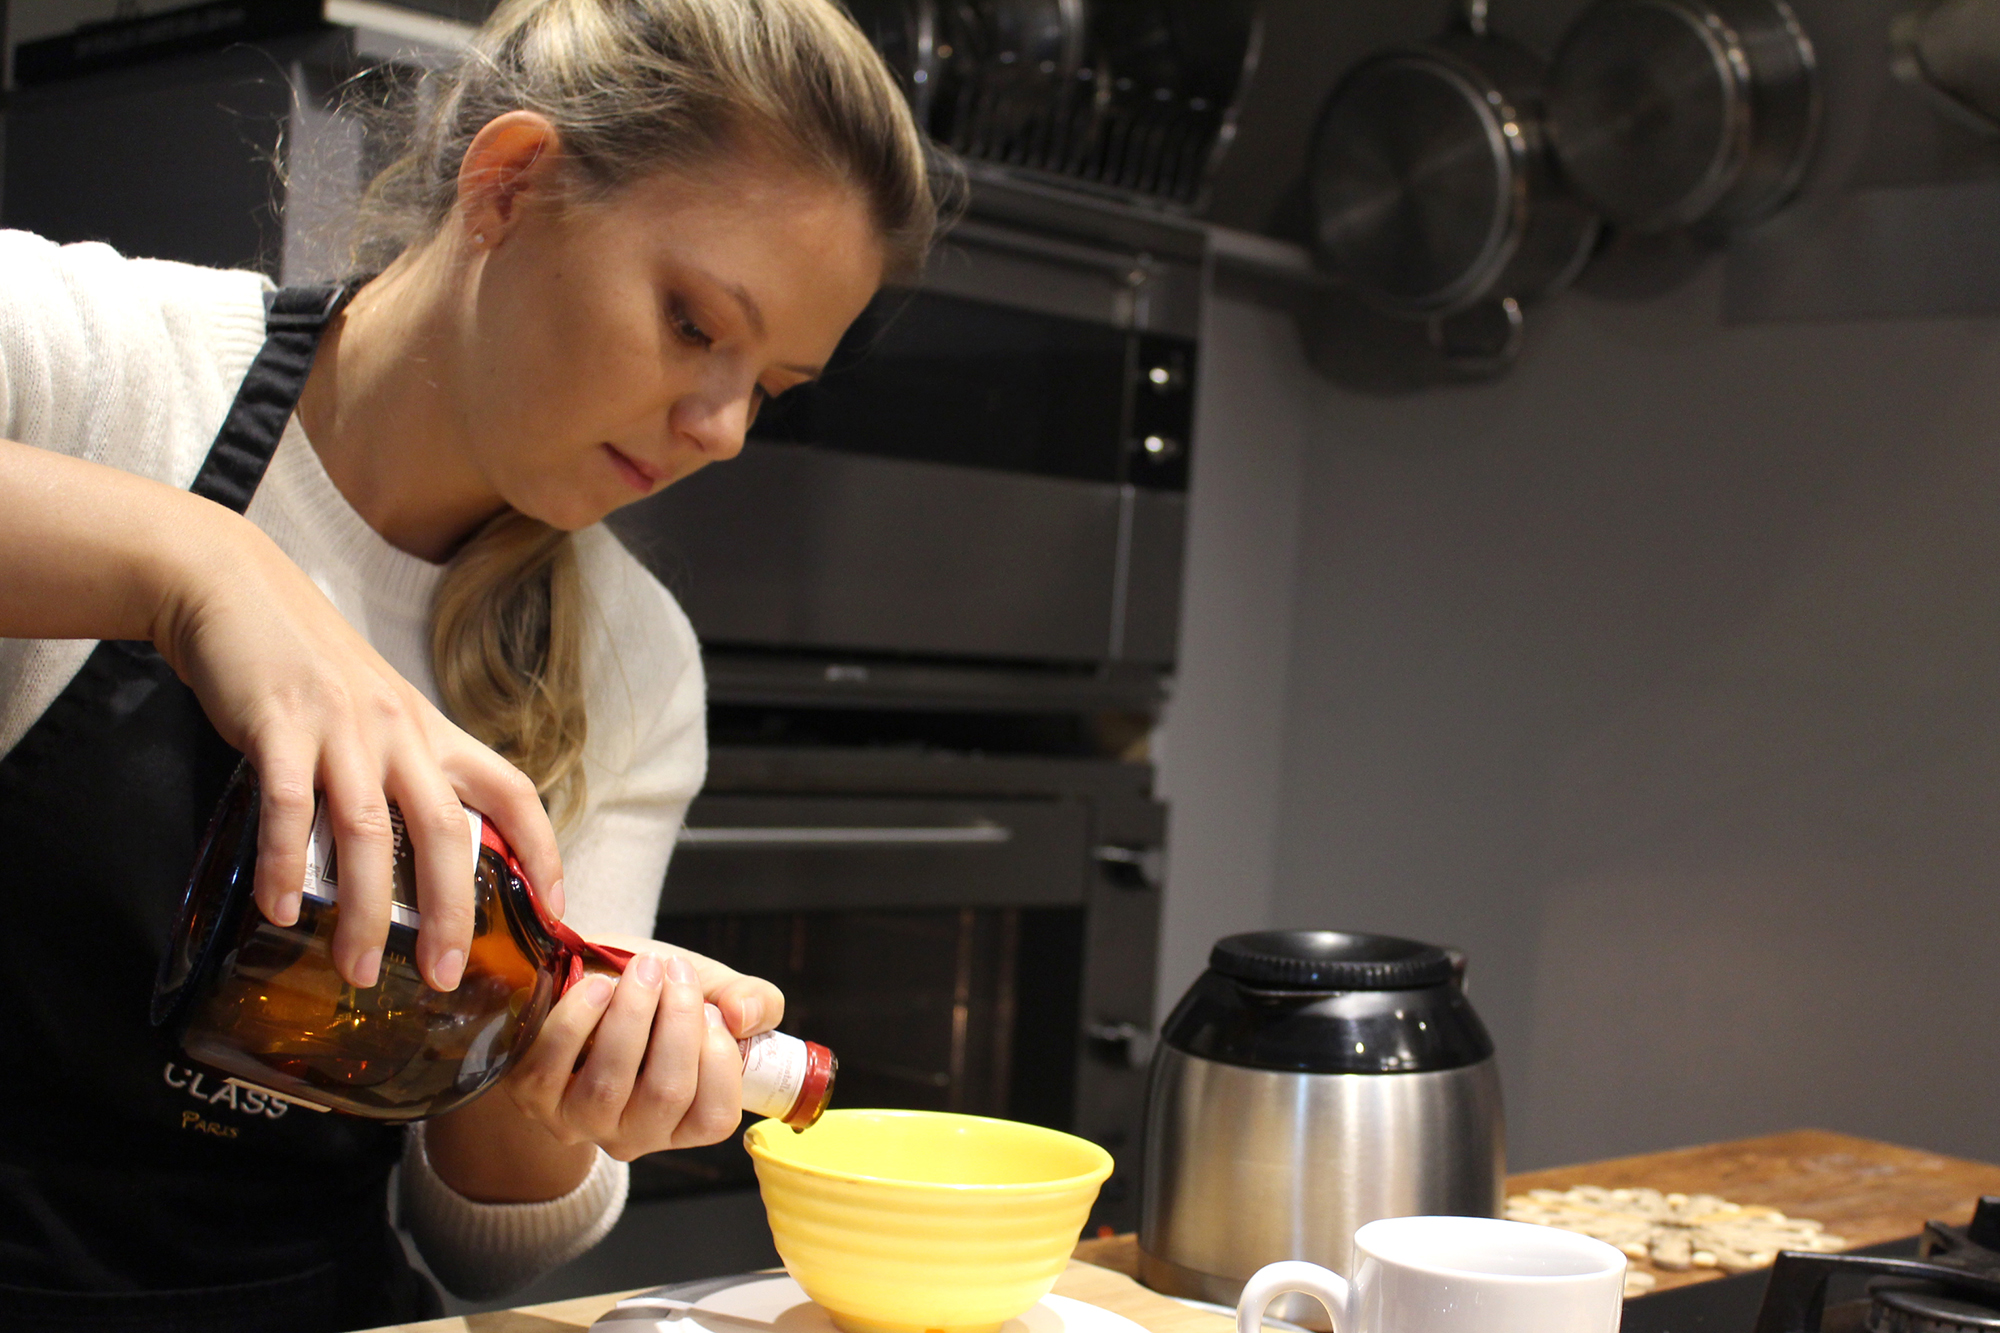
. . . measuring Grand Marnier for the chocolate soufflé . . .

measuring grand marnier
. . . sautéing the fennel as Chef Patrick looked on . . .

sauteeing fennel
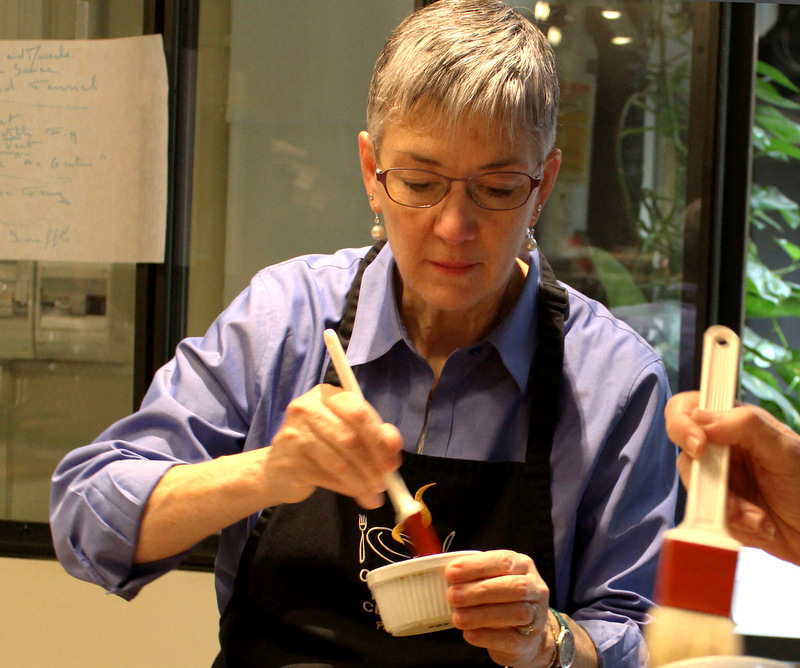
. . . buttering ramekins for the soufflé . . .

dlw buttering ramekins
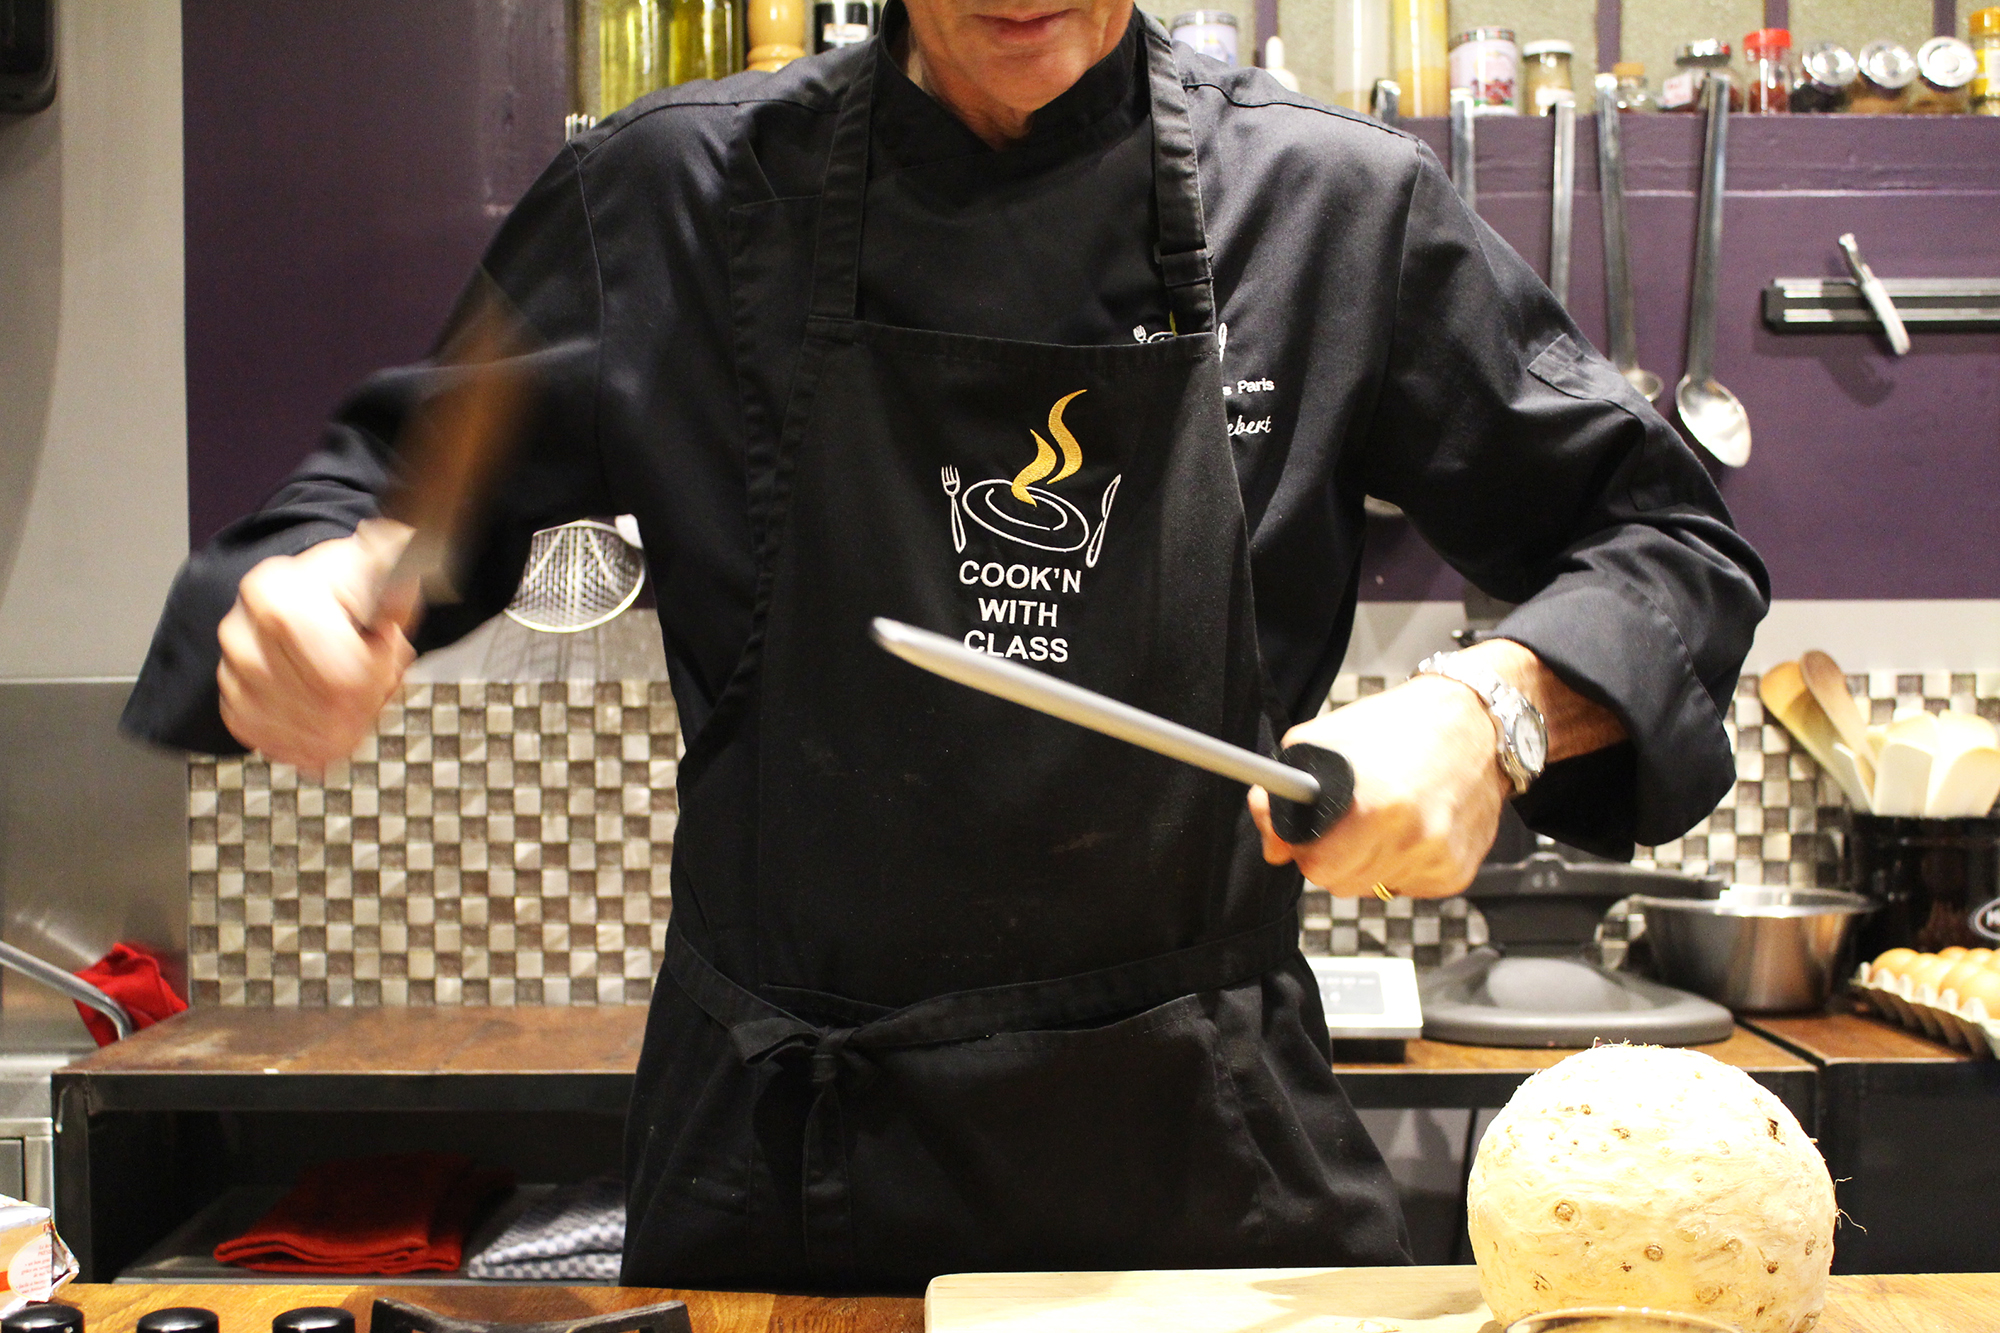
Chef Patrick showed us the correct way to sharpen knives . . .

chef patrick sharpening knives

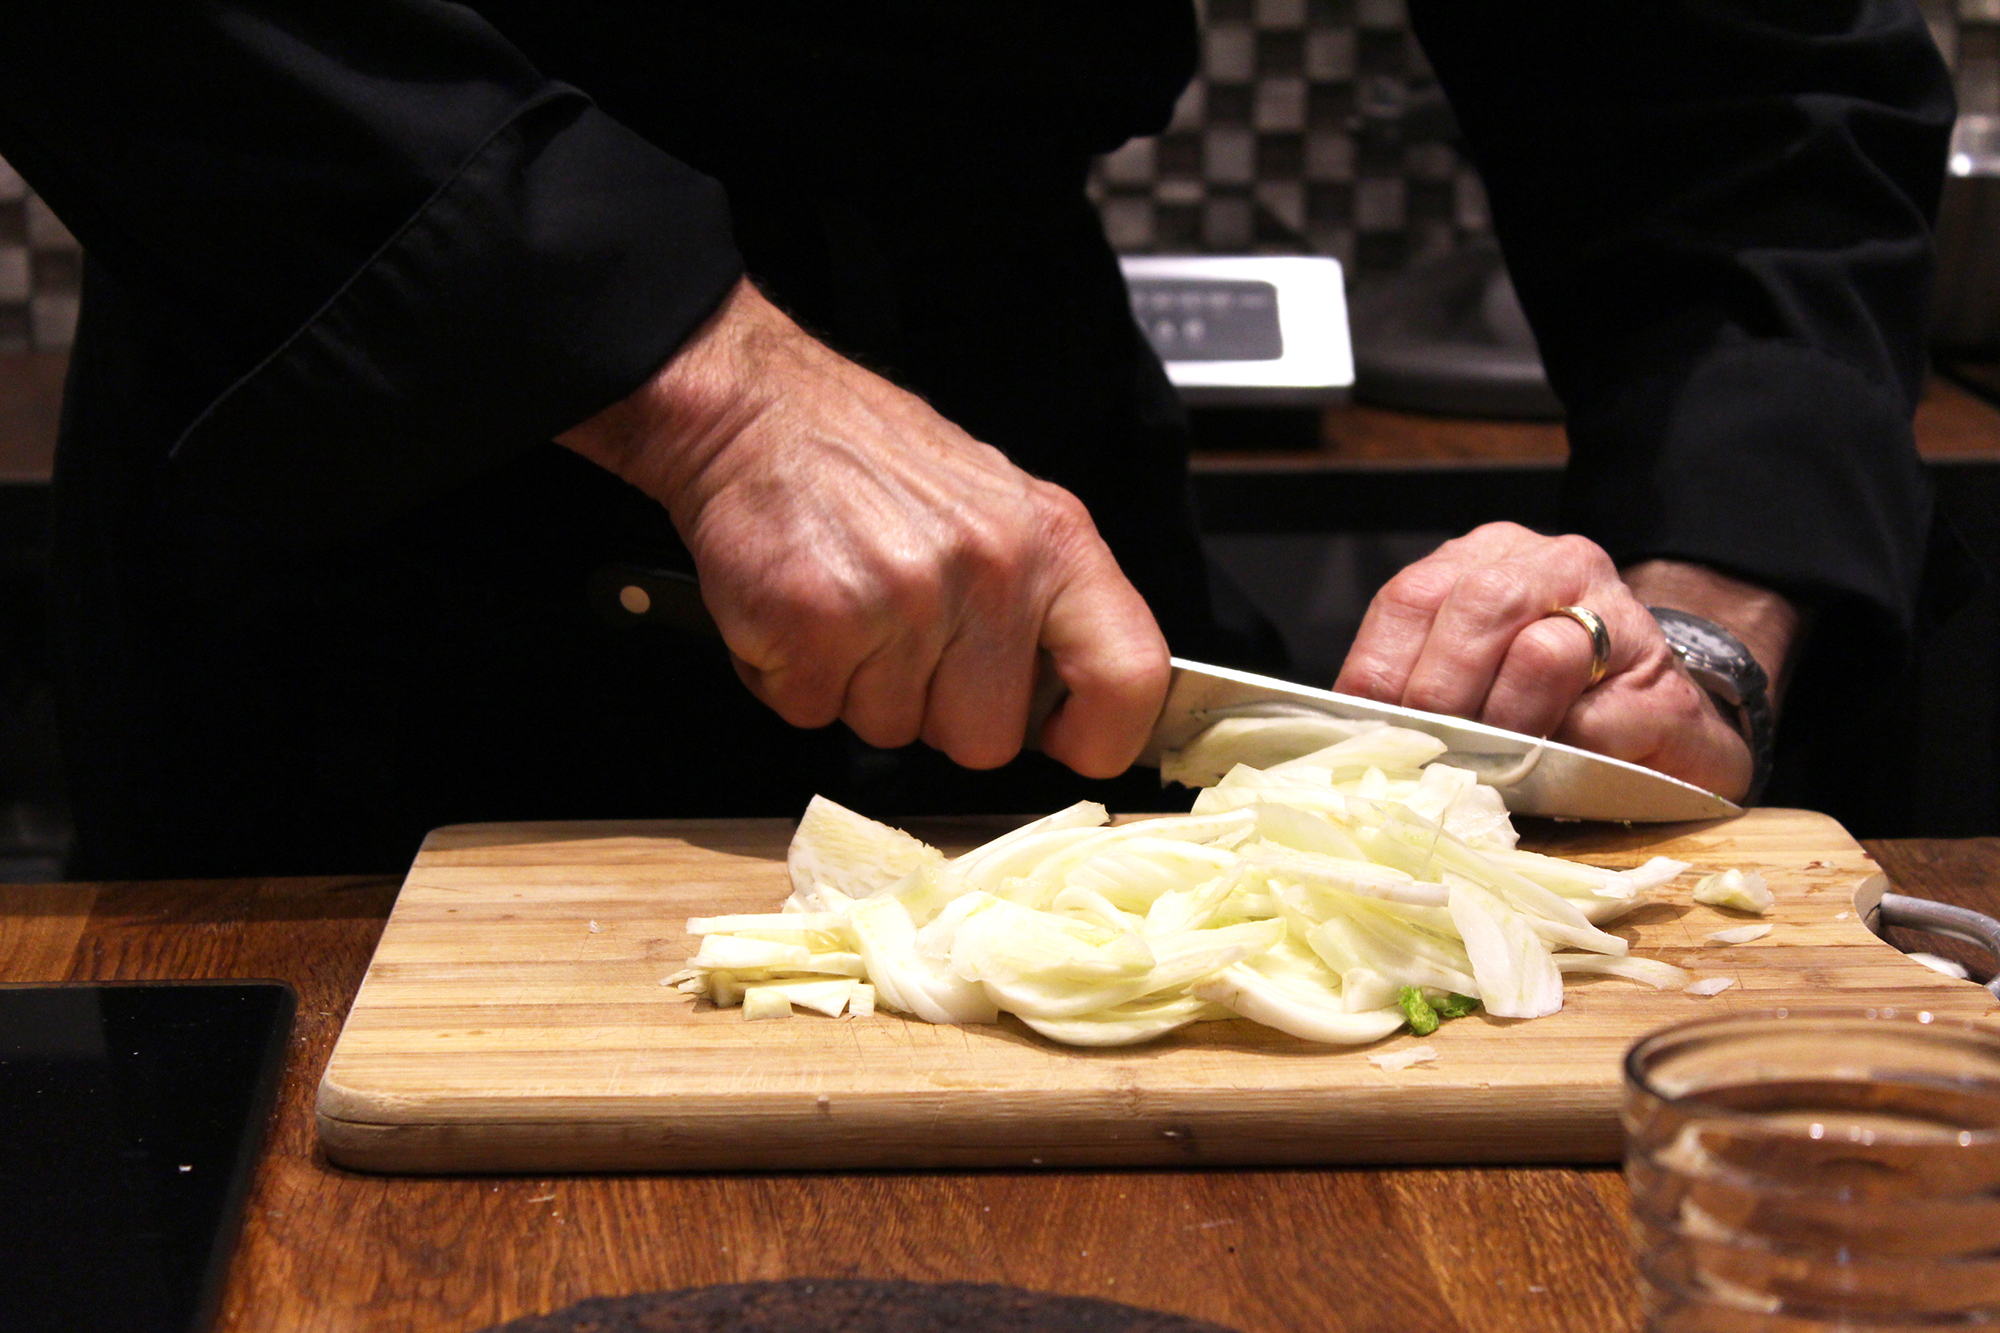
. . . and how to keep our fingers out of the way when chopping vegetables. Here he is slicing celeriac:

slicing celeriac
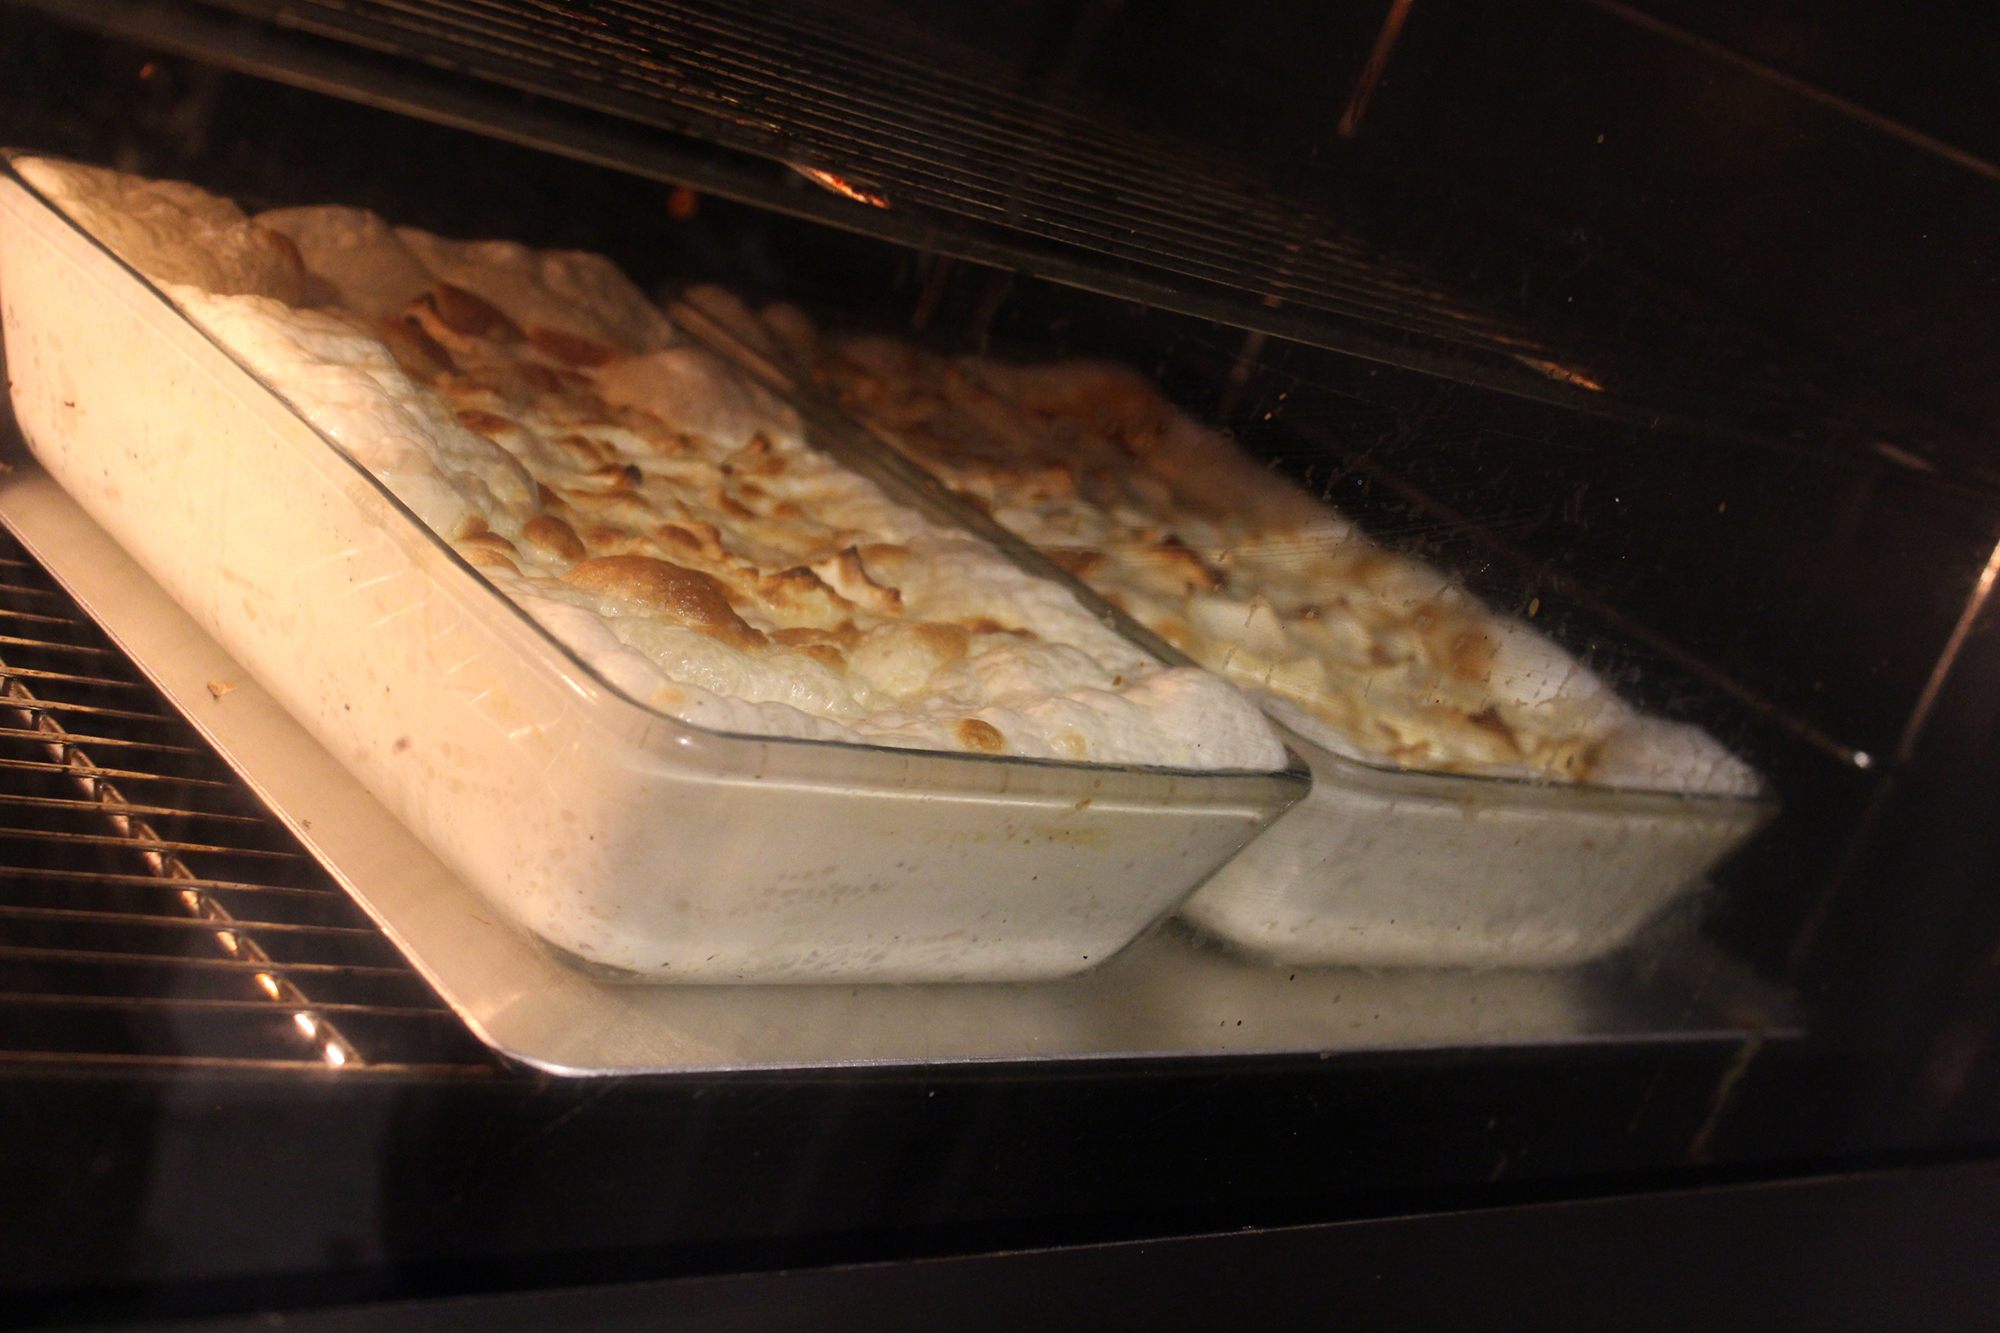
Dinner is coming together! Here is the celeriac au gratin bubbling in the oven . . .

celeriac gratin bubbling in the oven

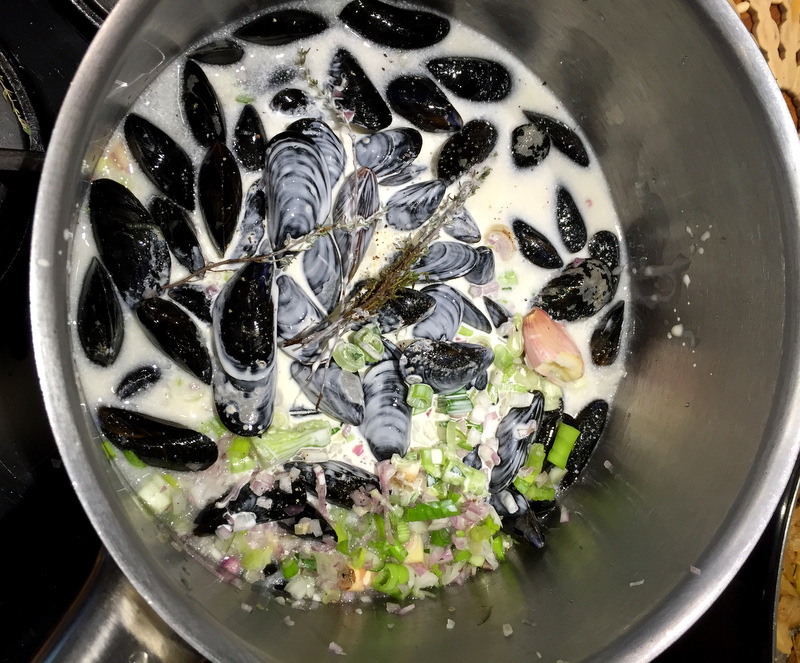
. . . mussels cooking in cream . . .

mussels cooking in cream

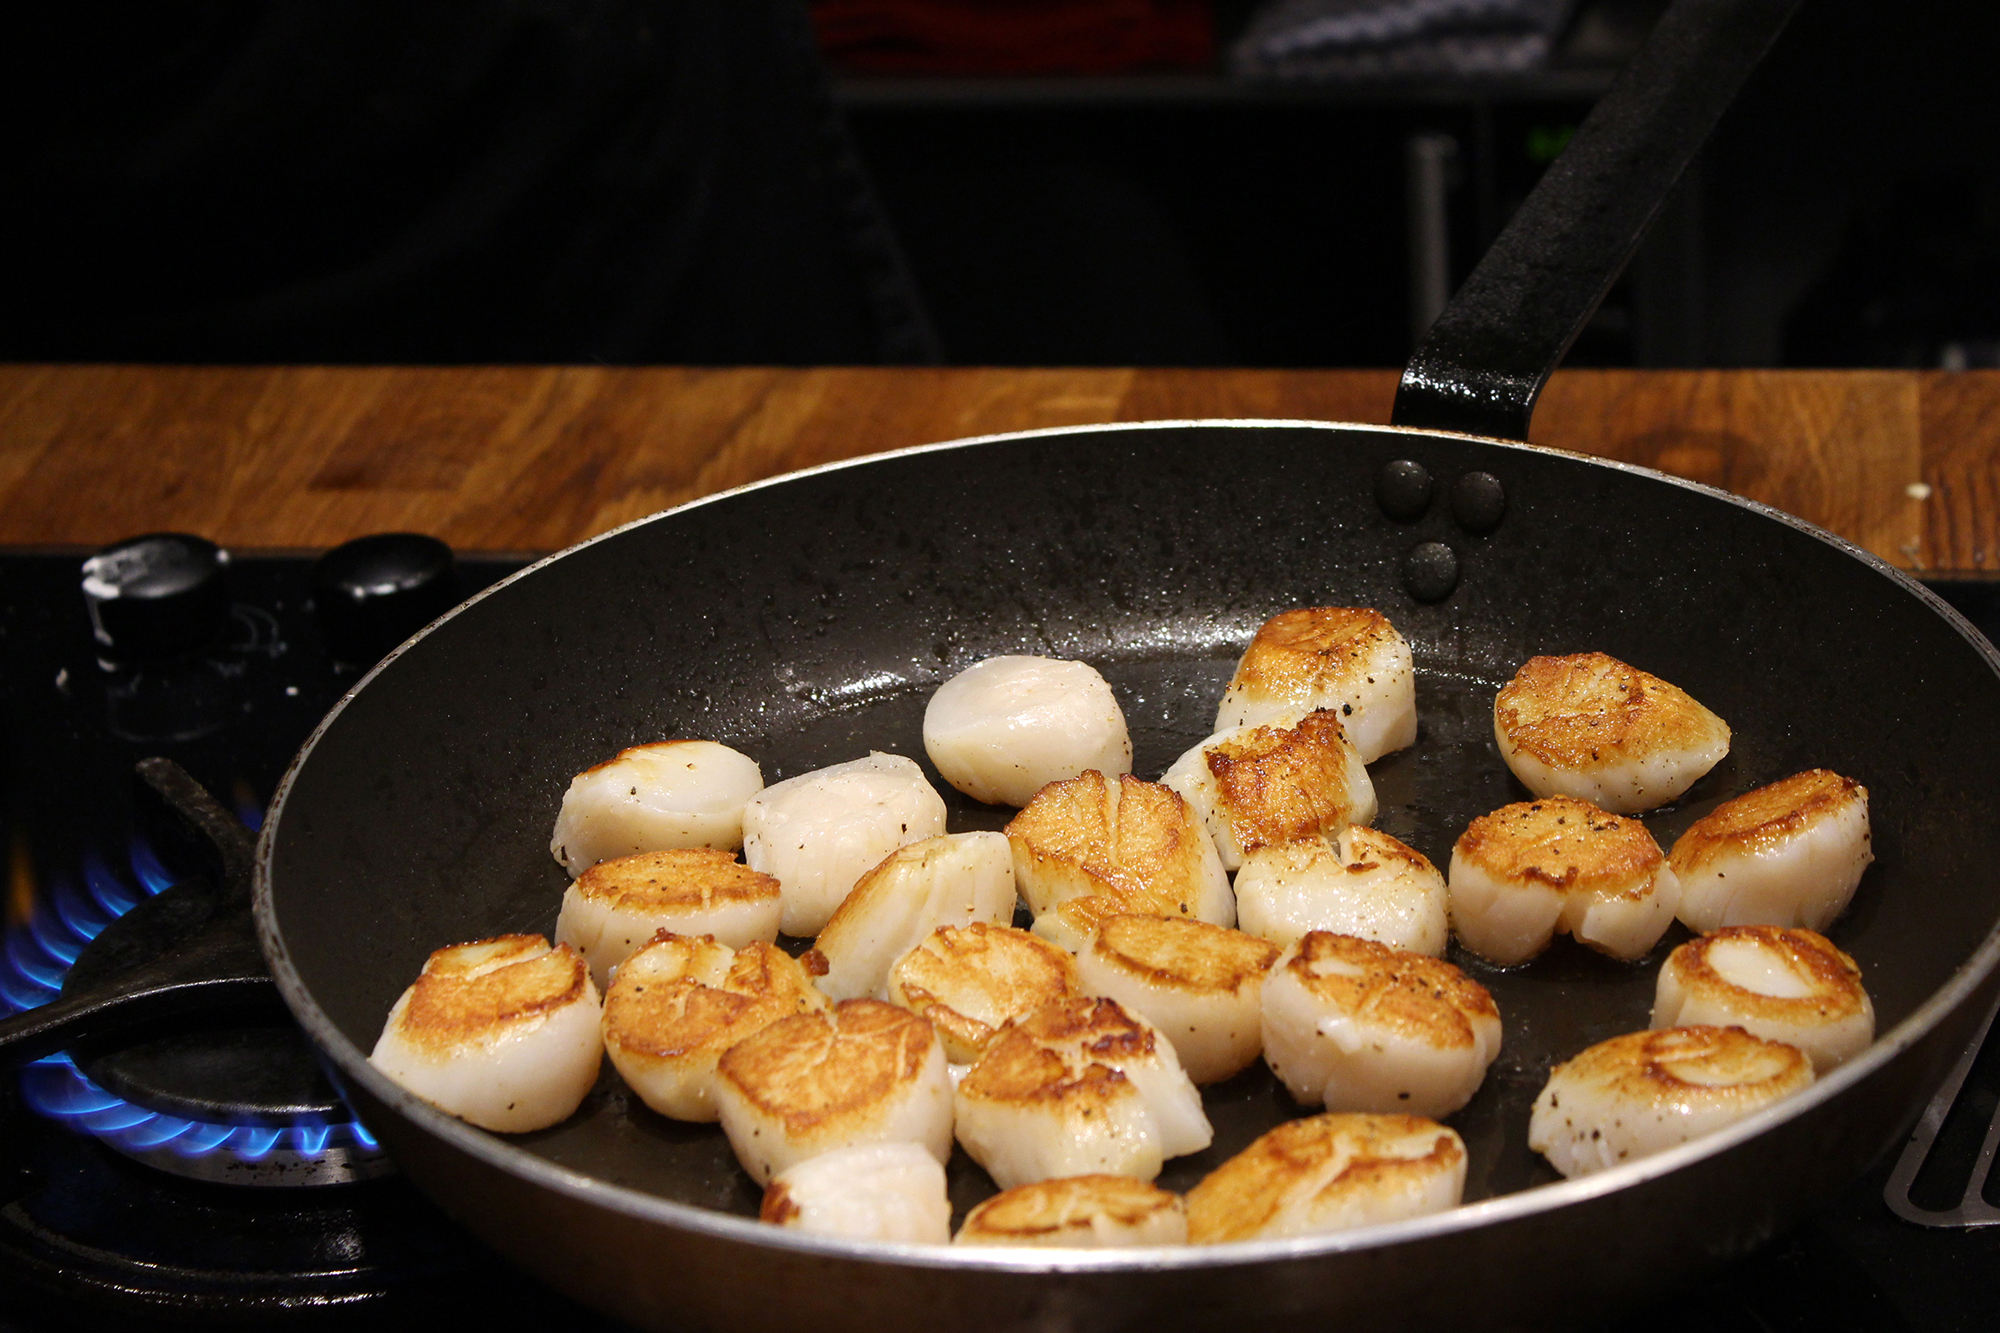
. . . scallops sizzling in the pan . . .

scallops cooking
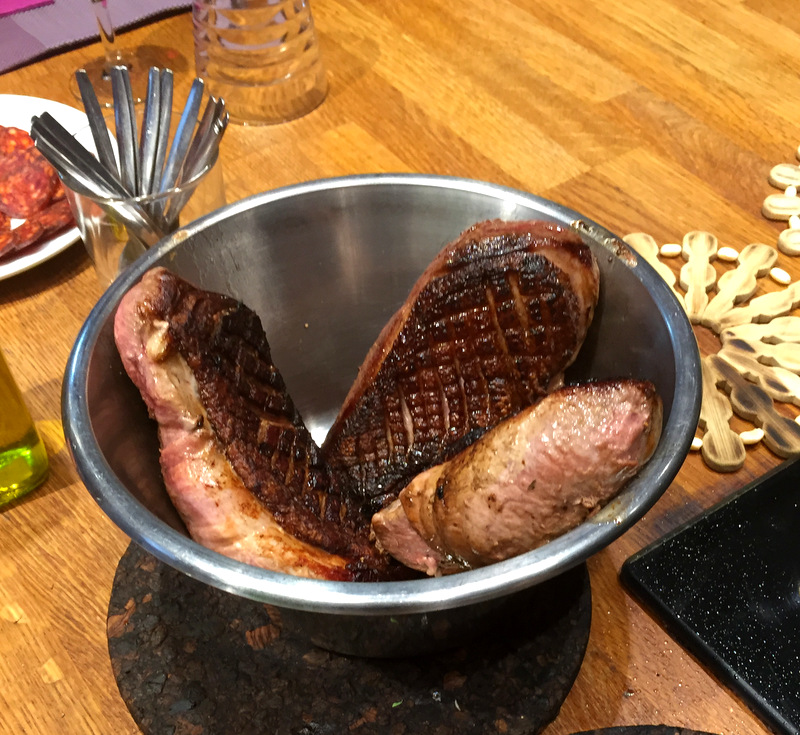
. . . and the duck magret resting in a bowl . . .

duck magret, resting
Dinner is ready.

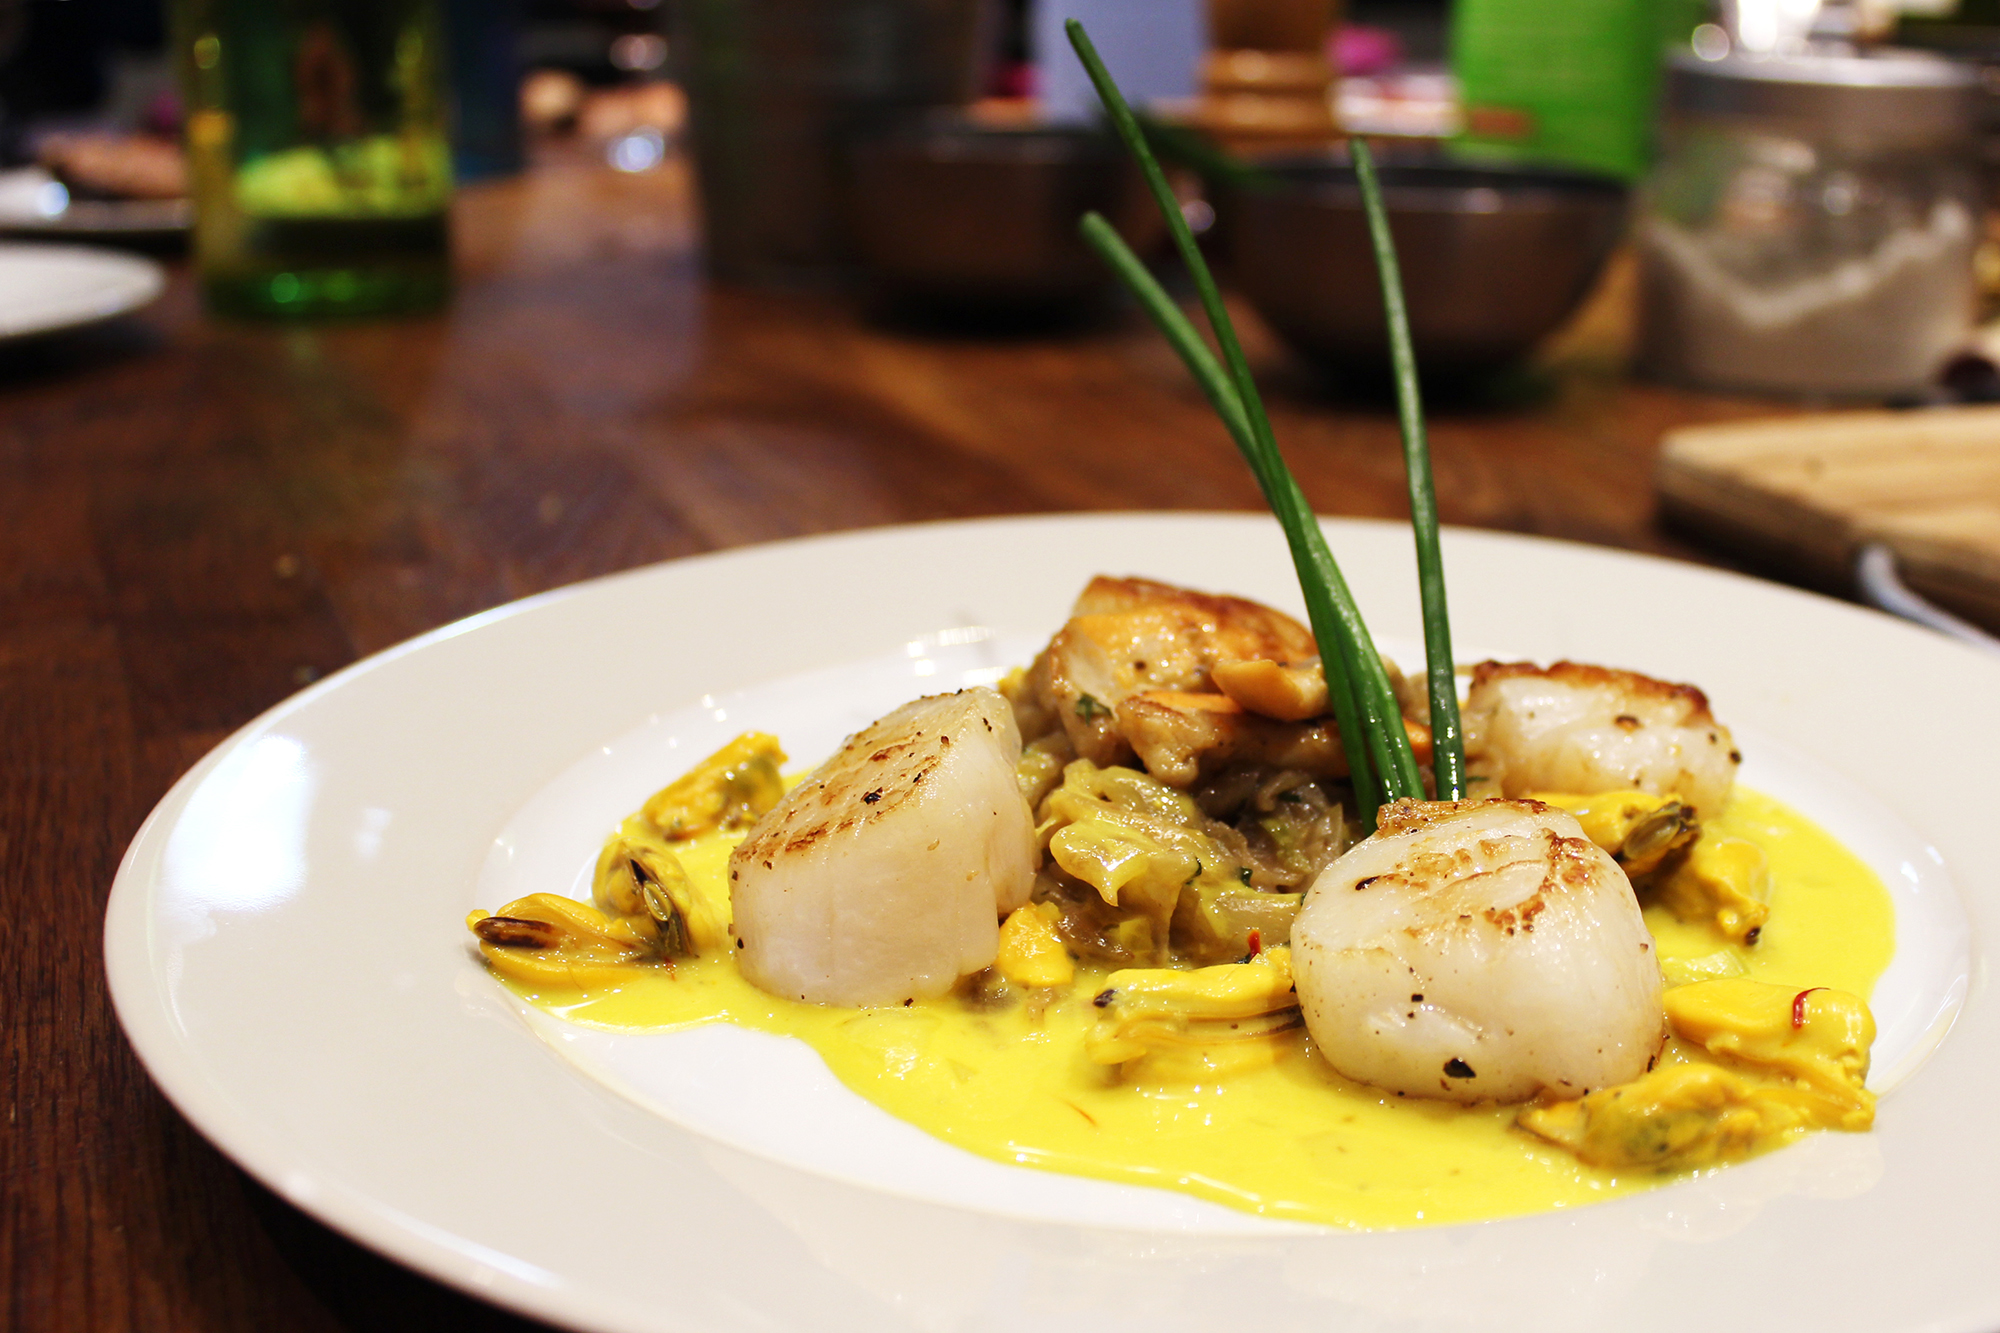
The first course: mussels and scallops in saffron sauce on a bed of caramelized fennel:

mussels and scallops
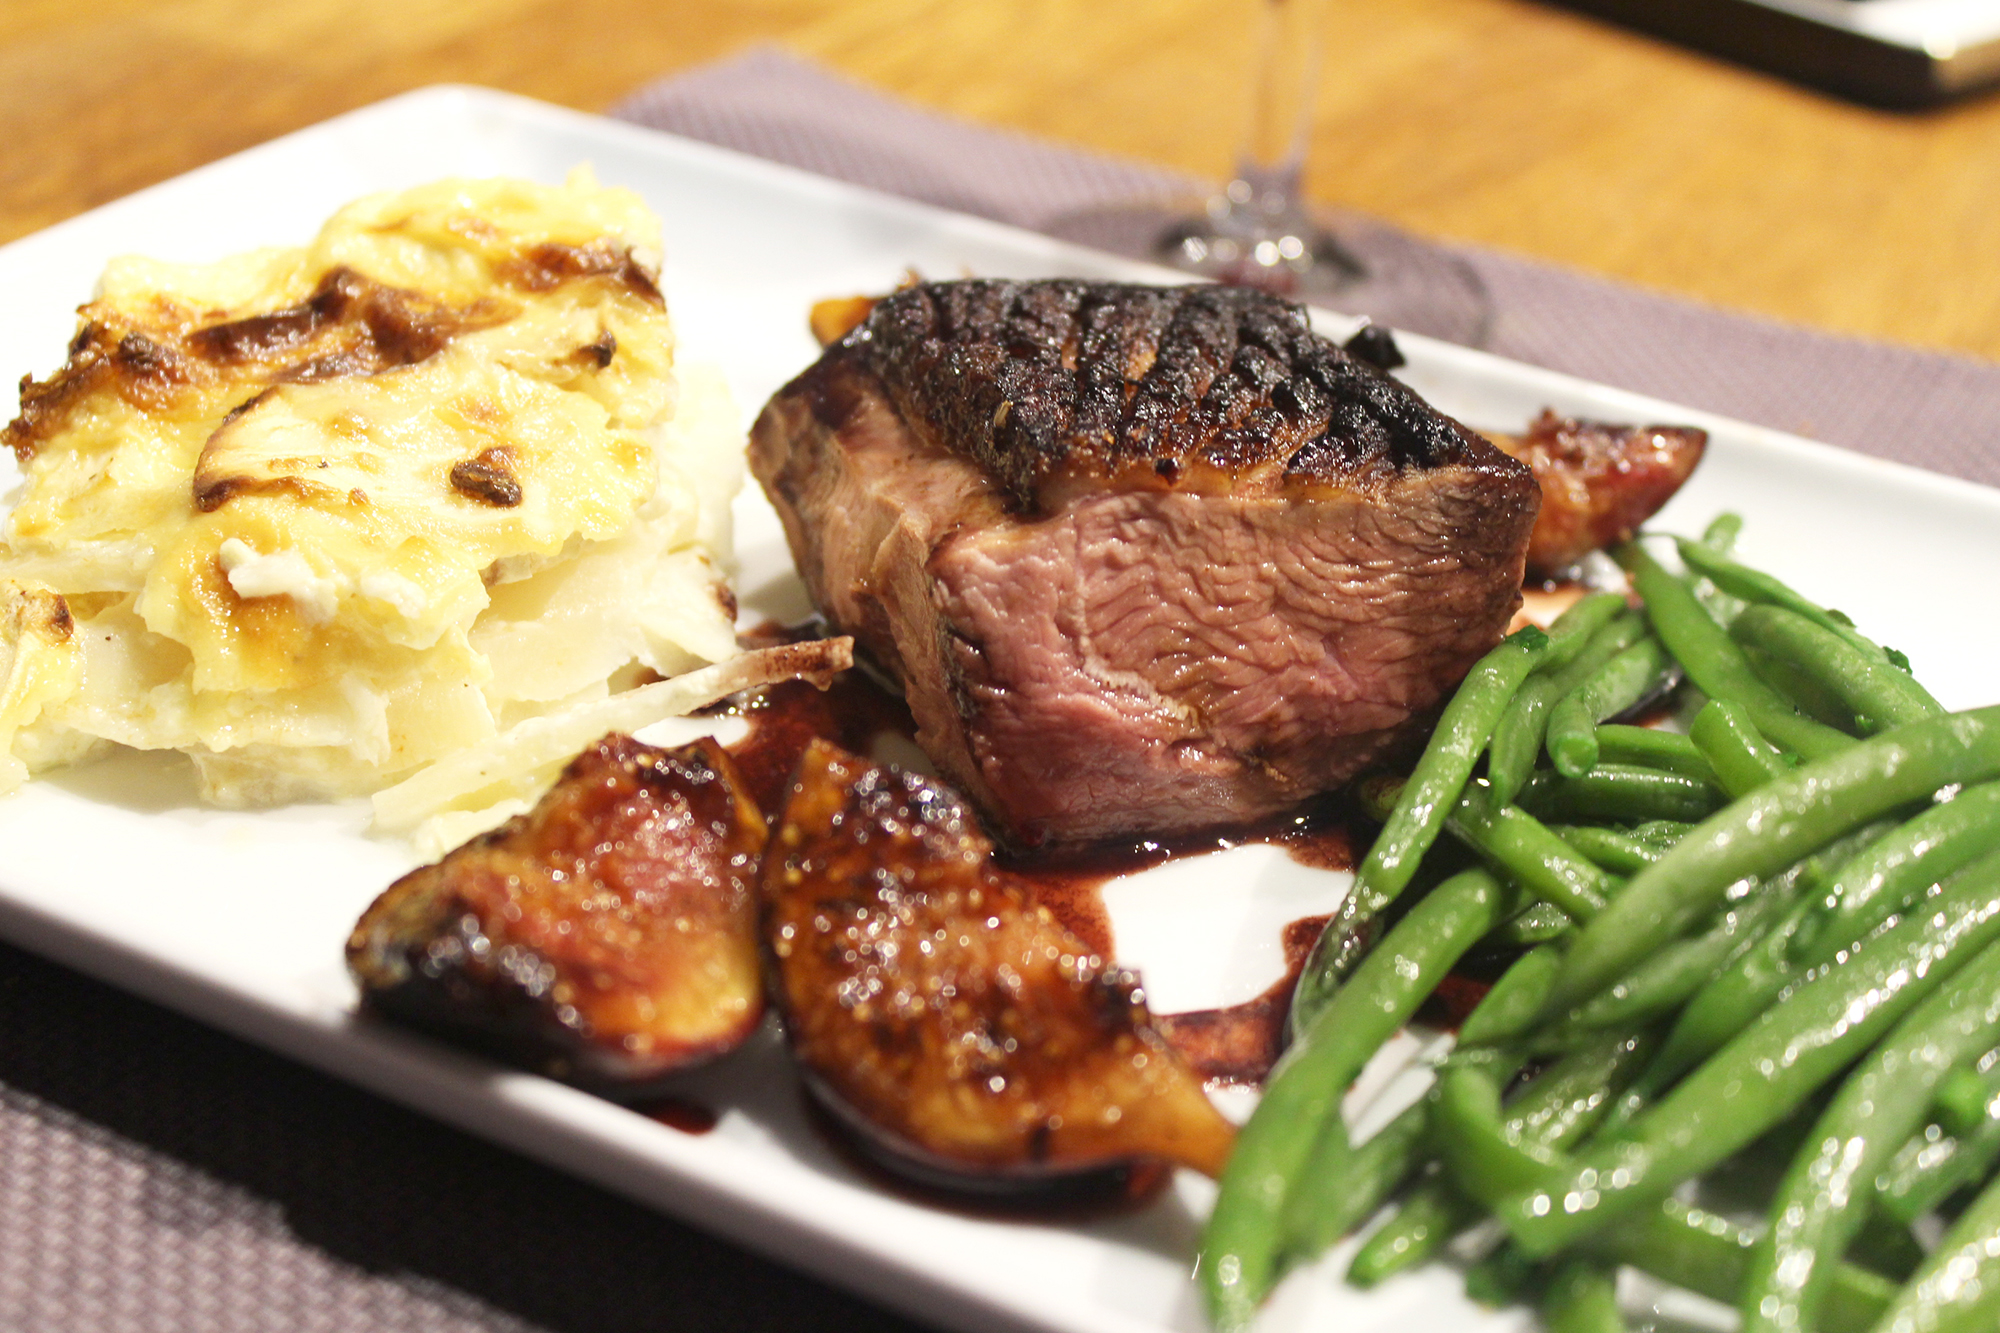
The main course: duck magret served with figs sautéed in butter and port, haricots vert, and celeriac au gratin:

dinner is served
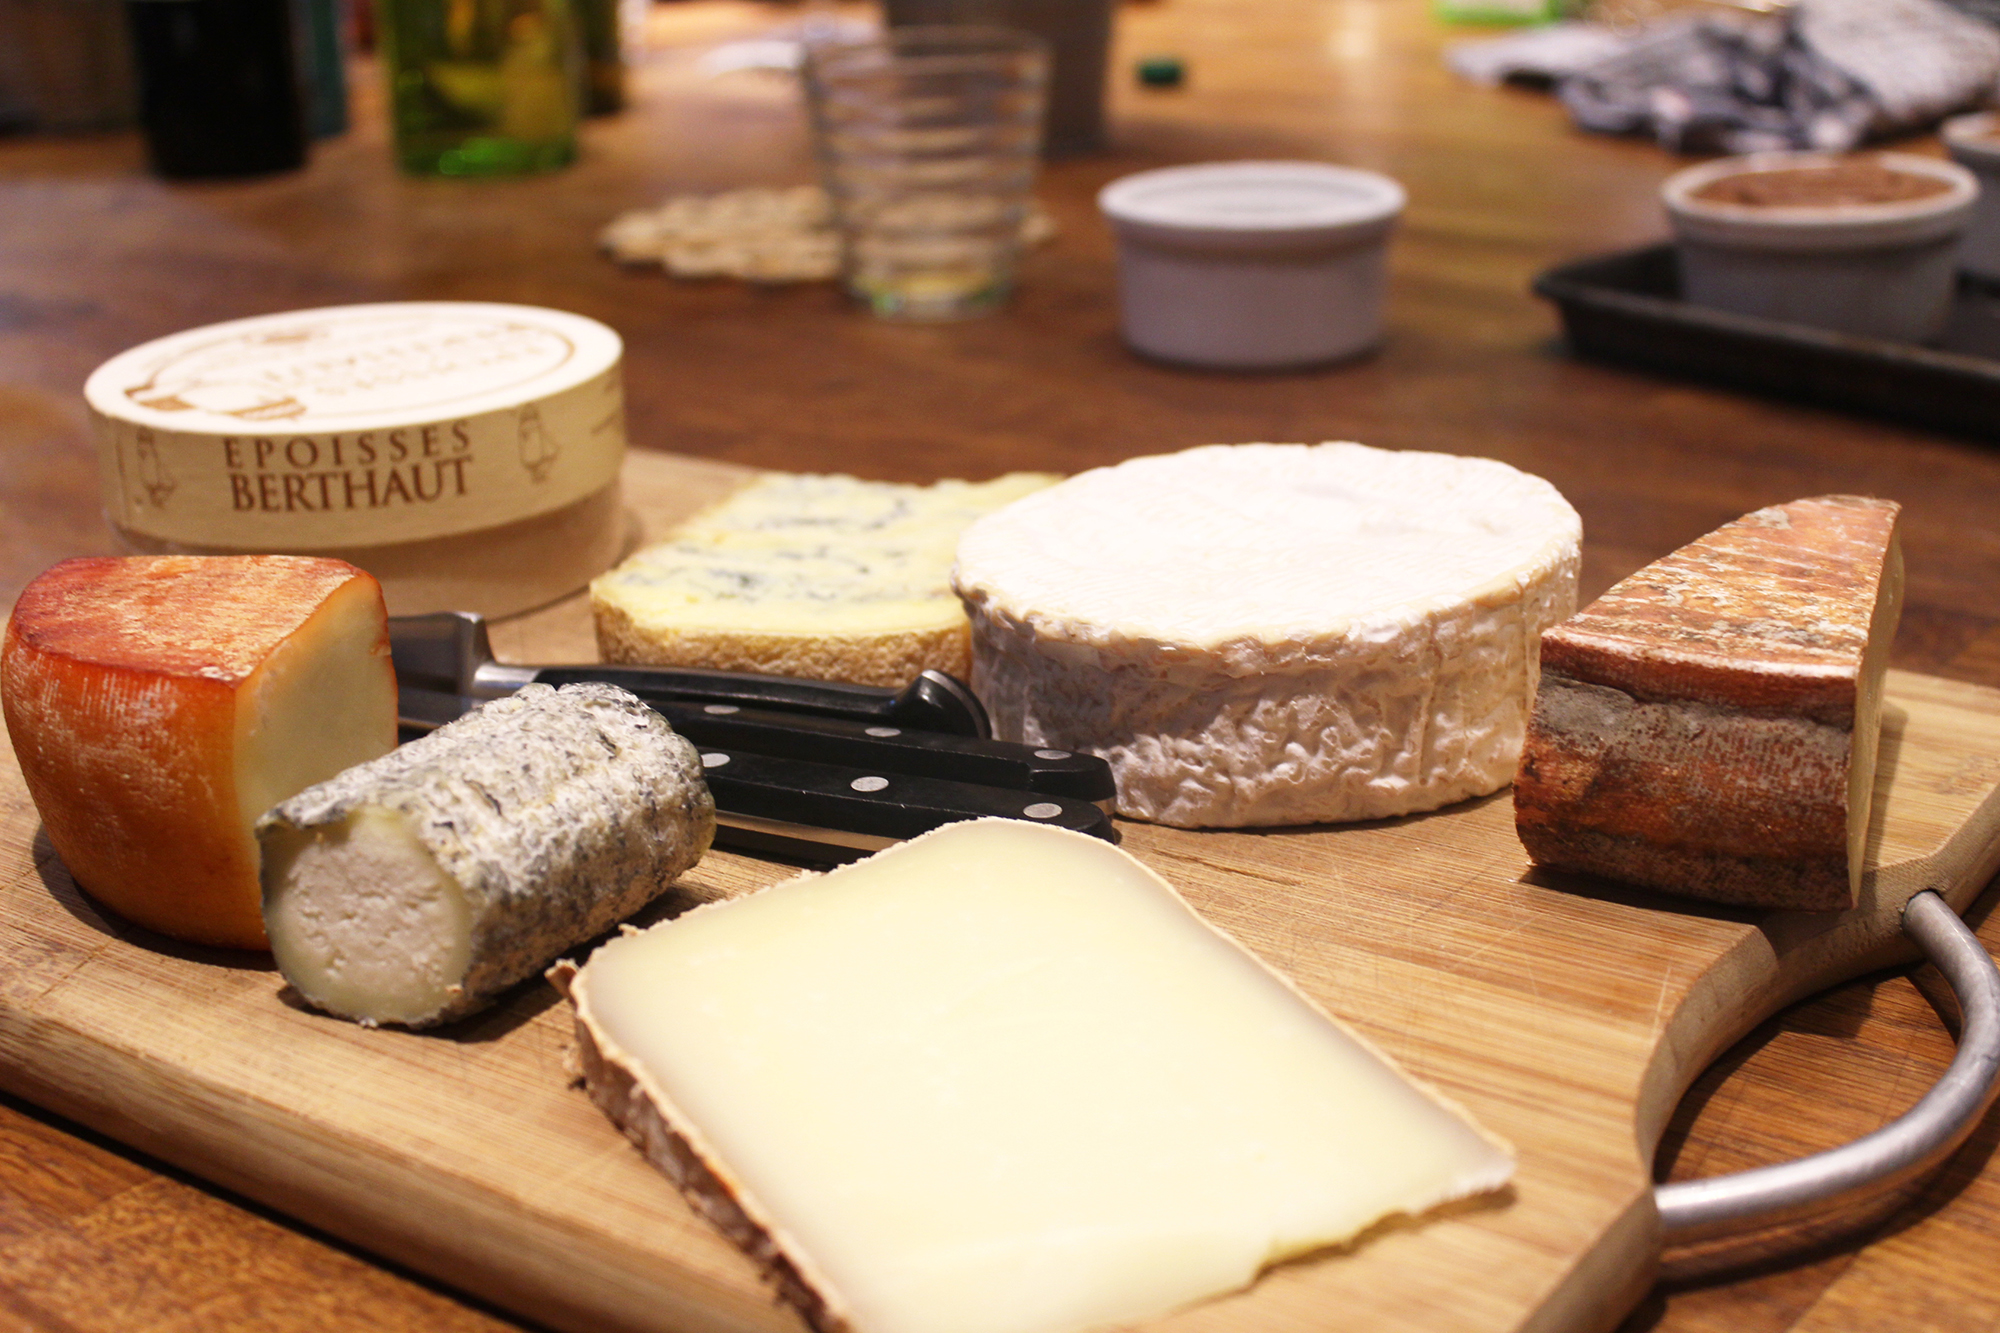
While the chocolate soufflé was in the oven, we enjoyed a cheese course:

cheese tray 1
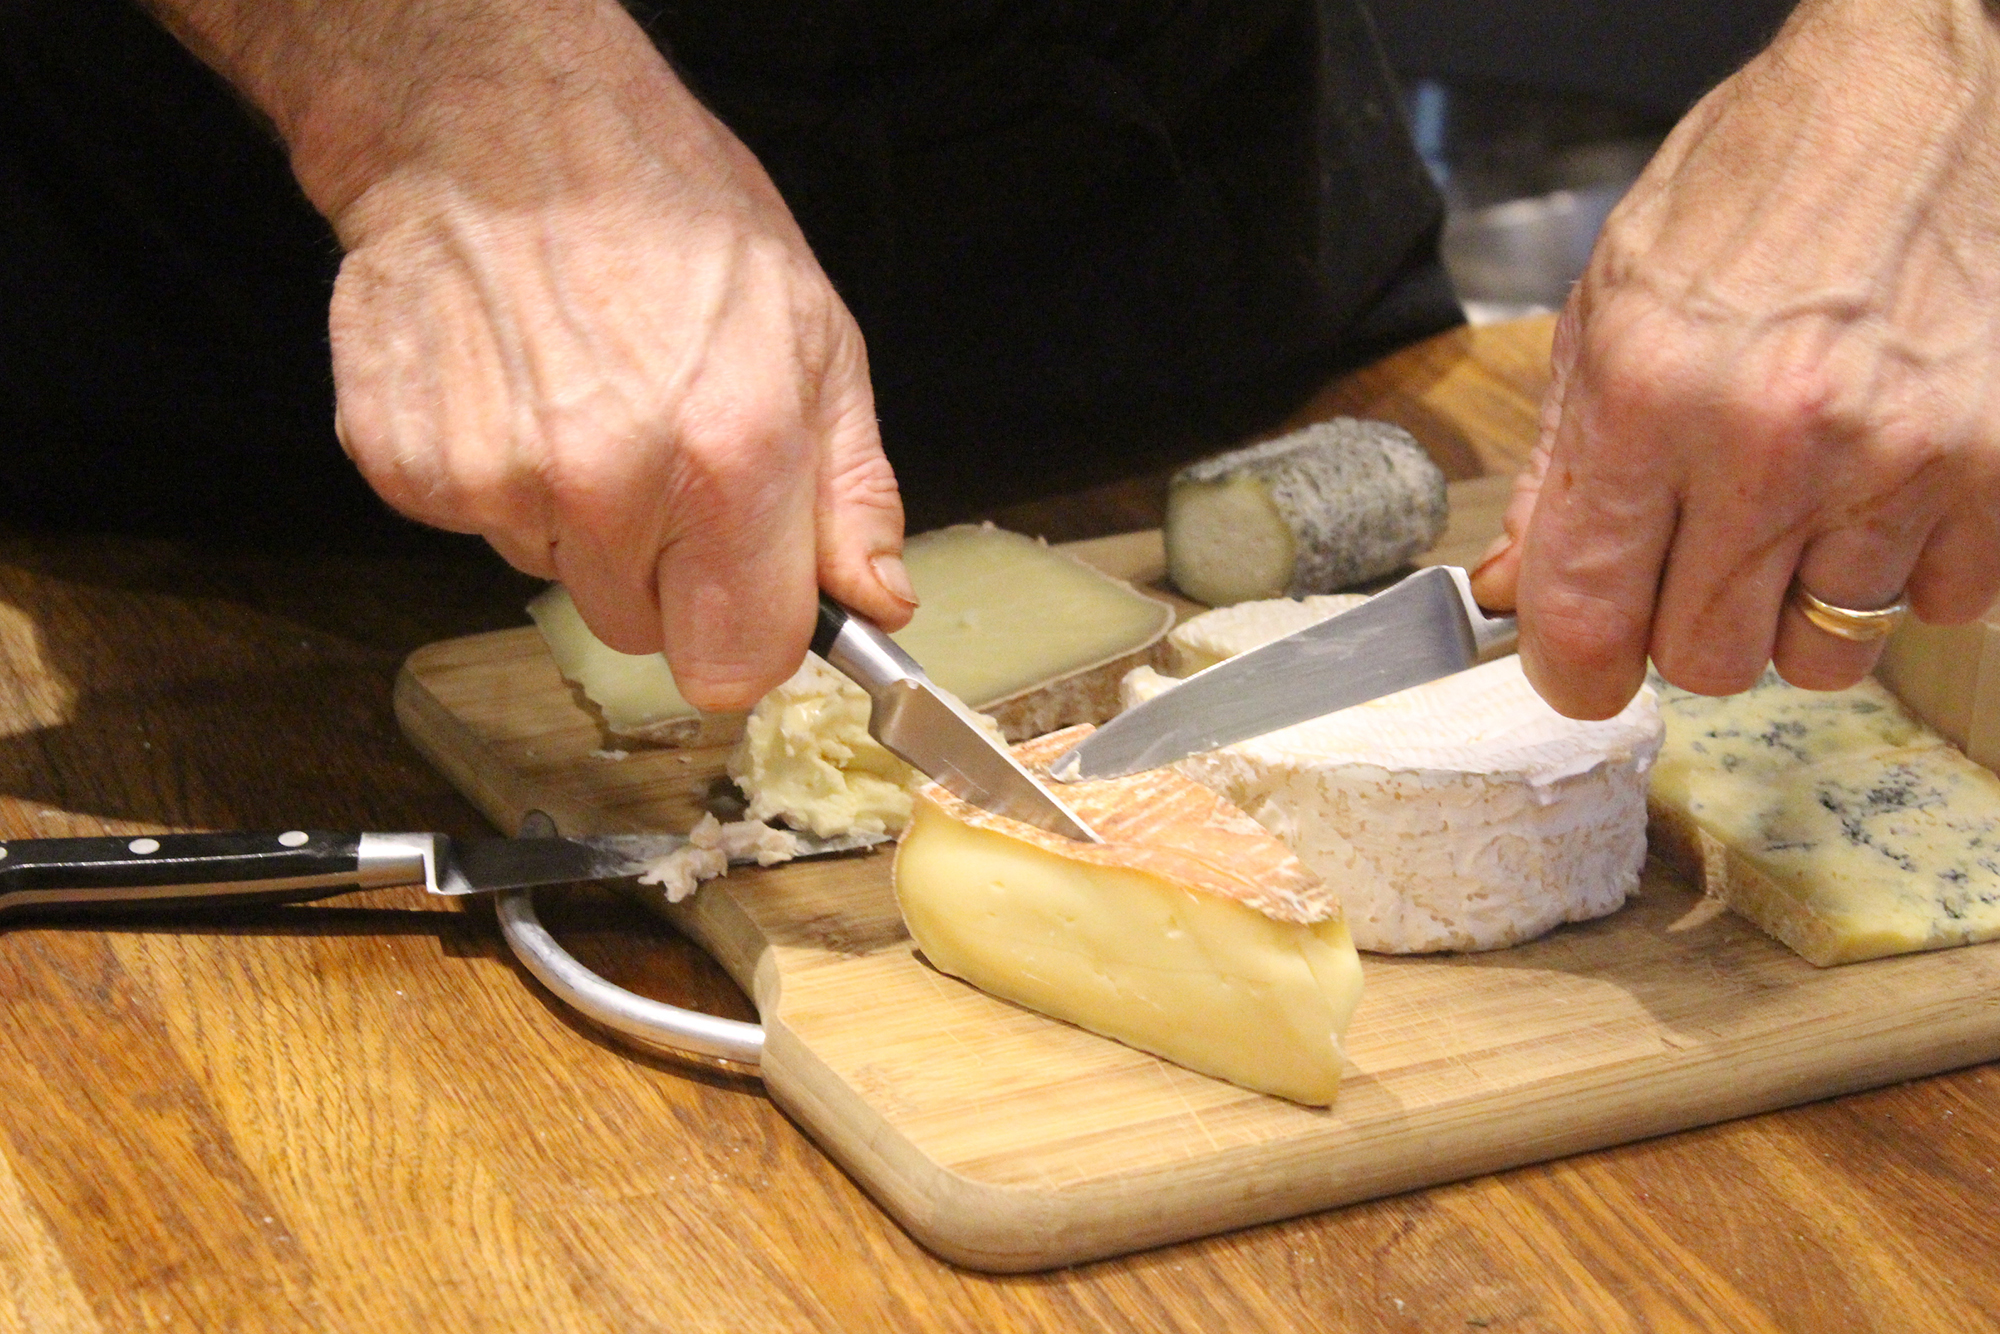
Chef Patrick showed us how to slice the variously shaped cheeses so that the last person wasn’t left with all the rind:

serving cheese
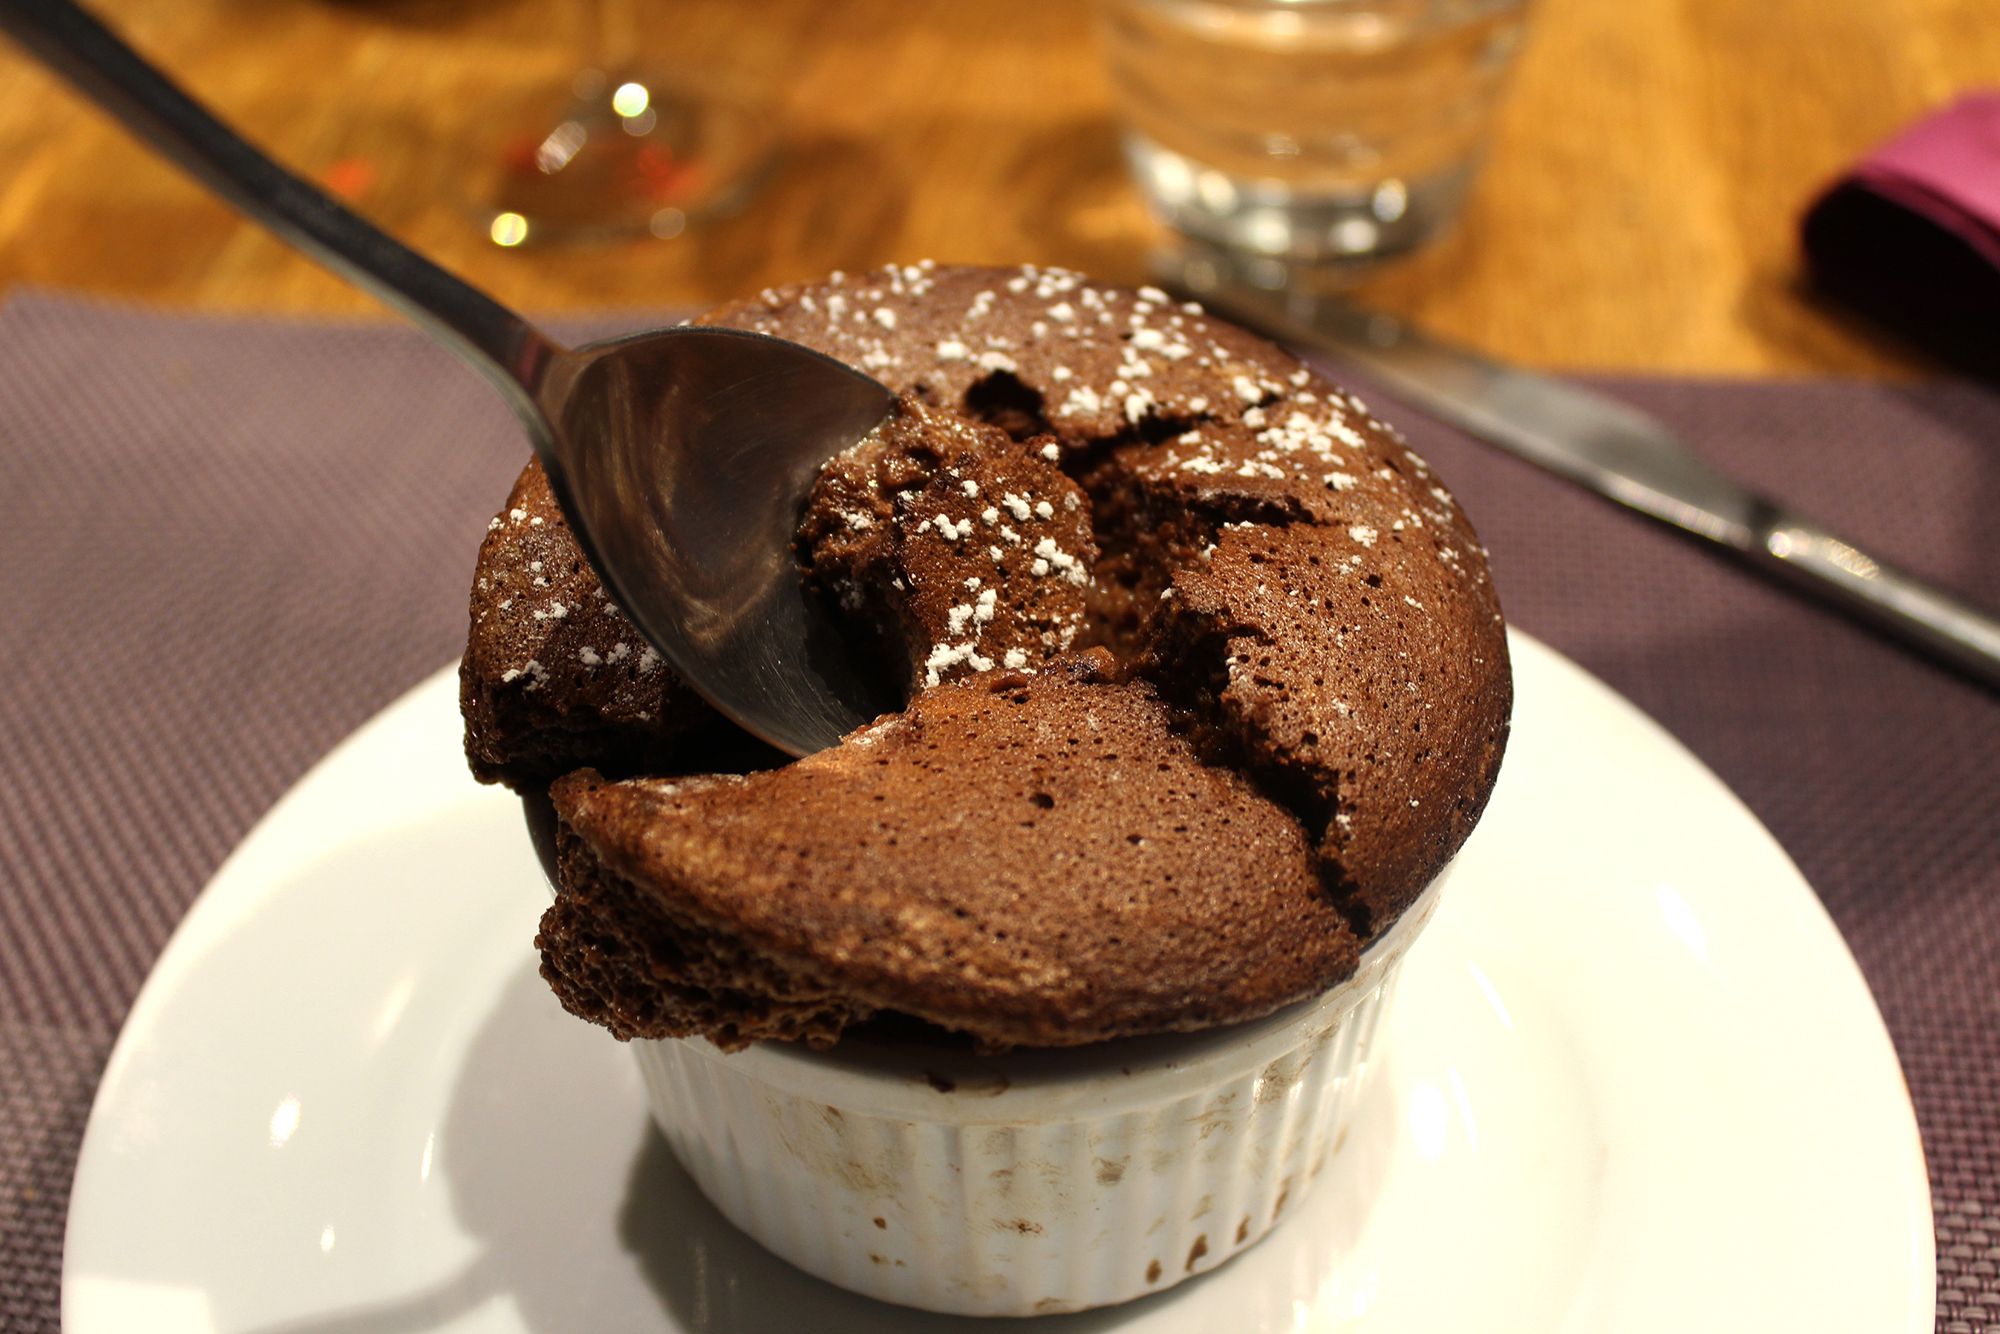
Now, ready for dessert. Ah, the first bite of chocolate soufflé:

chocolate souffle

Délicieuse!

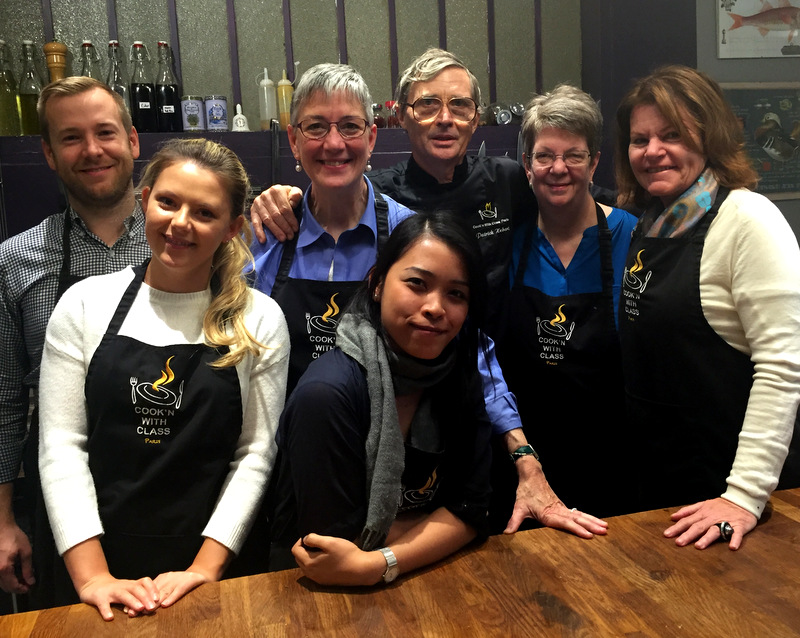
Here we are at the end of the day with Chef Patrick:

chef patrick and his students
Don’t we look well fed and contented?


Posted in family, Paris, update | 11 Comments

Time for a Tablecloth

For the last decade or so, my husband and I have spent Thanksgiving week in Atlanta with my twin sister Diane and her husband Ed. Three years ago I arrived at her home with a gift of these table napkins, made from a fabric called Heavenly Peace by Verna Mosquera for Free Spirit Fabrics:

A Dozen Table Napkins for Diane

Diane loved the fabric, and I promised to make a matching tablecloth. After three years, isn’t it about time?

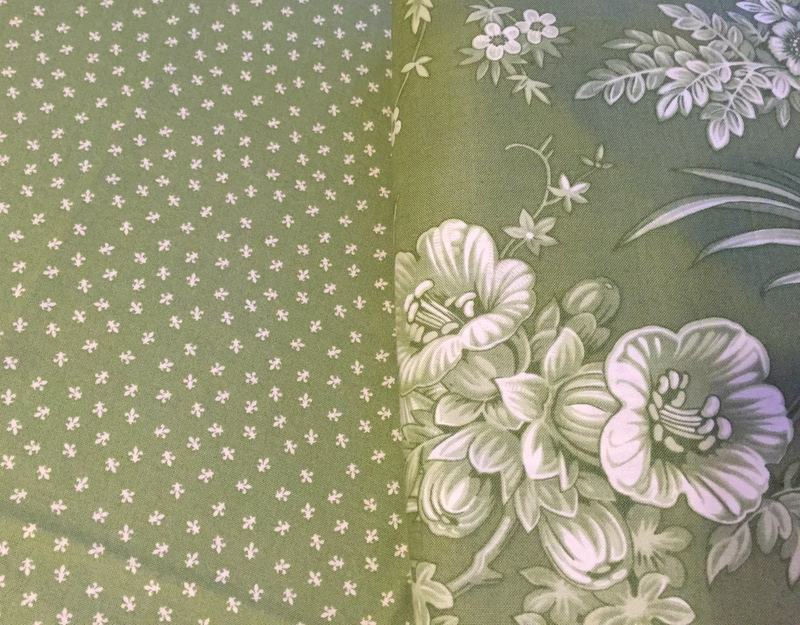
Since I like to work on a home dec project when I’m at Diane’s, I brought all the yardage I had left — which was considerable — along with a piece of fabric (from the American Jane line designed by Sandy Klop for Moda Fabrics) that was a perfect color match:

tablecloth fabrics 1-001

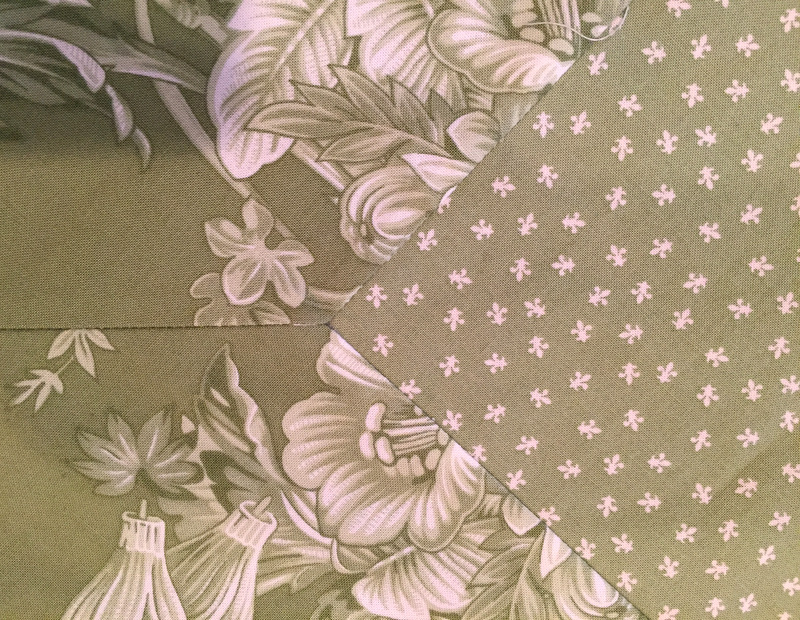
Diane and I worked out a simple design that would feature the fleur de lis fabric on the table surface. A few inches of the large floral print would also show on the table and continue down to a generous drop. I wanted to miter the corners and continue the miter around to the back so the stitching lines would be covered. That way no raw edges would be exposed.

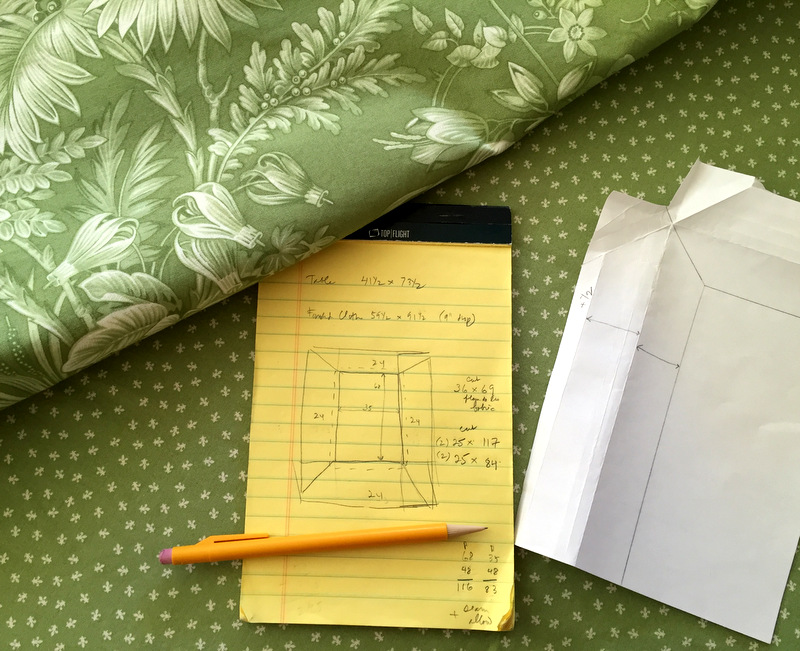
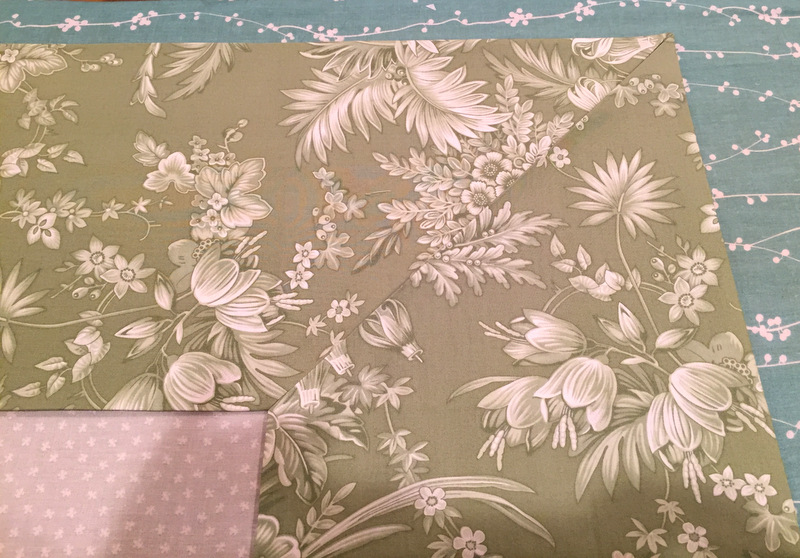
I did the math (or so I thought) and created a little paper pattern to guide me in the preparation of the miters:

tablecloth fabric

Well, friends, it would have taken 11 yards of the floral fabric to make the tablecloth the way I originally envisioned it. That’s because I was going to cut a 25″ strip and needed 398″ inches. The modified plan used half that because I cut the fabric along the fold, getting two strips from a width of fabric instead of one. (I wish I could tell you I figured that out before cutting the first 25″ strip.)

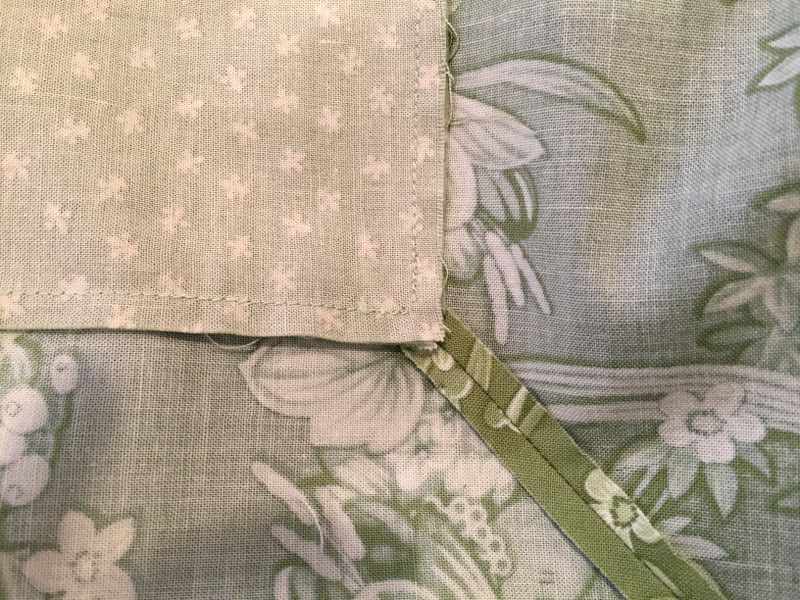
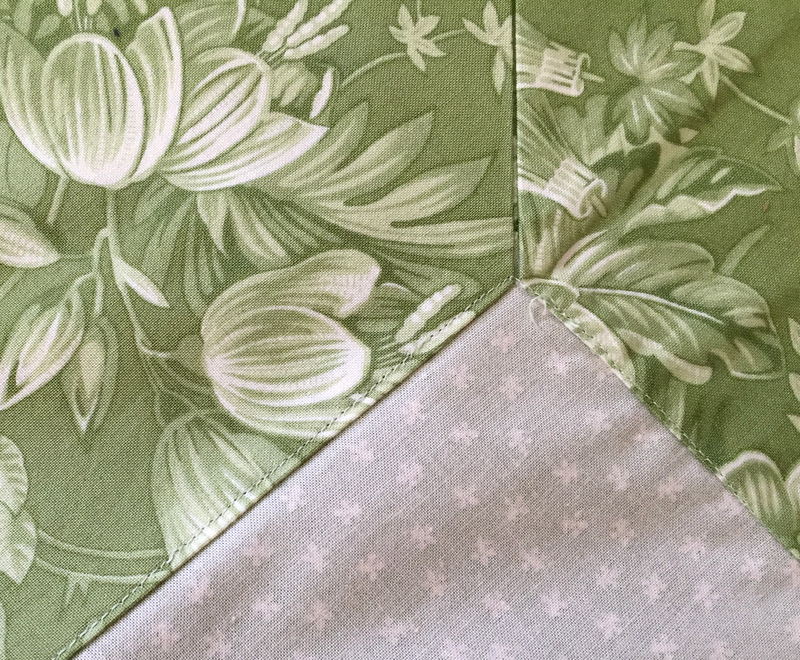
The mitered corners came together nicely. Here is a shot from the back . . .

tablecloth mitered corner from back

. . . and from the front:

tablecloth mitered corner from front

On the back, where the folded edges of the miter meet, I used Steam-a-Seam 2, a double-sided fusible web, to fuse the folded edges together:

tcloth with fused miter


From the front, I stitched in the ditch where the two fabrics meet. The stitching line caught the folded edge of the miter on the back:

tablecloth stitched in ditch

Here is Diane’s new tablecloth in place:

tablecloth

And here is the table set with a matching napkin:

tablecloth with setting

Diane and I both declared ourselves very pleased with the result. An added bonus: the fleur de lis motif is a lovely reminder of our recent big birthday trip to Paris.


Posted in home dec, mitered corners, table napkins, update | 9 Comments

A Fast Finish

big leaf, nov 2015
Dawn’s New Big Leaf, 24½” Square (2015)

Under two weeks, from start to finish. That must be a record for me, as I am more like the hare than the rabbit. Granted, my New Big Leaf is a small project — but hey, every finish counts, right?

I started this on Oct. 28 in a workshop with Pat Pauly, a renowned fiber artist from New York who came to Portland to teach her “New Big Leaf” design using freezer paper templates. A week later my top was pieced. Now on to the quilting.

This is the point at which my projects usually get tucked away. Like so many other quiltmakers, the actual quilting is my least favorite part. It is oh so easy to procrastinate. This time I vowed not to do that. I geared up to tackle not only this new project but also the table runner of my own design that I had put aside eight months ago. (I quilted that one first and wrote about it in my last post.)

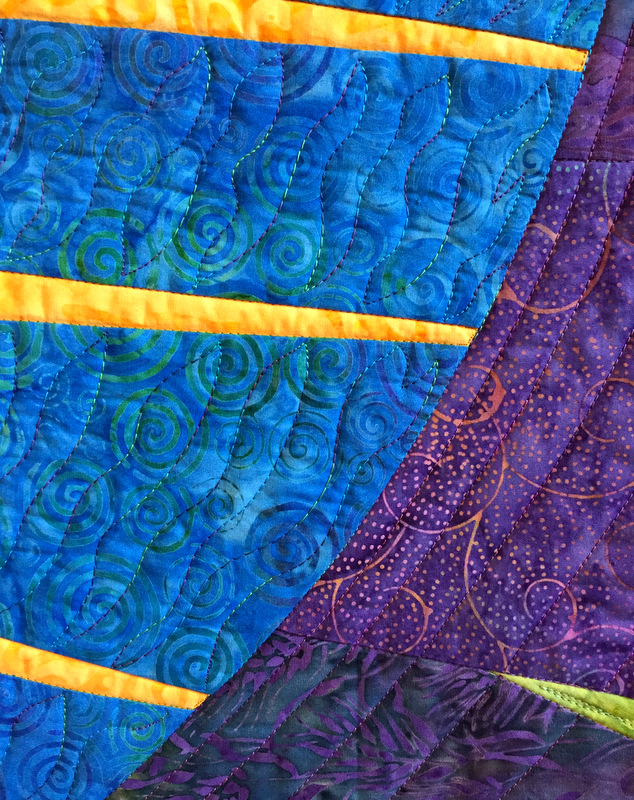
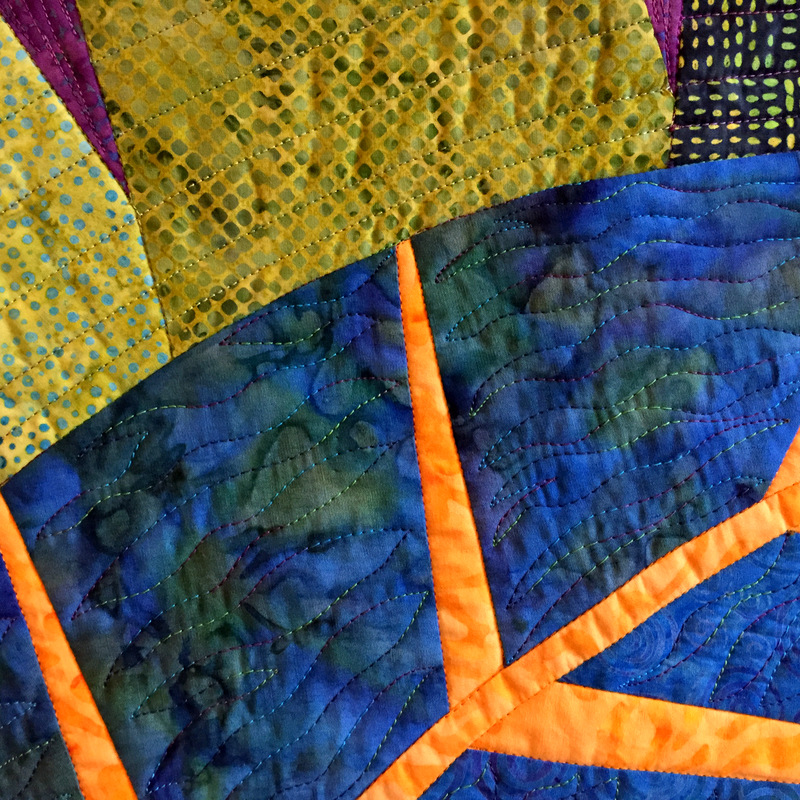
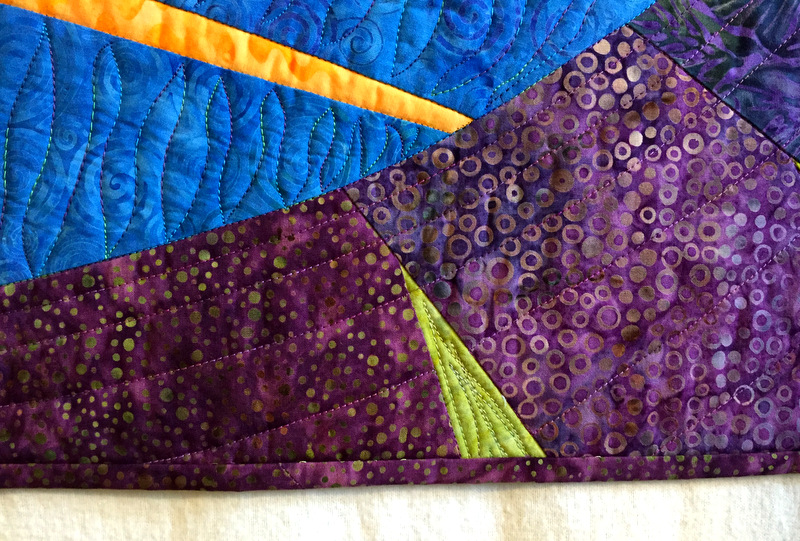
After pin pasting my New Big Leaf, I stitched in all the ditches. That enabled me to remove the safety pins for the rest of the quilting: free motion quilting in the blue parts of the leaf and gentle curves around the leaf using my walking foot. A few close-ups:

big leaf, quilting detail 1

big leaf, quilting detail 3 
big leaf, quilting detail 2
I used variegated threads that blend with the background, the goal being to add texture without adding color.

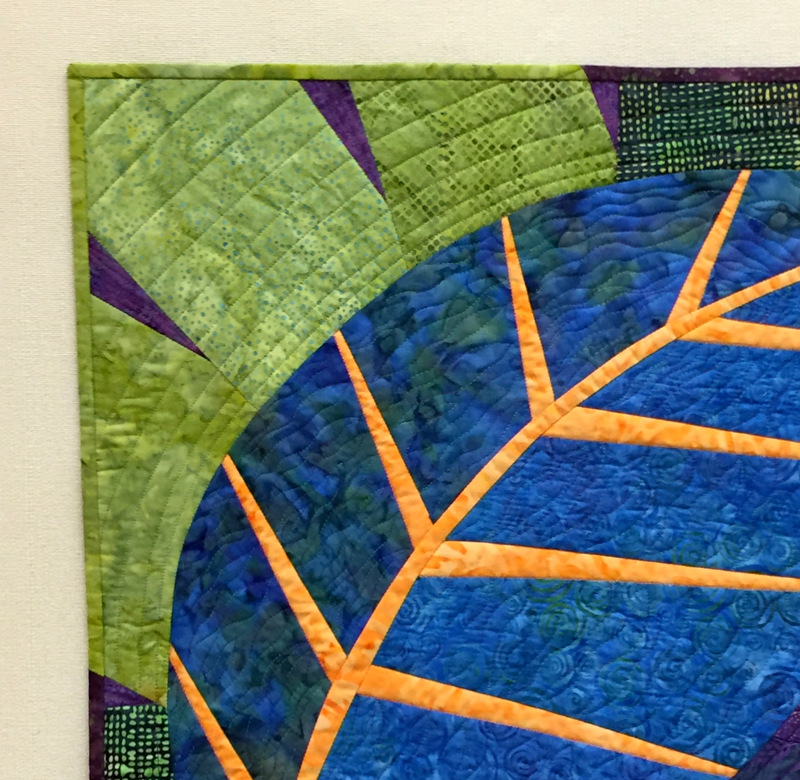
When it came to the binding, I didn’t want it to provide a frame around the leaf. I wanted the greens and purples to flow right into the binding. The solution: two fabrics in the binding. Here you can see where the green binding changes to purple on both sides of the upper left corner:

big leaf upper left corner

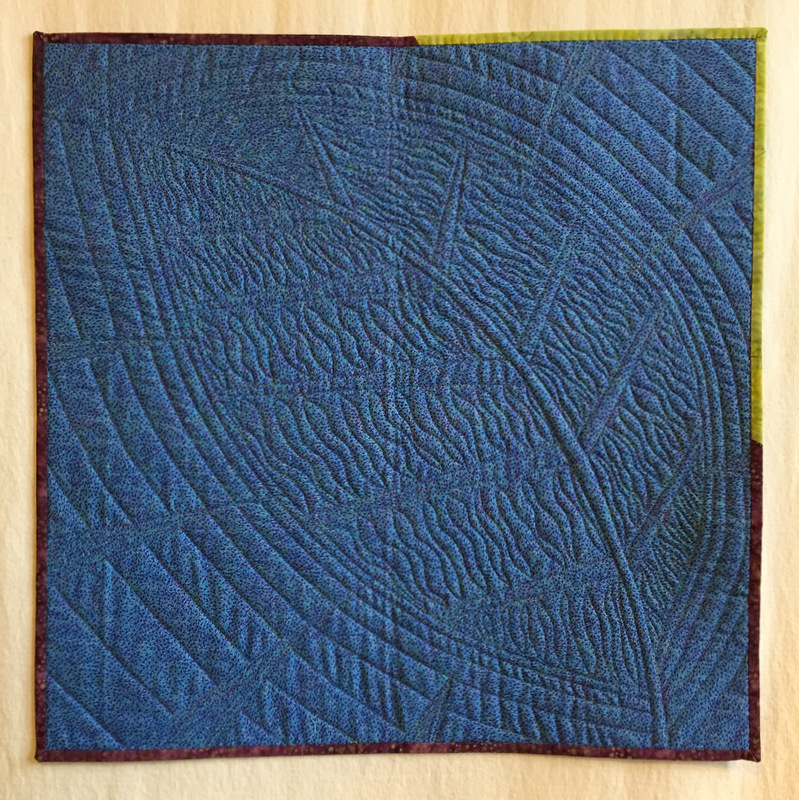
The back of the quilt is one piece of fabric (a departure for me). Although I used four different threads on the front of the quilt, I used the same purply-blue variegated thread in the bobbin so there’s just one thread on the back. The plan was for the thread to blend in completely on the backing fabric. That it did, but it also provided an outline of the leaf that both surprised and pleased me:

back of new big leaf
I finished hand stitching the binding Tuesday morning, 13 days from the day of Pat Pauly’s workshop. What a triumph!

Oops, not so fast. Now comes the confession: my project is not truly finished. Did you notice? No label on the back yet. And no name, for that matter. I was so eager to show it to you that I fudged a bit on my pronouncement that it was done.

I am still musing on a name. As for the label, I’m thinking about making one in the shape of a leaf, using the freezer paper technique I learned from Pat. Wouldn’t that be a fun touch?


Posted in free motion quilting, New Big Leaf, update | 6 Comments