. . . or perhaps I should say “My Next Quilt Finish.” Today I pulled a UFO out of my sewing room closet that’s been waiting in the wings for — oh, the last six years (!) and put a border on it:
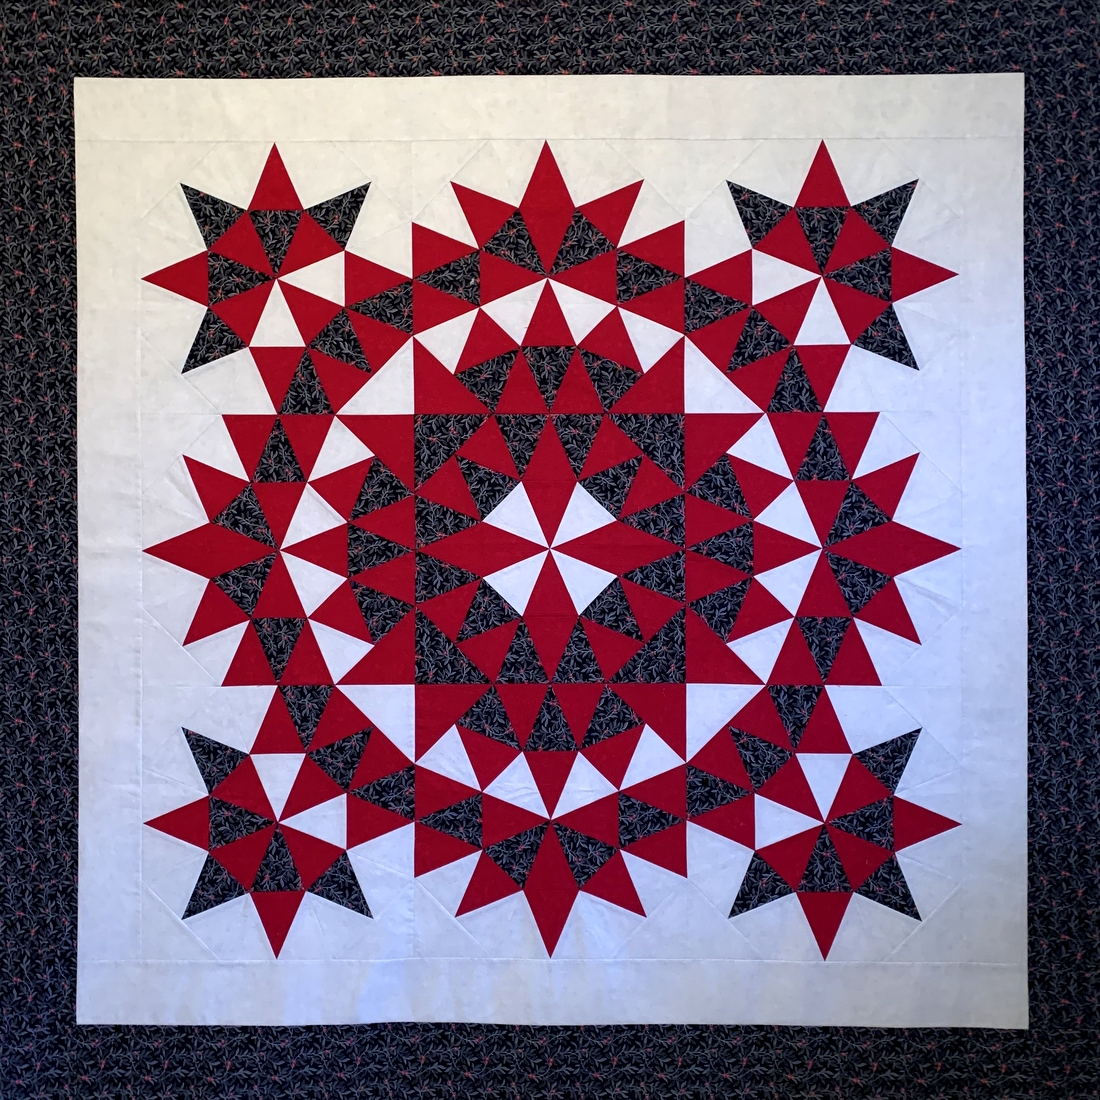
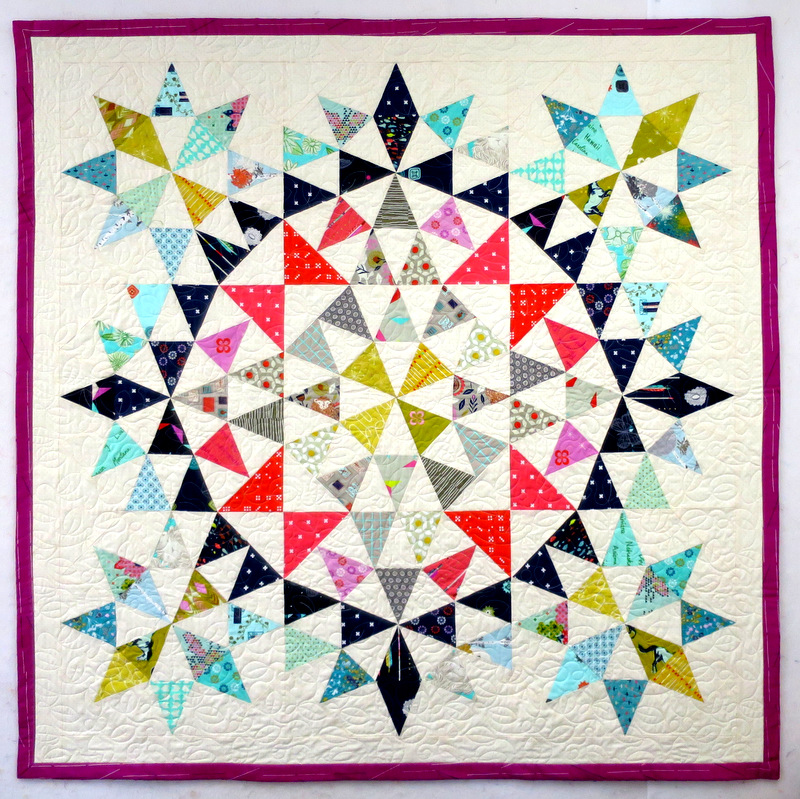
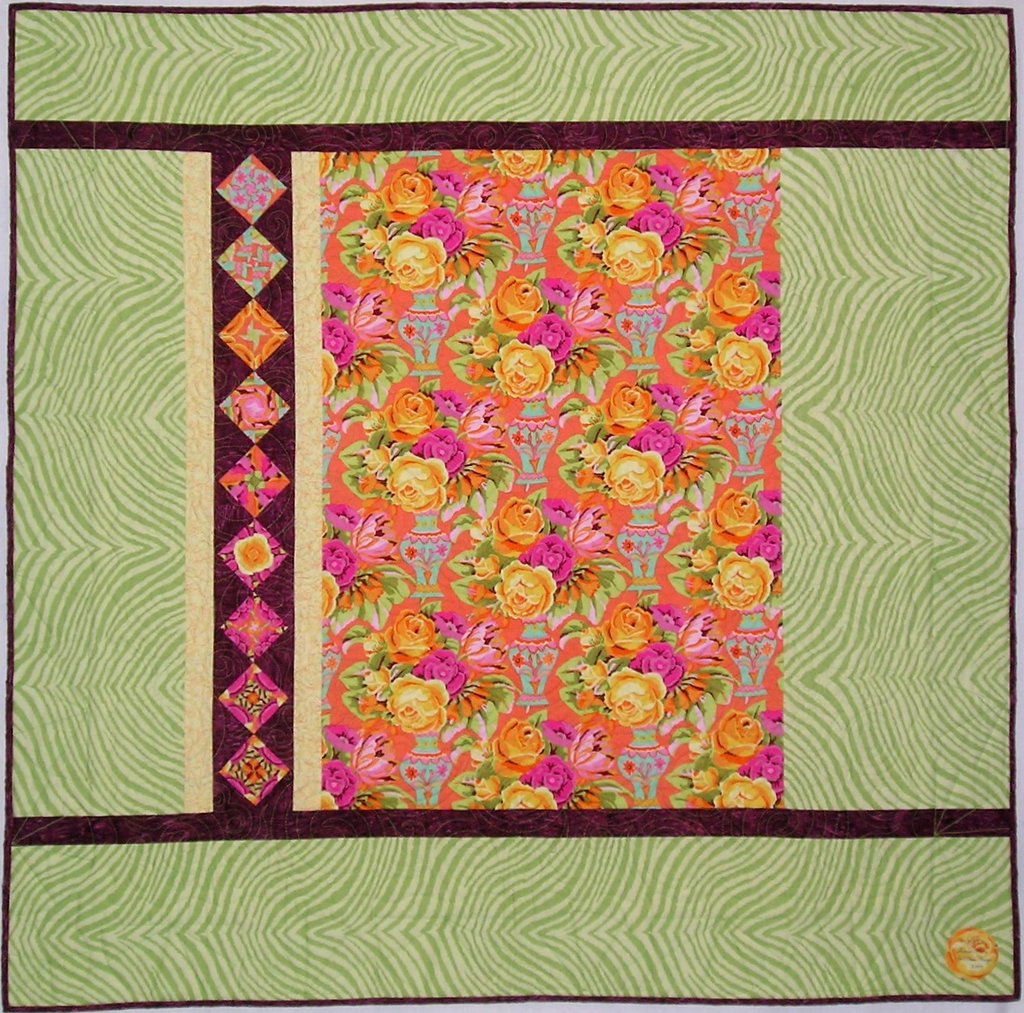
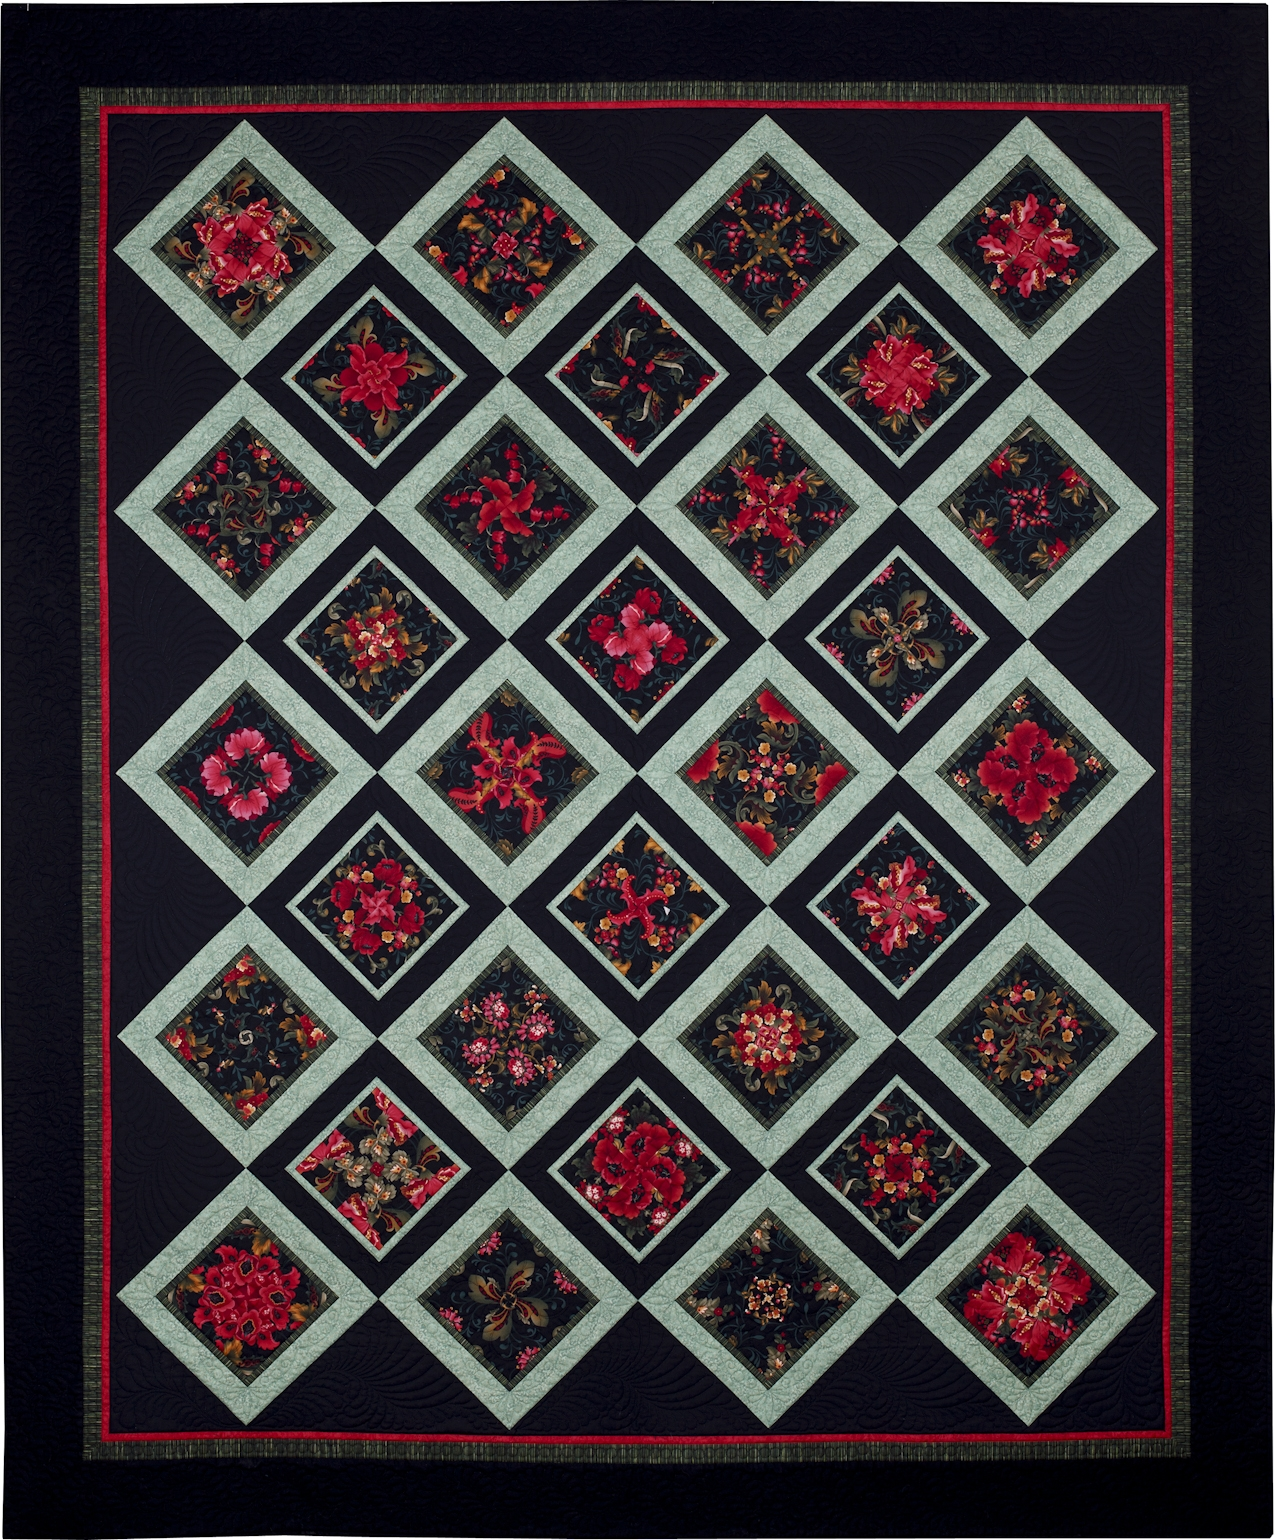
This Unfinished Object dates back to 2015, when I took a class from Joyce Gieszler on Grandma’s Surprise, the quilt pattern featured in her book Then and Now Quilts(Kansas City Star Quilts, 2014). In 2015 Joyce’s colorful version using cotton+steel fabrics had set Pinterest ablaze . . .
. . . but it was her three-color version shown on the right that I had fallen for:
Her class was great fun and I made my top pretty quickly, eking out a border of the background fabric with just enough left over to cut binding strips so the image would float. The quilt top finished at 57″ square. Because I like to piece my quilt backs, I put the project on the back burner while waiting for inspiration to strike.
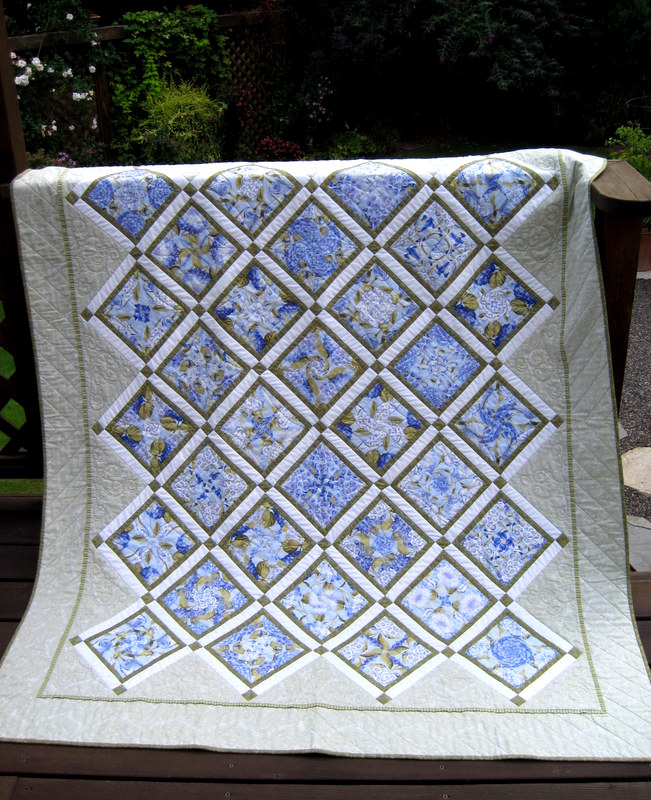
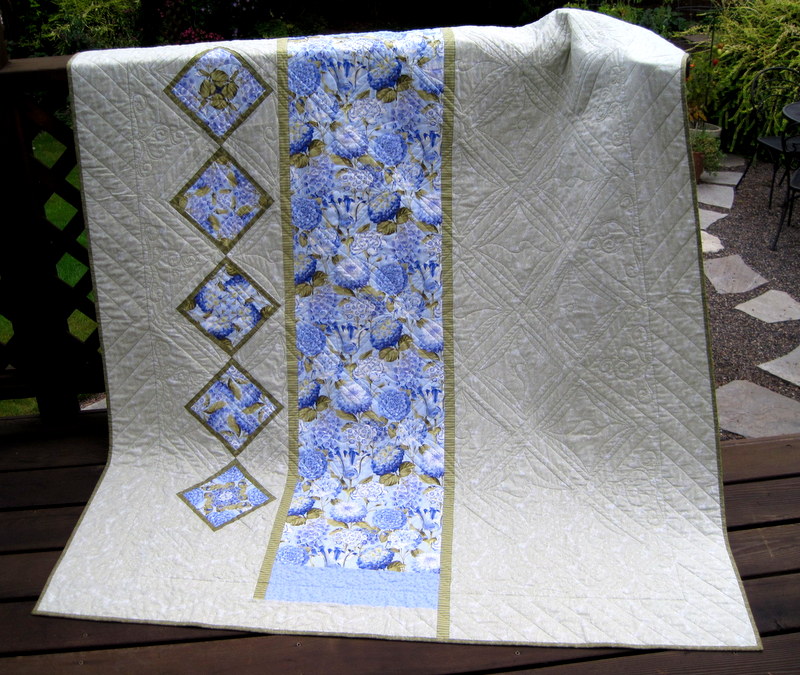
Well, you know what they say: time marches on for all of us. Suddenly, 2021 was well underway and I had never gotten around to the backing. Today, when I pulled the quilt top out to take a look, I decided I wanted it to be a bit larger and added a border of the black leafy print. Now it measures 66″ square, a really nice size for a throw or lap quilt.
And the backing? Some time ago I had purchased a piece of 118″ wide backing fabric in a pale grey leafy print. In the spirit of “get ‘er done!,” why not forget the pieced backing and just make a backing out of one piece? I got ready to cut the 74″ square I needed for the backing — longarmers like the backing to be 4″ larger on all sides — and then discovered a 3″ tear in a spot which made it impossible to cut the backing from one piece.
Boohoo!
It looks like a pieced backing is in the cards after all.
Who knew that playing around with computer-generated quilt labels could be so much fun? Well, not everyone’s kind of fun, I suppose. But I was delighted to learn from comments on my last post that my accidental method of making labels with fusible-backed fabric worked for other quilters using different fusibles and printing their labels on different computers. As promised, I will work on a tutorial for my website to show the method step by step.
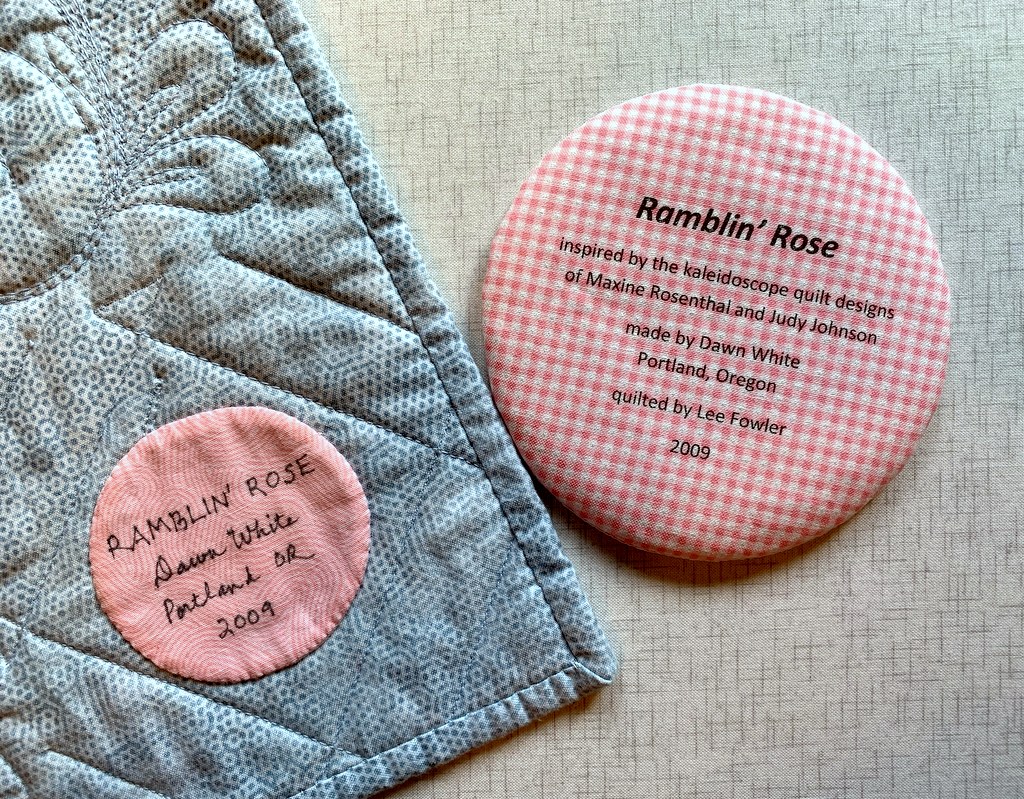
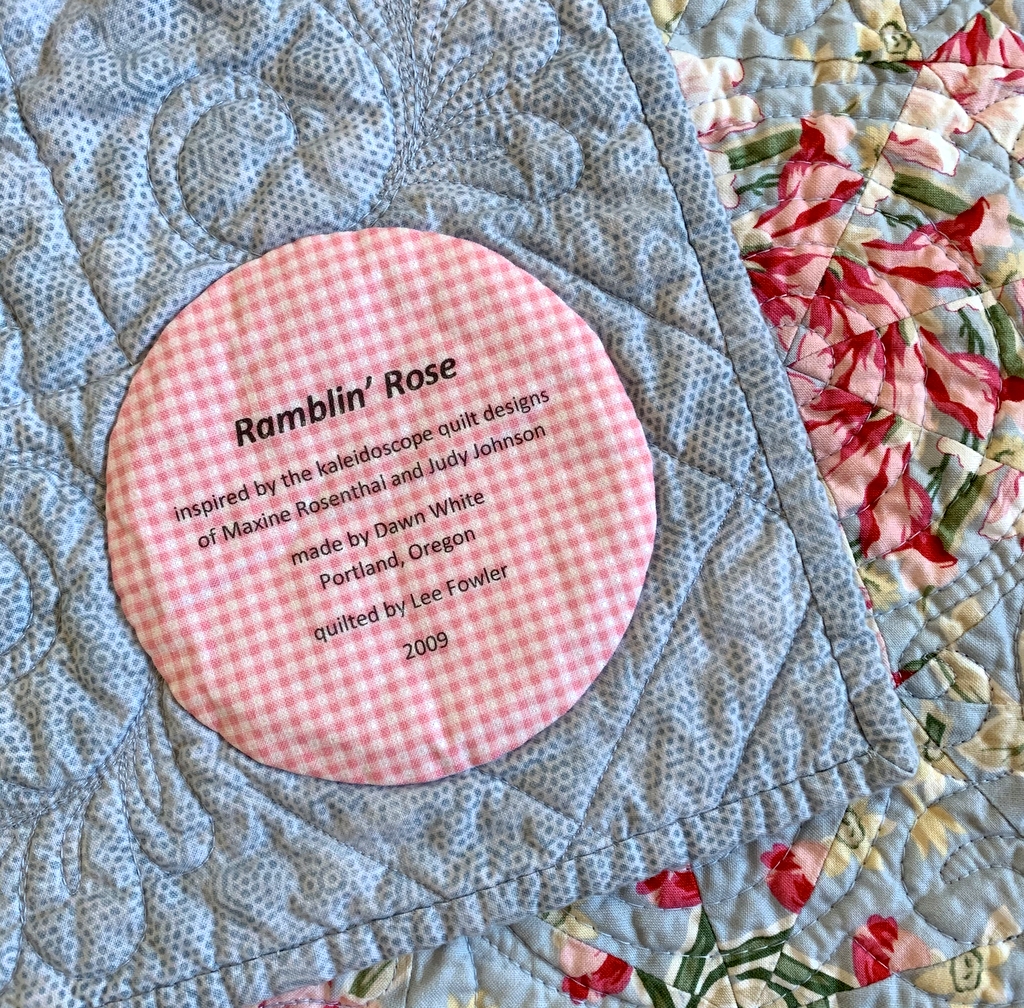
One quilter, Marge, noted that she starches her label fabric and sends it right through the printer. No interfacing, just one layer of fabric. Of course I had to try it! I decided to make a new label for Ramblin’ Rose, another kaleiodoscope quilt from 2009 that needed more information:
Ramblin’ Rose, 53″ x 59″ (2009)
I’m happy to report that Marge’s method worked beautifully. Marge did say she “starches the heck” out of her fabric so I made sure I did too. As a matter of fact, I spent more time starching the fabric than I would have just fusing interfacing to fabric. You really have to iron the fabric after each application of starch until it’s completely dry. The weight and feel of the “page” of starched fabric felt almost identical to the fused layer I experimented with earlier.
Unfortunately, when I printed my starched page I realized that the top line of the label was too close to the top of the page, not allowing enough room to draw around a compact disc for my preferred round label. I had to prepare a new one. Instead of starching a new piece of fabric, I went back to my method of fusing interfacing to the label fabric.
Here’s the old label still on the quilt and the one I just made:
In my last post I described how I used a piece of quilter’s cotton for the back of my label. My friend Arden suggested I try using fusible interfacing instead. That’s what I use for my label backing when I make hand printed labels. With those I have only two layers: the label fabric and the interfacing used for the backing instead of fabric. With a computer-generated label, though, I have three layers: the label fabric fused with interfacing and the second piece of interfacing used as the label backing. Would two layers of interfacing plus the label fabric make the finished label too stiff, I wondered?
Worth a try. Yes, the label did feel a little stiff and I found it very challenging pushing the needle through the layers when I hand appliquéd the label in place. I’m wondering if washing the quilt would soften the label a bit. Ramblin’ Rose has been displayed on a quilt rack in my sewing room for over a decade so it could probably use a trip to the laundry room. I’ll toss it in the washer and dryer and report back.
By the way, here’s a look at the back of Ramblin’ Rose (with the old label still in place — and the hanging sleeve so it could hang in a quilt show):
Update
Ramblin’ Rose has made her trip through the washer and dryer, and I’m delighted to report the label turned out beautifully: it has body but is still supple like the rest of the quilt:
A quilt I made over 10 years ago has an updated label, thanks to a mistake I made the other day creating a computer-generated label for my latest quilt, Uptown Funk. The label pictured above is the fourth one I’ve made using my computer and inkjet printer — and I may never go back to printing them by hand. (The smaller label on the left is the one I removed from the quilt so I could sew the new one on.)
For the first computer-generated label I made, created last fall for Give me the Simple Life, I followed a tutorial that called for label fabric to be fused to a layer of freezer paper and run through the printer. I had to use two layers of freezer paper before I was successful. Even then, the freezer paper rippled a little bit so it took a couple of tries (i.e. the printer jammed and I had to start over) before I got a label I could use.
On my second label, made for All You Need Is Love, I wanted an extra layer under the label so the print on the backing fabric wouldn’t show through. As an experiment I fused interfacing to the back of my label fabric before pressing it to one layer of freezer paper. There was very little rippling of the freezer paper. It went through the printer easily and I got a useable label on the first try. That in itself was serendipitous. Little did I know there was more serendipity to come!
To make label #3 for Uptown Funk, I decided to follow the second method. Three layers: label fabric, fusible interfacing, freezer paper. I made my preparations and trooped from my sewing room on the second story of our house down to the basement where the computer and printer are. Once there I realized I had only two of my three layers. I had fused the interfacing to the label fabric and trimmed it to size but had forgotten all about the freezer paper.
Arghh!! Did I really want to climb two flights of stairs to my sewing room to complete the freezer paper step? Or should I take a chance and run the fabric through the printer without the freezer paper? The worst that could happen is the printer would jam, right? So I tried it with just the two layers . . . and it worked — beautifully!
Was it just a fluke? Or have I stumbled onto an important discovery?
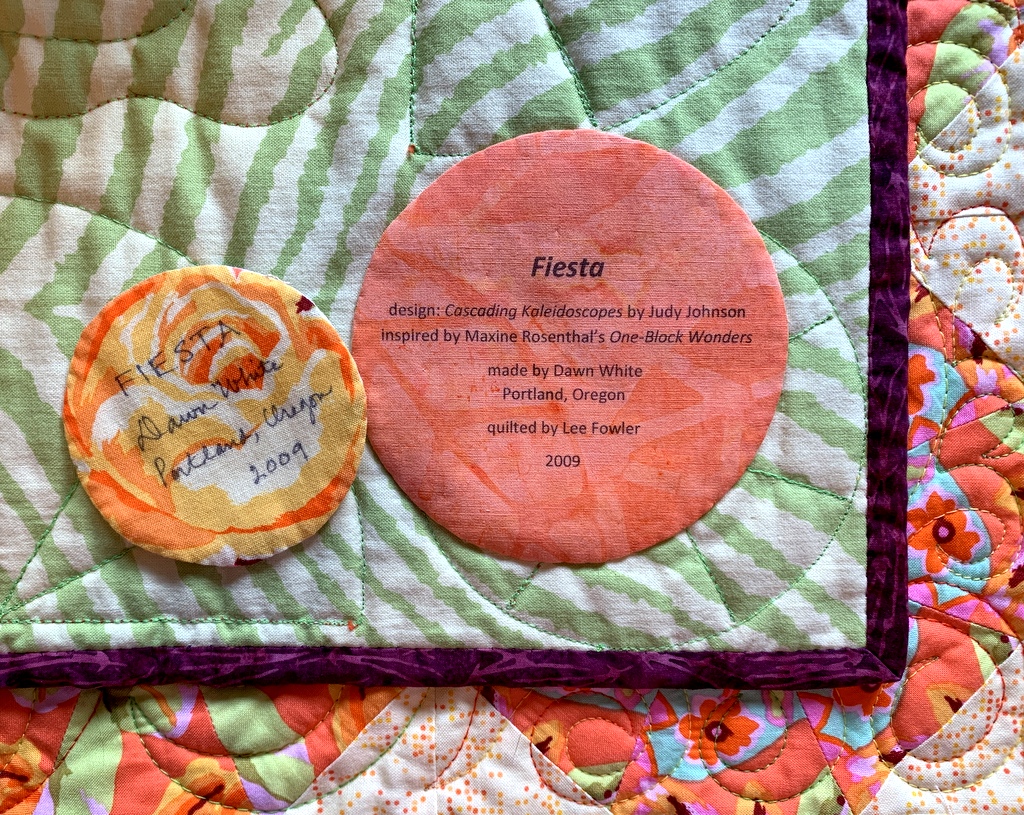
I decided to test my inadvertent discovery today by making a new label for a quilt I’d made in 2009. Back then my standard label information consisted of the name I had given the quilt, my name, and the year completed. At the time I didn’t appreciate the importance of providing additional information, such as the the designer of the quilt (if it wasn’t me) or the name of the person who quilted it for me. Nowadays I make it a point to include all that information on my labels.
Fiesta was quilted for me by the late great Lee Fowler, and I have been wanting to update the label information to acknowledge that for a very long time. I’ve actually been meaning to go back and remake several of my older labels but have always found an excuse to put it off. Creating labels by hand can be onerous and time-consuming, even when the results are pleasing. But now, thanks to the ease and speed of making a computer-generated label, my procrastination may be a thing of the past.
Here, very briefly, are the steps I took to make this label:
First, featherweight interfacing is fused to the label fabric. (I used Pellon 911FF.) Both pieces are cut slightly larger than a standard sheet of paper, 8½” x 11″:
Second, the fused fabrics are trimmed to 8½” x 11″ exactly:
Third, the two layers are fed into the inkjet printer and the label is printed from a file created on the computer. I tried two different sizes of type since I had room on the page for two labels:
Going with the smaller type, I decided I wanted a round label 4″ in diameter. (Labels can be any shape but I like the look of a round label.) My standard pattern is a compact disc measuring 4⅝” in diameter but it seemed a bit large so I made a trip to the kitchen to find just the right size to trace around. This small blue bowl is exactly 4″ across:
The larger circle drawn around the label was made with a compact disc, the smaller with the blue bowl.
I traced around the blue bowl on the wrong side of my label backing fabric so that when I held both layers up to the light I could position the top layer properly:
I don’t have a light table so the window had to do.
After being stitched and turned inside out, my label was ready to sew into place:
I chose to appliqué mine by hand but on another quilt it might be machine appliquéd if the stitching lines wouldn’t be distracting on the right side of the quilt.
My labels were printed on an HP OfficeJet Pro 8620. I know that all inkjet printers are not created equally. There must be wide variations between brands and models. I can’t help but wonder: with two successful labels behind me made with the new combo of label fabric + fusible interfacing + fabric for the back of the label, how transferable is this method of printing computer-generated labels?
Ah, that’s where you come in. If you are the least bit intrigued with my accidental discovery, would you be willing to make a test label? If this method works with different brands of printers — and different brands of fusible interfacing — I would be willing to create a tutorial for my website with detailed instructions and a lot of photos. I thank in advance any quilter who decides to go for this.
Before I sign off, here’s a look at Fiesta, the first in my series of kaleidoscope quilts, front and back:
Fiesta, 54″ square (2009)Back of Fiesta (2009)
Yes, I need to get a new photo of the back with the updated label!
First things first: Happy New Year!! Can you believe it’s 2020?
I’m taking a look back at some of the quilts I’ve made over the last 10 years, starting in 2010. (I got the idea from Thelma at Cupcakes’n’Daisies who posted on Instagram yesterday with photos of 10 gorgeous quilts she made between 2010 and 2019. Check out her beauties at instagram.com/thelmacupcake.
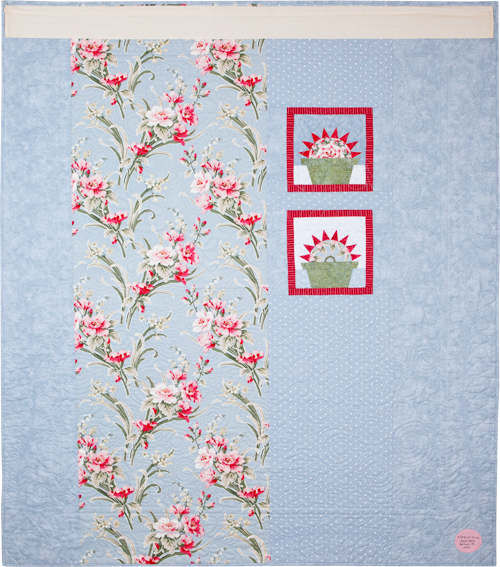
For 2010 I chose this quilt, Dianthus:
Dianthus, 57″ x 67″ (2010)
The pattern is 4-Patch Stacked Posies by HD Designs. I had recently discovered the four-patch kaleidoscope block and was having great fun investigating the possibilities with other fabrics and other settings. Here you see a large strip of the focus fabric as well as the blocks that didn’t make the cut for the front of the quilt:
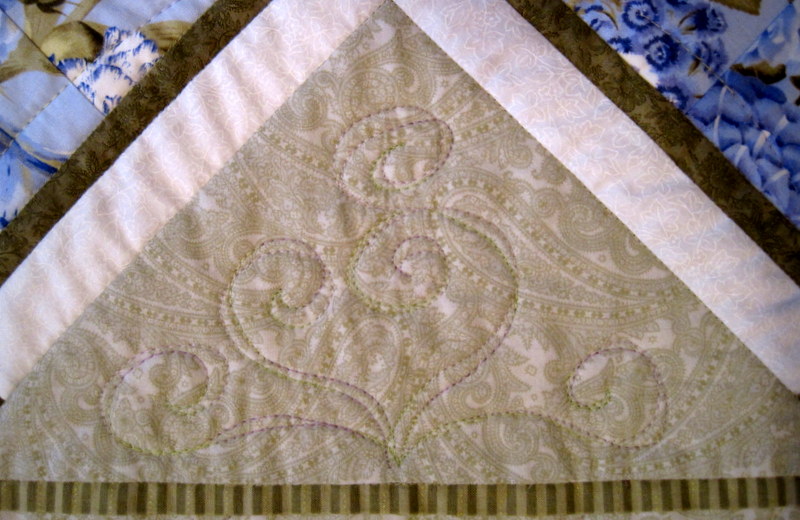
I quilted this one myself and I don’t mind telling you I was a bundle of nerves during the process. Here are a couple of close-ups:
I used a variegated thread of green and lavender. The color variation is very subtle, which is just what I wanted.
Why the name Dianthus? The fabric is a gorgeous melange of blossoms including tulips, hydrangeas, and carnations. Dianthus is the Latin word for carnation. The quilt wound up at the home of my twin sister, Diane. ‘Nuff said.
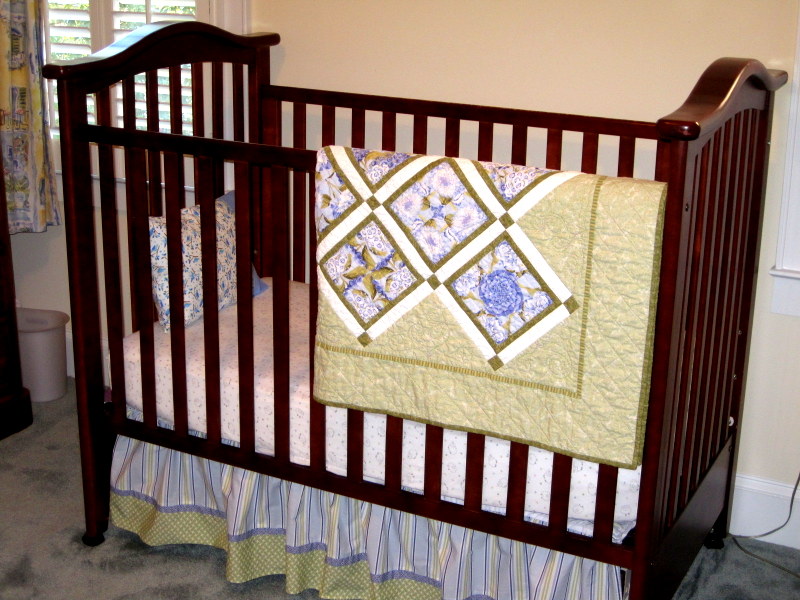
When Diane’s grandson Edward was a baby, the quilt was used in his bedroom at her home:
Edward is now 10 years old. (How did that happen?) He’s still a frequent overnight visitor but as you might imagine his room looks very different today. The crib has been replaced with a trundle bed, for one thing.
And the quilt? Nowadays it’s folded at the bottom of the bed in the first floor guest room and is often pulled into service for a lap quilt while watching TV. The 57″ x 67″ size makes it a good candidate for that.
Thanks for stopping by on this second day of the New Year. Do come back for next week’s Throwback Thursday to see a quilt I made in 2011.
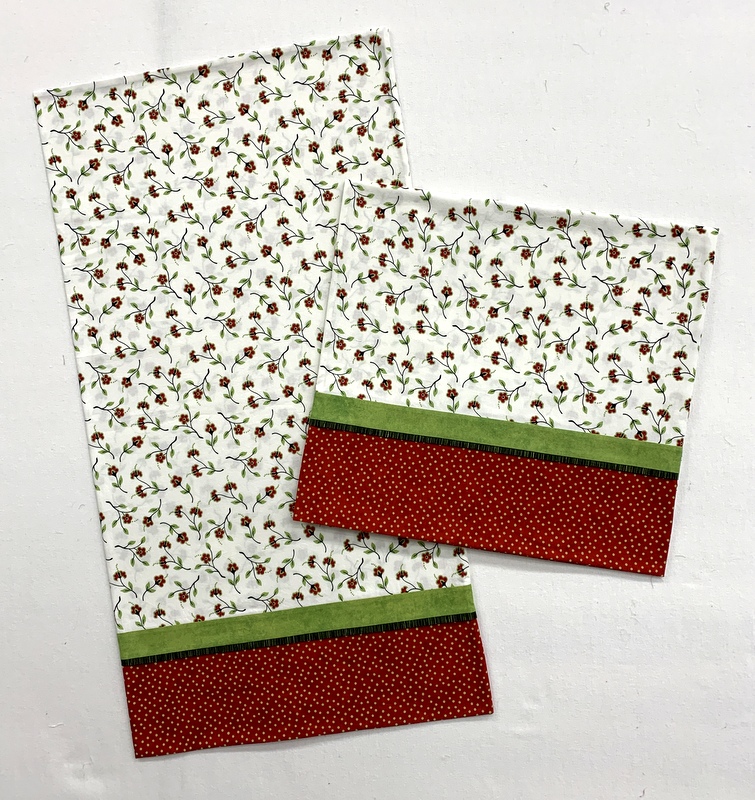
Now that Christmas is over, I can show you the pillowcases I made for my twin sister Diane and her husband Ed:
The cases are made for a king size bed so they measure a generous 20″ x 33″. I am so in love with that floral fabric; it’s from a 2010 line for Henry Glass Fabrics called “At Home for Christmas” designed by Heather Mulder Peterson of Anka’s Treasures. It’s been in my stash for years. Knowing I would be using most of it, I scoured the Internet looking for more and even contacted Heather to see if she still had some in her shop; alas, it is gone.
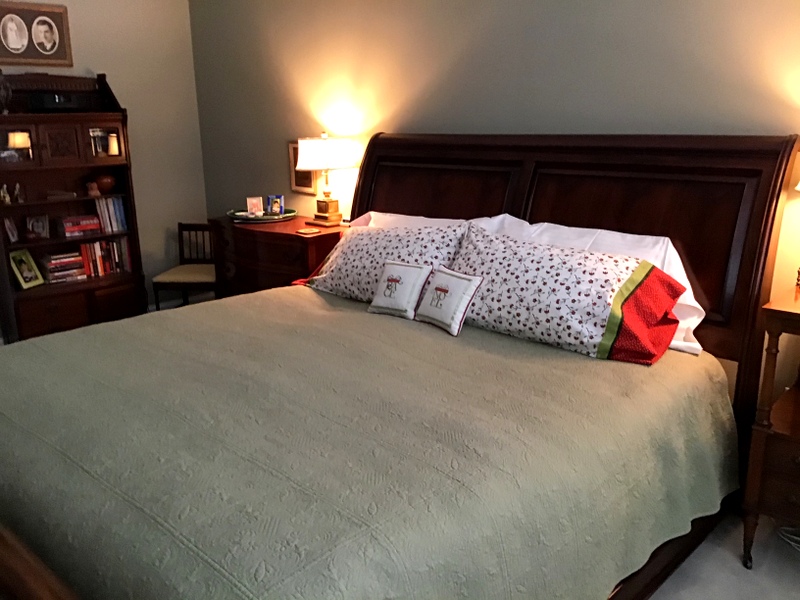
I confess it was really hard to cut into that fabric but I knew that pillowcases made from it would look wonderful in Diane and Ed’s master bedroom:
The colors are Christmas-y but the prints are not, making the pillowcases appropriate for use all year round.
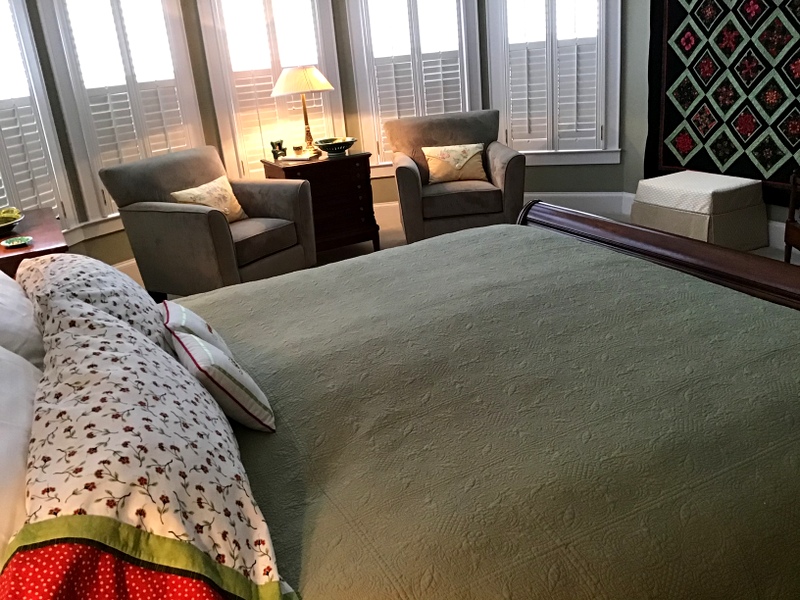
I had one other thing in mind when I chose the fabric. In the picture below you can just get a glimpse of a quilt on the wall:
It’s Midnight in the Garden, one of my very favorite quilts, made from my pattern 4-Patch Wonder:
I gave the quilt to Diane for her 60th birthday a few years ago and I get to see it whenever I travel to Georgia to visit her. I figured the pillowcases would complement her quilt very nicely. And they do, don’t they?!
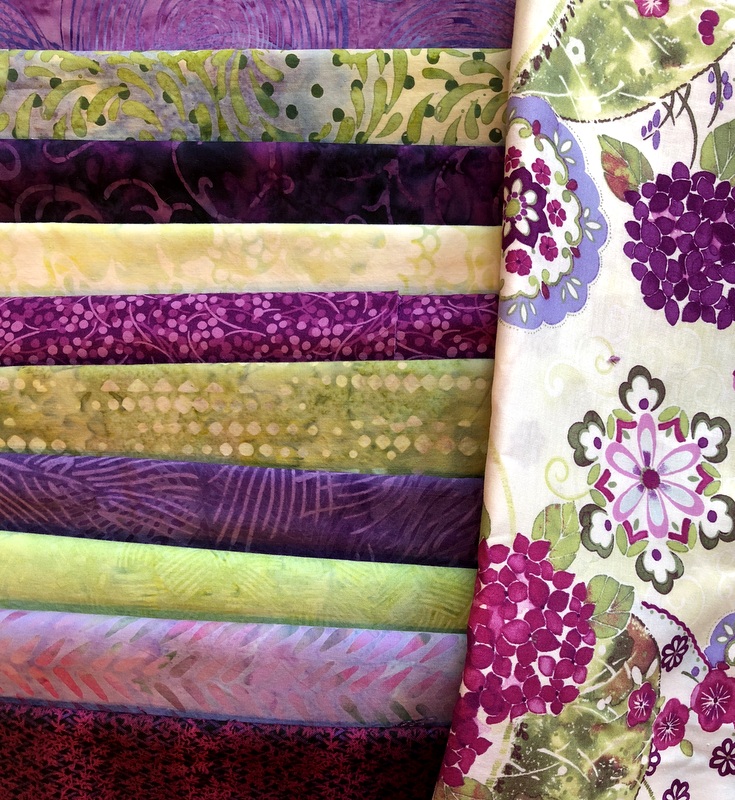
When I pulled fabrics a few weeks ago for my current Junior Billie Bag, these were my picks:
You can see at a glance this is a combination of batiks and regular woven cottons. Some quilters work exclusively with one or the other but I really like to mix ’em up.
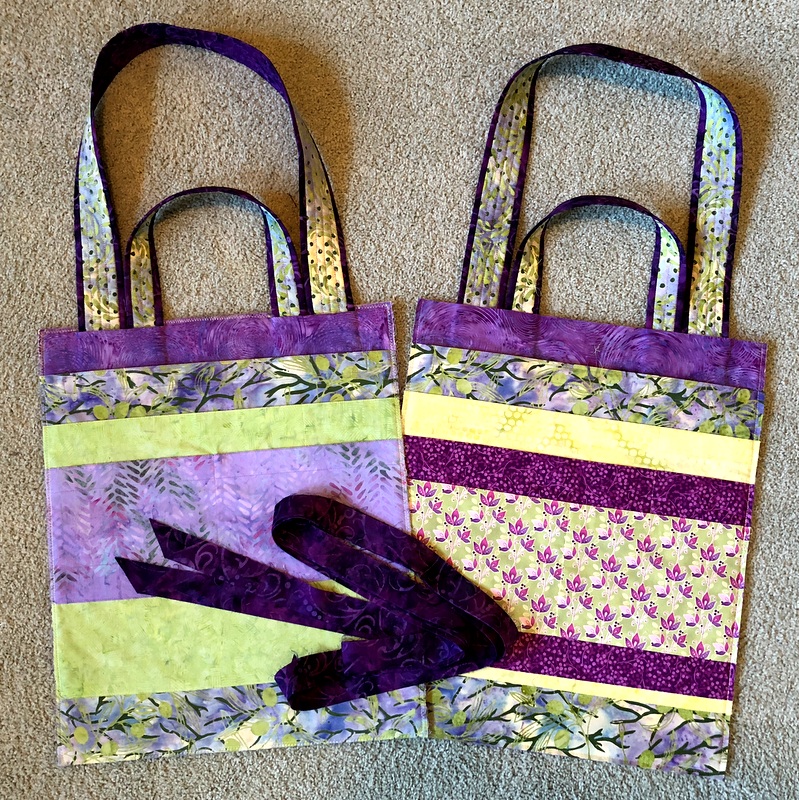
You’ve already seen the front and back panels of my JBB in progress:
Now here’s a look at the pockets on the inside of the front and back panels:
I also have the side panels/bottom unit done (not pictured) and my binding made. This bag is ready to become three-dimensional! That happens next week, when I demonstrate how it’s done for a marvelous group of students from the Oregon Coastal Quilting Guild.
When this bag is finished it will go on display at Montavilla Sewing Center in Lake Oswego. Why? Because I’m teaching a Junior Billie Bag workshop there in February and March of next year. When the class is over the JBB goes home with a dear friend of mine who loves the color purple.
In the works: a new Junior Billie Bag, based on Billie Mahorney’s original design. I’ve had the pleasure of teaching this fabulous quilter’s tote for the last three years and will be heading to the Oregon coast next week to teach a two-day workshop for a quilt guild.
A new class necessitates a new Junior Billie Bag, and here’s a preview of the one I’m working on right now:
(My celadon green carpet isn’t the best backdrop to show off the front and back panels but it will have to do for now.)
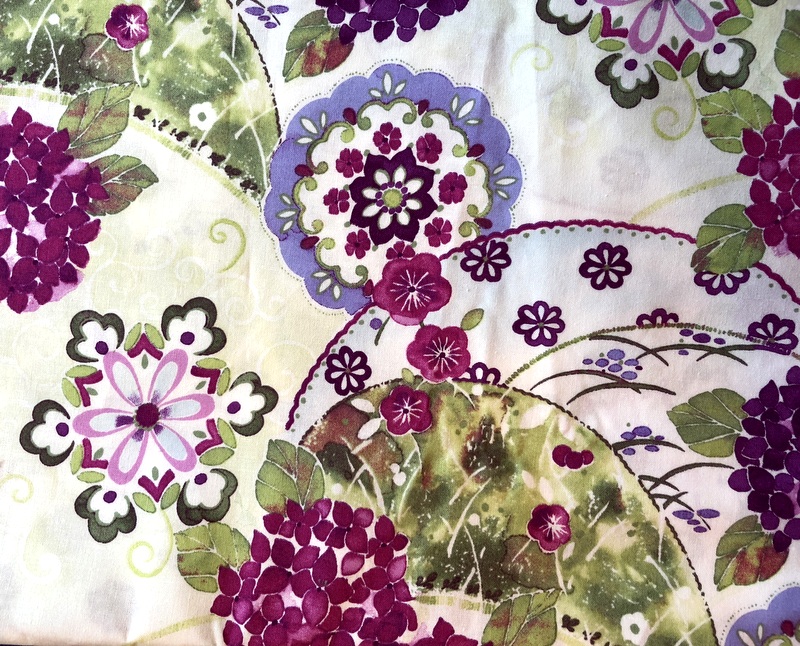
My starting point was this gorgeous print from In the Beginning Fabrics that came out last spring. Designed by Jason Yenter, it’s called “Ajisai Hydrangea:”
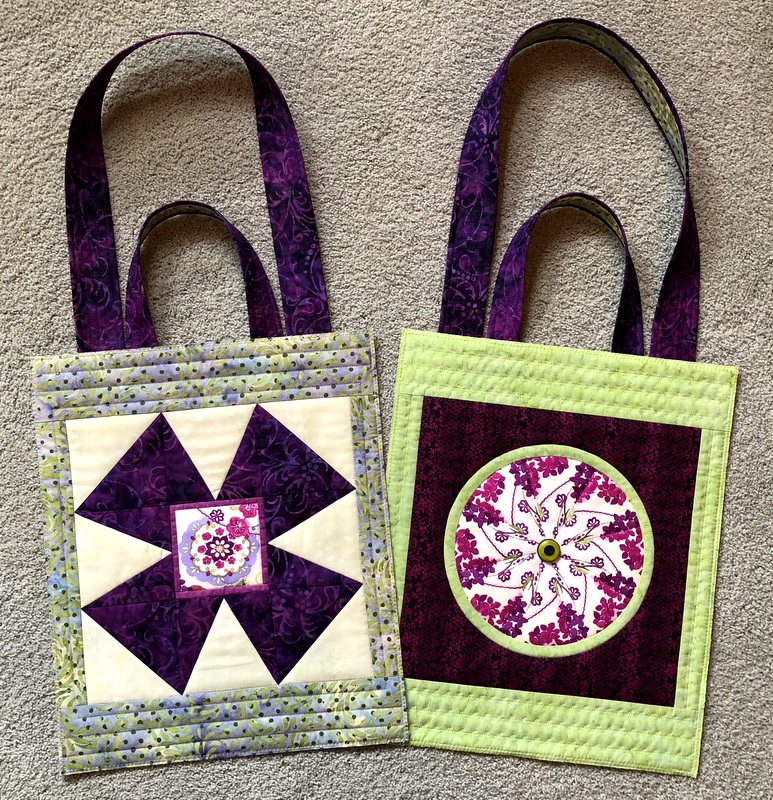
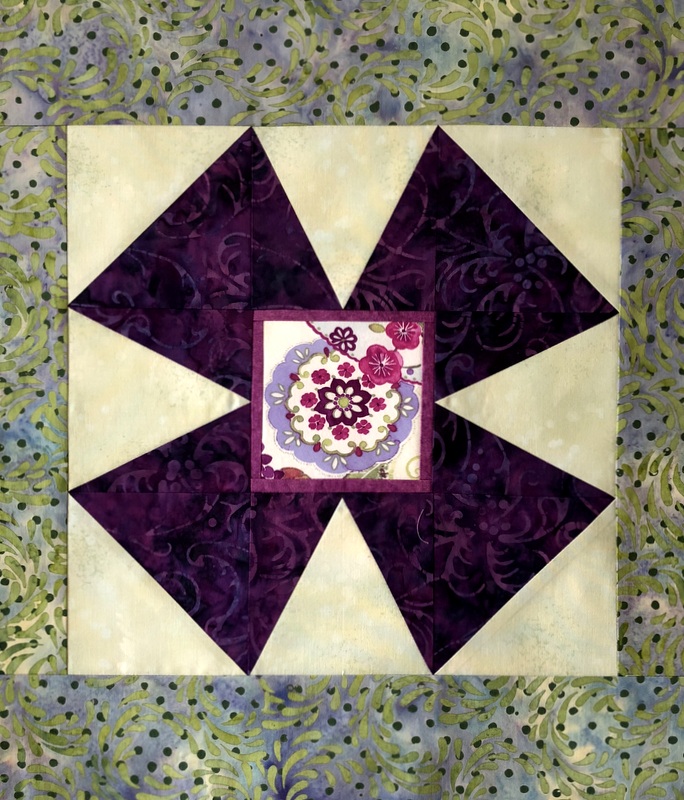
For one of the front/back panels I made a windmill block, inserting a fussy cut blossom in the center with narrow trim around it:
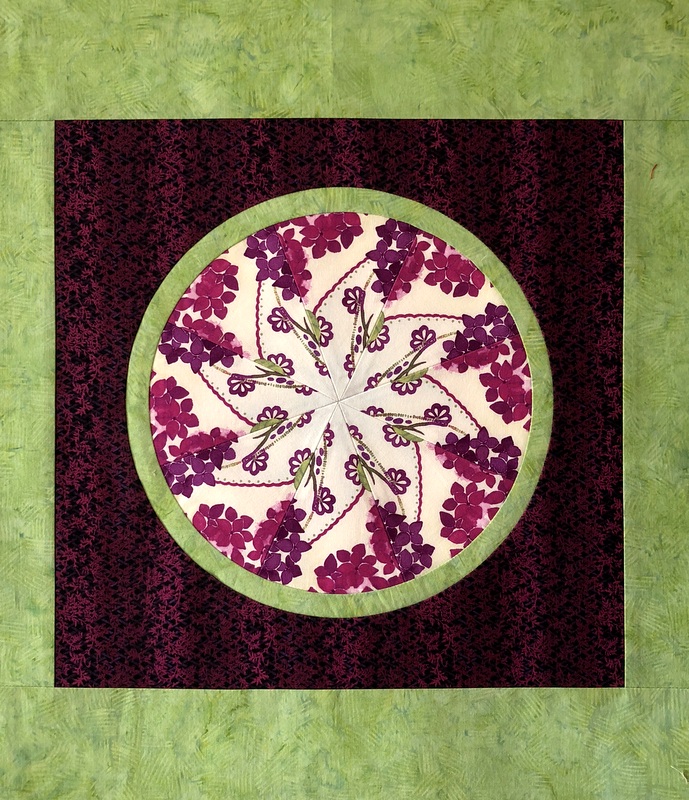
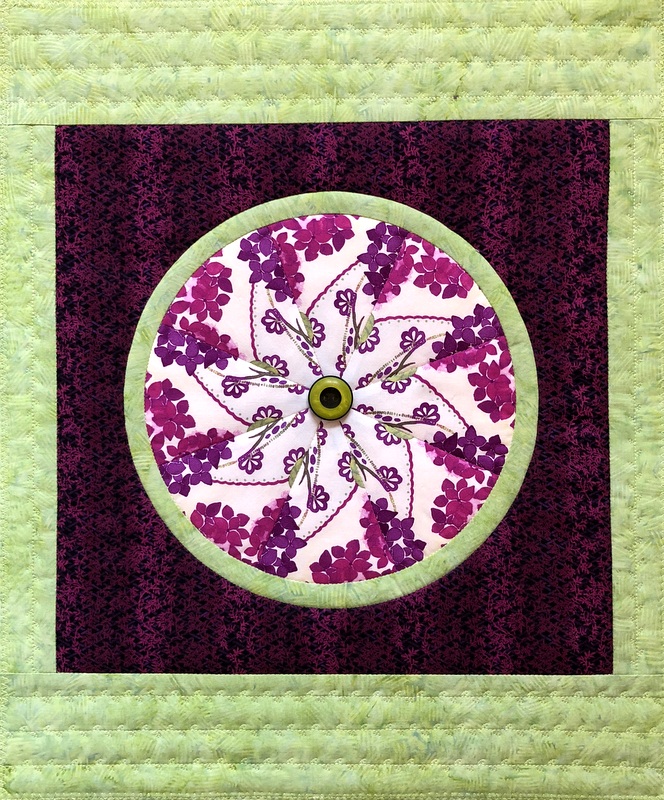
For the other panel I made a kaleidoscope block of eight 45° degree triangles, converting it into a double inset circle:
I just happened to have the perfect button in my collection to put in the center of the circle. The button went on after the panel was quilted:
Now I’m preparing to make a plethora of pockets. Here’s my fabric pull, a pleasing mix of woven cottons and batiks — all from my stash:
Does anyone else love the combination of green and purple as much as I do?
Happy first day of fall! This year is flying by way too fast.
After our unusually hot summer in Portland with a record number of days in the mid to high 90s, many folks are relieved that fall has arrived. Me, not so much. As a native Oregonian I don’t mind the rain and cooler weather that fall brings but I do miss the long days of early summer when the evening light doesn’t fade till close to 10 pm.
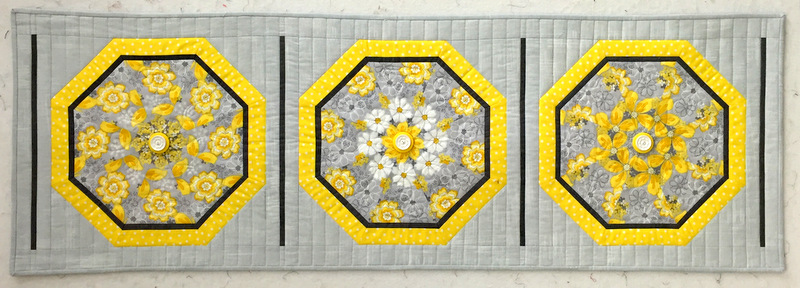
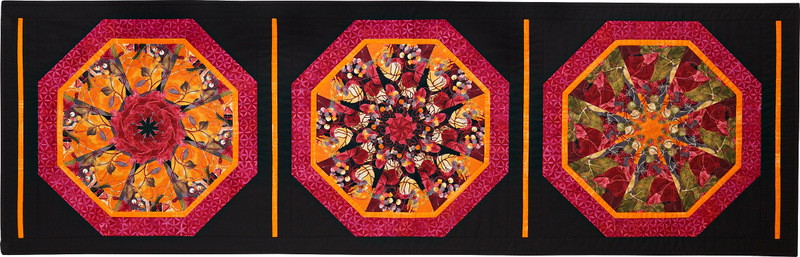
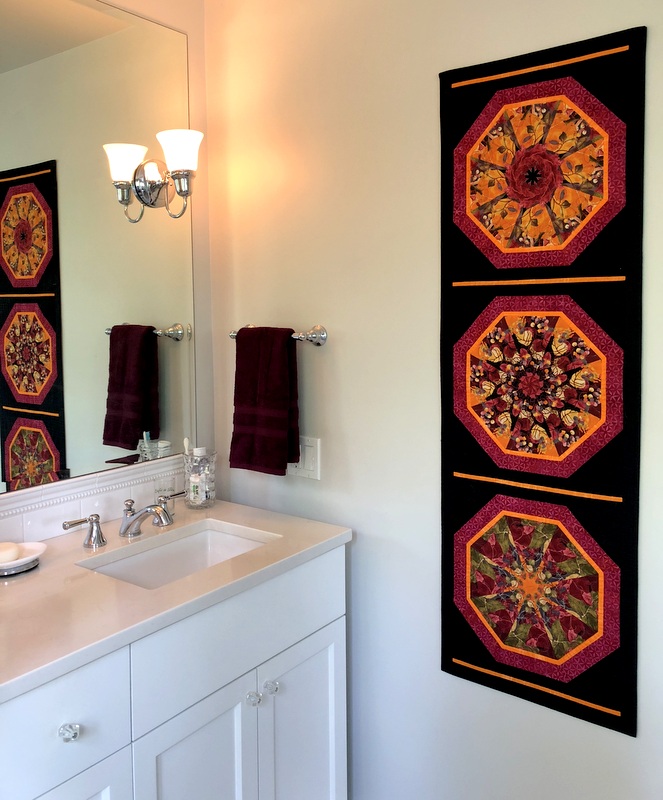
The official change of seasons is my cue to change the wall hanging in the master bathroom. Off the wall goes Sun Flowers . . .
. . . and up goes Autumn Reflections:
Both quilts were made from my pattern Season to Taste. They measure 18″ x 55″.
I was out of town last week on June 21, the Summer Solstice. That was the day I was planning to switch out the wall hanging in our master bath. Back in April I hung Under Paris Skies, the spring version of my pattern Season to Taste, so named because I envisioned a table runner or wall hanging for each season of the year based on fabric choices. (You can see my spring version here.)
Up went the summer version today and it couldn’t be more, well, summery:
Sun Flowers, 2015 (18½” x 55½”)
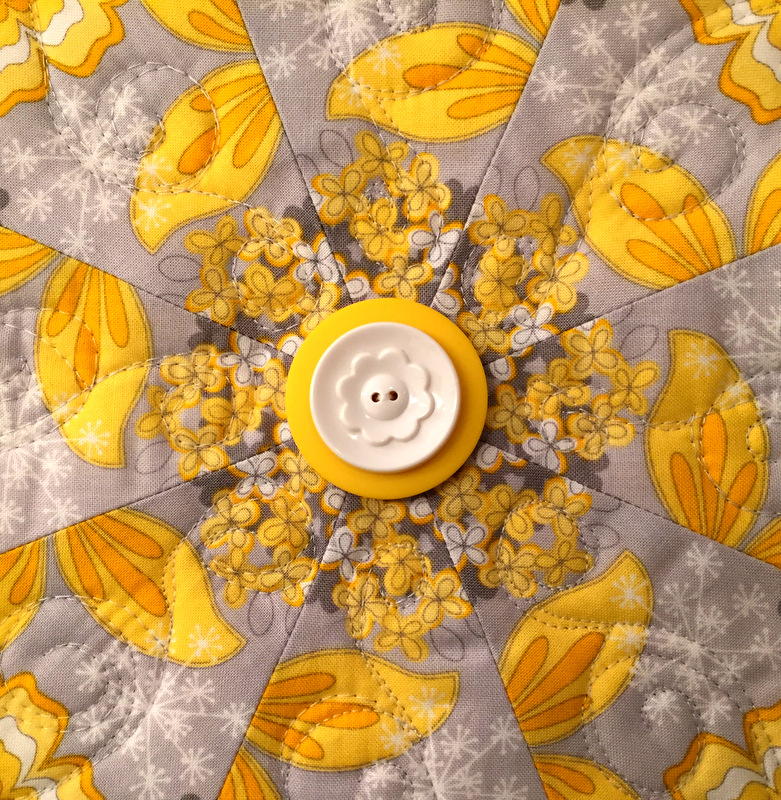
For a fun little touch I added a “flower” (two stacked buttons) in the center of each block:
I finished Sun Flowers in 2015 but it’s been hanging in a quilt shop. Now I get to gaze at it every day in my own home. I’ll enjoy it until it’s time to change to the fall version, made in 2014.
I never got around to making a winter version, though it’s been planned for years. If I’m going to have one ready by the time this winter rolls around, I’d better move it up on my project list!
It’s been a week since we flew back to the states from Portugal. Fortunately, I have many memories and lots of photos to remind me of the delightful time my husband and I spent cruising the Douro River and the many shore excursions we took to medieval hill towns and modern cities. Everywhere we went, images appeared that made me think of quilt blocks, appliqué designs, and even free motion quilting motifs.
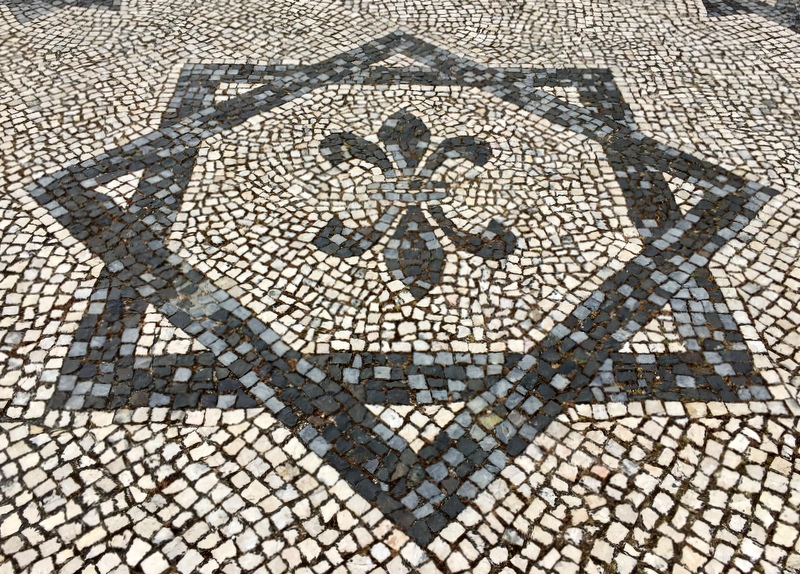
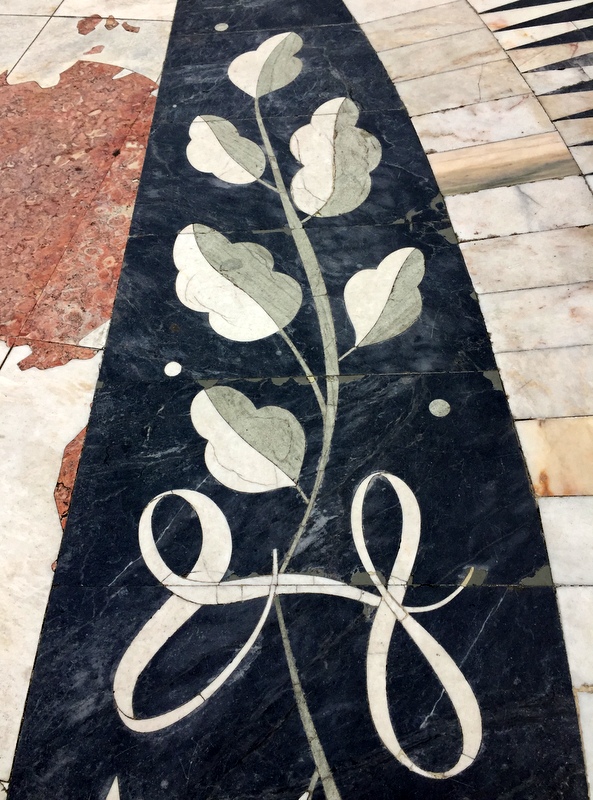
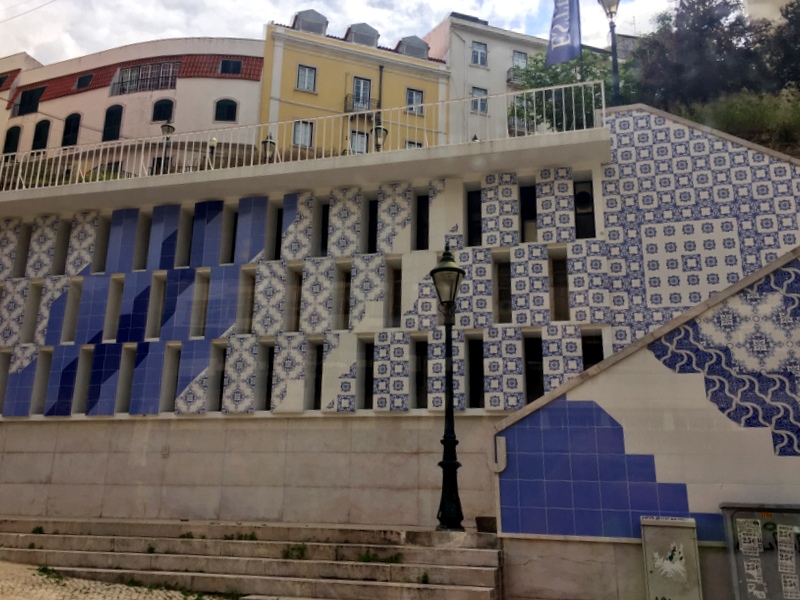
When we got to Lisbon, our final destination in Portugal, the amount of gorgeous tile work I was seeing made my head spin. These three designs were on the walkway outside our hotel:
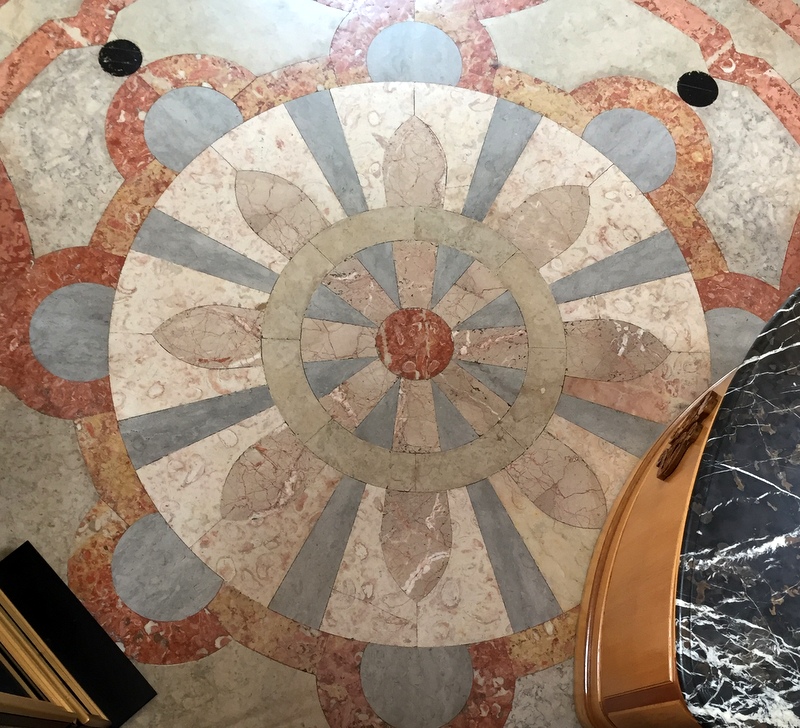
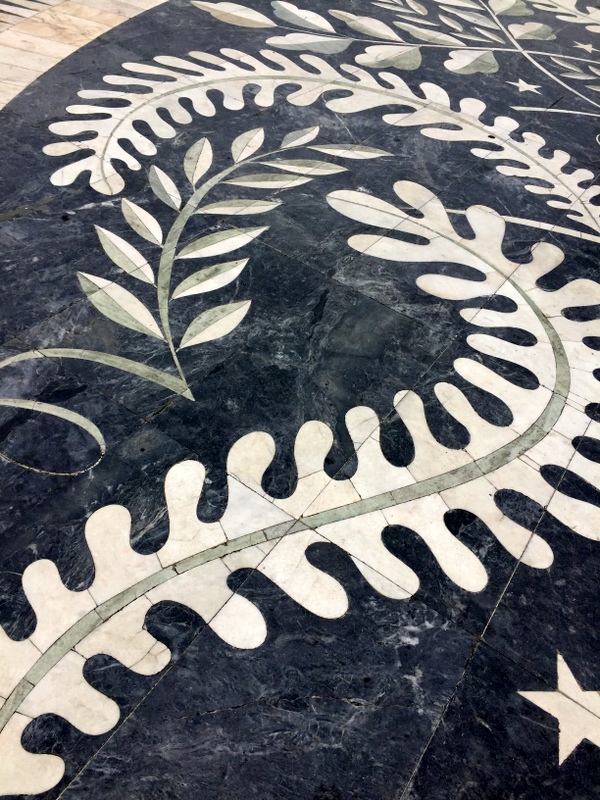
This one was on the floor of the main entrance to the hotel:
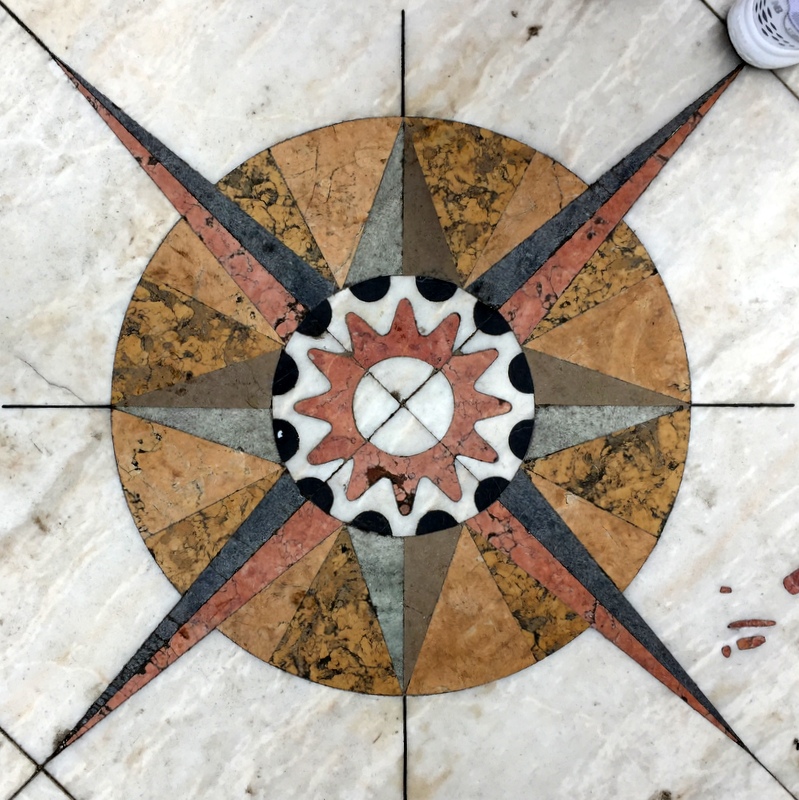
On the north bank of the Tagus River near the Monument to the Discoveries there’s a huge tile wind rose and map of the world charting Portuguese explorations. The map is embellished by wonderful designs that would look right at home on a quilt:
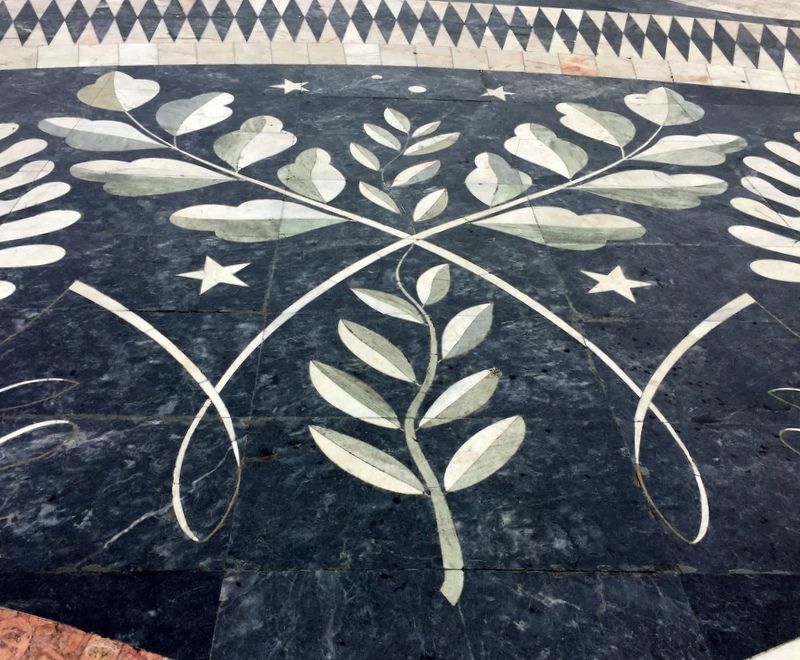
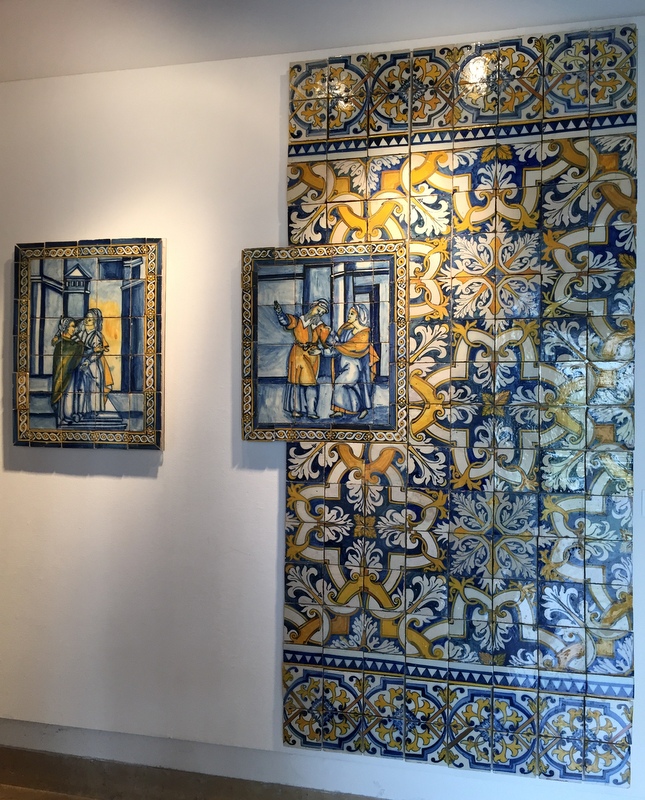
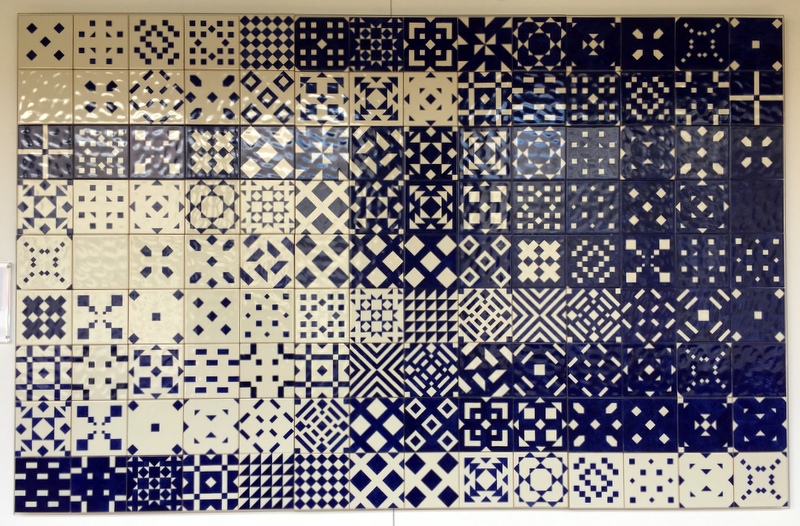
We visited the National Tile Museum dedicated to the azulejo, a glazed colored tile traditionally used in Spanish and Portuguese buildings. The museum houses examples dating from the 15th century to today. With the battery in my cell phone running low I took very few pictures but they’re enough to give you a sense of what I was seeing:
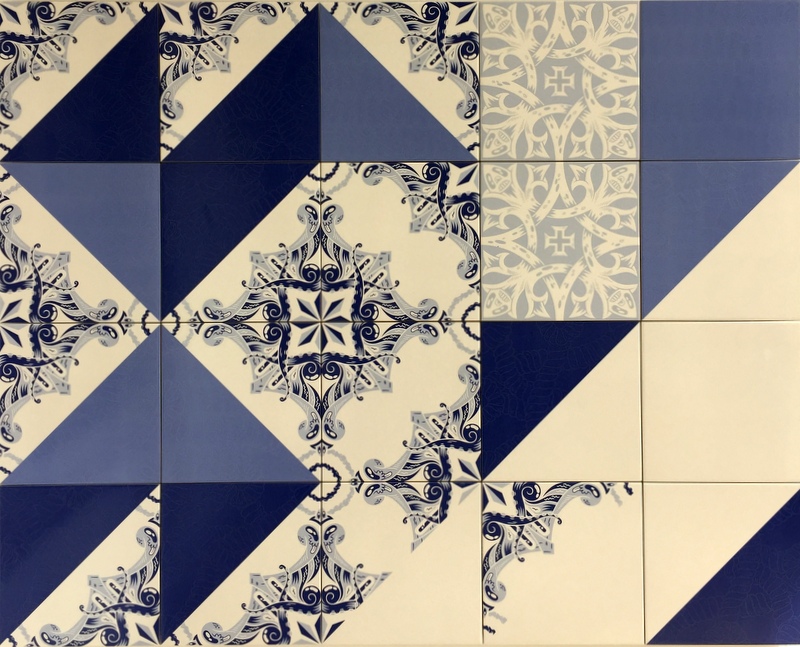
Tile work from the 21st century evoking a sampler quilt (a modern take on Dear Jane, perhaps?):
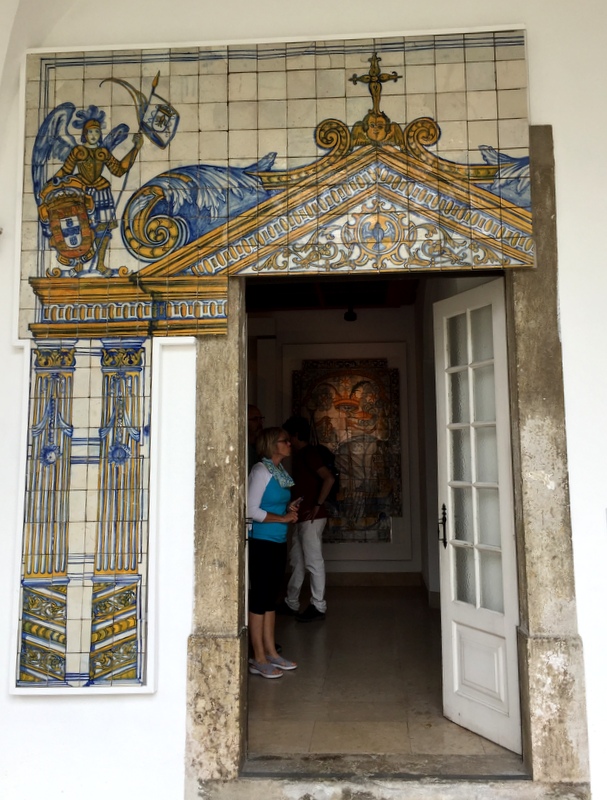
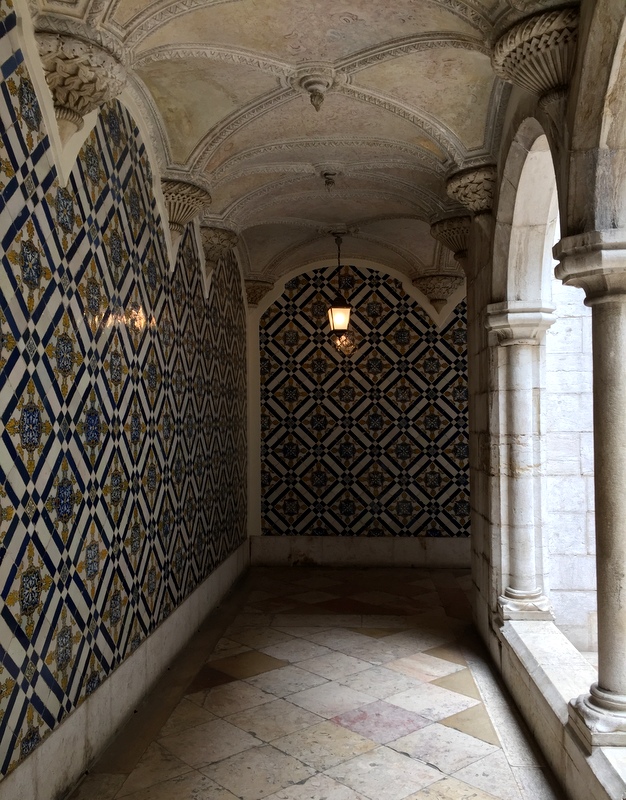
Looking for the restrooms? They’re in this hallway:
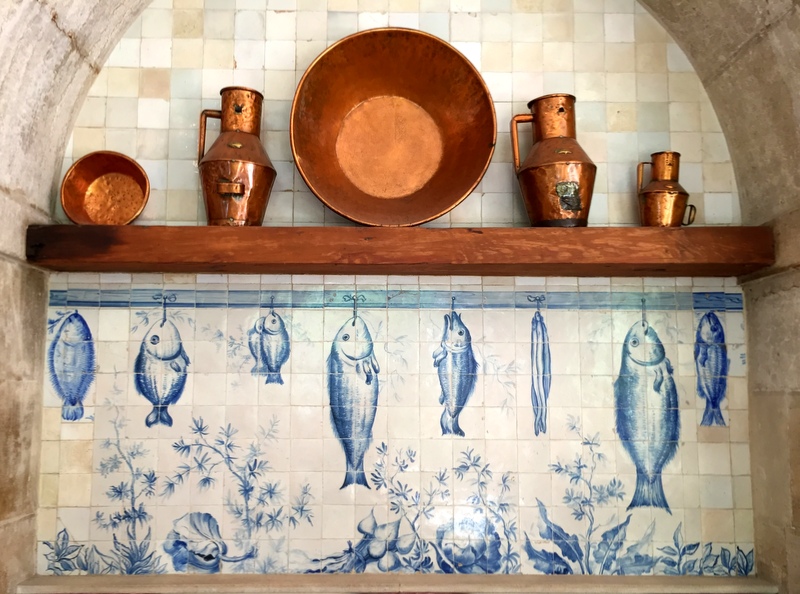
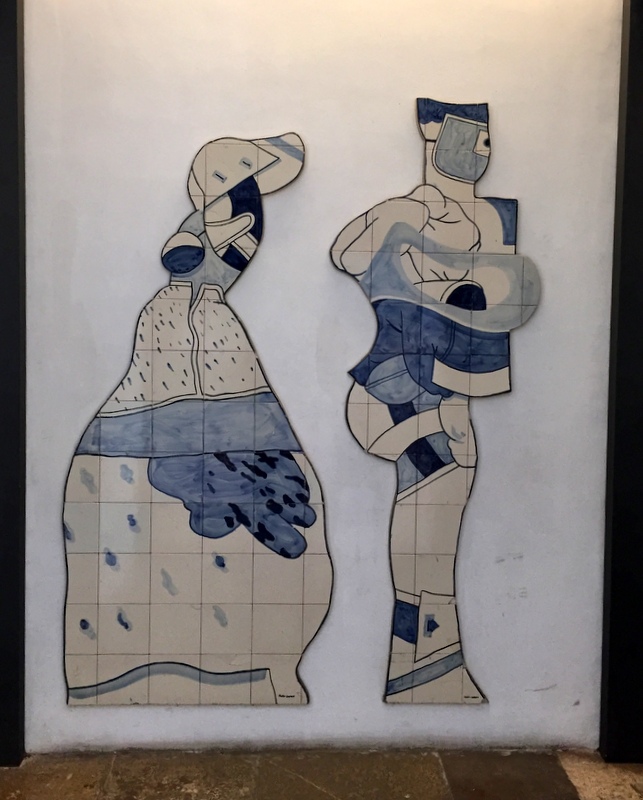
Taking a city bus back to our hotel, we spied more contemporary tile work that may well have been made by the same artists whose work we saw at the museum:
Looking at these photos makes me very eager to get back to my various and sundry quilting projects. I hope to have something to show you very soon.