Little Labors of Love

Thank you all so much for your kind comments on my last post about my father’s passing. I don’t often write about my personal life on this blog but in this case my connection with my dad intersected with my quilting life in such a meaningful way that I wanted to share it with my readers. I appreciate your words of comfort so very much.

My big project for 2018, the sampler quilt known as Hazel’s Diary Quilt, has been on hold the last couple months while I worked on small projects for friends and family. I think of these projects as Little Labors of Love.

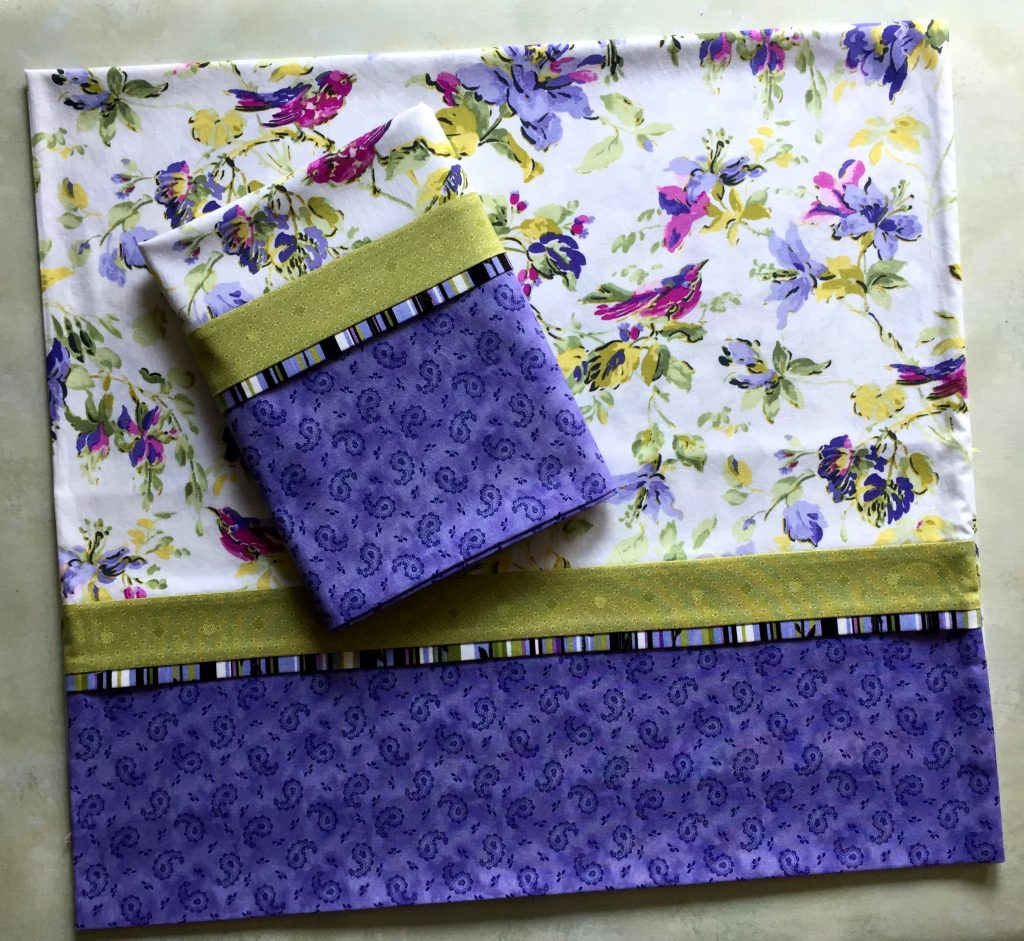
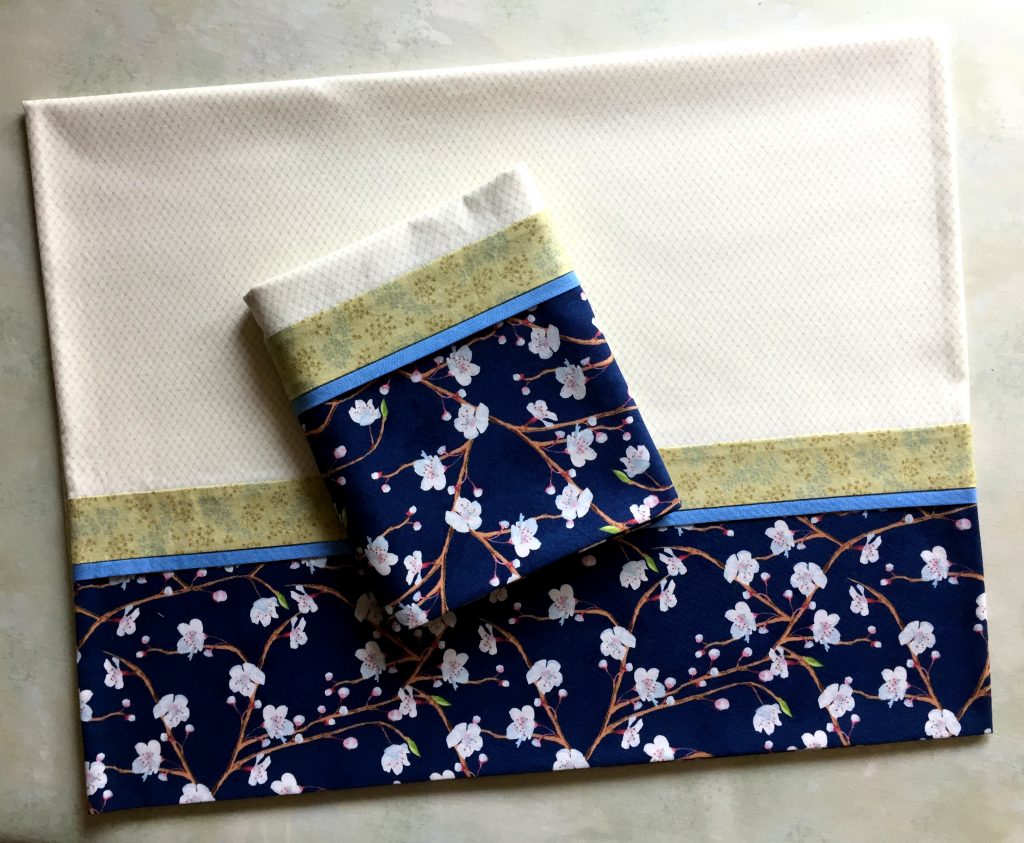
In the past I’ve shown photos of pillowcases made for my sisters Reigh and Diane. Recently I made pillowcases for another set of very special sisters in my family, Jenny and Tracy. I asked them to let me know their color preferences and then selected fabrics from my stash I thought they would love.

Here are Tracy’s cases . . .

. . . and Jenny’s:

(I followed my picture-heavy tutorial to make these burrito-style pillowcases.)

Another labor of love is this mysterious item made from quilted fabric:
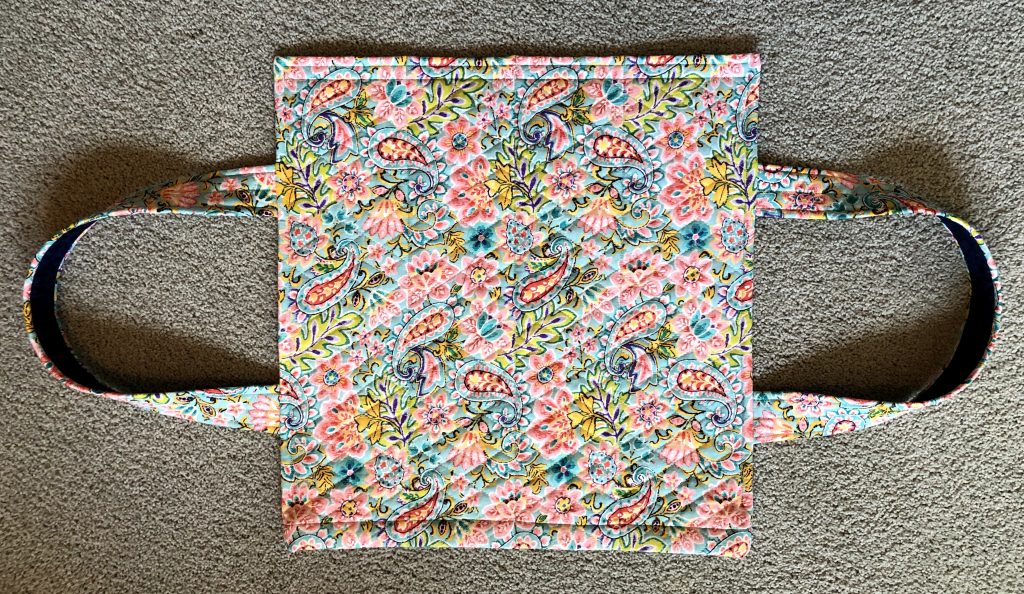

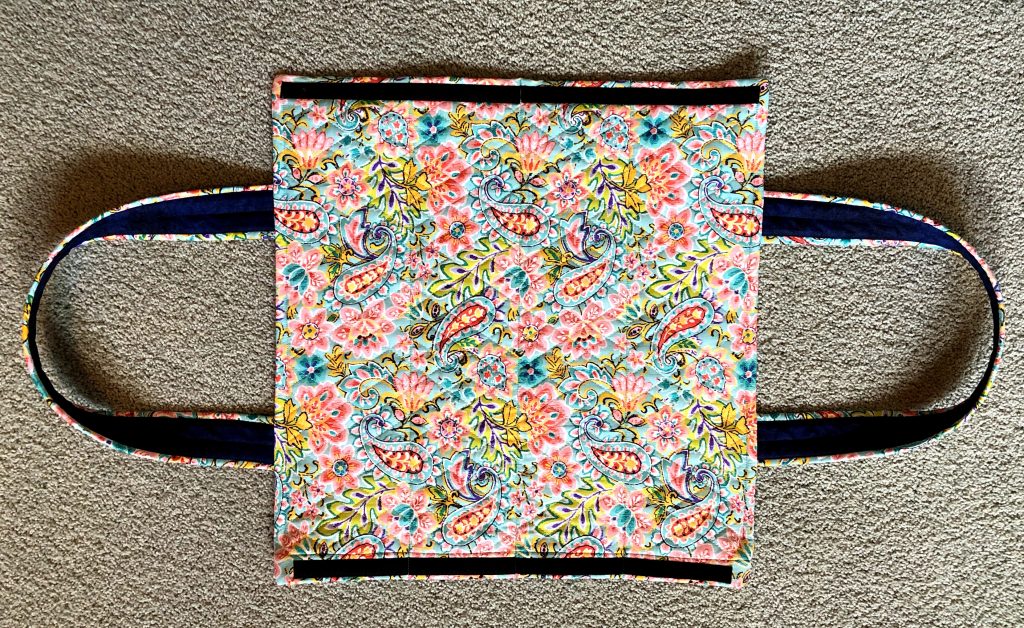
It measures about 18″ square (not counting the straps) and is doubled in order to create four channels, each about 4″ wide and open at one end. On the inside it has Velcro strips along the sides:

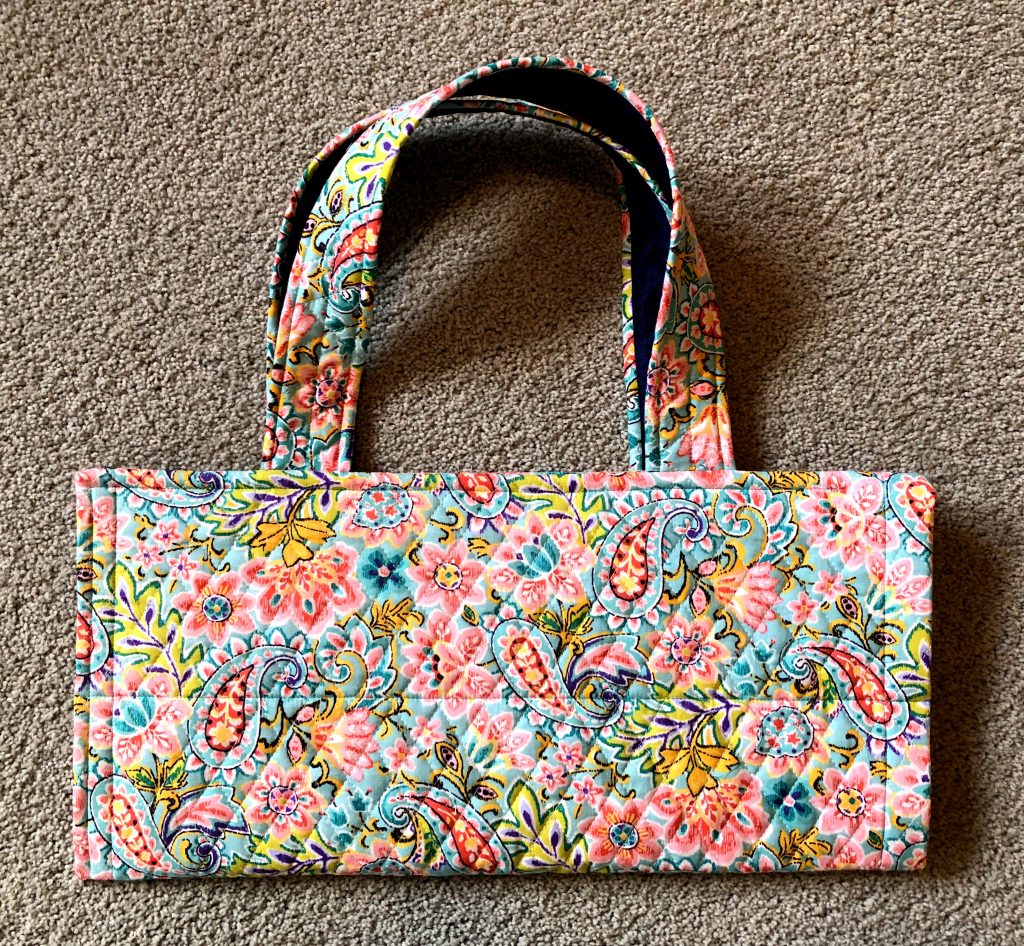
When folded in half the Velcro strips close and it becomes a carrying case:

Can you guess what this is for? Only if you are a Mah Jongg player! In addition to being a champion bridge player, my stepmother Shirley is an avid Mah Jongg fan and plays regularly. She asked me to make a carrying case for the tile racks in one of her sets.

My guide for this rack carrier came from another Mah Jongg player named Dorothy Huotari who posted a photo on Facebook in June of one she had made and graciously gave permission to other crafters to replicate it:

I have enough left of the quilted fabric to make Shirley a matching bag for the tiles similar to the one shown in the photo of Dorothy’s carrying case.

Last month I put the binding on a beautiful quilt made by my friend Virginia Hammon:
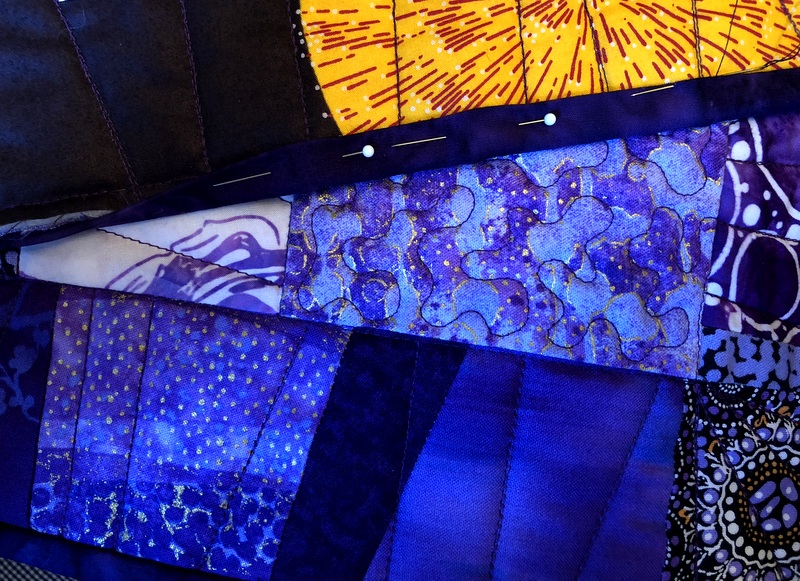
The quilt was one of many made by Virginia that were featured in a special exhibit at Northwest Quilting Expo last month. The quilts illustrate a book she has researched and written about the U.S. monetary system. With the text finished, Virginia can now concentrate on finishing the quilts. Since I truly enjoy the binding process, I was happy to add the binding to this beauty.

I get so much pleasure working on these Little Labors of Love, sandwiched as they are between longer term projects.



Posted in family, home dec, roll-it-up pillowcases, tote bags, update | 1 Comment

Transitions

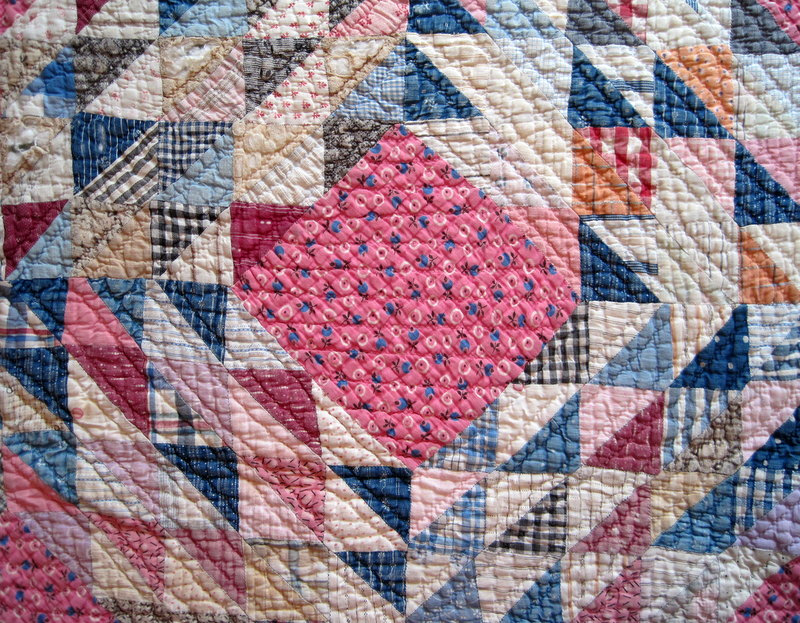
When I created my blog in May 2012, one of my very first posts was about an Ocean Waves quilt my father gave me in the 1980s when I first became interested in quilting. Here’s a close-up of the quilt:

To give you an idea of scale, the squares made of Half Square Triangles finish at 2″ and the bubblegum pink print in the center finishes at about 5½” square.

The quilt was made sometime in the late 1920s by Magdalena “Lena” Weissenfluh, my father’s Swiss-born grandmother. My dad, born in 1923, contributed to the making of this quilt. His job was to pull scraps of wrinkled fabric from the rag bag and iron them so his grandmother could cut triangles and sew them together on a treadle sewing machine.

The quilt was quilted by hand on a frame lowered from the ceiling of Grandmother Lena’s home in eastern Oregon. My dad described the frame and the quilting process in great detail in an email message to me, parts of which were included in this 2012 post entitled “Nattering ladies with needle and thread . . .”

My father, Calvin Eston Weissenfluh, died last week at the age of 95. He had fallen at his home in Bend, Oregon the week before and was in the hospital. My siblings and I rushed to his side, expecting he would be released to a rehabilitation center. Instead he entered hospice care. It was his time and he was ready. His last week was spent in the comfort of his own home surrounded by three generations of family members and his wife of 59 years, my dear stepmother Shirley.

The last week was a time of great sadness because we knew the end was coming but it was also a time of joy as we got to celebrate his long life with him. My father was clear-headed up to the end, telling stories, giving orders, engaging in some good-natured joshing with his son and grandsons, and enjoying one-on-one time with family members. The night before he died he asked for — and got — a sip of whiskey, enjoying a virtual toast over the phone with his son-in-law in Georgia.

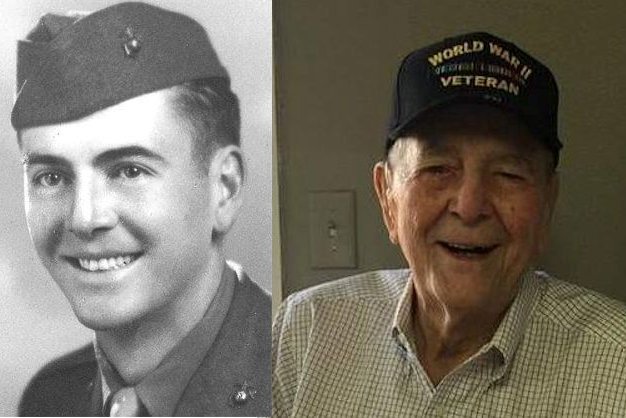
My father served in the US Marine Corps during World War II. Here’s a picture of him in uniform at the age of 23 alongside a photo of him taken seven decades later:

What a handsome fellow he was!

During my dad’s last week I was charged with drafting his obituary, which he read and approved. He made one correction and asked me to add one sentence that appears at the end of the following paragraph:

“Cal’s ancestors on his father’s side emigrated from Switzerland in 1880, settling in eastern Kansas before moving to eastern Oregon. A chance encounter with a Swiss tourist visiting Oregon in 1950 led to Cal’s discovery of Weissenfluh relatives in Guttannen, Switzerland. He made two trips to Switzerland to visit them and maintained close contact with his Swiss relatives for the remainder of his life. He was always very proud of his Swiss ancestry.”

My father gave me two things before he died. The first is a replica of the Swiss flag that he brought home from his first trip to Switzerland:

I’ve always loved the simplicity and strong graphic appeal of the white cross on a red background. Now I am thinking about how to include this 22″ square flag in a tribute quilt.

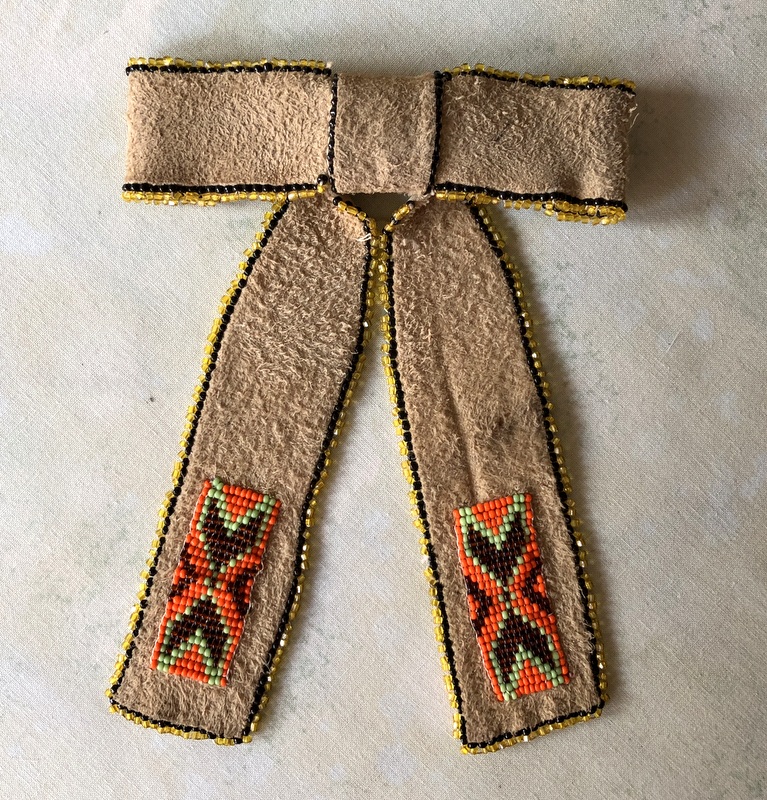
The second is a leather bow tie embellished with beading that was given to him in 1980 by a member of the Klamath Tribe in southern Oregon:


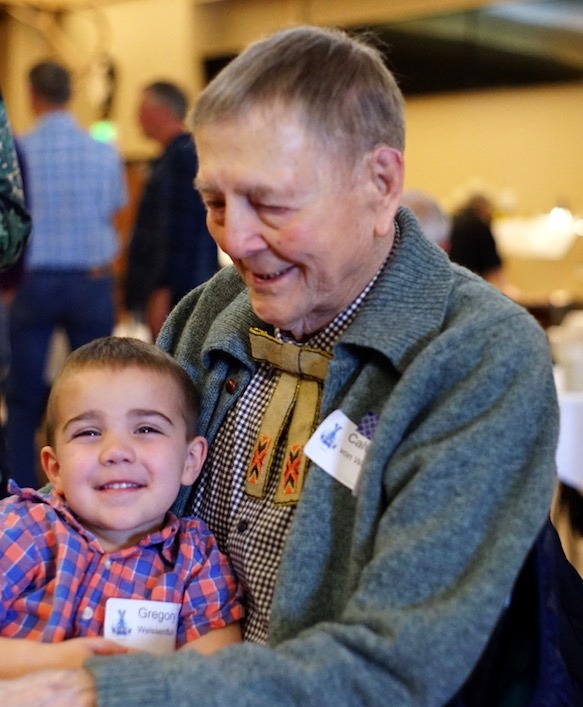
My dad loved that tie and wore it at our last Weissenfluh Family Reunion held in 2017:

I will wear it to the next reunion in his honor.

RIP, Pater.


Posted in bowties, family, update | 21 Comments

Junior Billie Bag: A New Beginning

In the works: a new Junior Billie Bag, based on Billie Mahorney’s original design. I’ve had the pleasure of teaching this fabulous quilter’s tote for the last three years and will be heading to the Oregon coast next week to teach a two-day workshop for a quilt guild.

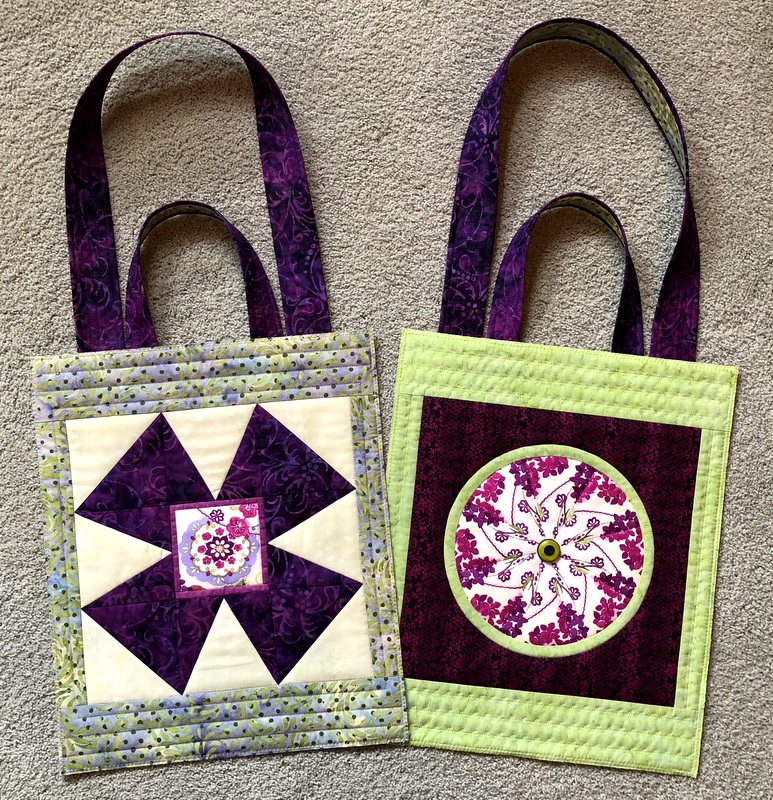
A new class necessitates a new Junior Billie Bag, and here’s a preview of the one I’m working on right now:


(My celadon green carpet isn’t the best backdrop to show off the front and back panels but it will have to do for now.)

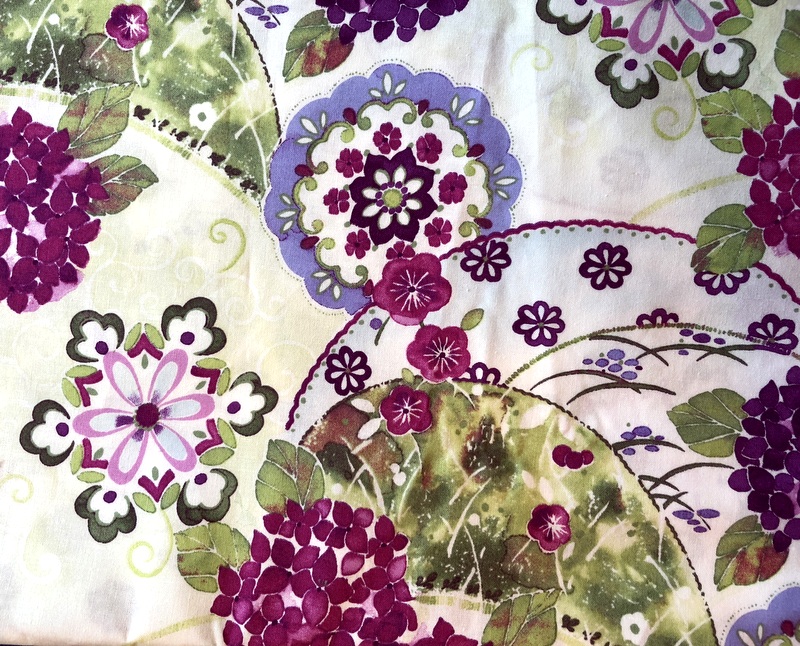
My starting point was this gorgeous print from In the Beginning Fabrics that came out last spring. Designed by Jason Yenter, it’s called “Ajisai Hydrangea:”

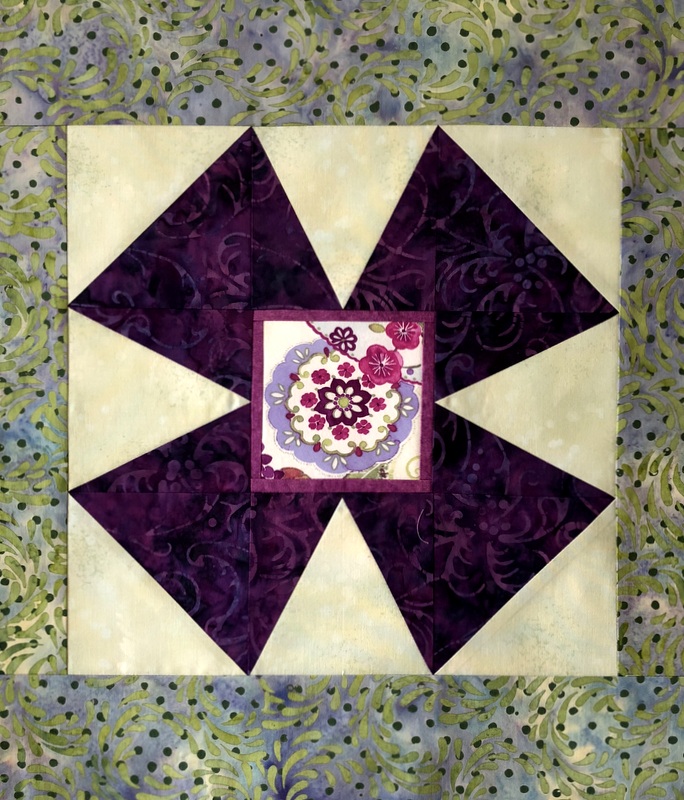
For one of the front/back panels I made a windmill block, inserting a fussy cut blossom in the center with narrow trim around it:


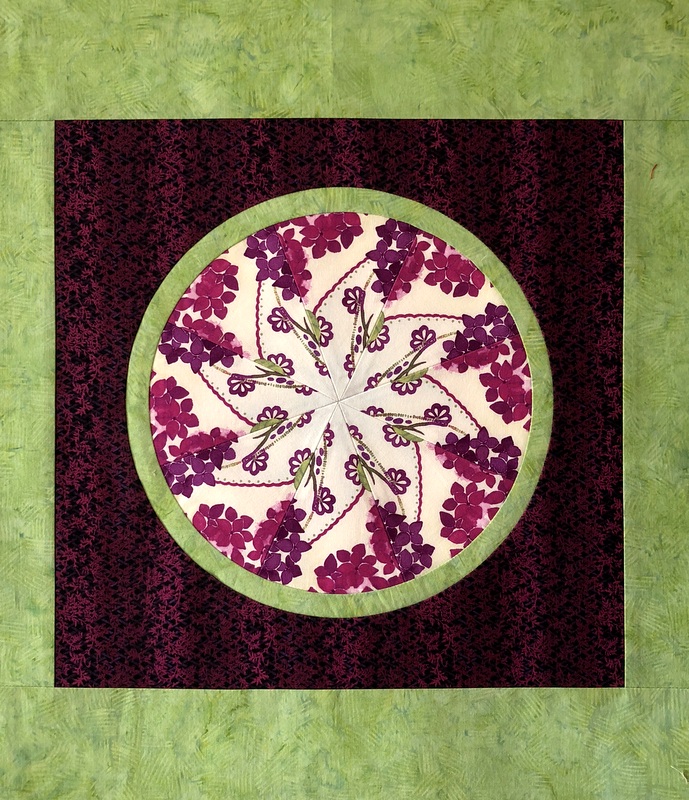
For the other panel I made a kaleidoscope block of eight 45° degree triangles, converting it into a double inset circle:


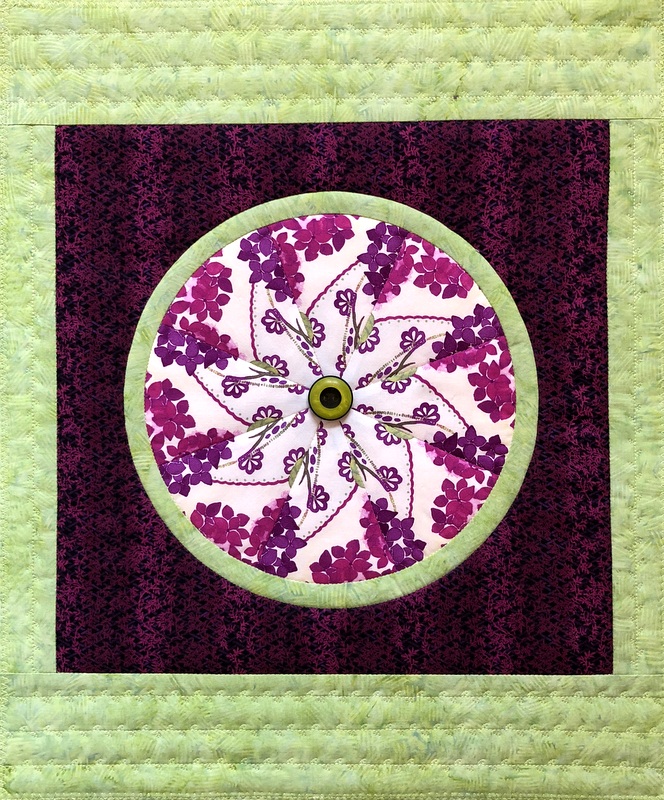
I just happened to have the perfect button in my collection to put in the center of the circle. The button went on after the panel was quilted:

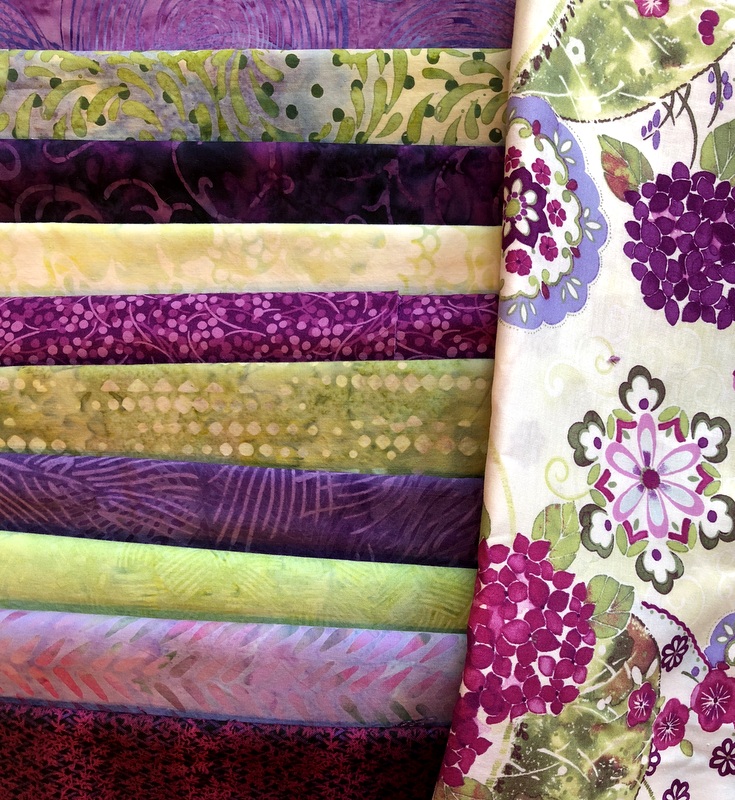
Now I’m preparing to make a plethora of pockets. Here’s my fabric pull, a pleasing mix of woven cottons and batiks — all from my stash:


Does anyone else love the combination of green and purple as much as I do?


Posted in Billie Bag, Junior Billie Bag, kaleidoscope quilts, tote bags, update, windmill block | 8 Comments

A Confession

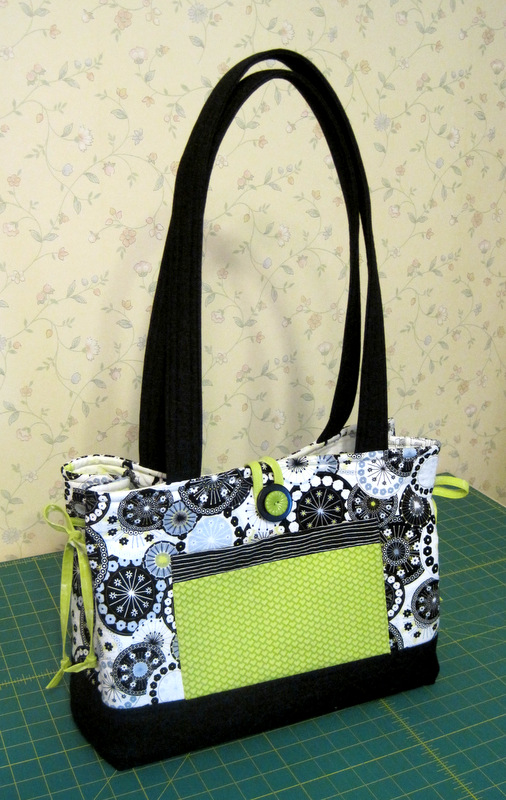
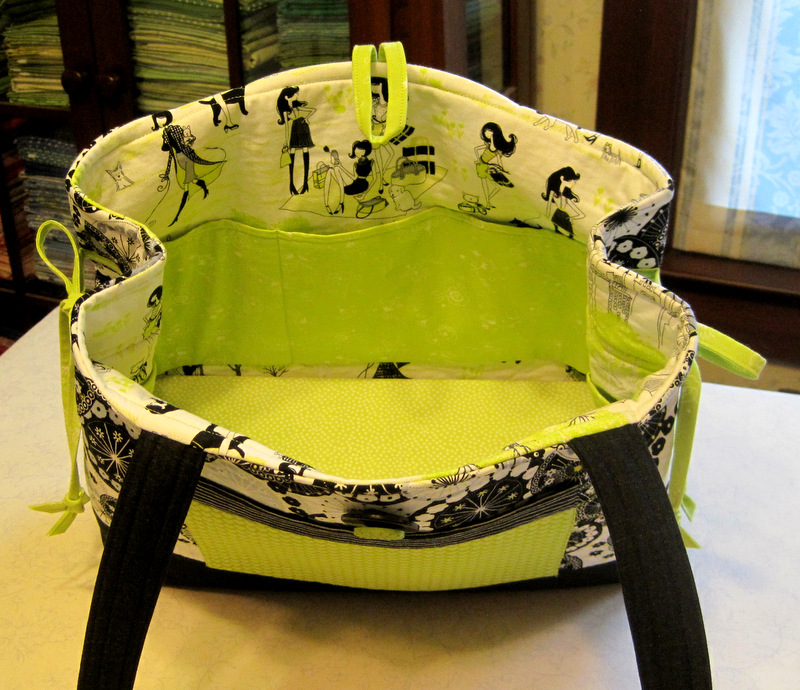
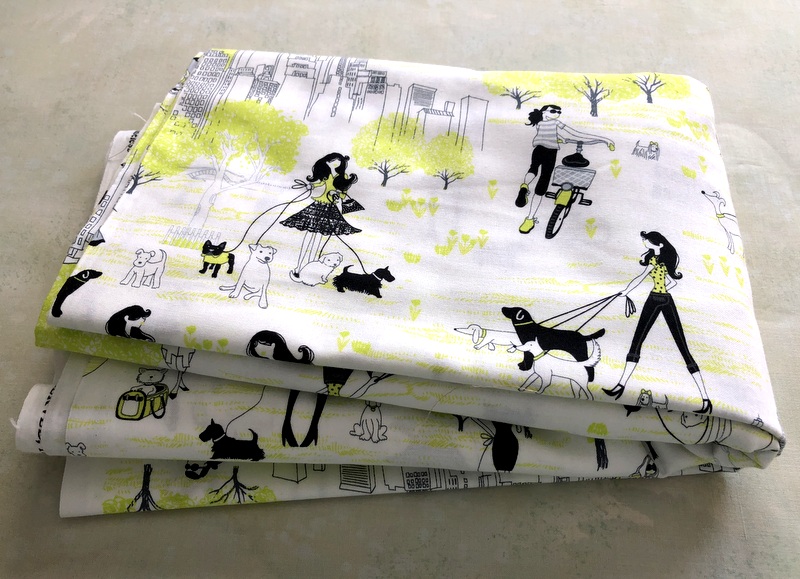
Five years ago or so, I bought a couple yards of New York-themed fabric from a Timeless Treasures line called “Central Park.” In 2014 I used a bit of the fabric to line the inside of this tote bag, the Bow Tucks Tote by QuiltsIllustrated.


Here’s a peek inside at the lining:


Regular readers may remember reading about it in this post from 2014.

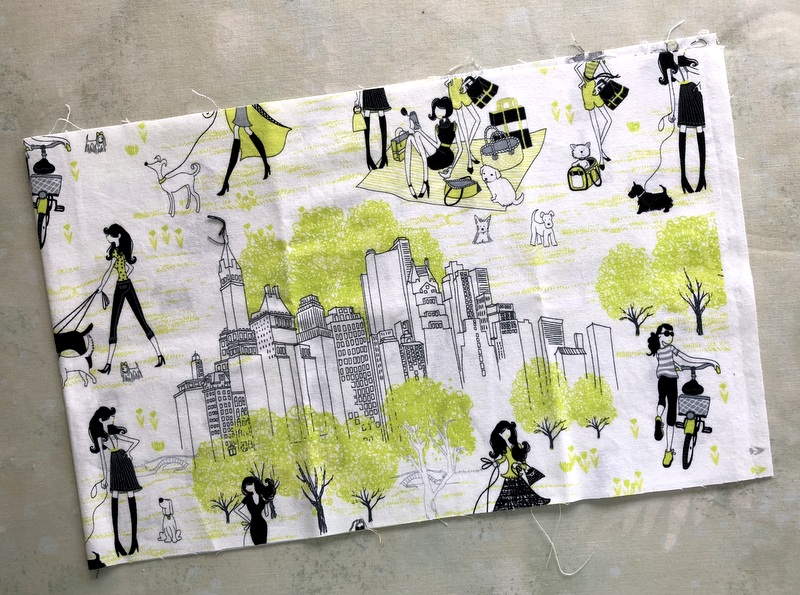
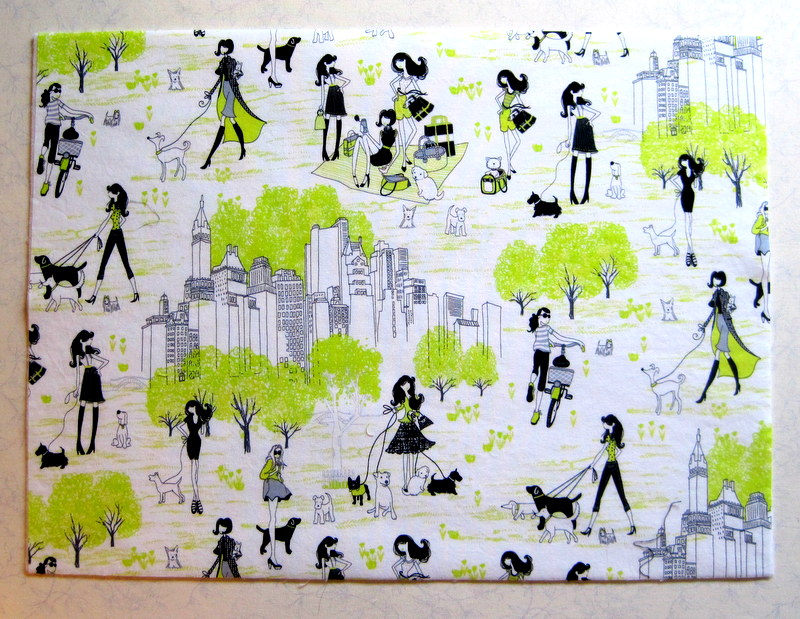
Fast forward to 2018. I used most of the remaining lining fabric for the backing of my latest quilt, Checkerboard CurvesAll I had left was this remnant . . .

. . . measuring about 9″ x 26″.

I was sorry to use it up and briefly considered searching the Internet for more. I constantly fight the impulse to replace a loved fabric when it’s gone, reminding myself that there will always be new pieces of fabric to catch my fancy. All it took was a look at the size of my fabric stash to convince me that adding to it was probably not a good idea.

But then . . . my friend Barbara, who is making her own black-and-white version of this quilt based on the pattern Dancing Churndash, asked me for selvage information on my backing fabric, hoping she could find enough for the backing of her quilt. Given the length of time since my initial purchase, I wasn’t very optimistic that Barb would find some. However, she embarked on a search of the Internet and I joined in on her behalf.

Well . . . guess what? I found enough fabric online for the backing of Barb’s quilt. And then Barb found some more! And now — here comes the confession — look what I have:

Four more yards of fabric to love!


Posted in update | 14 Comments

Oh Happy Day

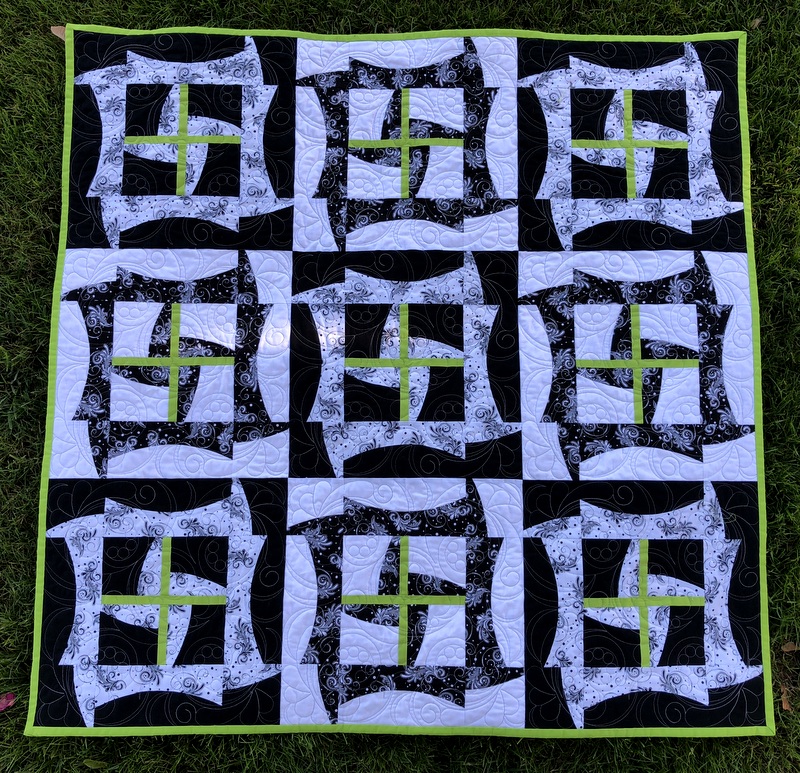
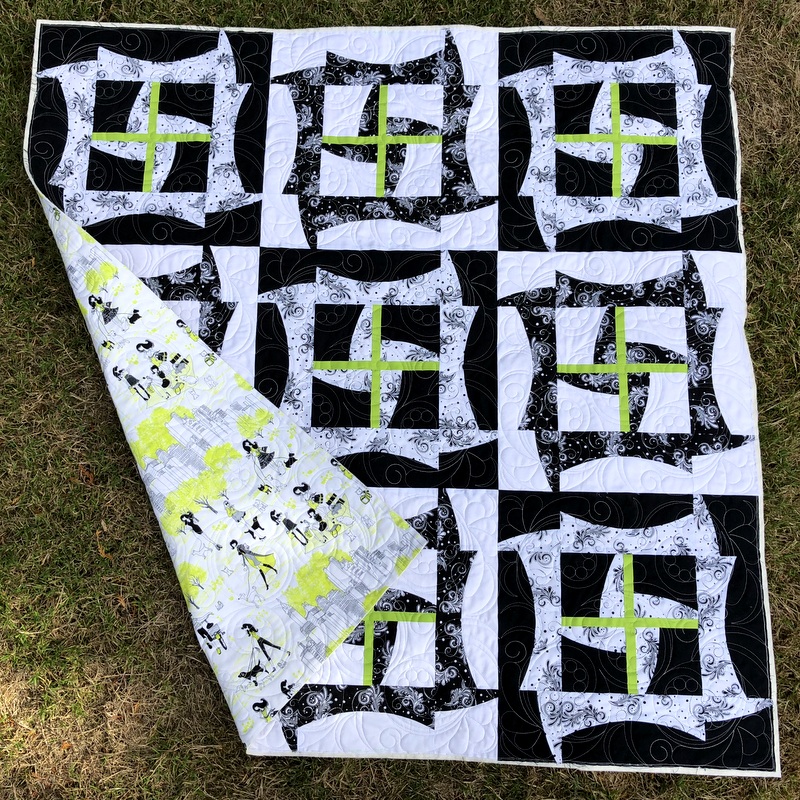
It’s always a happy day when I have a quilt finish to report. My quilt finish du jour is Checkerboard Curves, which you have seen each step along the way. It’s based on the pattern Dancing Churndash designed by Jenny Pedigo and Helen Robinson of Sew Kind of Wonderful.

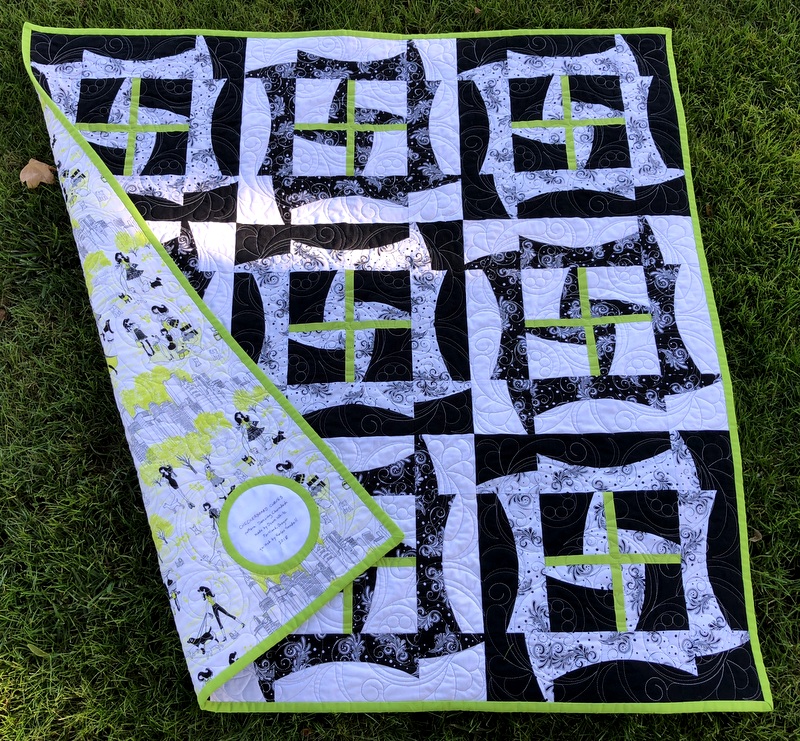
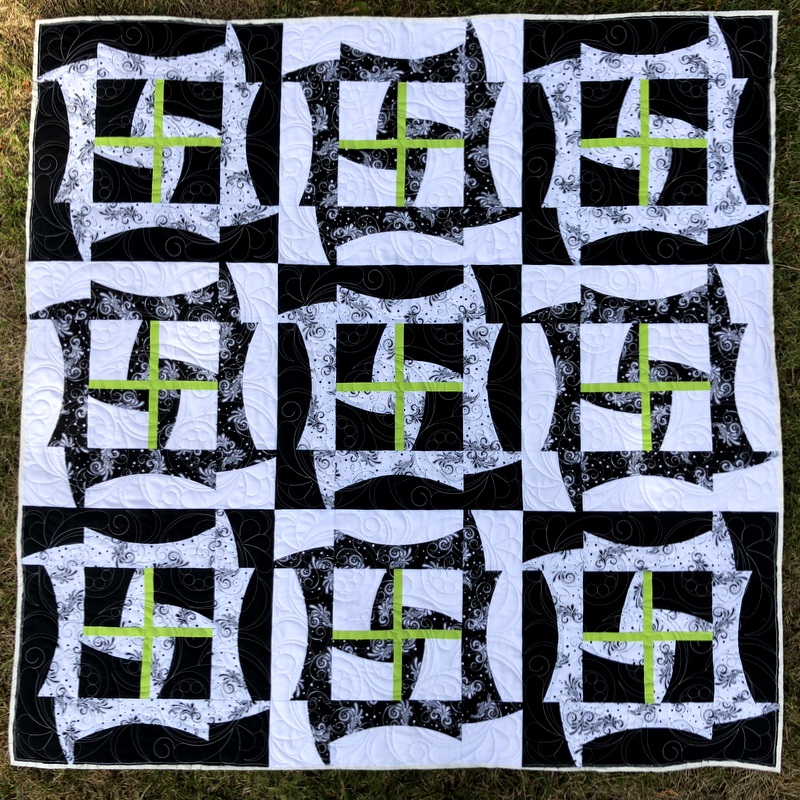
Presenting Checkerboard Curves, bound and labeled:

Measuring 44″ square, the quilt was finished with ½”-wide binding in a lime green solid to match the sashing strips in the center of each block. I rarely use solids in my quilts but this one really seemed to call for it.

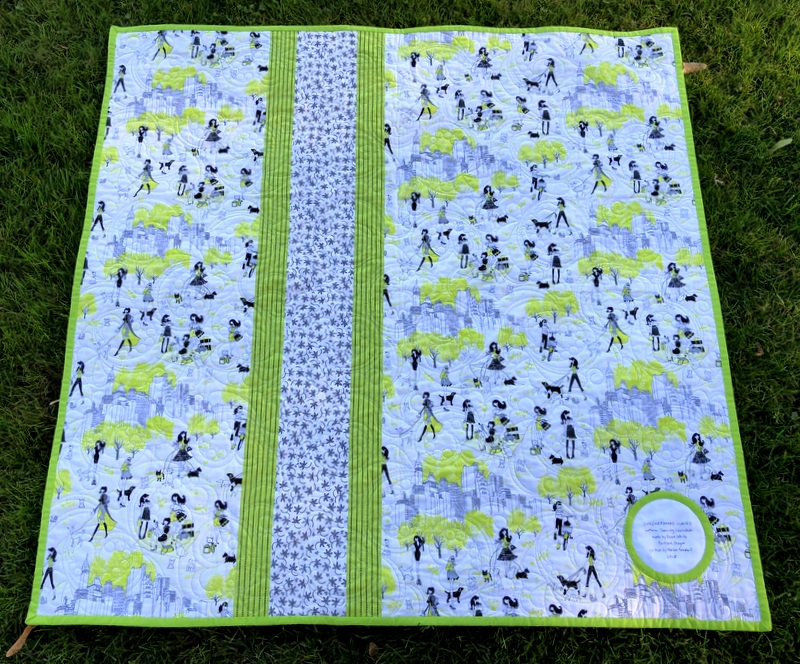
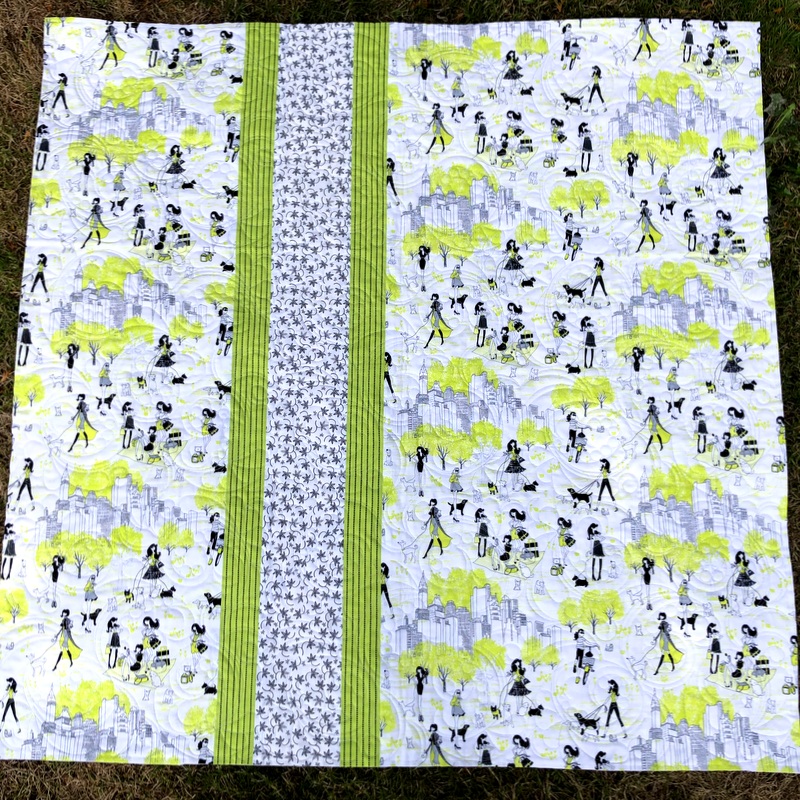
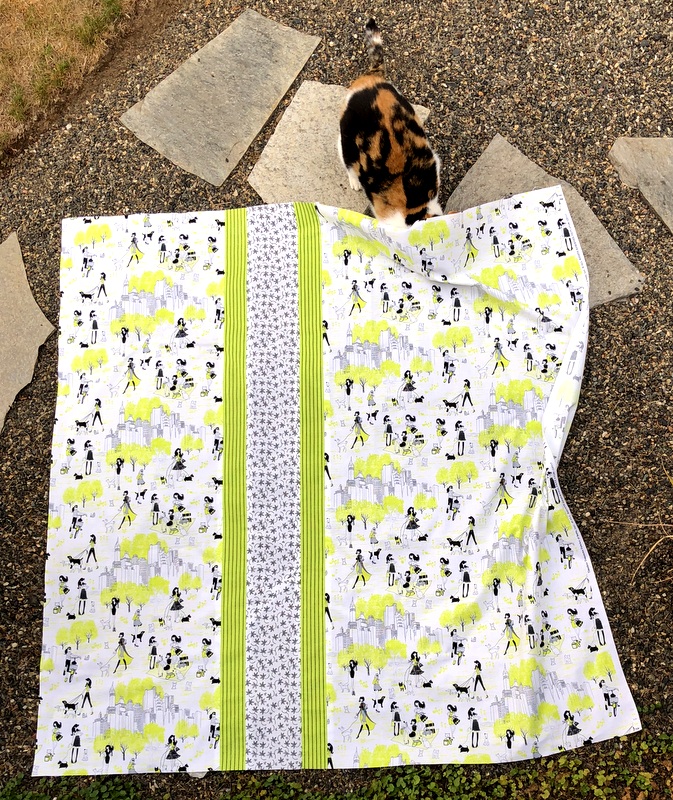
Here’s a look at the back featuring a delightful print of young women walking their dogs in Central Park:

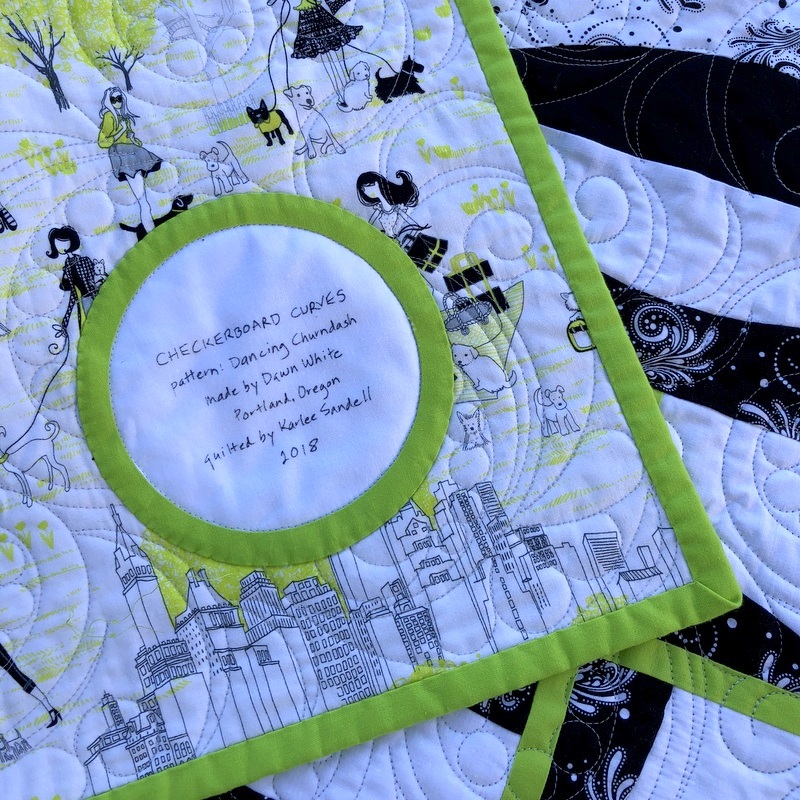
I also used the solid lime on the label:

Can you see that I stitched in the ditch by machine on the inside edge of the green circle? The stitching is virtually unnoticeable on the front because it totally blends in with the curves and circles of the quilting motif.

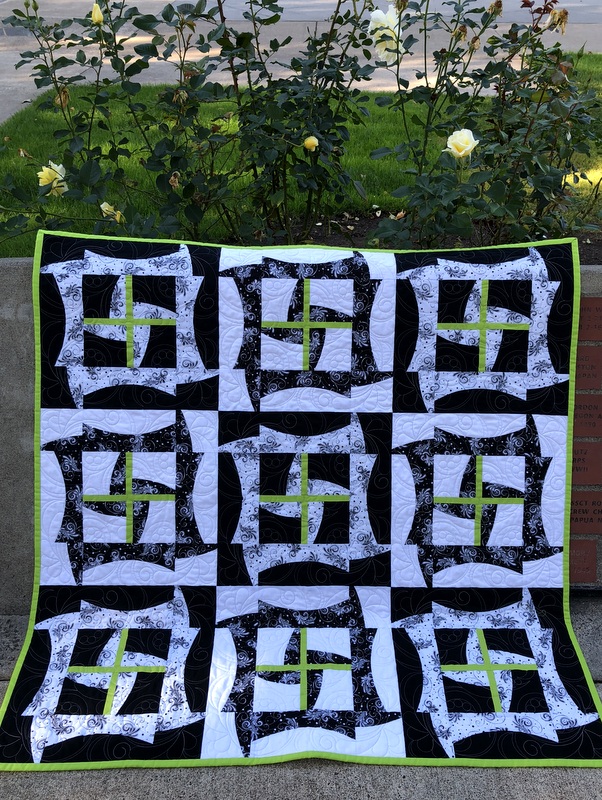
These photos were taken earlier this week on a beautiful late afternoon in early fall:

I’m loving the effect of the dappled sunlight on my quilt.

One last shot against a backdrop of pale yellow roses:


Posted in Quick Curve Ruler, update | 8 Comments

Autumn Reflections

Happy first day of fall! This year is flying by way too fast.

After our unusually hot summer in Portland with a record number of days in the mid to high 90s, many folks are relieved that fall has arrived. Me, not so much. As a native Oregonian I don’t mind the rain and cooler weather that fall brings but I do miss the long days of early summer when the evening light doesn’t fade till close to 10 pm.

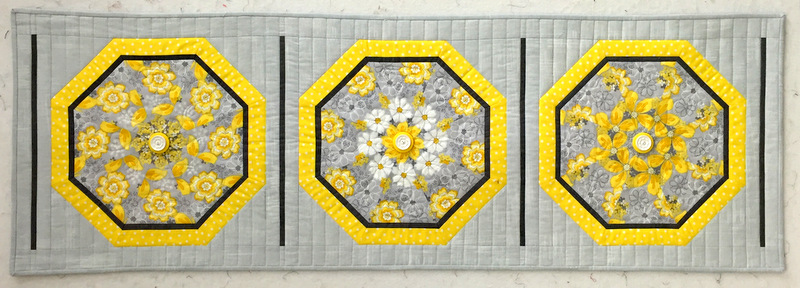
The official change of seasons is my cue to change the wall hanging in the master bathroom. Off the wall goes Sun Flowers . . .

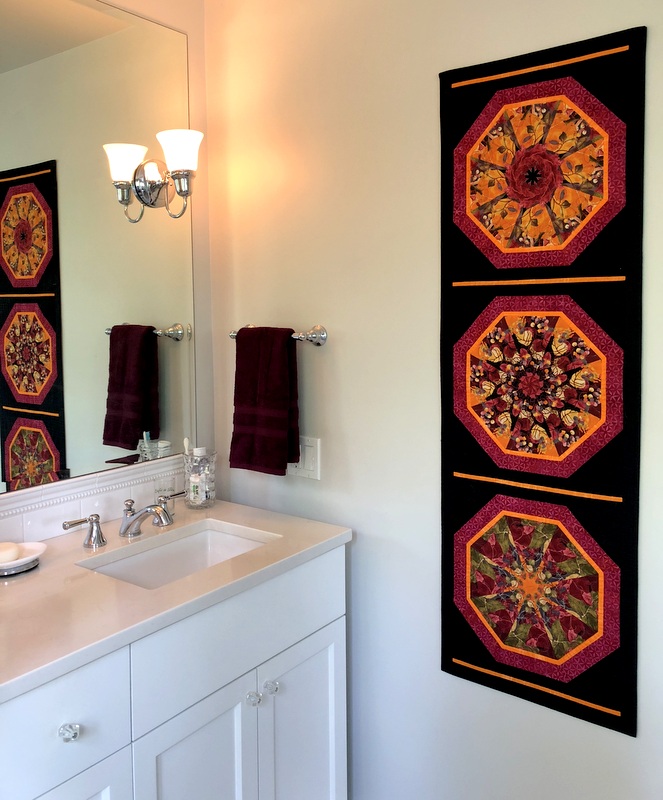
. . . and up goes Autumn Reflections:

Both quilts were made from my pattern Season to Taste. They measure 18″ x 55″.

Here’s a look at Autumn Reflections in situ:

Of course I had to buy coordinating hand towels!


Posted in free motion quilting, home dec, kaleidoscope quilts, update, wall hanging | 4 Comments

Back from the Quilter!

Checkerboard Curves, my quilt made from the pattern Dancing Churndash, is back from the quilter and I’m doing a happy dance:

I’ve been watching the Instagram feed of longarmer Karlee Sandell (SewInspired2Day), who has quilted several quilts for me. “Swan Song,” a quilting design she used recently, was on my short list for this quilt. After consulting with Karlee, it moved to the top of the list.

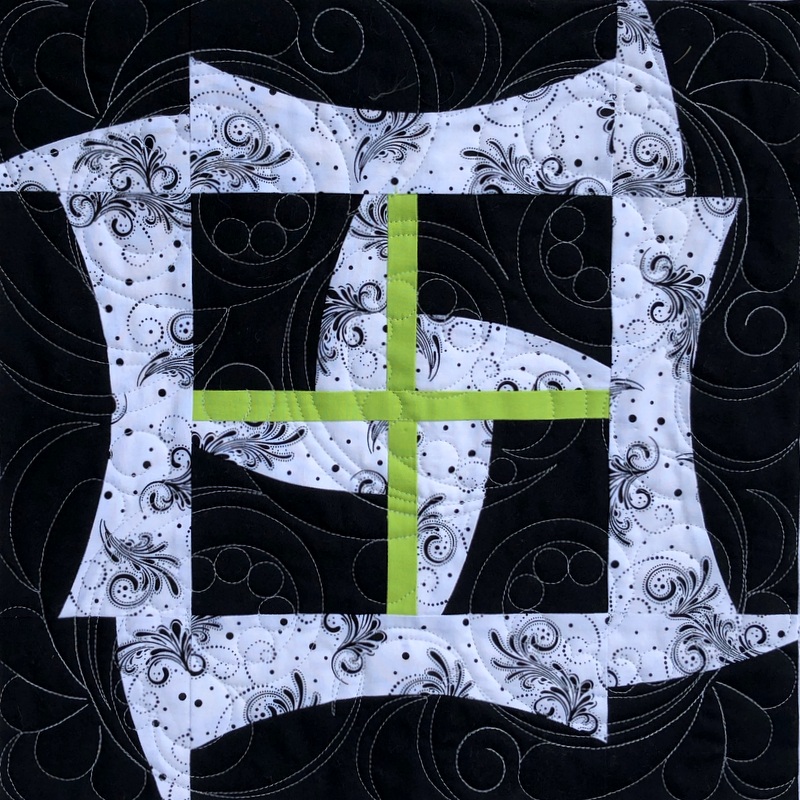
Can you see how the curves and circles in the quilting design mimic the curves and circles in the prints? The effect is so lighthearted and whimsical. Let me show you  a couple of close-ups. Here’s a positive block (black print on white background) . . .

. . . and a negative block (white print on black background):

You may not realize it but the thread I picked isn’t white, it’s a very pale grey. I knew it would give definition to the quilting on the white background without being too strong. Likewise, I knew the grey thread would slightly soften the impact of the quilting on the black background. Perhaps you can see that if you go back and look at the two blocks above.

I’m pretty tickled with how the quilting looks on the back of the quilt as well:


Just enough quilting to provide texture without interfering with the playful print:

Originally I was thinking about custom quilting for Checkerboard Curves. I would have gone with black thread in the five negative blocks and white in the four positive ones. Know why I didn’t? The back of the quilt! I liked the print so much I didn’t want to cover it up with dense patches of black thread.

When trimming the quilt I left a quarter-inch margin all around. That’s because I’m going to frame the quilt with half-inch binding in solid lime to match the half-inch wide strips in the center of each block. With the binding added Checkerboard Curves will measure about 44″ square.

I may go with a lime green label, too, just for the fun of it.


Posted in Quick Curve Ruler, update | 8 Comments

Opposites Attract

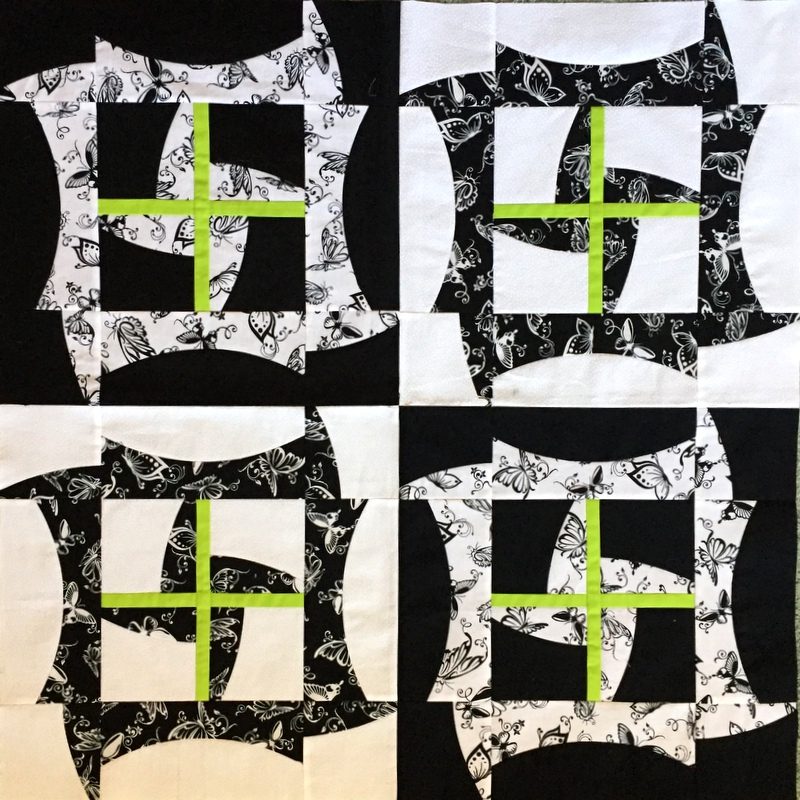
Back in July I was playing around with the pattern Dancing Churndash, using positive and negative prints in black and white:

I liked the checkerboard effect immensely but only had enough of the prints to make these four blocks, having used most of the fabric years before in a couple of other projects.
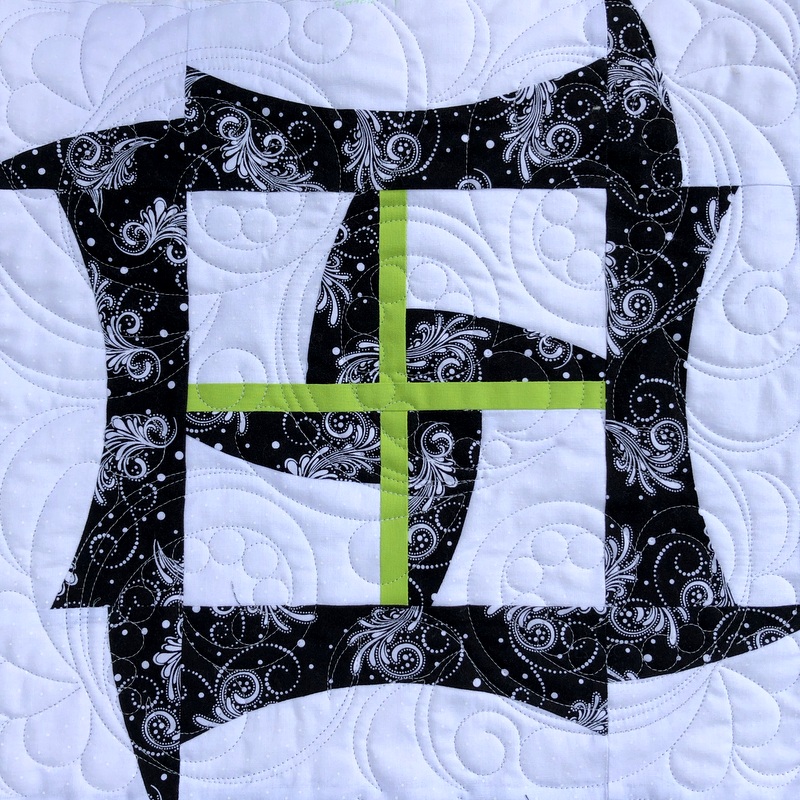
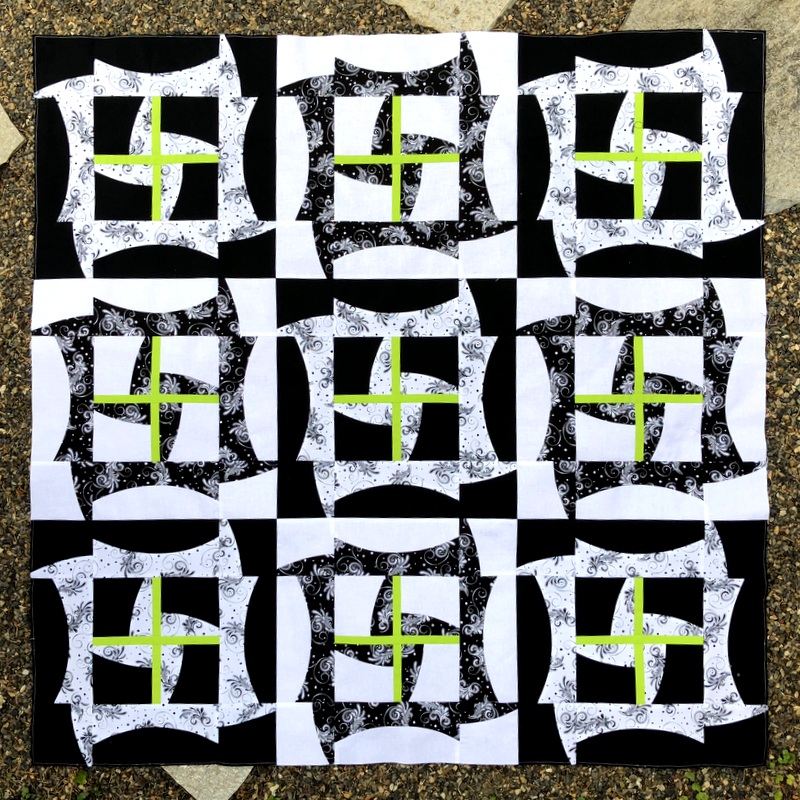
Not to worry. I just (ahem) happen to have several other sets of positive/negative black and white prints in my stash. I pulled out one of those sets to make a quilt I’ve already named Checkerboard Curves. It’s easy to see why:


Dancing Churndash
was designed for Cut Loose Press by Jenny Pedigo and Helen Robinson of Sew Kind of Wonderful. The traditional Churn Dash block is one of my favorites, and I love Jenny and Helen’s contemporary curvy take on it. (In fact, this is my second version of Dancing Churndash. You can see the first one here.)

The top above measures 44″ square. I generally make quilts that are at least lap size and thought about adding borders to this one to make it larger. In the end I decided to keep it simple and will finish it with lime green binding after it’s been quilted.

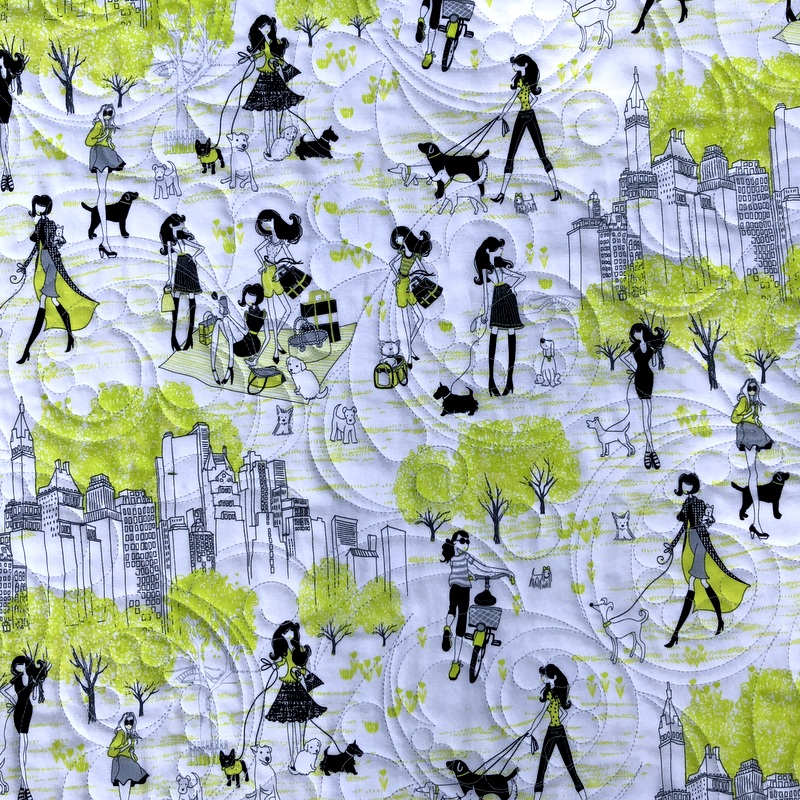
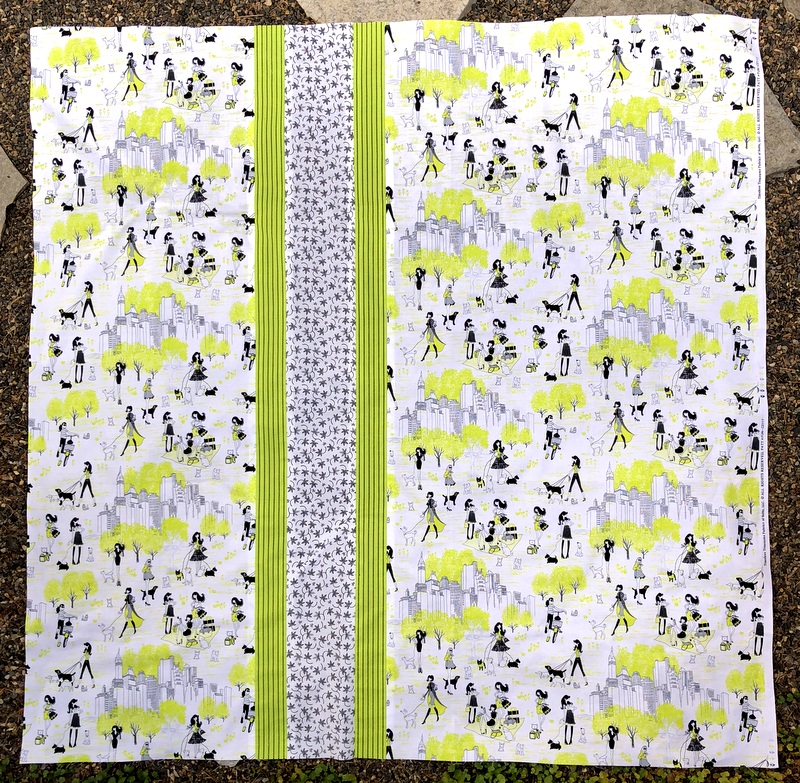
For the backing I did a little more stash diving and came up with this Timeless Treasures print from a few years ago featuring stylish young women walking their dogs in New York City and picnicking in Central Park:

I had just enough length for the backing but needed to add to the width to make it work:

Isn’t that cute?

The photo above was taken yesterday just as the light was beginning to wane. Coco the Cat was keeping my husband company while he was weeding in the backyard but she came over immediately to investigate:


Posted in cats, family, Quick Curve Ruler, update | 6 Comments

Tutorial: Scissors Case from First Light Designs

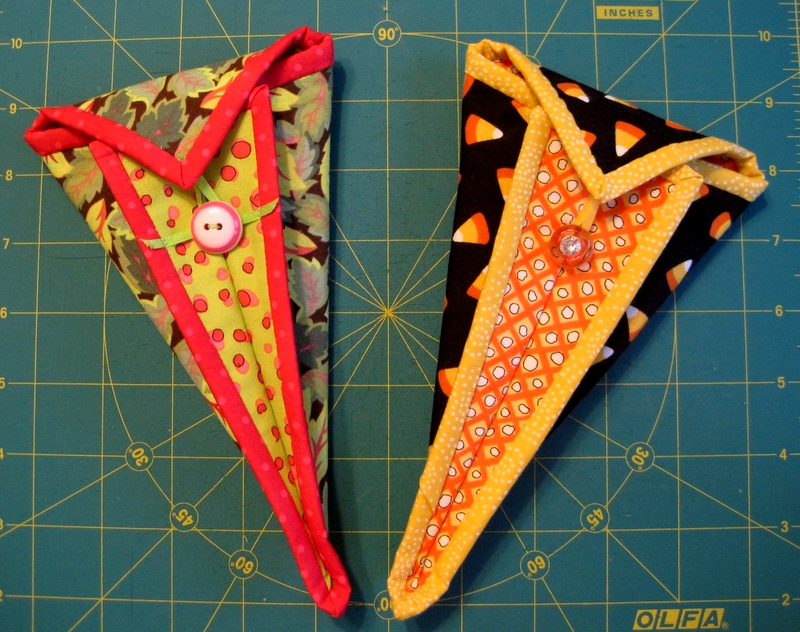
These safe and stylish scissors cases look complicated but they are surprisingly easy to make. Each case is made from a little quilt sandwich that’s bound, folded in half on the diagonal, and stitched with one seam. If you’ve ever bound a quilt using double-fold binding (also known as French binding), you’ll have no trouble making one of these cases. They make wonderful gifts as well as delightful additions to your own sewing basket.

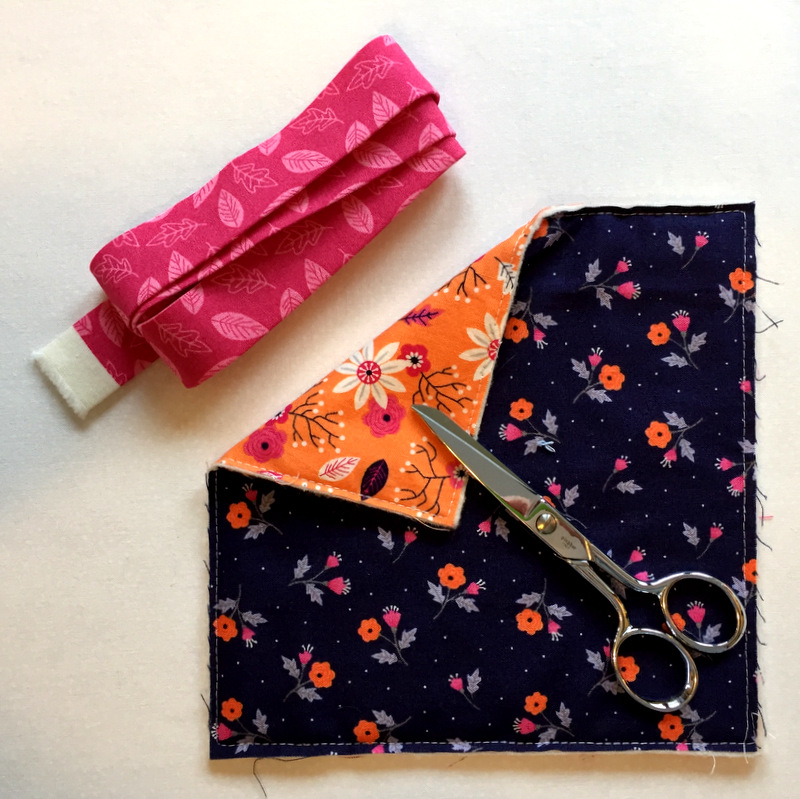
All you need are two squares of contrasting fabric, one square of batting, and a length of 2″-wide binding (straight grain or bias, your choice) in a third fabric:


Bits of ribbon, small pony tail elastic bands, and vintage buttons combine to make charming fasteners. These are completely optional, however. Even though I usually put a loop and button on my scissors cases, I tend to leave the top flap open so I can easily see if the scissors are there when I look into my quilter’s tote.

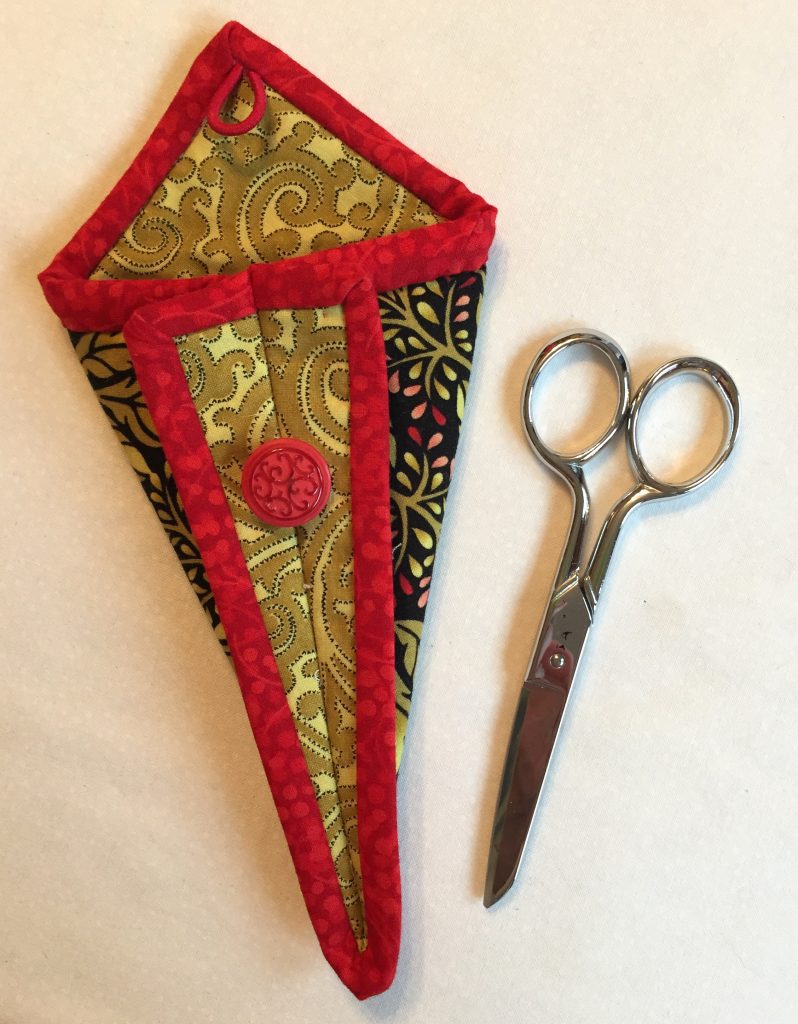
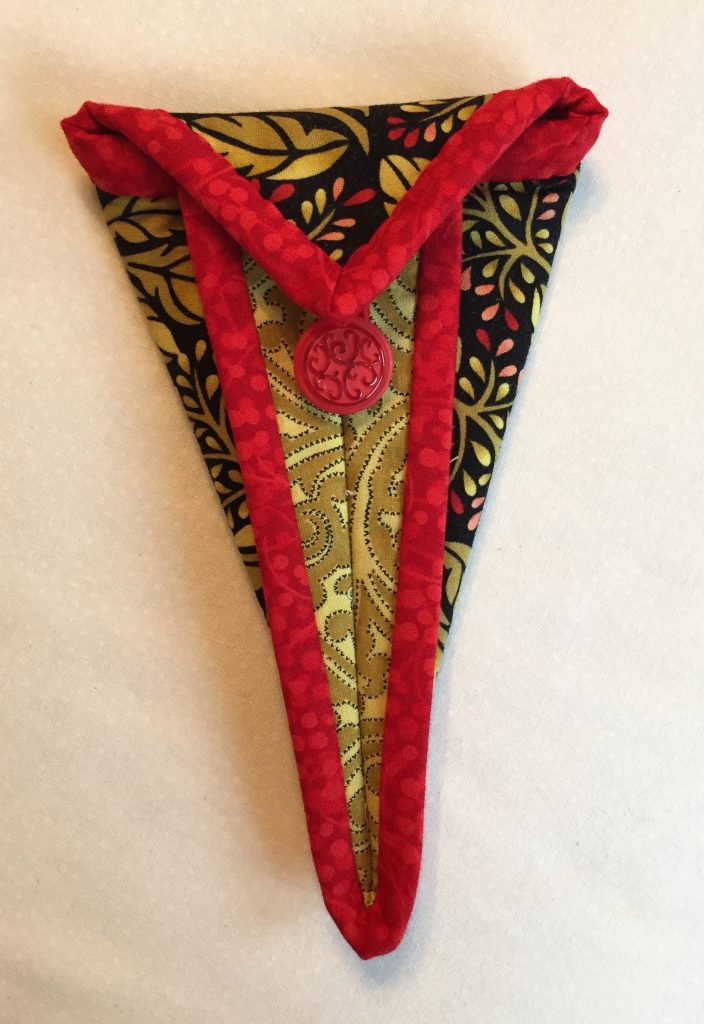
If you start with 7″ squares, you’ll wind up with a scissors case that measures about 5″ x 10″. This case was made with 6″ squares and measures about 4″ x 8″ opened . . .

. . . and about 4″ x 6¼” closed:

I like this size best for my 5″ Ginghers.

(If you’re not sure what size square you need for the scissors you have in mind, experiment with squares cut from sheets of paper. Fold the paper using the instructions below as a guide. Insert your scissors into your paper “case” and test the fit.)

This tutorial is for the slightly larger case using 7″ squares but can easily be modified for the 6″ size.

Scissors Case from First Light Designs

Finished size: about 5” x 10” (from top point of flap)

Materials
(2) 7” squares of cotton
(1) 7” square of light to medium weight batting
36” of binding fabric cut 2” wide and pressed in half lengthwise
Optional: small ponytail elastic band or 4” length of ⅛” – ¼” wide satin or grosgrain ribbon
Optional: button
Optional: ¼”wide Steam-a-Seam fusible web

Recommendation: use a walking foot for construction

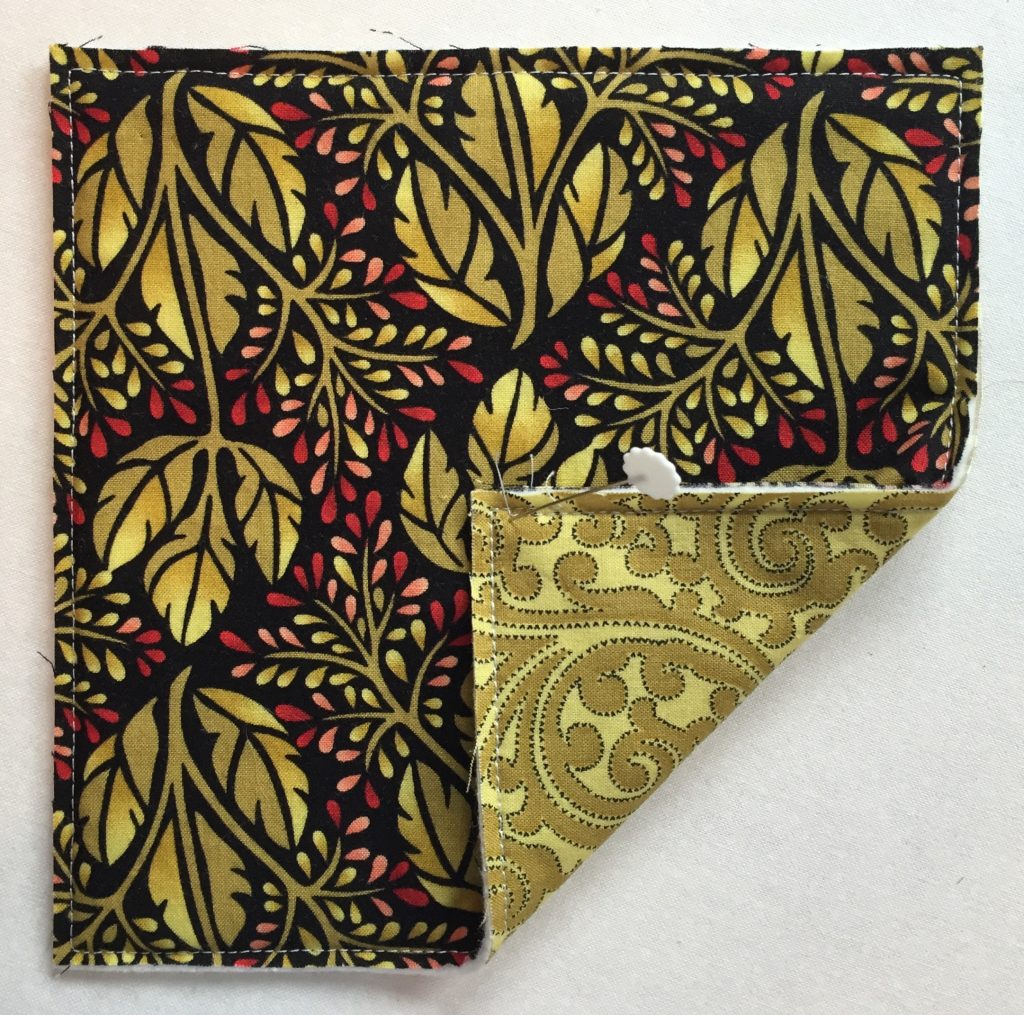
Step 1. Layer the cotton squares and batting as for a quilt and stitch ⅛” from the outside edges to hold the layers together:

In the photo above, the darker print is the outside of the case and the two-toned gold fabric is the lining.

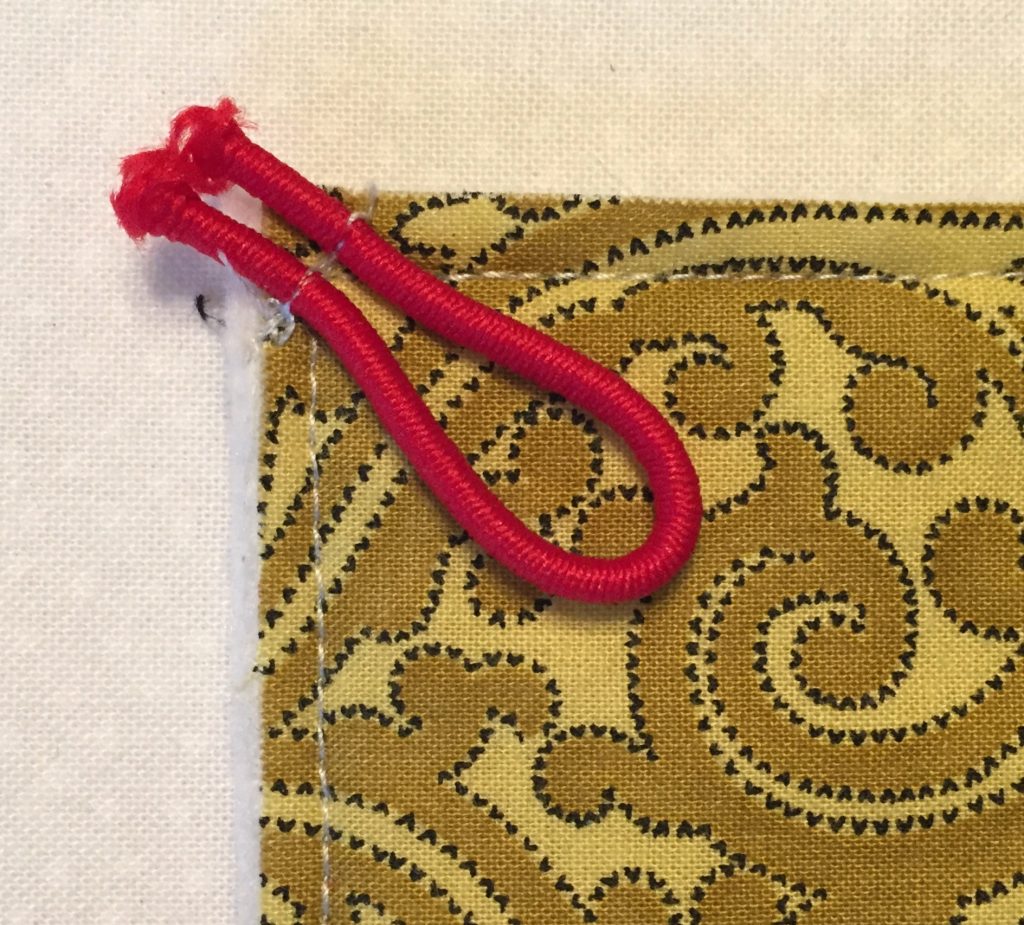
If using a loop and button closure, stitch a loop in one corner on the lining side, keeping stitching inside the seam allowance:

I used a small ponytail elastic on this case but you could also use narrow ribbon as I did in the two cases at the top of this post.

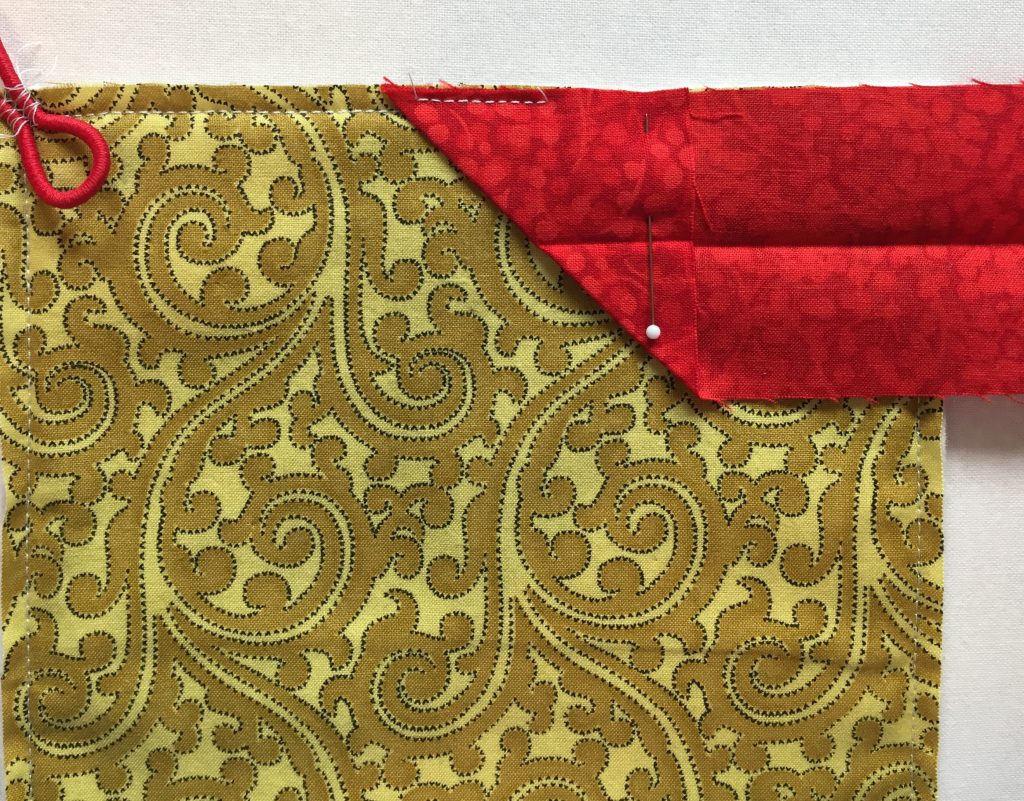
Step 2. Still working on the lining side, position the binding strip halfway down the side from the loop:

Note how the edge of the binding has been folded at a right angle and how I added a few stitches inside the seam allowance to secure the binding to the edge of the quilt sandwich.

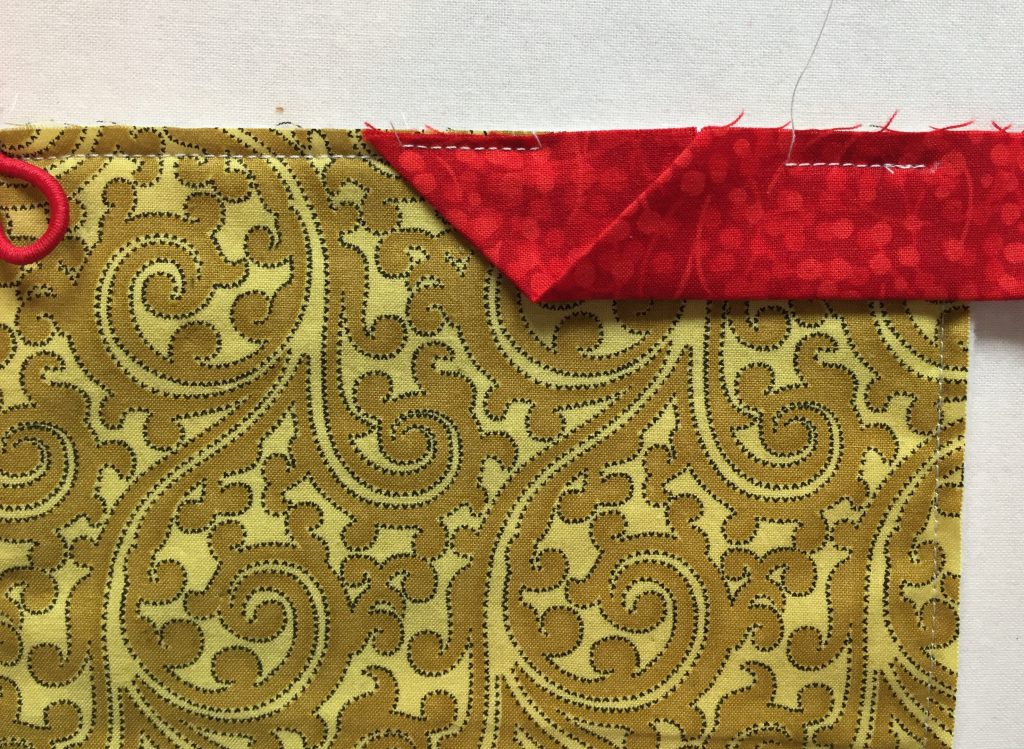
Step 3. Leaving enough room to tuck the other binding tail into the fold, begin stitching the binding with a scant ¼” seam, stopping ¼” from the end in order to miter the corner:

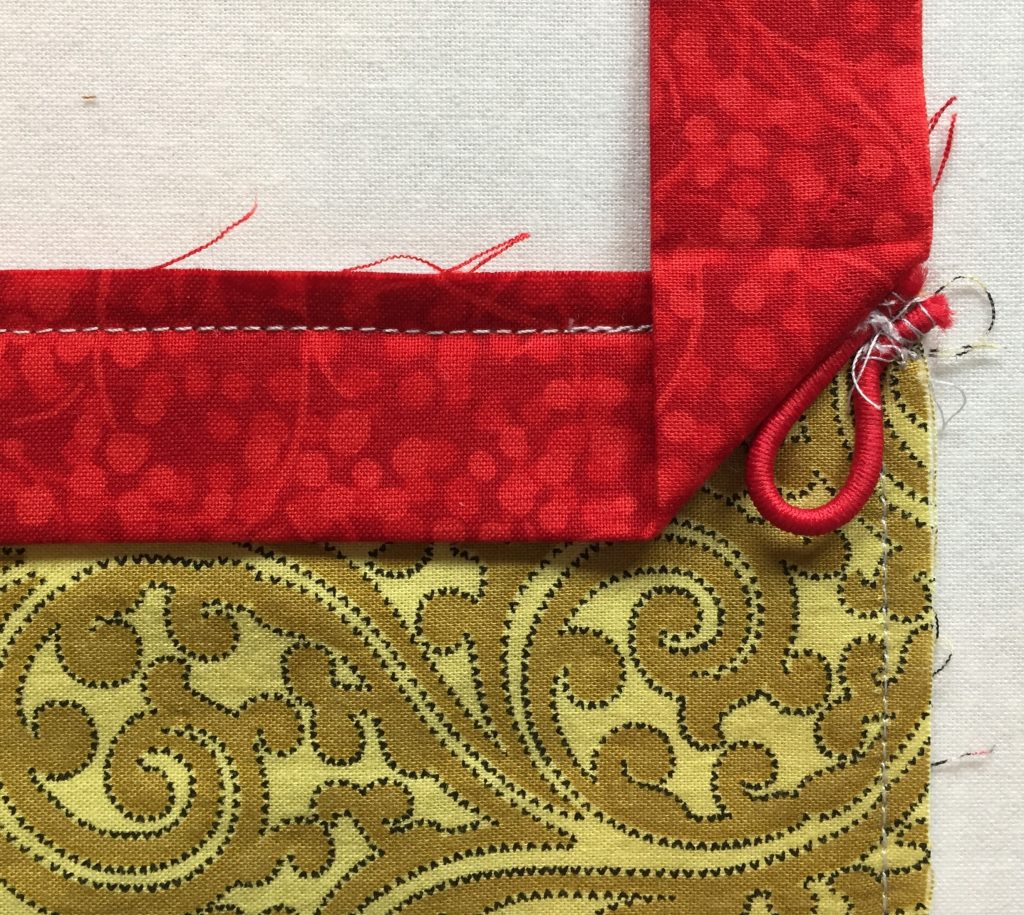
When you come to the fourth corner, be careful not to catch the loop in the binding seams when you miter that corner:

Step 4. Tuck the left tail into the fold of the right tail . . .

. . . and finish stitching the seam, starting and ending a few stitches beyond the original stitching.

Step 5. Turn the binding to the right side and stitch by hand or fuse in place using ¼”-wide Steam-a-Seam 2 (not Steam-a-Seam 2 Lite). If using fusible web, take care not to melt ponytail elastic with hot iron!

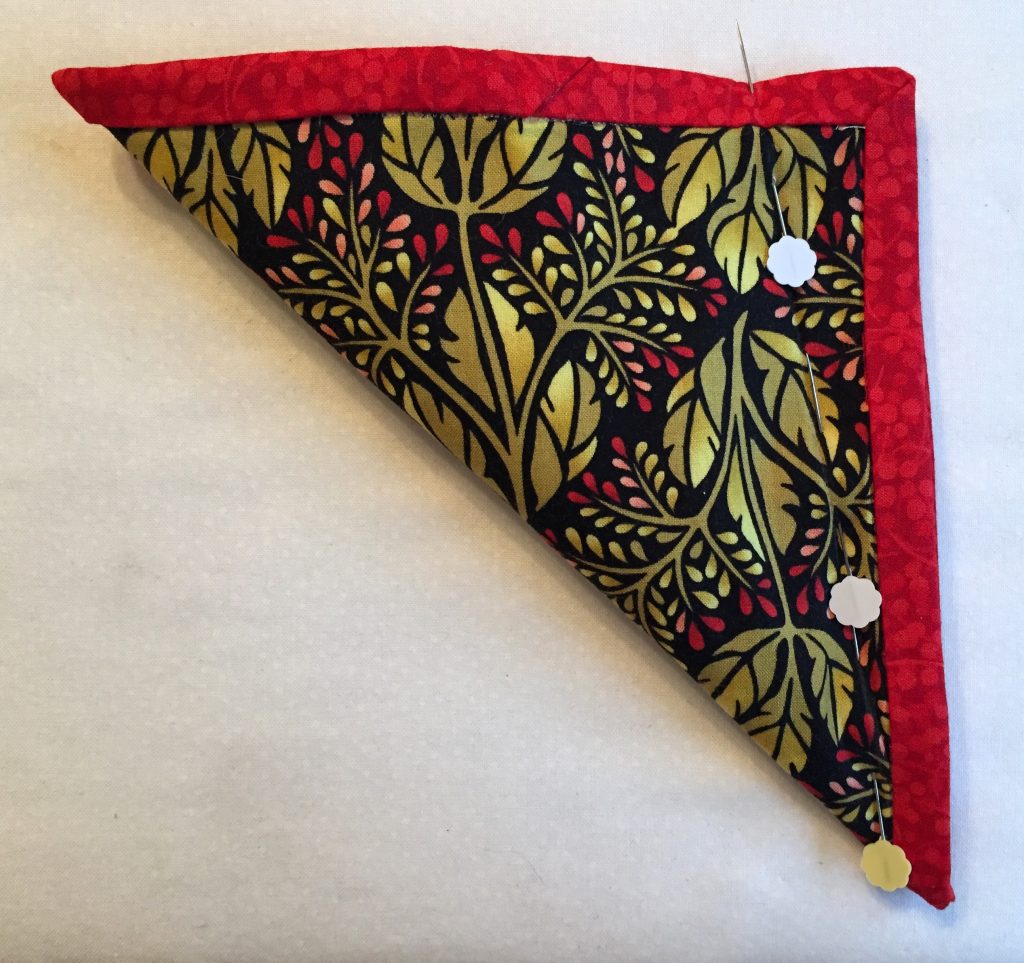
Step 6. Fold the case in half diagonally and mark a stitching line 1¼” in from the upper right corner, tapering to the bottom as close to the binding at the bottom as you can get. (Note: loop is in the upper left corner). The pins in the photo below show the stitching line:

Stitch, backstitching at both ends:

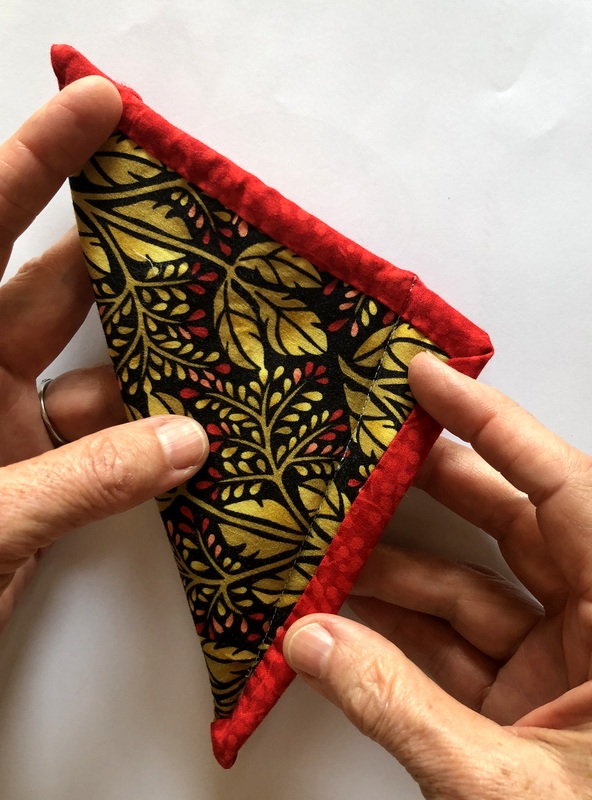
Note that you stitch through the binding at the top of the seam and taper down toward the corner with the stitching ending right next to the binding. Try using a zipper foot for this line of stitching if the walking foot skips stitches. The stitching will not show when the flaps are folded back. (If using 6″ squares, mark your stitching line 1″ in from the right edge rather than 1¼”.)

Open up the seam and press flat as shown below. Sew button on seam line (test placement by holding top flap down to see where loop is in relation to button).

Voilà! Ready to use:


Posted in rotary cutter case, tutorial, update | 7 Comments

Hazel’s Diary Quilt: Domestic Bliss (Block 8)

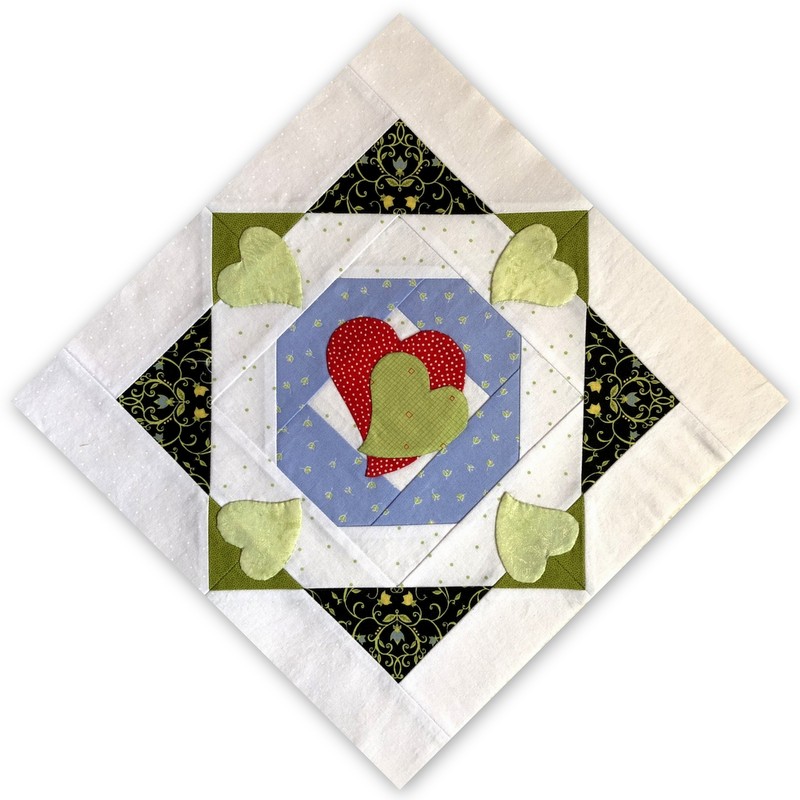
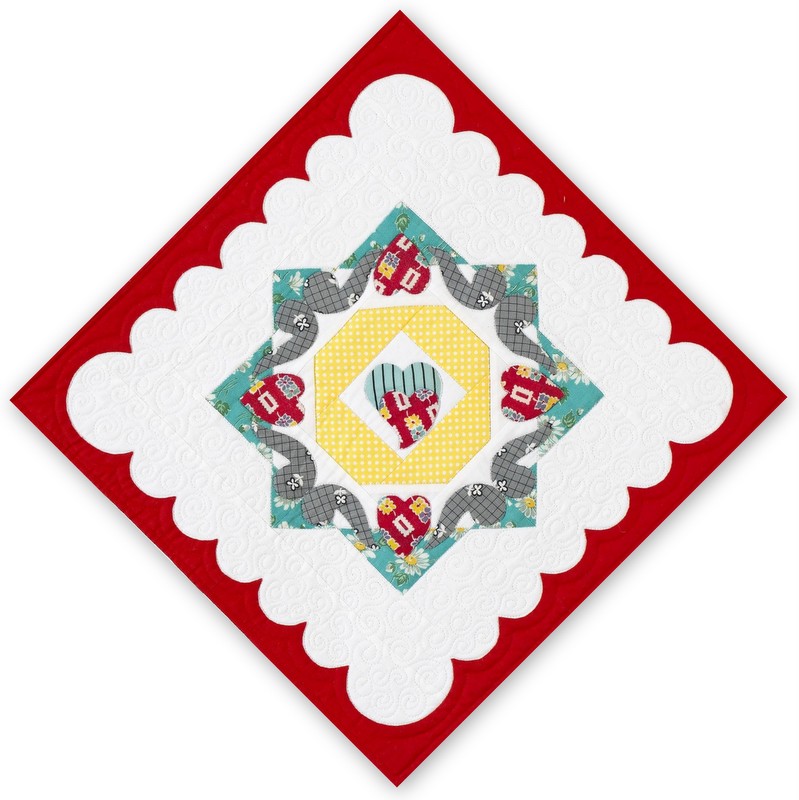
Domestic Bliss, Block 8 of Hazel’s Diary Quilt is finished. I followed designer Shelly Pagliai’s instructions for making the block but changed her appliqué design in order to preserve the fussy cut images in the large dark triangles. I also enlarged the two hearts in the center and changed their orientation slightly. You’ll see what I mean when you look at Shelly’s original block:

I’m happy with the how my block turned out but I really struggled with the appliqué on the four outer hearts. I can see that one of the hearts has a couple of little points where there should be only curves. At first I thought it was fine but the more I look at it the more I know it has to be replaced. The fabric is a Michael Miller Fairy Frost and I’m wondering if the slightly metallic finish makes it harder to needleturn the fabric.
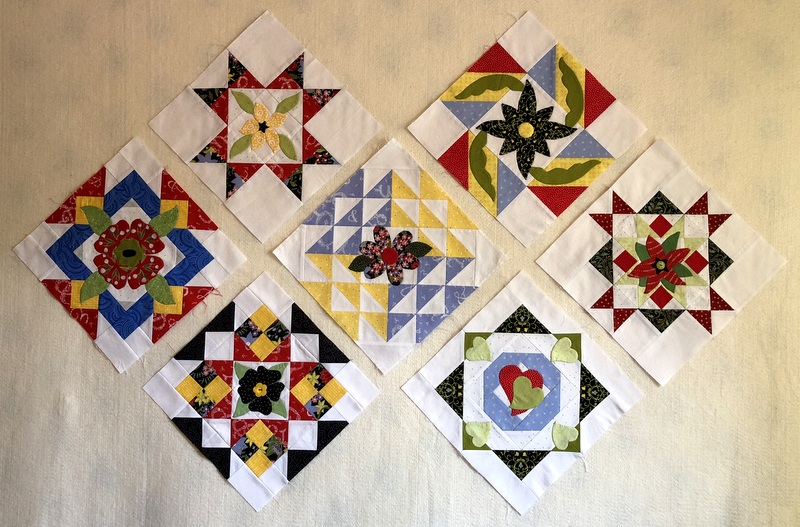
For now, Domestic Bliss is up on my design wall with the other six blocks I’ve made so far:

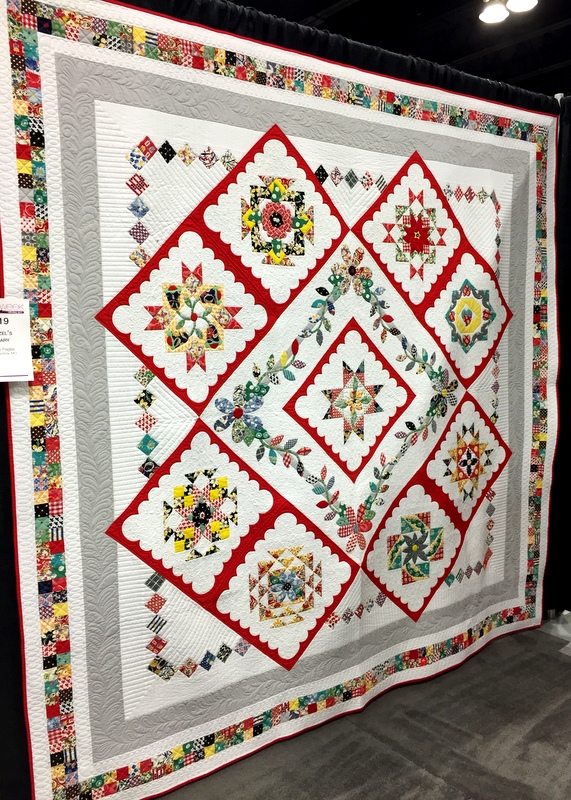
That’s not the final setting; I just put the blocks up in the order they were made. Two more blocks to go and then I will add white sashing strips and a red scalloped border — needleturned! — around each one.

I look at Shelly’s marvelous quilt . . .


. . . and dream about mine.


Posted in appliqué, Hazel's Diary Quilt, needleturn appliqué, update | 9 Comments