Author Archives: Dawn

First Light Designs: Best of 2021

For the sixth consecutive year, Cheryl at Meadowmist Designs is hosting a “Linky Party,” inviting quilt bloggers to share their top five posts of the year. It’s a fun way to look back on the past 12 months and identify some of the high points as well as see what marvelous things other quilters are creating. So thank you, Cheryl. I’m delighted to join the 2021 party!

Clicking on the links below will take you to the original posts where you can read more about the finishes and see more photos.

Number 1. Best Tutorial:  Oven Mitts that Fit

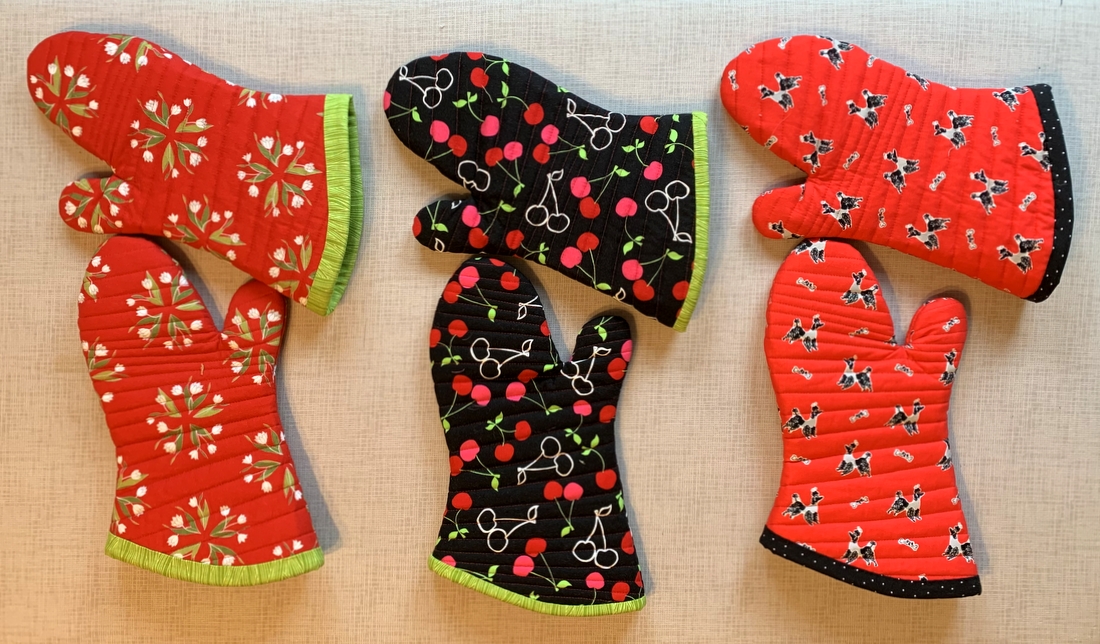
I’m still waiting for the quilting and crafting world to discover my tutorial on quilted oven mitts. I worked really hard on writing this tutorial and loading it with pictures. So much so that the tutorial is in two parts with a prequel!

Oven Mitts that Fit: the Prequel gives the background for my taking on this project and shows you how to make your own pattern based on the size of your hand.

Part 1 covers fabric requirements, instructions for downloading and printing the pattern, assembling the layers, and quilting the resulting “quilt sandwich.”

Part 2 covers the sewing of the mitt and contrasting band around the cuff edge as well as the final step of tacking the band down before turning the mitt right side out.

These mitts make great gifts for friends and family. I invite you to take a look!


Number 2. Best UFO Finish

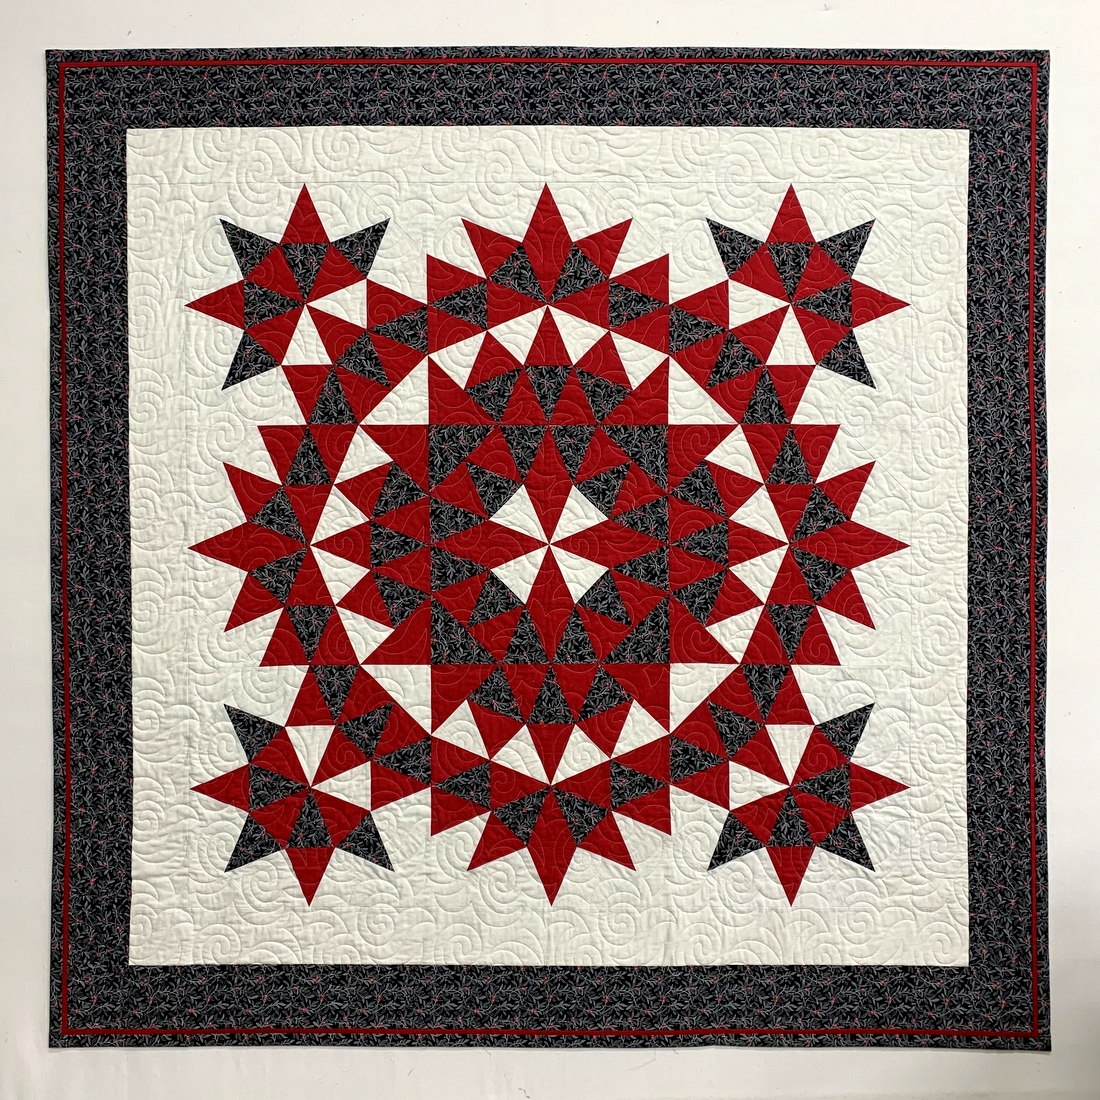
Okay, I confess:  This is the only UFO (UnFinished Object) I busted this year. It’s an updated version of the traditional pattern Grandma’s Surprise. I started working on this quilt in 2015 in a class taught by Joyce Gieszler. Her book Then and Now Quilts (Kansas City Star Quilts, 2014) had come out the year before and Grandma’s Surprise was one of the quilts featured in the book. My version of this design is called Currant Affairs (there’s a pun in that name).


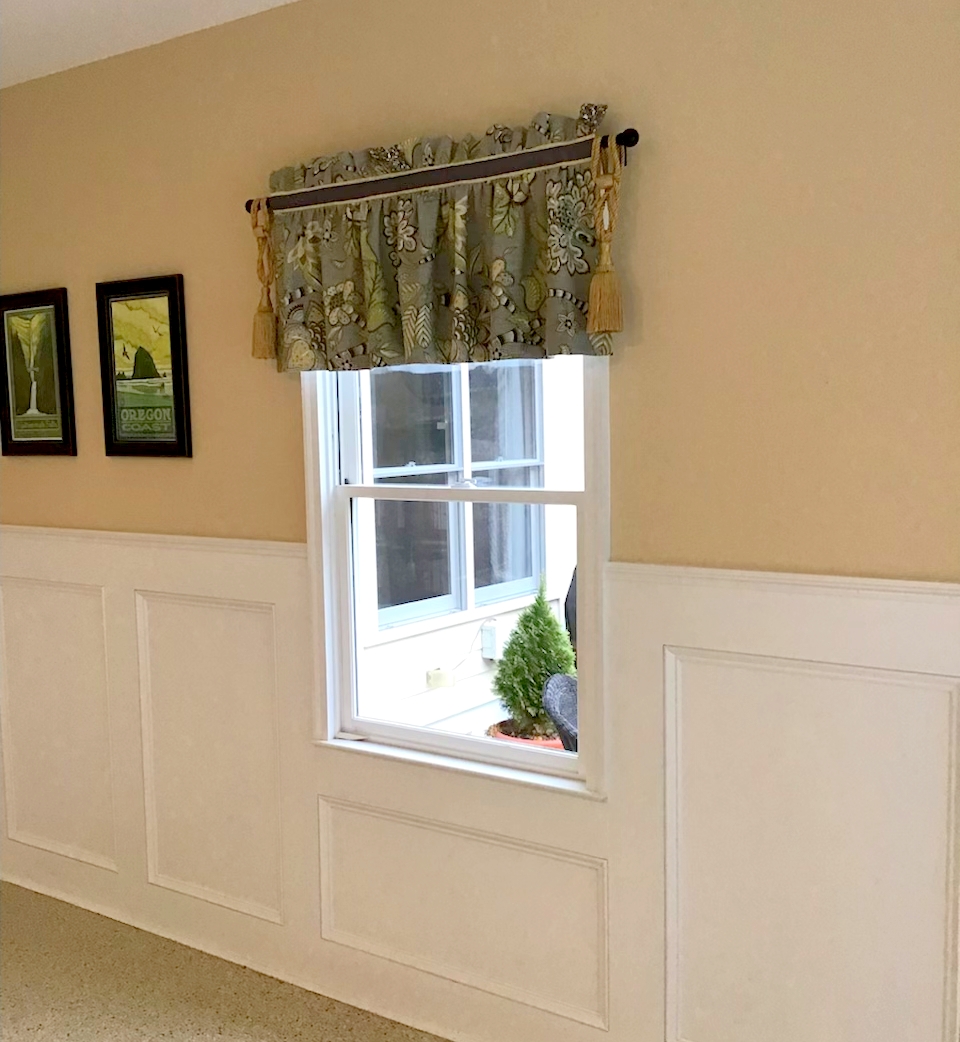
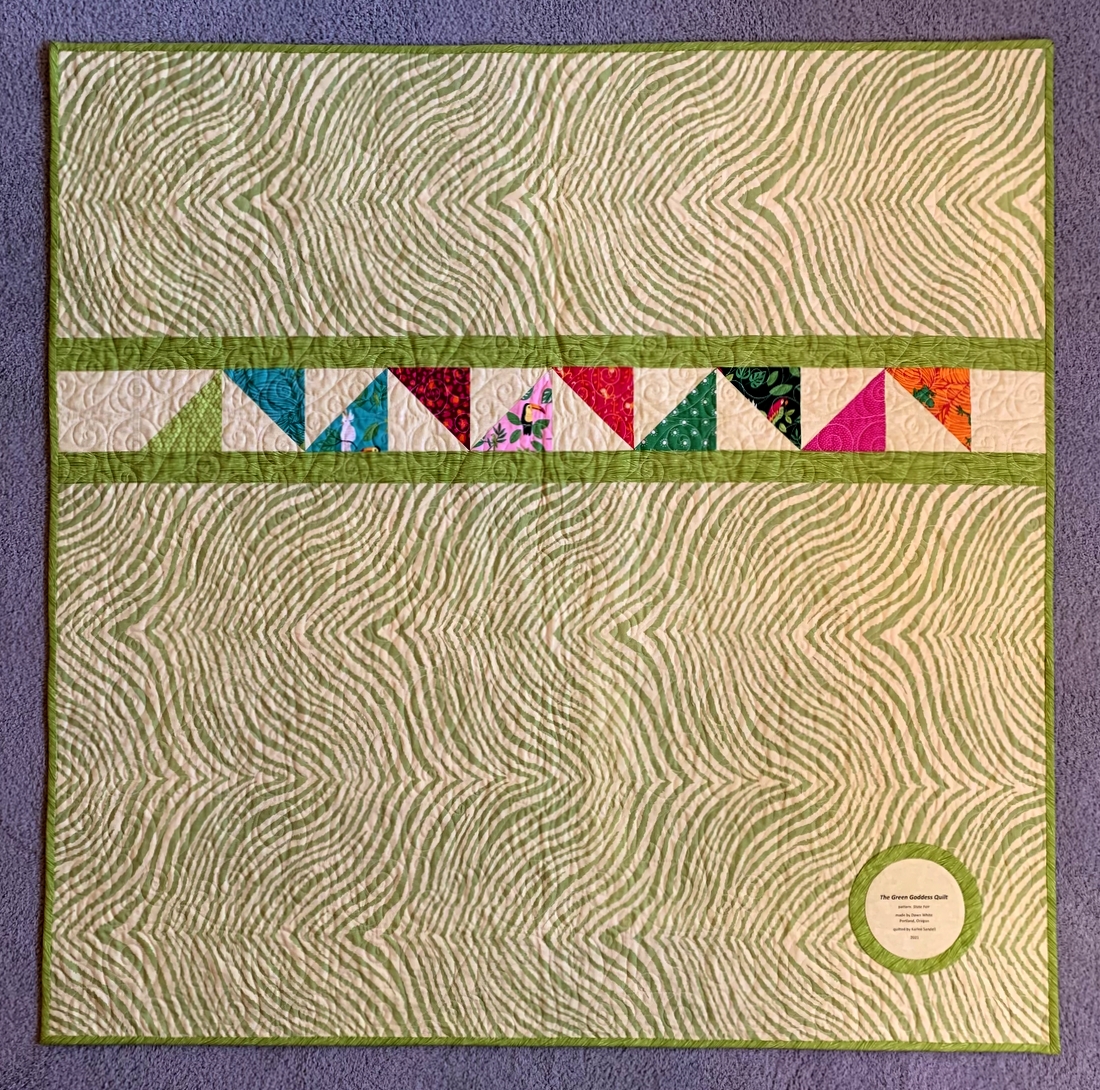
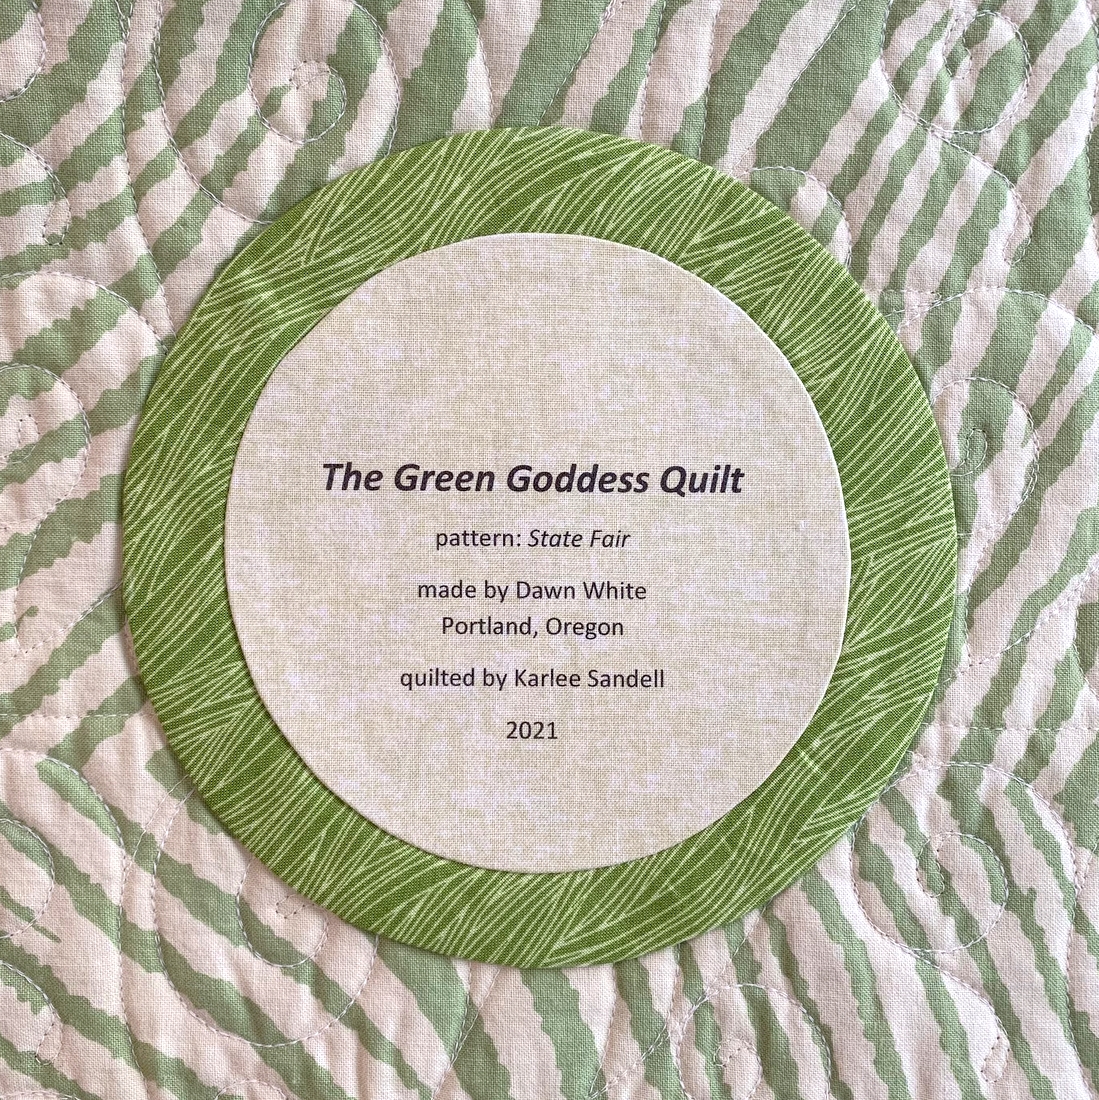
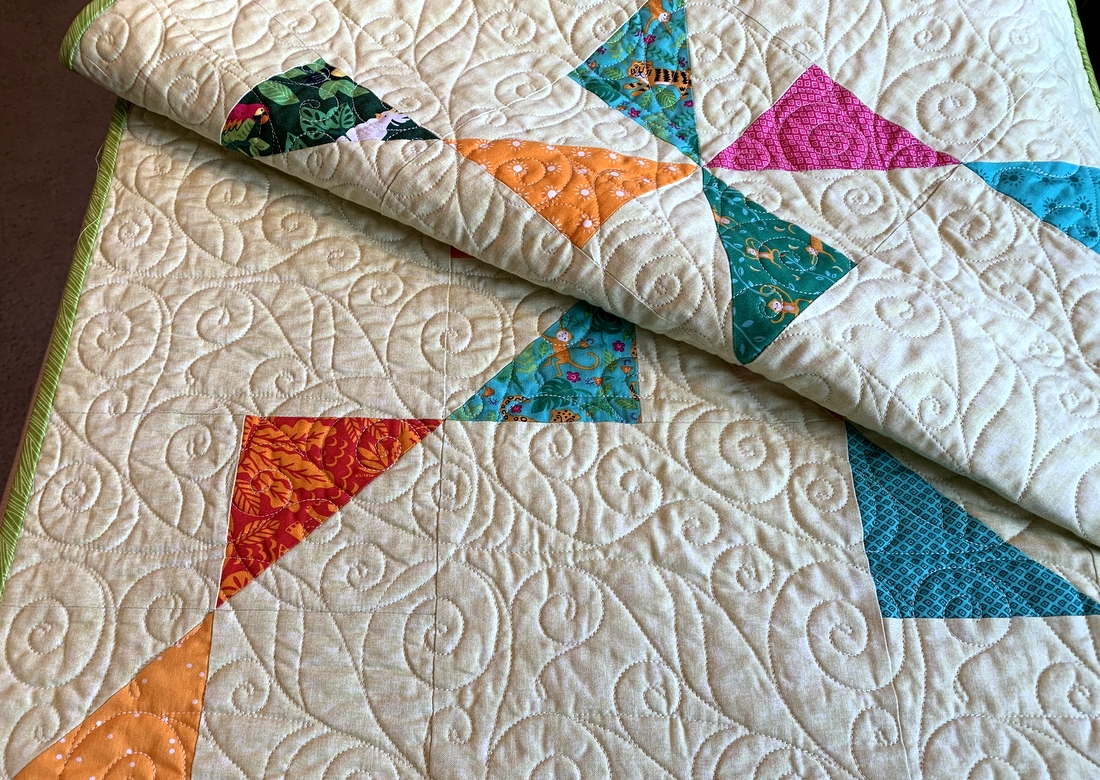
Number 3. Best Quilt Made for a Car

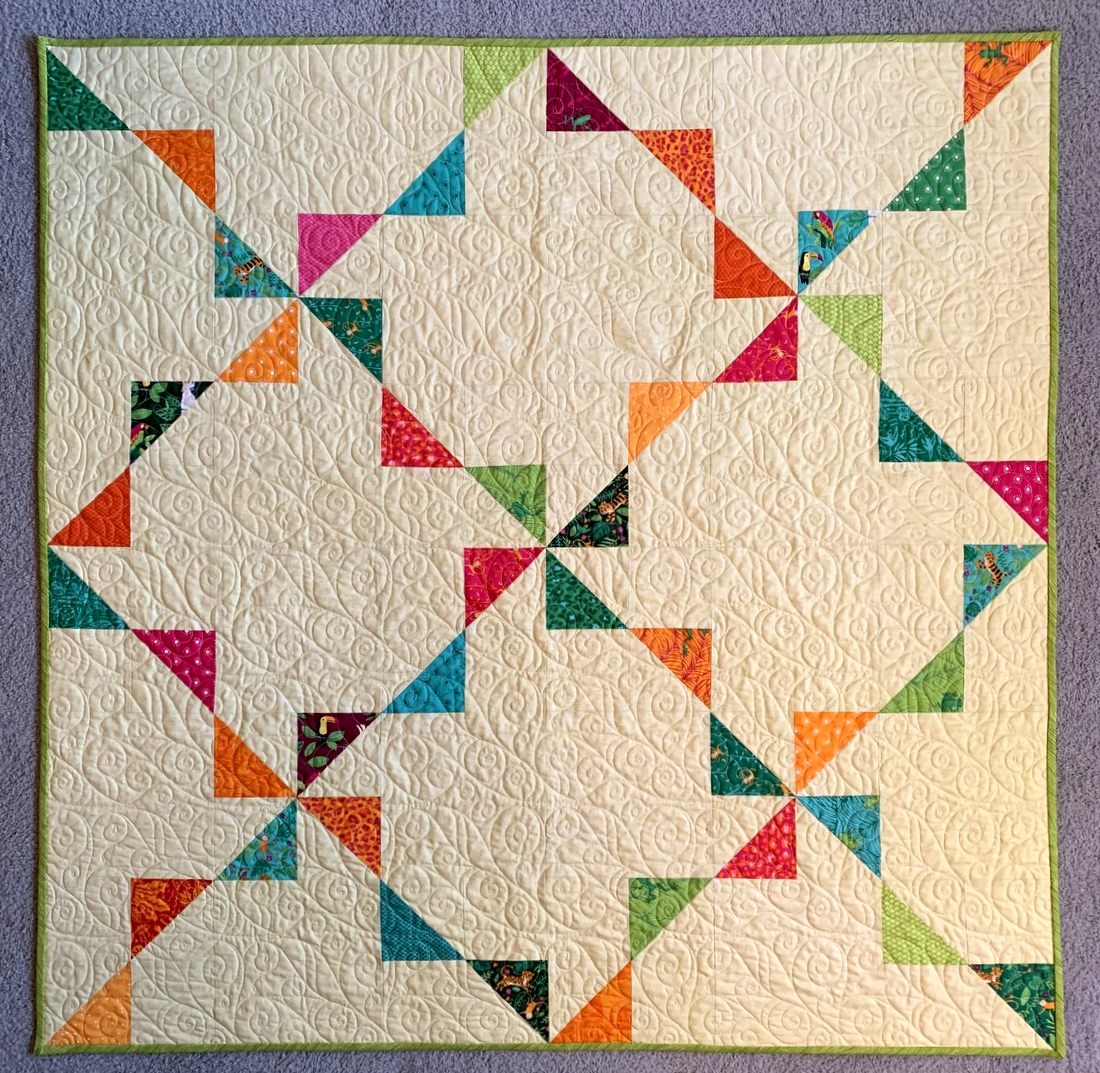
You read that right. I made this quilt for my 2019 Subaru Forester aka the Green Goddess. I’d been wanting to make a car quilt for some time and was prompted to do so when I discovered the line of “Jungle Paradise” fabric designed by Stacy Iest Hsu and the free (and very easy) pattern State Fair by Melissa Corry. This is my Green Goddess Car Quilt.


Number 4. Best Quilt Made from a Jelly Roll

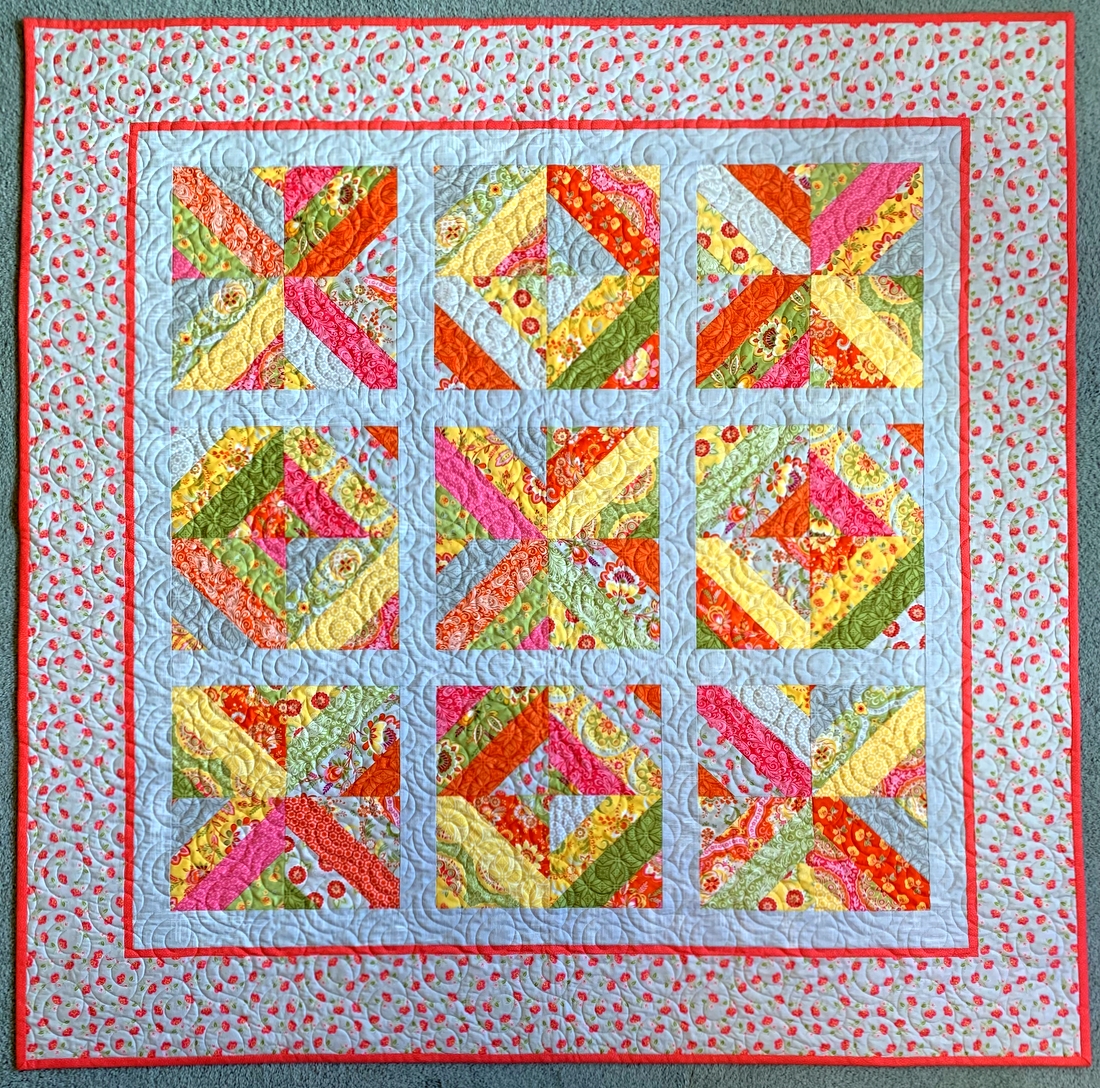
I don’t use precuts very much, mainly because I like to prewash my fabrics. But in my stash was a Jelly Roll (2½” strips) of “High Street,” a line of fabrics by Lily Ashbury for Moda Fabrics. I used the Jelly Roll in a free pattern called Tea Time in Bali and wound up with a quilt I named Tea Time on High Street.


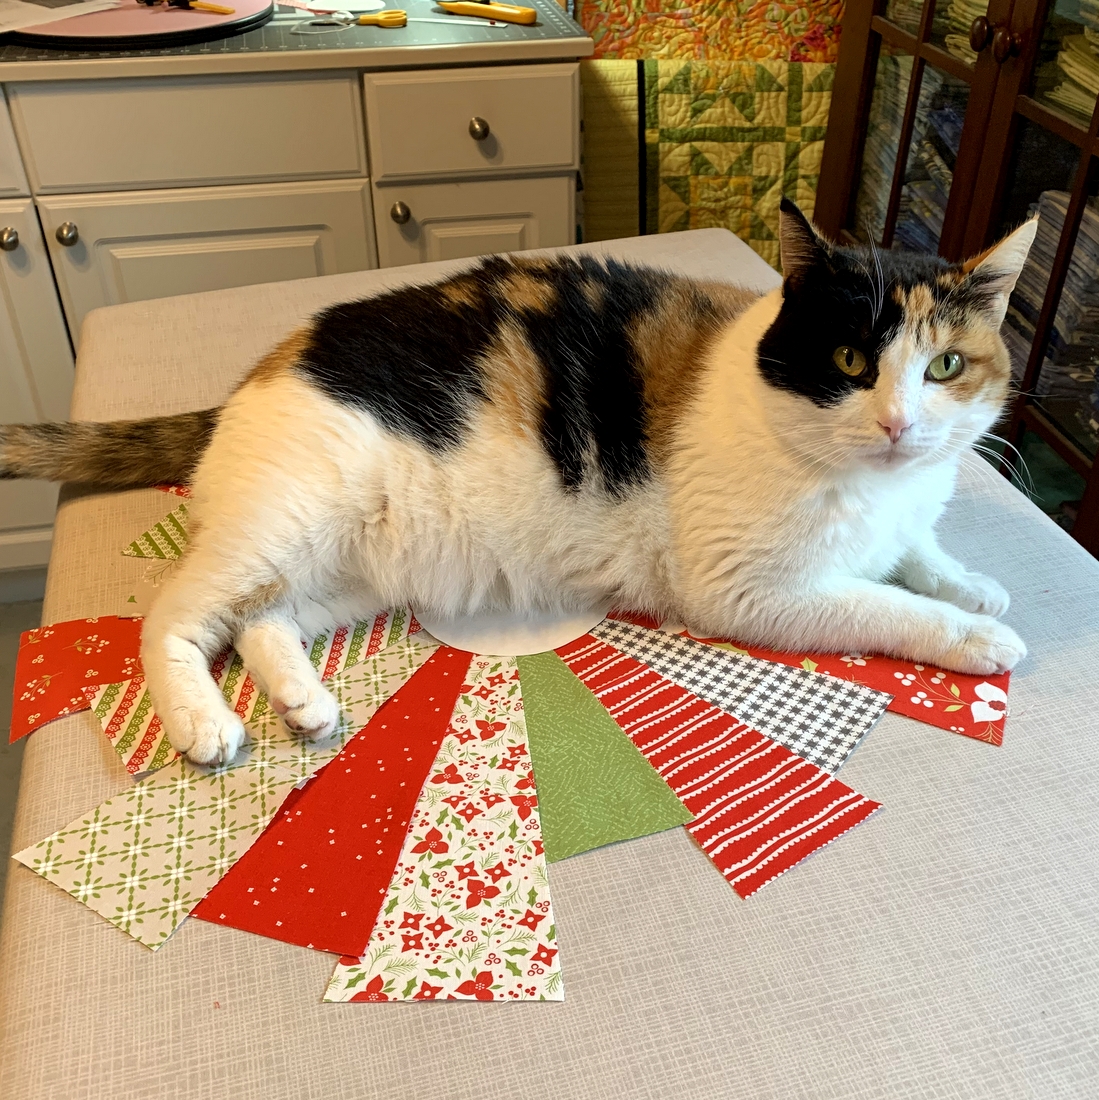
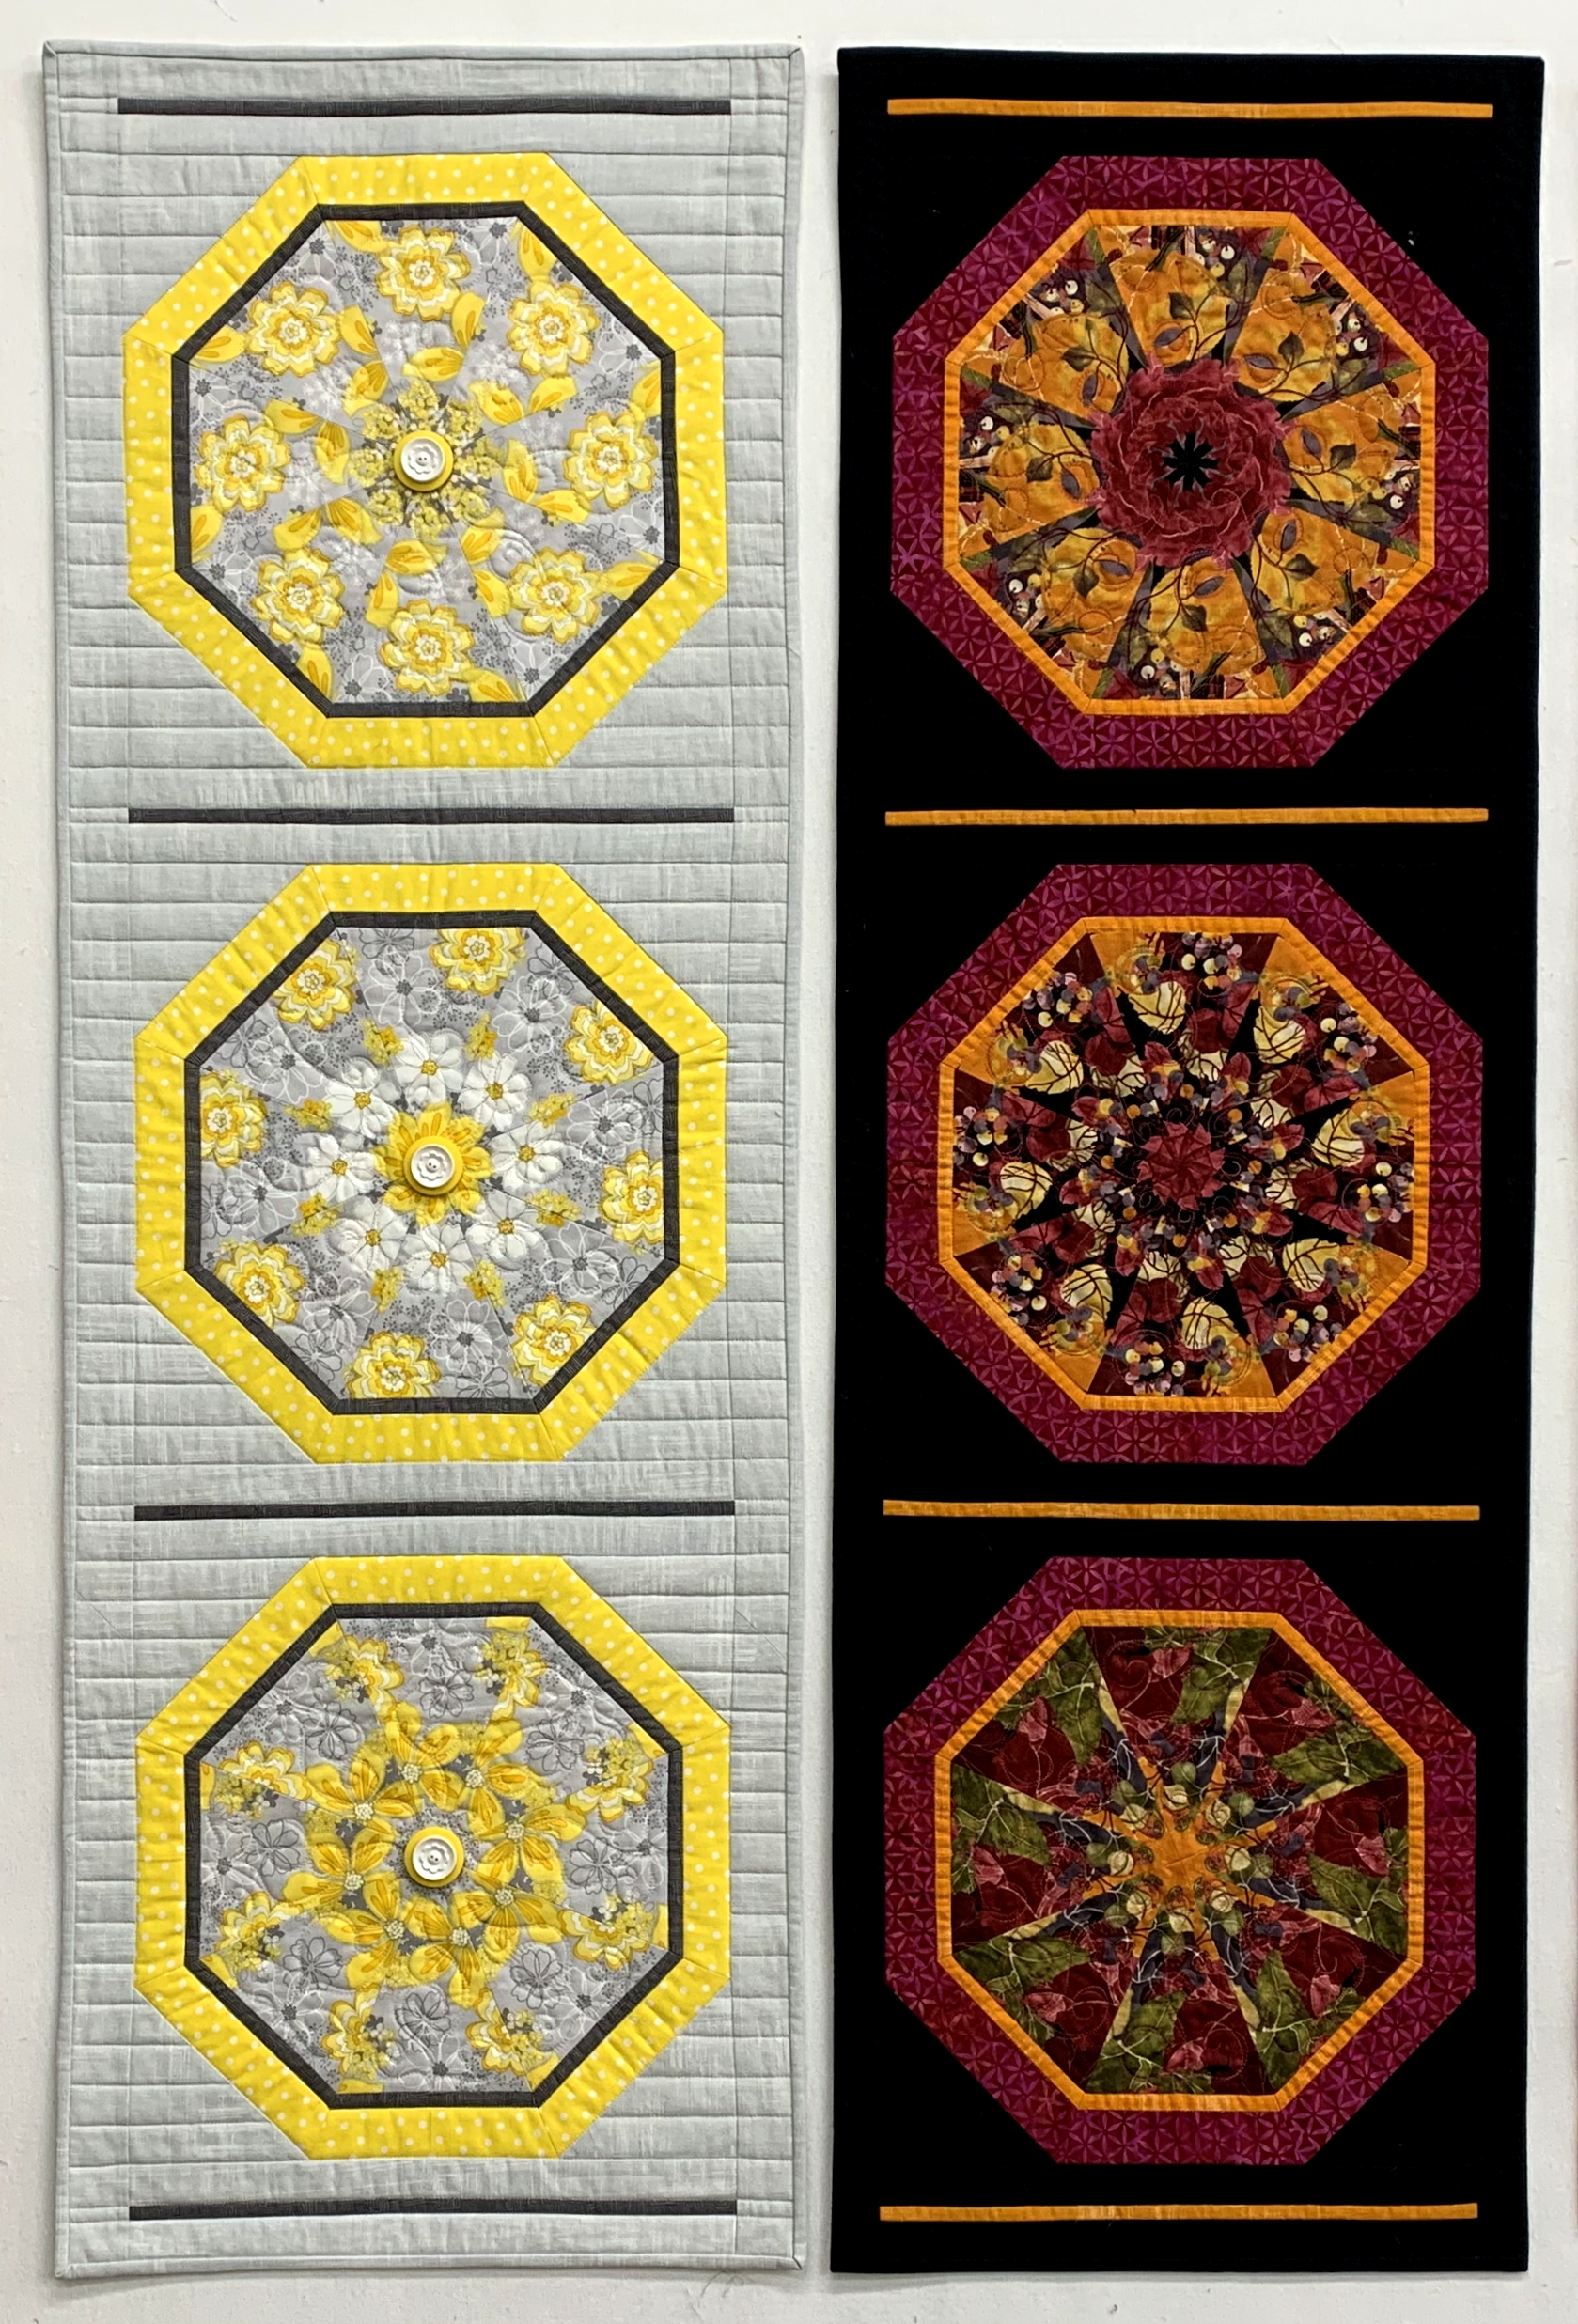
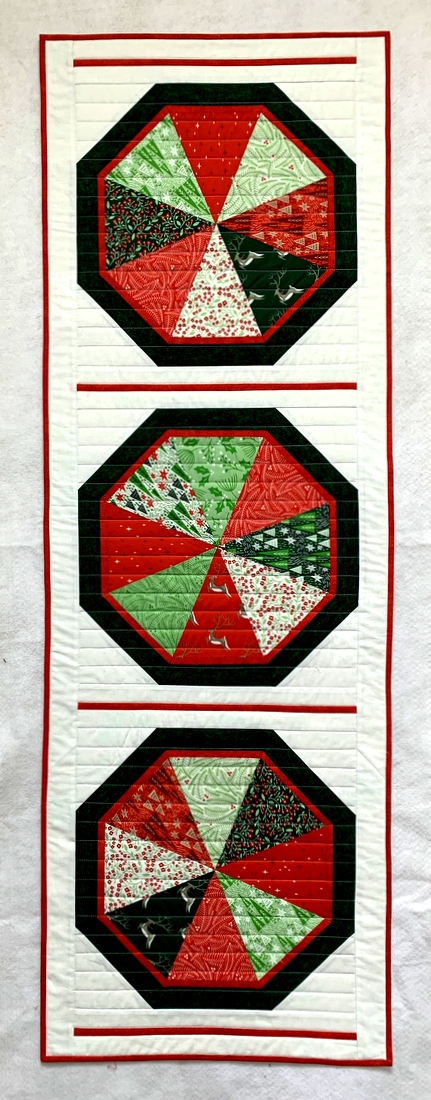
Number 5. Best Red and Green Quilt

It’s a tie! I made two quilts this year using red and green fabrics. First up is ‘Tis the Season:

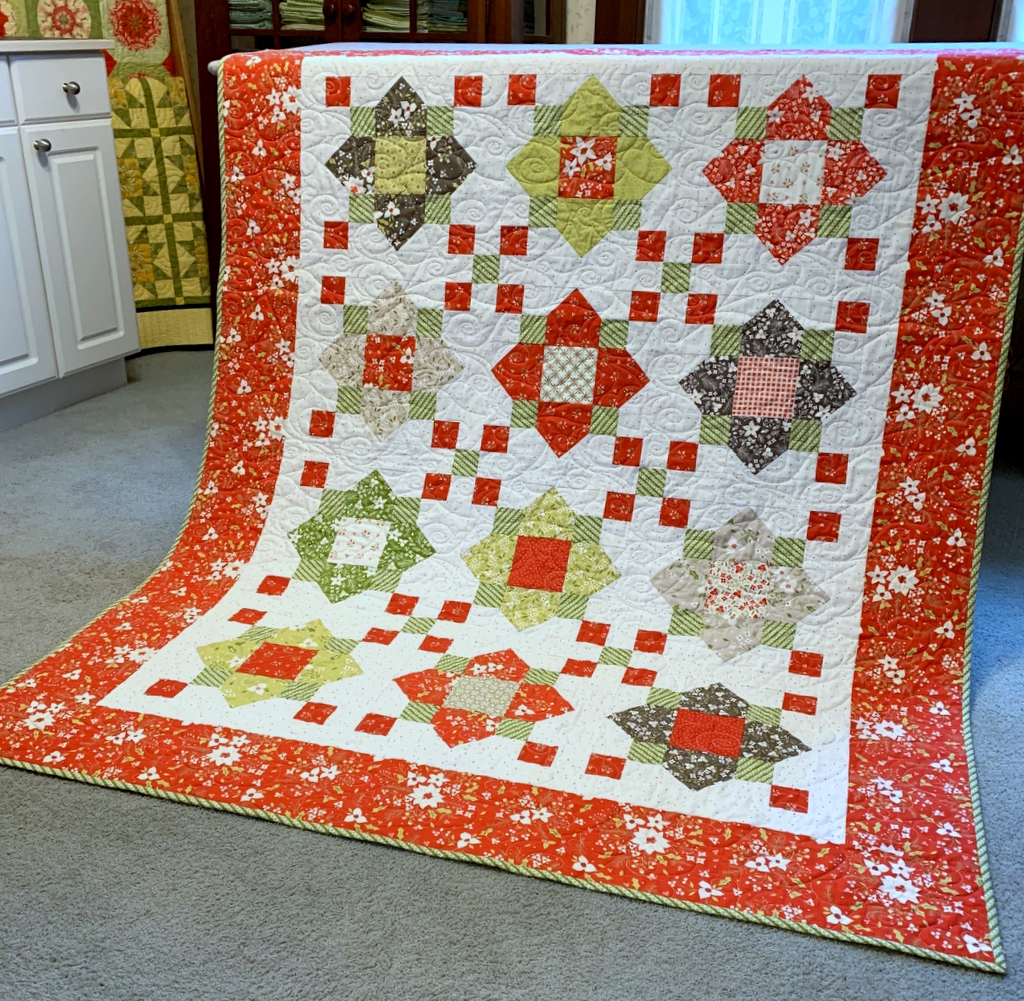
It’s actually my first quilt finish of 2021 but I saved it for the fifth slot because we’re still celebrating the season. ‘Tis the Season was made using the Missouri Star Company’s pattern Quatrefoil and Corey Yoder’s fabric line called “Holliberry.”

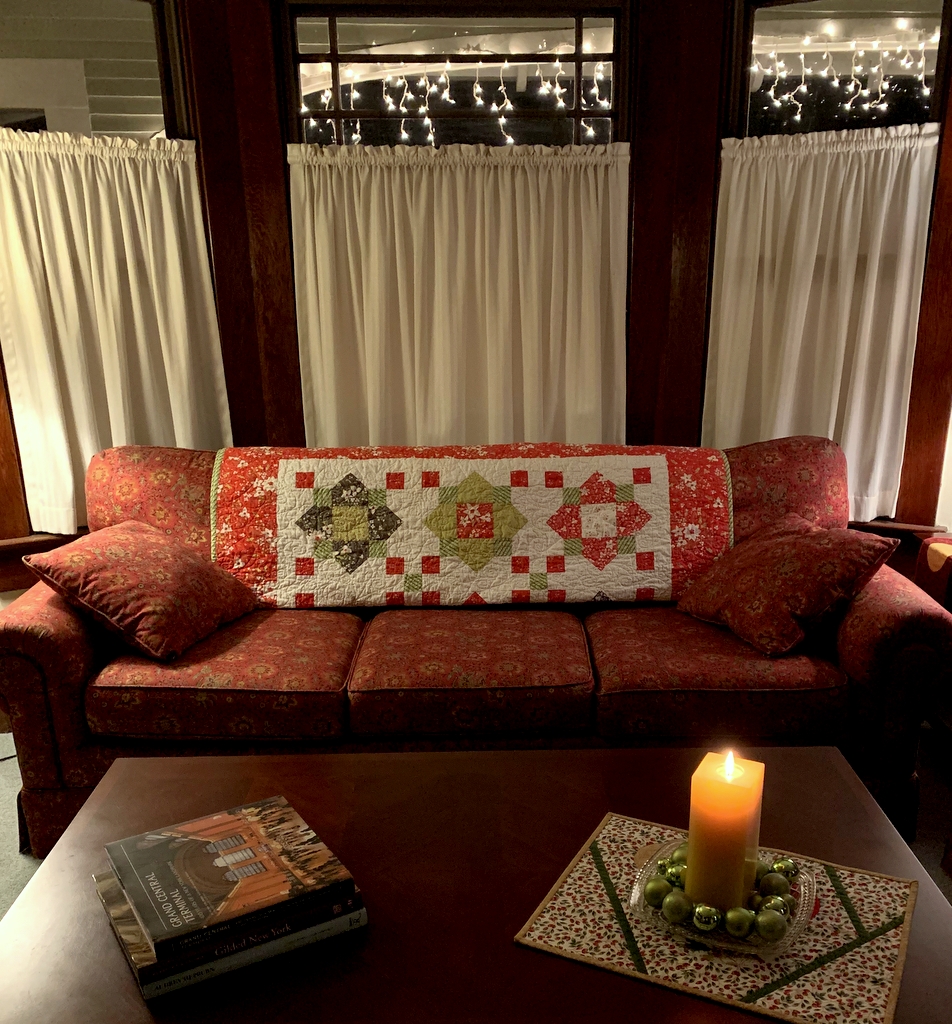
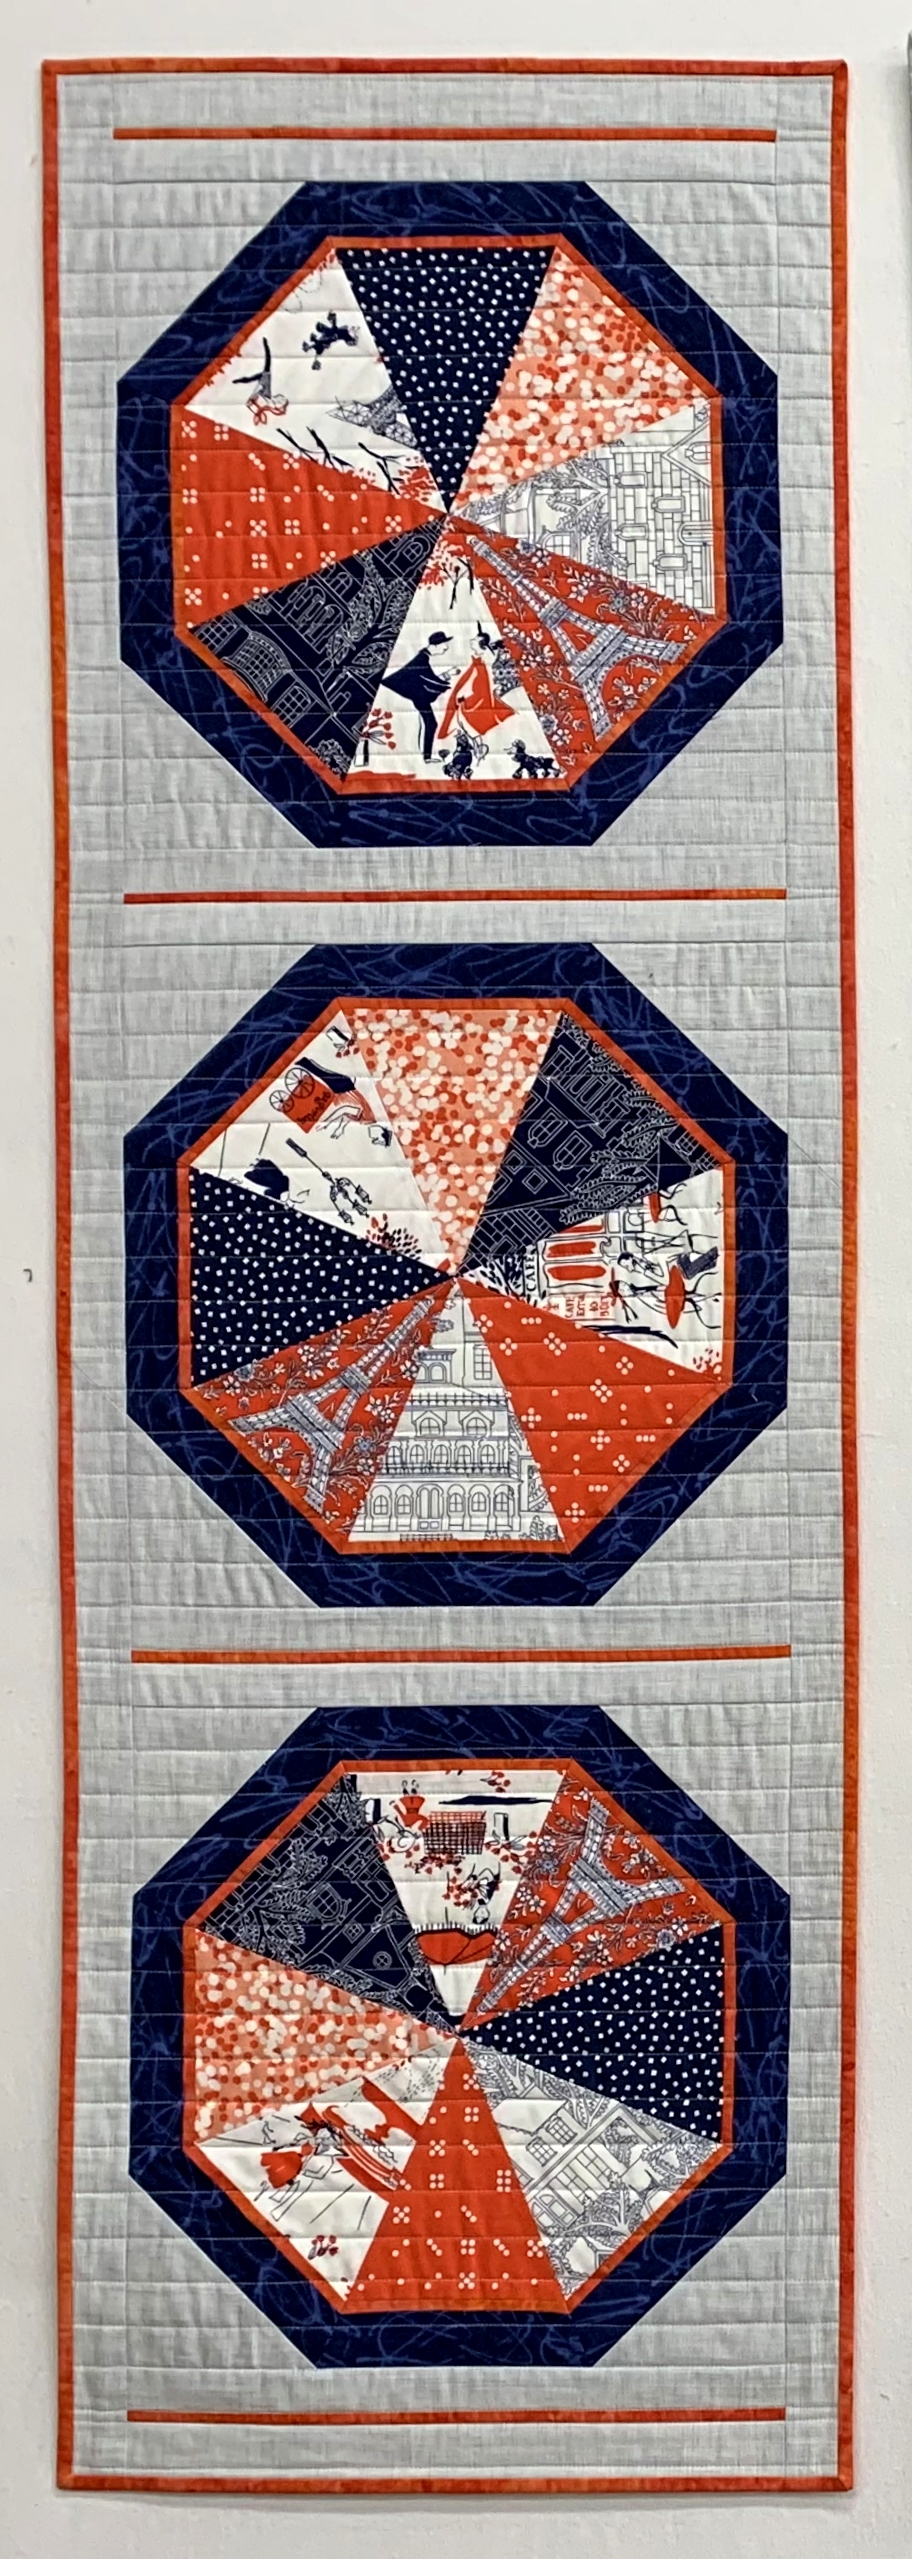
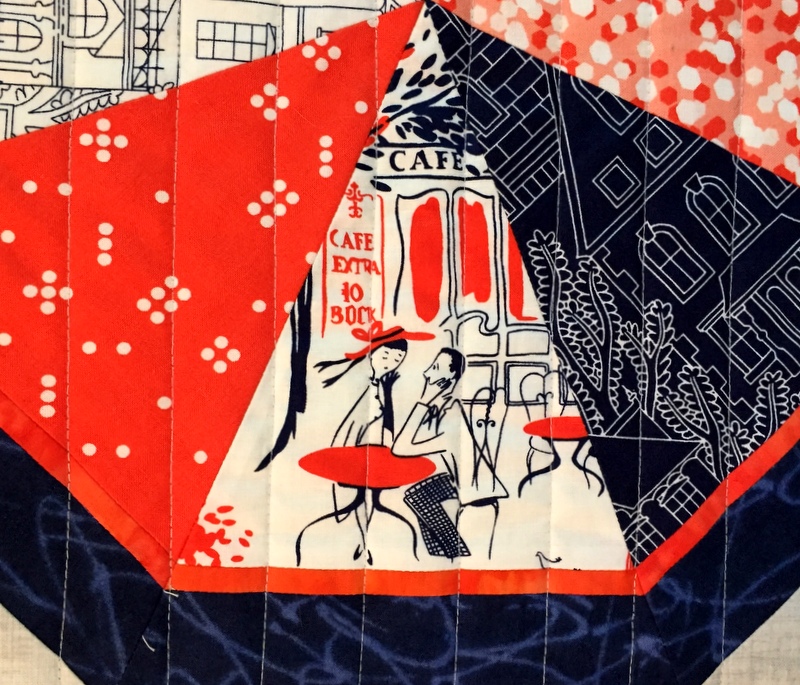
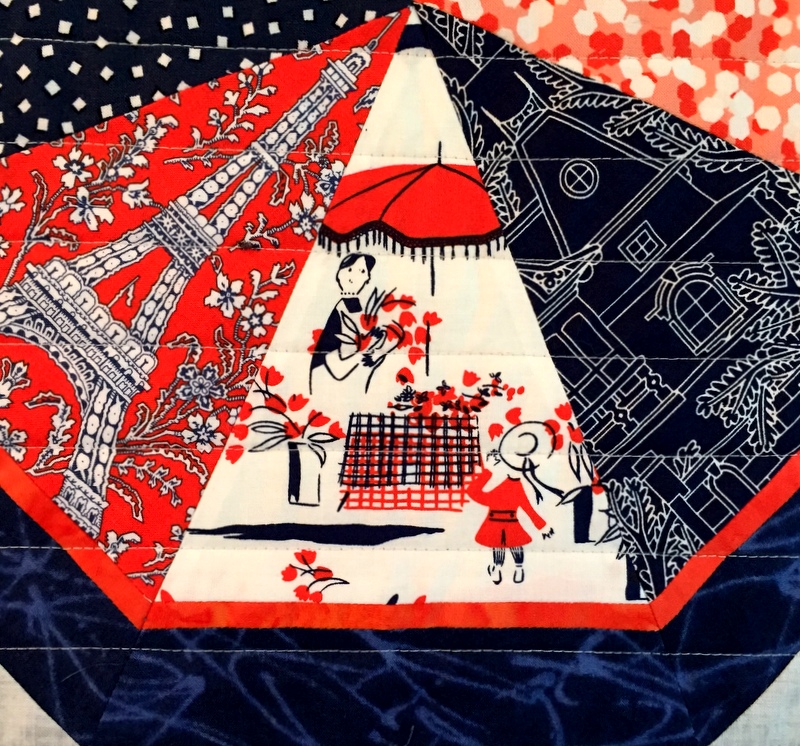
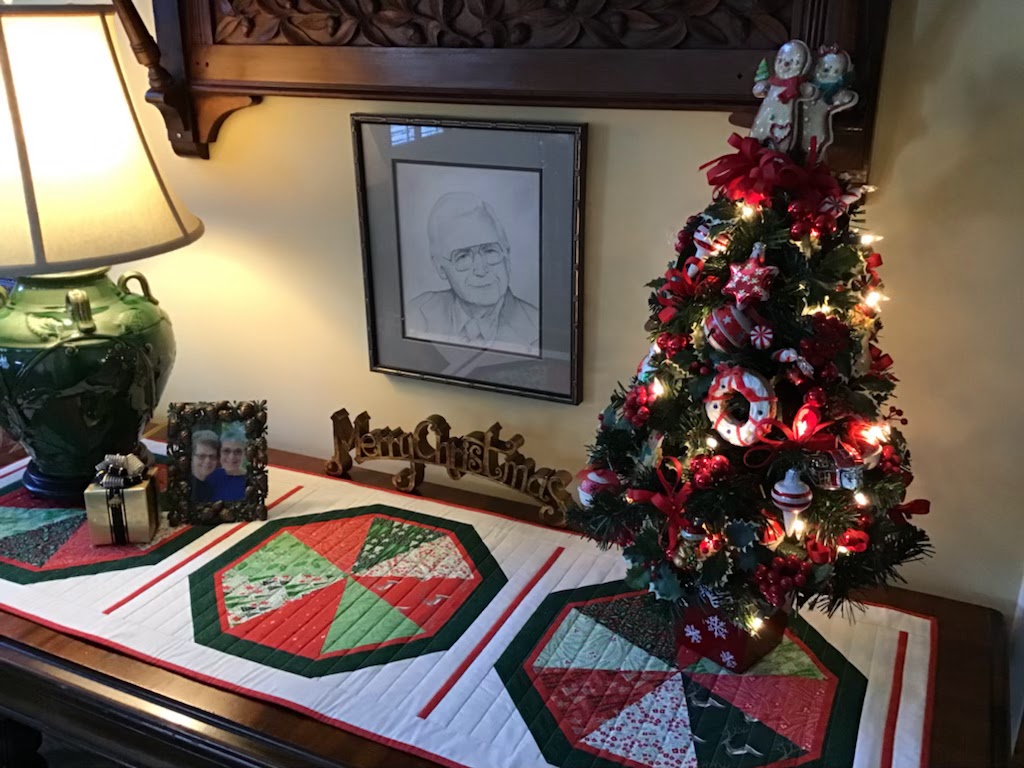
My second red and green quilt of 2021 is the very recently finished Winterwood, based on my pattern Season to Taste:

It can be a wall hanging or a table runner. I gave it to my sister Diane for Christmas so now we know: it’s a table runner:


With five days left in the year, there’s a good chance I’ll be able to add a third red and green quilt to the mix. (You may see it in next year’s Linky Party.)

Be sure to check out the top five posts of the other quilting/blogging partygoers. If you’re a quilter, you can join Cheryl’s Best of 2021 Linky Party, too. The link is open until January 2. Thank you for visiting First Light Designs. All the best in 2022!


Posted in home dec, kaleidoscope quilts, oven mitts, Quatrefoil, single-fold binding, State Fair quilt pattern, table runner, tutorial, update, wall hanging | 8 Comments

An Early Christmas Present

Winterwood, the winter version of my Season to Taste table runner/wall hanging series, has a new home:

My sister Diane seemed quite taken with it when she read my previous posts about it so I decided to surprise her and send it to her for Christmas, with instructions to open the package upon arrival rather than waiting till Dec. 25. It arrived yesterday and Diane has already found the perfect place for it. The runner fits the table in the main entry hall perfectly. It was meant to be!


Posted in family, home dec, kaleidoscope quilts, table runner, update, wall hanging | 7 Comments

Under Construction: A New Wonky Dresden Neighborhood

My current work-in-progress is a second version of the delightfully whimsical pattern Dresden Neighborhood by Kim Lapacek of Persimon Dreams. I’m using scraps from Corey Yoder’s “Holliberry” line from last year plus a few other red and green fabrics culled from my stash:

As you can see, progress was interrupted by the arrival of Princess Cordelia (Coco for short), who did her thing:  flopping down on top of whatever project happens to be on my ironing board. When she finally deigned to depart I was able to sew the dresden blades together:

Having blades of different lengths topped off by lopsided roofs, windows, and doors is what makes the Dresden Neighborhood so delightfully wonky as you can see in my first version, Uptown Funk:


I love the idea of a holiday version. The “Holliberry” fabric I’m using made its first appearance in my quilt ‘Tis the Season, currently on rotation on the back of our couch because — of course — ’tis the season:

In spring next year I’ll be teaching “Wonky Dresden Neighborhood” at Montavilla Sewing Center’s Lake Oswego store and also for the Oregon Coastal Quilters Guild. Making a second version is part of my preparation. It will refresh my memory on what I learned the first time around and allow me to try out some different ideas in customizing my neighborhood. What fun!


Posted in cats, home dec, machine applique, update, wall hanging, wonky Dresden neighborhood | 5 Comments

Cue Vivaldi

Imagine you are hearing the strains of Vivaldi’s “Four Seasons” as you view all four versions of my Season to Taste table runner/wall hanging design:

Four versions of Dawn’s pattern Season to Taste

Aligning with Vivaldi’s concerti, the presentation begins with spring, followed by summer, fall, and winter. The winter version, named Winterwood, was the last one to be made:

Winterwood (2021)

When I started working on this quilt using fabrics with a holiday vibe (red and green prints, though not overtly Christmas-y), I thought about making a second winter version that is weather-related, i.e. not associated specifically with the holidays. The other day I found a piece of fabric in my stash that may just fill the bill. I’m not sure when work will begin on it but I’m giving myself until winter 2022 to finish it. (Do you think that’s enough lead time??)

The 45-degree triangles in the spring and winter versions were made with a selection of fabrics while the summer and fall versions, seen below, were each made with one focus fabric for a true kaleidoscopic effect:

Sun Flowers (2015) and Autumn Reflections (2014)

The fabric I have in mind for the second winter version would yield this kind of design.

I’m happy with the way all of of these turned out but I confess I have a favorite. It’s my spring version, Under Paris Skies:

Under Paris Skies (Sous Le Ciel de Paris) (2014)

The quilt contains fussycut images of street scenes of Paris that always make me smile (in addition to which spring is my favorite season). Here are a couple of those street scenes:

So . . . what about you? Of the four quilts pictured here, do you have a favorite?


Posted in free motion quilting, home dec, kaleidoscope quilts, Paris, table runner, update, wall hanging | 6 Comments

Welcome . . .

. . . to my sister Diane’s glamorous garage! This is the last of three posts devoted to the new window treatments I made while visiting her over Thanksgiving. To hide the brackets, Diane added tassels:

Such an easy fix, and it ramps up the glam factor considerably. Here’s a close-up:

Over the 20 years Diane and her husband have lived in this house, the garage has undergone a gradual transformation. Since guests enter their home mainly through the garage, it’s important to her that it look nice. She is fortunate to have found a very talented handyman who not only installed the wainscoting but also built the large storage cabinets on the left side of the garage:

Among other things, the cabinets hold her Christmas decorations. No more hauling them down from the attic!

A longer view of the right side:

If you didn’t see part of the garage door on its track above, you might think this was an interior room. I swear, I could live in this garage!


Posted in family, home dec, update, valance | 9 Comments

Garage Glamour Update

I’ve been working at a leisurely pace on my current sewing project for my twin sister Diane’s garage windows. (That’s another way of saying I am easily distracted by any and all invitations to play Scrabble.) Here’s a look at the first valance in place:

As mentioned in my last post, the plan was to make gathered valances attached to a flat rod pocket accented with grey grosgrain ribbon. I was going to make the rod pocket the width of the grosgrain ribbon — 1-1/2″ — but then realized that if I centered the ribbon on a larger piece of contrasting fabric it would make the grosgrain ribbon really stand out.

Here’s a close-up of the valance in process. You can see the grosgrain ribbon has been attached to a strip of yellow gold fabric:

(Pay no attention to the fabric in the background. It was used to cover Diane’s ironing board.) That yellow gold fabric? It was left over from another project I made for Diane at least 10 years ago, the valance over the kitchen window:

The rod pocket trim fabric is almost the same color as the garage walls and ties in nicely with the gray and gold patterned rug at the door leading into the house:

This picture is also proof that Diane and Ed actually do park their cars in the garage! Diane wants me to explain that she wants a nice-looking garage because 99% of the people who visit enter the house through the garage rather than climbing 26 steps to the front door. Earlier this year Diane and Ed had the oil-stained cement floor treated so it could be covered with a multilayered epoxy treatment. It certainly elevated the look of the garage, and Diane reports the floor is easy to clean.

The second valance is finished but our project is not quite done. Both Diane and I don’t like the fact that the brackets holding the curtain rods are visible and have devised a plan to block them from view. (Stay tuned for the final reveal.)

My friends already know I’m a bit obsessive-compulsive. Now you know: it’s a twin thing.


Posted in family, home dec, Scrabble, update, valance | 5 Comments

Garage Glamour

Greetings from Georgia, where my husband Charlie (aka the Dear Husband) and I are enjoying our annual visit over Thanksgiving with my twin Diane and her Dear Husband, Ed. As usual I have a home dec project to work on and this time the site is the garage, of all places.

Several years ago Diane bought a pair of beautifully made custom valances at a garage sale (how appropriate), although I’m certain the valances initially adorned an interior room. The valances featured a charming toile print with a gathered ticking stripe underneath. After years in the garage the striped ticking disintegrated from exposure to sun streaming in through the windows but the tailored valances survived. Take a look:

Diane framed vintage images of scenes from Portland and the Columbia River Gorge to remind her of her native Oregon:

But I digress. Here’s a close-up of one of the valances:

Now it’s time to replace them. (By the way, have you ever seen such a clean garage? Mine sure doesn’t look like that!)

Last week my twin and I went shopping not only for her valances but for valances I am going to make for our stepmother — my next home dec project. Diane and I found fabrics for both at the very first place on our list. This is Diane’s valance fabric, a lovely floral linen print:

The plan is to make valances that are softly gathered at the top and bottom and to accent the rod pocket with grey grosgrain ribbon. I’m going to line the valances with whiteout fabric to add body and protect the linen from the ravages of the sun.

And what of the valances we took down? They are still in good shape. And we have an idea on how they might be repurposed elsewhere in Diane and Ed’s home. Subject of a future post, no doubt!


Posted in family, home dec, update, valance | 9 Comments

Winterwood: Almost a Wrap

With the holidays fast approaching, I decided it was time to finish the winter version of seasonal wall hangings based on my pattern Season to Taste. This is Winterwood:

I finished the top in June and wrote about the making of it here. If you’re curious about where the name Winterwood came from, you’ll find the explanation in that June post.

Winterwood is quilted very simply with horizontal lines. Unfortunately, I forgot to extend the stitching lines across the borders, and now that the binding is on I’m not entirely happy with the result. I’m going to give it a good press and then decide if I need to add some after-the-fact quilting in the borders.

Winterwood was made to be a wall hanging but I decided to piece the back in such a way that it could double as a holiday table runner:

That’s a 7″ inset circle in the middle. I’m going to make a label using a compact disc as a pattern and put the label on the circle, figuring that I can put a candle or plate on top of the label to hide it. Because the tree fabric is directional, I deliberately arranged it so that the trees go in both directions.

Once this winter version is finished, I’ll show you how it looks with the spring, summer, and fall versions. Do I have a favorite? Why yes, I do. Perhaps you will, too!


Posted in home dec, kaleidoscope quilts, quilt labels, single-fold binding, table runner, update, wall hanging | 1 Comment

My Feedbag Face Mask, Modified

I made myself a new face mask yesterday using the excellent free mask pattern from SeeKateSew. In the process I made a second modification that not only makes the mask fit my face better, it also eliminates one of the final sewing steps. Gotta love that! Here’s a look at my new mask:

Kate calls her design the 3D Mask but in my family it’s known as the Feedbag Face Mask, thanks to an observation my twin sister Diane made last year about my first effort involving a rather unfortunate choice of mask fabric on my part:

(You can read about it here. It still makes me laugh when I see that photo with the peapod lips and teeth.)

Kate’s pattern is essentially an elongated octagon. I extended the ends to allow for a wider casing for the earloops. That was my first modification, made last year. What you see below is her pattern along with the freezer paper pattern I made from it:

Through folding and stitching, the flat pattern is transformed into three sections (still in one piece). The top section goes across the nose, the middle section over the mouth, and the bottom section under the chin. The mask becomes three-dimensional when pleats are made along the ends of the top and bottom sections next to the casing. This photo of two masks I made last year shows what I mean:

You can also see the channel at the top of each mask where a nosewire can be inserted.

On my latest mask I omitted the pleats at the top section. One result is that the top of the mask comes up a bit higher on my face but another — and better — result is greater comfort. That’s because the nosewire, which gets pressed across the bridge of my nose, fits along the top of my cheeks better. My older masks tend to leave indentations in my skin from the nosewires because the pleating at the top pulls the masks tighter across my face. My modified mask is still slightly boxy (and still snug) at the top while the greater boxiness at the bottom makes the mask fit nicely under my chin.

As long as the need to wear masks continues, we might as well go in style, right? For me that means fun fabrics and comfort.


Posted in face masks, family, update | 3 Comments

It’s a Wrap: The Green Goddess Quilt

A windy fall day in Portland, Oregon did not offer a great photo op for my latest finish, The Green Goddess Quilt. Nevertheless, I posed in front of my Subaru Forester (aka the Green Goddess) today so the Dear Husband could snap this photo to show you how well the quilt goes with the car.

Here’s a close-up of the binding:

Don’t you love the look of a stripe on the bias on a quilt binding? I sure do!

Here’s a photo of the finished front . . .

. . . and the finished back:


The label:

I made an inset circle (using a compact disc as my pattern) and then enclosed it in another circle using the same fabric I used for accent strips on the back and for the binding. The label was appliquéd in place by hand.

Sometimes, if the quilting motif is compatible, I will stitch in the ditch around the inner circle to secure the label even more to the quilt. The motif I chose for this quilt (an edge-to-edge design called Sashay) has a lot of loops and swirls so I went for the added stitch-in-the-ditch. If you look carefully you can see the stitching:

Now take a look at the front of the quilt:

Do you see the circle? Look at the dark orange print triangle in the lower left corner. There it is!

But if you looked at the entire quilt again from the front, you probably wouldn’t notice it unless I pointed it out:


That’s what I mean about the stitching motif being compatible; the stitching around the label is virtually unnoticeable from the front.

Before The Green Goddess Quilt takes up residence in its namesake, I need to throw it in the washer and dryer so it gets that lovely old-fashioned puckery look that only comes with laundering.

The Green Goddess Quilt finishes at 48″ square. It was made using Melissa Corry’s free pattern State Fair and a Layer Cake (10″ squares) of the charming “Jungle Paradise” line designed by Stacy Iest Hsu for Moda Fabrics.


Posted in family, quilt labels, State Fair quilt pattern, update | 8 Comments