Category Archives: home dec

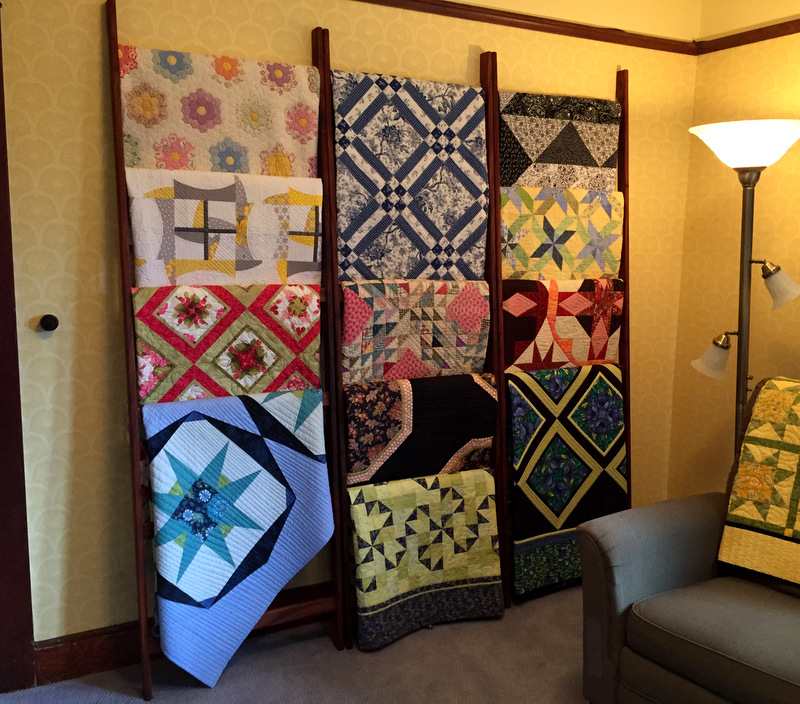
My Wall of Quilts

dawn's quilt wall

The quilts displayed on this wall in our TV room replace a piano that I donated a few months ago. I had bought a secondhand piano 20-some years ago. Having taken lessons as a kid, I thought I would relearn how to play. That never happened, not because I didn’t want to but because I preferred to spend my free time sewing, especially when I was still working. Retiring in 2008, I plunged headlong into quiltmaking. The piano, alas, remained unplayed.

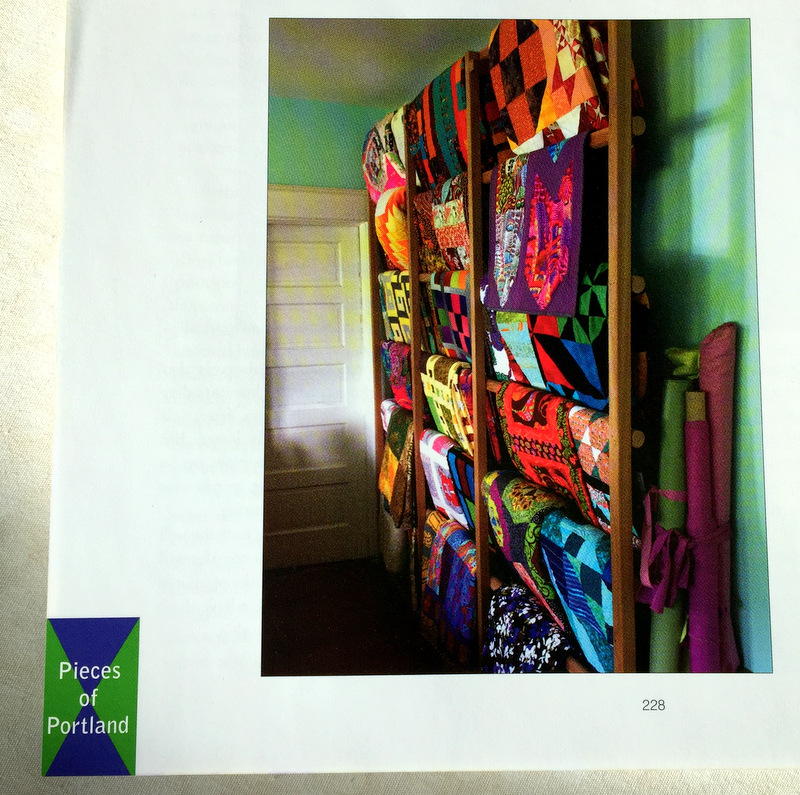
With the piano gone, my inclination was to increase the seating in the TV room by adding a sectional sofa. Gradually, with that expanse of wall staring at me, the notion of a quilt wall took over. I remembered a photo I had seen in Marie Deatherage and Joyce Brekke’s fabulous book Pieces of Portland (Quiltlandia, 2015). Marie’s husband, Ric Seaberg, made her a wall-size quilt rack:

marie's quilt wall

Floor to ceiling  — what an efficient use of space! Since the wall in our TV room is one of the few that doesn’t get direct sunlight, I knew it would be the perfect spot to display quilts.

I called upon master craftsman Phillip Galyon of Wooden Images. Phillip made me a custom sewing table and cabinet in 2012, and the next year he crafted a console table and stool for our remodeled master bathroom.

My idea for this project was a series of quilt ladders that could stand alone or be joined by pegs to form one piece. After consulting with Phillip, we decided on separate ladders that, when placed next to each other, would look like one unit. The wood of choice was African mahogany, well suited to the original dark stained wood trim in our 1913 Craftsman home.

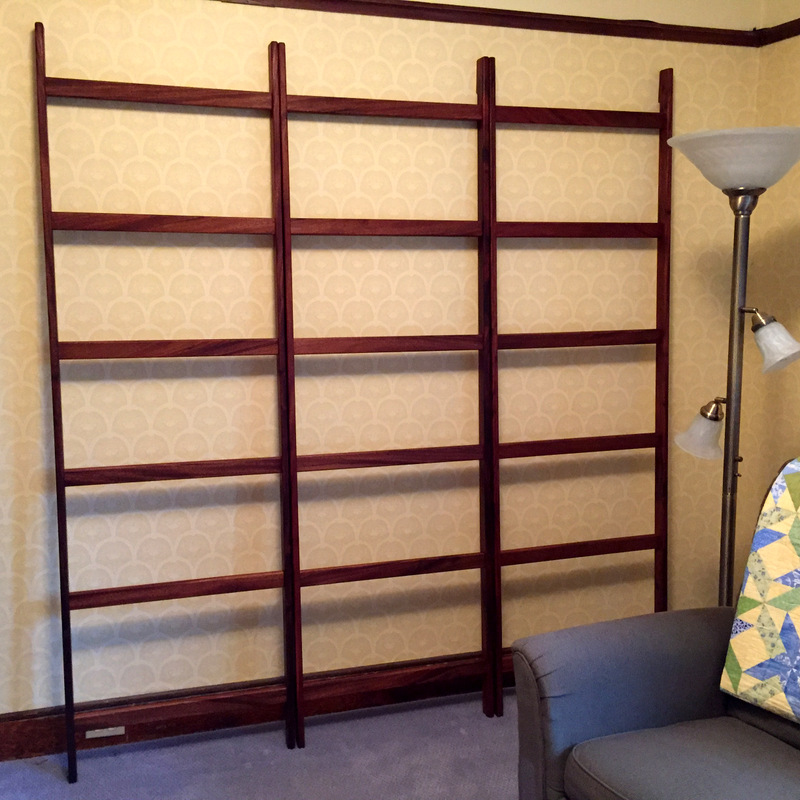
Here are three ladders butted up next to each other . . .

quilt ladder wall 1

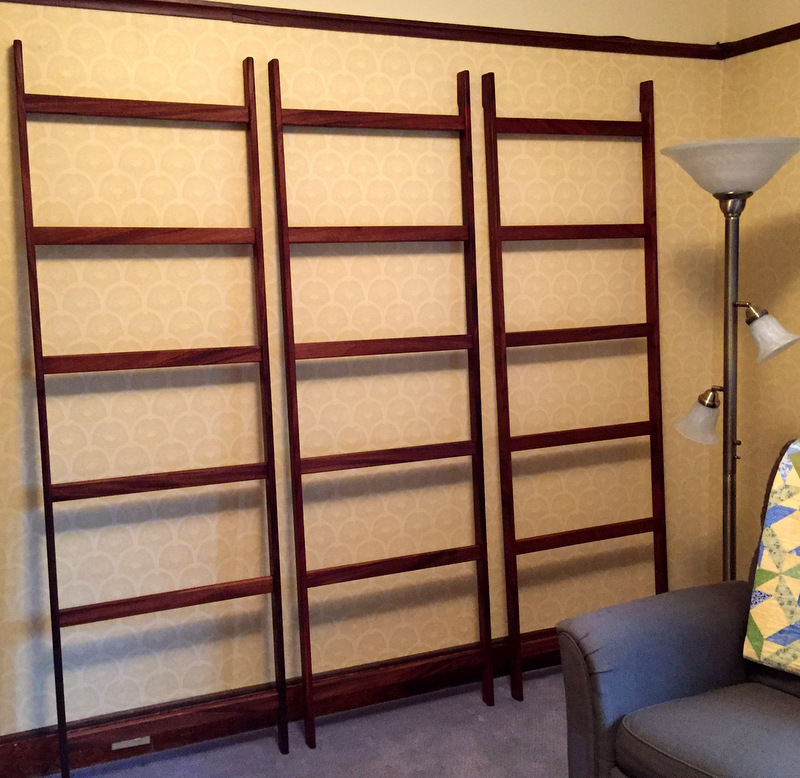
. . . and here they are with a couple of inches between them:

quilt ladder wall 2

As you see from the photo at the top of this post, I chose to put the ladders together — at least for now. They can easily be moved apart for a change of pace. And adding or rearranging quilts will be a breeze because of the ease with which the ladders can be moved.

I can’t say enough good things about the quality of Phillip’s work. He angled the rungs of the ladders so the quilts would hang properly. He leveled the tops of the ladders so they would be flat across the top (level with the floor). And he added a wedge to the top of the backs so they would lie flat against the wall. Not only that, he put felt on the backs so they wouldn’t scratch:
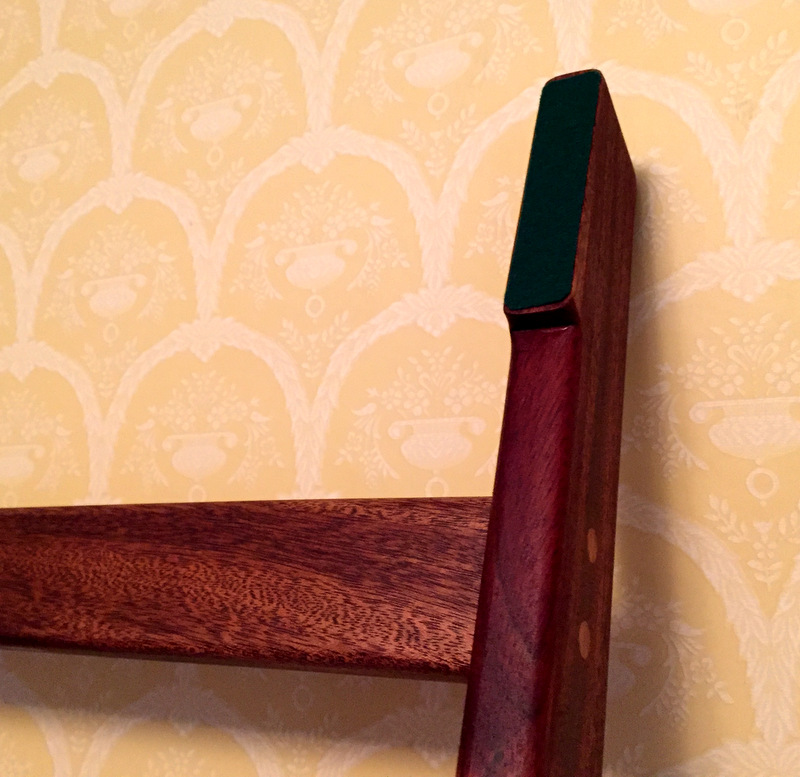
quilt ladder, detail of back
And he signed each piece on the back of the bottom rung:
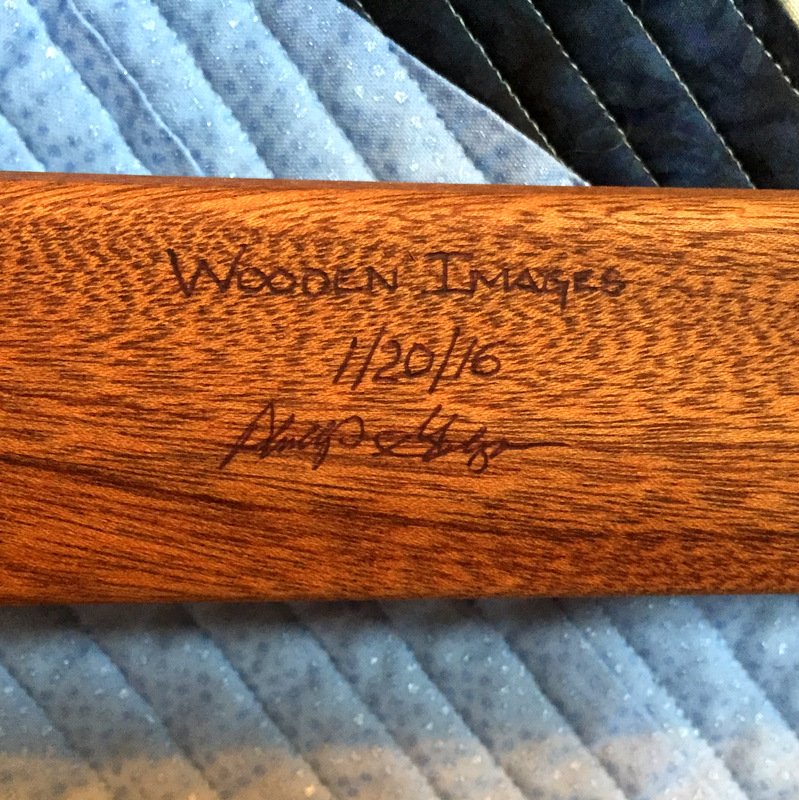
quilt ladder, signature
All told, Phillip made four ladders for me. There is room for another ladder on my quilt wall in the TV room but for now the fourth ladder is in an upstairs bedroom (hung with quilts, of course).

Having this wall of ladders means that the precious quilts that have come down through my family will be on display as well as the quilts I have made myself. Some of the latter will be given away eventually, to be replaced by new ones, but for the time being I will have the pleasure of seeing them frequently.

I envision my wall of quilts as a changeable feast.


Posted in family, home dec, update | 16 Comments

Pretty Little Things

This is Part Two of a two-part post on what I accomplished in my sewing room during 2015. Part One featured my finished quilts (unquilted tops don’t count) and can be seen here. Most everything else qualifies as a Pretty Little Thing, so let’s take a look at the Pretty Little Things I made in 2015:

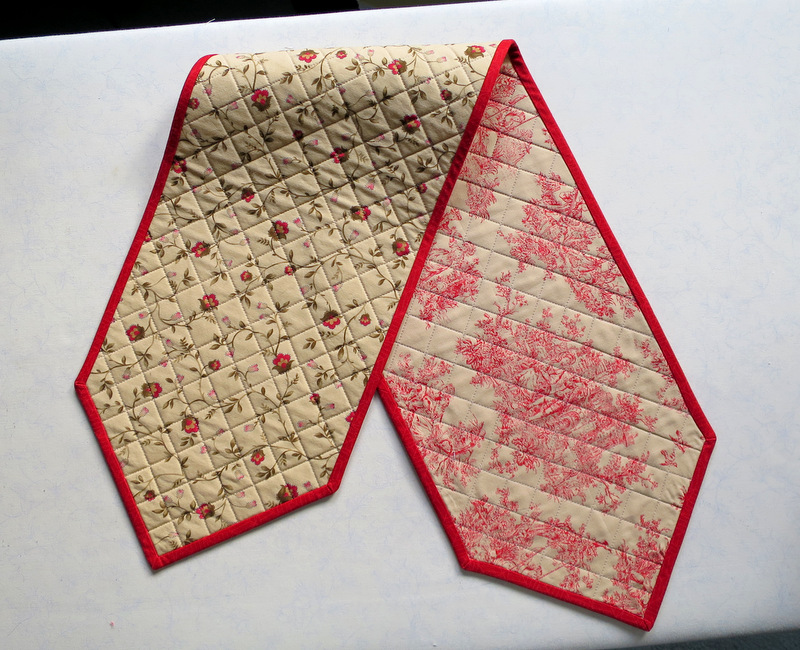
This 9″ x 41″ reversible runner was made for my sister Diane’s living room to cover a “seam” created when two small chests were placed back to back to make a larger unit:

runner completed

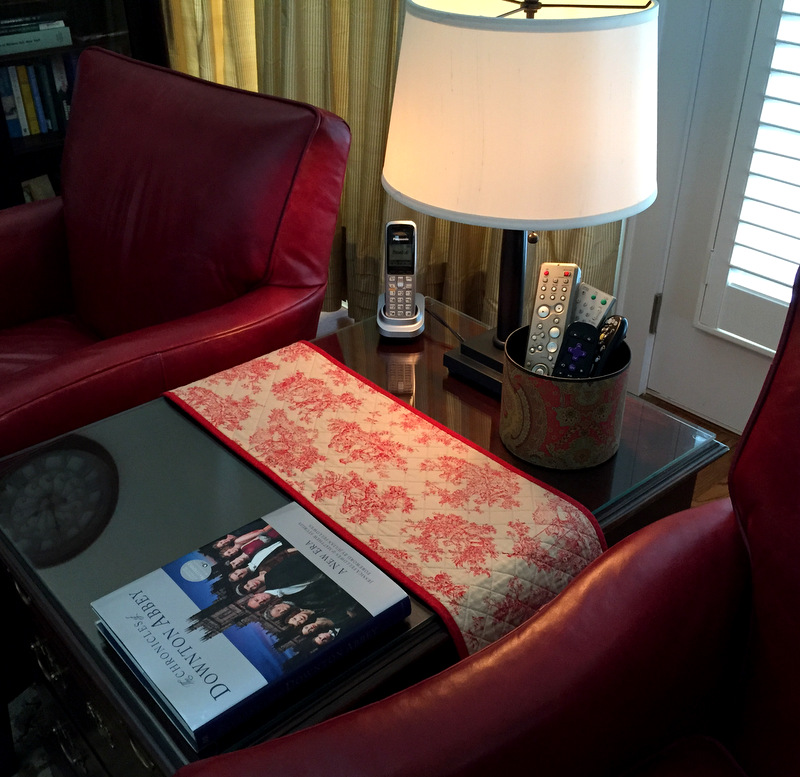
Here is the runner in situ in her living room in Atlanta:

Scott find round box for remotes in place
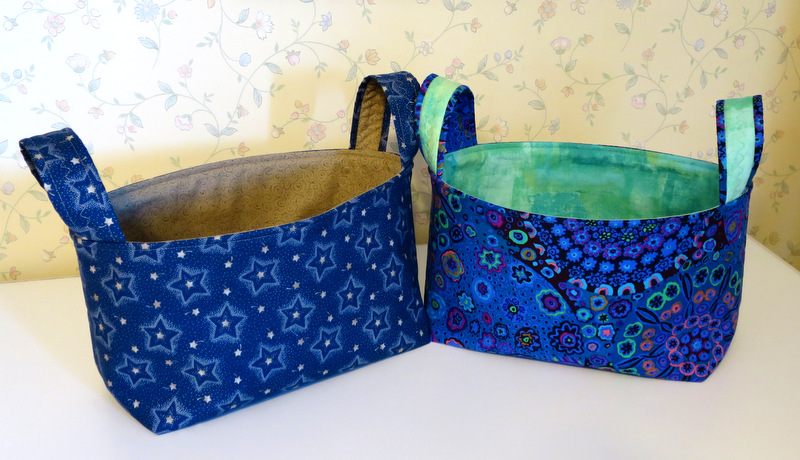
To celebrate the spring birthdays of my friends and fellow Quisters (Quilt Sisters) Deborah and Peggy, I made these fabric baskets based on the 1 Hour Basket Tutorial from Hearts and Bees. The baskets measure about 9½” wide, 6½” tall, and 5½” deep.

a pair of baskets
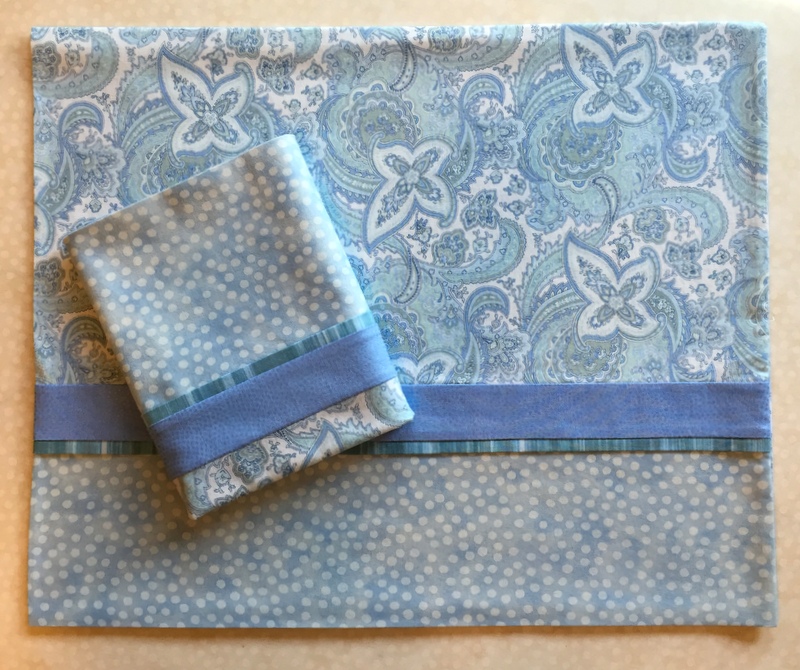
Pillowcases! I make several every year. Here are cases I made as a hostess gift for my friend Anna in Paris . . .

pcases for Anna and Joe

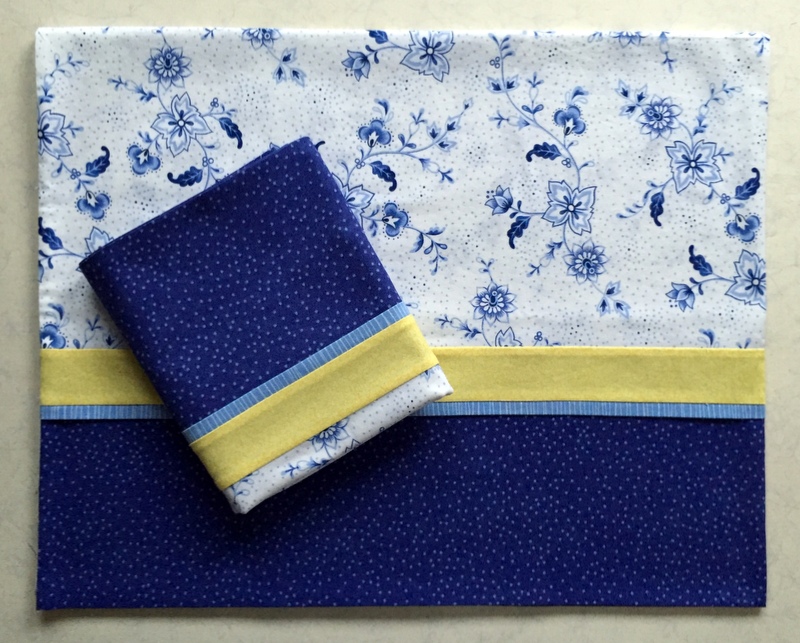
. . . and a pair made for the Portland White House:

pcases for Portland White House

Of all the pillowcases I have made for my own home, these are the ones my husband likes best.

My sister Diane commissioned me to make a pair of pillowcases to give as a hostess gift to friends in Maine:

pcases for Kathy and Paul's guest house
Her friends have a darling little terrier named Lucy who got her own little pillowcase (and pillow). It measures 6″ x 12″ and goes in her doggie bed:

dog pillow front

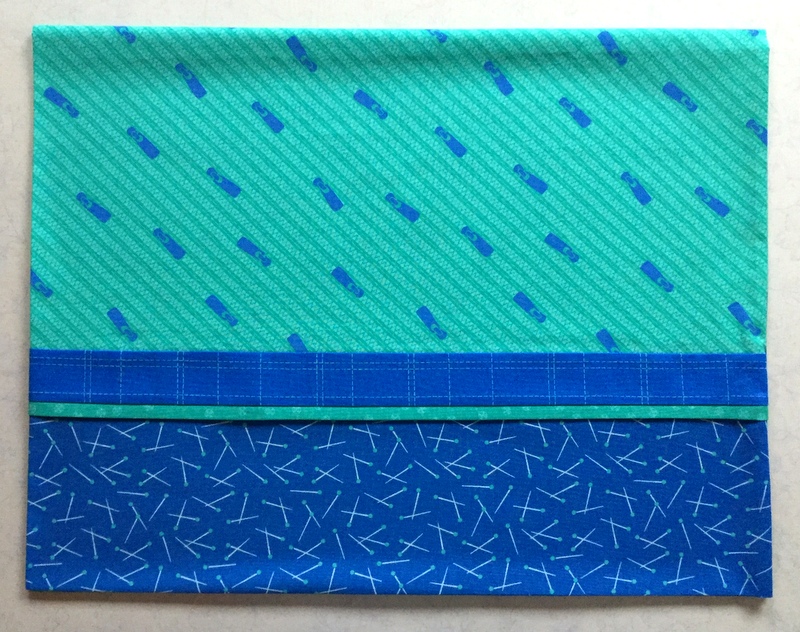
This sewing-themed fabric became a singleton pillowcase for me to take to Quilt Camp:

Dawn's quilt camp pcase
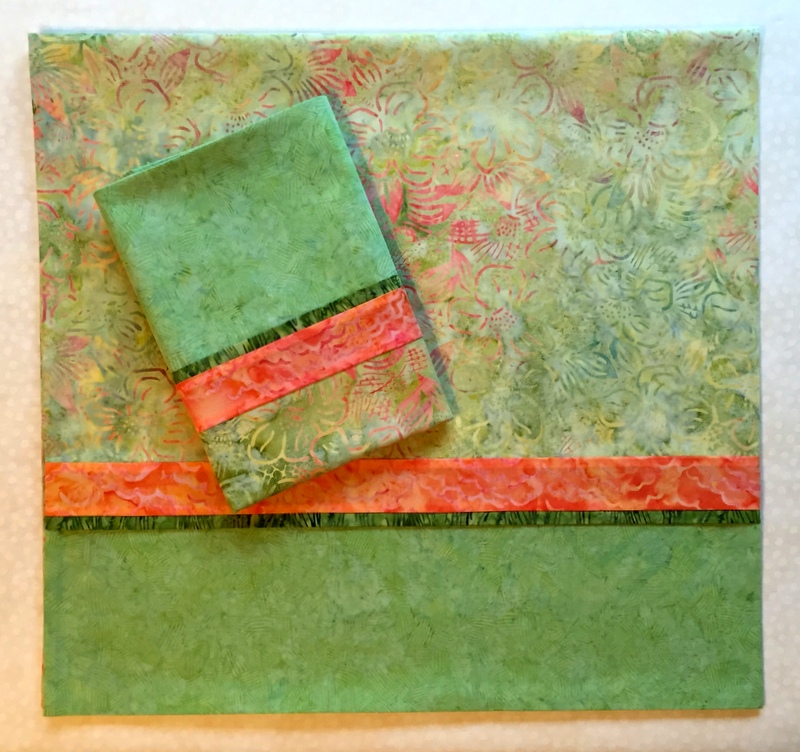
I drew my sister Diane’s name in our annual sibling draw for Christmas. When I asked her for ideas on what I could get her, she said, “Dawn pillowcases, of course!” I made her these king size pillowcases from my batik stash:

pcases for Diane and Ed
By the way, all of the pillowcases above were made following my tutorial, Perfect Pillowcases.

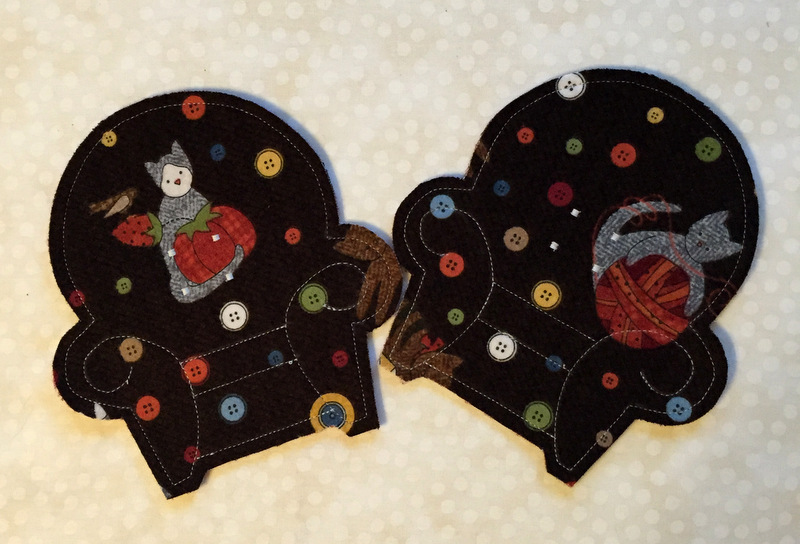
For the annual fall Open House at the Pine Needle, the quilt shop where I teach, I made these Cozy Flannel Armchair Coasters, inspired by coasters bought at a craft sale 30 years ago:

flannel coasters print

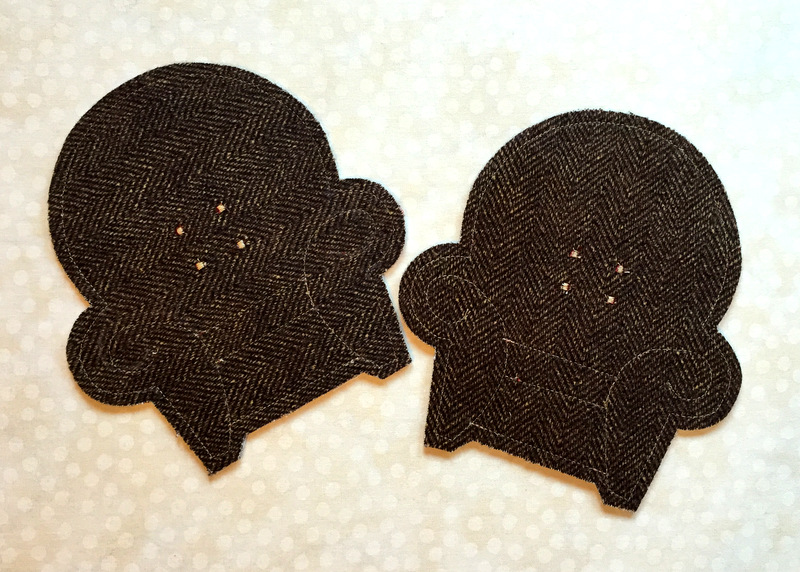
The coasters are reversible. Below are the backs of the coasters you see above. Just for fun I changed orientation of the herringbone weave:

flannel coasters brown

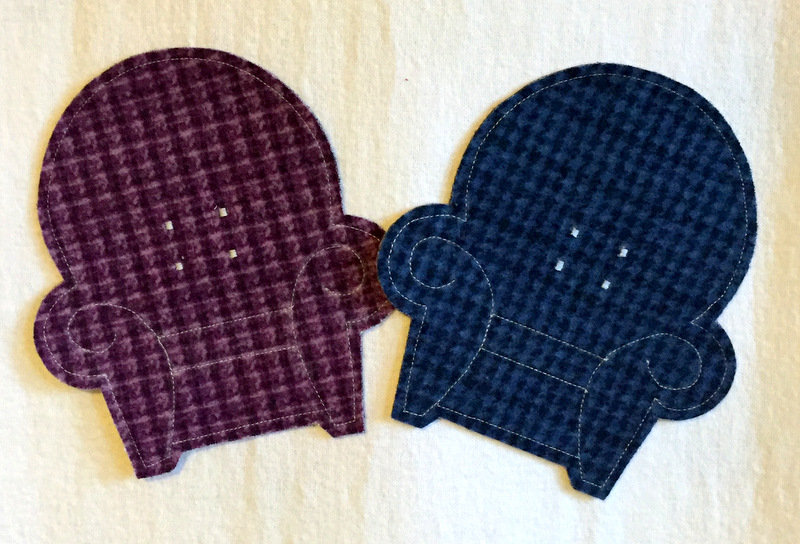
The coasters were a big hit so I made some more as gifts. My friend Beth got these for her birthday in her favorite colors . . .

coasters teal and purple
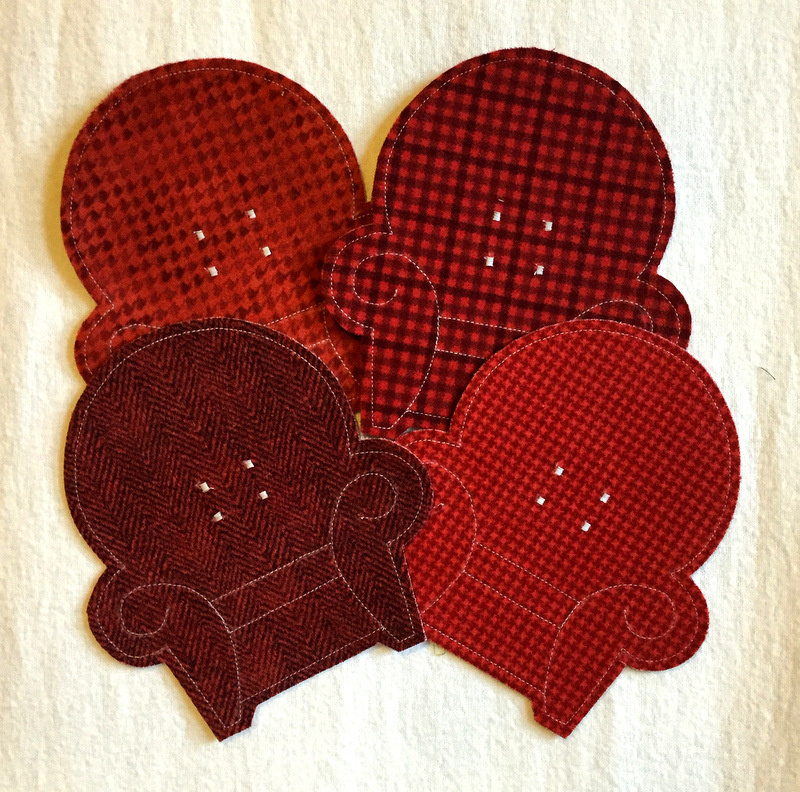
. . . and I tucked in this set of four as part of my sister Diane’s Christmas present:

flannel coasters red
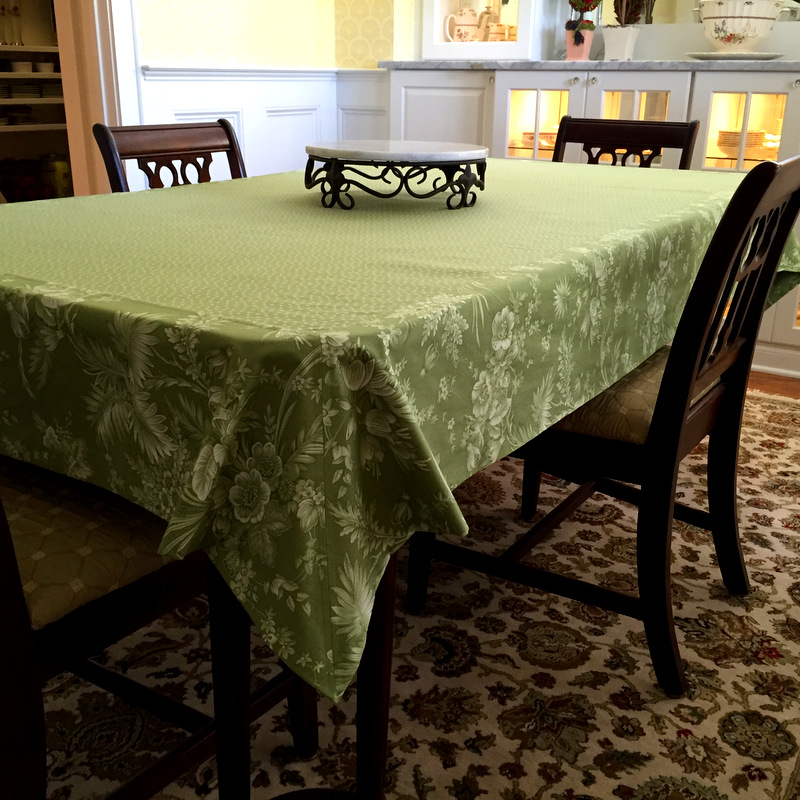
My last non-quilt project for the year isn’t small and didn’t get made in my sewing room but I’m including it here anyway. It’s the two-fabric tablecloth I made for my sister Diane’s dining room while visiting her over Thanksgiving:

tablecloth
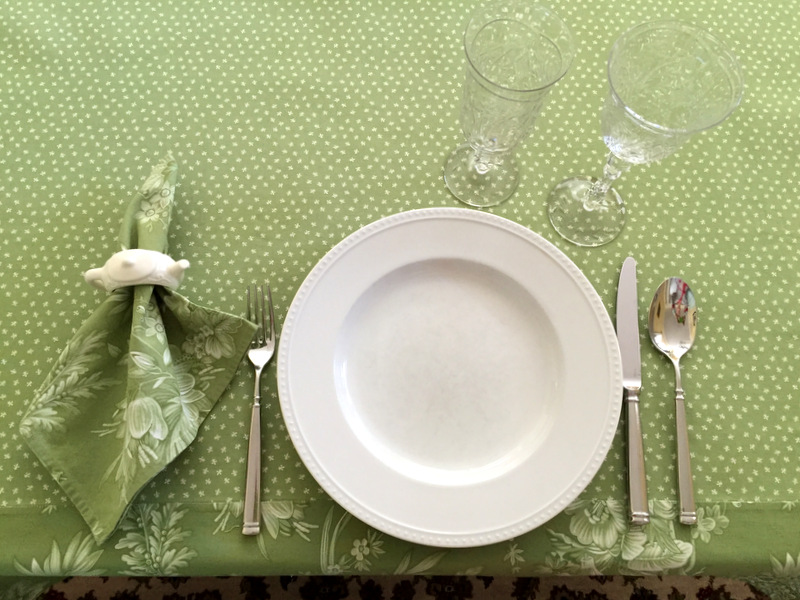
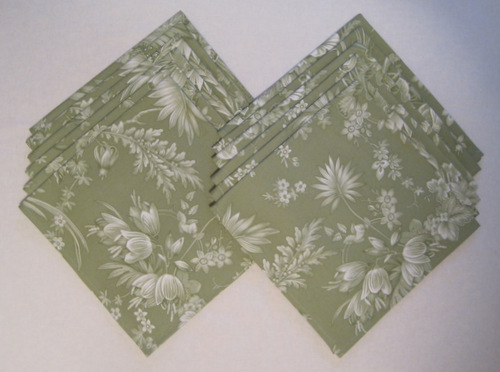
The tablecloth goes with the 16 mitered-corner napkins I made for her a couple of years ago out of the same large floral print used in the border. Here’s one of those napkins in a place setting:

tablecloth with setting

Oh, there’s a tutorial for those napkins, too: Make Mine Mitered.

How satisfying to have a visual record of what I made last year! Thanks so much for taking this look back with me. And now it’s time to head back to my sewing room and get started on my 2016 projects.

Avanti!


Posted in family, home dec, mitered corners, Quisters (Quilt Sisters), roll-it-up pillowcases, table napkins, table topper, update | 3 Comments

Time for a Tablecloth

For the last decade or so, my husband and I have spent Thanksgiving week in Atlanta with my twin sister Diane and her husband Ed. Three years ago I arrived at her home with a gift of these table napkins, made from a fabric called Heavenly Peace by Verna Mosquera for Free Spirit Fabrics:

A Dozen Table Napkins for Diane

Diane loved the fabric, and I promised to make a matching tablecloth. After three years, isn’t it about time?

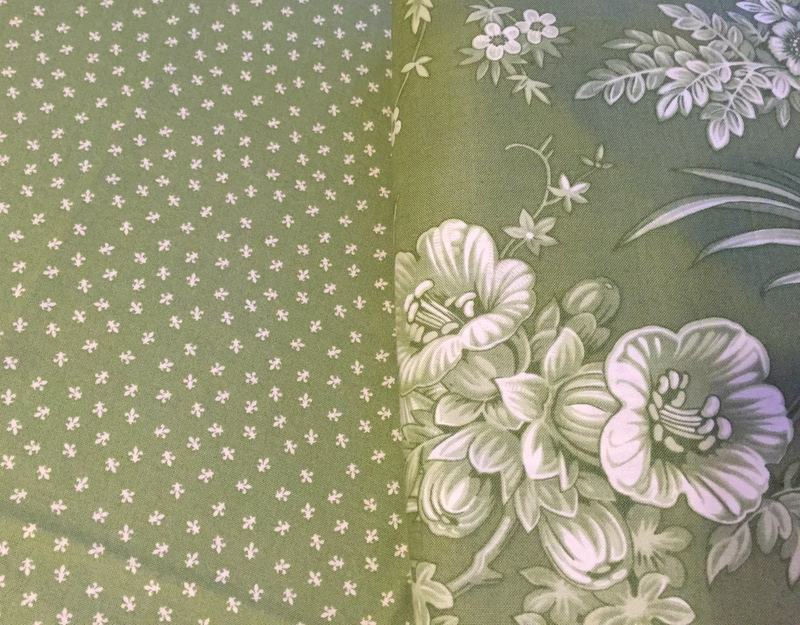
Since I like to work on a home dec project when I’m at Diane’s, I brought all the yardage I had left — which was considerable — along with a piece of fabric (from the American Jane line designed by Sandy Klop for Moda Fabrics) that was a perfect color match:

tablecloth fabrics 1-001

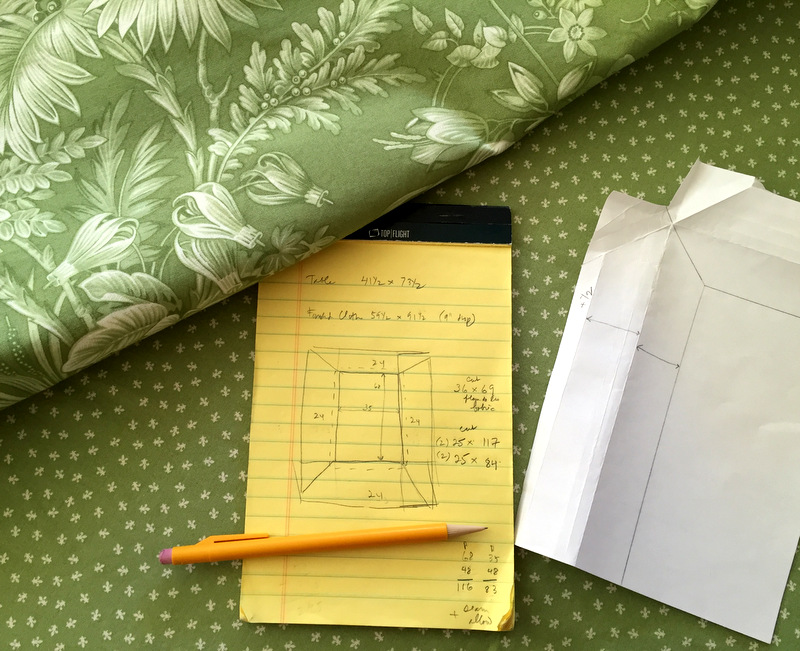
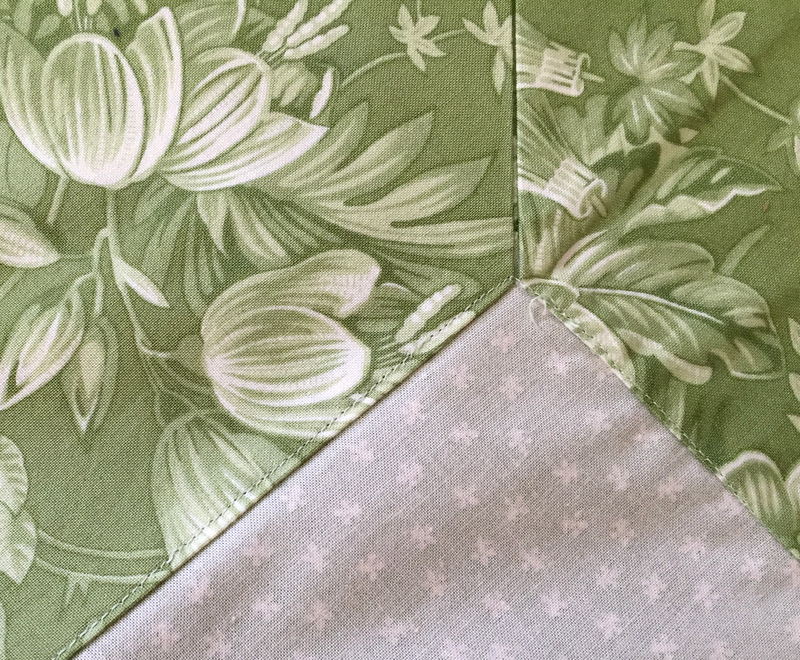
Diane and I worked out a simple design that would feature the fleur de lis fabric on the table surface. A few inches of the large floral print would also show on the table and continue down to a generous drop. I wanted to miter the corners and continue the miter around to the back so the stitching lines would be covered. That way no raw edges would be exposed.

I did the math (or so I thought) and created a little paper pattern to guide me in the preparation of the miters:

tablecloth fabric

Well, friends, it would have taken 11 yards of the floral fabric to make the tablecloth the way I originally envisioned it. That’s because I was going to cut a 25″ strip and needed 398″ inches. The modified plan used half that because I cut the fabric along the fold, getting two strips from a width of fabric instead of one. (I wish I could tell you I figured that out before cutting the first 25″ strip.)
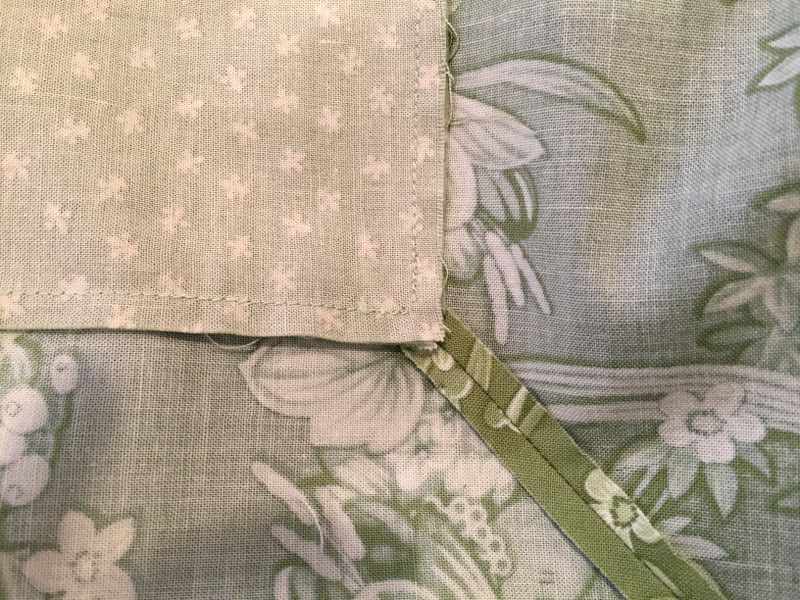
The mitered corners came together nicely. Here is a shot from the back . . .

tablecloth mitered corner from back

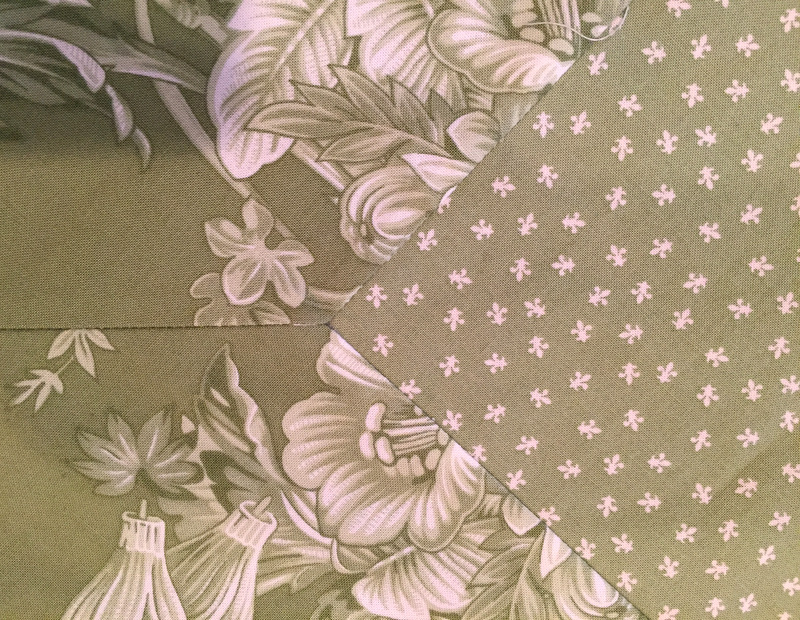
. . . and from the front:

tablecloth mitered corner from front

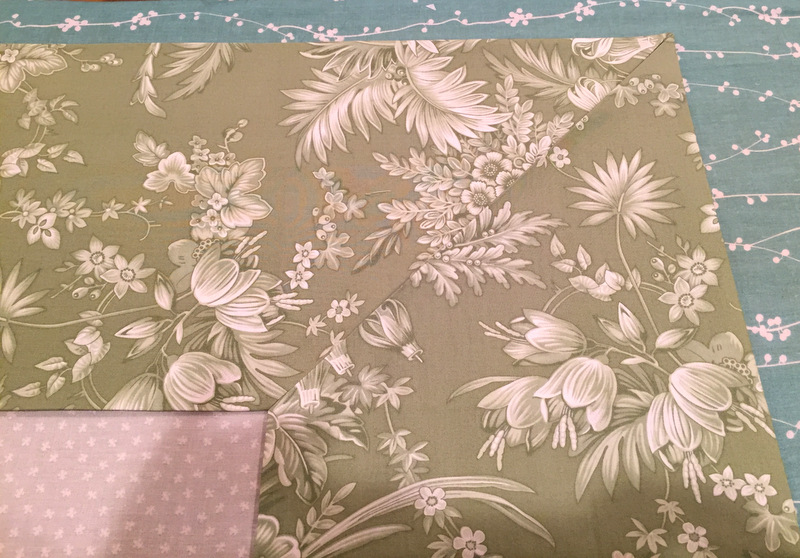
On the back, where the folded edges of the miter meet, I used Steam-a-Seam 2, a double-sided fusible web, to fuse the folded edges together:

tcloth with fused miter


From the front, I stitched in the ditch where the two fabrics meet. The stitching line caught the folded edge of the miter on the back:

tablecloth stitched in ditch

Here is Diane’s new tablecloth in place:

tablecloth

And here is the table set with a matching napkin:

tablecloth with setting

Diane and I both declared ourselves very pleased with the result. An added bonus: the fleur de lis motif is a lovely reminder of our recent big birthday trip to Paris.


Posted in home dec, mitered corners, table napkins, update | 9 Comments

A Pillow for a Pampered Pooch . . .

. . . and a Pair of Pillowcases. (How’s that for alliteration?)

My twin sister Diane and her husband, who live in Atlanta, are going to Maine in September to visit some very good friends. Diane commissioned me to make a couple of hostess gifts: a pair of pillowcases for their friends and a pillow for their dog Lucy’s bed.

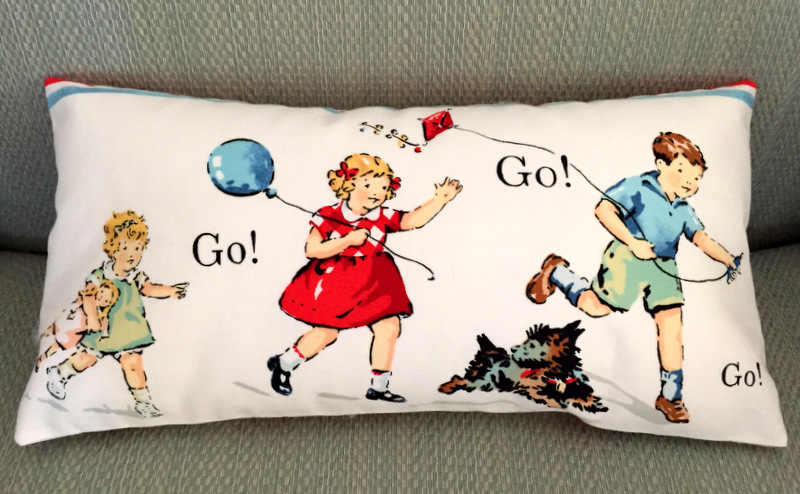
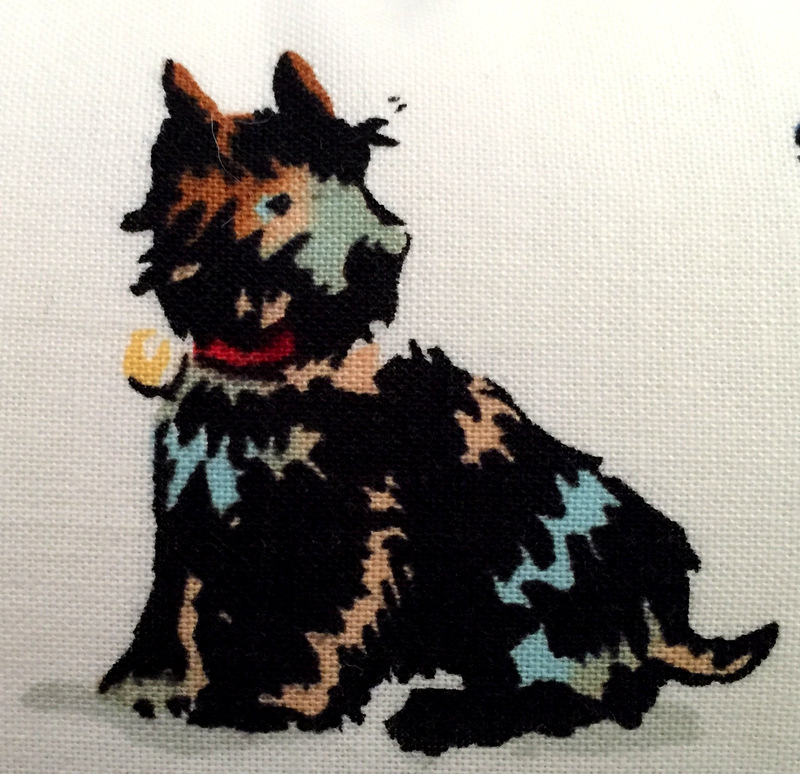
Diane had some very specific fabric in mind for the dog pillow: the Alexander Henry fabric that came out a few years ago depicting scenes from the Dick and Jane early reader books. Dick and Jane have a little terrier named Spot — a dead ringer for Miss Lucy.

dog pillow image close up

Regular readers of my blog have seen this Dick and Jane fabric before. It made its first appearance on the back of Susan Elinor’s quilt, a baby quilt I helped my neighbor Janice finish in 2014. Later that year I also made a pillowcase for Diane’s grandson to use when he stays overnight at her home.

Lucy’s pillow measures 6″ x 12″ — exactly the same size as a vignette printed along one selvage end of the fabric. Take a look:

dog pillow front

Does Lucy sleep with her little head on a pillow? I don’t know. Most likely the pillow will be tucked up on one side of her doggie bed and just look cute.

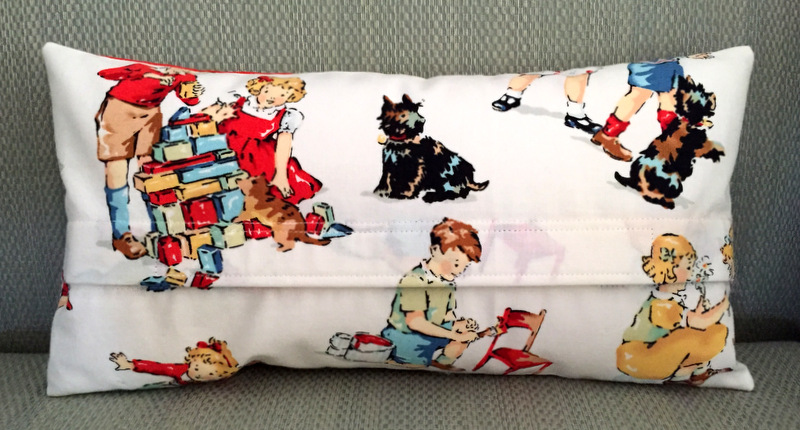
Here’s the back of the pillow:

dog pillow back
I was planning to finish the back side with buttons and buttonholes. Then it occurred to me that Lucy might be the kind of dog who likes to gnaw on buttons so I sewed Velcro strips to the back pieces instead.

See how the design matches on the top and bottom pieces?

dog pillow back closeup

I guess I went a bit overboard. (But in a good way, right?)

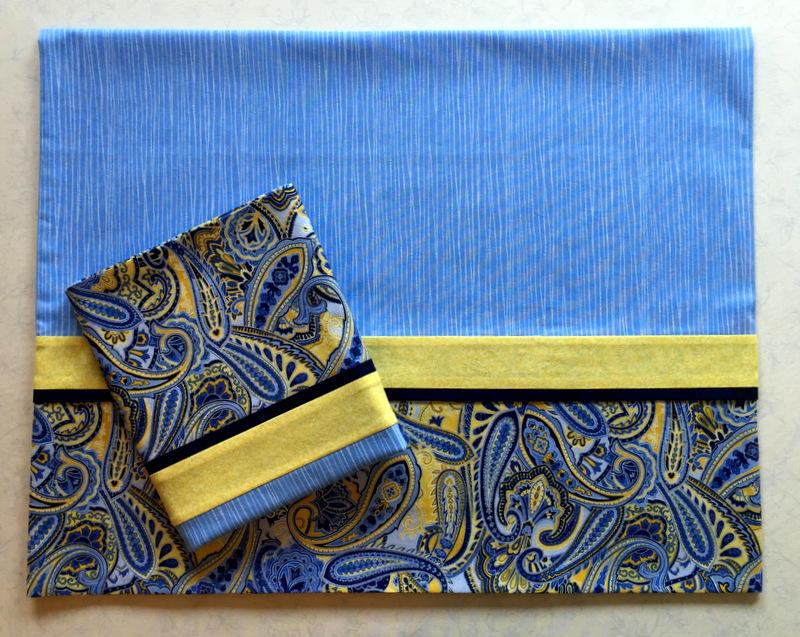
The pillowcases were made using my favorite roll-it-up method that neatly encases the top and side seams:

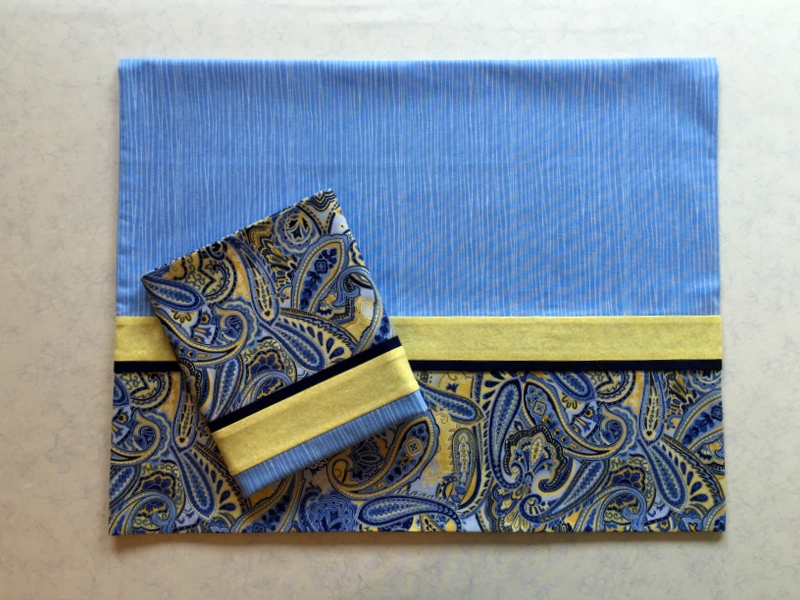
pillowcases for kathy and paul

I love that combination of  yellow and blue. Diane assures me that her friends will, too.

The gift items will be on their way to Georgia tomorrow, in time for Diane to dress them up every so nicely in a gift box in preparation for her trip to Maine.


Posted in family, home dec, roll-it-up pillowcases, update | 5 Comments

Darn It!

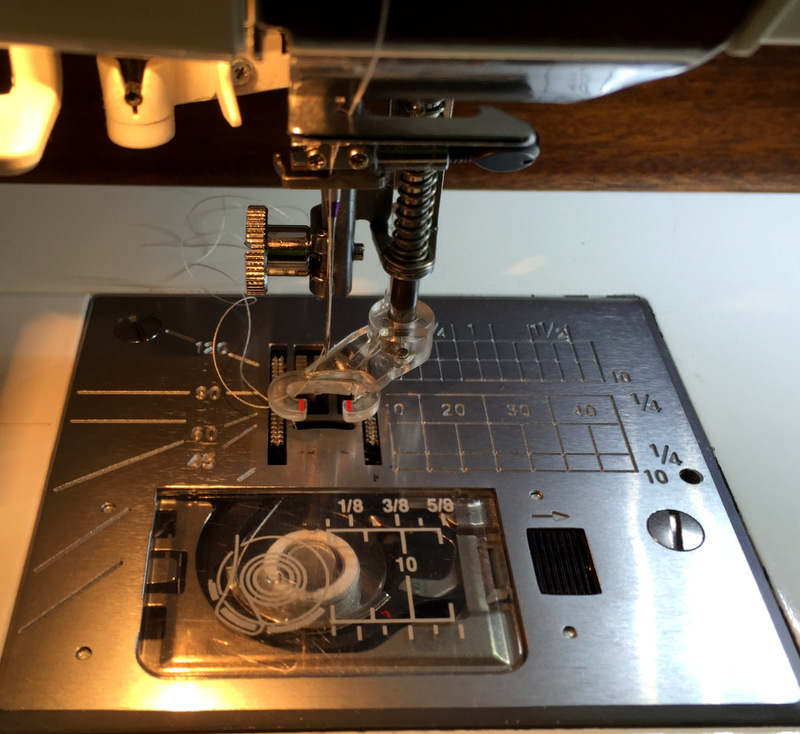
darning 1
See that foot? It’s the darning/free motion quilting foot for my Janome sewing machine. I’ve had this sewing machine for 10 years and have used it quite a bit for free motion quilting but today I did something with it that I’ve never done before:  I used it for darning.

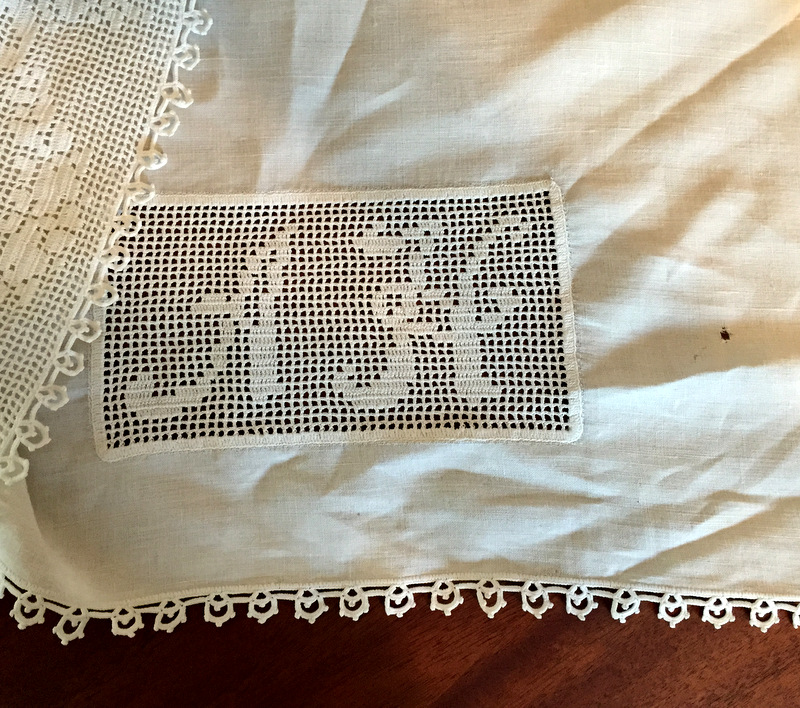
Decades ago I bought this vintage dresser scarf at an estate sale in Portland:

darning 2

It’s the kind of find that quickens the heart of any lover of vintage linens. (Of course it didn’t have a hole in it at the time.) It measures 17″ x 64″ and, in addition to the inset initials, features beautifully crocheted edging all around and this lovely design on both ends:

darning 2a
I’ve used it on a side table in my dining room ever since I brought it home. (My initials, by the way, are DW. I don’t think I even know anyone with the initials AH.)

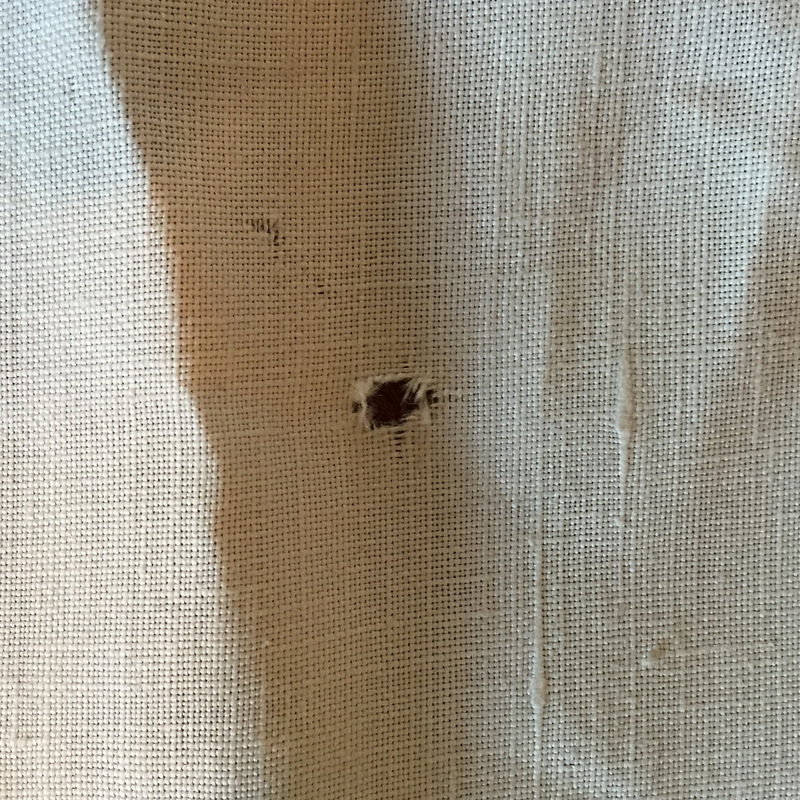
Over time the scarf developed a pinhole, which eventually turned into a hole the size of a pencil eraser:

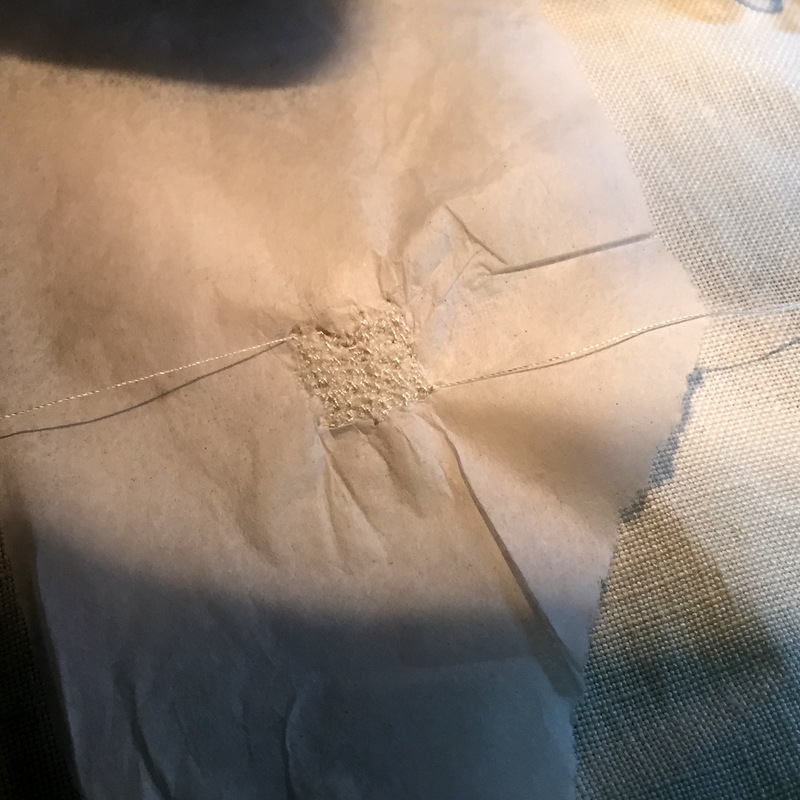
darning 3

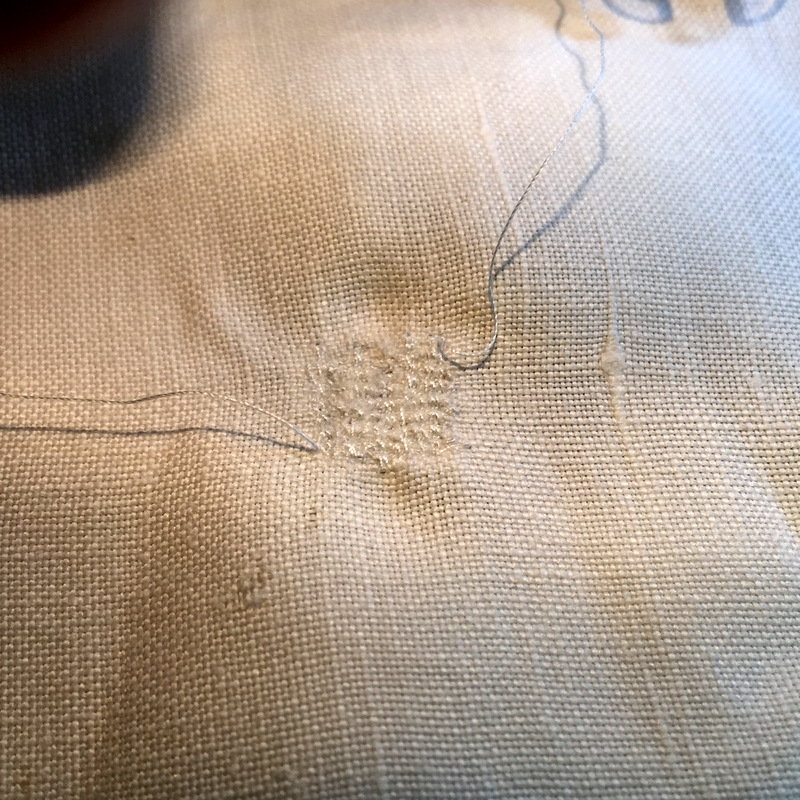
Something definitely needed to be done. After practicing my darning skills on a scrap of fabric (up and down, back and forth, in a crosshatch pattern), I was ready to work on the real thing:

darning 4
I put a scrap of tissue paper underneath the runner before stitching to help stabilize the cloth. This is what it looked like from the back:

darning 5
The tissue paper peeled away easily, just as you’d expect.

Now freshly laundered and ironed, the scarf is back in its proper spot in the dining room:

darning 7
Flush with success, I proceeded to mend holes in another vintage linen, a round jacquard tablecloth 84″ in diameter that I got for $10 at a garage sale in my neighborhood some years ago. It was badly yellowed with age but otherwise seemed to be in good condition. It washed up beautifully, and I have used it many times over the years on the round patio table on our back deck. Like the dresser scarf and other well loved linens in my collection, the cloth had developed holes over time from extensive use and repeated launderings.

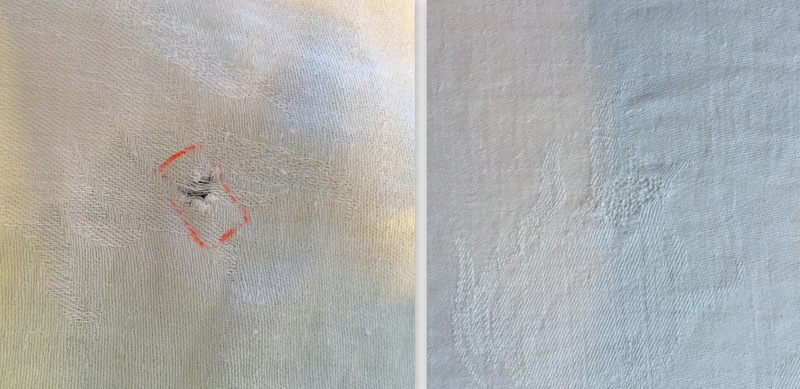
Here’s a before and after shot of one of the holes:

darning before and after
The tablecloth is so big I drew lines around the holes so I could locate them more easily when the bulk of the tablecloth was under and around my sewing machine. (Those colored lines were made with a Frixion pen; the lines disappear with the touch of hot iron.) I also stitched over some pinholes before they had a chance to turn into larger holes.

I think I’m on a roll. Need anything mended?

(Kidding!)


Posted in home dec, update | 10 Comments

Diane’s Table Runner in Situ

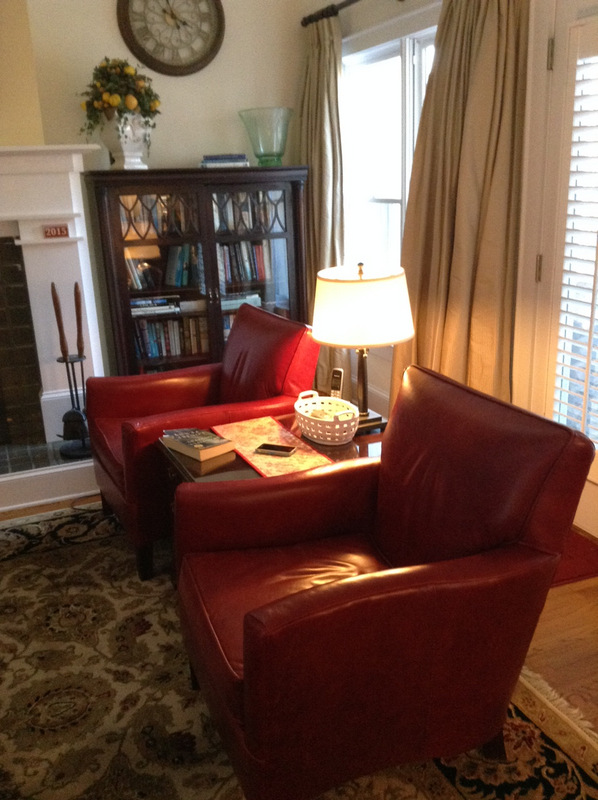
A couple weeks ago I wrote about a reversible table runner I made for my sister Diane’s living room. The runner was made to cover a seam (for lack of a better word) created when two chests were placed back to back to create a larger table surface between two chairs. Here’s a look at the single chest Diane started with:

dks liv rm before photo
Even with the lamp placed at the very back of the chest, people sitting in the chairs had to crane their necks around the lamp to see each other when talking. The limited surface space made it difficult to have multiple items on the chest at the same, items such as a TV remote, a glass of wine, a cell phone, a book. In addition, the drawers in the chest were difficult to open from a sitting position because the chest was positioned so far back. You can understand why Diane considered this a design dilemma.

Her solution was to take a matching chest from another room and place it back to back with the first one, doubling the surface area, making it possible to move the lamp farther back toward the windows, and making the drawers in front more accessible. Sounded like a win-win-win to me. The only issue was the seam where the two chests met.

That’s where the table runner (and I) came in. Consulting by phone between Portland and Atlanta, Diane and I selected fabric from my stash and I proceeded to make this reversible runner that measures about 9½” x 41″:

runner completed

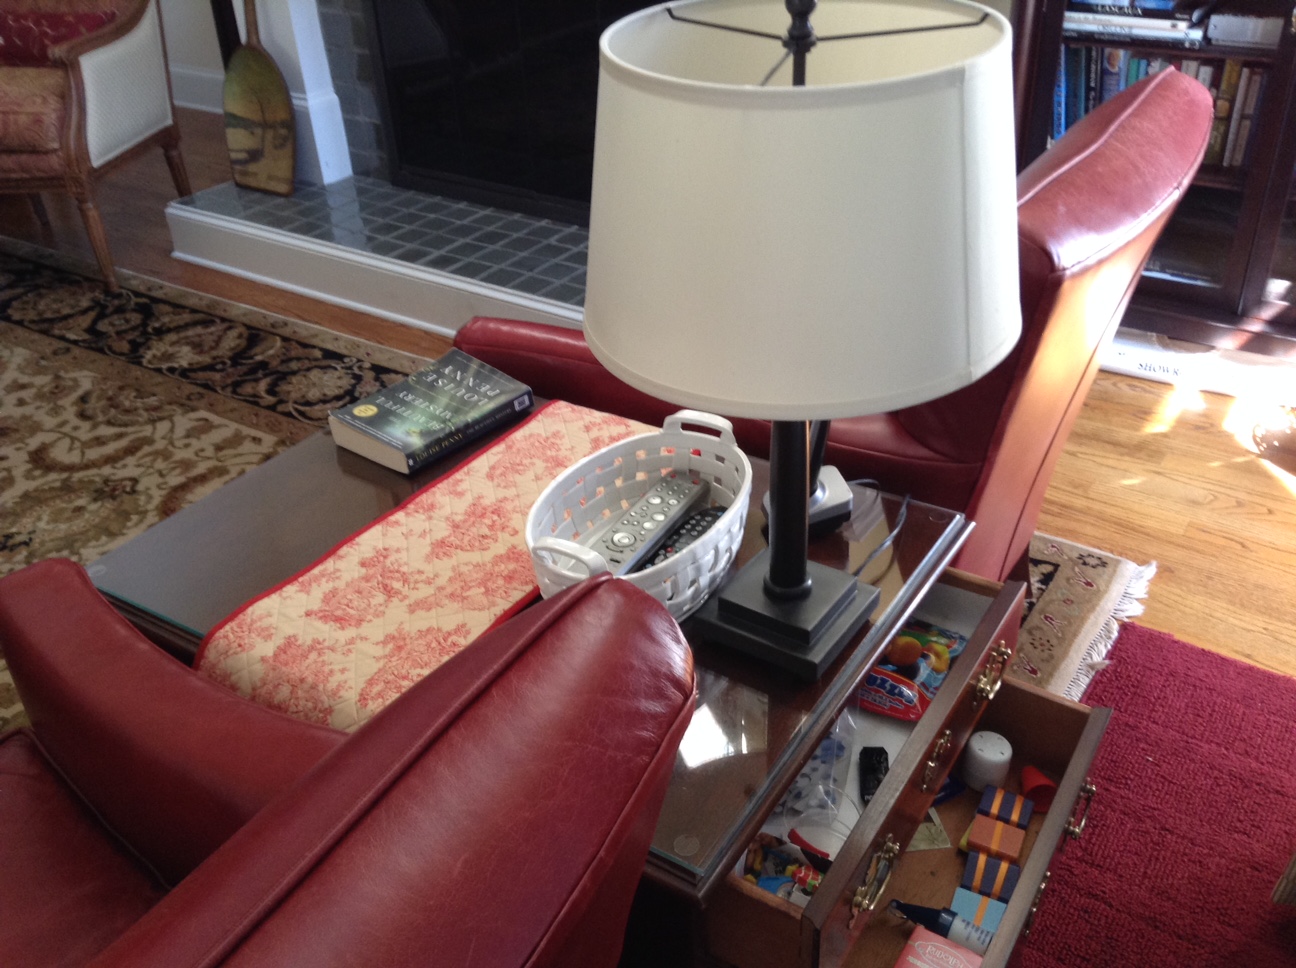
It was very easy to make: two cotton prints, a layer of batting, simple cross-hatching for the quilting, and traditional double-fold binding. Soon it was on its way across the country. Here it is in place:

dks liv rm after toile

See how much farther back the lamp is? Much easier now for folks to converse. The toile fabric is in the up position in the picture above. Here’s another shot with the floral vine in the up position:

after with vine 2

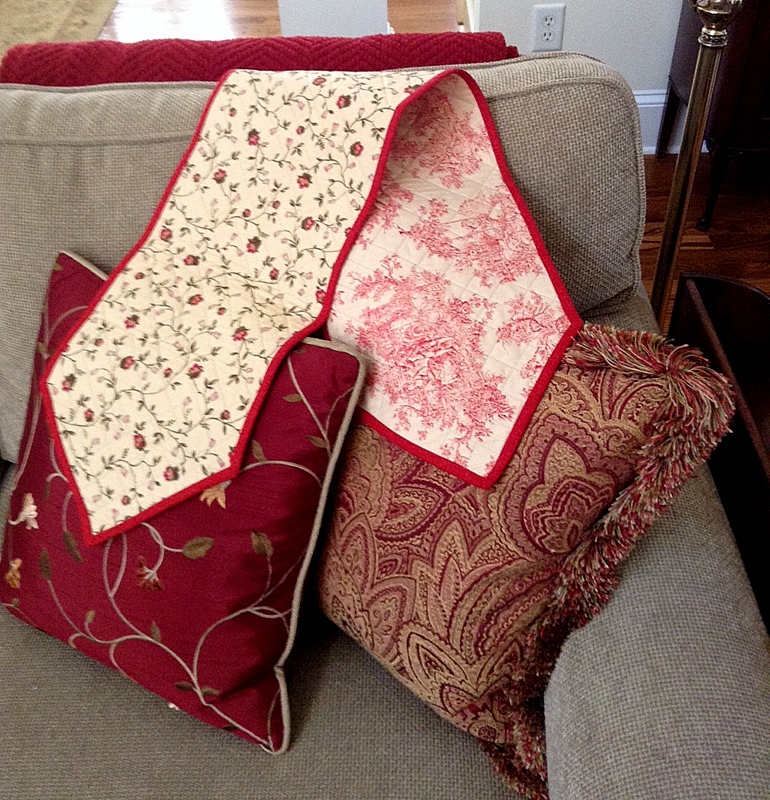
While auditioning fabrics, Diane and I kept the sofa pillows in mind:

dks liv rm couch (2)

Look how well these fabrics go together. I especially like the connection between the floral vine fabric on the runner and the pillow on the left:

table runner and pillows
This home dec mini makeover came with a bonus: because the chests are positioned back to back, there’s a set of drawers on both sides. Diane and Ed’s 5½-year-old grandson Edward gets the exclusive use of the drawers at the back for his own little stash of treasures and playthings:

in place 3


Posted in family, home dec, update | 4 Comments

Design Dilemma

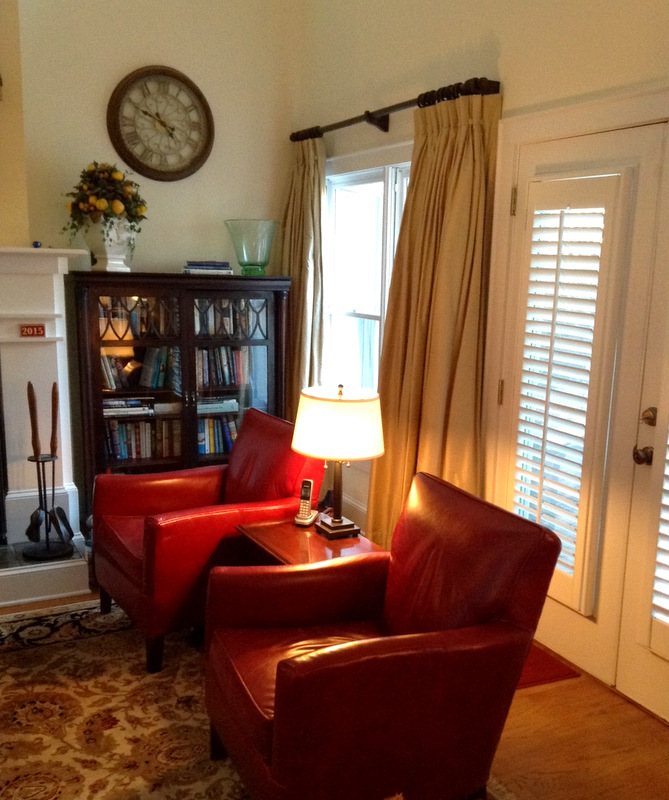
Earlier this week my twin sister Diane called me with a home dec design dilemma. The small chest that sat between two red leather chairs in her living room was so narrow that people sitting in the chairs couldn’t see each other around the lamp at the back of the chest. Her solution was a clever one: she claimed a matching chest from another room and placed it back to back with the first one. Then she had a piece of glass made to fit the top. The only problem was that you could see under the glass where the two chests met in the middle.

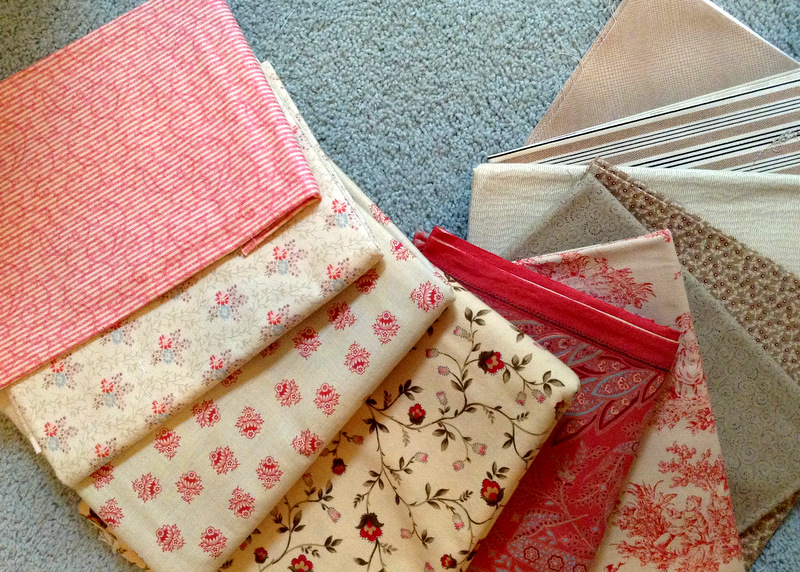
Could she commission me to make a table runner to cover the middle section? Of course she could. She wanted something very simple — no piecing required, just a rectangle about 9″ wide and long enough to extend down both sides of the chest. We talked about colors to match her living room — deep red, tan, forest green. I was ready to charge off to a fabric store to look at home dec fabrics.

Diane was incredulous. “Don’t you have some fabric in your stash that will work?” she asked. Well, of course I did. A little stash diving resulted in this group of fabrics sent from Portland to Atlanta via iPhone for Diane’s inspection:

fabric choices

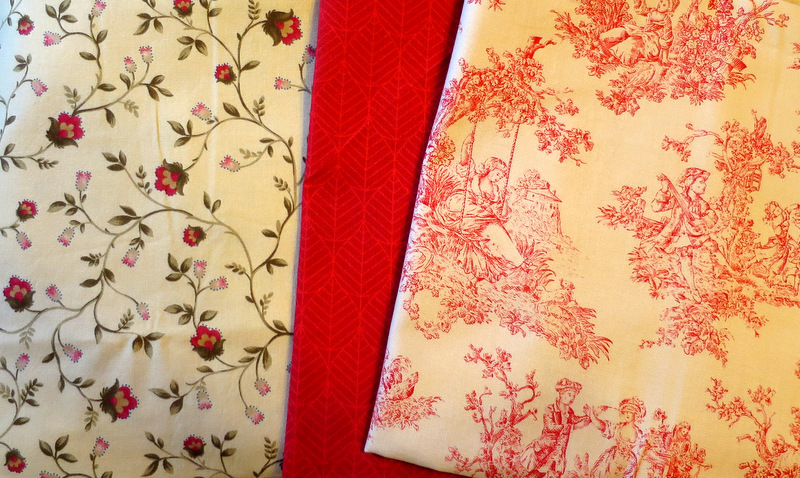
She liked the print in the center of the photo — the one with the red flowers and vines on a tan background — and the red and tan toile on the right side. No need to choose between them. By making the table runner reversible, we could use both fabrics.

I pulled a red leaf print from my stash for the binding:

the winning combo
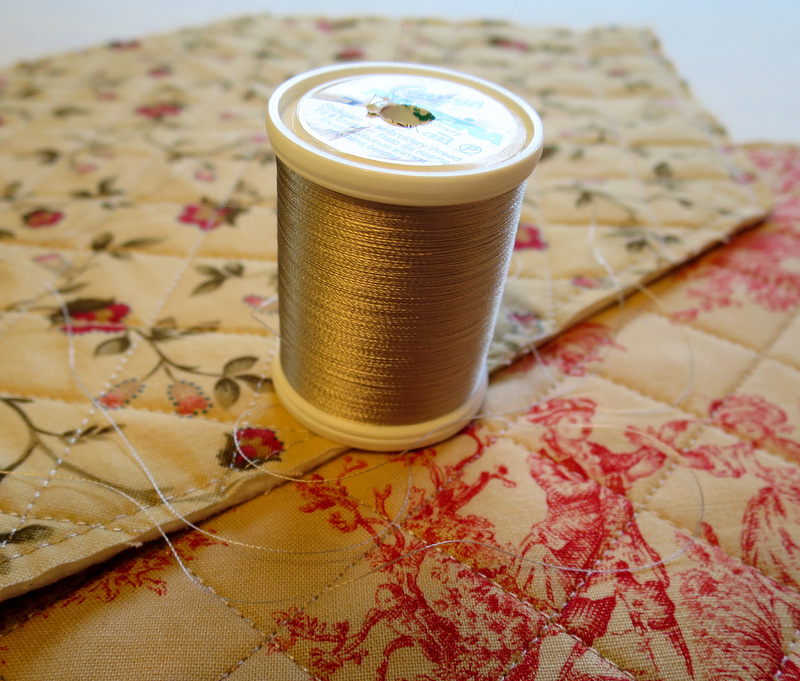
The only thing I needed to buy was topstitching thread. It had to be just the right color to look good on both fabrics, as the backgrounds are similar but definitely not the same. In no time at all my quilt sandwich was ready. I decided to quilt a diagonal 1″ grid across the surface of the table runner, using my walking foot and this light taupe rayon thread by Madeira that has a beautiful sheen:

topstitching thread
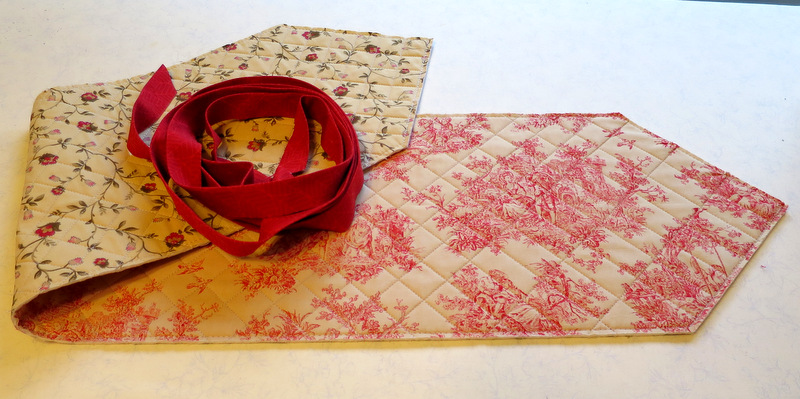
I cut the binding strips on the bias, by the way, because I knew the leaf print would look better that way. Here is the runner quilted and ready to bind:

ready to bind
Notice that the table runner isn’t just a rectangle? It wouldn’t be much more work, I reasoned, to make the ends pointed, and it would be so much more elegant. It didn’t occur to me until later that I would have six corners to miter and that four of those corners would be angles greater than 90 degrees. No worries, though. Heather Peterson of Anka’s Treasures has an excellent tutorial on her blog, Trends and Traditions, that shows how to bind outside corners greater than 90 degrees.

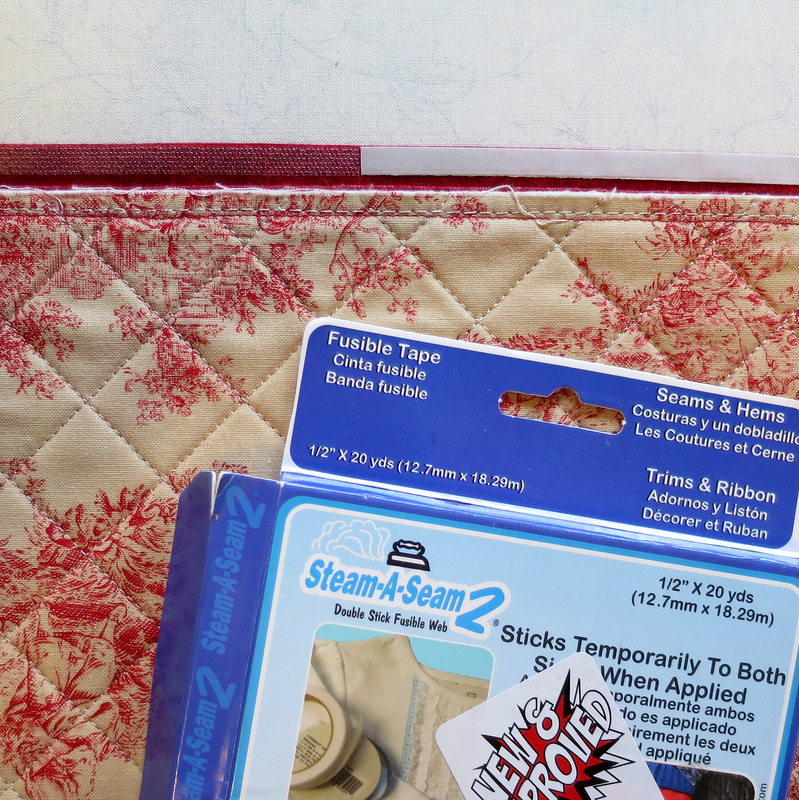
Once the binding was stitched on, I tacked it down on the other side using Steam-a-Seam 2, a double stick fusible webbing. At the top of the photo you can see how the webbing is positioned right along the folded edge of the binding:

fusing the binding

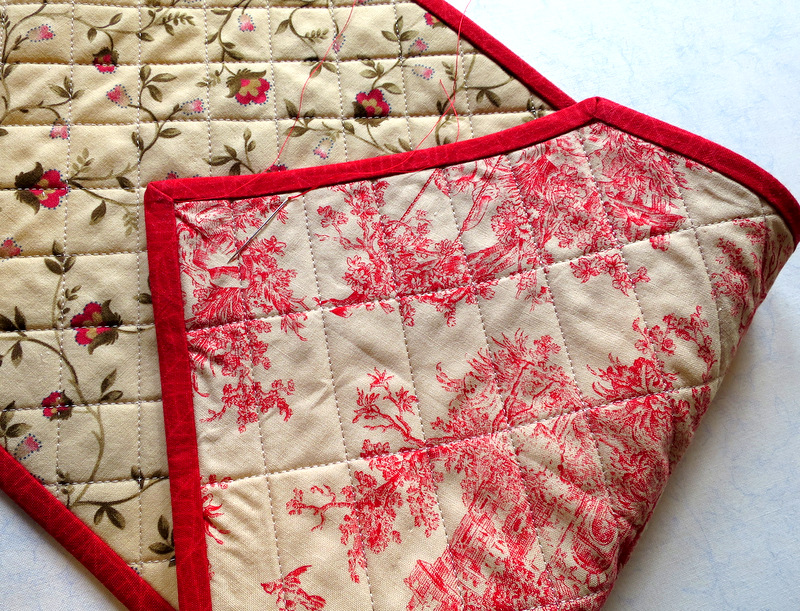
(Steam-a-Seam 2 comes in ¼”-wide rolls. All I had on hand was ½”-wide. Easy enough to cut it in half to make ¼”-wide strips.) The fusible webbing made short work of finishing the binding. All that was left was tacking down the mitered corners by hand. I was on the last miter when I noticed I had missed three rows of quilting:

tacking down the binding (2)
Now doesn’t this look better?

stitching corrected
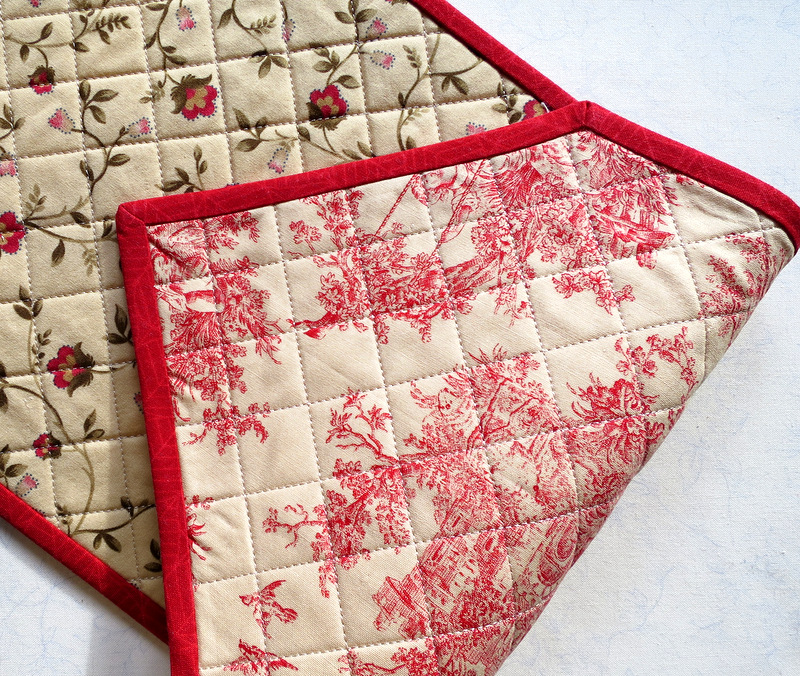
Here is Diane’s reversible table runner (measuring 9-3/8″ x 41″), ready to be boxed and mailed:

runner completed

This little project was a pleasant diversion from binding Toile Story. I do enjoy binding quilts by hand but was ready for a little break. Diane said she wasn’t in a hurry to receive this but was hoping to get it before she hosts a cocktail party later this month. She’ll be very surprised to get this in the mail so soon — unless she sees this post first.


Posted in family, home dec, mitered corners, update | 3 Comments

Fabric Facelift

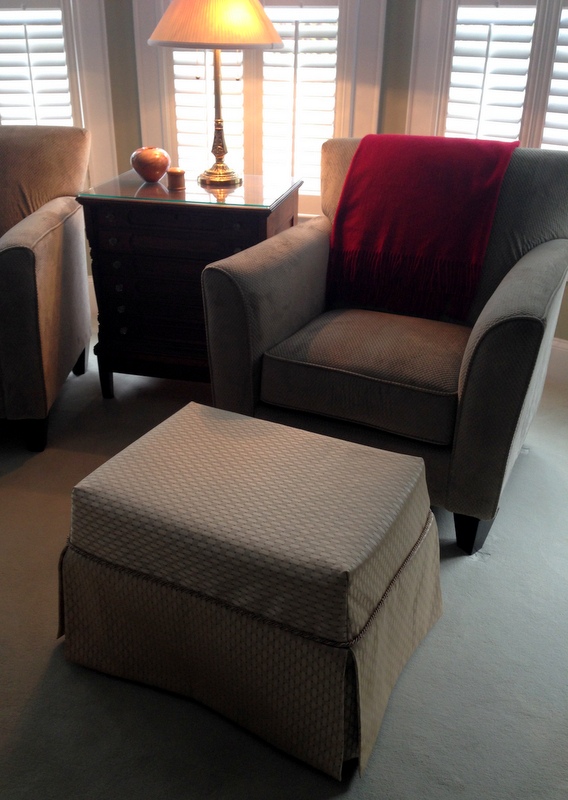
The ottoman in the master bedroom at my twin sister Diane’s house got a facelift, a new custom cover I made for it:

ottoman 1
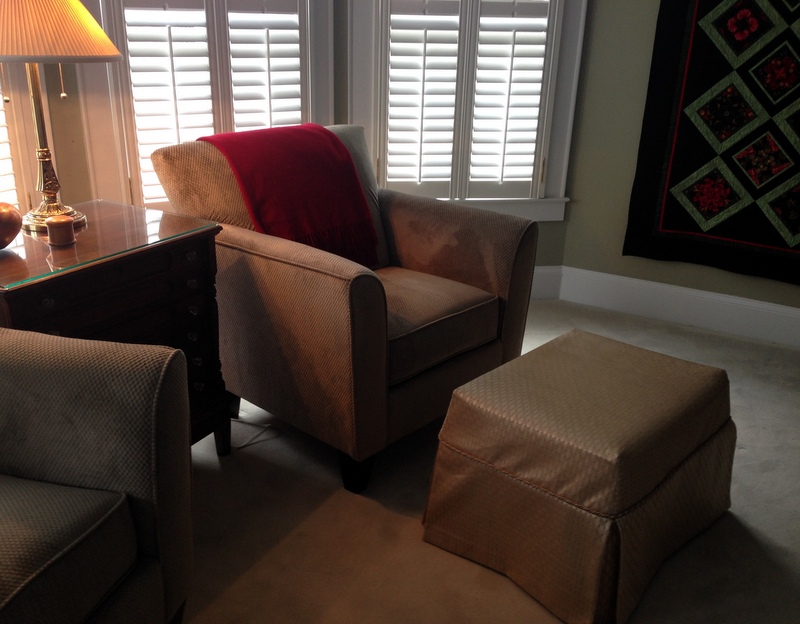
The original upholstered cover fell victim to the claws of Diane and Ed’s dear departed cat Alex. The newly slipcovered ottoman looks right at home in front of an easy chair in her bedroom:

ottoman 2
Here’s a view that includes a peek at Midnight in the Garden, the quilt I gave Diane for her 60th birthday:

ottoman 3
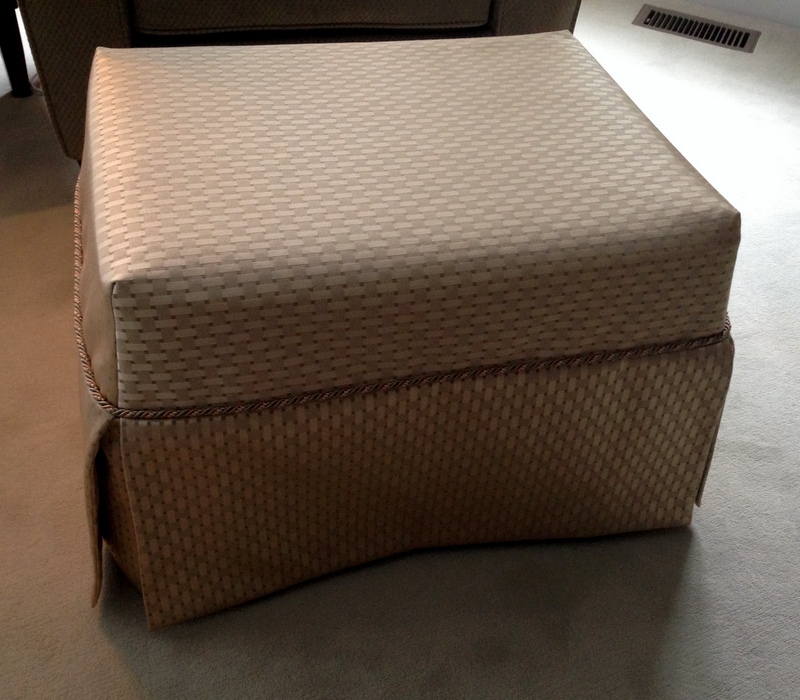
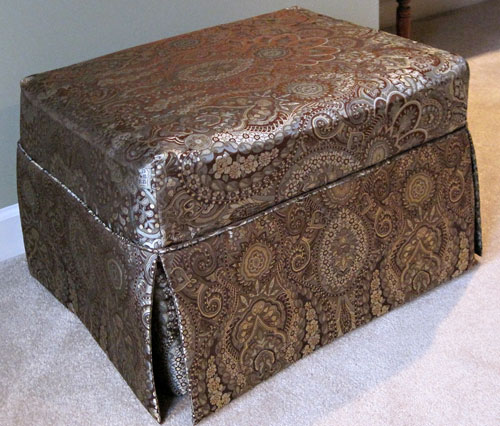
The newly covered ottoman actually has a fraternal twin (hey, just like me!):

Custom ottoman slipcover by Dawn White

This is the slipcover I made four years ago when I was visiting Diane over Thanksgiving. My goal was to make this look like an upholstered piece, since I’m not a fan of slipcovers. It was a real seat-of-the-pants project, since I had never made a slipcover or upholstered anything. When I started working on the new one, all I had to do was look at the old one to refresh my memory on how I had made it. No need to reinvent the wheel!


Posted in family, home dec, update | 2 Comments

A Home Dec Project for Diane

Every year when I visit my twin sister Diane over the Thanksgiving holiday, I work on a home dec project for her. It’s a small way to repay the generous hospitality she and her husband Ed show my husband Charlie and me on these annual visits.

This year I’m making a slipcover for an ottoman that goes in the master bedroom. This is what it looks like now:

1

Ed and Diane’s dear departed cat Alexis (Alex for short) liked to sharpen her claws on the ottoman, and she left the evidence behind:

2
Alex  was an equal opportunity kneader. She managed to work her magic on both sides of the ottoman:

3
On my visit last year, Diane and I found this lovely basketweave fabric which we thought would be perfect to recover the ottoman with:

4
This year we found the perfect trim for it — 50% off — at Frugal Fabrics:

5
Today I got the fabric measured and cut. Here is the top with boxed corners pinned and ready to sew:

6
Tomorrow I will get out my trusty old Elna sewing machine (bought in 1975), which now lives at Diane’s house, and will start sewing. It will be good to sit in front of a sewing machine again!


Posted in family, home dec, update | Comments Off on A Home Dec Project for Diane

Diane’s Dream Kitchen, Part 3

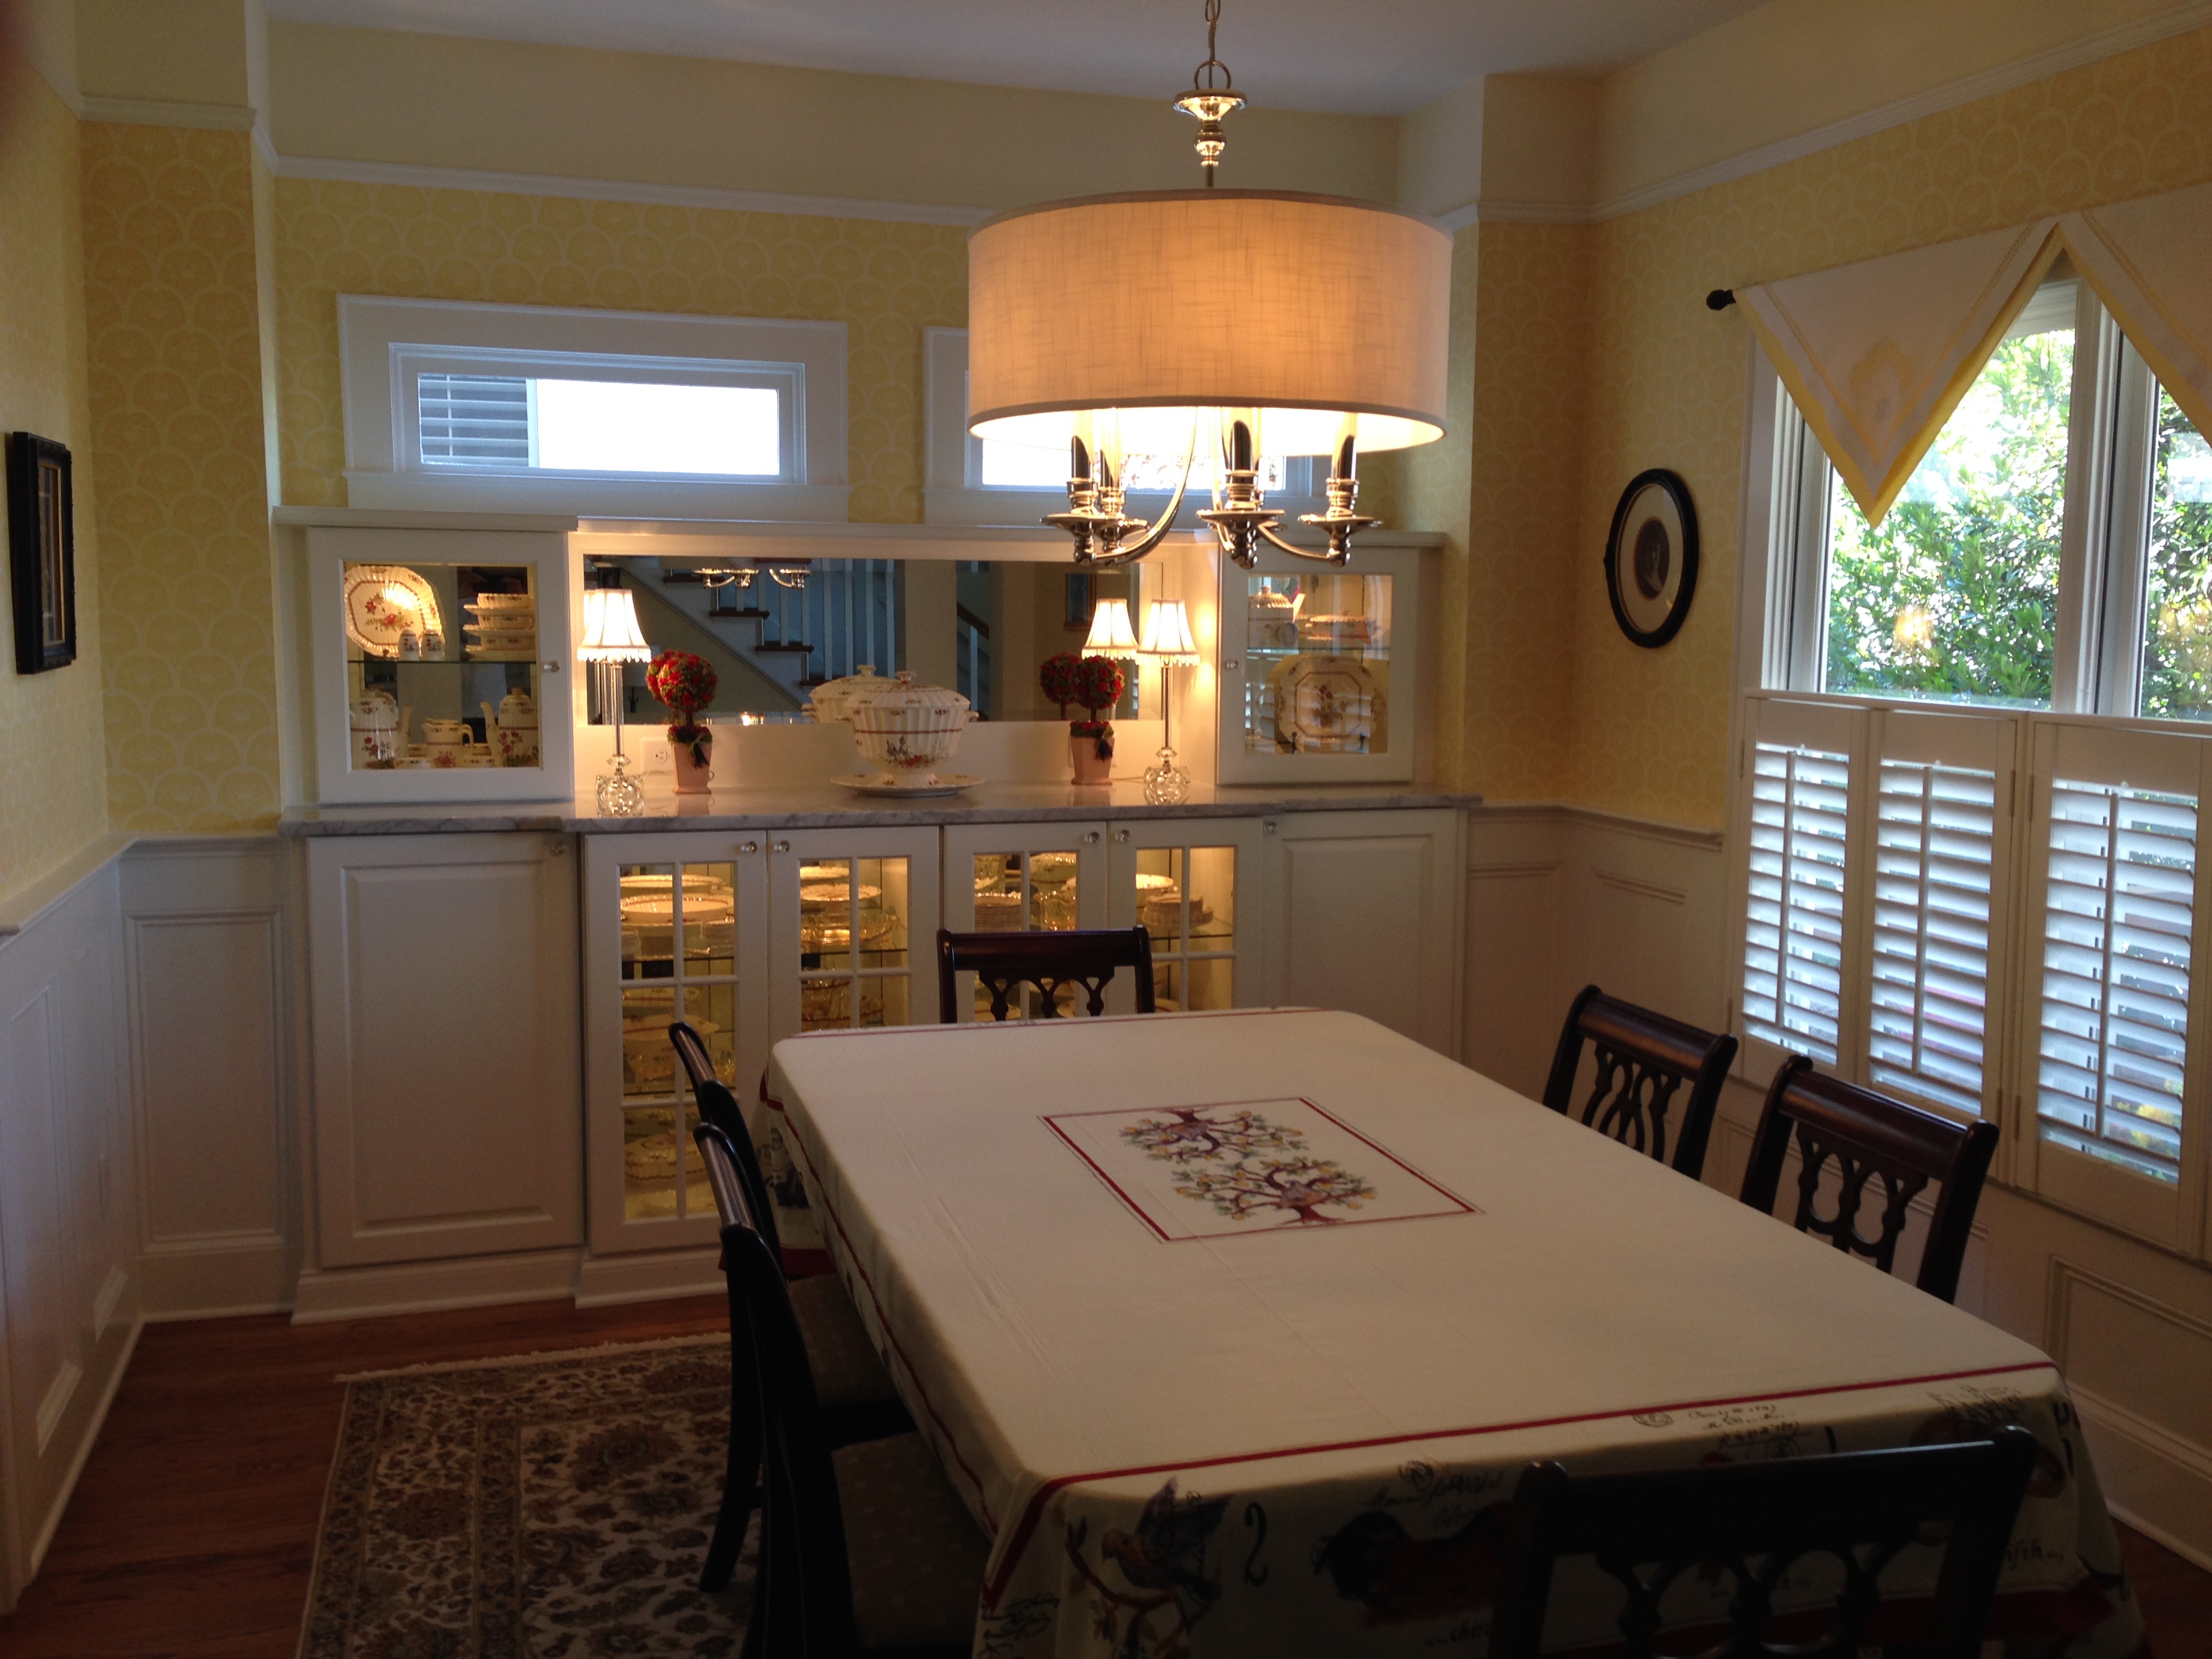
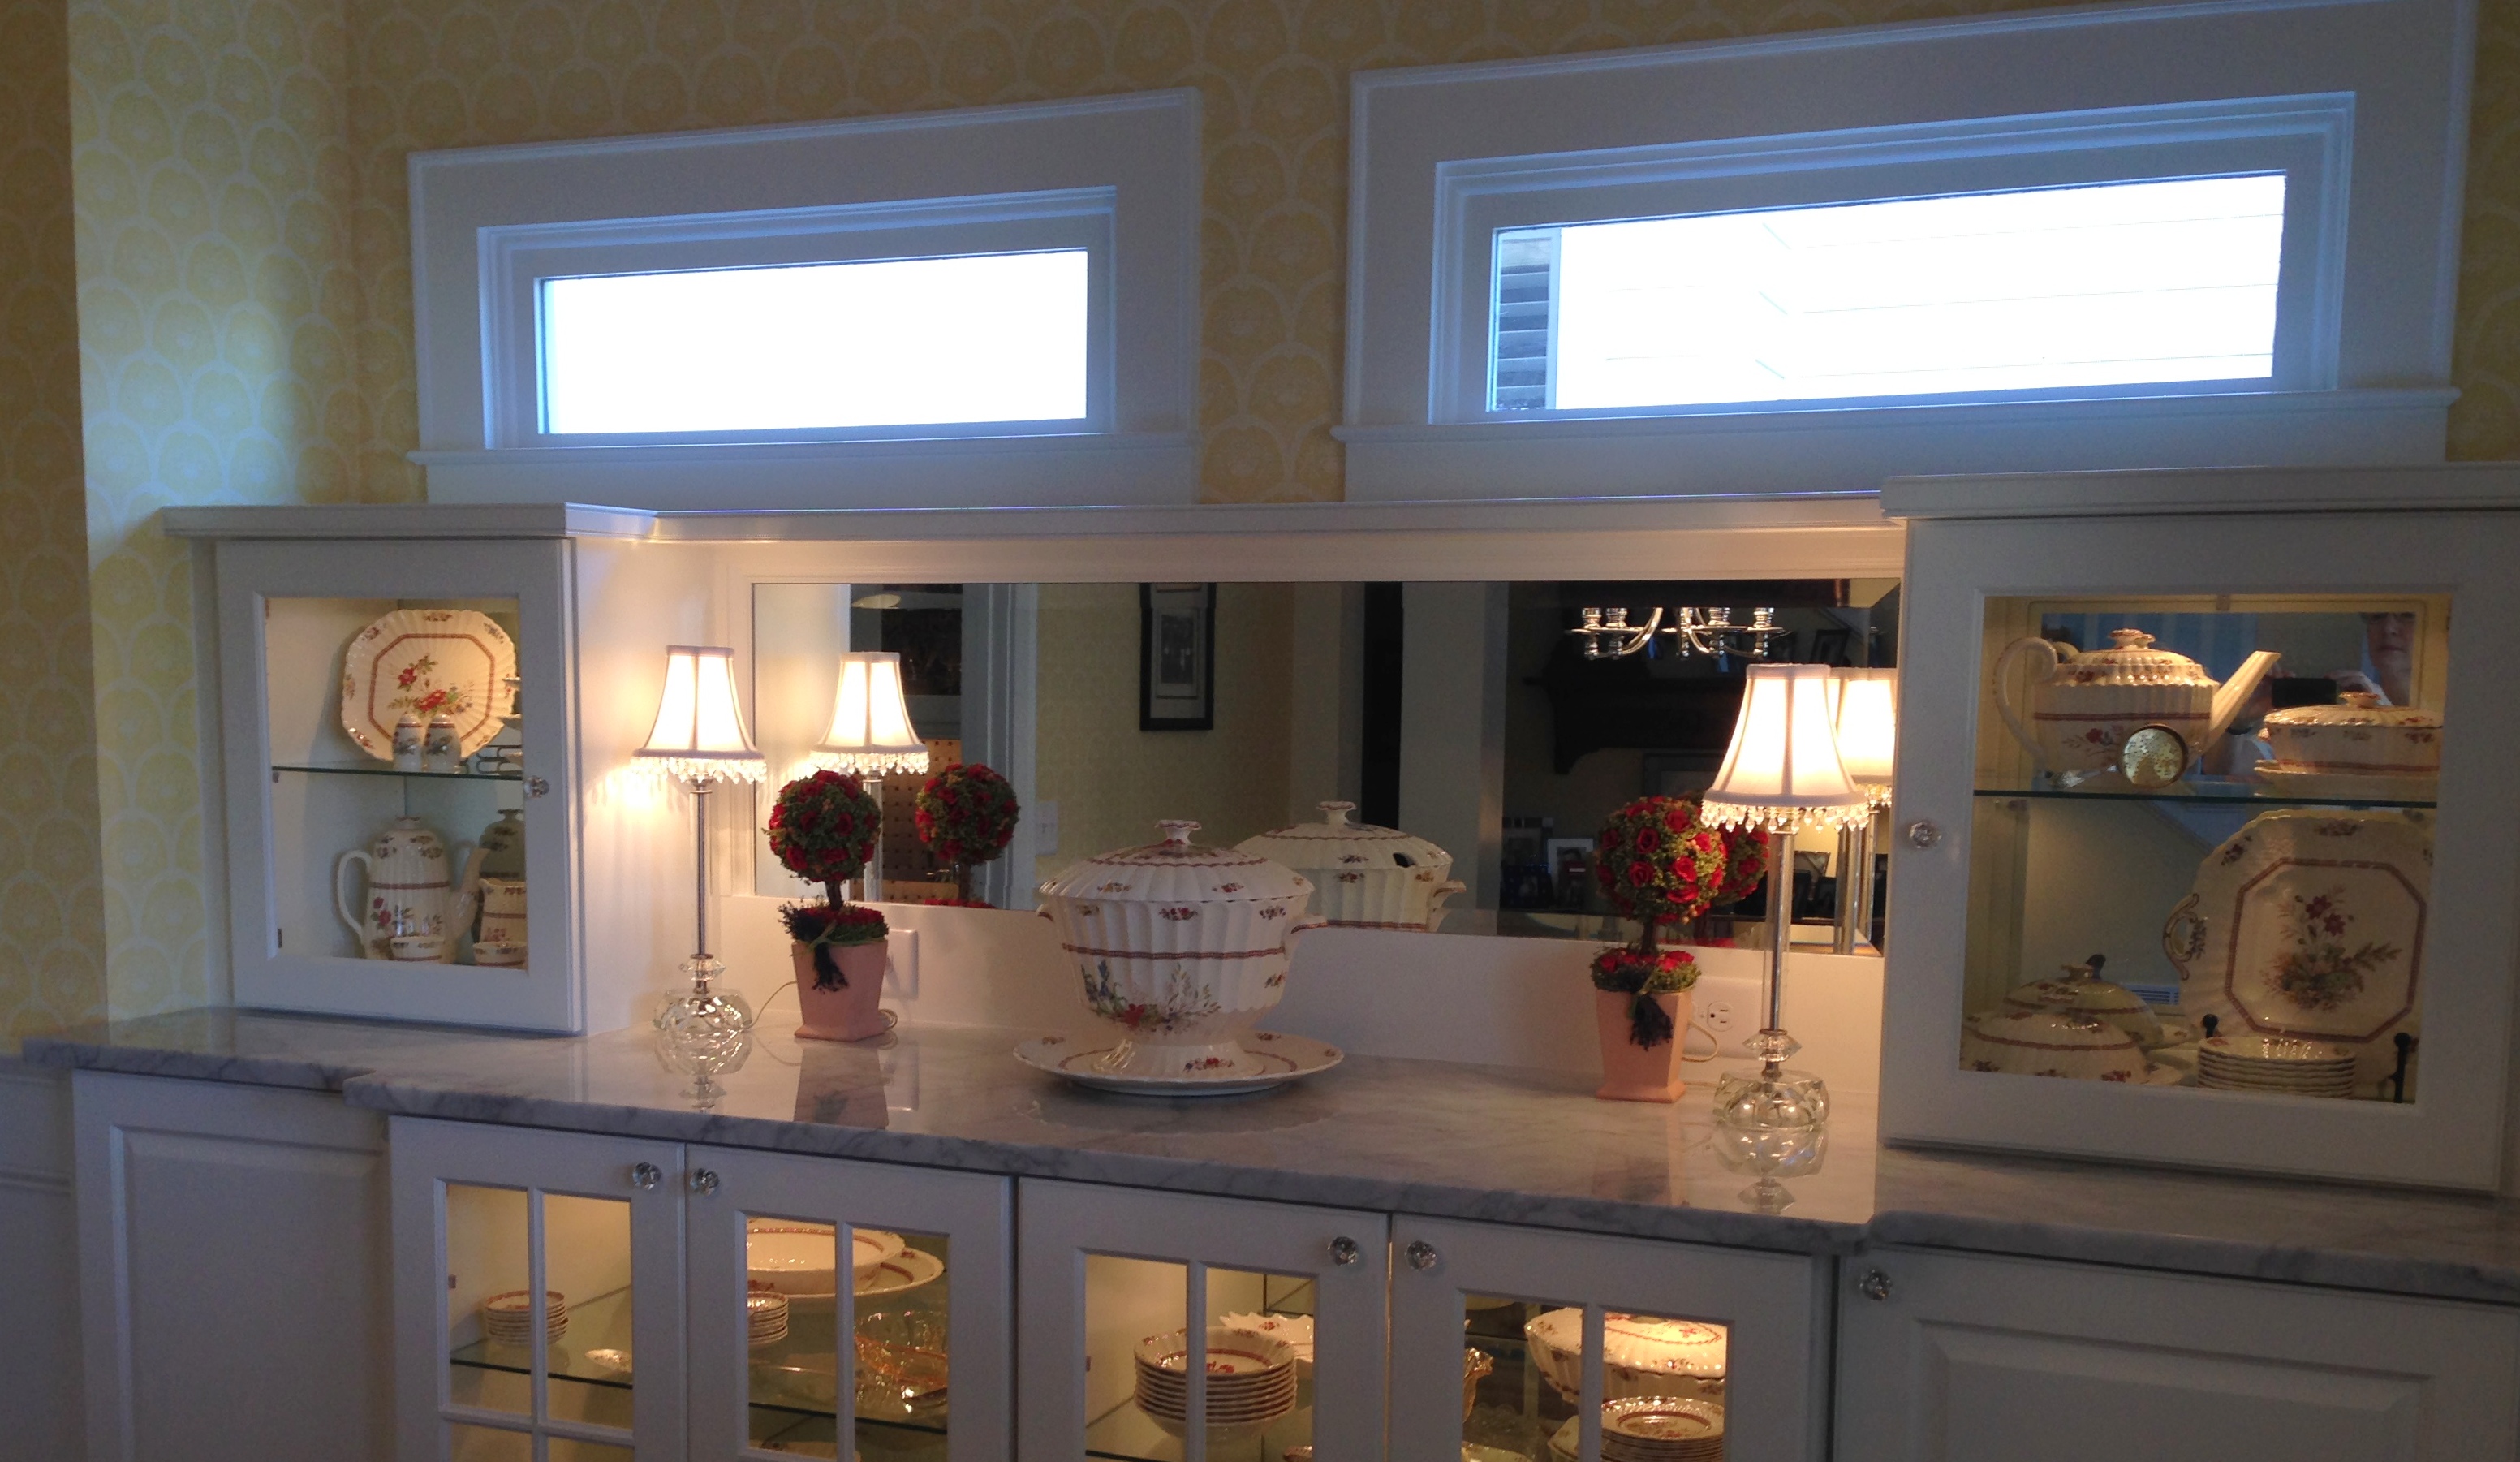
My sister Diane’s kitchen renovation (subject of the this post and the previous one) included the creation of a built-in buffet in her dining room. It’s almost nine feet wide! Check it out:

buffet viewed from the left
The buffet replaced a standing sideboard that was just under five feet wide so you can imagine all the storage and display space she gained. Here’s a closer look at the top of the buffet:

buffet top view
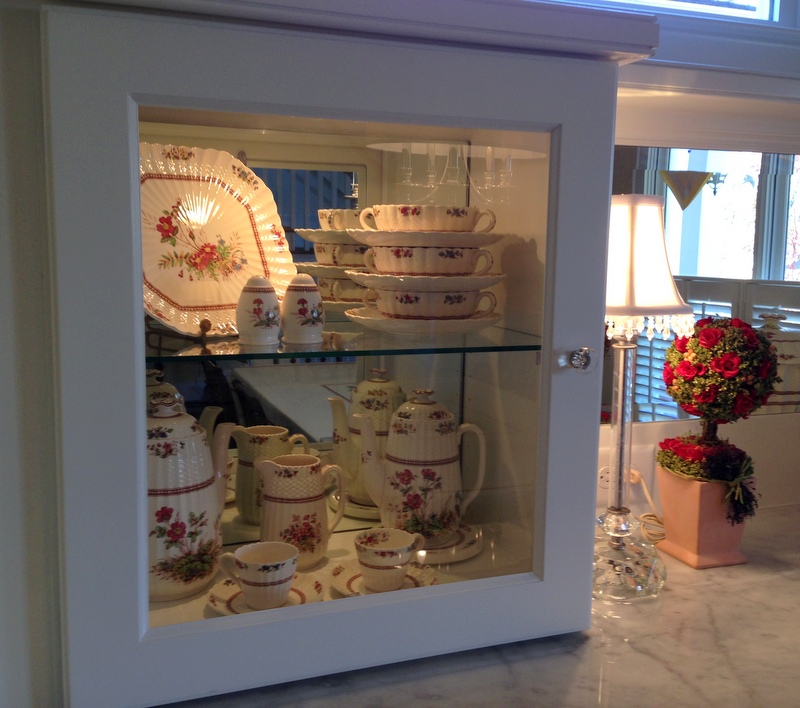
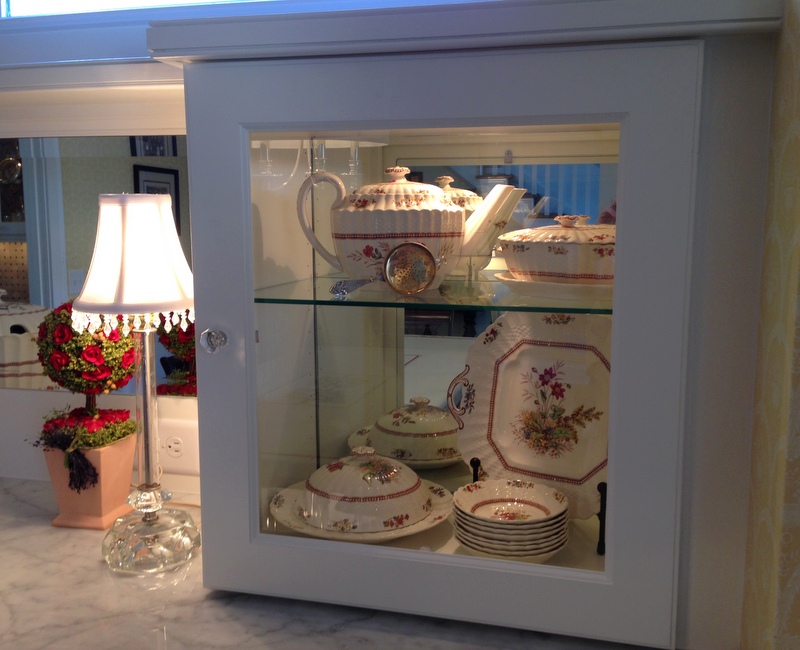
Diane and I had such fun rearranging her “Rosalie” Spode china! It was given to her about 30 years ago by her mother-in-law. Thanks to antique stores, estate sales, and ebay, Diane has added to her collection over the years and, I am happy to report, uses it often.

The top cabinets of the buffet are glass-fronted without panes to show the china to its best advantage. Here are close-ups of each cabinet:

upper left cabinet 800upper right cabinet 800
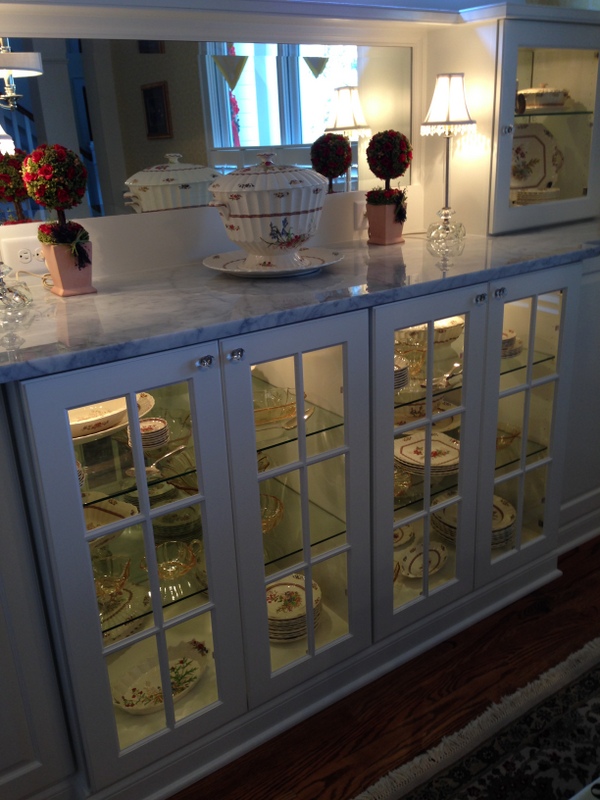
Four of the six cabinets on the lower cabinets are also glass-fronted:

buffet, lower cabinets-001
A few years ago our stepmother Shirley gave Diane her yellow Fostoria glassware in the “Baroque” pattern, which features the fleur de lis, a favorite motif of mine. Every time I came from Oregon to Georgia to visit Diane, I would tuck a few carefully wrapped pieces of glassware into my luggage. It took a while for all the pieces to get here but the effort was well worth it. The Fostoria and the Spode look elegant together, don’t you think?

I must confess to being a little green with envy over these wonderful changes to my sister’s home. But I’m also very happy for her. After 40+ years in the working world, she recently retired. She has earned this renovation, and I know she will enjoy it for many years to come.


Posted in family, home dec, update | 7 Comments