A Couple of Surprises

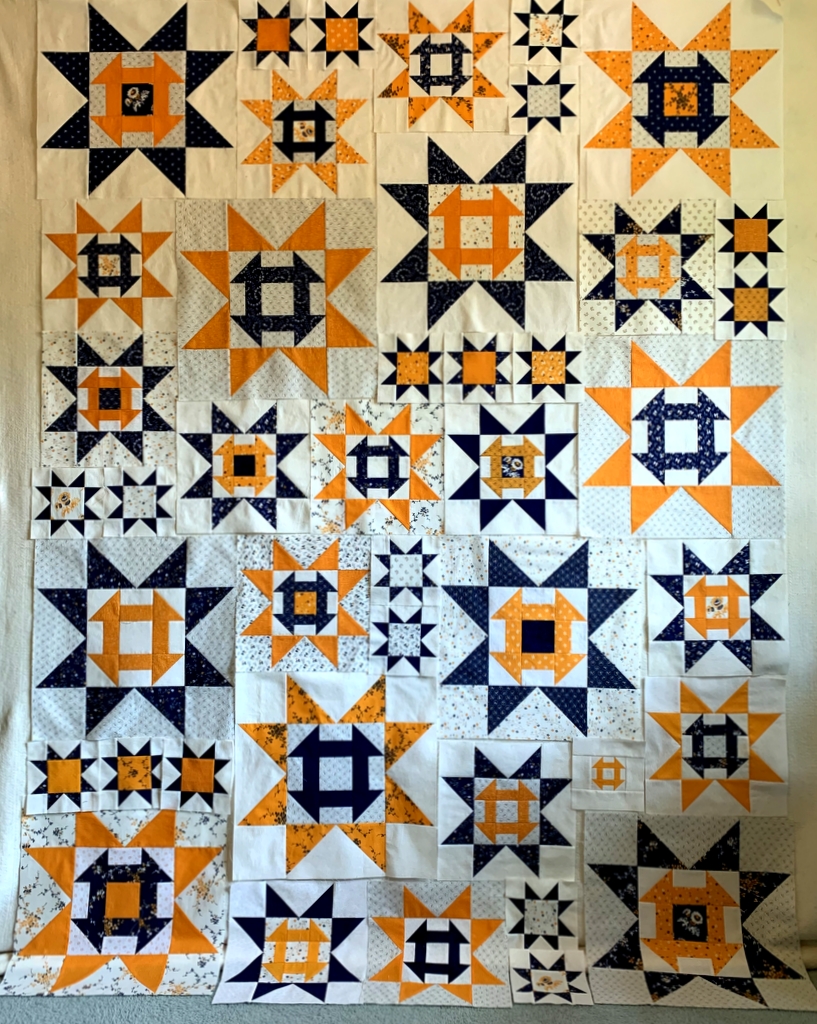
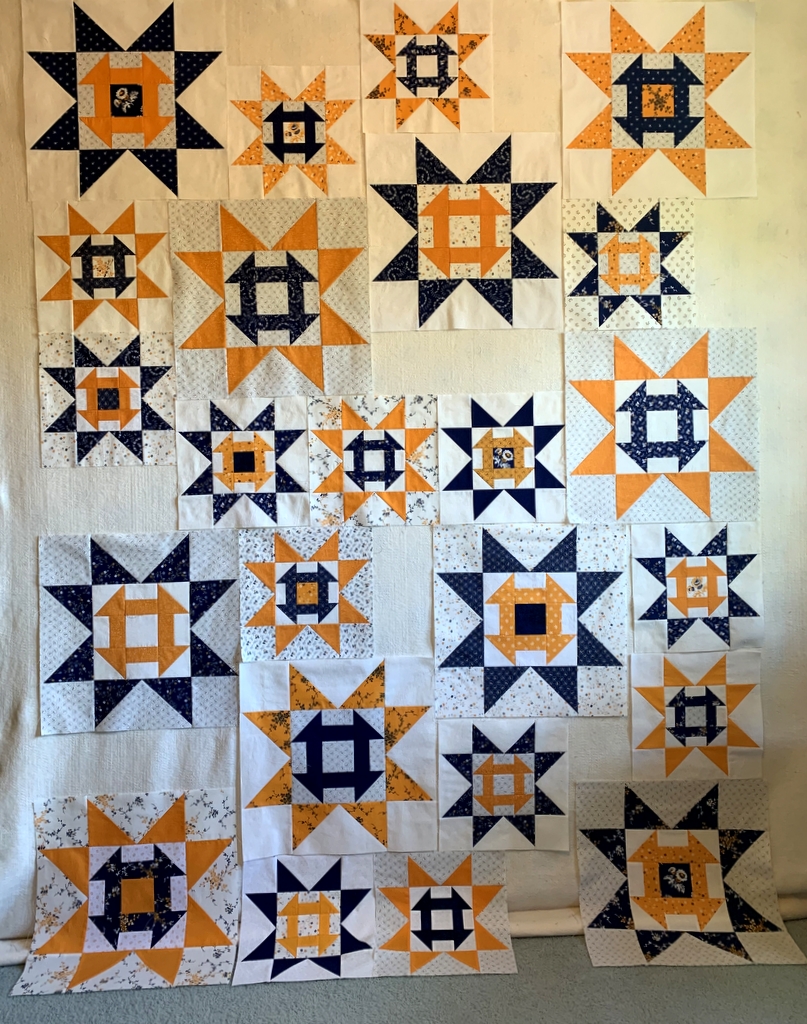
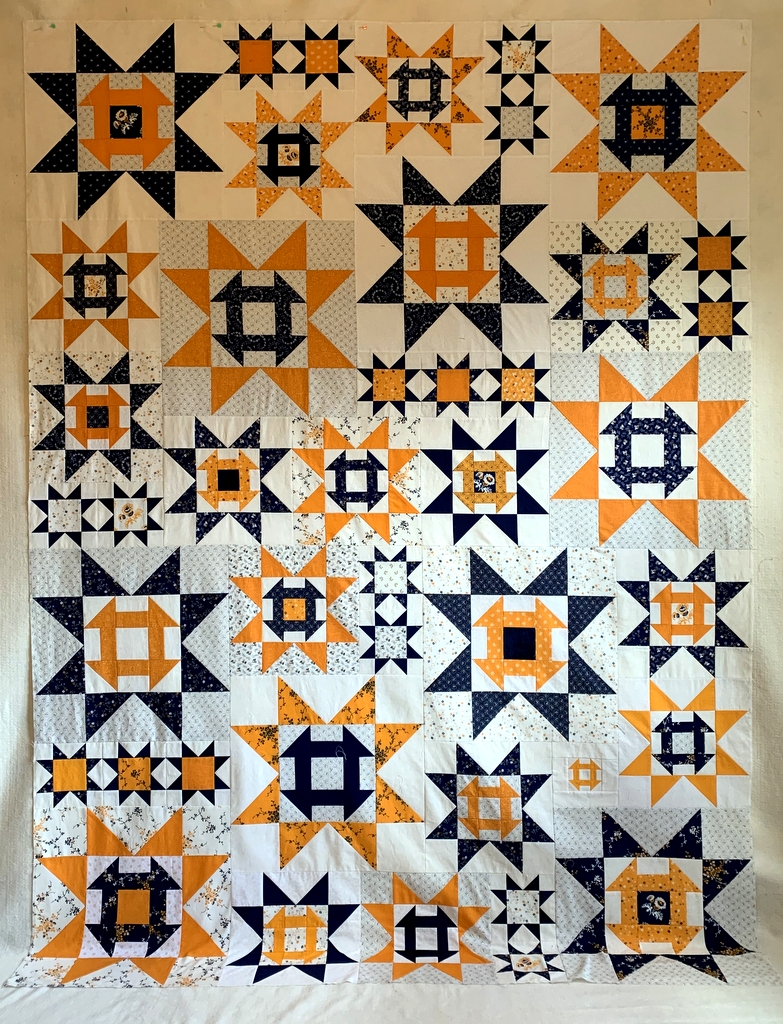
I finished sewing the blocks together for Scattered Stars, my cheddar and indigo quilt, this evening. Take a look:

Light from the window on the right side of the room isn’t spreading evenly across the surface and the bottom part of the quilt top is puddling on the floor but I think you can get a good idea of what this quilt is going to look like.

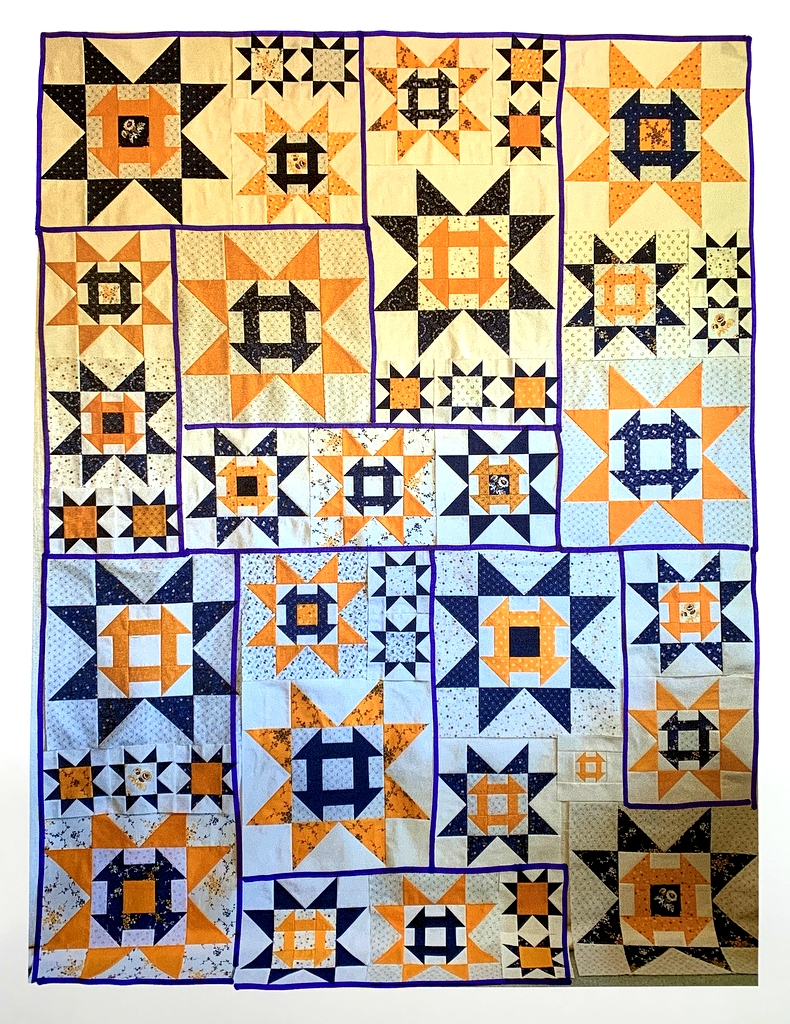
With three sizes of blocks (six, 12 and 18 inches) scattered across the quilt, I figured there’d be plenty of partial seams. They’re not especially difficult but I wanted to plan for them so I didn’t sew an entire seam and then have to rip out part of it. The plan was to sew the blocks into smaller sections that could then be joined together.

I started by printing a photo of my layout and marking the sections with a Sharpie:After studying the diagram I realized there are only two partial seams in the entire quilt. What a pleasant surprise! (One of the places is in the lower right side of the quilt around “that singleton block” — the one with the 3″ Churn Dash in it. Can you spot the other?)

I sewed the six-inch blocks together first — six pairs and two trios — and then the 12-inch blocks — three pairs and one trio. The star points meet in these blocks and I knew I’d have to pin the intersections — all 28 of them — carefully. When those were done to my satisfaction (yes, there were a few that had to be redone) I started creating the sections.

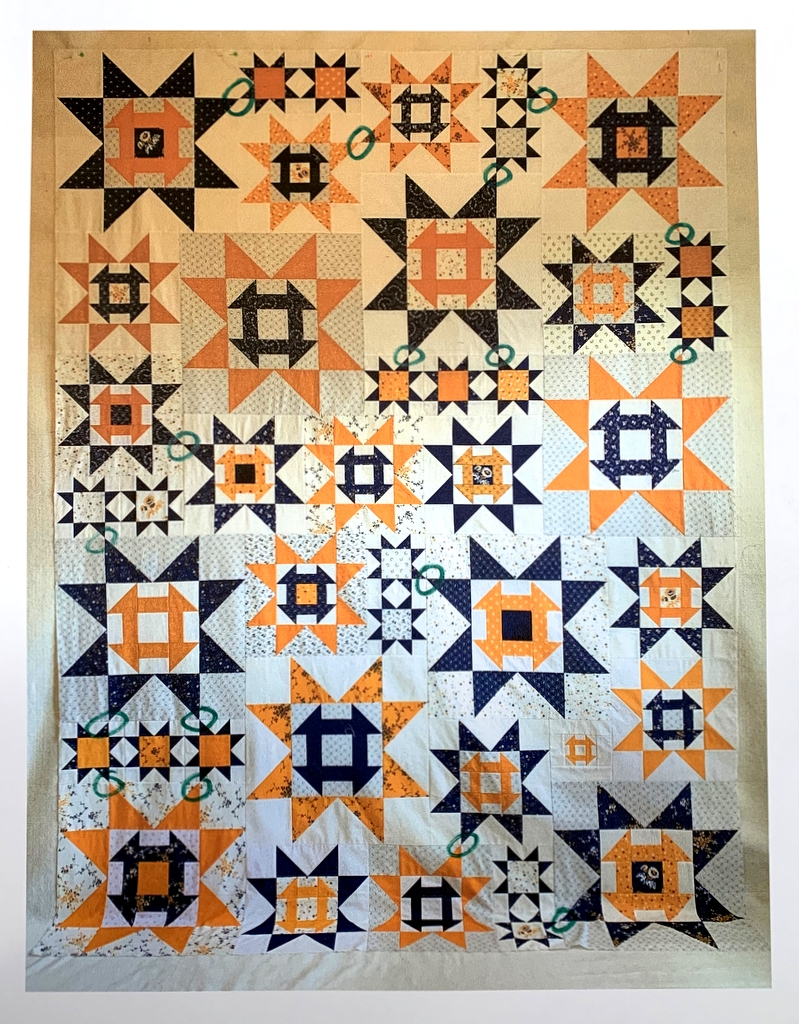
That’s when I realized there are several other places where star points meet — stars of different sizes. That surprise wasn’t quite as welcome. Turns out there were 17 of those, all needing to be carefully pinned. I’ve circled them in the next photo:I admit a few of those had to be redone as well.

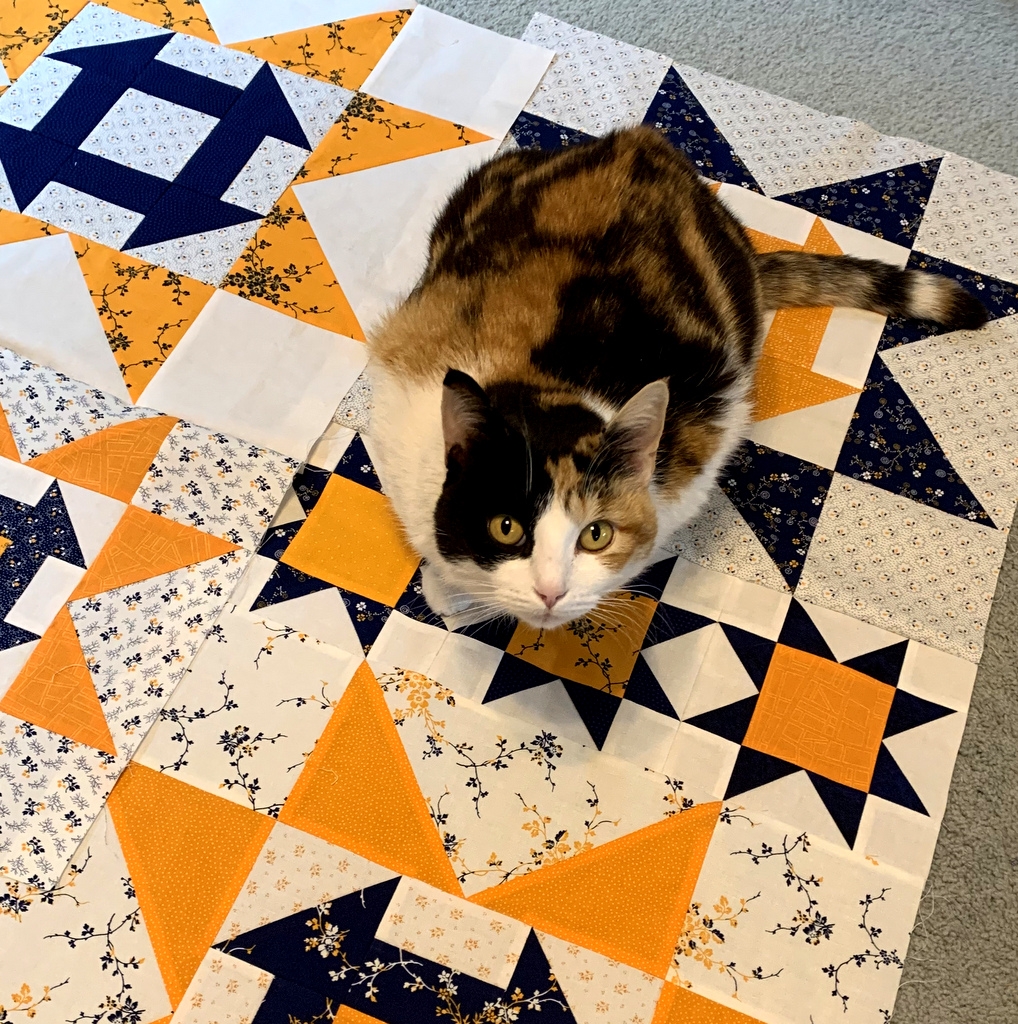
It took the better part of three days to get these blocks together. Coco was a frequent visitor in my sewing room during this time. Here she is staring at me intently, willing me to stop what I’m doing and fix her dinner:

The top measures 66½” x 90½” which is just about right for a twin size quilt so I’ve decided not to add borders. I’m thinking about finishing it with ½”-wide binding.

Next up: a pieced backing using a couple of 18″ blocks that didn’t make the cut for the front.


Posted in cats, cheddar and indigo, Churning Stars quilt block, update | 12 Comments

That Singleton Block

I think this is the final layout for my cheddar and indigo quilt:

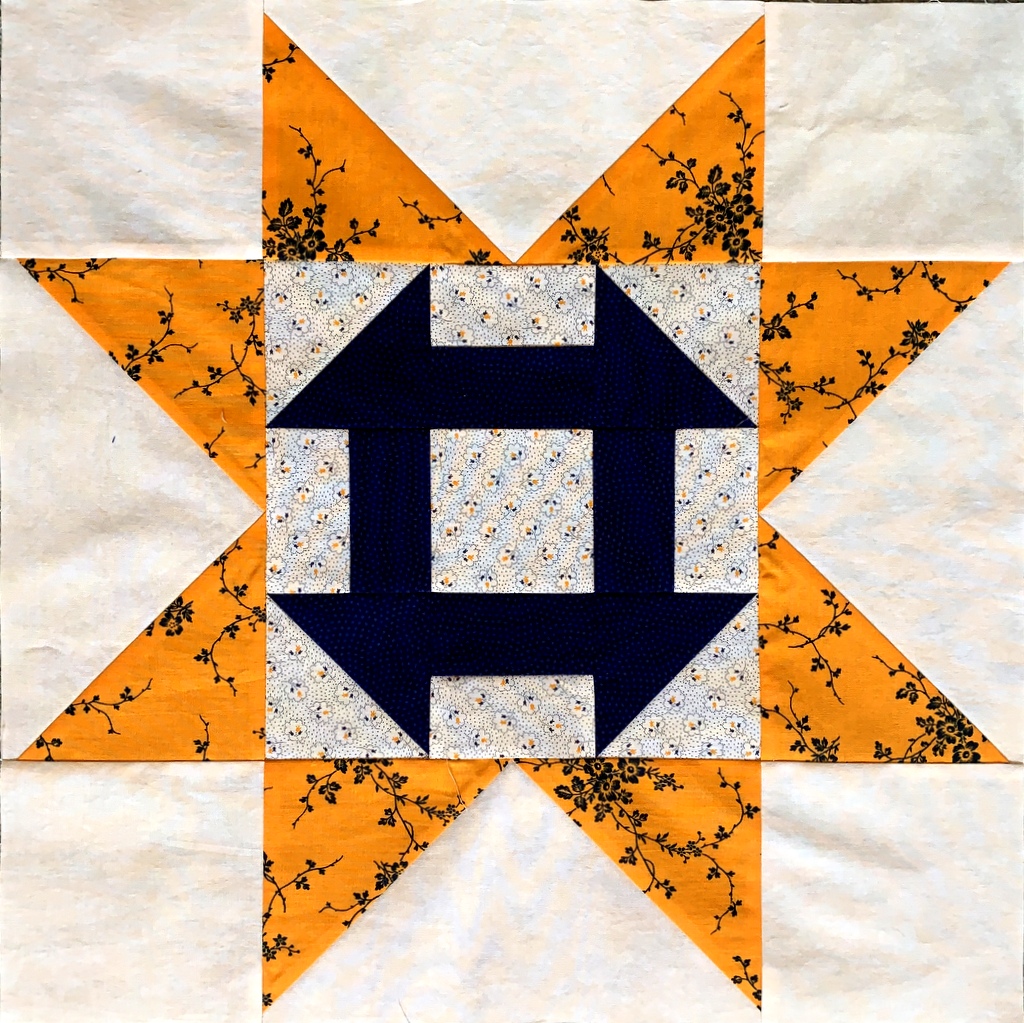
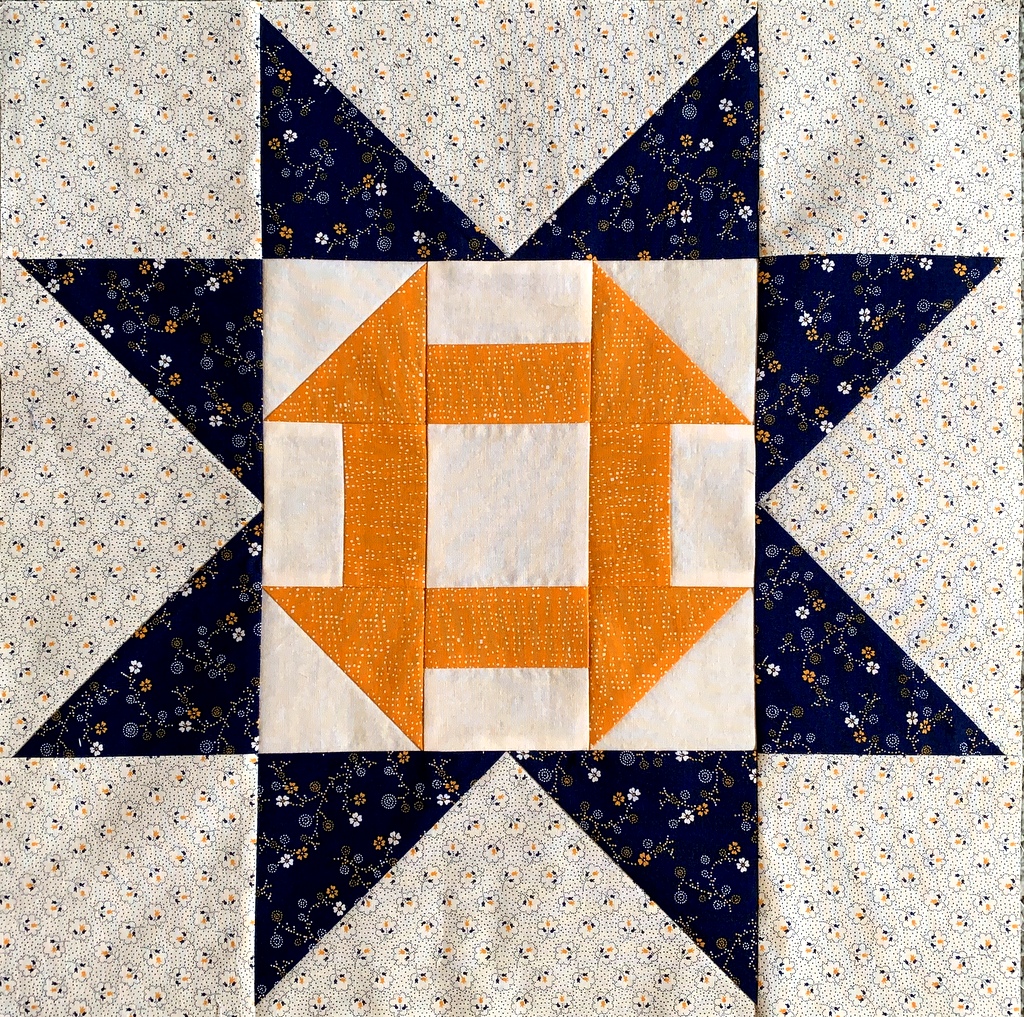
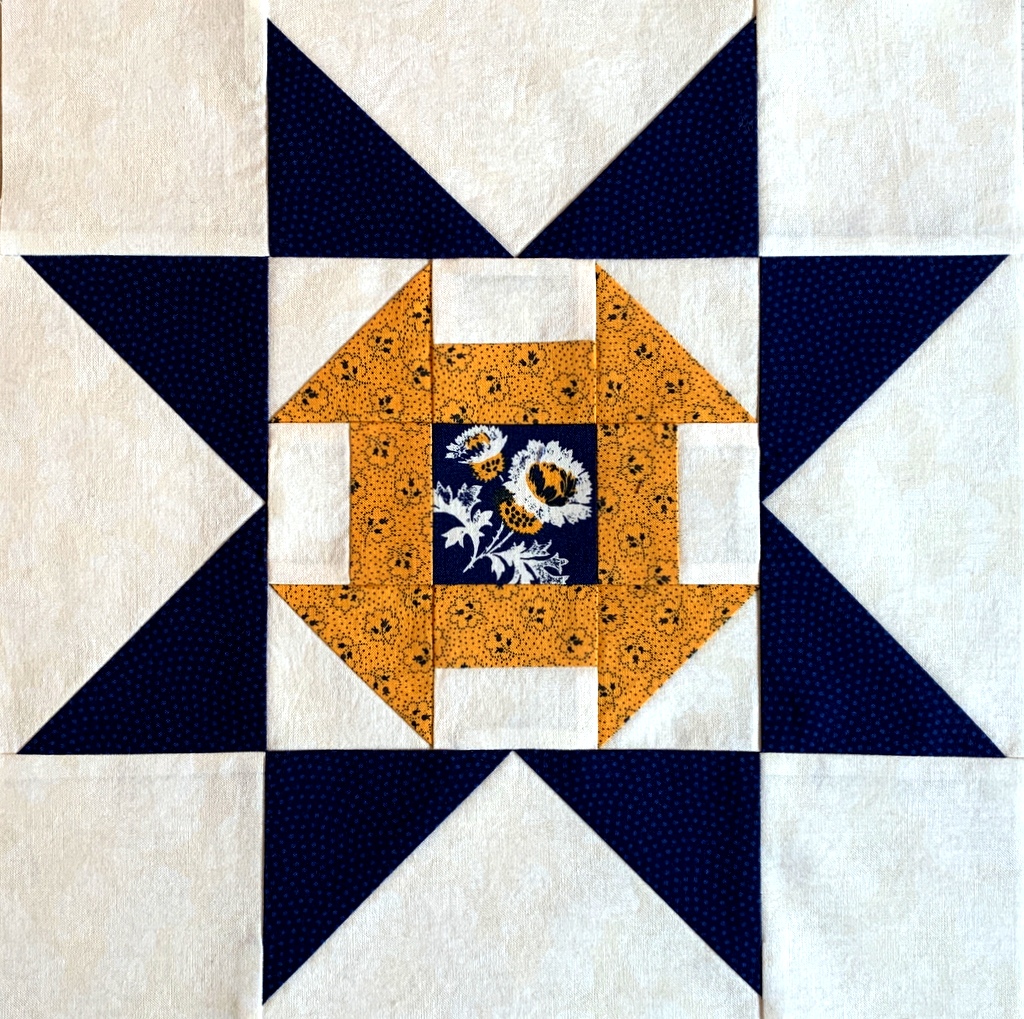
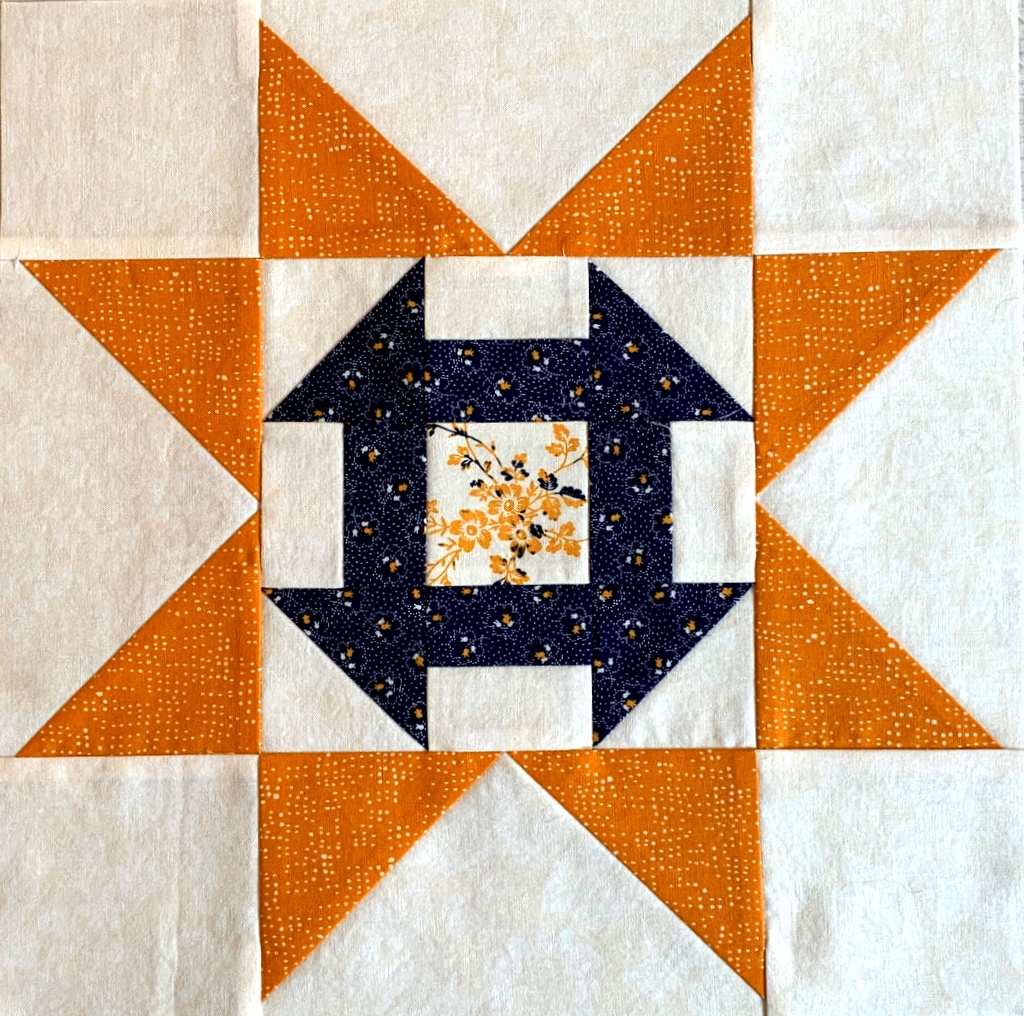
I’ve been moving the little six-inch Sawtooth Star blocks around to get the best distribution of the stars with light and cheddar centers and am finally satisfied with the layout you see above. They’re surrounded by larger Sawtooth Stars with Churn Dash blocks in their centers, called “Churning Stars” after the design by Jenifer Gaston.

As you can see, the little Sawtooth Stars are grouped in twos and threes. In my layout I had one six-inch spot left over — and that’s where “that singleton block” appears. But it’s not a Sawtooth Star; it’s a Churn Dash. Do you spot it? Look in the lower right part of the photo.

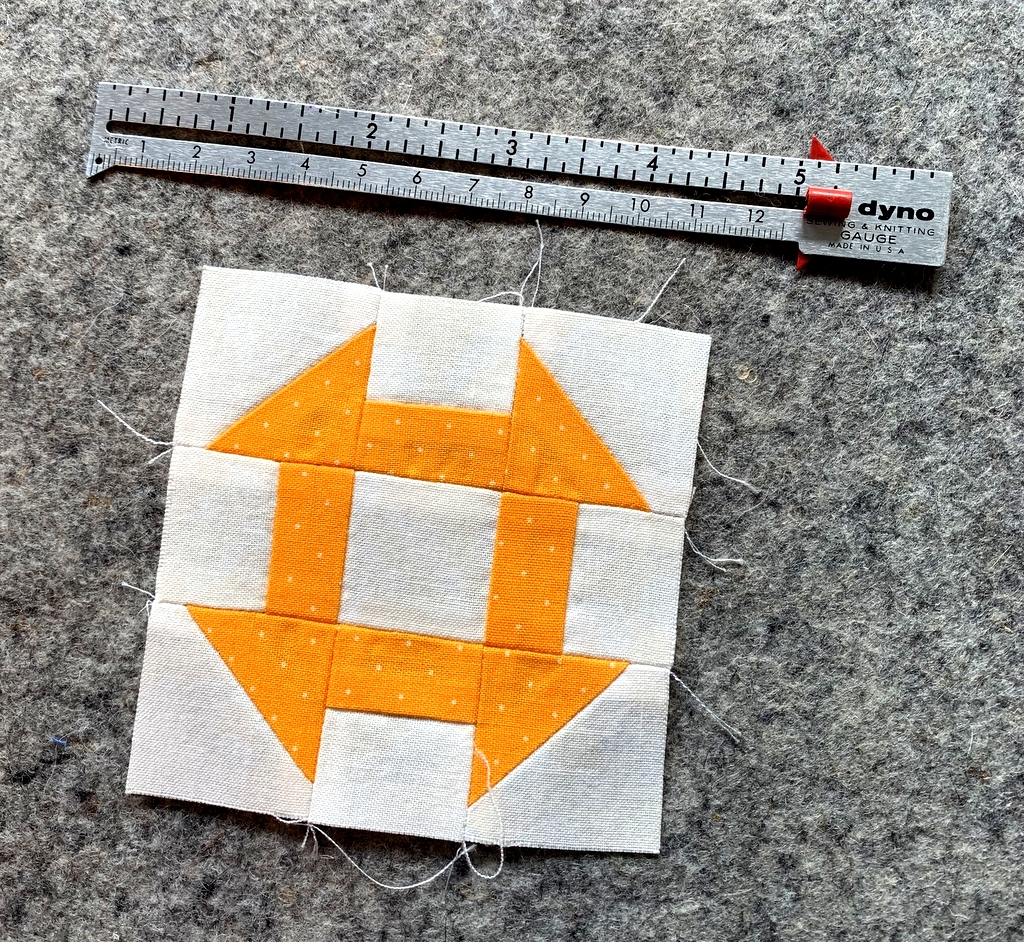
Isn’t that a sweet little Churn Dash? It started out as a three-inch block . . .

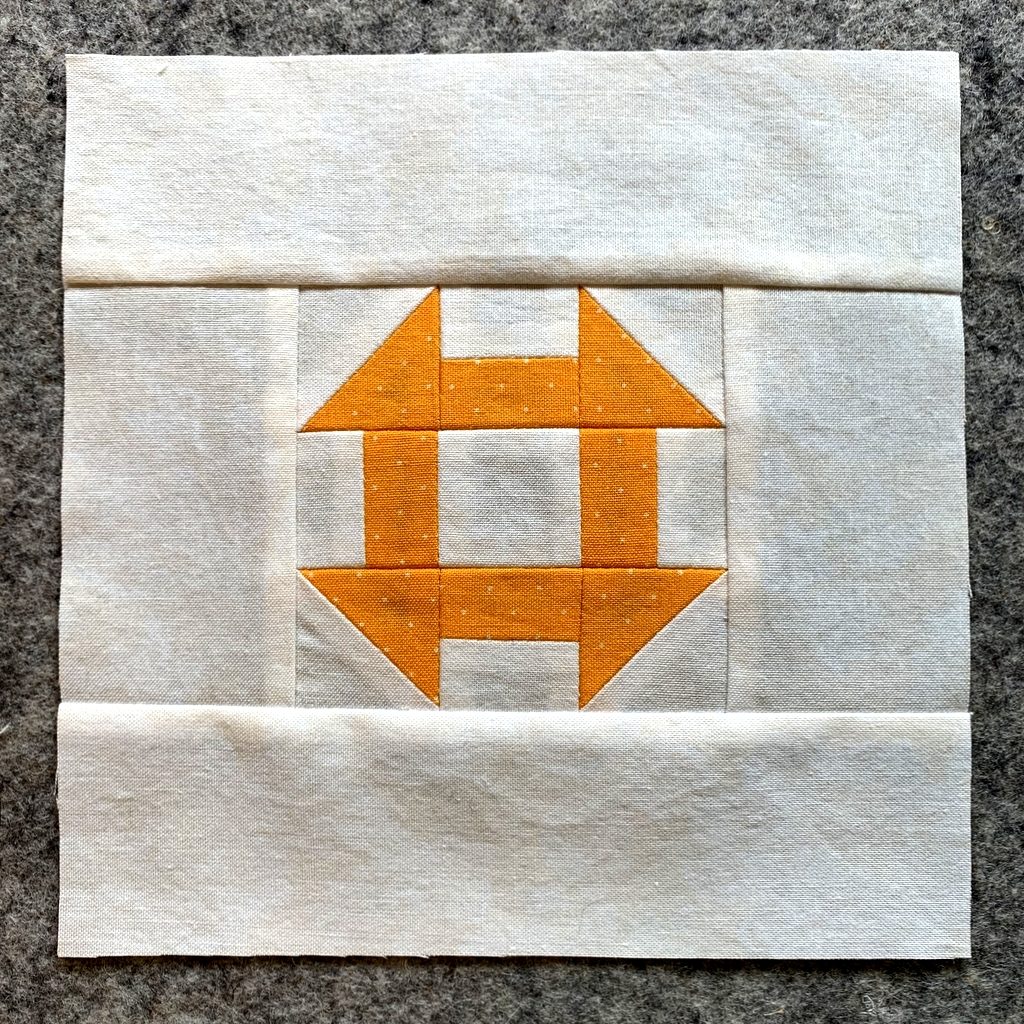
. . . that now nestles inside a block that will finish at six inches:


I have my friend Colleen to thank for the creation of this block. Back in November when we were together at Quilt Camp I was making my first Churning Star blocks — the ones that finish at 12″ and 18″ inches square — with no plan as to what I would do with them. It was Colleen who suggested I add some six-inch blocks. That was a great suggestion because it turned out I would need a whole bunch of them.

Then Colleen said, “Why don’t you make a three-inch block?” So I did. Just one. It wasn’t until I had completed my layout of the quilt on graph paper that I saw a special place for that one wee Churn Dash block.

Standing back 10 feet from my design wall, I am really liking the way the blocks are offset due to the layout and their different sizes. And I am liking the way the Sawtooth Stars are scattered over the surface of the quilt.

Hmmm! Scattered Stars . . . that just might turn out to be the name of this quilt.


Posted in cheddar and indigo, Churning Stars quilt block, update | 13 Comments

The World’s Smallest Quilt Sleeve

Haha! Just kidding. That’s actually a sleeve for a face mask nose wire. It’s for the mask I made for myself yesterday and goofed on.

The mask looks just fine from the front:

It’s the same lemon fabric I used to make a mask for my twin a couple weeks ago. (We have a thing about lemons.)

Here’s the inside of the mask:

See that line of stitching about 3/4″ down from the top of the mask? That’s where the bottom of the nose wire sleeve is supposed to be . . . on top of the lining fabric, not sandwiched between the lining and the mask where it will never see the light of day. Oops.

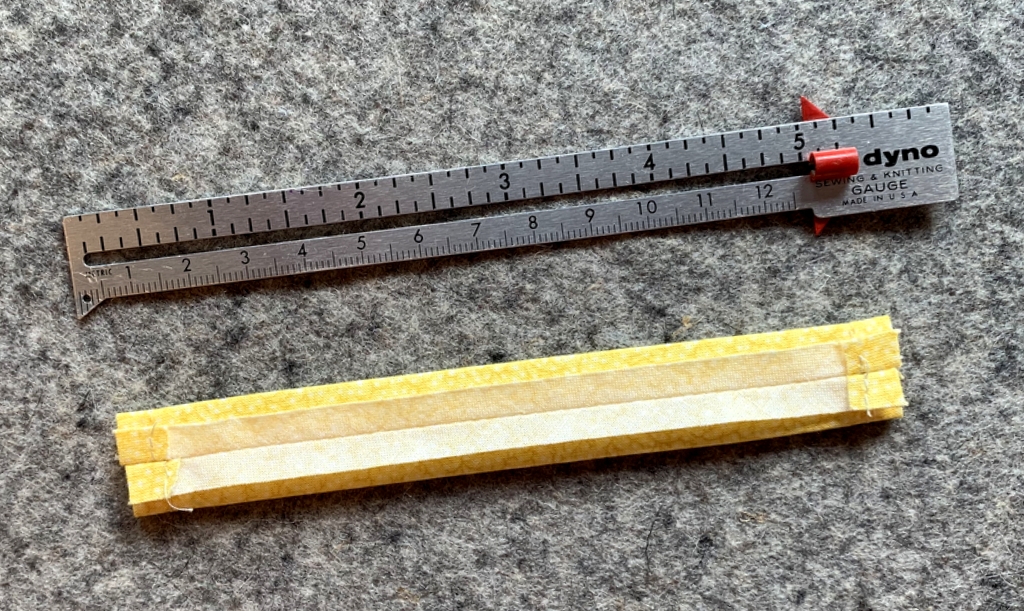
My solution was to make a new sleeve and attach it by hand. The sleeve is made just as if it were for the back of a quilt . . .

. . . except it’s miniature. It’s not necessary to turn the sleeve inside out because the seam is going to be on the underneath part of the sleeve when it’s stitched on, forever out of sight.

Oh, there is one other difference from a regular quilt sleeve: this sleeve is cut on the bias rather than the straight of grain so that it molds nicely around the curve of the mask:

I’m using my wonderful little red sticky thimble (official name: Poke-A-Dot by Jillily Studio) to push my needle through the layers of fabric:

It took just a few minutes to stitch the sleeve in place. (I could have stitched it by machine but then the stitching would have shown on the front of the mask.)

Here’s what the mask looks like from the inside now:

I didn’t want to attach the new sleeve on top of the old one — too much bulk — so I stitched it to the opposite side. The bottom of the mask is now the top.

And looky here: I found the perfect place to store my Poke-A-Dot until I need to use it again:

All’s well that ends well!


Posted in face masks, update | 10 Comments

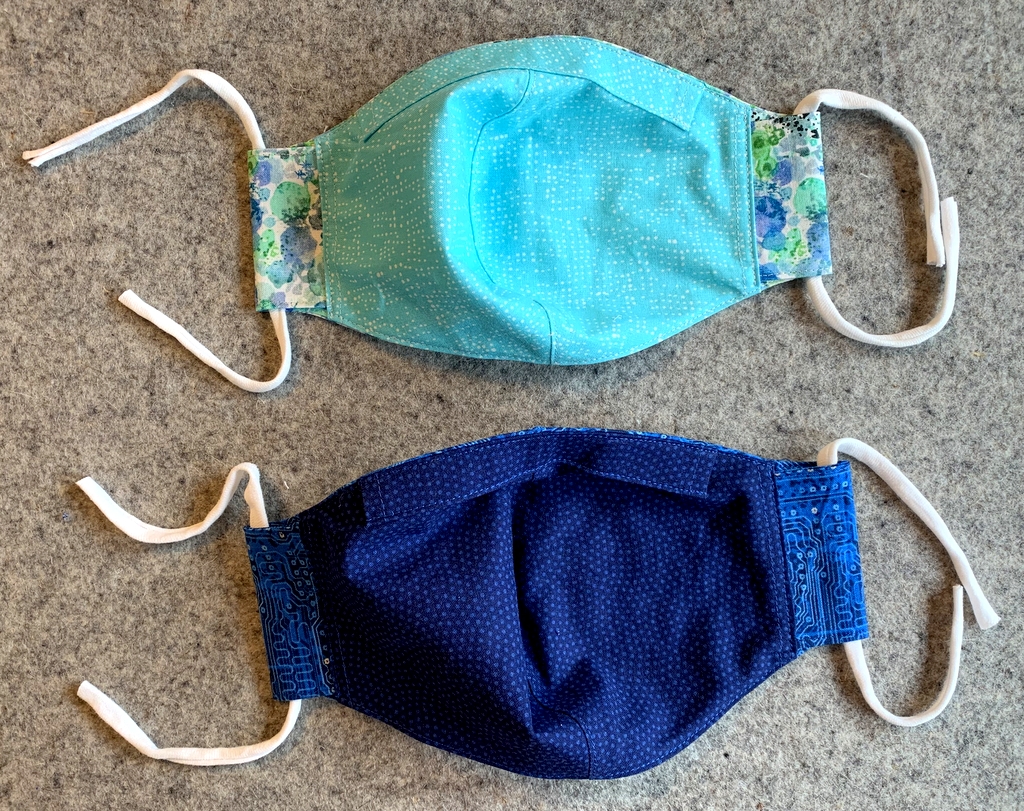
The Perfect Hostess Gift?

Tomorrow the Dear Husband and I will go on our first social outing since we began sheltering in place in March. The big event is a Happy Hour with good friends at their home. We’ll rendezvous on their spacious deck where we can chat (and eat and drink!) while maintaining proper social distance.

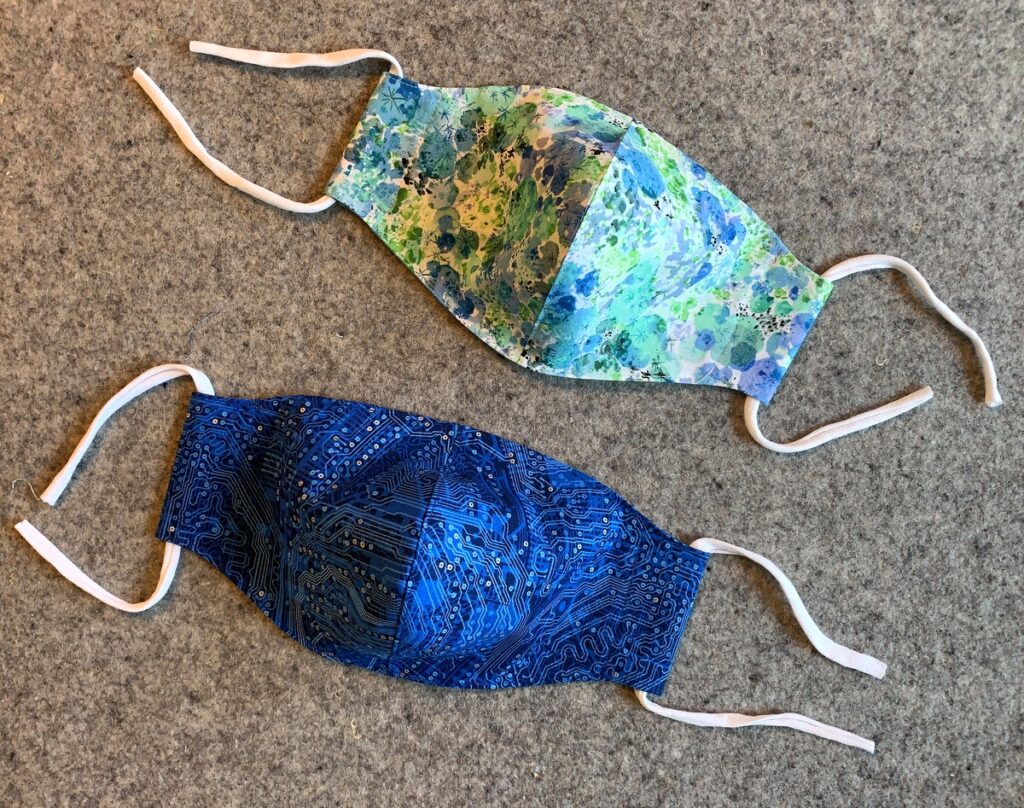
Here’s what I’m bringing as a hostess gift:

I never thought I would be bringing face masks as a hostess gift. On the other hand, I never expected to be living through a pandemic.

Here’s a look at the inside of the masks:

You can see each one has a channel at the top to hold a nose wire.

I made a new mask for myself and added a channel for a nose wire. Unfortunately, I wasn’t paying attention and attached it to the wrong side of the mask lining. When I sewed the lining and the main mask piece right sides together and turned them, the channel was nowhere to be seen. Silly me!

I’m not going to take it apart. There’s an easier solution, which I will share in my next post.

Have a wonderful weekend!


Posted in face masks, family, update | 4 Comments

Cheddar and Indigo Star Blocks: Taking Stock

In my last progress report I talked about playing with the cheddar and indigo blocks on my design wall and realizing more blocks were needed. This quilt is going to contain blocks in three sizes — six, 12 and 18 inches — in an arrangement still to be determined. I made four more blocks of each size — and then I stopped. Why? I hadn’t yet decided what size my quilt would be — an important piece of information when figuring how many more blocks to make!

I finally settled on a twin sized quilt for a rather compelling reason:  I am ready to finish this project and move on to something else! After spending time moving blocks around on my design wall I realized how difficult it is to create a layout with different sized blocks. And it’s complicated by the fact that I’m combining various prints and trying to get them distributed evenly around the quilt.

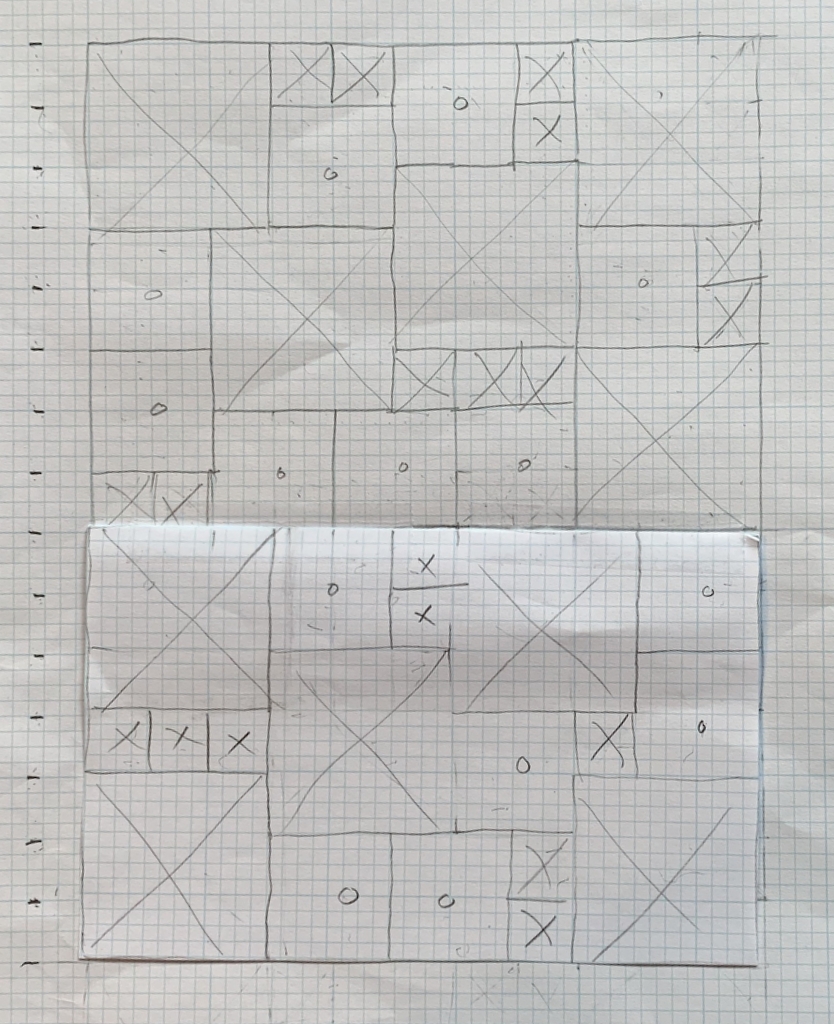
I figured I’d better move to graph paper. Here’s the result, achieved with much erasing and with the bottom of the layout cut and pasted on:


The blocks with the big X are obviously the 18″ ones. The squares with the circle in the middle are the 12″ blocks and the squares with the small X are the 6″ blocks. The quilt will measure 66″ x 90″ (assuming I don’t put a border on it).

With paper layout in hand, I arranged the 18″ and 12″ blocks on my design wall . . . and kept moving them around until finally deciding on this distribution of blocks:

The white spaces you see are where the 6″ blocks will go, mostly in twos and threes but there is one space for a singleton block. I have something special in mind for that one.

I’m not very good at “going scrappy.” The quilt looks awfully busy to me — even before adding the 6″ blocks. But I love the block design and the fabrics  so I just have to trust I will be happy with the end result.


Posted in cheddar and indigo, Churning Stars quilt block, update | 9 Comments

Best Tips for Perfect Star Points

Do you love star quilts as much as I do? I’ll bet half the quilts I’ve made over the years contain star blocks. Susan of stitchedbysusan.com, a quilter whose work I very much admire, asked me the other day on Instagram about my “best tips for perfect star points.” I thought to myself, “That’s a good topic for a blog post!”

I’m always surprised — and yes, a little disappointed — when I see star quilts with the points cut off. With a little care that can be avoided completely.

To illustrate this post I’m using a 6″ Sawtooth Star block from my current project. It’s made up of four Flying Geese units which form the star points, a square in the middle of the block, and four smaller squares in the corners:
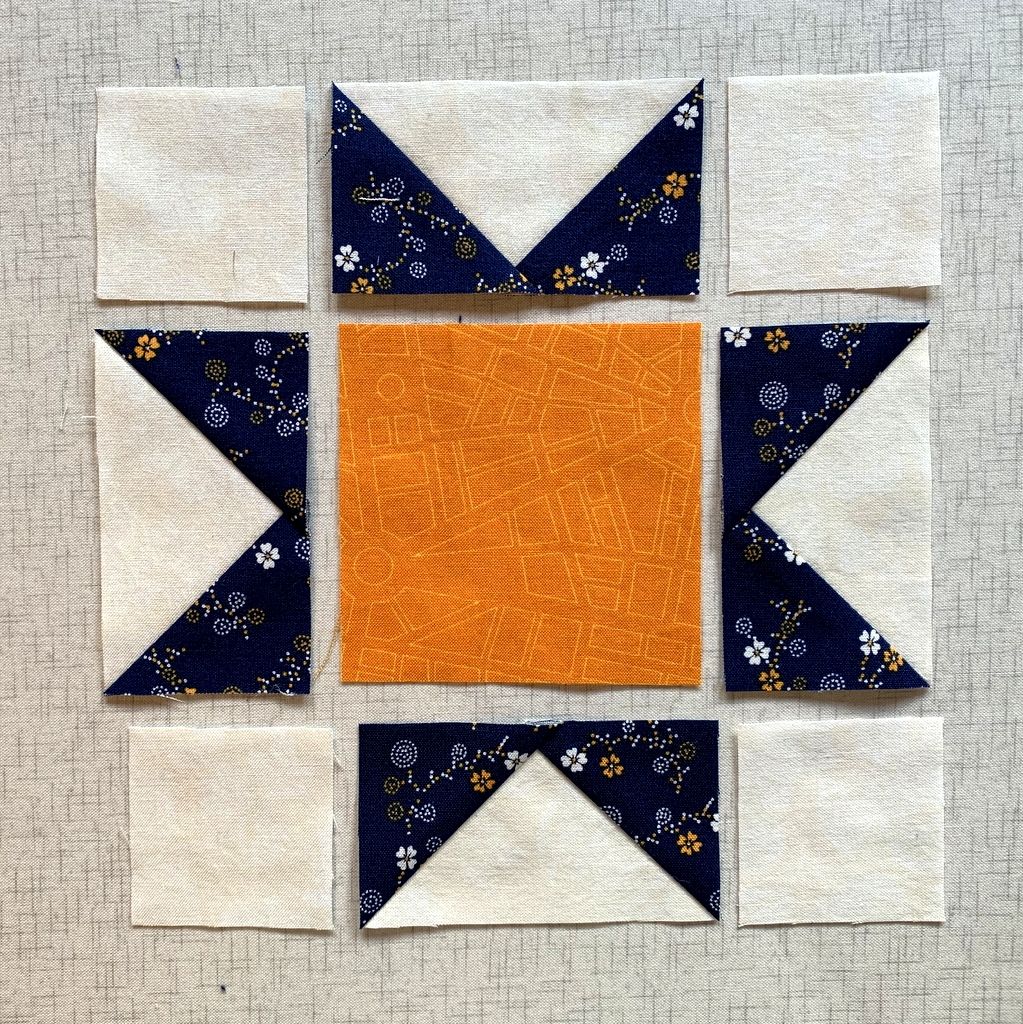
If you look at the four Flying Geese units you’ll notice that the points of the star go right to the corners, the outer edges of the units. If the seamline is off on either side of the corner by even an eighth of an inch, the star point is going to be off when it’s joined to the other pieces in the block. In a block this small, a sixteenth of an inch can make a difference.

Tip #1: Make sure the seamline intersects the corner precisely.

The easiest way to achieve this is to make the block slightly oversize and then trim to exact size with a ruler. This is especially true with star points because they contain diagonal seams and it’s all too easy to get some distortion when sewing and pressing them,  especially if you use steam and press with a heavy hand like I do.

There are several excellent Flying Geese trimming rulers on the market (I have two that I love) but the truth is you can trim perfect star points with any ruler that has the proper angled degree line going to a corner. Because a traditional Flying Geese unit is always twice as long as it is high, that angle is 45 degrees. Virtually every quilting ruler has a 45 degree angle marked on it.

Tip #2: Don’t forget the No Surprises pin.

I have my teacher and mentor Billie Mahorney to thank for this tip. It’s one of the most valuable things I ever learned from her. The No Surprises pin is the one that goes at the end of every stitching line to make sure the two layers are still lined up when you get to the end. The feed dogs on a sewing machine don’t always feed the layers evenly, resulting in one layer coming up short. This is especially true with longer seams. No matter how short the stitching line, I never fail to put in the No Surprises pin.

In my block the first three seams are pinned and ready to chain sew. Because these pieces are so small I didn’t feel the need to do pinning other than the No Surprises pin:
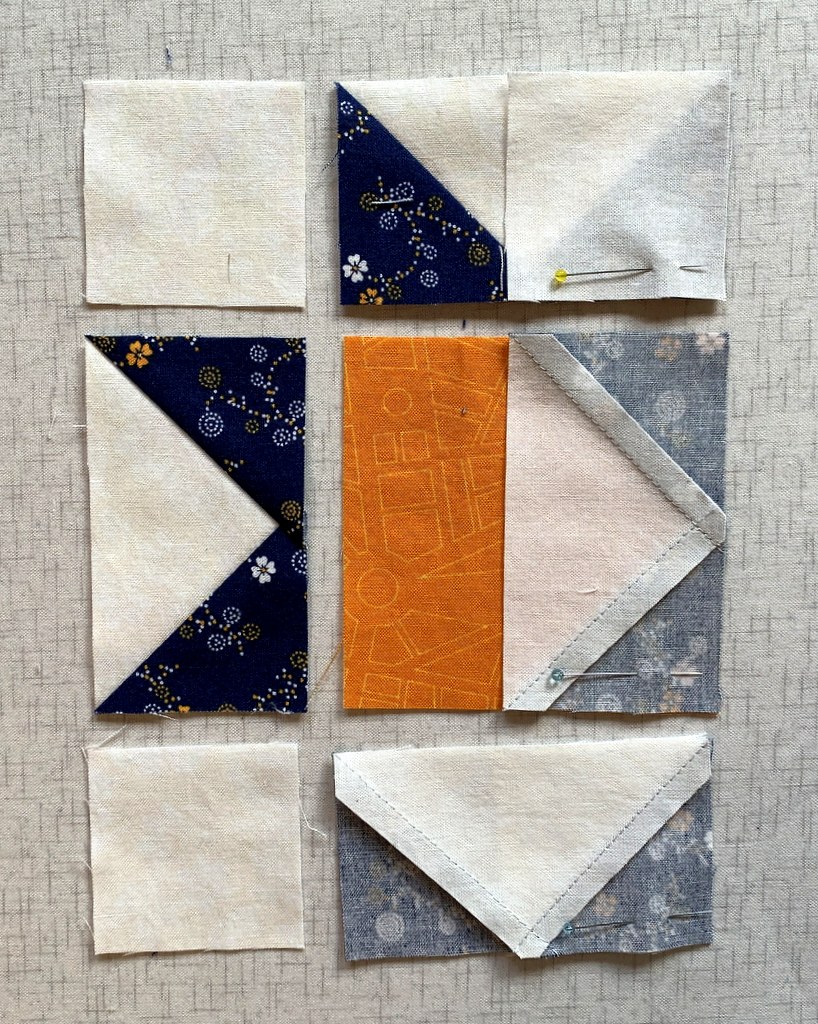

I have arranged the top and bottom pairs to be stitched so that I am stitching in the direction the diagonal seam was pressed (i.e. with the seam rather than against it).

On the middle pair I’m stitching on the side where I can see the intersection and make sure I cross it in the proper place (see Tip #3 below).

Here are the pieces chain stitched:
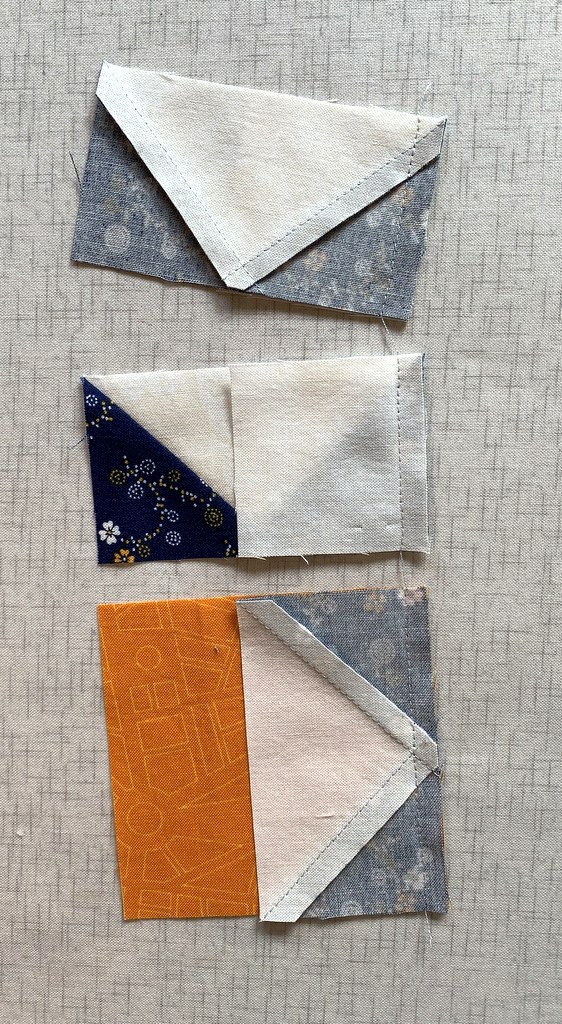

Look very carefully at this next photo for a preview of Tip #3:
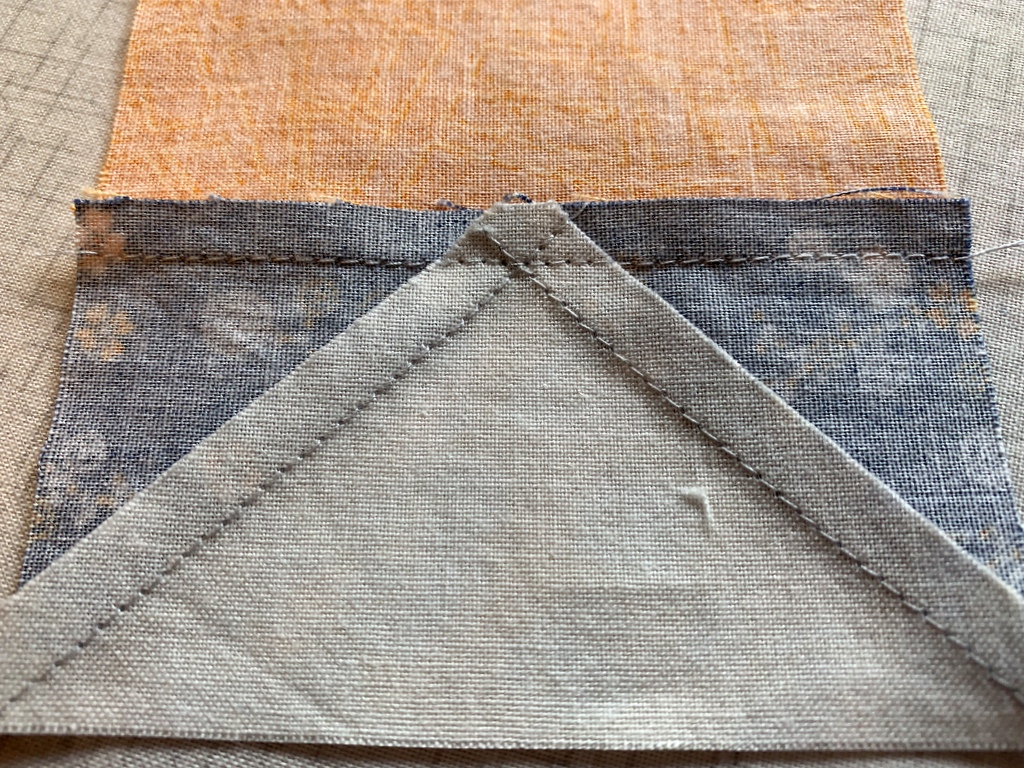

Do you see how my stitching line joining the two pieces doesn’t cross at the exact top of the inverted V? It’s actually a couple of threads away from the point formed by the V and toward the raw edges.

When the stitching line is right on top of the point or — heaven forbid — a few threads on the inside, the point in the background fabric gets chopped off. This is where an accurate quarter-inch seam is so critical.

Tip #3: When approaching a point (in this case it’s the bottom of the V of a Flying Geese unit), don’t stitch exactly across the point where the stitching lines intersect; rather, sew a couple of threads away from the point and toward the raw edges. This little tip is what gives you a nice crisp point when the seam is pressed.

Tip #4: In order to achieve Tip #3, make sure you are using a foot that allows you to see the needle going in and out of the fabric. Most quarter-inch feet are “open toe,” allowing you to see the path the needle takes.

Take a look at the next photo. You can see that my star points in the top two pieces where the corner squares have been added are a quarter of an inch away from the edge — thus they won’t get chopped off when I sew them to another piece of fabric. In the bottom piece, which is the center of the block, the inside V of the background fabric is nice and sharp.
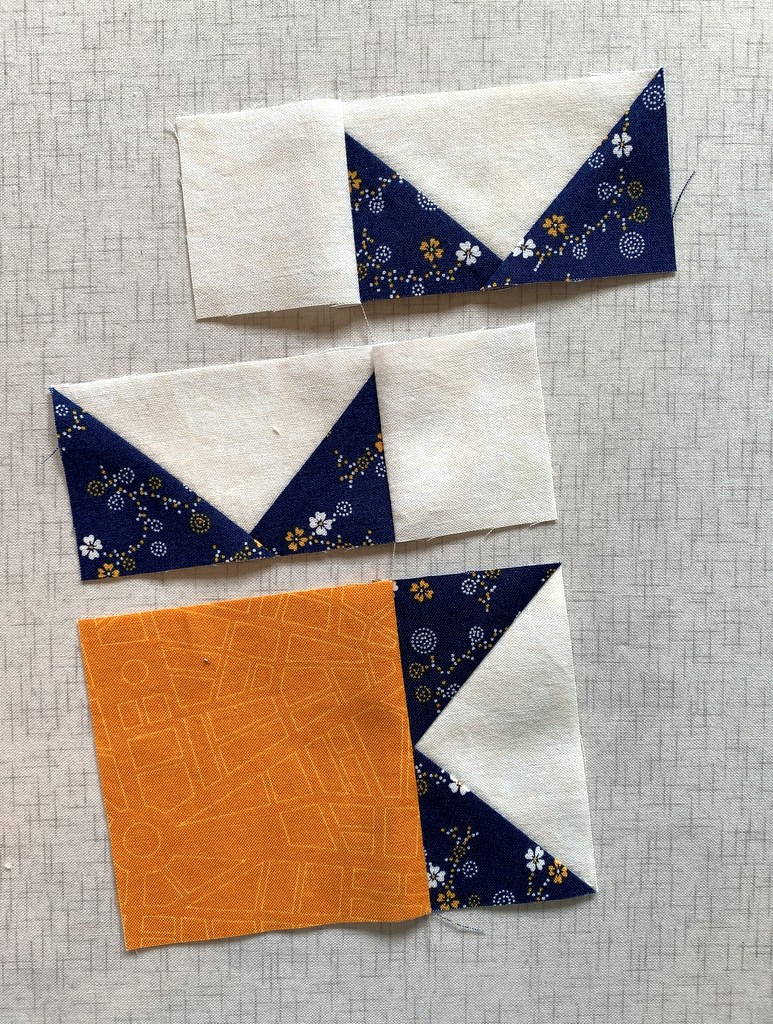
Tip #5: Sew seams with a regular quarter inch seam. This is not the time to go for a “scant quarter inch” because the point of your star will land inside the seam allowance when other pieces are sewn to the block. That’s another way star points get chopped off.

Now look at the picture again and notice how the seams are pressed. In the top two pieces the seams are pressed toward the outside (toward the corner squares). In the bottom piece, the seam is pressed toward the center square and away from the Flying Geese unit. My seams will nest when I’m ready to sew the units together.

Tip #6: Whenever possible, press away from the points, whether it’s the star points or the bottom of the V of a Flying Geese unit.

Tip #7: Whenever possible, press from the right side of the block. This helps prevent tiny pleats from being pressed in at the seamline, which often happens when blocks are pressed from the wrong side.

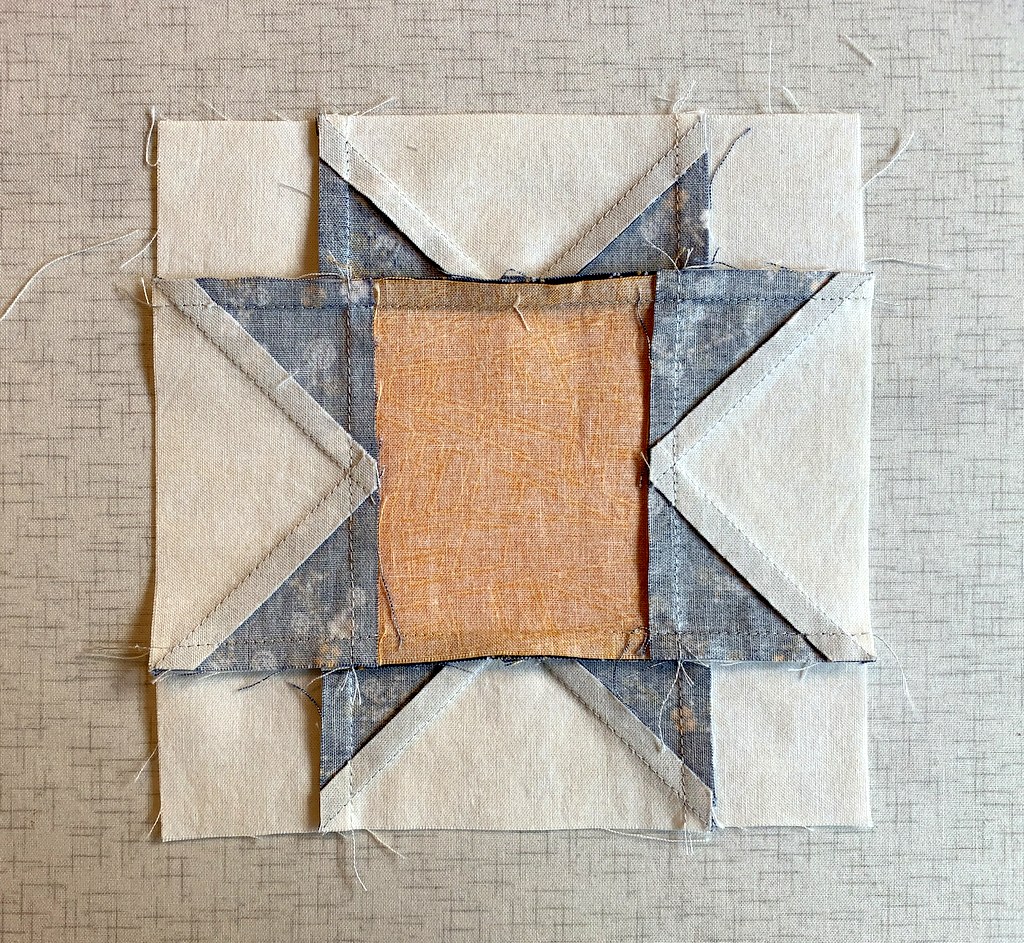
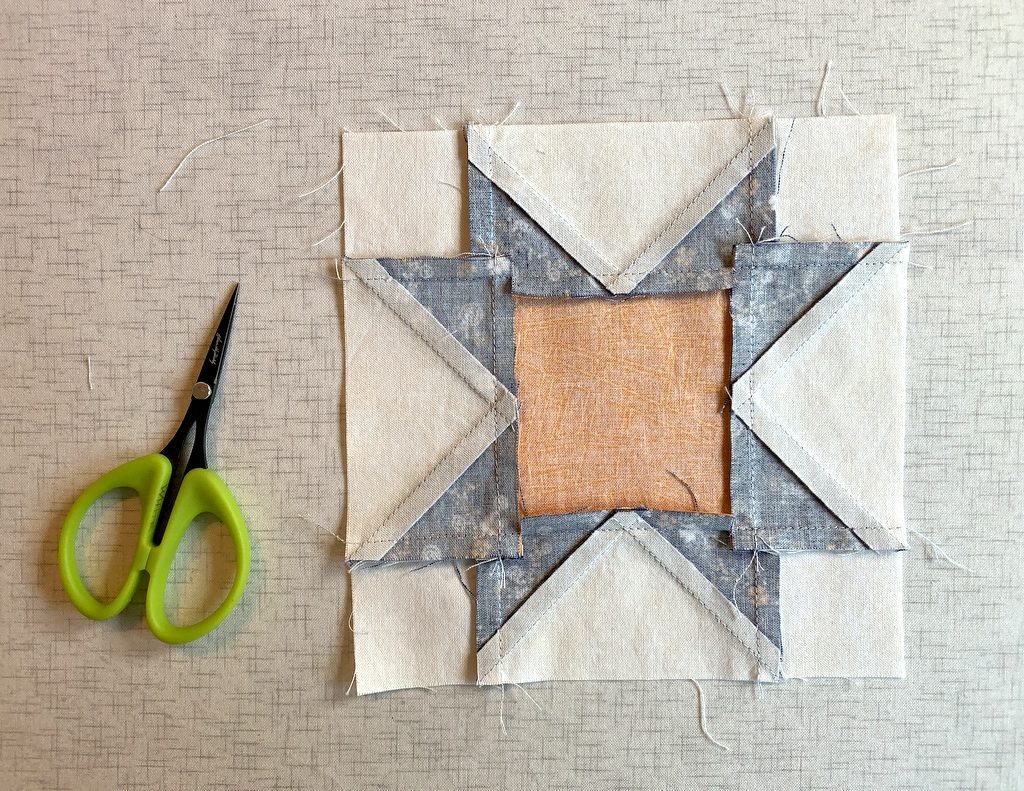
I’ve added the other pieces of my Sawtooth Star block and now have three units ready to sew together. Here they are from the front . . .
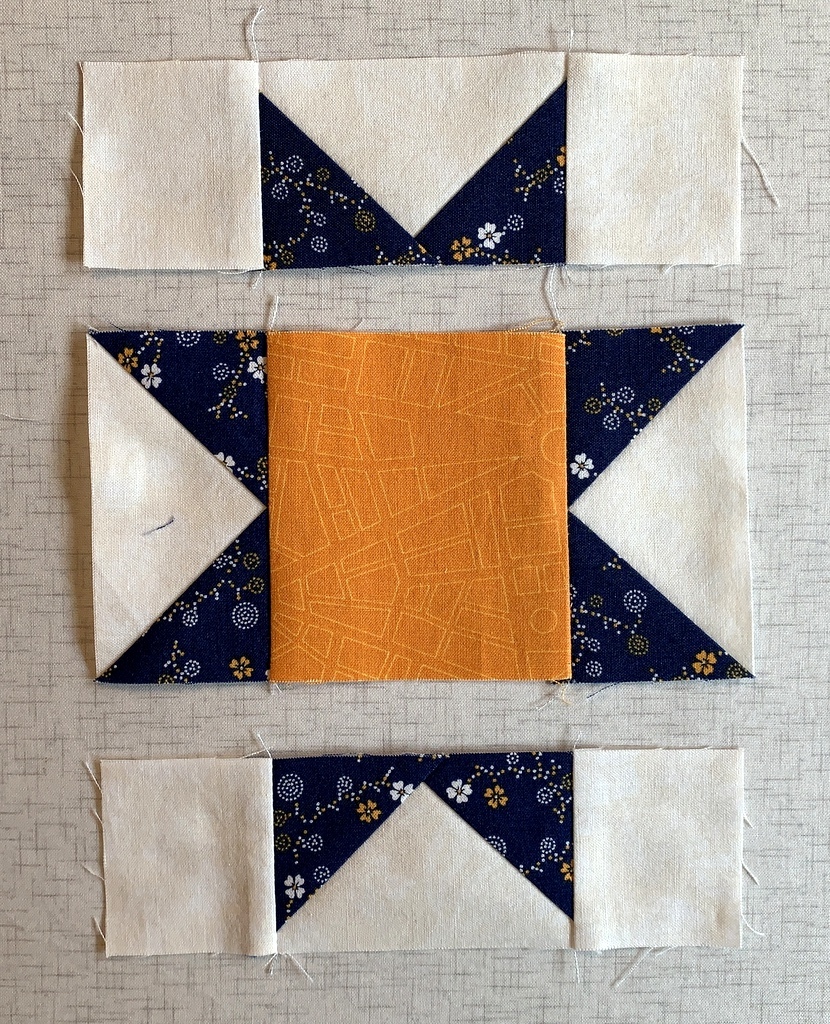
. . . and from the back:
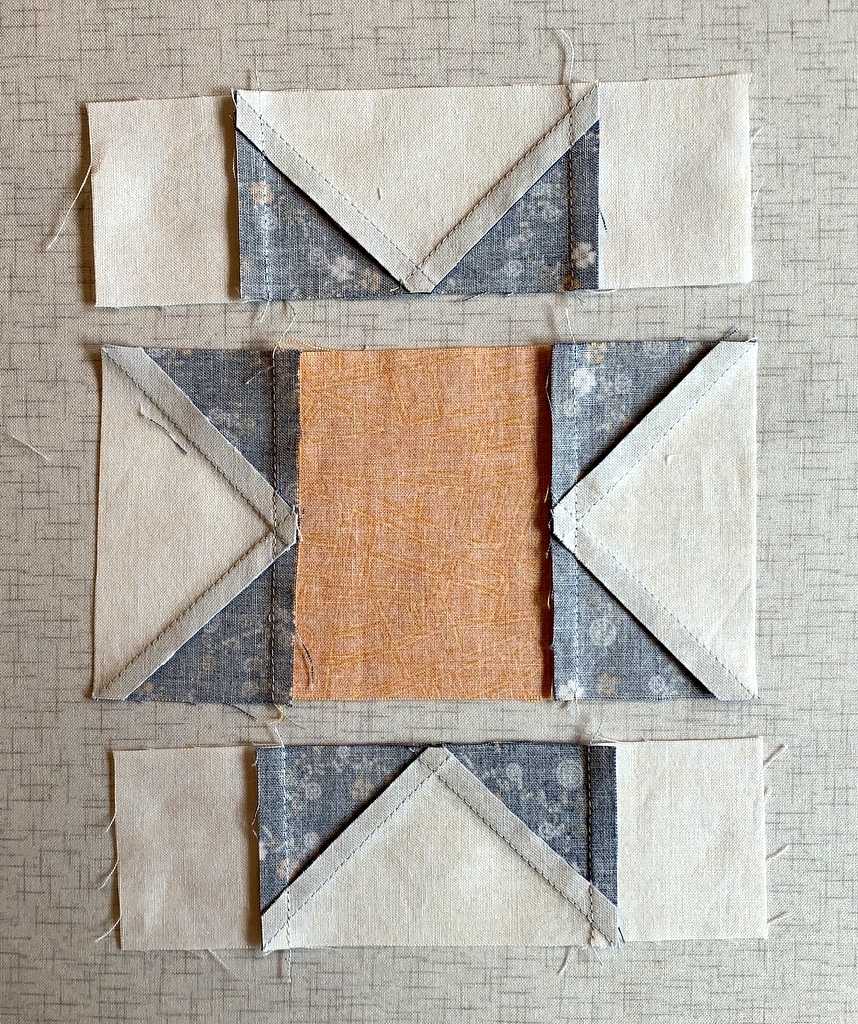

Even though the seams are pressed in opposite directions where they will meet, I still pin the intersections and add the all-important No Surprises pin at the end:

Do you see how the edges at the beginning of the stitching line (upper left corner) don’t meet? They’re supposed to. To correct this I’ve added a pin at the beginning of the stitching line to nudge that top layer over to meet its neighbor underneath:
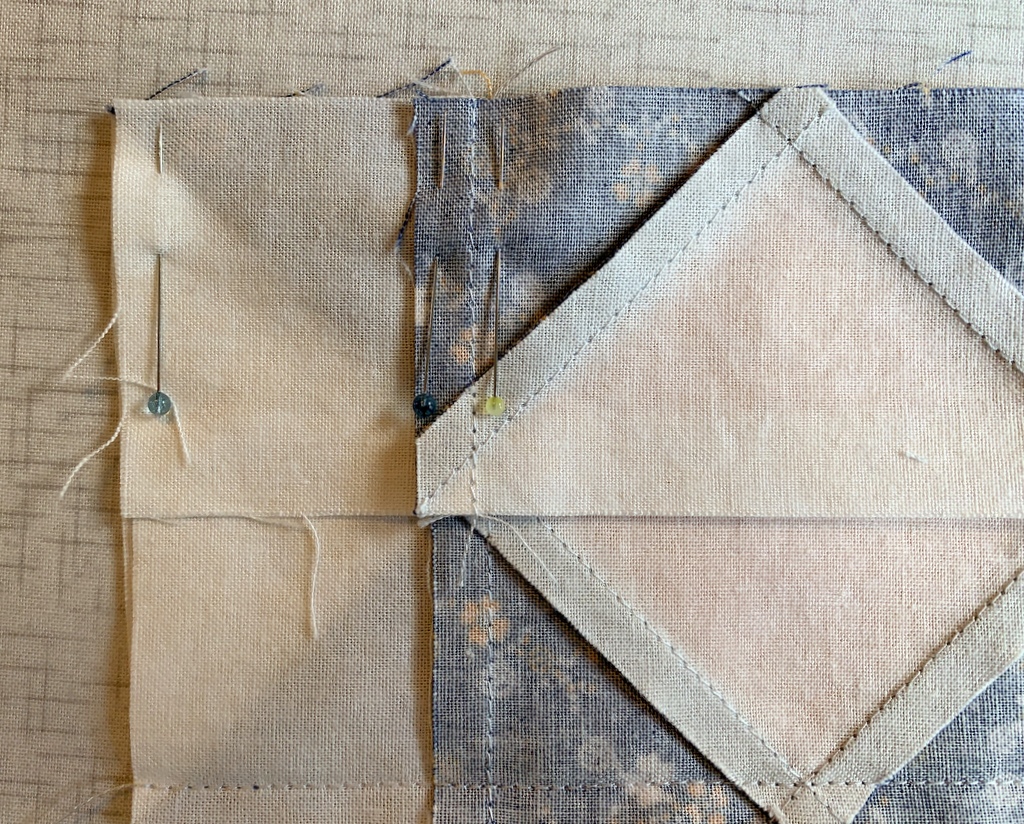

These two seams that I’m sewing are the ones that connect my Flying Geese units to the middle section. When I get to the middle of the block I’ll make sure my stitching line is a couple of threads away from the point and toward the raw edges (Tip #3).

The seams are sewn and pressed toward the outside:
This is the way I pressed my star block seams for years. The block still looks good from the front but it feels bulky at the V where all those layers are lying on top of each other. Nowadays I clip the seam at the intersections so that I can press it toward center of the block, minimizing the bulk at the V:
Another option is to make a second clip on the other side of the intersection and press the seam open just between the clips, revealing a tiny 4-patch design. That’s what I showed you in my last post:
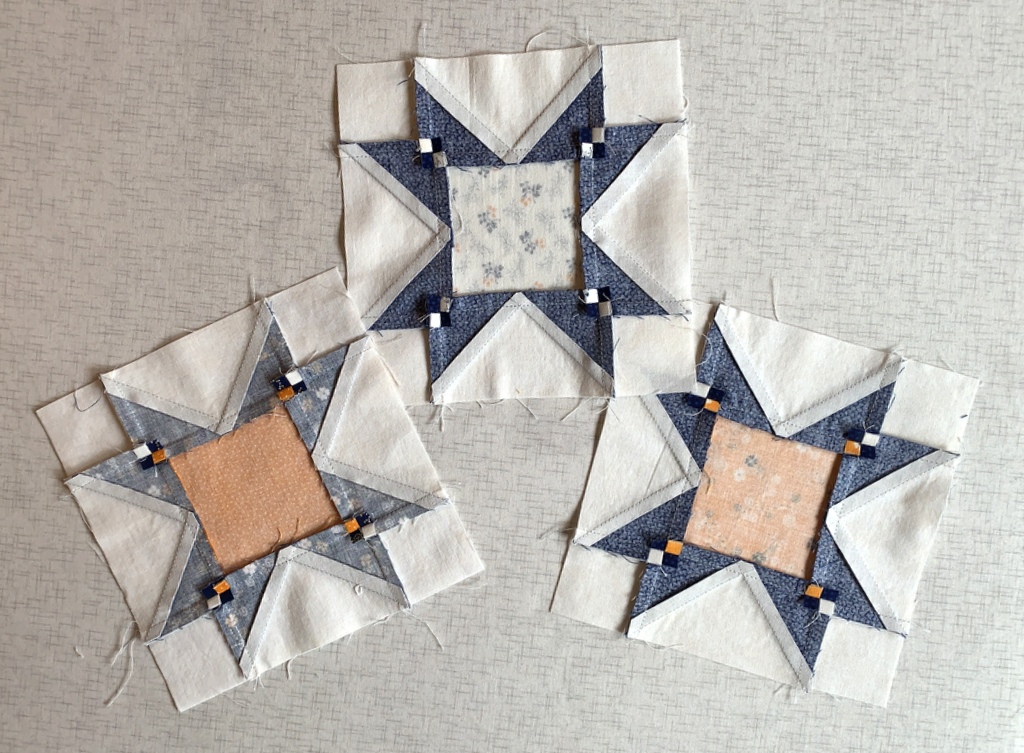
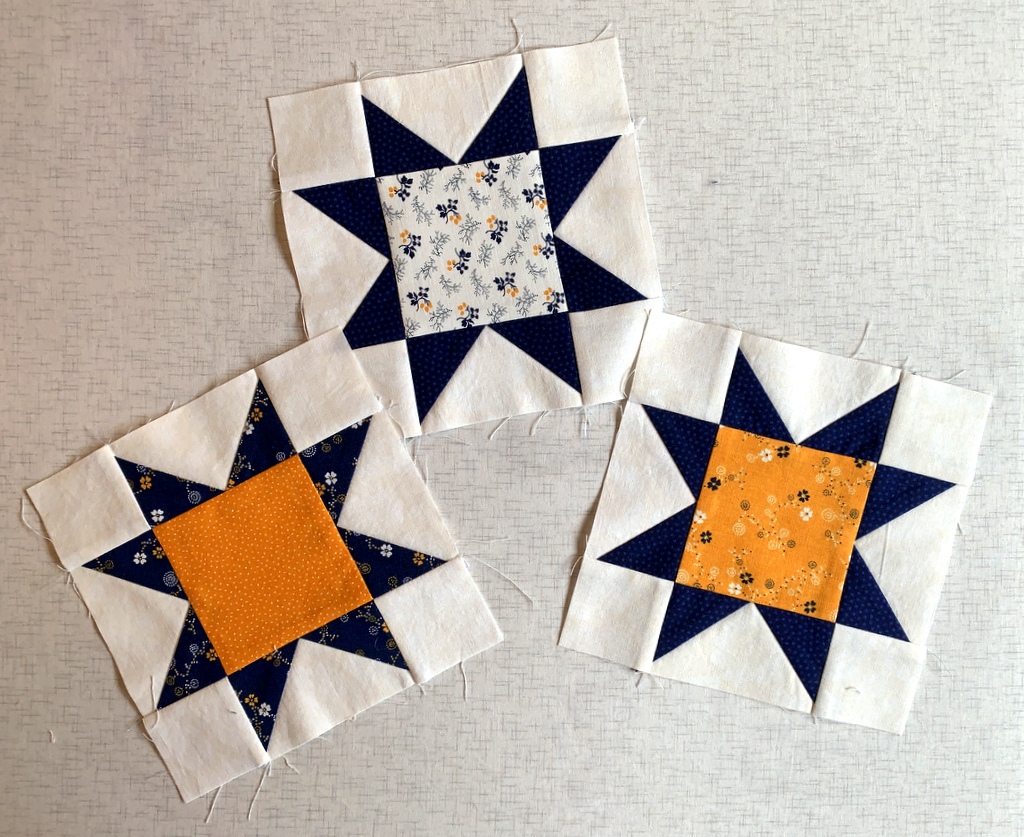
Here are my three most recent 6″ Sawtooth Star blocks, including the one starring (sorry, couldn’t resist) in this post:

I hope you found my tips helpful. Please let me know if you have any questions!

Update: to take a look at Scattered Stars, the quilt these star blocks were made for, click here.


Posted in cheddar and indigo, tutorial, update | 14 Comments

Progress Report: Cheddar and Indigo Quilt

Perhaps I should have titled this post “Plodding Along: Cheddar and Indigo Quilt.” Even with all the extra sewing time available to me (thanks to the coronavirus pandemic), I don’t feel like I’m taking proper advantage of it. Part of the problem is that I seem to spend as much time petting my fabric as I do cutting and sewing it.

And I must confess to whiling away a big chunk of time last week just playing around with blocks on my design wall. Based on that pleasant exercise, I realized I need about twice as many blocks as I have. I decided to make a few more of the largest Churning Stars blocks — the 18″ Sawtooth Star blocks containing 9″ Churn Dash blocks in the center.
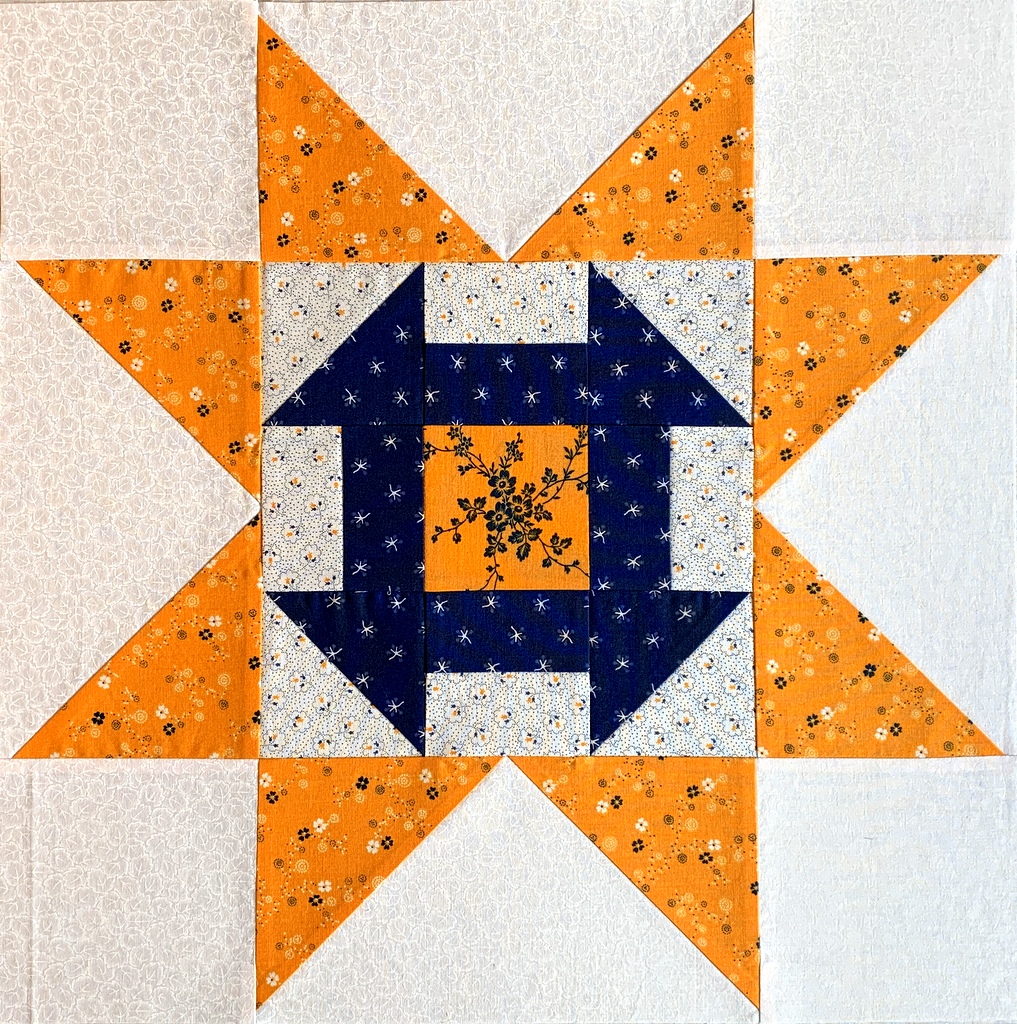
As I made each block, it instantly became my favorite. In this block the background dark navy print in the Churn Dash block and the background print in the Sawtooth Star are the same print in different colorways:

The same print in a third colorway makes the star points in the next block:

A very modern print from Victoria Findlay Wolfe’s “Futurum” line shows up in the Churn Dash block– but look how well it goes with the very traditional prints in the Sawtooth Star:


One more big block with indigo Sawtooth Star points is in the works. When it’s done I’ll have a dozen big blocks. Will that be enough? Time will tell . . .

My layout (the one in my head) calls for blocks of different sizes to be staggered. I expect there will be a lot of 6″ Sawtooth Star blocks used as filler so I’m gearing up to make a boatload of them. Here are three I made last week:

Look how cute they are from the back:

I have a new way of pressing the seams that makes them as flat as possible at the intersections. It does involve clipping to the seamline, which is something I used to avoid doing. But after making two large sampler quilts involving lots of angled seams, I have come to embrace the idea of clipping seams. The teeny tiny four-patches are an unexpected byproduct of the technique.

Maybe by the end of the week I’ll have some potential layouts to share with you. I hope you’ll stop by for a look!


Posted in cheddar and indigo, Churning Stars quilt block, update | 5 Comments

Out of Sight . . .

. . . out of mind. Isn’t that the truth!

In February my design wall was starting to fill up with Churning Star blocks. (Churning Stars is the name designer Jenifer Gaston gave to a quilt with Churn Dash blocks centered in Sawtooth Star blocks.) I’m combining different size Churning Star blocks in cheddar and indigo fabrics for a quilt whose layout is still in my head. All I know so far is that it will be a bed-size quilt and blocks will vary in size.

I took the blocks down from the design wall to make room for a couple of smaller projects and the stack lay untouched in my sewing room. For four months. Part of the reason is that the coronavirus came to Oregon and I moved on to making face masks. I’m still making masks but this weekend I was inspired to dig out those cheddar and indigo fabrics, get my blocks back up on the design wall, and make some more Churning Stars.

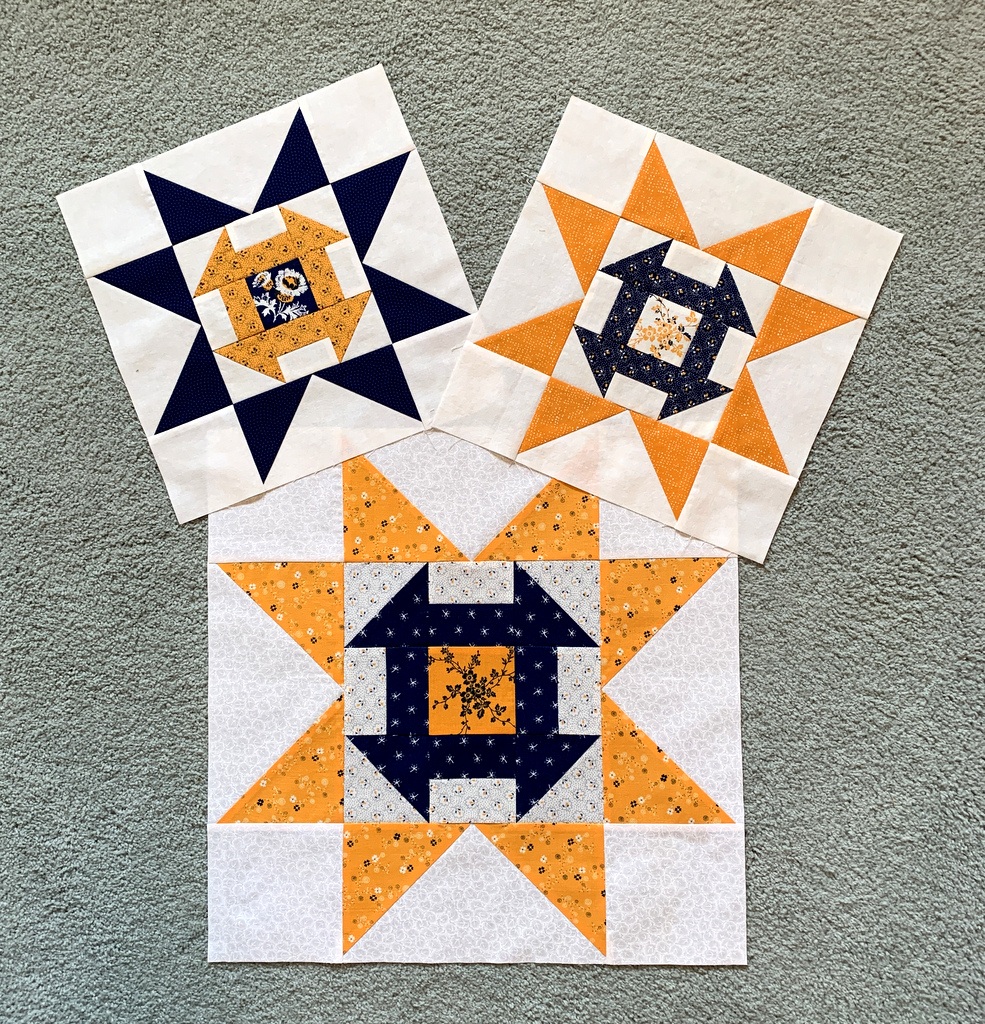
Here are my latest blocks:

The two blocks at the top will finish at 12″ square and the one on the bottom will finish at 18″ square. The blocks are easy and fun to make. I do believe it’s taking me more time to decide which fabric combinations to use than it is to actually make the blocks!

Here are close-ups of the blocks:


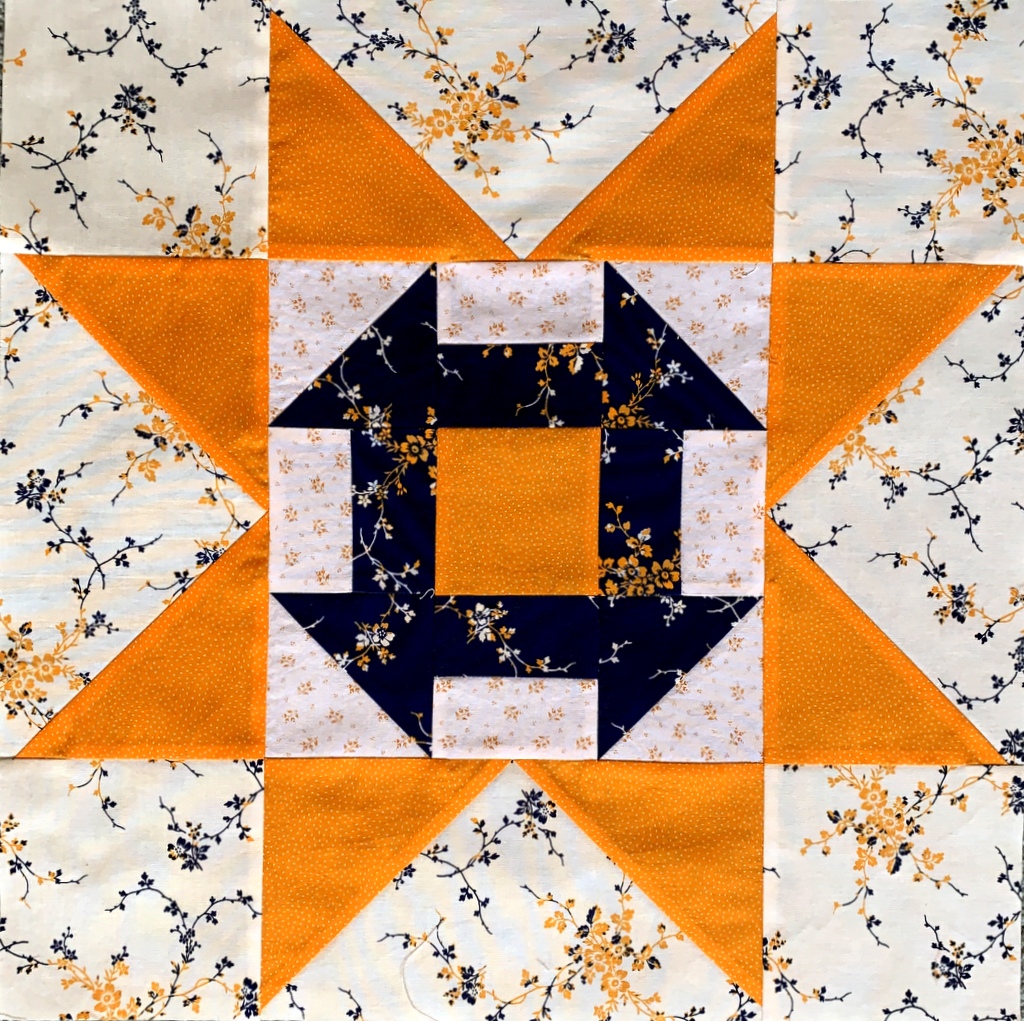
Those two are the 12″ blocks. The one below is the 18″ block:


Not all of my blocks have fussy-cut centers but these three do. That’s part of the fun!

I’m going to concentrate on this project and see if I can wrap it up by the end of the month. And this time I’m going to keep the blocks on my design wall until I’m ready to sew them together.


Posted in cheddar and indigo, Churning Stars quilt block, update | 15 Comments

More About Masks

I’m shifting gears in my mask-making endeavors. Since mid-March, when the Dear Husband and I started sheltering in place at our Portland White House, I’ve made several dozen face masks using one of the first tutorials I came across, that of ER nurse Jessica Nandino. Between then and now, I’ve tried a few other patterns and haven’t found any I liked better.

Until now:

This is PJ Wong’s design. (I haven’t met PJ yet, although we both teach for Montavilla Sewing Centers. She’s an expert on designs and projects for machine embroidery and leads several clubs at Montavilla devoted to sewing, serging, and machine embroidery.) On the Montavilla website I came across this link taking me to instructions for two masks PJ has designed: one with a vertical center seam and one with three pleats. Both designs include instructions for an optional filter pocket, and the pleated mask also includes a casing for a nose wire. The site includes pdf patterns, written directions, and video tutorials.

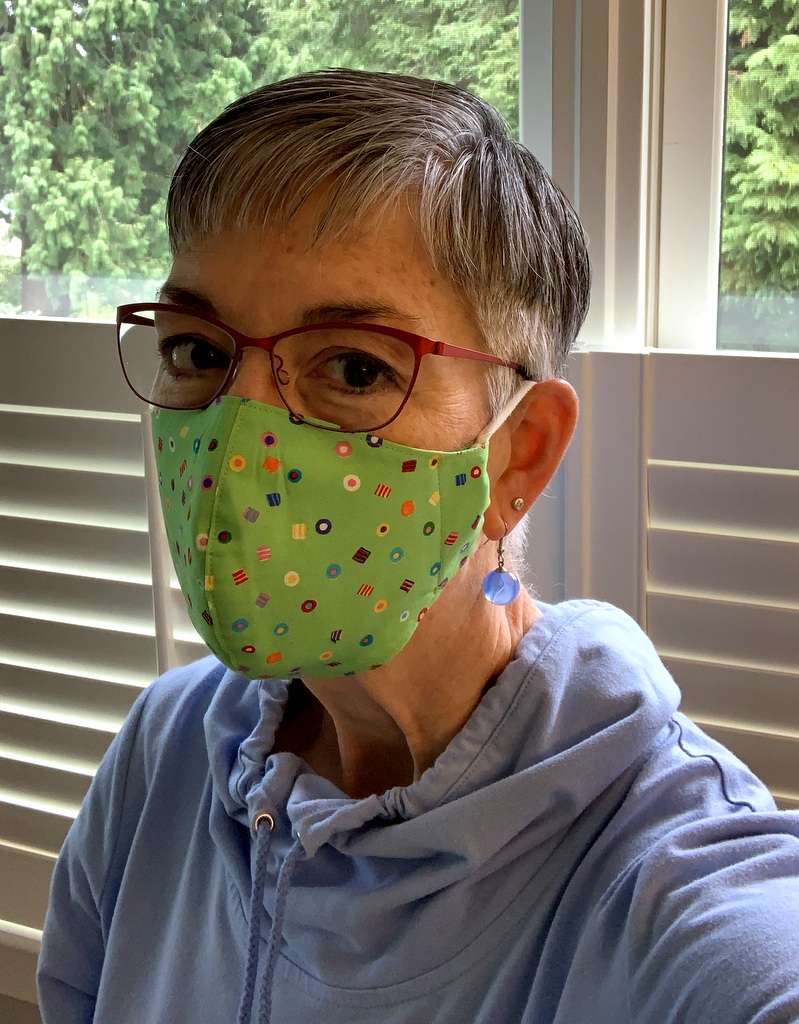
I tried PJ’s design for the mask with the center seam (often called a duckbill mask) and proclaimed it a winner. What I like most about her design is the inclusion of a facing, separate from the mask and lining pieces, that gives the mask a beautifully finished look — inside and out. What’s more, the facing creates a casing at the sides that allows the mask to be secured with ties or elastic or — a new discovery for me — “t-shirt yarn.” (More on that below.)

As you see in the photo above, I used quarter-inch double fold bias tape on my first mask. All I had to do was stitch the tape closed and thread it through the casing. I cut my lengths of bias tape 36″ long, leaving a length of 18″ on each side at the top and 15″ at the bottom. That leaves plenty of tape to tie at the back of the head and the base of the neck. If you look carefully at the casing, you can tell that I stitched a little bar tack in the middle of the casing to maintain those lengths.

Here’s my first effort:

PJ’s duckbill pattern comes in four sizes, small through extra large. The one I made first is a medium and felt a bit large on me so I decided to try making a mask in the small size. And while I was at it, I wanted to try a different method of securing the mask in place. To be honest, cutting bias strips and sewing fabric ties was the one thing I found rather tedious about the other mask design I’ve been using, although it certainly has other features I really like.

I had seen several references on Instagram to using t-shirt fabric to make ear loops for masks. It is said to be softer than elastic hence more comfortable around the ears. All roads pointed toward a tutorial by craftpassion.com on making t-shirt “yarn.” It was a breeze to make and now I have a small ball of yarn made from one of the DH’s t-shirts, enough for a few dozen masks. (I haven’t told him yet about his sacrifice.)

Here’s my second effort, with t-shirt yarn for the ear loops:

The ear loops are very comfortable. And look how cute the mask is on the inside:

See what I mean about the nice finish? PJ’s directions call for the facing (green fabric) to be stitched down right next to the lining (yellow dotted fabric), which is left open so that a filter can be slipped into the center of the mask. Since I’m not using a filter, I stitched the ends of the lining closed.

The next version I made was for my twin sister, Diane, who needs a mask to go with the dress she is planning to wear to a wedding later this month. The dress is a navy knit wrap with a gray leaf design on it. She wanted a mask that would complement her dress, and she asked for a mask that would hold a nose wire. I made this one for her:

Take a look at the inside:

How cute is that lining fabric? Even with the addition of the gray leaf strip at the top, which holds a nose wire, the mask is nice enough to wear inside out:

Kidding, of course. But now I may have to make a mask for myself with the lemon fabric on the outside because it goes so well with my top!


Posted in bias tape, face masks, family, tutorial, update | 8 Comments

Here, There, and Everywhere

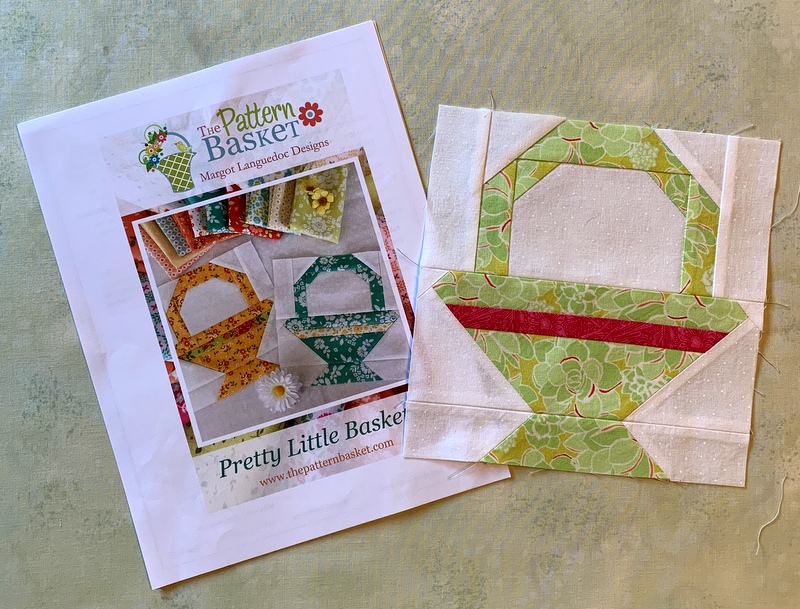
Do you ever buy a piece of fabric that you have no idea what to do with but you just know you have to have it? A couple years ago I was in a quilt shop in Bend, Oregon and spotted a succulent print in greens from the “Canyon” line designed by Kate Spain for Moda. I had to have some!

It sat on a shelf in my sewing room cabinet until a few weeks ago when I pulled it out to make this test block from a new pattern by Margot Languedoc called Pretty Little Baskets:

The pattern is definitely on my “to do” list but I only made one block with that fabric.

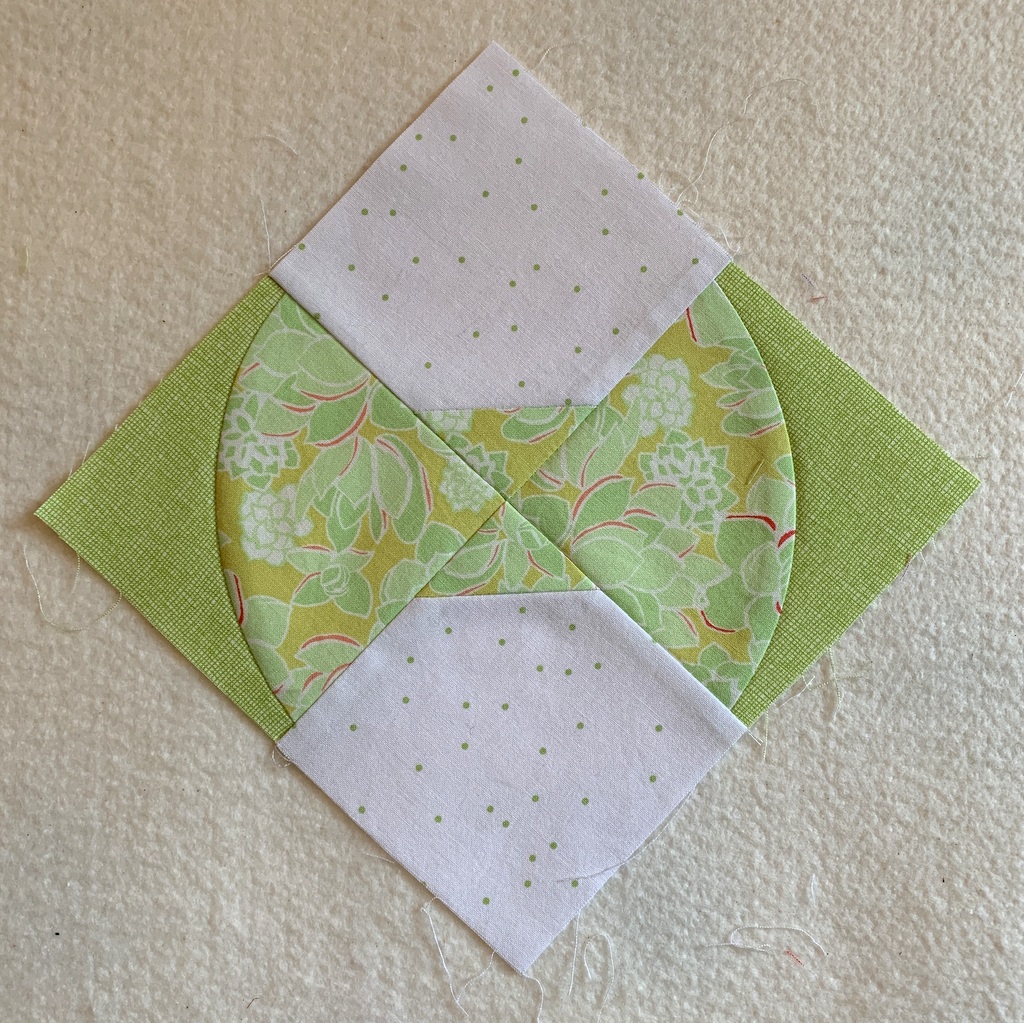
Then very recently Sew Kind of Wonderful released a new pattern called Curvy Bow Tie using the new Wonder Curve Ruler and I used a bit more of the fabric to make this test block:

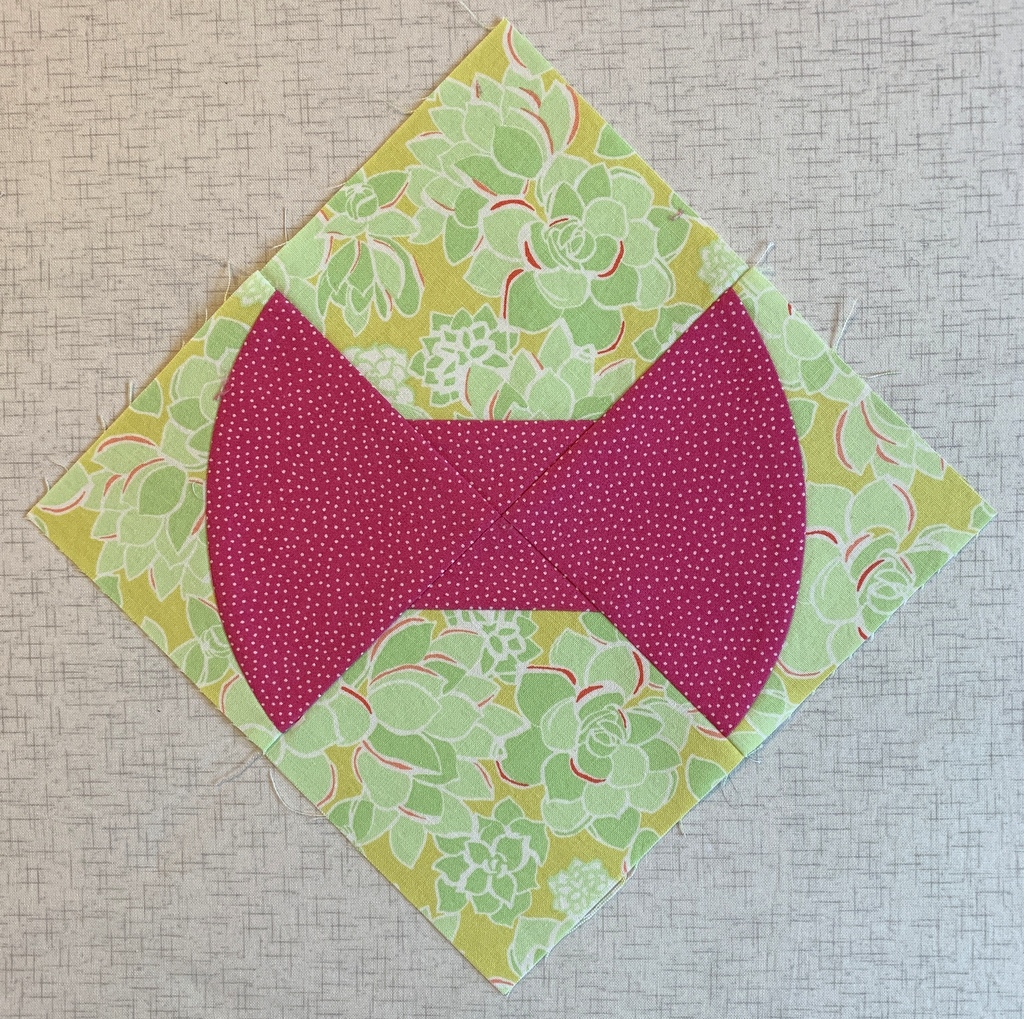
Such a cute block but I wondered if the fabric would look better as the background of the block rather than the focal point. I made another block to see:

Oh yes, I like that better. But I’m not ready to make an entire quilt out of it just yet. (I love the Curvy Bow Tie pattern, though, and do plan to make a quilt when I’ve decided on a color scheme.)

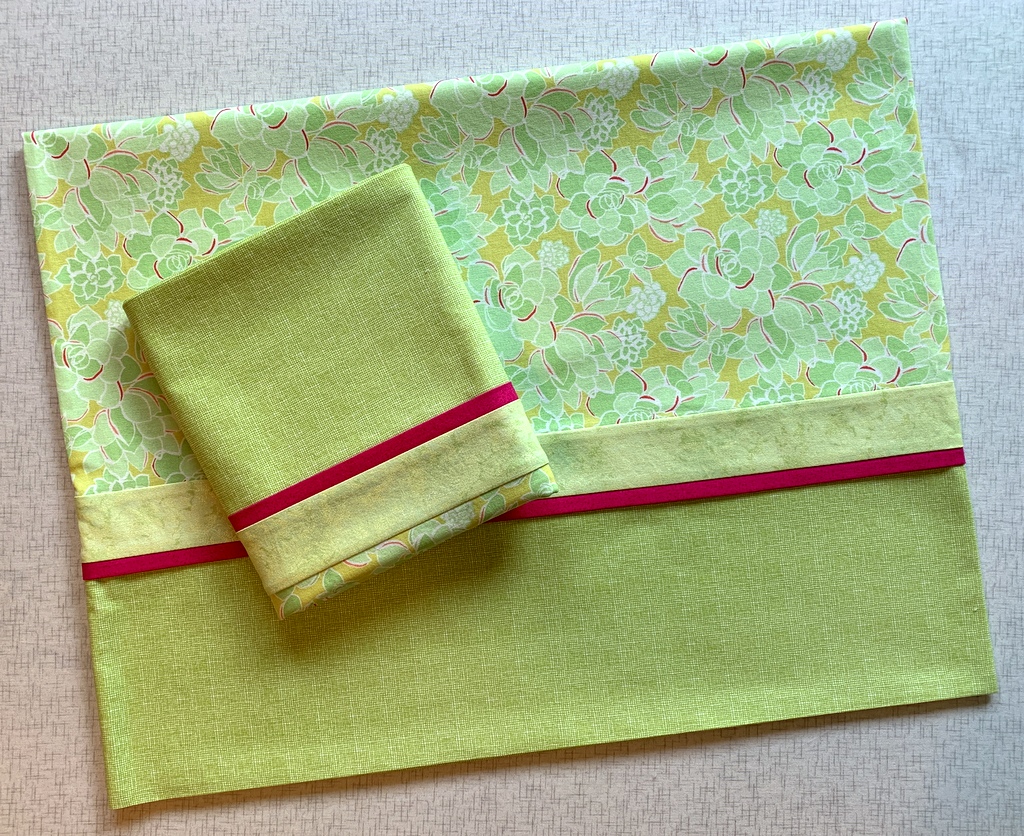
What I really wanted to do with that fabric was make a pair of pillowcases for the Portland White House (using my own tutorial). So I did:

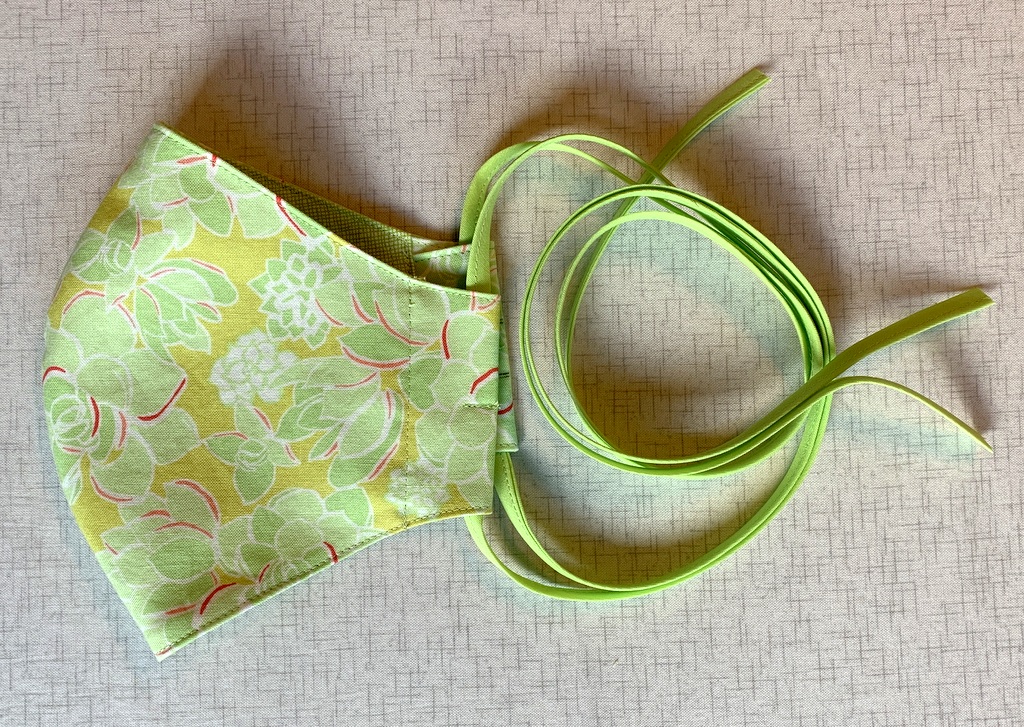
And I used some scraps to try out a new mask tutorial:

Now I can’t stop thinking of ways to use this fabric. Wouldn’t it make a great camp shirt?


Posted in bias tape, bowties, face masks, home dec, roll-it-up pillowcases, tutorial, update, Wonder Curve Ruler | 12 Comments