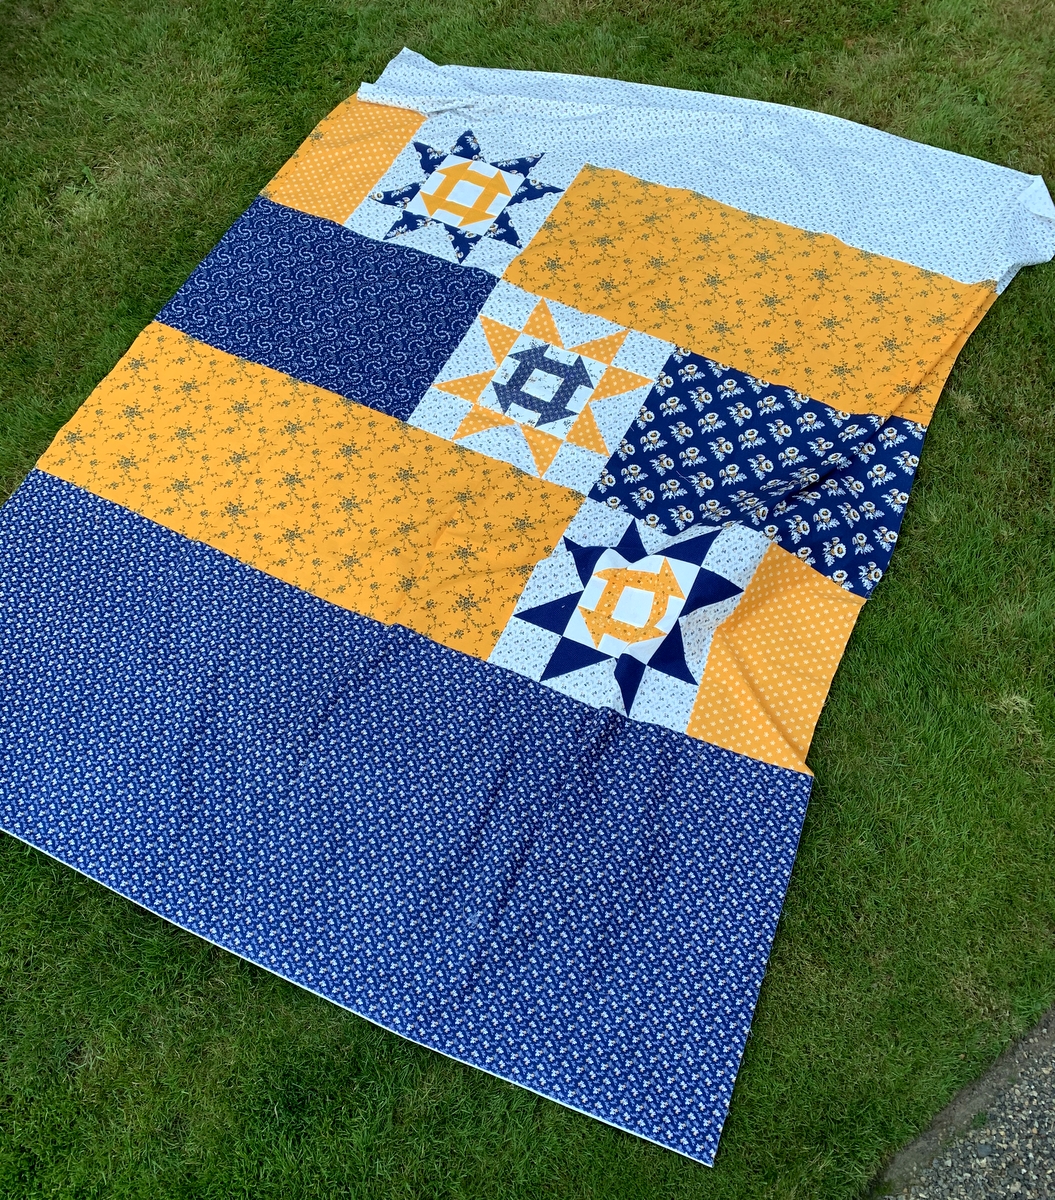
That’s what I have to say about the back of my Scattered Stars quilt:
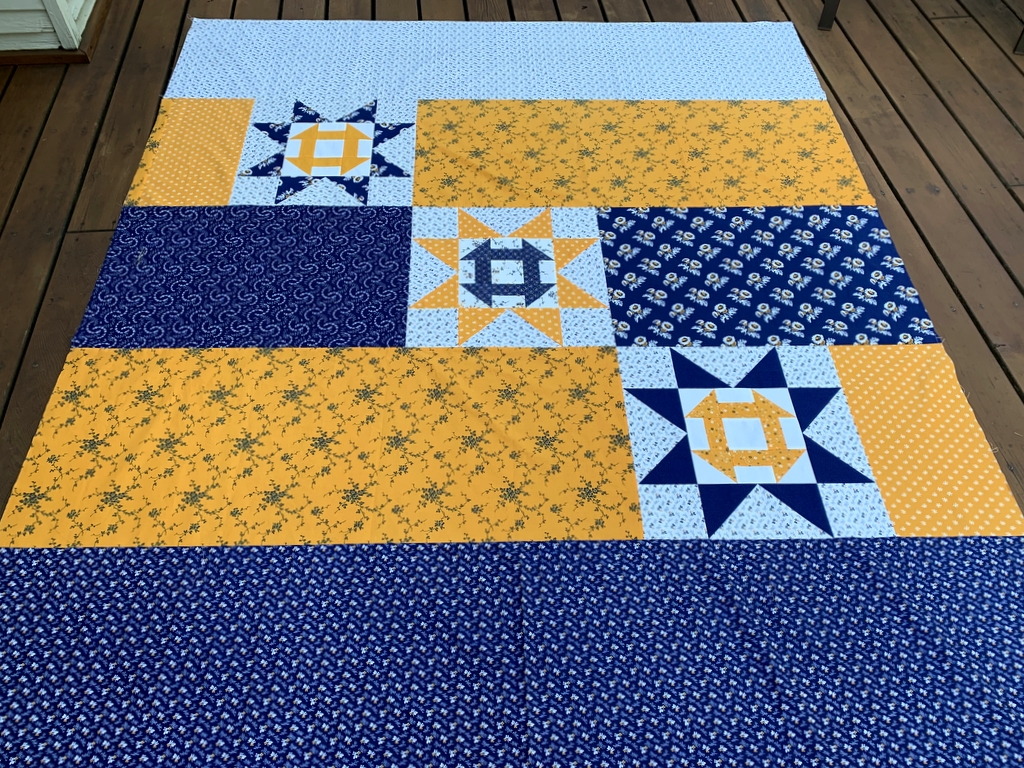
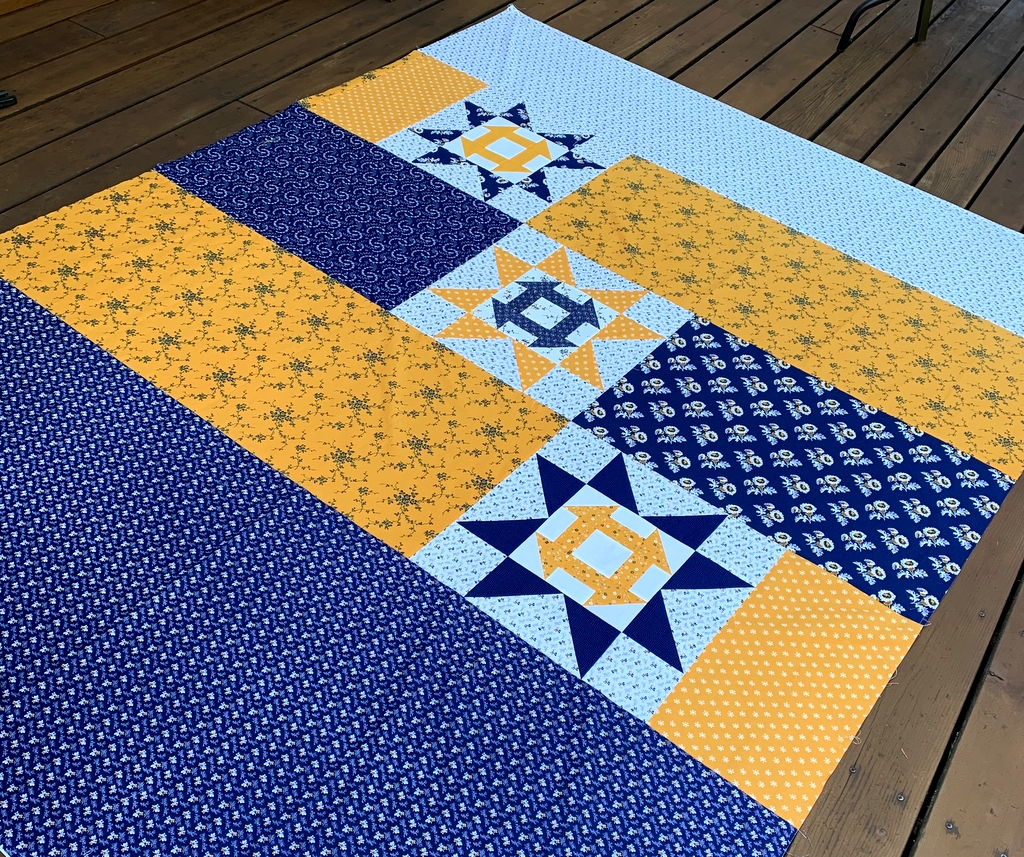
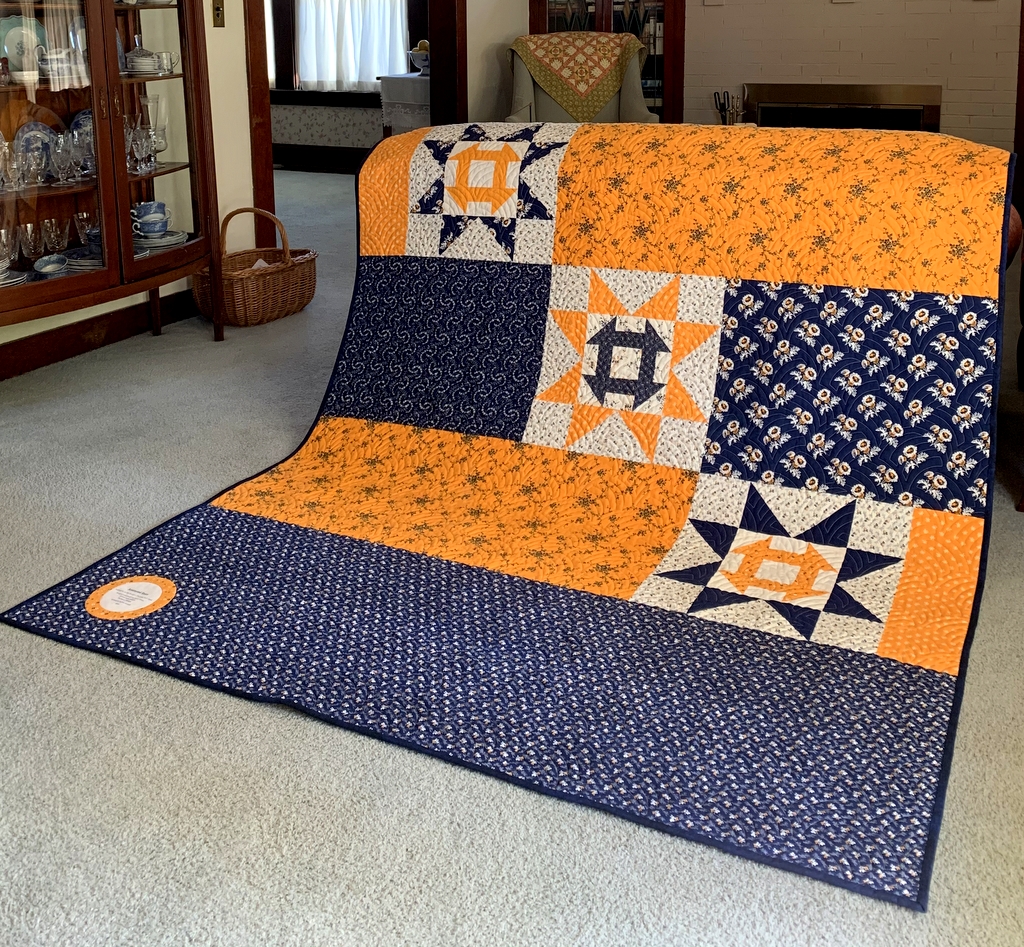
It’s pretty simple as pieced backings go. I started with three 18″ blocks and filled in the spaces around them with strips of leftovers from my stash of cheddar and indigo fabrics. A chunk of cheddar fabric makes quite a colorful statement, doesn’t it?! Big and bold, no doubt about it.
Here’s a view from a different angle:
You can see what these blocks might look like on point. Intriguing, right? That’s what I thought when I first spotted the charming quilt called Churning Stars in Jenifer Gaston’s book Primitive Style: Folk-art Quilts and other Finery (Martingale Press, 2015). Her quilt inspired me to make a quilt of my own using cheddar and indigo fabrics. I think of these as Churning Star blocks in acknowledgment of Jenifer’s design.
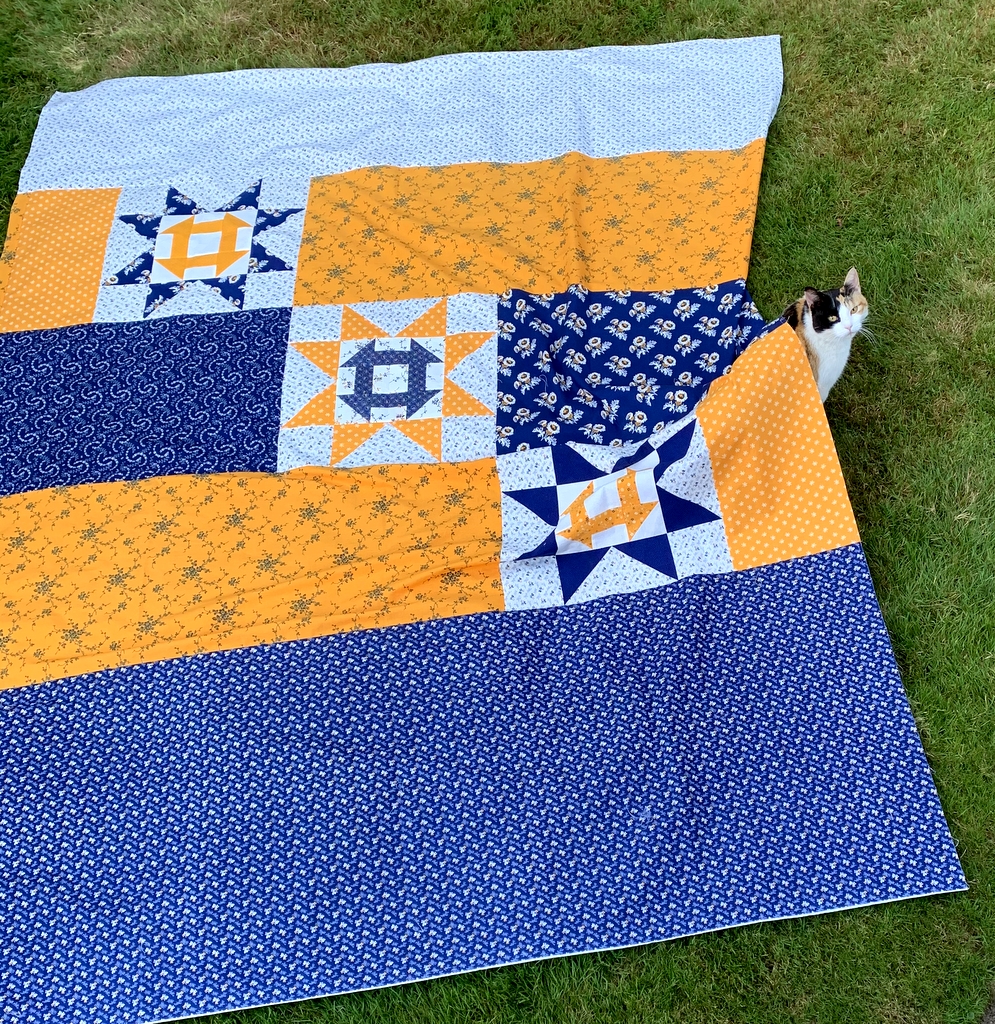
The photos above were taken late this afternoon on the back deck. This evening after a lovely al fresco dinner I took the backing down to the lawn to see if I could get a better shot from the deck. I was just about ready to snap the photo when a certain feline appeared out of nowhere and wiggled underneath. See that lump on the right side, under the bottom star?
Yes, it’s Coco the Photobomber:
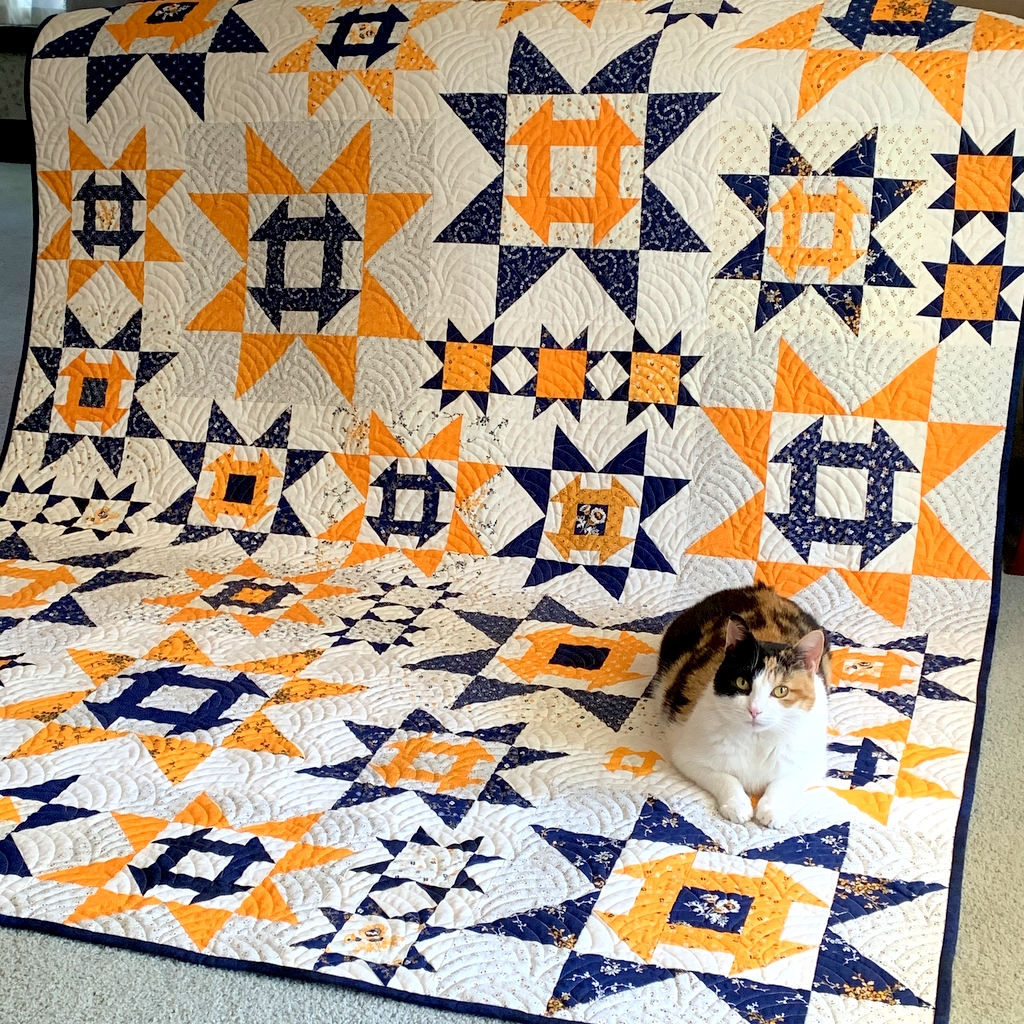
After she wandered away I managed to get a quick shot of the front of my quilt:
I’m so happy with the way it turned out!
My plan is to deliver the top and backing to the longarm quilter tomorrow. I have a quilting motif in mind that I think will be perfect for my Scattered Stars. Here’s a hint: it’s a contemporary motif that is strongly reminiscent of a very traditional quilting design.
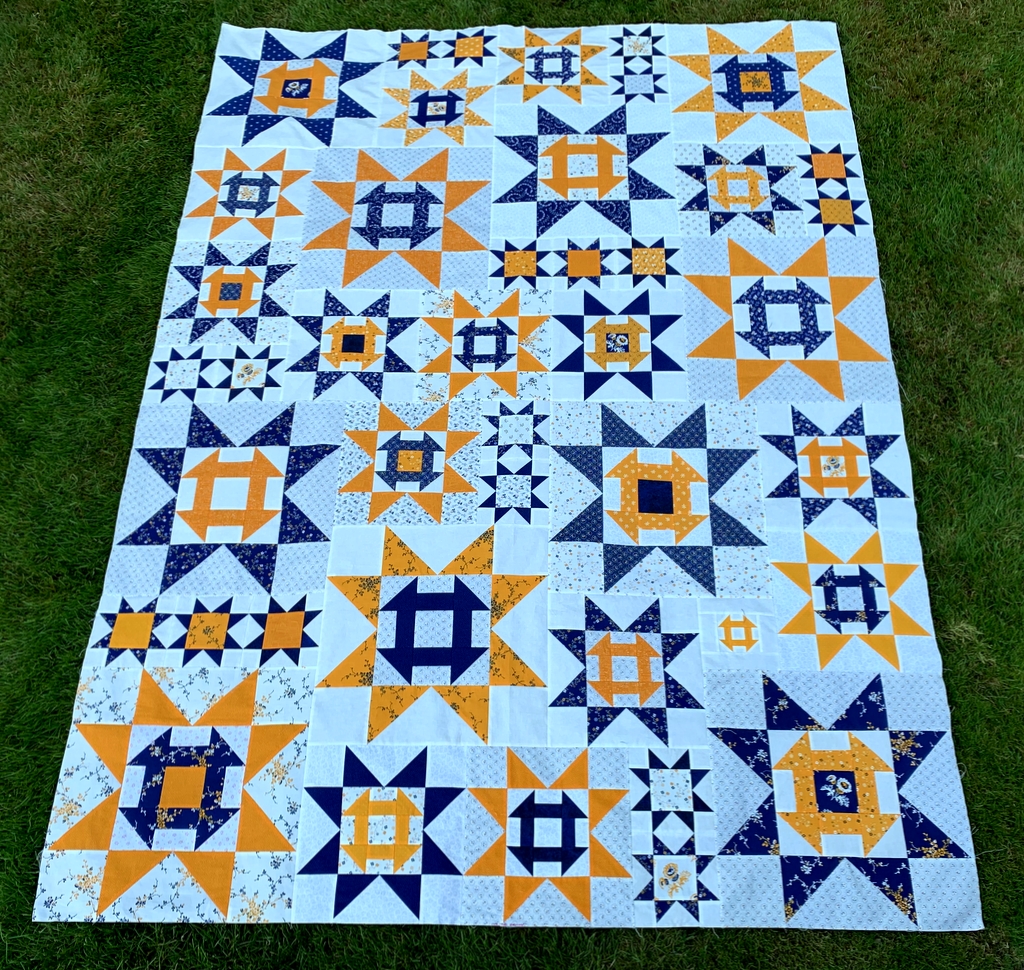
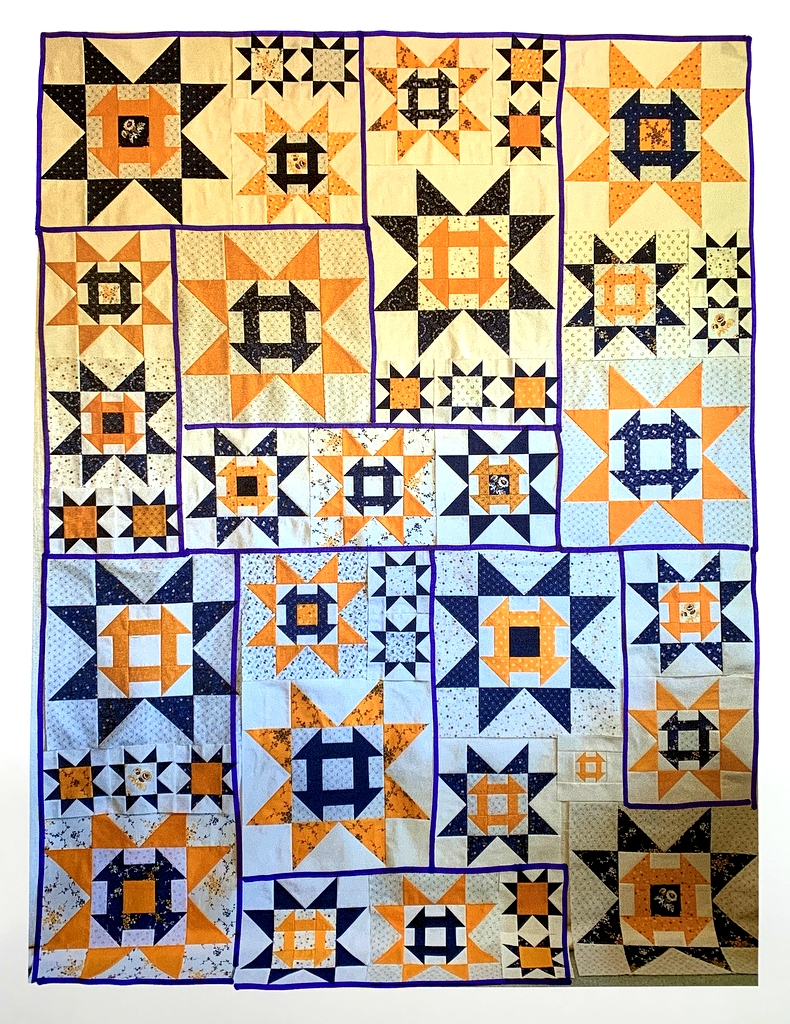
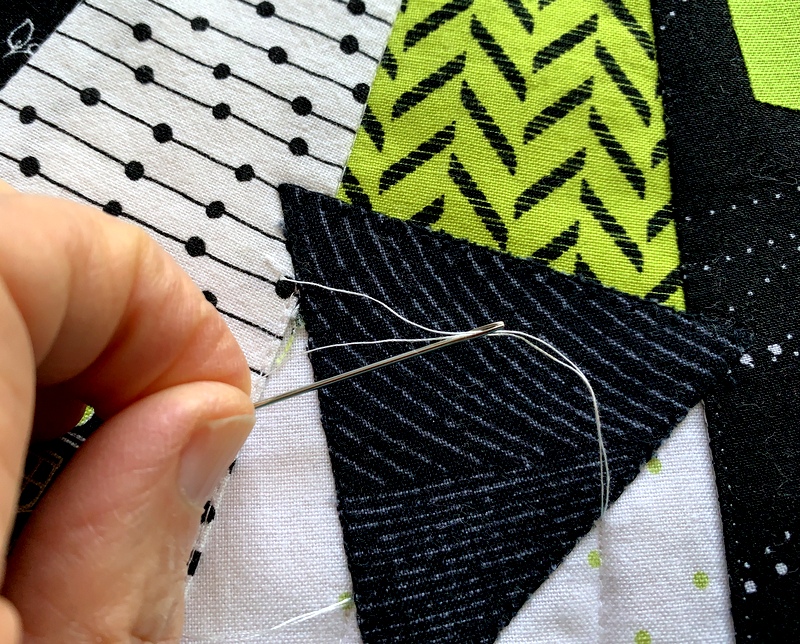
I finished sewing the blocks together for Scattered Stars, my cheddar and indigo quilt, this evening. Take a look:
Light from the window on the right side of the room isn’t spreading evenly across the surface and the bottom part of the quilt top is puddling on the floor but I think you can get a good idea of what this quilt is going to look like.
With three sizes of blocks (six, 12 and 18 inches) scattered across the quilt, I figured there’d be plenty of partial seams. They’re not especially difficult but I wanted to plan for them so I didn’t sew an entire seam and then have to rip out part of it. The plan was to sew the blocks into smaller sections that could then be joined together.
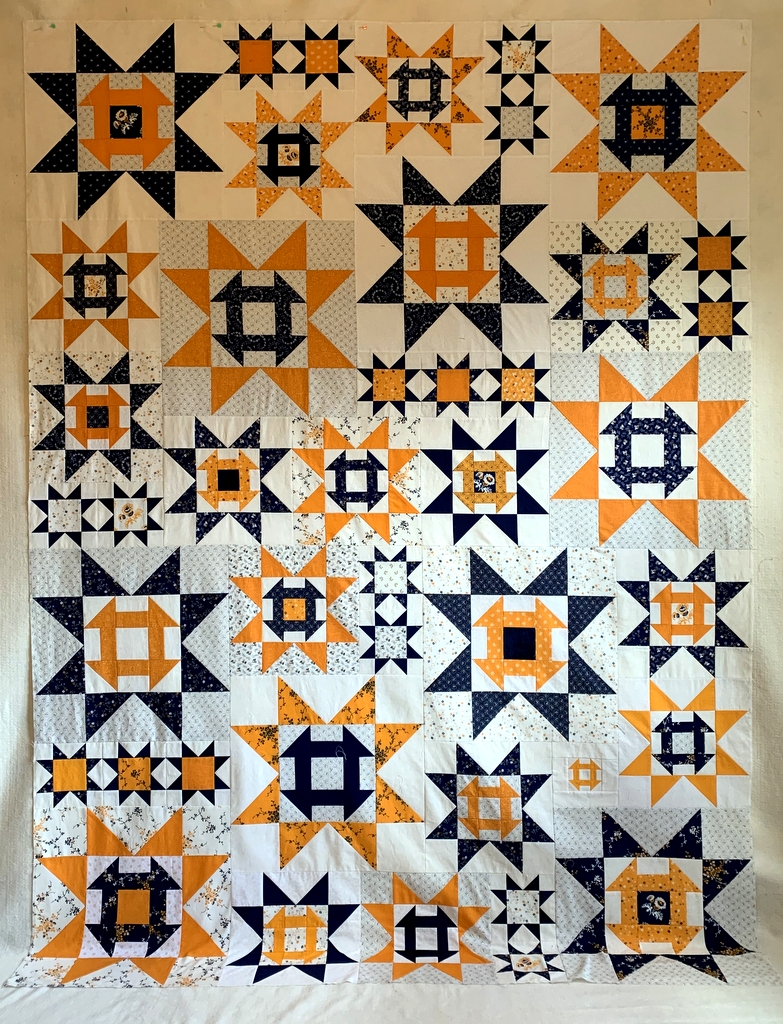
I started by printing a photo of my layout and marking the sections with a Sharpie:After studying the diagram I realized there are only two partial seams in the entire quilt. What a pleasant surprise! (One of the places is in the lower right side of the quilt around “that singleton block” — the one with the 3″ Churn Dash in it. Can you spot the other?)
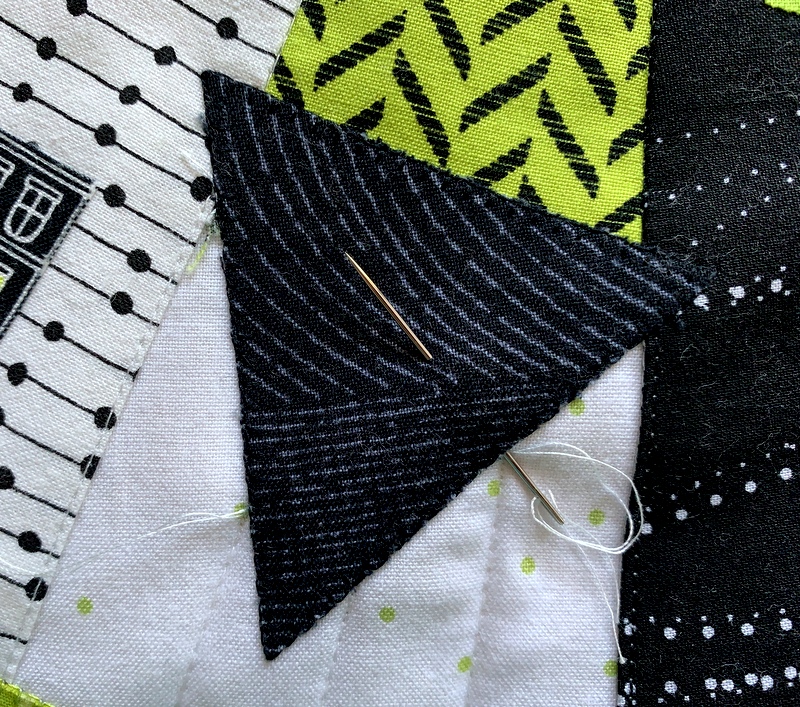
I sewed the six-inch blocks together first — six pairs and two trios — and then the 12-inch blocks — three pairs and one trio. The star points meet in these blocks and I knew I’d have to pin the intersections — all 28 of them — carefully. When those were done to my satisfaction (yes, there were a few that had to be redone) I started creating the sections.
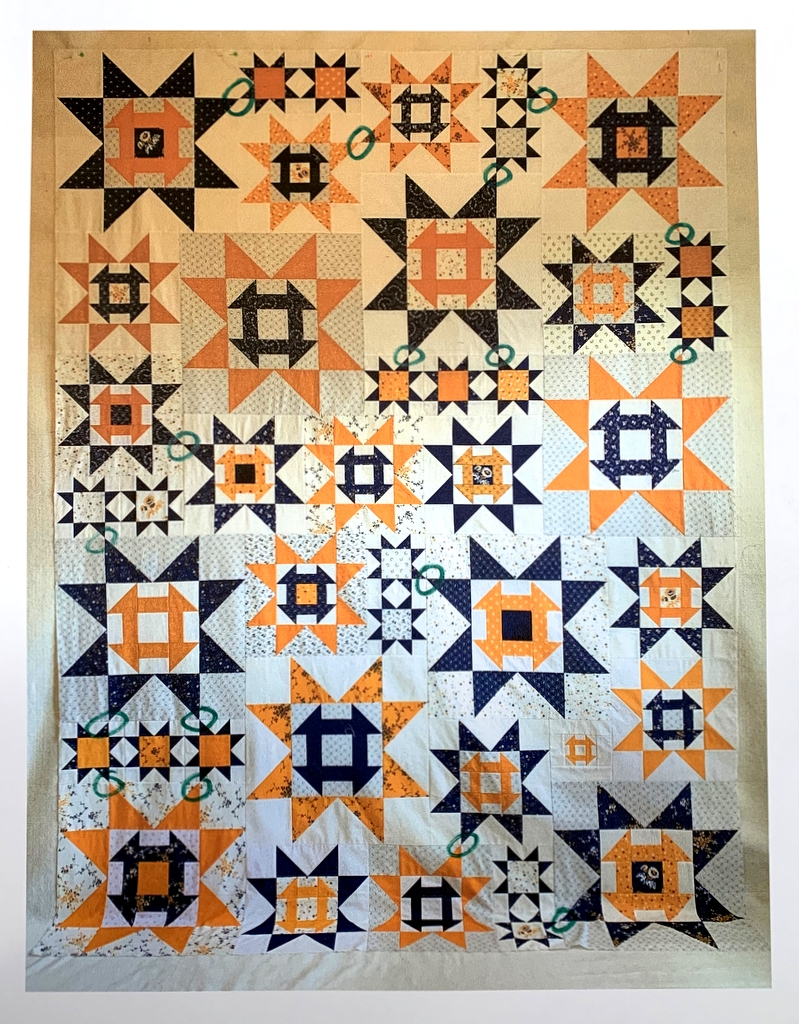
That’s when I realized there are several other places where star points meet — stars of different sizes. That surprise wasn’t quite as welcome. Turns out there were 17 of those, all needing to be carefully pinned. I’ve circled them in the next photo:I admit a few of those had to be redone as well.
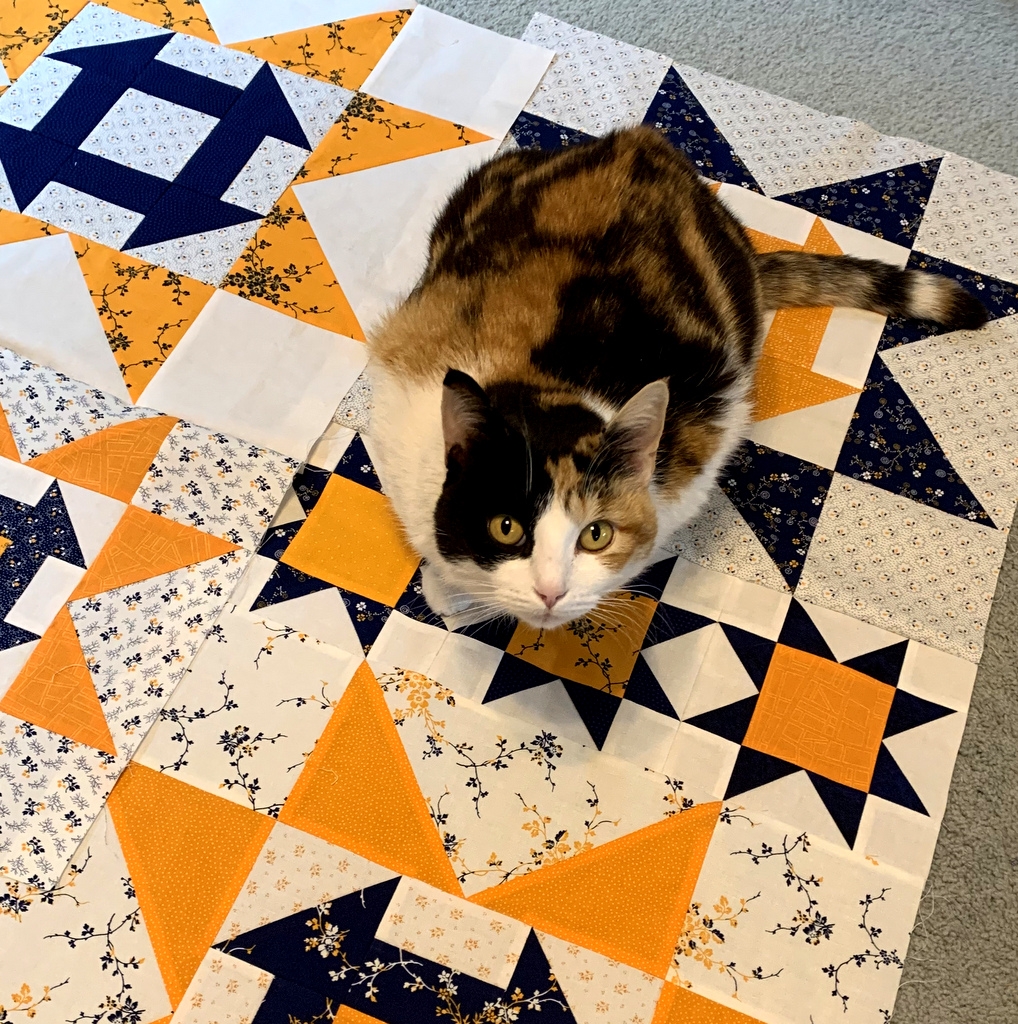
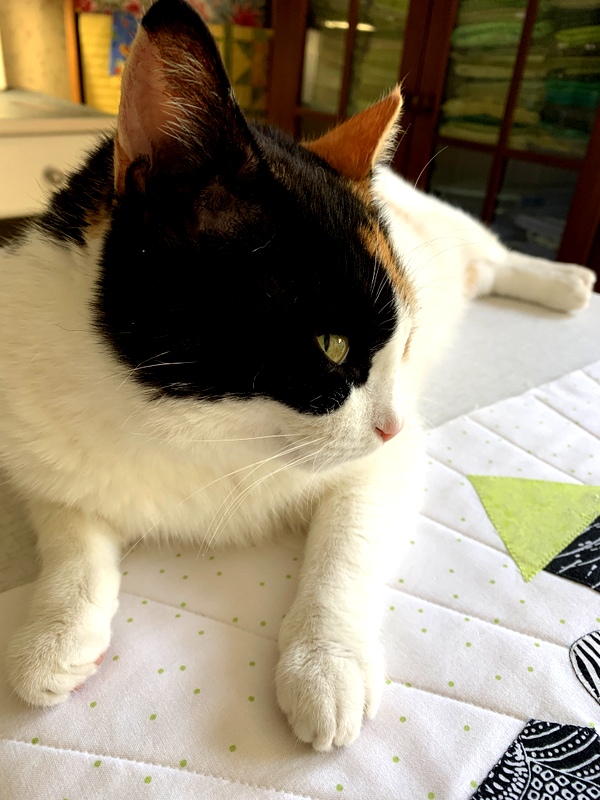
It took the better part of three days to get these blocks together. Coco was a frequent visitor in my sewing room during this time. Here she is staring at me intently, willing me to stop what I’m doing and fix her dinner:
The top measures 66½” x 90½” which is just about right for a twin size quilt so I’ve decided not to add borders. I’m thinking about finishing it with ½”-wide binding.
Next up: a pieced backing using a couple of 18″ blocks that didn’t make the cut for the front.
And now you know, if you’ve been following along as I pondered four binding options, that Option #1 — the lime green faux flange with the zebra fabric — was the winner.
But guess what? It wasn’t my first choice. Nope. I was going with Option #4, the green flange with the white background fabric as the binding. Here’s the mockup I showed you in my last post, with paper strips made from photocopied fabric:
Why this choice? I liked the idea of the white background fabric extending to the edges, almost as if the quilt were faced rather than bound, with that thin flange as a bright but understated accent. Plus it was an unexpected choice. (I have to thank my friend Deborah for suggesting white fabric. It never would have occurred to me, as I was gravitating to the black prints used in my quilt.)
I made my binding accordingly and started to apply it. Normally binding is stitched to the right side of the quilt and turned to the back. With this faux flange method, however, you sew the binding to the wrong side of the quilt and turn it to the right side to expose the flange. When I got ready to miter the first corner, I turned the binding to the right side. And this is what I saw:
Oh no! You can clearly see the green fabric through the white fabric in the binding. With this particular treatment the seam allowance must be pressed toward the binding fabric for the flange to lie flat. I tried pressing it the other way but it was a “no go.” There was no way I could see to remedy this problem.
Back to the drawing board — er, cutting table. My second choice for the binding was the zebra fabric. That was my husband’s first choice and also my twin sister’s. Some of my readers liked it too so I figured it was a keeper. (Thank you, Vickie R., for suggesting the zebra fabric. Like the white background fabric, it wasn’t even on my radar initially.)
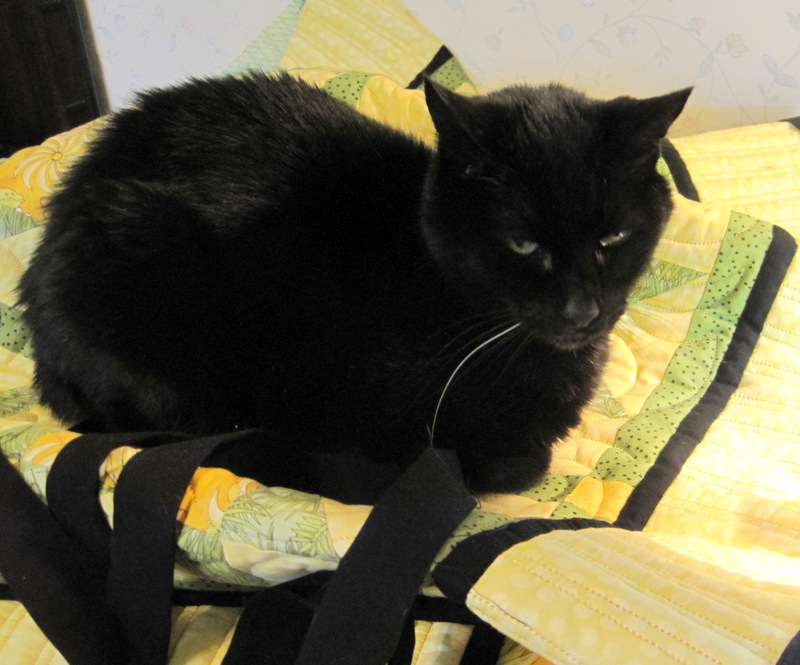
I started cutting more binding strips . . . until a certain feline came to investigate:
Princess Cordelia (Coco for short) was gently ejected from my sewing room so I could proceed. The binding went on very nicely.
The conventional way to finish a faux flange binding is to machine stitch in the ditch where the flange meets the binding fabric. Instead of doing that I fused the binding down with Steam-a-Seam-2, a double-sided fusible web.
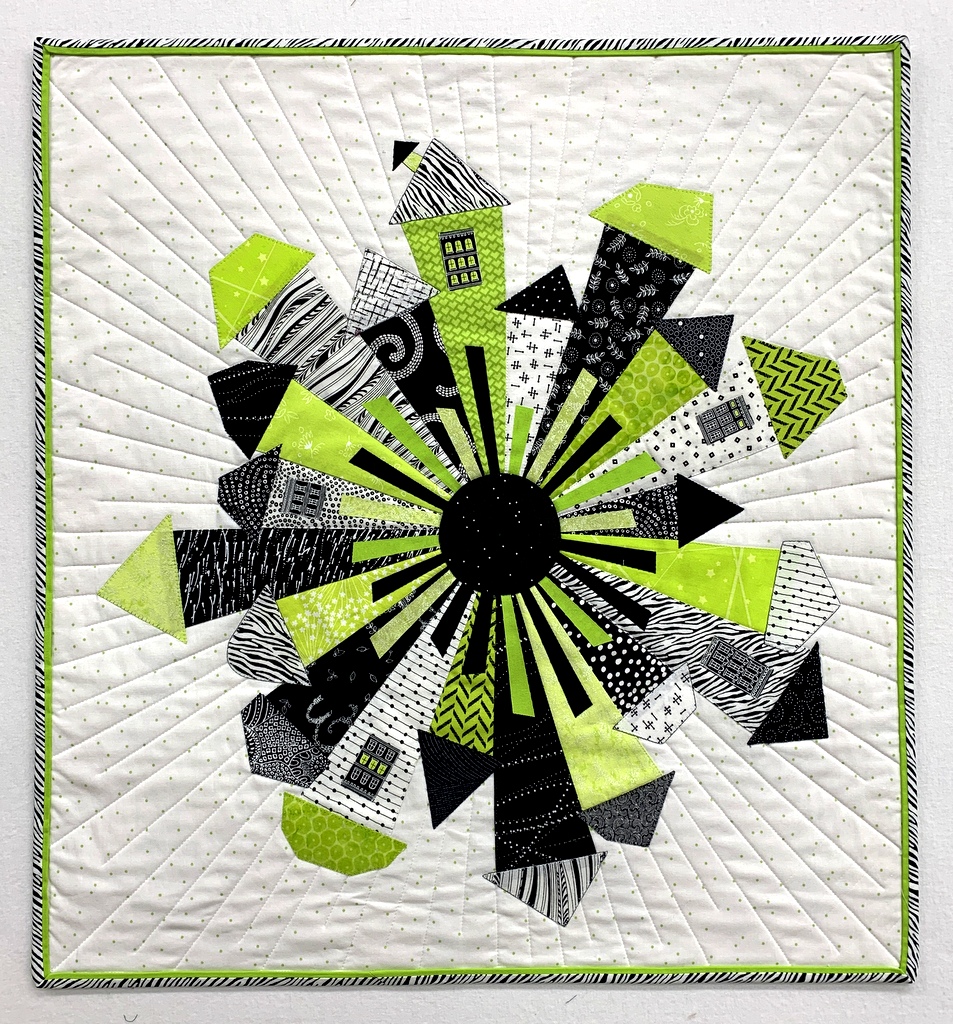
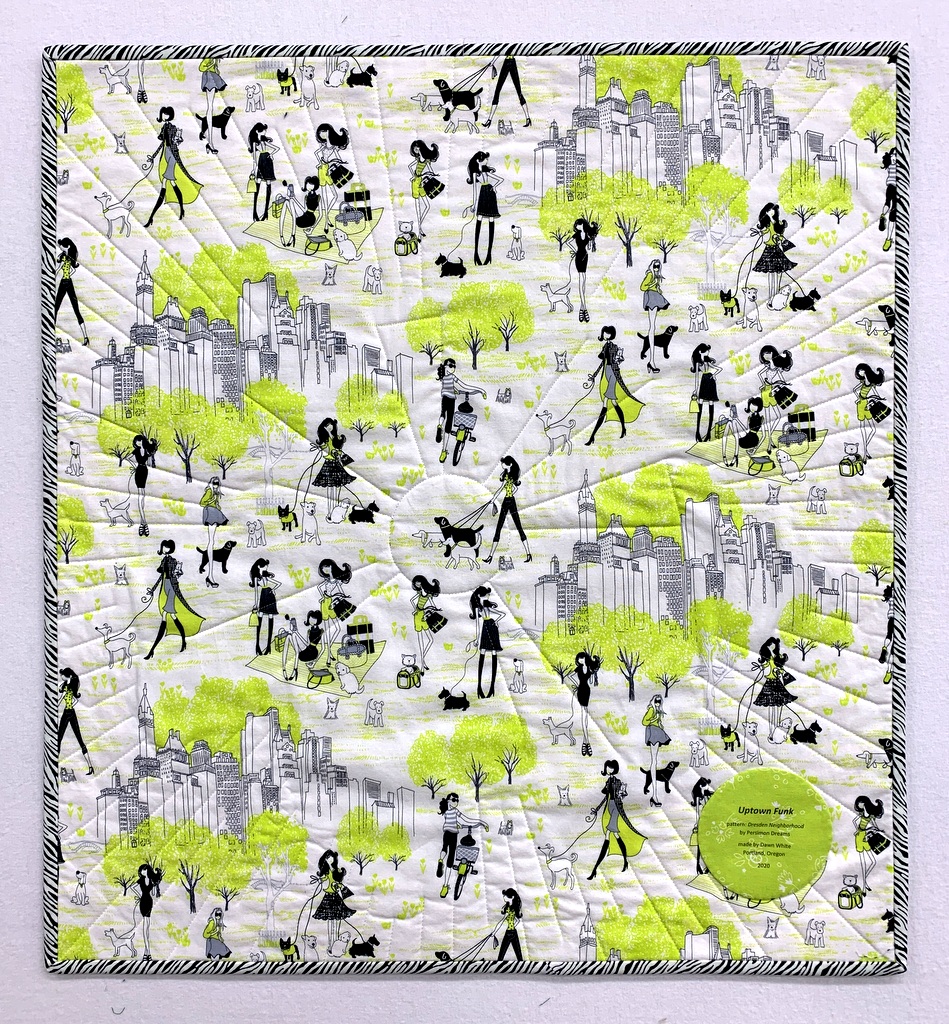
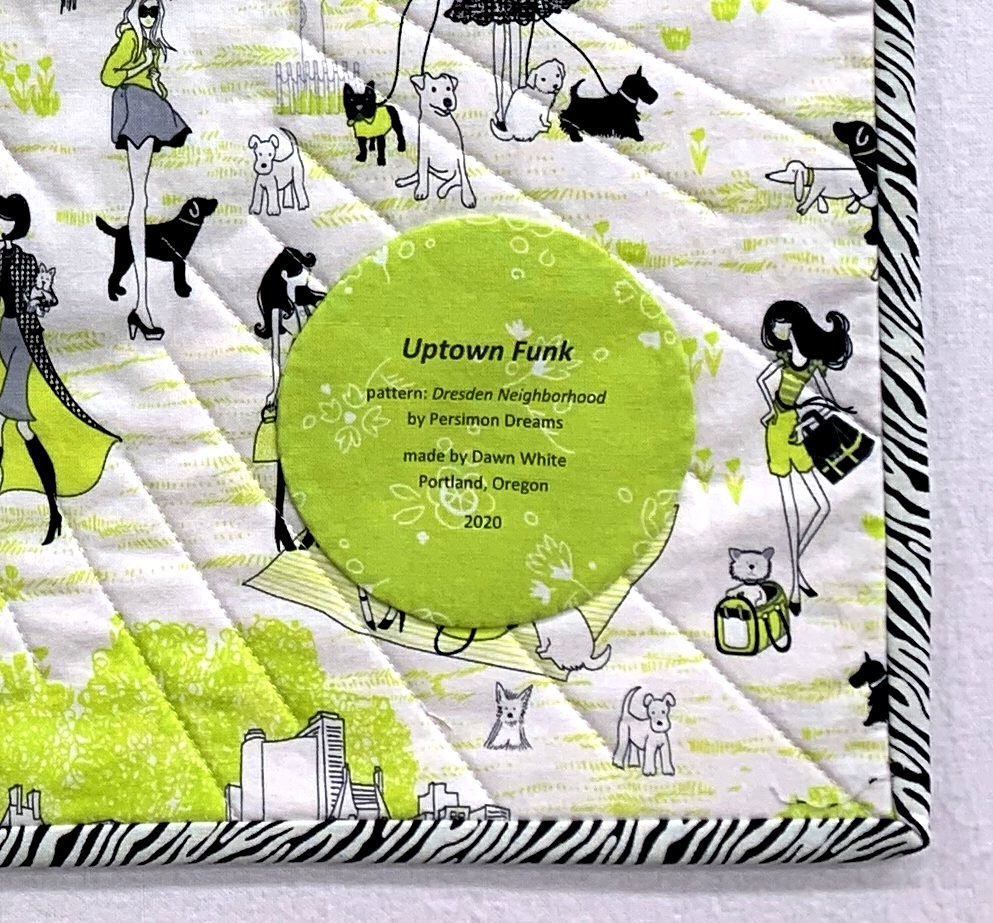
Here’s the back of Uptown Funk:
I love the way the binding looks with the backing fabric.
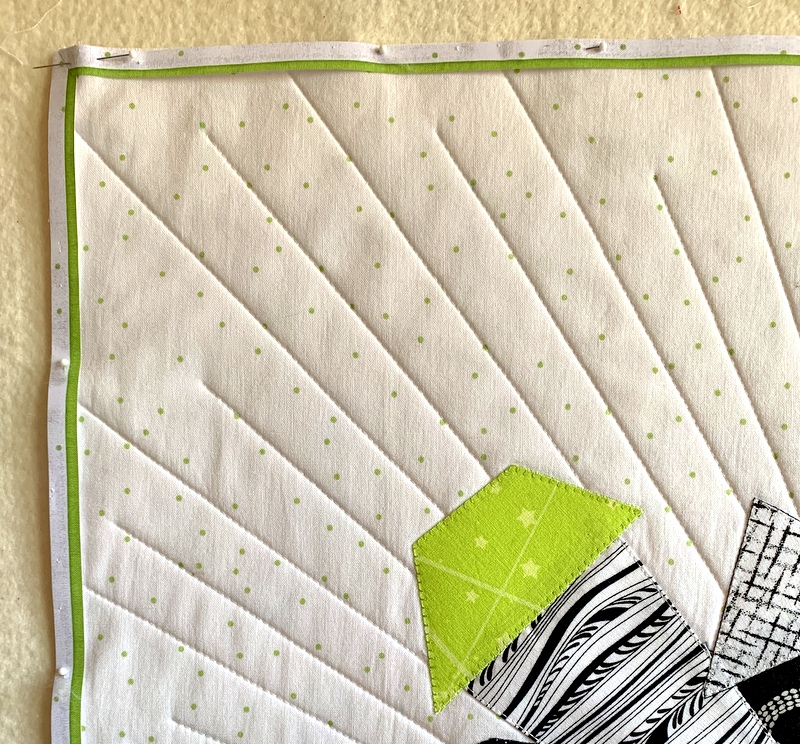
Uptown Funk, my version of Kim Lapacek’s pattern Dresden Neighborhood, needed more quilting. I knew it right away when I looked at it this morning. So what did it need? More quilting lines radiating out to the edges. Not all the way to the outside, mind you. As you can see, the new stitching lines, placed between the first set I showed you in yesterday’s post, are of staggered lengths and all end shy of the edges, some by quite a bit.
I’m very pleased with the effect but creating that effect was quite a chore, let me tell you. Each stitching line began and ended with four tiny stitches (1.0 on my computerized machine) to lock the threads in place in lieu of knotting. The main part of the line was sewn with a stitch length of 2.7. That’s a lot of stopping and starting while the stitch length was being adjusted. And I buried all the threads. Let’s see: 40 stitching lines — yes, 40! — means there were 80 sets of threads to be buried.
I’ve found that the key to burying threads easily, once you’ve drawn them to the same side of the fabric, is to trim both threads to the same length — three to four inches works best for me — and use a needle with a large eye so the thread ends go in easily:
Because I pulled the bobbin threads through to the front when I started the stitching lines in the interior of the quilt, I buried a lot of the threads in the roofs:
The roofs have a layer of fusible web underneath them so those threads aren’t going anywhere. It was very easy to pull the threads taut and clip them right where they came out of the fabric:
The top thread at the end of each stitching line got pulled to the back of the quilt and buried in the backing fabric.
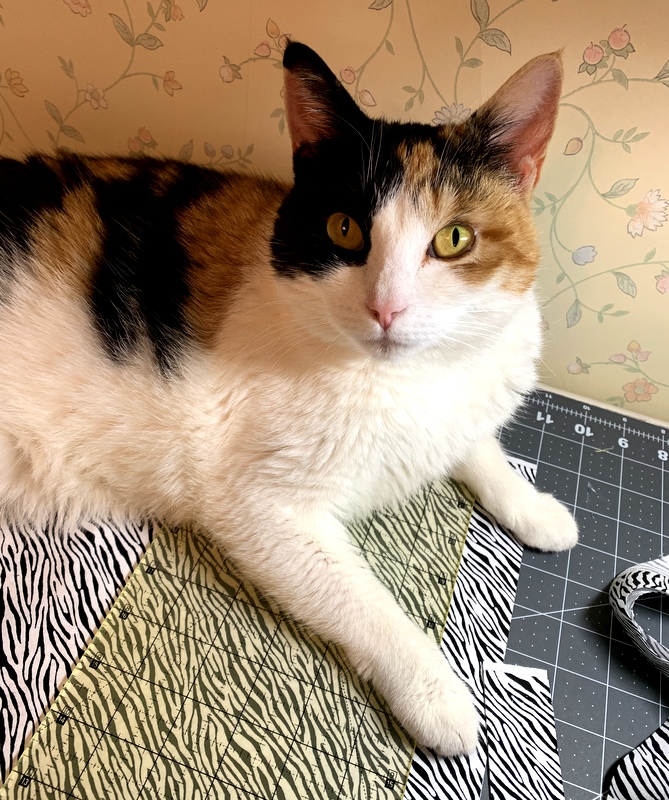
Just before getting started this morning, I left my sewing room for a few minutes. Look who I found lounging on my ironing board when I came back:
Good thing Coco’s paws were clean!
Now I’m ready for the binding. For those of you who commented on my last post and offered suggestions on color and fabric choices: thank you so much! I’m going to audition everyone’s ideas before making a final decision.
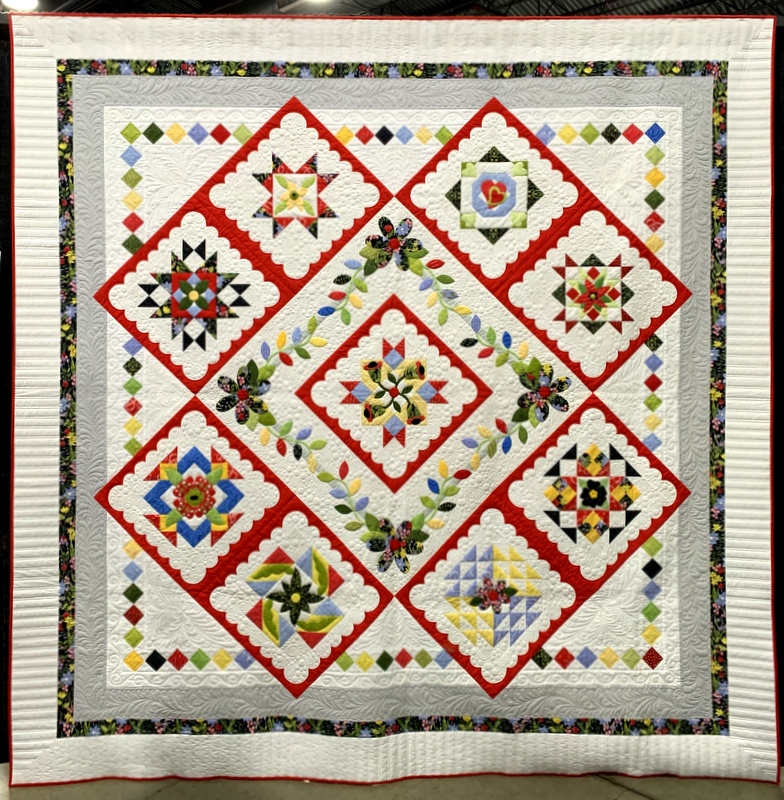
It’s time for the tenth and final installment in my Throwback Thursday series looking at quilts made in the last decade. Coming up with my choice for 2019 was easy: it was the only quilt I completed last year! Here is Give Me the Simple Life:
Give Me the Simple Life, 95″ square (2019)
The pattern is Hazel’s Diary Quilt by Shelly Pagliai of Prairie Moon Quilts. Regular readers followed the making of this quilt from my very first block (and post) in January 2018 till its completion in September 2019.
I’m very proud of this accomplishment, as I made it my goal to become proficient in needleturn appliqué during the making of the quilt. It certainly provided ample opportunities for practice! Longarm quilter Kazumi Peterson did the amazing quilting.
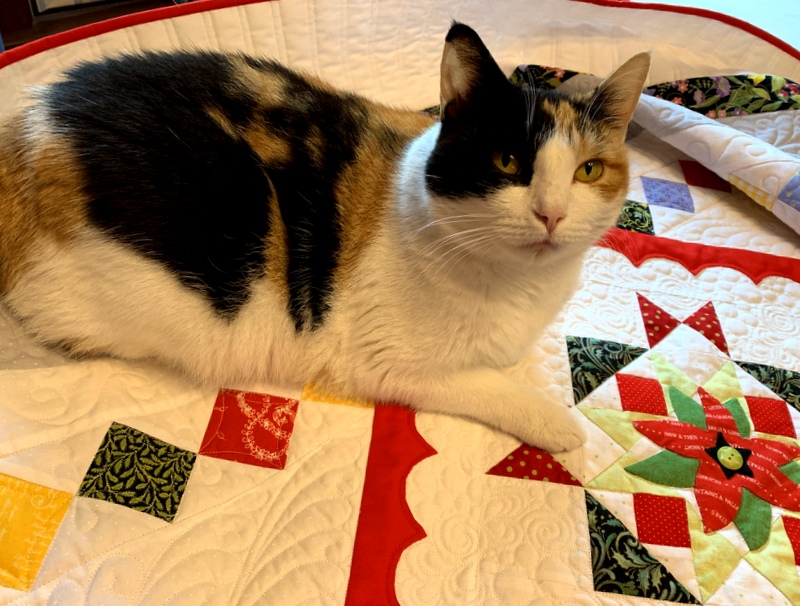
Approved by Coco the Cat Inspector
Give Me the Simple Life will be on display later this month at Northwest Quilters’ 46th annual show, “A Festival of Quilts,” in its new venue, Camp Withycombe, in Clackamas, Oregon. Dates are Friday and Saturday, March 20 and 21. If you are in the neighborhood, please stop by. There’ll be over 300 quilts on display and lots of vendors selling wonderful things (like fabric).
Thank you so much for joining me in this 10-week lookback at some of my favorite quilts!
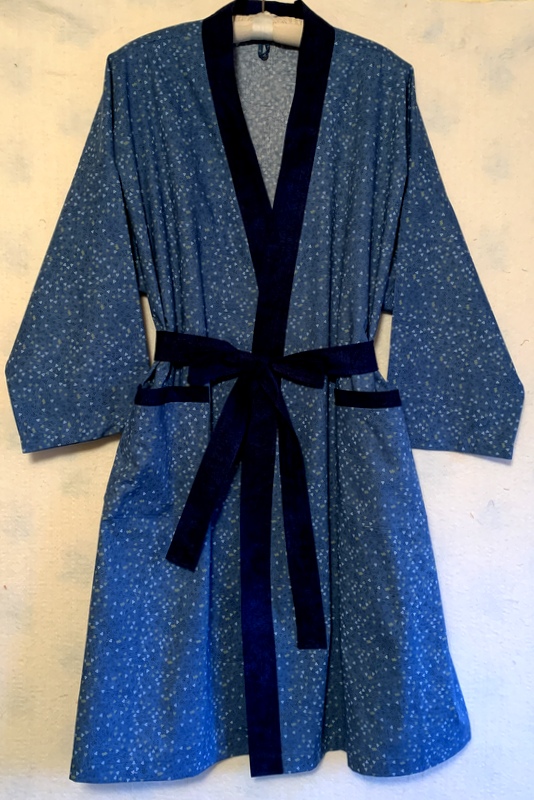
Just in time for Christmas, though it’s not a Christmas present. The one I made him several years ago was completely worn out. I’m chagrined he had to wait so long for a new one.
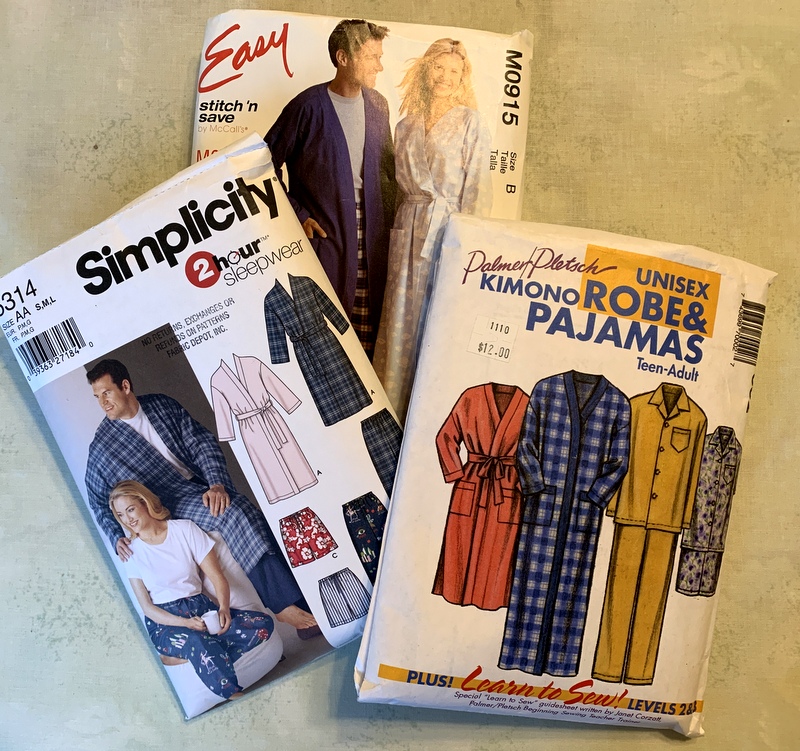
Somehow I wound up with three bathrobe patterns. The one I ended up using was the Palmer/Pletsch one (lower right), with a few modifications:
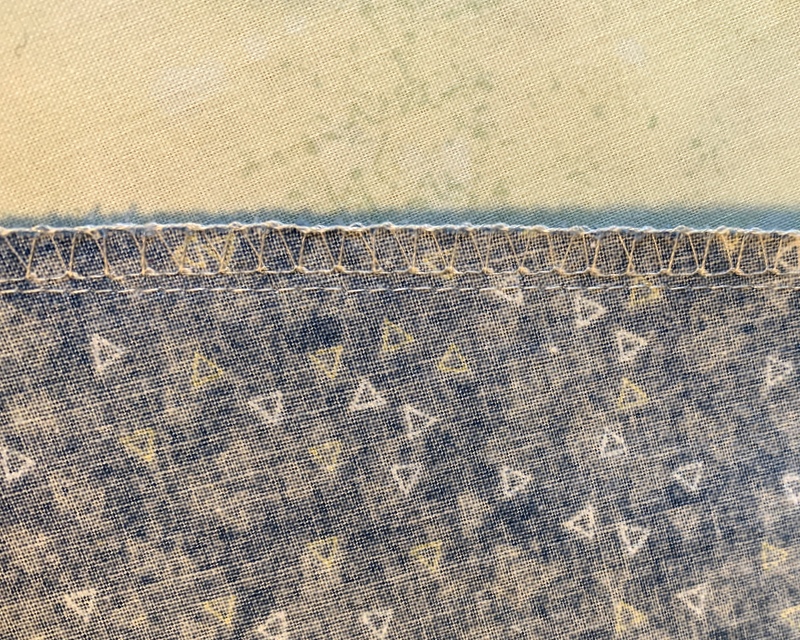
And I didn’t pull my serger out of the closet after all. I decided to try finishing the seams with the overlock foot on my Janome, a foot I had actually never used before. The results were just fine:
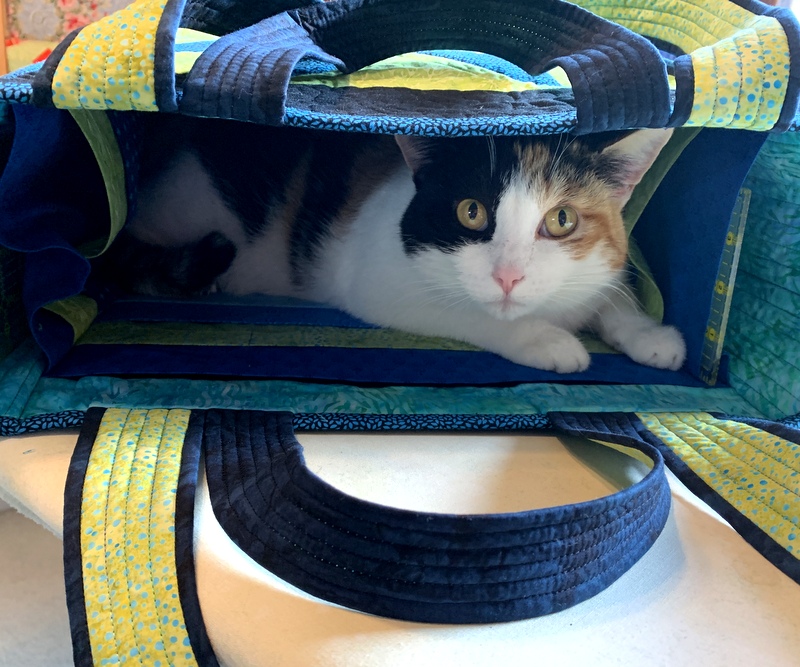
It did take longer to finish the seams this way. And this frequent visitor to my sewing room caused additional delays in the construction process:
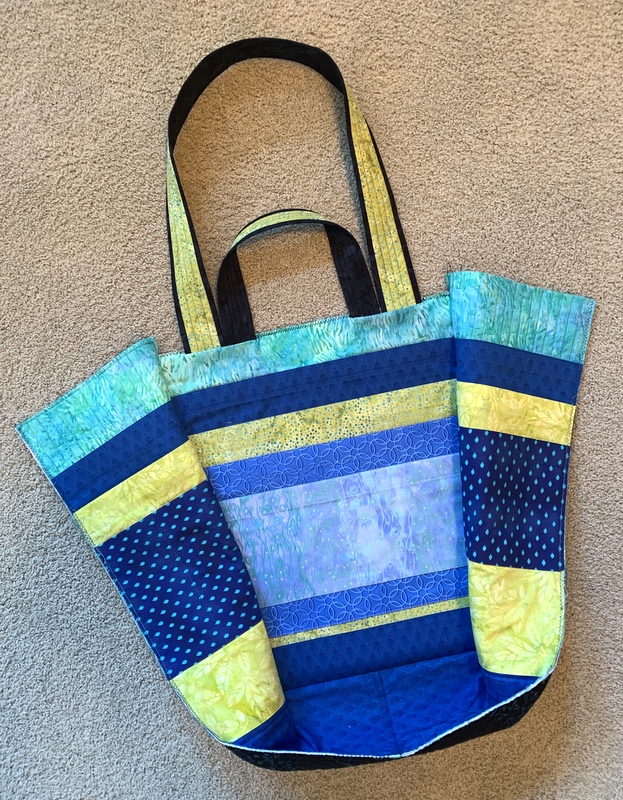
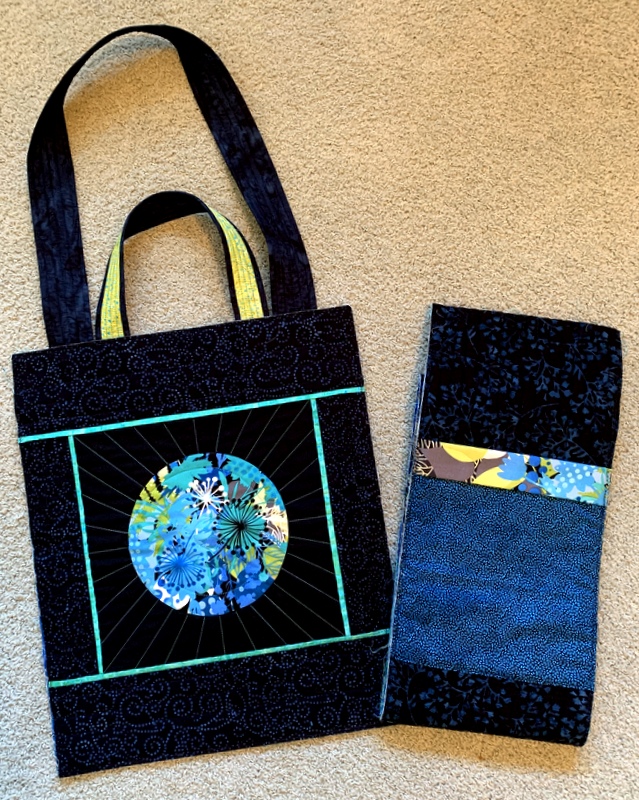
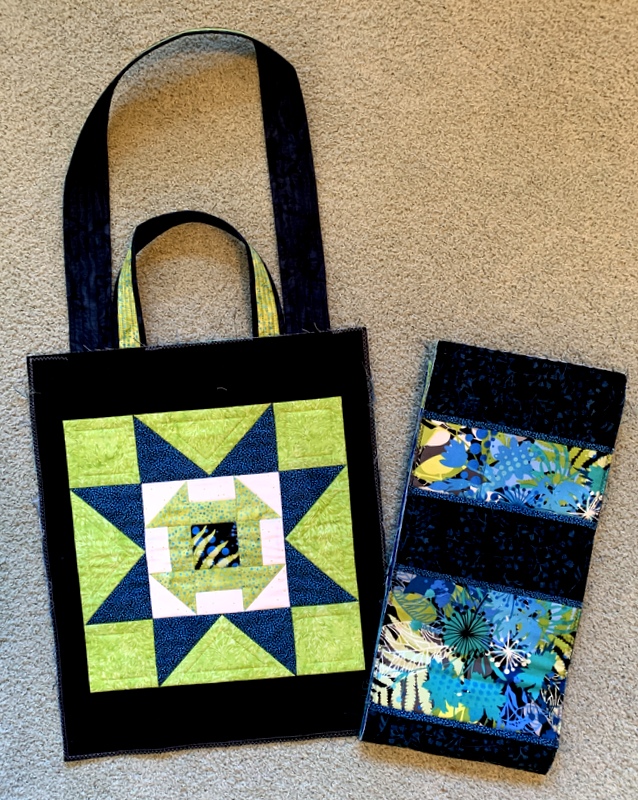
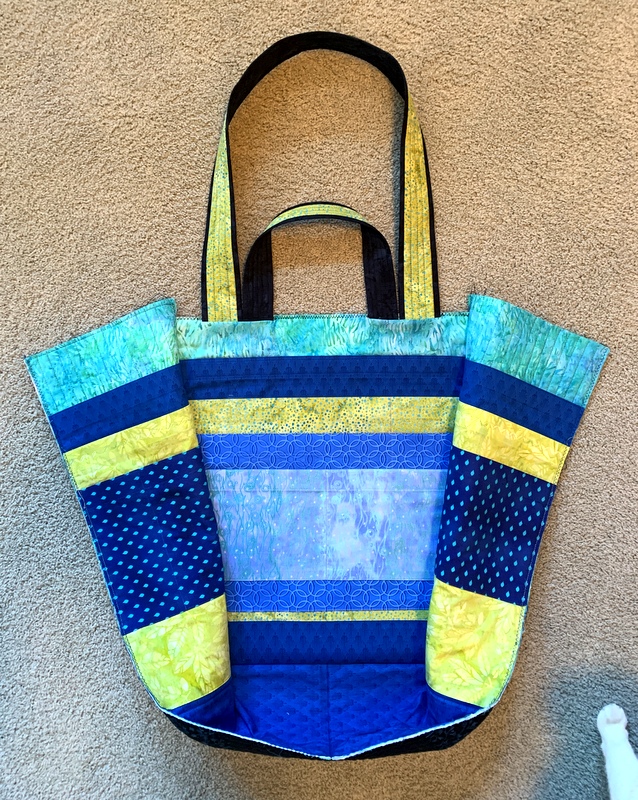
I put the finishing touches on my latest Junior Billie Bag yesterday. Take a look at #10:
I can’t decide which view I like better! The block on the left is a Sawtooth Star with a Churn Dash in the center. The block on the right features an inset circle set off by a narrow flange. It’s hard to see from the photo that I used a variegated thread of blues and greens to quilt lines radiating from the circle.
I’ve used both block designs before in other projects (including other Junior Billie Bags) because I really like to make them.
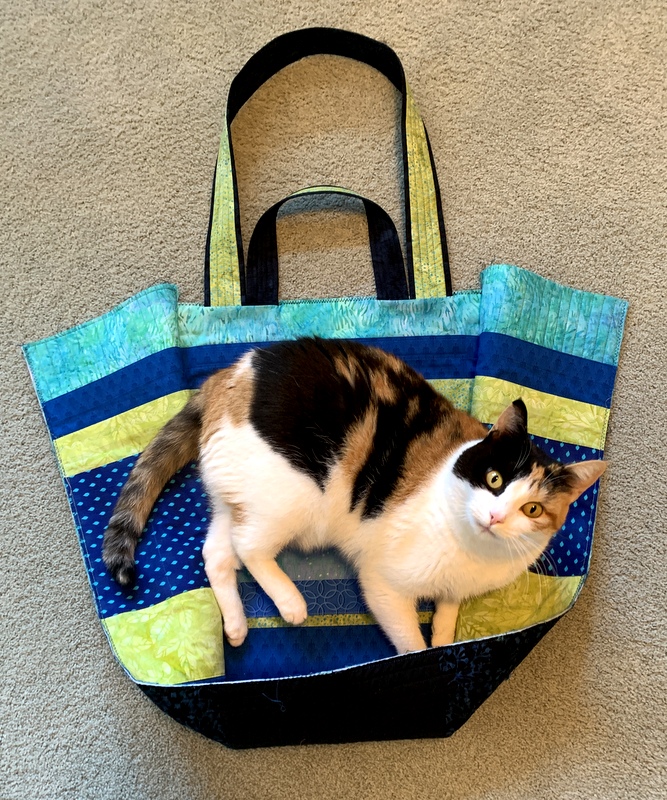
Coco the Cat Inspector approves:
She found it so comfortable that she actually took a little catnap, which is why I don’t have a picture of the inside pockets to show you just now.
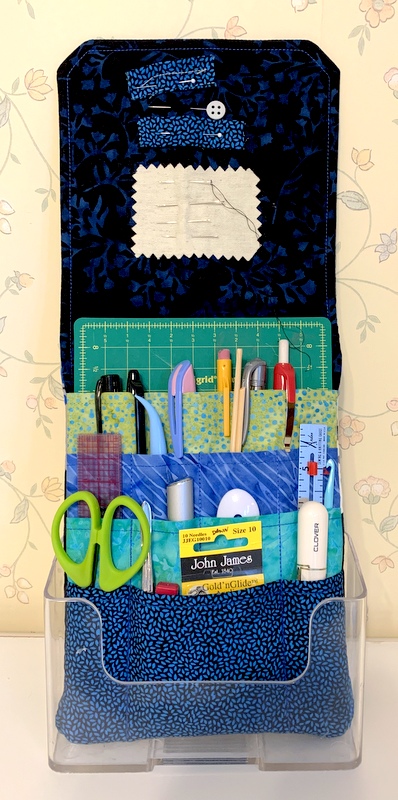
This JBB is one that I’m keeping for myself. It’s already loaded with my favorite rulers and other essential tools, as is the coordinating tool caddy I made from the Travel Case pattern from p3designs.com:
I made a few modifications, including the addition of a fourth pocket.
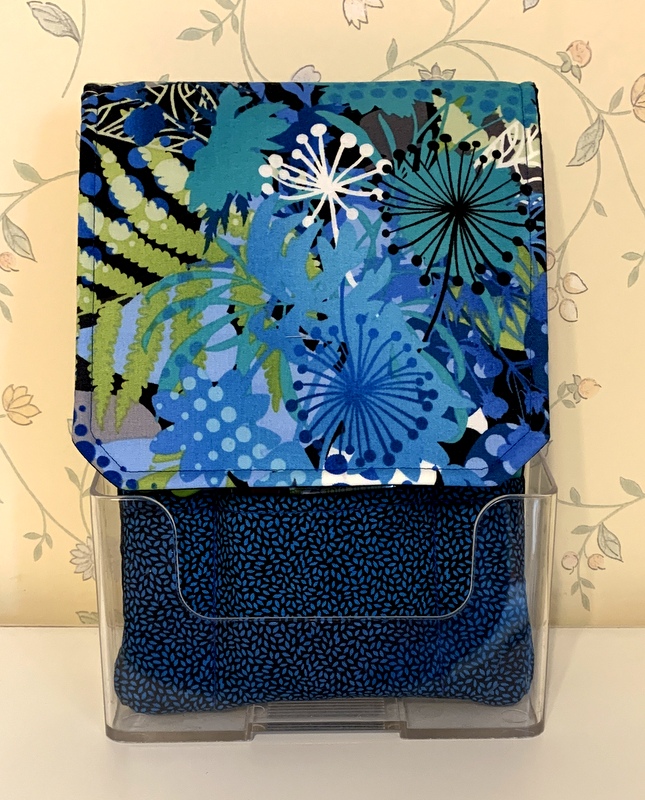
This is what it looks like closed:
I keep it in a plastic brochure rack so that it is always upright, with my smaller tools right at hand.
Still to come: the other accessories I like to make with each Junior Billie Bag, including a rotary cutter coat, a scissors case, and a 4″ square fabric box used as a thread catcher.
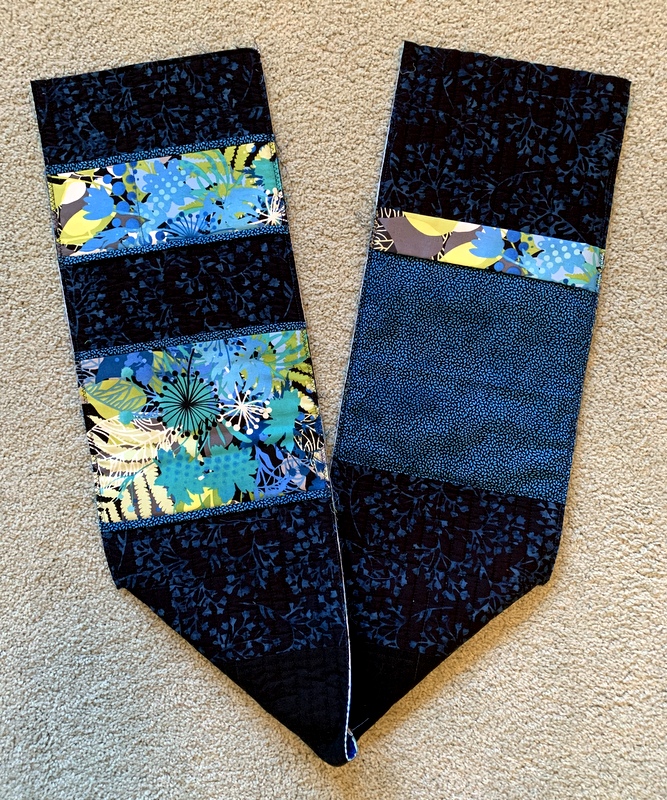
A rather cryptic title for a blog post, I know, but regular readers know what it means. My latest Junior Billie Bag in-the-making has gone three-dimensional:
As I’ve mentioned before, this is my favorite part of the process, when a series of flat panels like this . . .
. . . and this . . .
. . . and this . . .
. . . are transformed into the quintessential quilter’s tote known as the Junior Billie Bag.
Junior Billie Bags (JBBs for short) have been a frequent topic on my blog since I started teaching Billie Mahorney’s design three years ago. I have been asked many times about a pattern for this tote but Billie, who owns the copyright on the design, never wanted to create a pattern.
Teaching her design in a hands-on class is by far the best way to go because I can share tips and techniques that have come to me through experience and also troubleshoot problems my students may encounter, just as Billie did when she was teaching. I’m so sorry that quilters across the country and beyond who have seen pictures of various JBBs on my blog don’t have the opportunity to create one of their own.
As I was snapping photos for this post, a little white paw made its way into the frame:
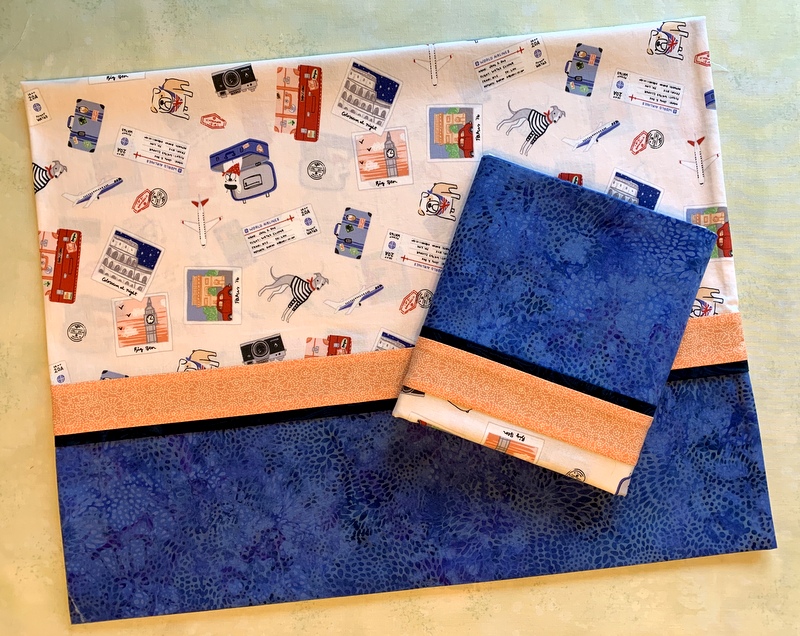
When I spotted this whimsical travel-themed fabric at a quilt shop in central Oregon last year, the first person I thought of was my friend Anna. Anna loves animals (especially dogs), France, and world travel — probably in that order.
Several years ago Anna sold her home in Portland and moved to Paris to live. Imagine that! It was a dream she had had for many years. I knew her through a mutual friend but had not seen her for some time when we ran into each other on the street just weeks before her departure. We stayed in touch after this chance meeting and a few years later, when Anna proposed a short-term house swap, my husband and I jumped at the chance.
In 2015 Charlie and I spent three weeks at Anna’s apartment in Paris taking care of her sweet cat Buddy . . .
. . . while Anna stayed at our home in Portland taking care of Empress Theodora:
The arrangement worked out splendidly. And I was lucky enough to go back to Paris in the fall of the same year with my twin sister, petsitting for Anna while she went to the United Kingdom to visit her beau, an American who had spent his professional life working in Europe.
Anna subsequently married her beau and they bought a house in France’s Loire Valley which they share with Buddy and two rescue dogs. So you can see how this fabric seems to have Anna’s name written all over it. (In fact, the travel documents on the fabric are in the name of Jane S. Doe but we can use our imaginations.)
I decided to make a pair of pillowcases with the fabric and send them to Anna in France. Months came and went while the fabric stayed in my stash. Then I learned Anna was coming to Oregon this summer for her 50th high school reunion. In no time at all I had made a pair of pillowcases, which were waiting for Anna when she arrived last week:
I tried to tone down the cuteness factor by choosing a rather masculine batik for the cuffs of the cases. After all, husband Joe has to sleep on them too!
(For those who might be interested, the fabric is from the line “Jetset Europe” by Anne Bollman for Clothworks Fabrics. I used my own tutorial to make the pillowcases.)

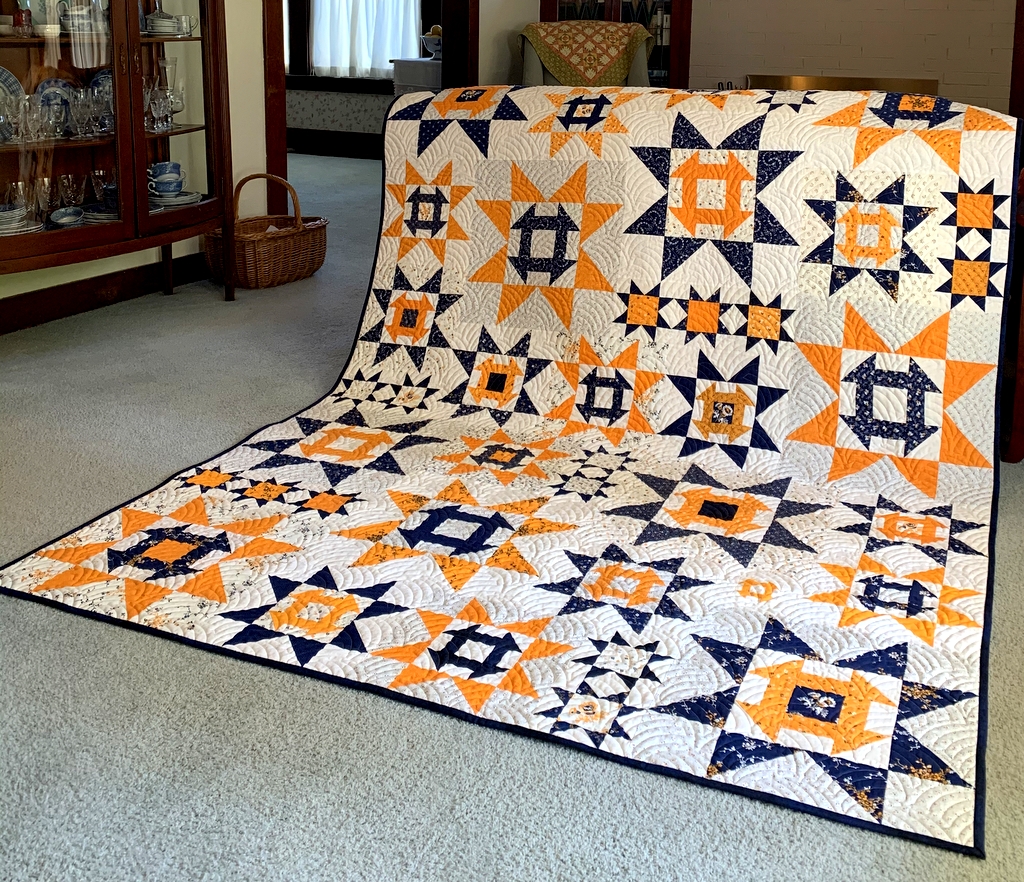
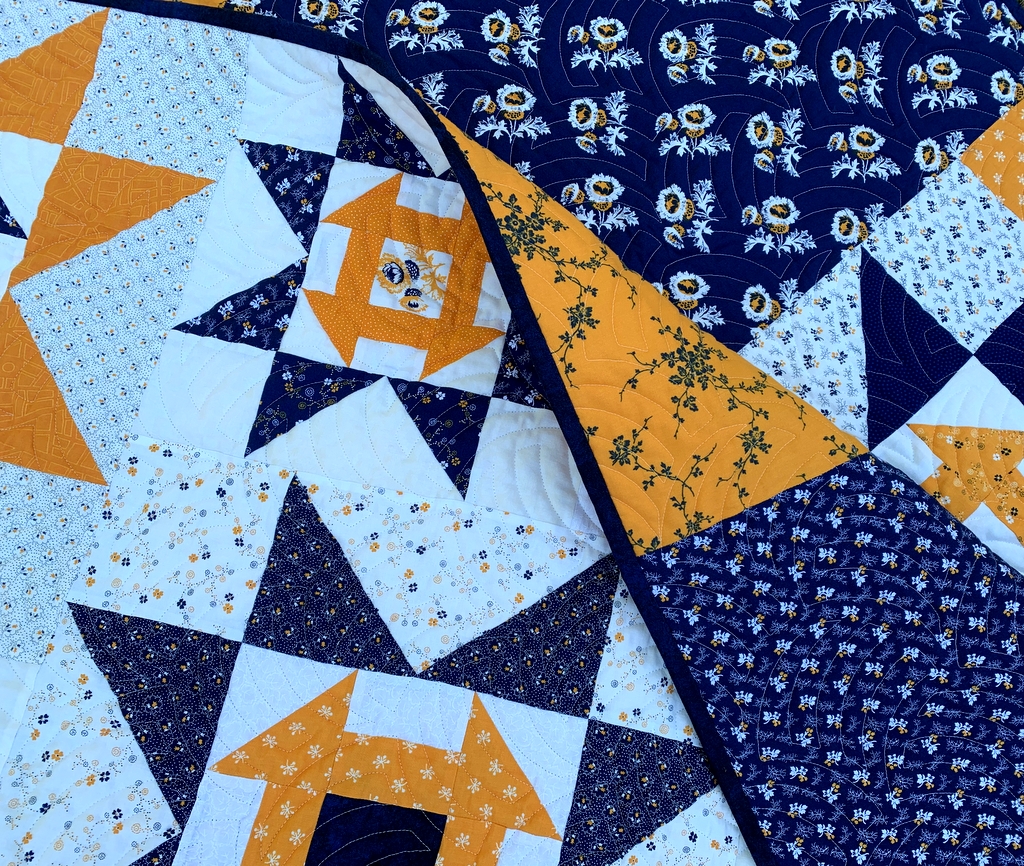
 Scattered Stars finished at 66″ x 88″.
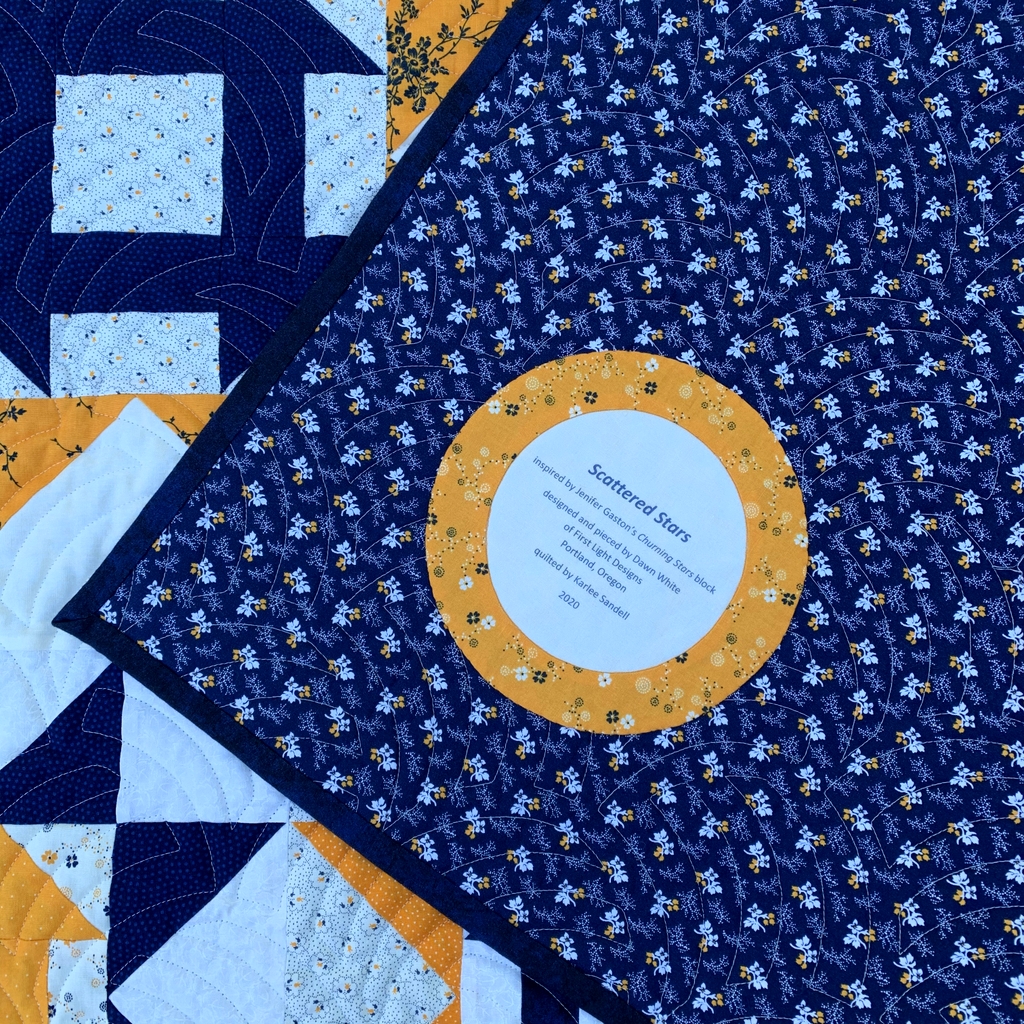
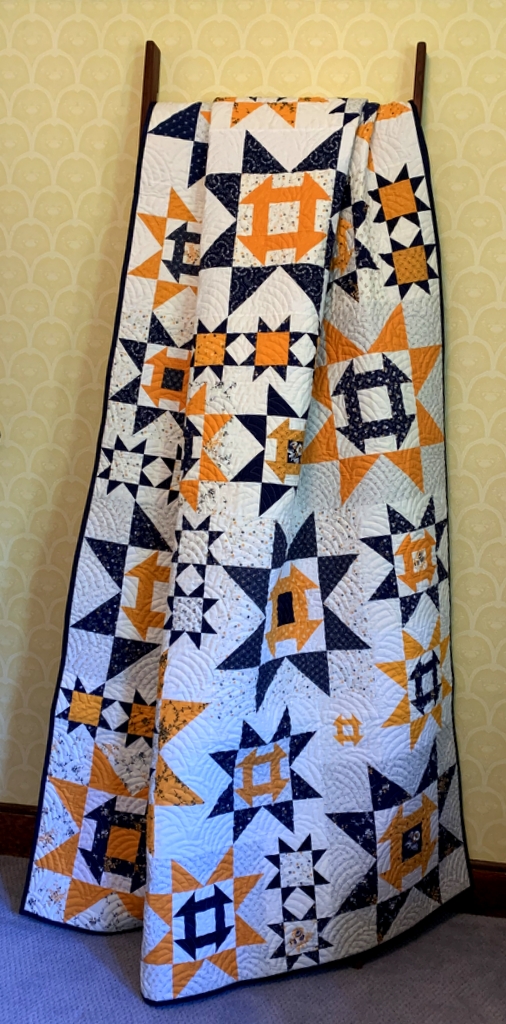 At least you get a good look at the beautiful quilting done by Karlee Sandell of SewInspired2Day.