Sashaying Around

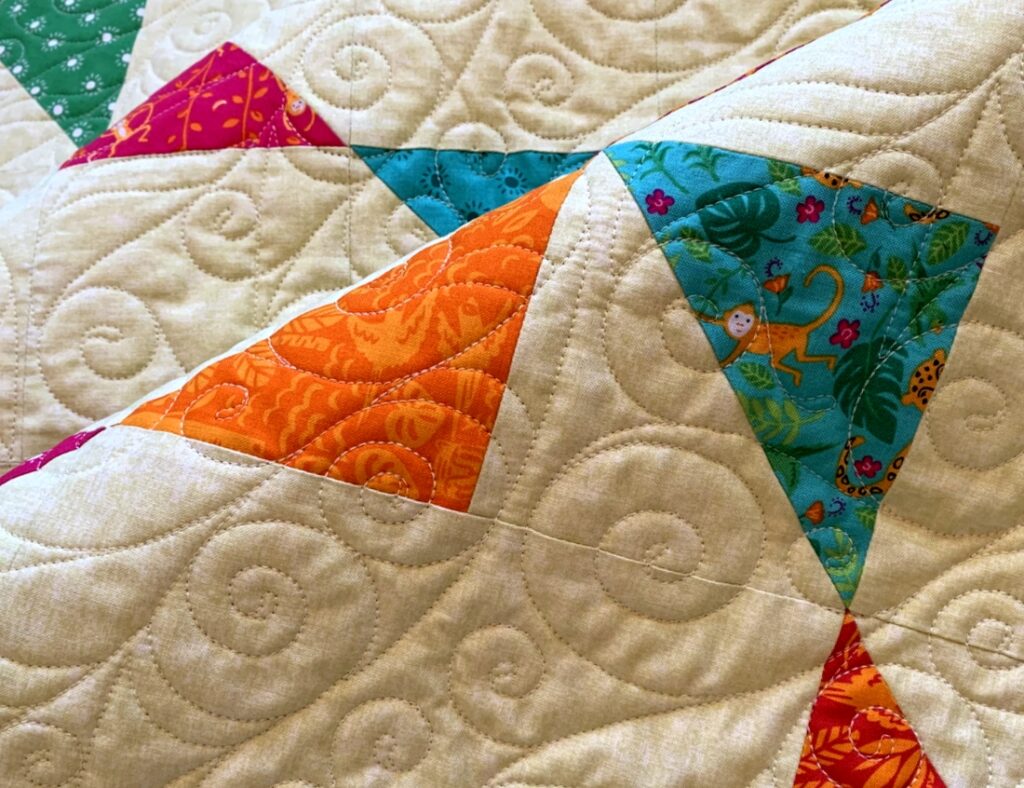
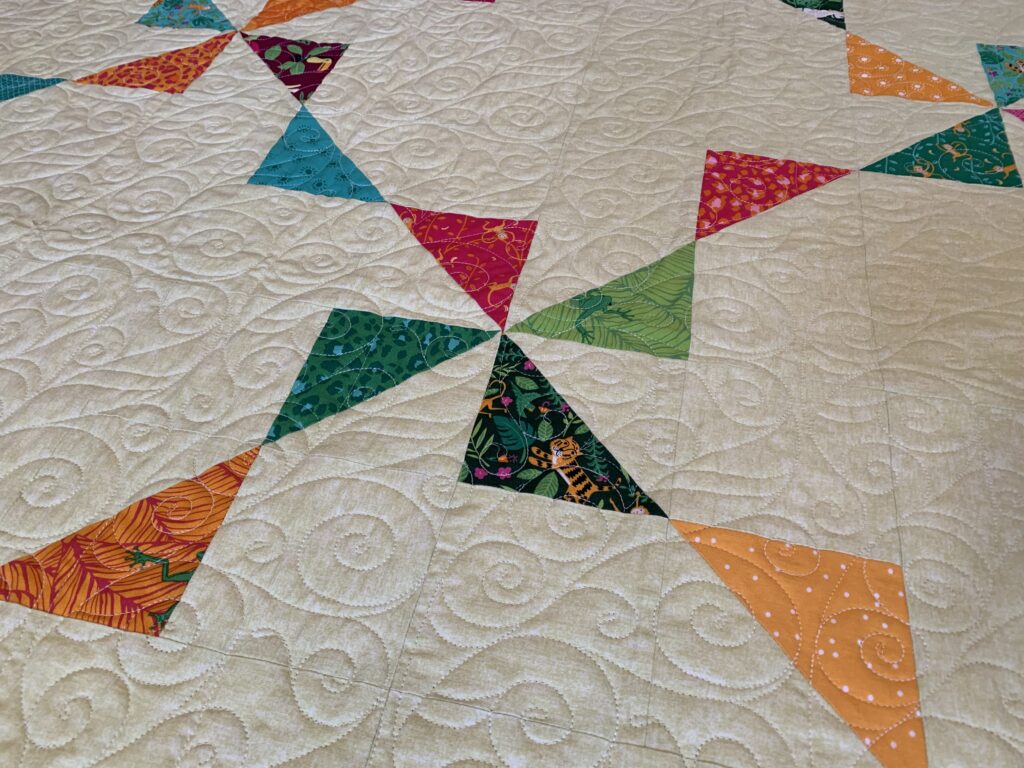
Who’s doing the sashaying? That would be moi, doing the happy dance because my latest quilt is just back from the longarmer. Karlee at SewInspired2Day quilted it with an edge-to-edge design called “Sashay” by Anne Bright. Take a look:
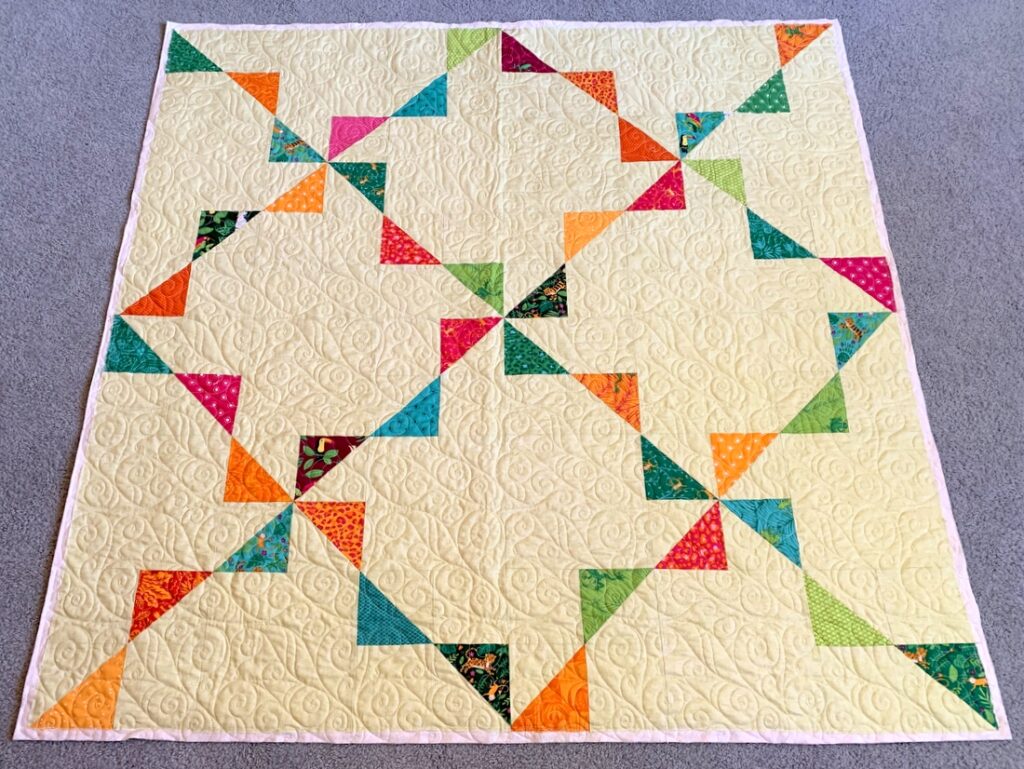
For such a small quilt (48″ square), there’s a huge amount of negative space — so much so that any quilt motif was bound to stand out. I was looking for a design with loops and swirls that would provide a pleasing counterpoint to all of those straight and diagonal lines in the print fabrics. “Sashay” fits the bill nicely. I asked Karlee to match the quilting thread to the pale green background fabric so the quilting would compliment the quilt design without overpowering it. I’m delighted with the result.

Here are a few close-ups for your viewing enjoyment:
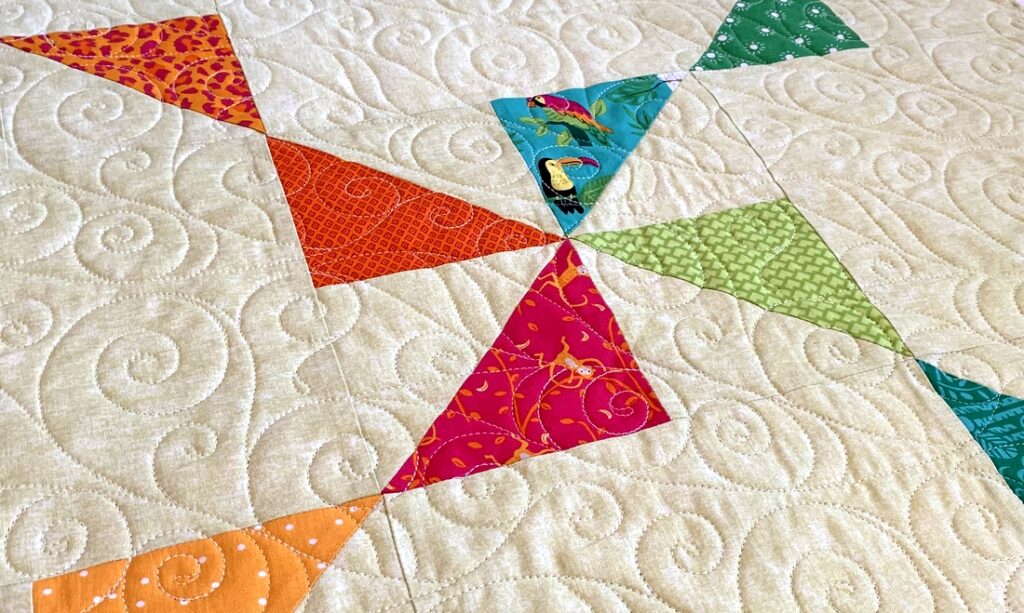


If you’ve just tuned in, those fabrics are from the “Jungle Paradise” line designed by Stacy Iest Hsu for Moda Fabrics. The quilt pattern is a freebie from Melissa Corry called State Fair.

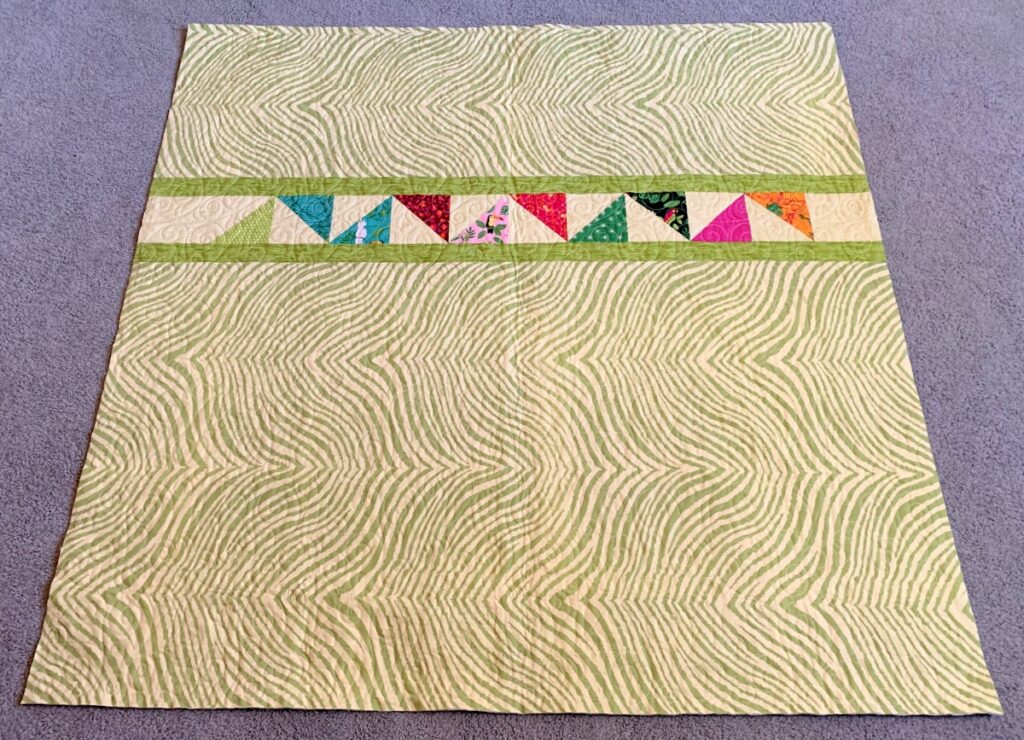
Here’s a look at the back of my quilt:

When I turned the quilt over to Karlee I asked her to extend the quilting about a half-inch beyond the edges of the quilt top. The reason? With no border on this quilt, I knew I’d have to be very careful when trimming the excess batting and backing fabric to leave enough so that no points are cut off the triangles when the binding strip is added. Having the quilting stitches go all the way to the very edges of the fabric (and beyond) helps keep the edges flat, making it easier to trim the quilt and add the binding.

If you look at the top photo you’ll notice I didn’t trim to the very edges of the quilt. I left a half-inch margin all around. Now that I’ve measured and know that the quilt is square all around, I’ll trim most of that extra off, leaving just an eighth of an inch because I’m going to make my binding finish at 3/8″ instead of my usual quarter inch.

This is actually the second time I’ve chosen “Sashay” for a quilt. Back in 2017, longarmer Sherry Wadley used that motif on a baby quilt I made for my great niece Selene. You can see Selene’s quilt here.

With all of the Major League Baseball playoff games under way, I’m eager to get the binding sewn to the front so I can settle down in front of the TV with the Dear Husband and handstitch the binding to the back while watching to see which teams continue their advance to the World Series.



Posted in State Fair quilt pattern, update | 6 Comments

Zingy Zebra Stripes

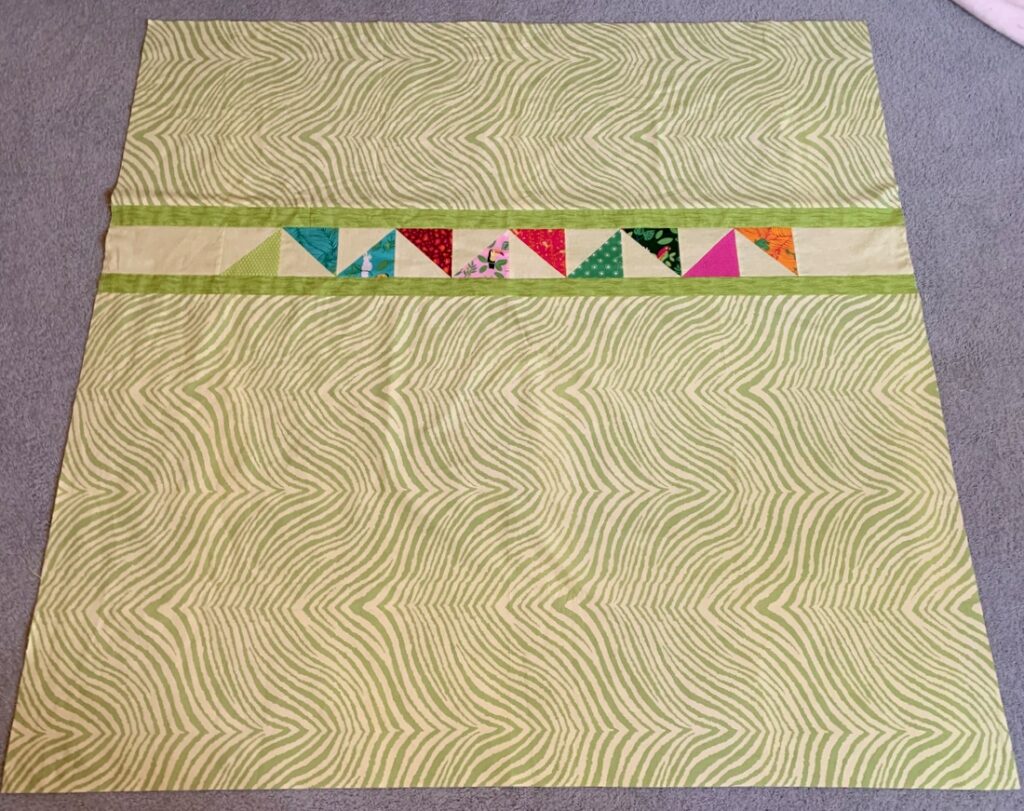
As promised, here’s a shot of the backing of my current project:

You will recall that the front features glimpses of wild animals and birds frolicking in the jungle:

Didn’t I tell you I had the perfect fabric in my stash for the backing? I hope you agree! I’ve had this green zebra stripe fabric for — oh, at least a dozen years. I’ve used it in two other projects and have enough left for at least a couple more. That’s because after buying one large-ish piece, I found it for sale somewhere else and on impulse bought the rest of the bolt. It was a good impulse, right?

For those of you who like to know such things, the backing fabric is from the Peyton Collection designed by Anna Griffin for Windham Fabrics. I just checked her website, AnnaGriffin.com, and it appears she isn’t designing fabrics now. That’s probably a good thing for my pocketbook because if she were still designing fabrics, I’d be buying them.

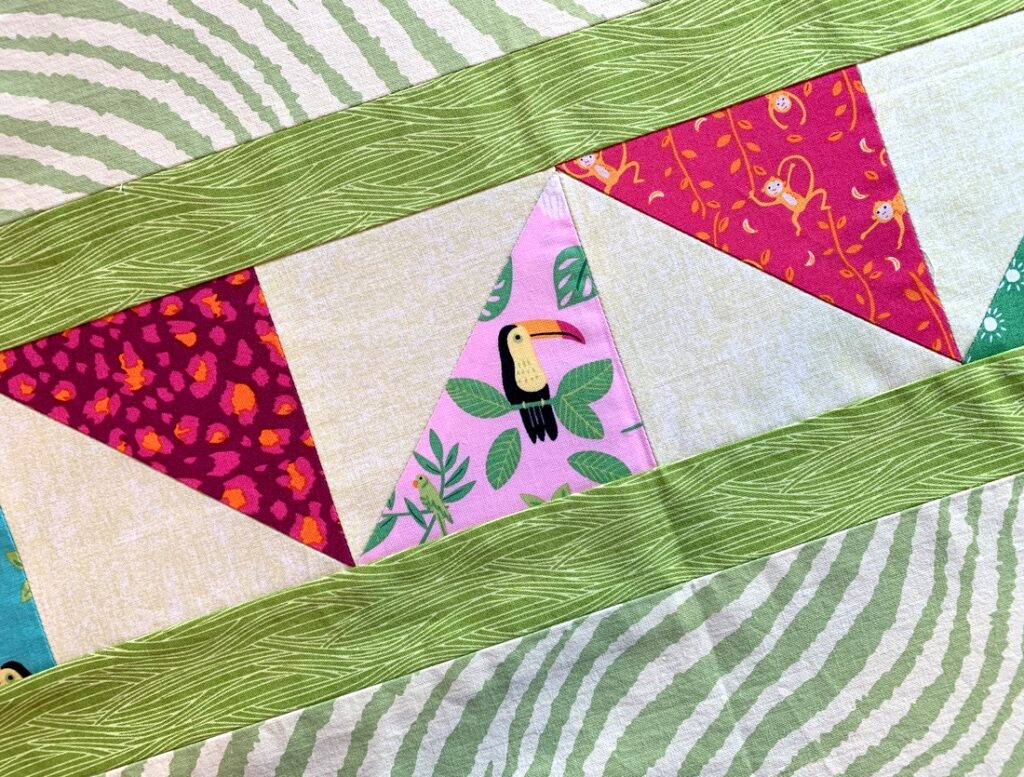
On the back I added a row of leftover half-square triangles (HSTs), including one with a pink background that didn’t seem quite right for the front. Here’s a close-up:

The HSTs are separated from the zebra stripes by a stripy green print that makes me think of blades of grass. I’m going to bind the quilt with this same fabric, cut on the bias. I think it will add a bit of zing to both the front and back of the quilt.

Speaking of front and back, they are ready for the longarm quilter. All those straight lines and angles in the quilt top are telling me the quilt motif needs to incorporate curves and circles. I’m thinking “filigree.” Stay tuned!


Posted in State Fair quilt pattern, update | 4 Comments

Changing Horses Midstream

There must be a quilting equivalent to that expression but I’m leary of mixing my metaphors. And, metaphorically speaking, I didn’t really change horses midstream. Instead I said “Whoa!” and pulled them to a halt.

You already know that I spent hours and hours in front of my design wall arranging the blocks on my current project, nine large blocks making up a fun pattern called State Fair. Each block contains 36 pieces so you know there was a lot of moving pieces around to get the balance I was seeking. I didn’t sew a single component together until I had all nine blocks laid out.

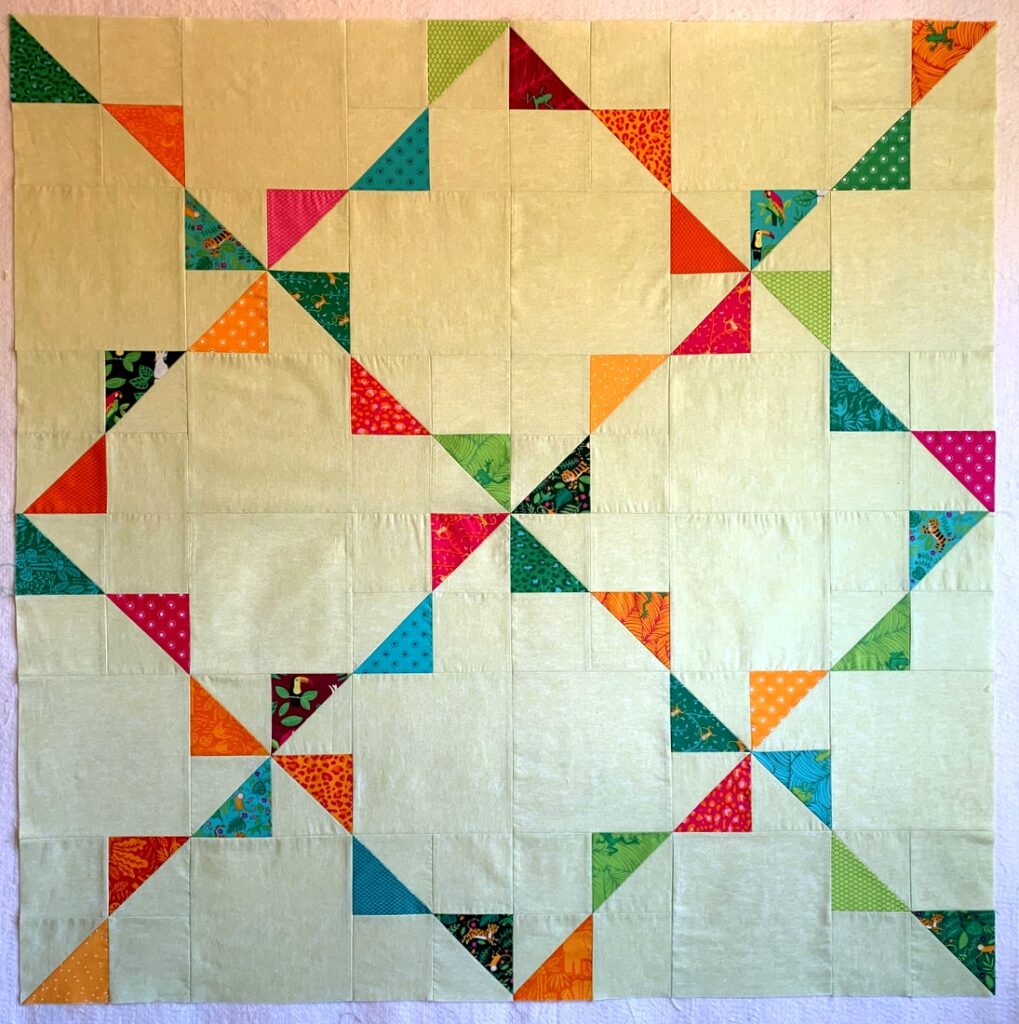
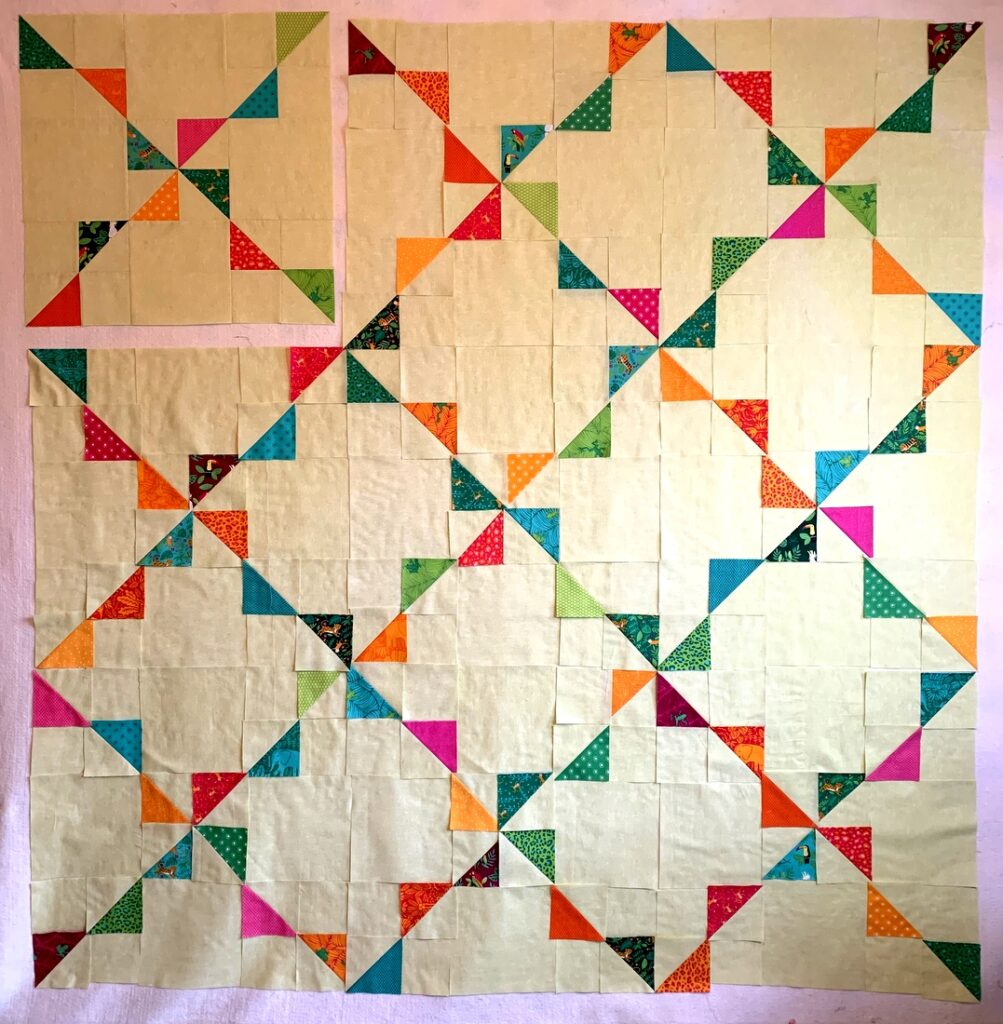
But here’s what happened: after sewing just four of the nine blocks together, I was so pleased with what I saw that I didn’t want to go any further. Behold:

What you see is a quilt top that will measure 48″ square when bound. That’s a bit on the small side for a lap quilt — but not for what I have in mind. You see, I have long wanted to make a quilt for my car (aka the Green Goddess). I think this will be the perfect size. It’s large enough for the Dear Husband to throw across his lap on a road trip but small enough to fold up easily and toss in the back seat. And in a pinch it could double as a seat cushion at a baseball game.

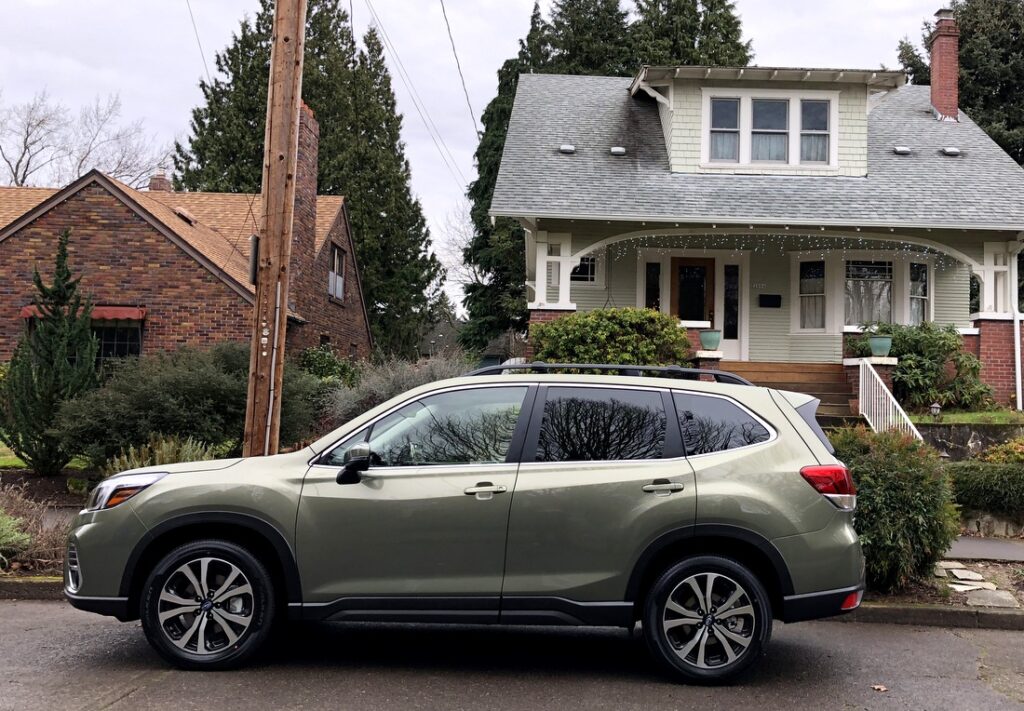
Here’s another bit of good news:  in my fabric stash I found the perfect fabric for the back. I’ll be back soon to show you. In the meantime, here’s a shot of the Green Goddess when she was brand new (January 2019):

You’ve probably already noticed:  green house, green car. And soon: a green quilt for the green car.


Posted in family, State Fair quilt pattern, update | 4 Comments

Pinwheel Palooza

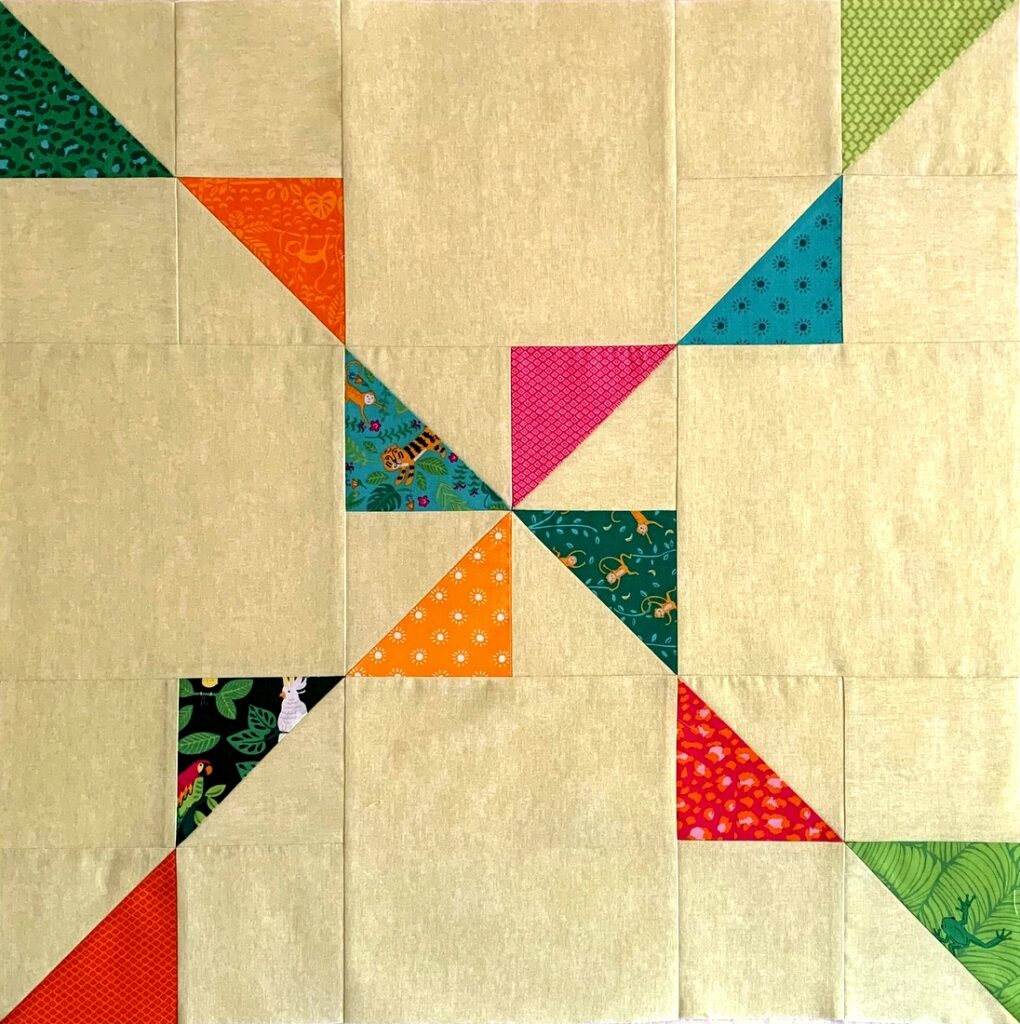
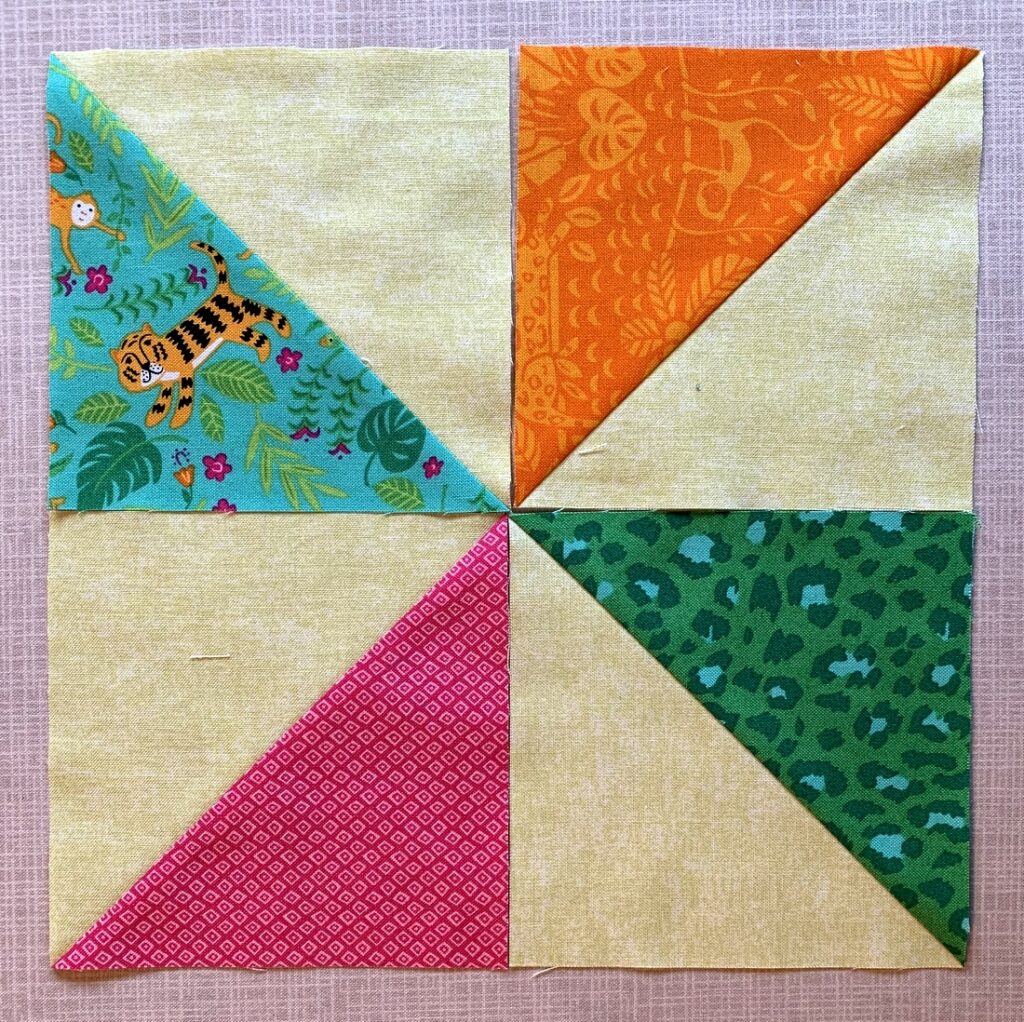
I’ve been spending a lot of time in front of my design wall over the last week arranging (and rearranging) the blocks of my current project. If you’ve been following my progress, you know I’m making the pattern State Fair using a whimsical line of jungle-inspired fabrics. Today I finally stitched the first of nine blocks. Have a look-see:

I started with one block, essentially a nine-patch with a pinwheel in the center. After deciding the pinwheel should feature two animal prints, I filled out the rest of the block trying to find just the right balance of prints, colors, and values.

Every day I would station myself in front of my design wall and, beginning with the pinwheel in the center of each block, start playing with fabric combinations. The goal was to make the combos look spontaneous and random but for me it was a painstaking process. (I knew it would be; I love scrappy quilts but making them is not my strong suit.)

Working initially just with the prints in the fabric line, I wound up limiting the number of dark prints and eliminating the lightest ones because the latter looked washed out against the light green background fabric. Dipping into my stash I pulled out four medium blenders — two oranges, a green, and a fuchsia — to make replacement HSTs (half-square triangles).

Here’s what the design wall looks like right now:

Oho! I just spotted two HSTs turned the wrong way. It is sooo easy to do. I’m going to be extra watchful when sewing these blocks together to keep them properly oriented.


Posted in update | 5 Comments

Fair Play

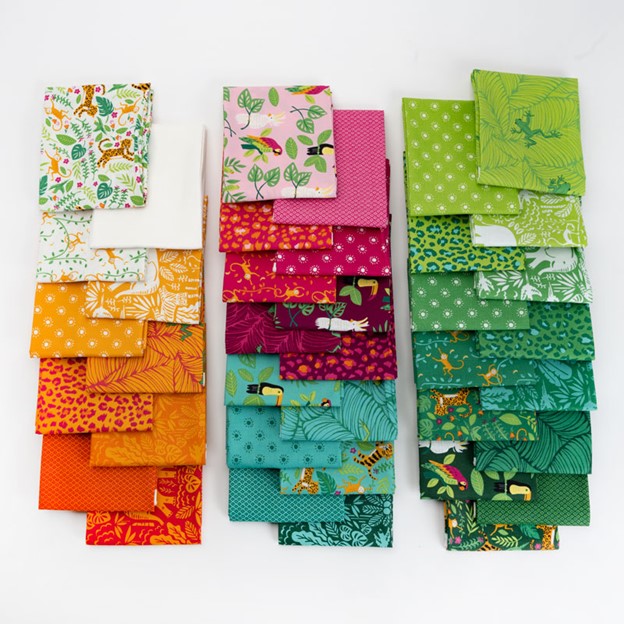
That’s “fair” as in State Fair, a new — and free! — pattern from Melissa Corry of Happy Quilting, paired with “Jungle Paradise,” Stacy Iest Hsu’s new fabric line for Moda Fabrics:

Seriously, is this not a match made in Quilt Heaven? Just look at those animals — exotic birds, frogs, monkeys, tigers, elephants, and more — frolicking in the jungle against vivid backdrops of fuchsia, turquoise, orange, green, and magenta. Can’t you just see them frolicking across the surface of a quilt?

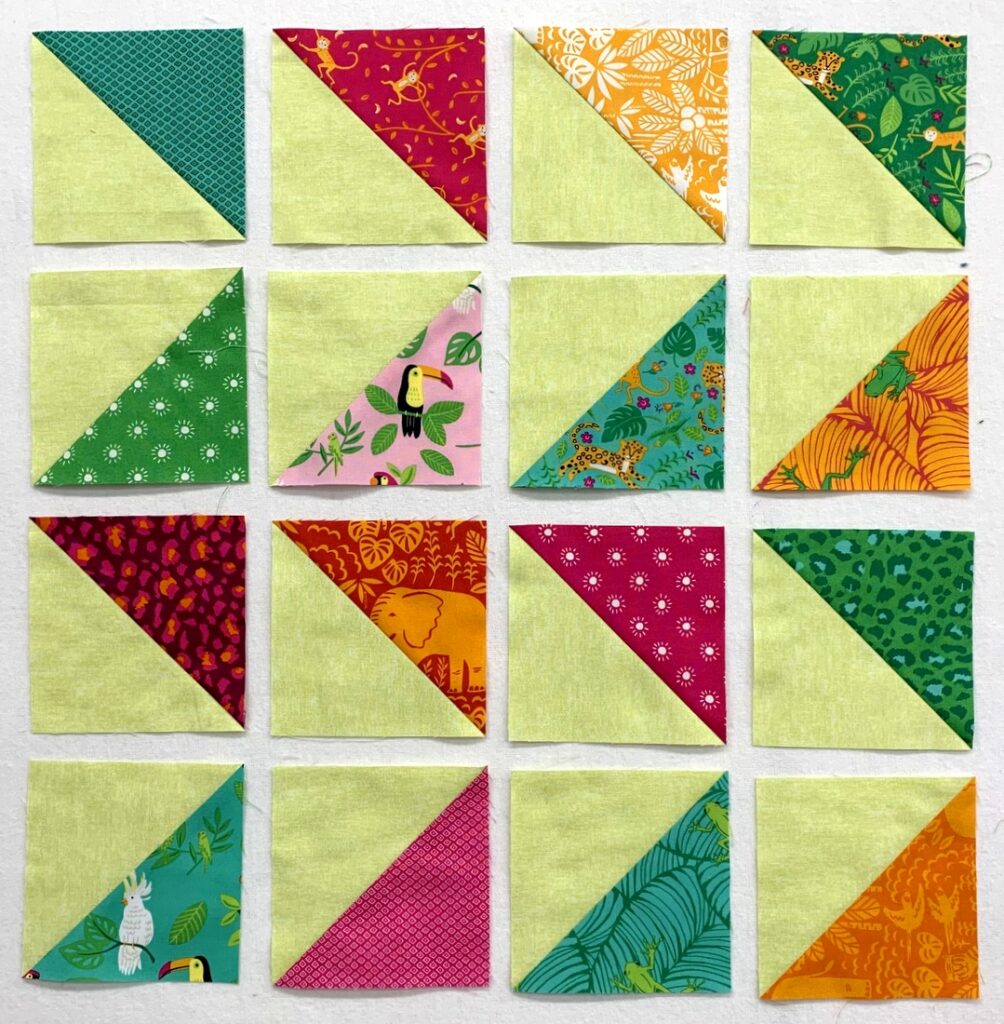
Just a few more pairs of Half-Square Triangles (HSTs) to make and trim . . .

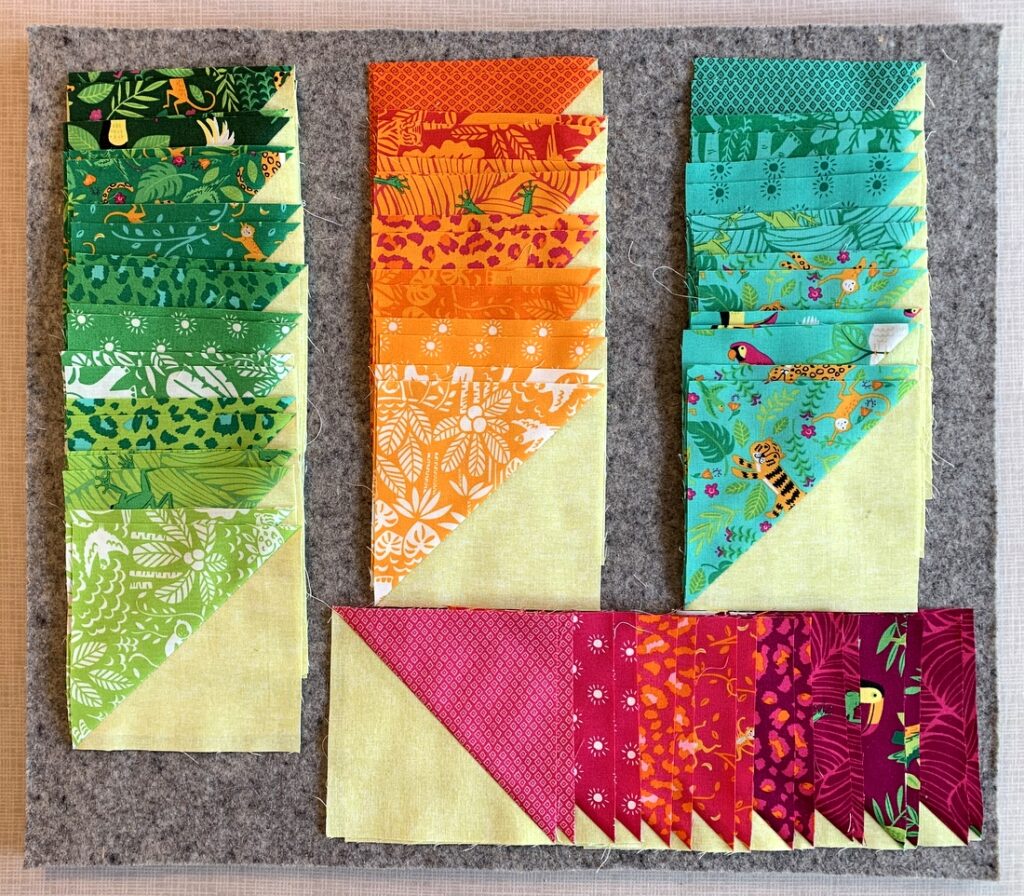
. . . and then I’ll be ready to start arranging them on my design wall. Truth be told, I’ve already been playing with these blocks, sorting them by color family and arranging them from medium dark to medium light in value:

I started with a set of 10″ squares of the entire line (called a Layer Cake by Moda) and cut two 5″ squares from almost every fabric. That yielded around 120 HSTs. Combined with other squares of background fabric, I only need 48 of these HSTs to make a 48″ square baby quilt. But I’m going for a larger size because I have a bigger kid in mind for this quilt. (That would be moi.)

Best of all, I still have a whole set of 5″ x 10″ strips left over (plus a few 10″ squares I didn’t use) so I can still make a baby quilt if the need arises. Back to playing — er, sewing!


Posted in update | 3 Comments

Stepping into the Jungle

Step 1: Spot a new line of fabric, “Jungle Paradise,” by Stacy Iest Hsu for Moda:

Think to yourself: “I must make something with these fabrics!” Even though you rarely buy pre-cuts, order a layer cake — 42 10″ squares representing every fabric in the line.

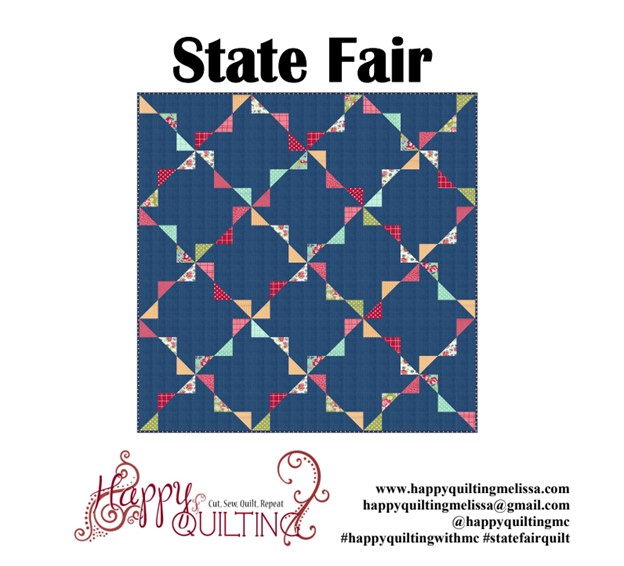
Step 2: Spot a free pattern on Instagram called State Fair by Melissa Corry:

Think to yourself: “Wouldn’t those jungle fabrics look great in this pattern?” Decide then and there to make this quilt using those fabrics. Download and print the pattern.

Step 3: Find the perfect background fabric, a pale grassy green blender (“Cotton Shot” by Amanda Murphy for Benartex Fabrics).

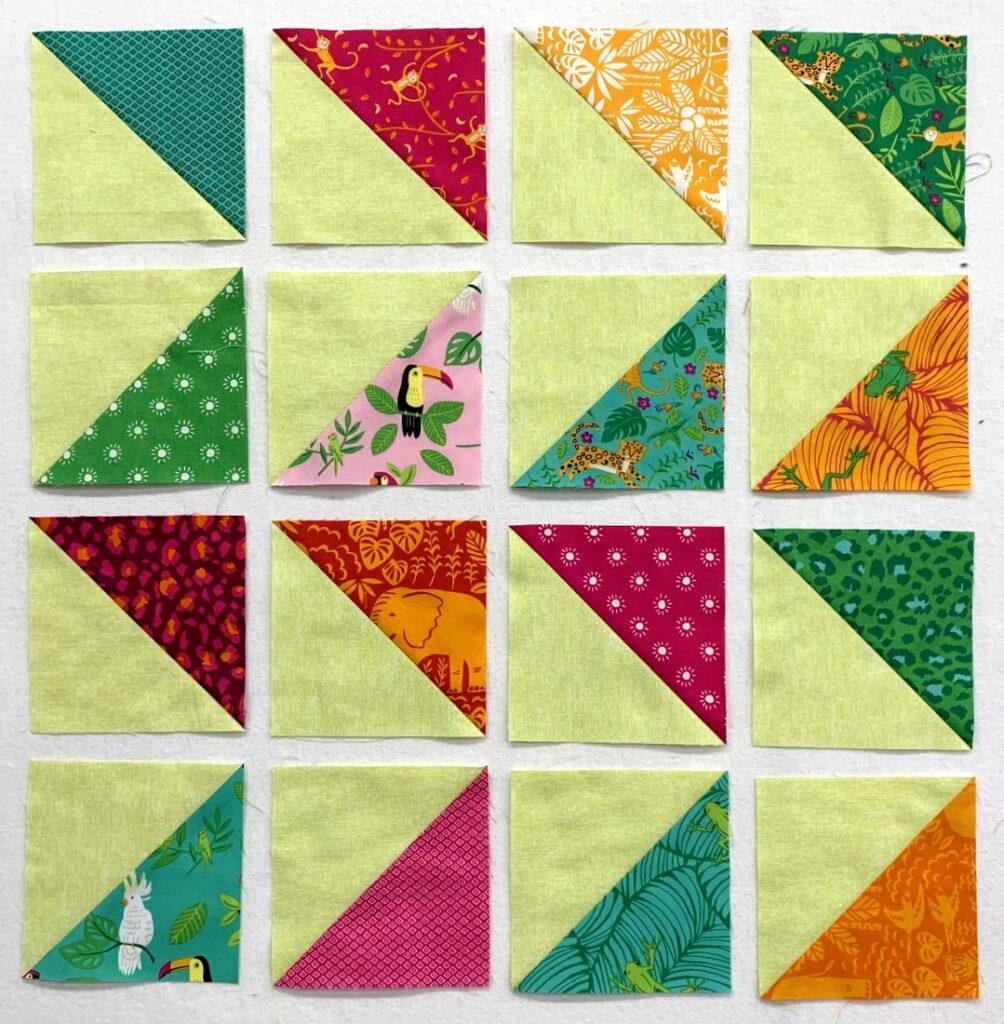
Step 4: Make a few test half-square triangles (HSTs), which will finish at 4″ square . . .

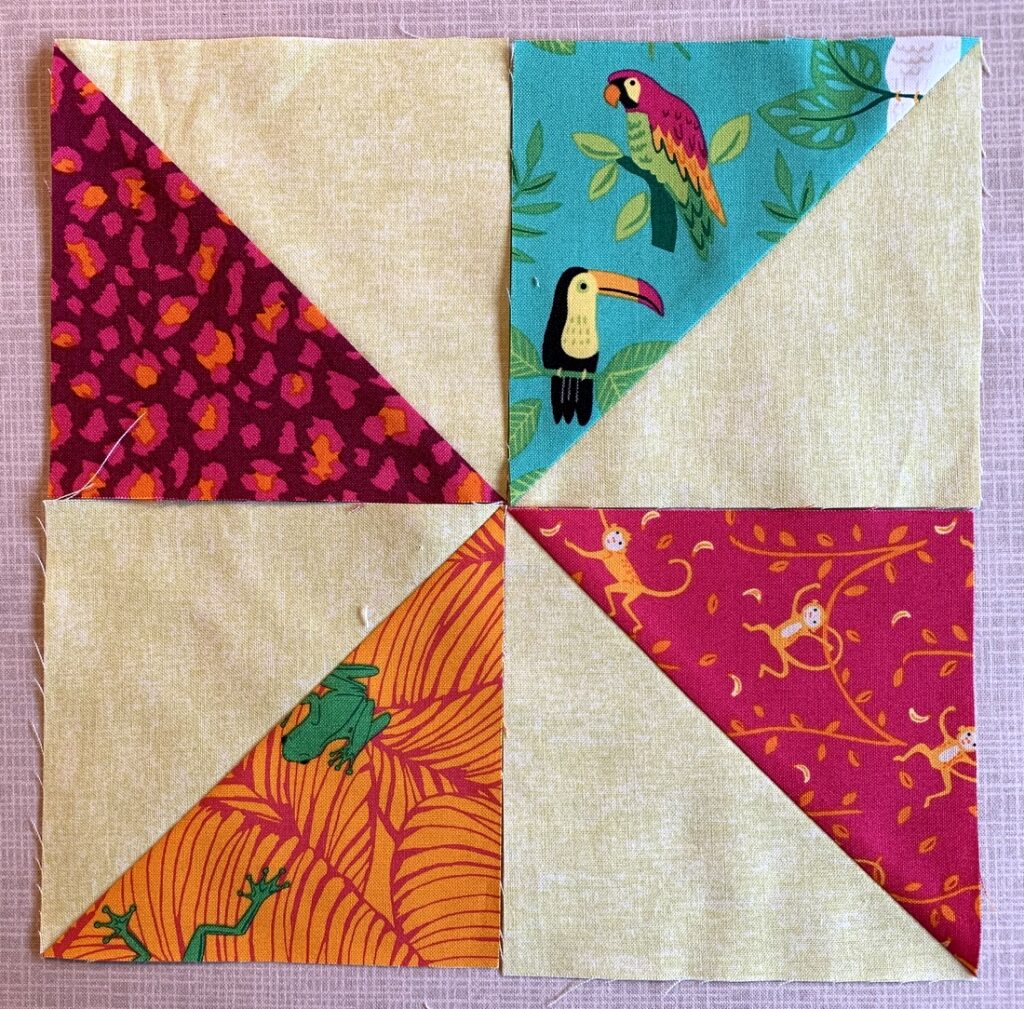
. . . and play with possible pinwheel combinations:

Step 5: Conclude that this was a good idea all around and prepare to launch into major HST (half-square triangle) production mode, knowing that playing with these whimsical animal prints and vibrant colors and textures will be making you smile the entire time.


Posted in update | 6 Comments

Sea Sampler Block Revision(s)


I’m much happier with this block in my Sea Sampler project after replacing the lower left corner of the block. If you read my previous post, you know that vertical seam was angling to the right. It’s straight now. Funny thing, though:  it was sewn straight the first time. Turns out it was the seam directly to the right, the one connecting the bottom left and bottom center sections, that was off.
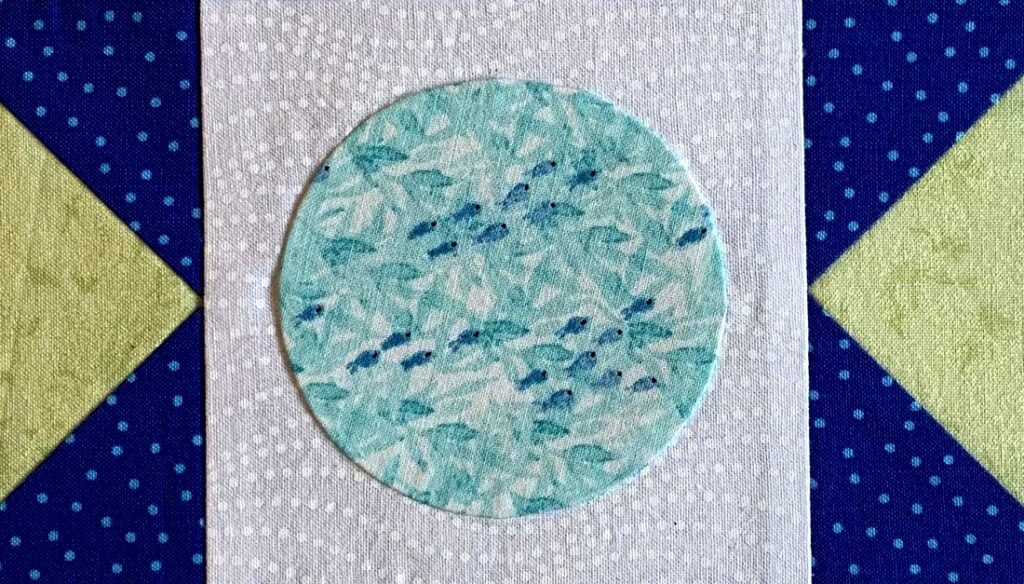
I made one more change to the block: the seam of the inset circle is now pressed toward the center of the circle:

It was originally pressed away from the circle, making the circle lie very flat within the square. When the seams of an inset circle are pressed toward the center, it raises the edges of the circle slightly, making it look appliquéd.

Here’s the photo from my previous post:

Can you see the difference?


Posted in Block of the Month (BOM), Quilt-Along, sampler quilt, update | 5 Comments

Labors of Love on Labor Day

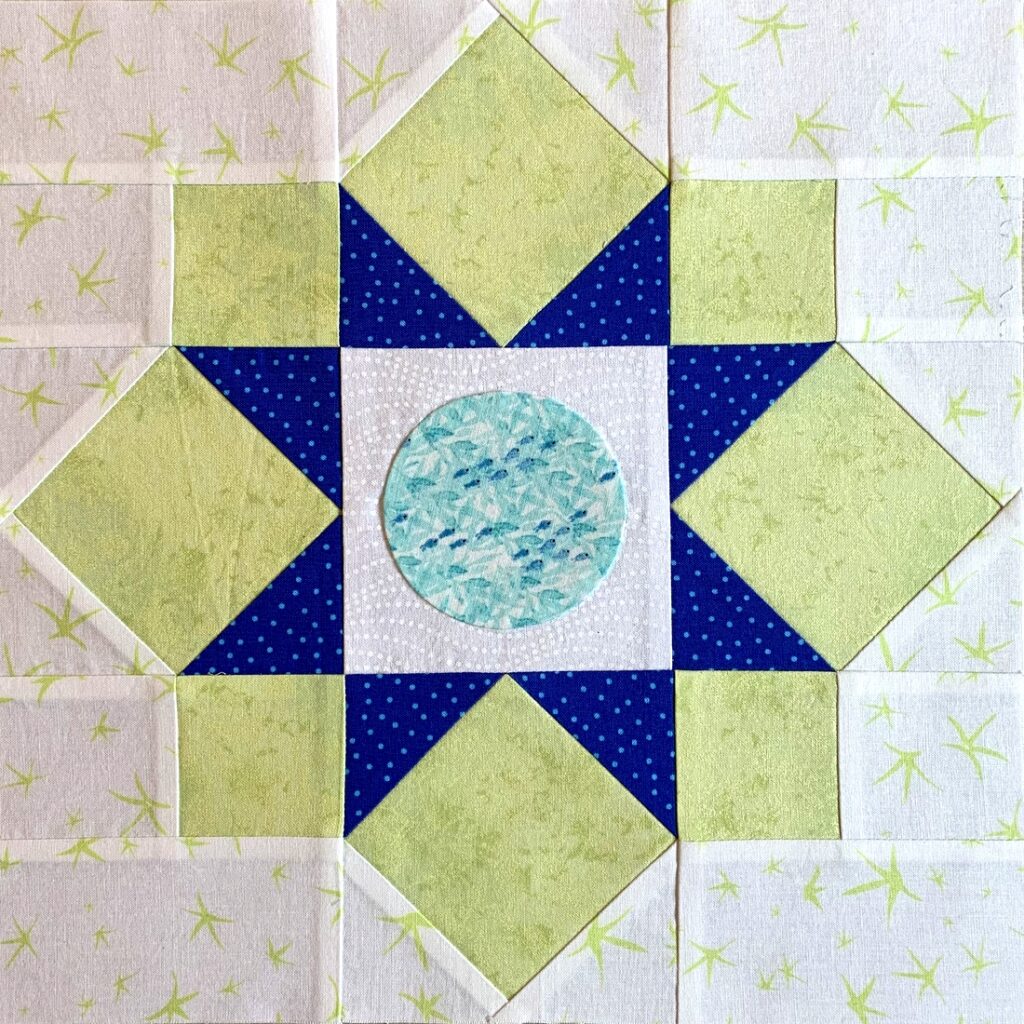
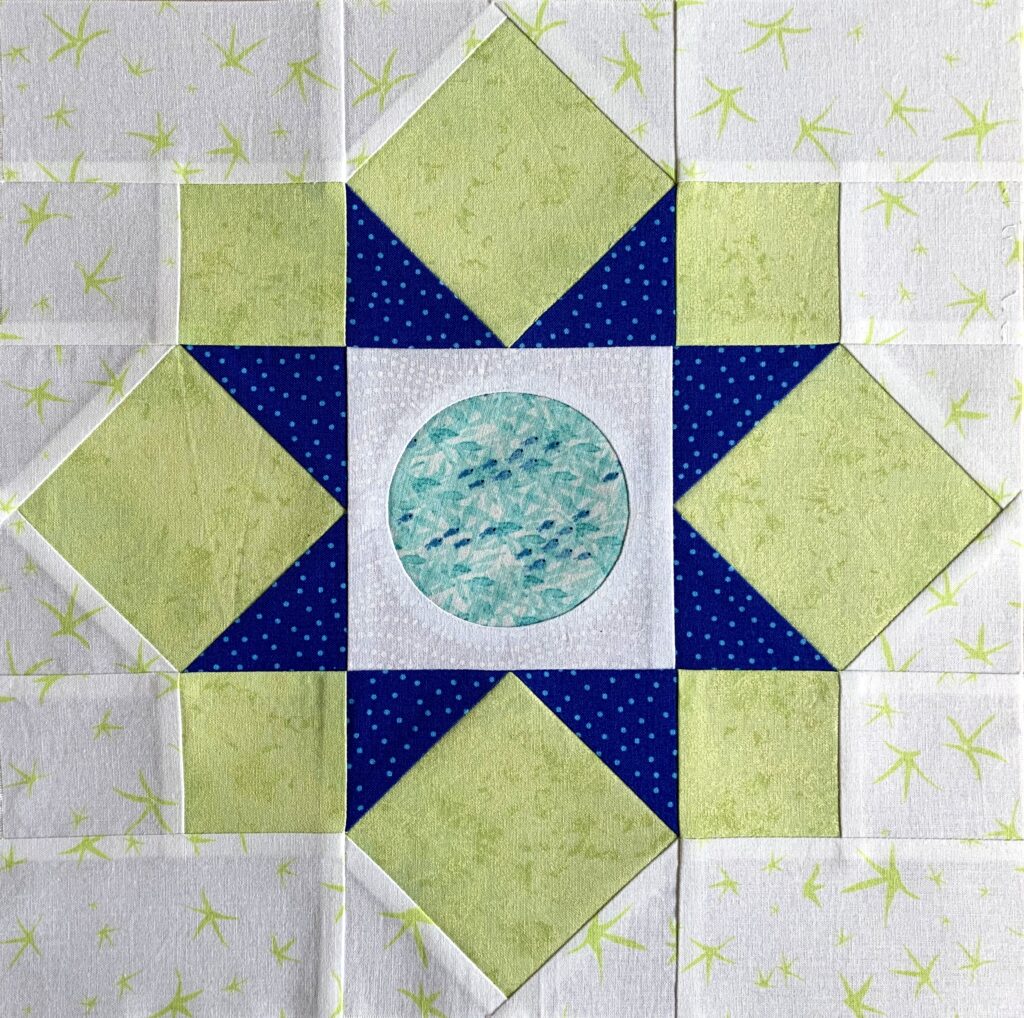
Monday of this week was Labor Day in the U.S., a federal holiday that celebrates the achievements and contributions of American workers. I was working on a little labor of love on Labor Day:  a block in my ongoing Sea Sampler project. But I wasn’t happy with my fabric selections so today I remade the block with all different fabrics. This is the result:

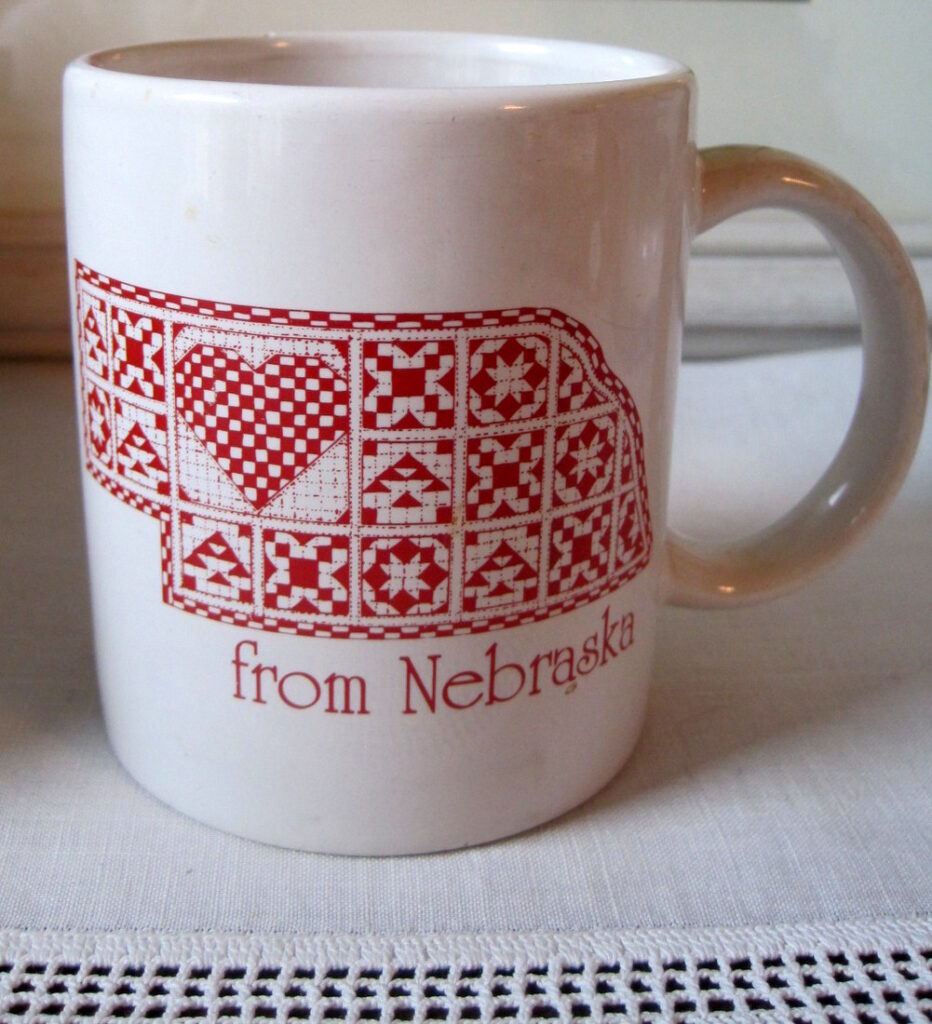
The block’s a keeper. It doesn’t have a name that I know of. (If you recognize it, please let me know.) I think of it as my Nebraska Star block because it’s on this coffee mug that I brought home a couple of decades ago from a trip to Nebraska:

If you look above the capital N of Nebraska, you’ll see the block. It’s very striking as a two-color block but also lends itself to other color combinations.

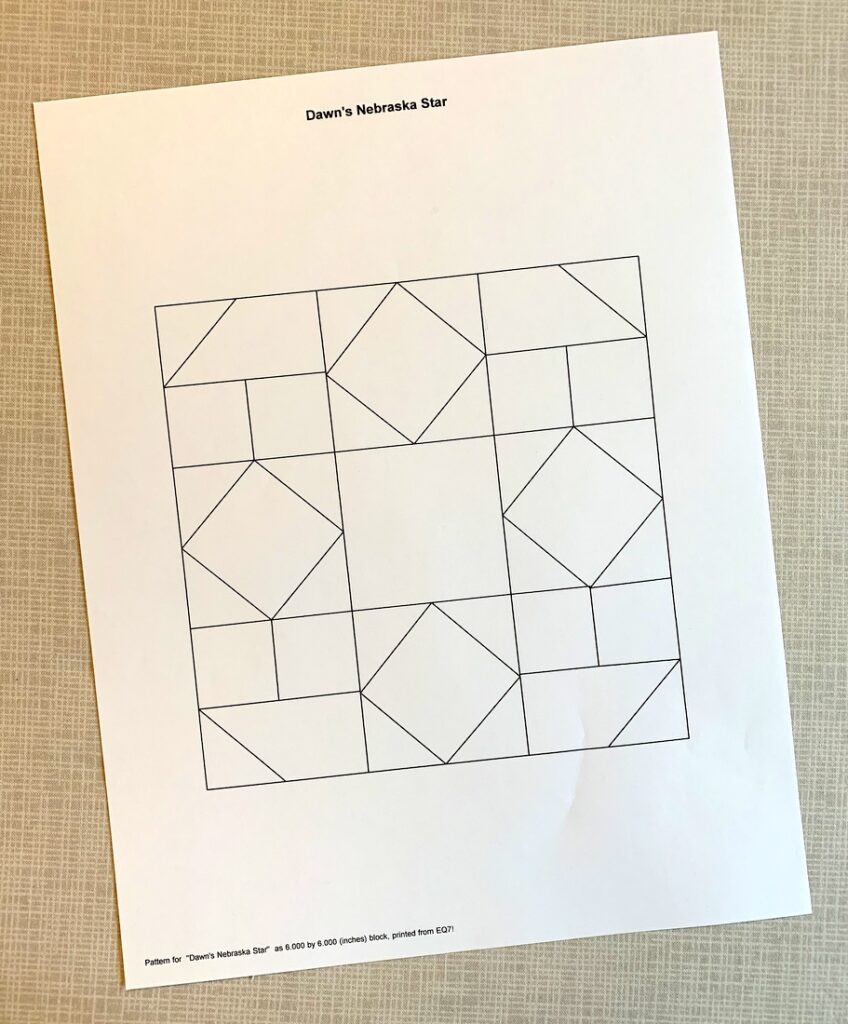
I drew the block in EQ7, the quilt software program . . .

. . . and colored it with fabrics similar to the ones I actually used:

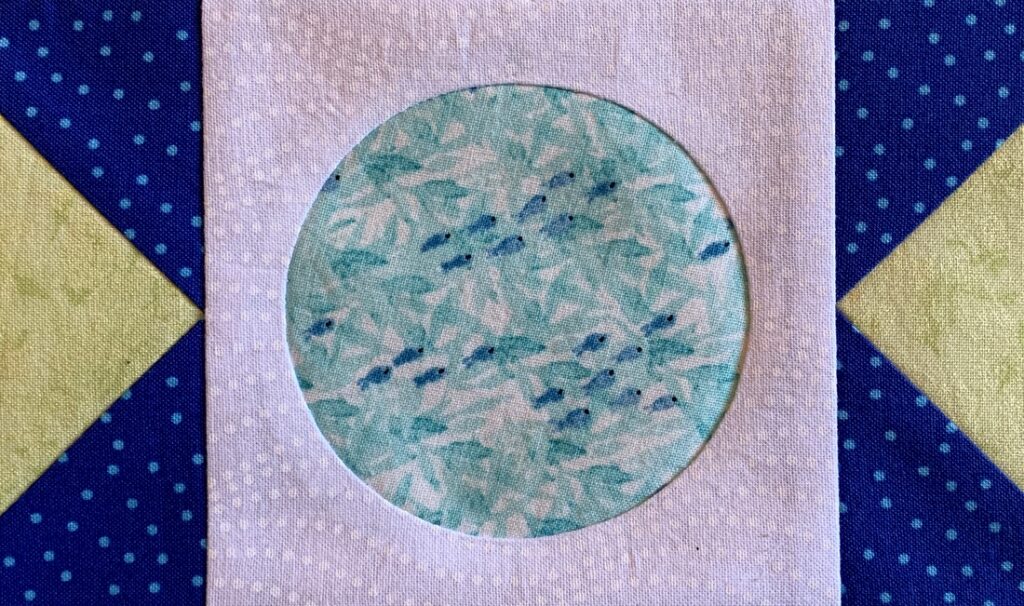
Instead of using a simple square in the center of the block, I made an inset circle of little fishies (from the “Kaikoura” line by Jessica Zhao for Cotton + Steel):

I cut the fabric a little on the bias so the fishies are swimming slightly upstream.

Because I wanted to lead your eye to the center of the block where those little fishies are, I opted not to include the blue triangles in the outer corners of the block, although they can be added later if need be.

I really hate to draw your attention to a problem but I’m going to remake the lower left section of the block. It wasn’t obvious until I saw my photo:  that vertical line between the two small squares is not truly vertical; it’s definitely slanting to the right. How did that happen? No idea but it’s going to bother me no end until it’s fixed.

Labor Day 2021 also marked my return to the quilt classroom after 18 long months. All in-person classes at Montavilla Sewing Center in Lake Oswego came to a screeching halt in March of 2020 when the the coronavirus pandemic reached Oregon and we started to fully realize its impact. Monday evening was the first of four “Sew with Dawn” classes that will meet during fall term, September-December.

To say I was thrilled is an understatement. It was so good to see my friends and fellow quiltmakers in person again! We are all fully vaccinated — students, staff at Montavilla, and myself. Of course we were fully masked the entire time but even with masks on we could see everyone was smiling.


Posted in Block of the Month (BOM), sampler quilt, Sew-Along, stitch-and-flip corners, update | 5 Comments

Another Sea Sampler Block

Here’s the latest block in what I have started to think of as my “Sea Sampler” quilt:

The block is basically an Ohio Star with half-square triangles (HSTs) in the corners. I’ve been finding fabrics in my stash with a watery vibe that go really well with my other fabrics in this Block of the Month project through Montavilla Sewing Center in Lake Oswego.

Take a look at this close-up of my block:

The white on white fabric reminds me of bubbles and that light periwinkle print looks like waves and whitecaps. And could those shapes swimming in the waves possibly be turtles? I like to think so.

Look again at the first picture. If you really use your imagination, the green swirls against the dark blue in the center of the block could be floating algae or seaweed. Ferns, maybe? Pondering this will lead me to a name for my quilt eventually.

I now have these four blocks that will finish at 12″ square:

They play together very nicely, don’t you think?

For the layout I am envisioning, I need to make four more 12″ blocks, three more 18″ blocks, and a few more of these 6″ atomic star blocks:

Thanks to my dear friend Vickie R., I don’t have to worry about using up the last of this precious aqua print from a line that came out over a decade ago. It’s so hard for me to use up fabrics I love. Vickie knows this about me and she also knows I was running low on this fabric because I had mentioned it in an earlier blog post. Miraculously, she found a yard of it for sale on Etsy and surprised me with it last week. (Thanks, Vickie!)

It’s time to start another block and I’ve already decided what it will be. I seem to be moving at a snail’s pace on this project (make that a sea snail) but I am enjoying the process so much.


Posted in Block of the Month (BOM), Quilt-Along, sampler quilt, update | 6 Comments

Brace Yourself

When I launched my First Light Designs website in May of 2012 (you can see my very first post here), this was the photo on my “About Dawn” page:

It was taken by graphic designer Deb Hollister, who also designed my website, setting it up to serve as both website and blog.

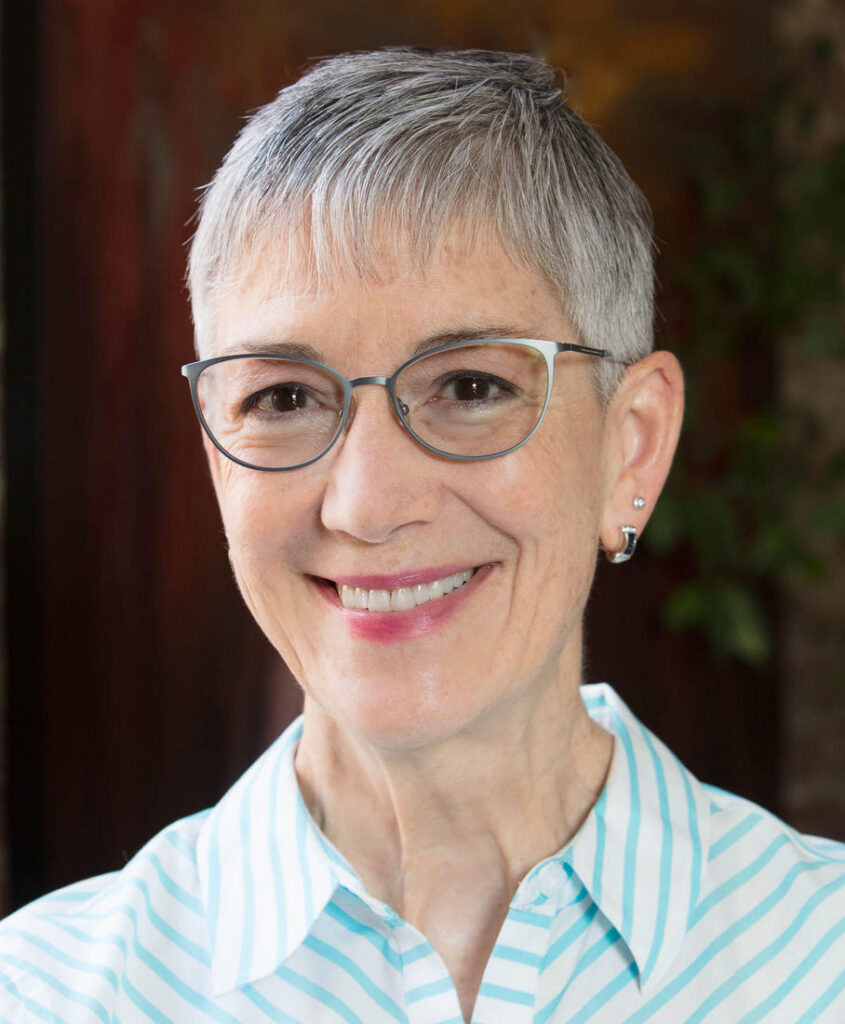
Years passed. Nine years, in fact. Occasionally I would think about updating the photo but found it easy to procrastinate. I finally contacted Deb a couple of weeks ago to ask about getting a new photo taken, only to find out that she had retired in 2019. Lucky for me, Deb graciously agreed to take my photo anyway, and this is the result:

The ensuing years have brought more gray hair and more wrinkles, and I’m fine with that. Notice anything else, though?

My teeth! At the age of 70, I did something I’ve thought about doing for decades:  I got braces.

Ironically, the retirement of my longtime dentist was the catalyst. My new dentist suggested I consider Invisalign braces, offering a free consultation with computer modeling to show what my teeth would look like during and after treatment. In addition to straightening my teeth (including my very crooked bottom teeth which don’t show up in photos), the braces would correct my significant overbite.

I decided to go for it. I got my braces in December 2020 and am now near the end of treatment. I’m very happy with the results and glad to get that page on my website updated.


Posted in update | 10 Comments