Happy National Quilting Day!

Today is National Quilting Day, a celebration of all things related to — of course! — quilting.

It seems fitting to celebrate with a shoutout to Billie Mahorney, who taught me so much about quiltmaking. I took classes from Billie at the Pine Needle Quilt Shop from 2005 until 2009, when she retired and moved to Idaho. How I wish I had discovered her sooner!

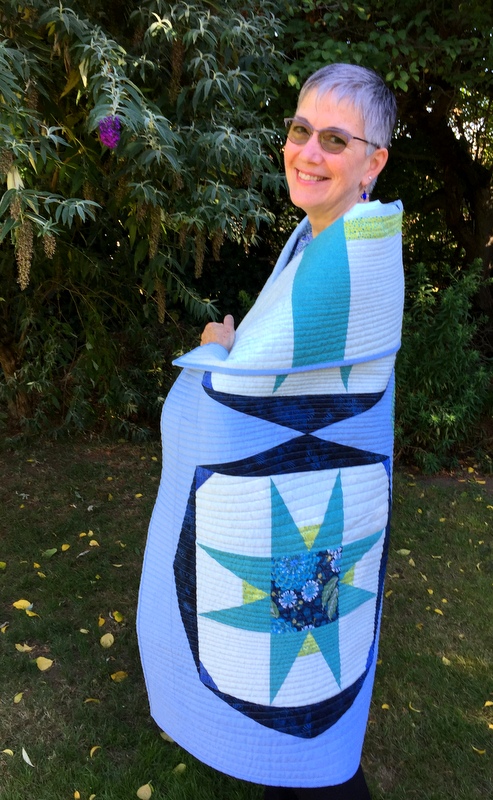
Here I am with Billie’s Star, the quilt I designed and made in 2015 in homage to Billie:

Among the many tools and techniques I learned from Billie were how to draft a quilt block and how to get sharp points on my stars — two things that came in very handy while making this quilt.

To read more about the making of Billie’s Star, click on this link.

To read more about National Quilting Day, click here.


Posted in update | 2 Comments

My Favorite Part . . .

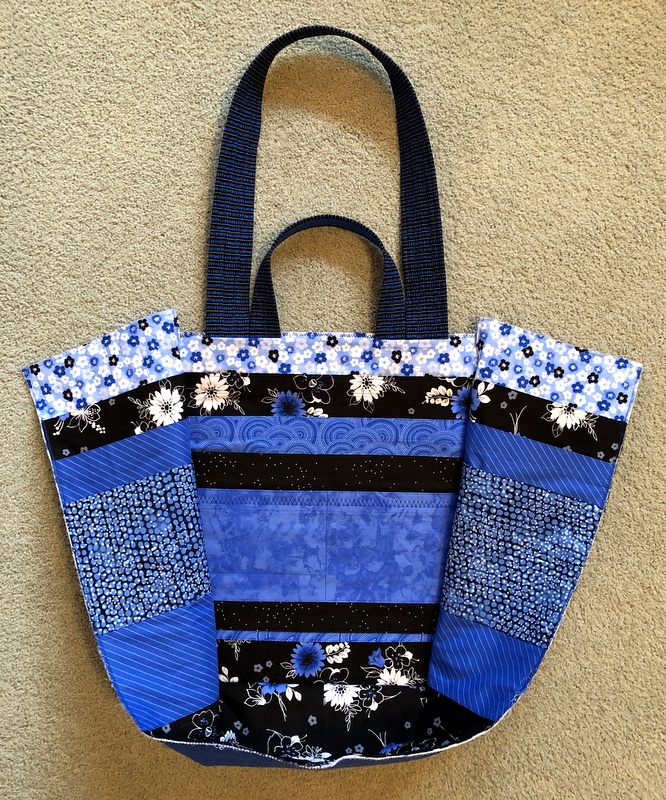
. . . of making a Junior Billie Bag is that moment when the bag, until now a series of flat panels . . .

. . . becomes three-dimensional:

You are looking at the inside of my Junior Billie Bag, with the side panels/bottom unit pinned to one of the front/back panels. You may not be able to tell from the photo that there are 14 pockets showing. The other front/back panel (not shown) has five pockets.

Combined with the pockets on the outside of the bag . . .

. . . this JBB has 23 pockets. Now you know why I call it the “quintessential quilter’s tote!”

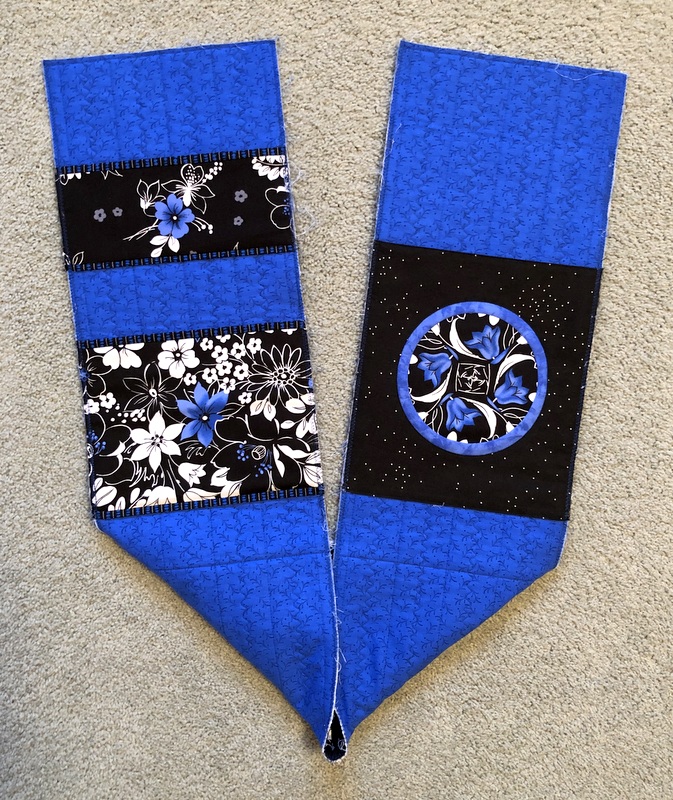
It’s a lot of fun playing with pocket design for the outside of the bag. For the pockets on the left side above, I trimmed them in the same striped fabric I’m going to use for the binding. (While I love the look of striped binding cut on the diagonal, I opted to cut my strips on the straight of grain for this one.)

For the pocket on the right side, I started with a four-patch kaleidoscope (what I call a Four-Patch Wonder block) and made a double inset circle.

I sure do like that vivid blue against black and white!


Posted in 4-Patch Wonder, Billie Bag, faux-kaleido quilts, Junior Billie Bag, tote bags, update | 3 Comments

Saved by the Bell — er, Button

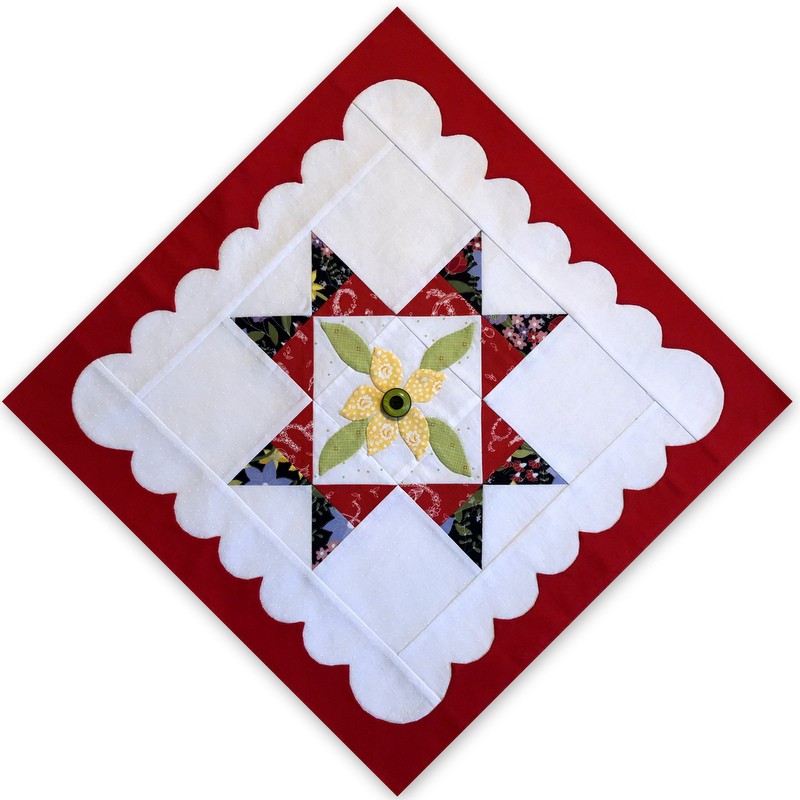
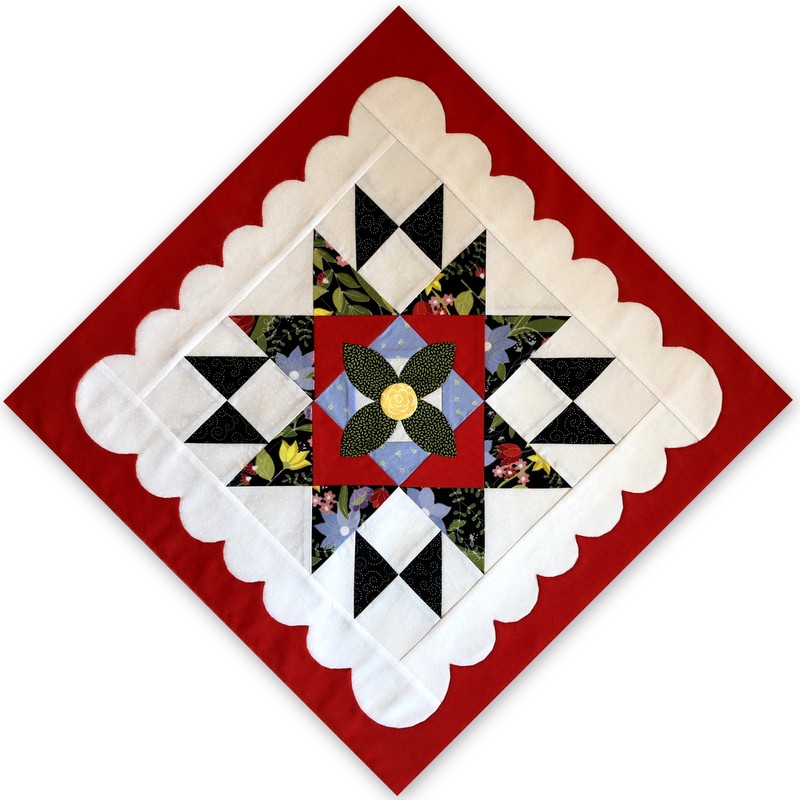
Work continues on my version of Hazel’s Diary Quilt, the lovely sampler quilt Shelly Pagliai designed in memory of her mother. I finished appliquéing the red scalloped frame on Block 1, Missouri Farm Girl, yesterday. All that remained was sewing a tiny black star in the center of the yellow flower.

Missouri Farm Girl was the very first block I made when I started this project at the beginning of 2018. I’d been postponing affixing the tiny star until I had many more hours of practice in with needleturn appliqué.  I thought I was ready. Nope. Not ready. (Did I mention that star is tiny?)

After a couple of failed attempts, I turned to my button collection, rifling through several antique spooners and celery vases to find a button that looks like it belongs in the block. I think I found the perfect one:

What do you think?


Posted in appliqué, Hazel's Diary Quilt, needleturn appliqué, update | 12 Comments

I Have a Plan. Sort of.

Do you ever start a quilt without having a firm plan in mind? It’s a tendency of mine. It seems I am always making test blocks and then deciding to proceed with a quilt without knowing what the finished product will look like. I just start making more blocks willy-nilly until a plan emerges.

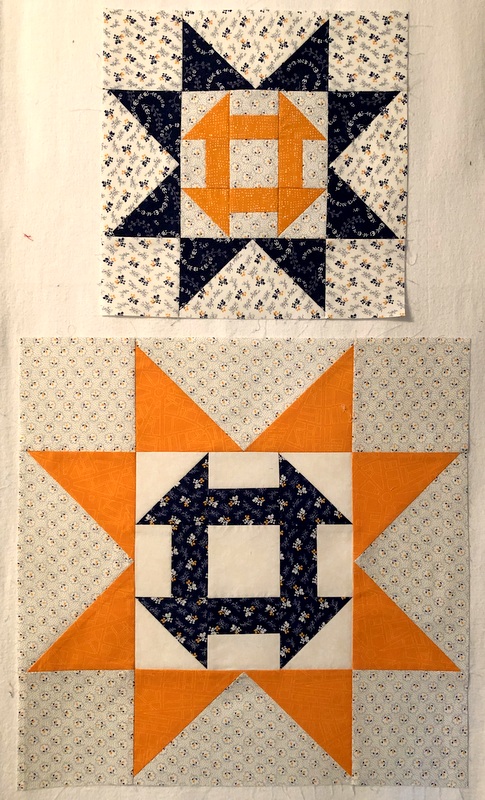
Such is the case with my newest WIP (that’s Work-in-Progress for you non-quilters). Starting with my stash of cheddar and indigo prints from Penny Rose Fabrics and the Churn-Dash-inside-a-Sawtooth-Star block that Jenifer Gaston created for her Churning Stars quilt, I made 12″ and 18″ test blocks, subject of my last post. Where to go from there? Should I add some 9″ and/or 6″ blocks to the mix? Might be fun to play around with that.

When the bundle of fat quarters I found online arrived the other day, I got busy cutting 12″ squares from the cheddar and indigo prints:
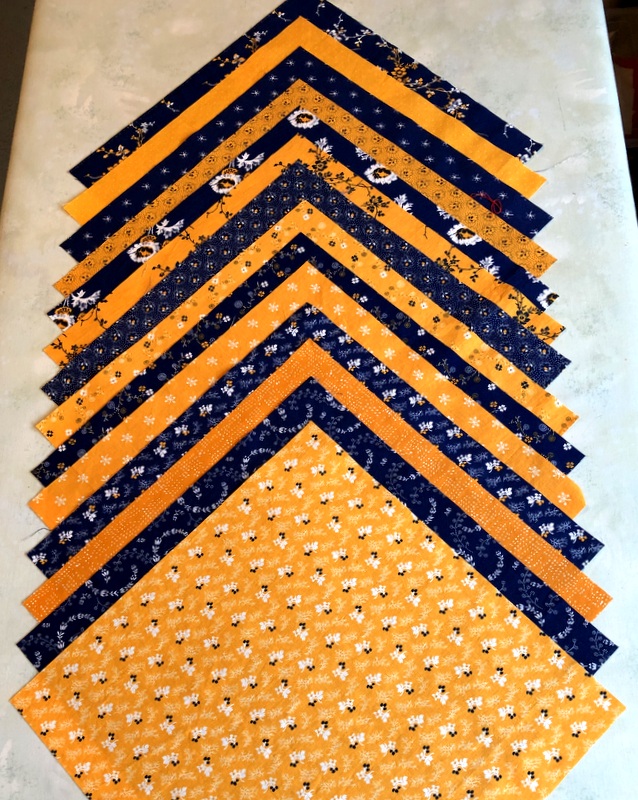
Why 12″ squares? For the star points in the Sawtooth Stars, I’m making Flying Geese units using the method that calls for two different size squares and yields four Flying Geese units. A 12″ square is needed for the 18″ blocks and it’s also the largest to be cut from a fat quarter so I figured I’d better cut them first. After I had cut all the squares you see above, it dawned on me that I probably don’t want that many 18″ blocks. Oops.

That’s what happens when you don’t have a plan. Well, all is not lost. I can cut those squares into smaller pieces to use in smaller blocks. And I have enough fabric for two quilts anyway. One of the benefits of having an ample stash, right?

You probably know from my previous post that I’m going for a “controlled scrappy” look with my cheddars and indigos. Because of that I decided to make a bunch of Churn Dash blocks and a bunch of Flying Geese units for the Sawtooth Stars but wait to combine them into blocks until I can play around with the components on my design wall. That’s my current plan. If you can call it that.

For now I’ve made a couple Churn Dash blocks and Flying Geese sets in two sizes. The Churn Dash blocks measure 6½” and 9½” square, as they will go in the center of blocks that finish at 12″ and 18″ square:
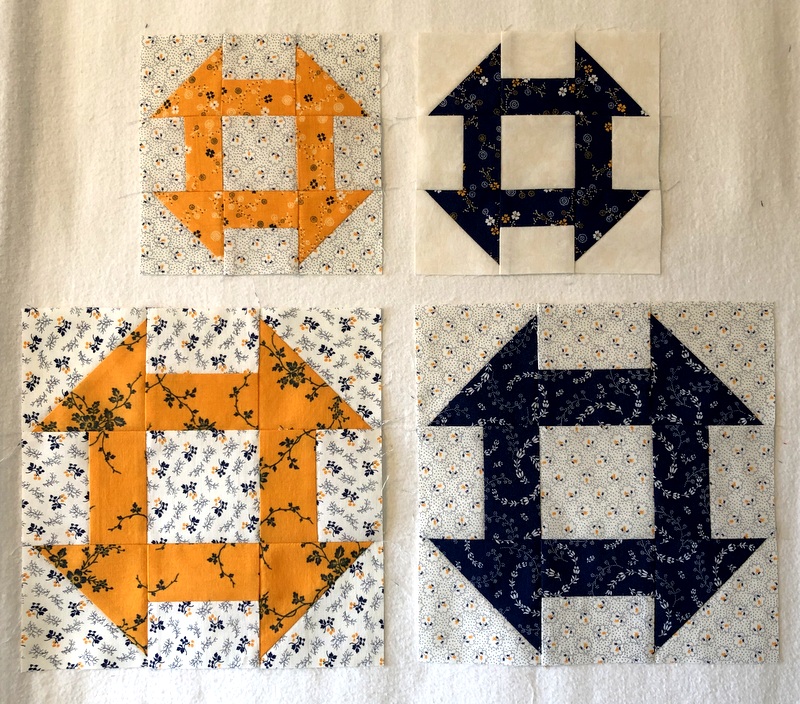
The Flying Geese units below are half sets (i.e. there are actually four units in each set, not two) as I wanted to combine parts of four sets in one photo. The large units measure 4½” x 9″ and the smaller ones 3½” x 6½”:
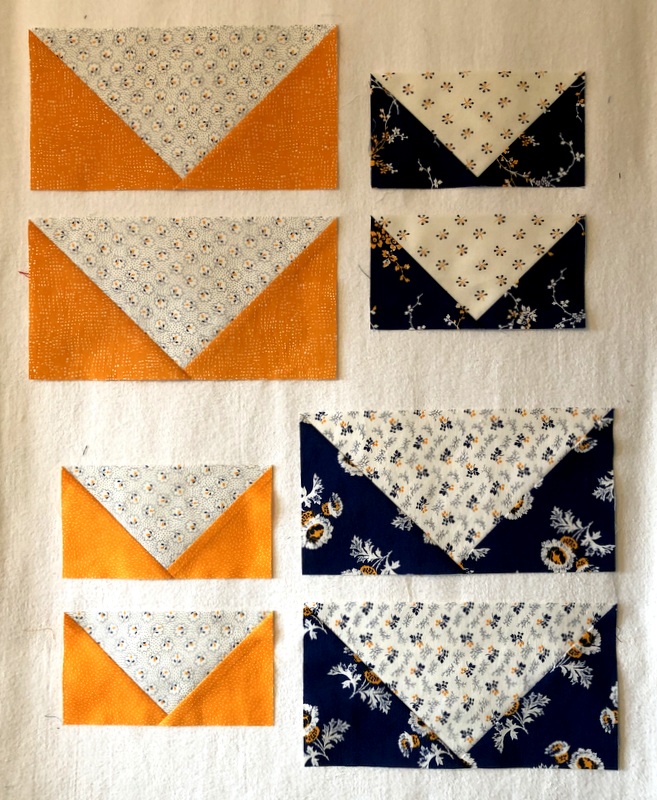
The cheddars in this photo are not from the original fabric line but rather fabrics from my stash that I want to include in the quilt.

This WIP is destined to become a WISP (Work in Slow Progress, an acronym I learned just the other day) as I really must turn my attention to some other projects. Because these Churn Dash blocks and Flying Geese units go together quickly — and are fun to make — I’m going to make a few whenever opportunity and inclination coincide.


Posted in cheddar and indigo, Churning Stars quilt block, update | 4 Comments

Along for the Ride

When I confessed in my last post that I was tempted to drop everything and start a new project, my friend Vickie responded at once with these words: “Resistance is futile. Give into the temptation.” Thank you, Vickie! All it took was that bit of encouragement for me to abandon my current quilting projects — only temporarily, you understand. I spent a delightful few hours Sunday afternoon petting my stash of cheddar and indigo fabrics, playing with possible fabric combinations, and finally making a couple of blocks using Jenifer Gaston’s Churning Stars block design.

I already knew Jenifer’s block was a winner. I tested it a couple weeks ago for the Junior Billie Bag I’m working on and couldn’t wait to make some blocks for an actual quilt.

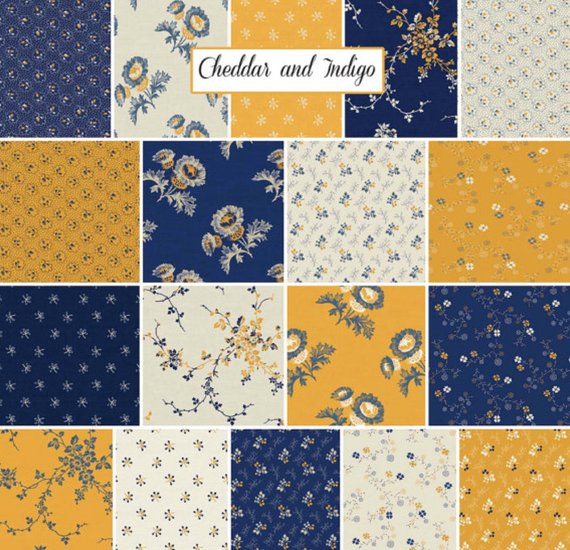
Most of the fabrics I’m working with are from the “Cheddar and Indigo” line by Penny Rose Studio, a division of Riley Blake Fabrics. It came out in 2015. Here’s the entire line:


I had eight of the fabrics: four of the cheddars but only two navies and only two background fabrics. How perfectly providential, then, to find a complete fat quarter bundle for sale last weekend on eBay! It was not a bargain but I snagged it anyway. With a full selection from the line plus a few fabrics pulled from other sources I’ll be able to make what I call a “controlled scrappy” quilt.

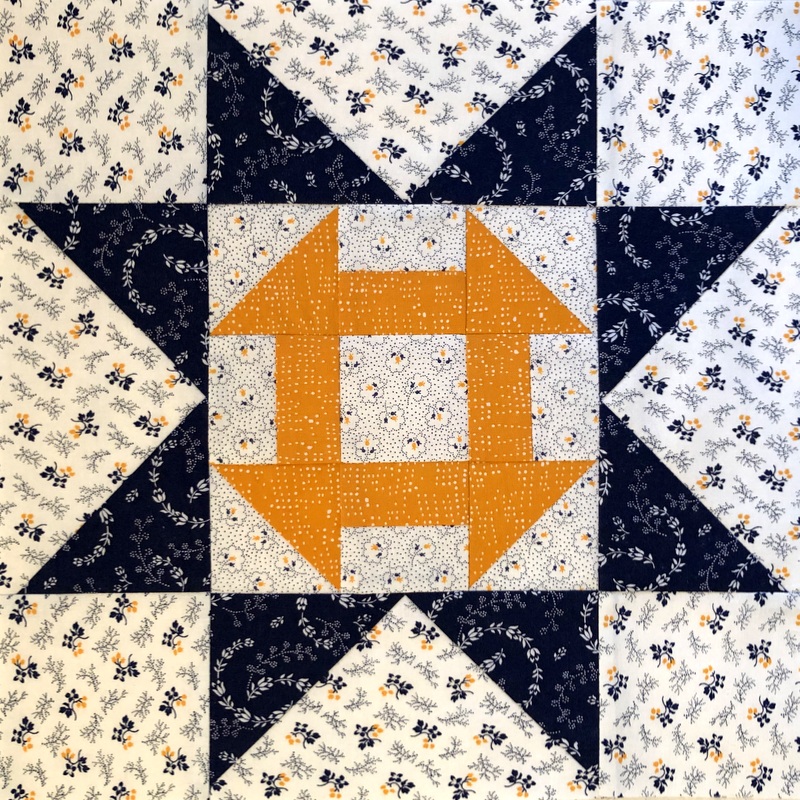
As you can see, the prints are very traditional but I’m throwing some modern prints into the mix. The first block I made contains a cheddar print from Victoria Findlay Wolfe’s “Futurum” line:

That navy and white print is vintage. There’s no selvage information and I don’t remember where I got it but I had to cut away fabric where the sun had faded it along the fold lines.

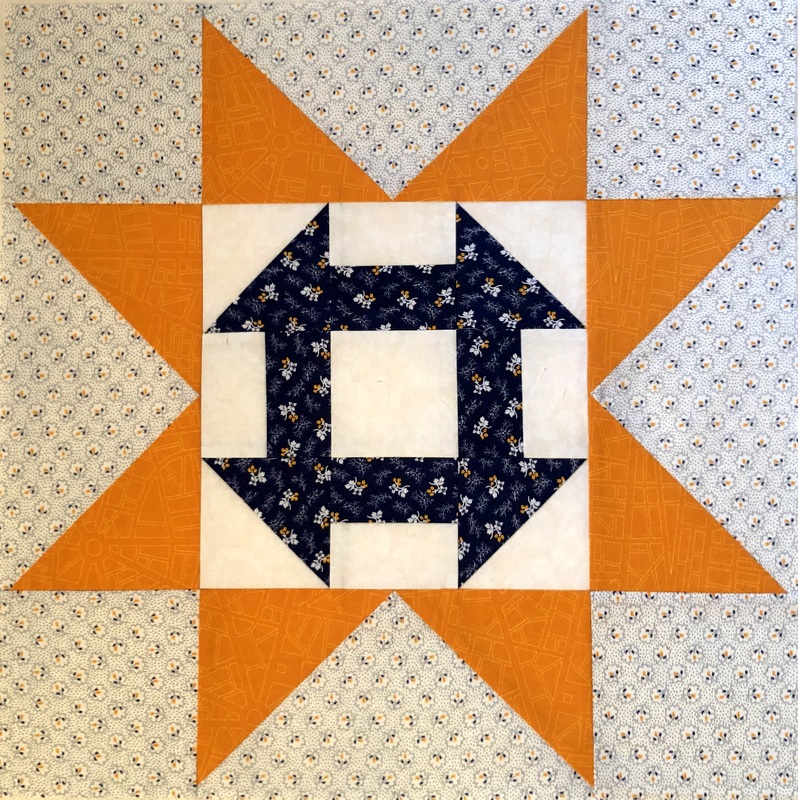
The cheddar in my second block is from the “Barcelona” line by Zen Chic for Moda:

The first block measures 12½” square, the second 18½” square. Here they are together:

Apparently I’m going to play around with different size blocks until I land on an overall design. I have no idea where this is taking me but I’m sure going to enjoy the journey!


Posted in Billie Bag, cheddar and indigo, Churning Stars quilt block, Junior Billie Bag, update | 10 Comments

Fair Weather . . .

. . . is something we are not having in Portland, Oregon at the moment. There’s snow on the ground and “frozen mix” predicted for eight of the next nine days. C’mon, Portland! Where’s that teaser week of balmy weather we usually get in February?

Despite the inclement weather forecast, I can claim a spot of Fair Weather inside the Portland White House, namely in my sewing room:


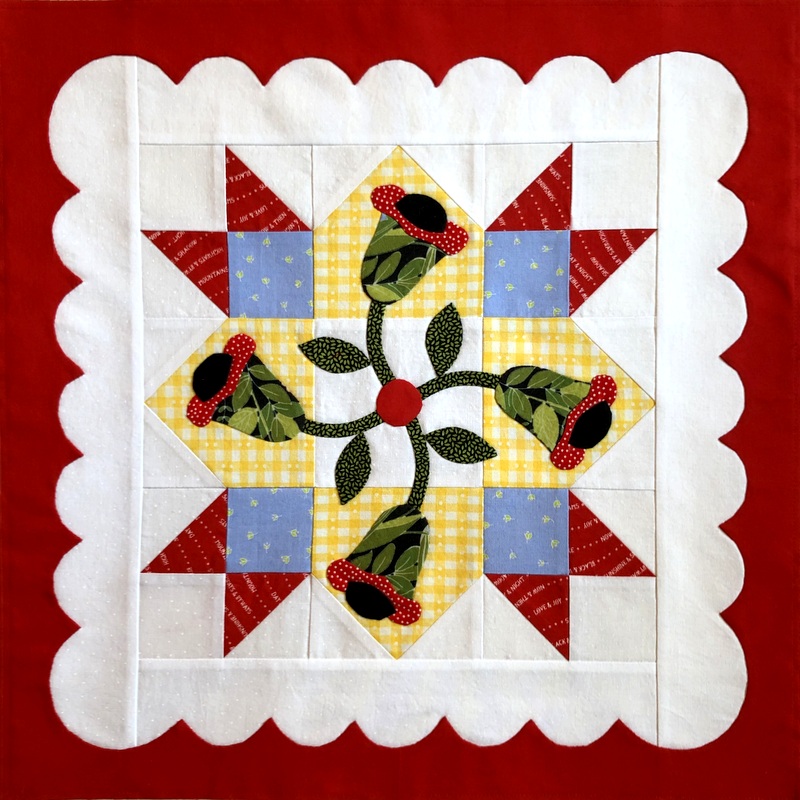
That’s the name of Block 10 of Hazel’s Diary Quilt, the gorgeous sampler quilt designed by Shelly Pagliai that’s been the focus of much of my sewing and needleturn appliqué efforts over the past 14 months.

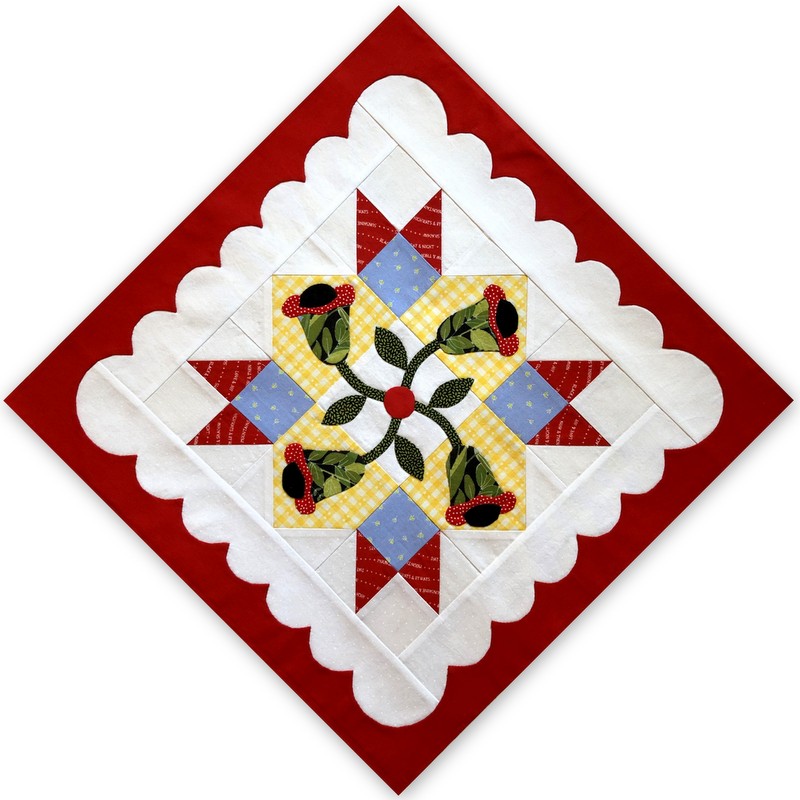
Here’s the block on point, as it will be in the finished quilt:

Don’t you love the swirly motion provided by the stems in the center appliqué?

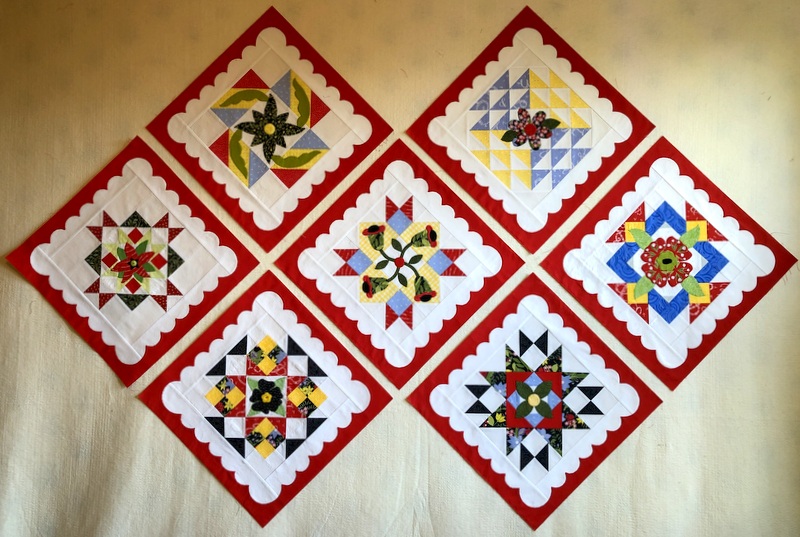
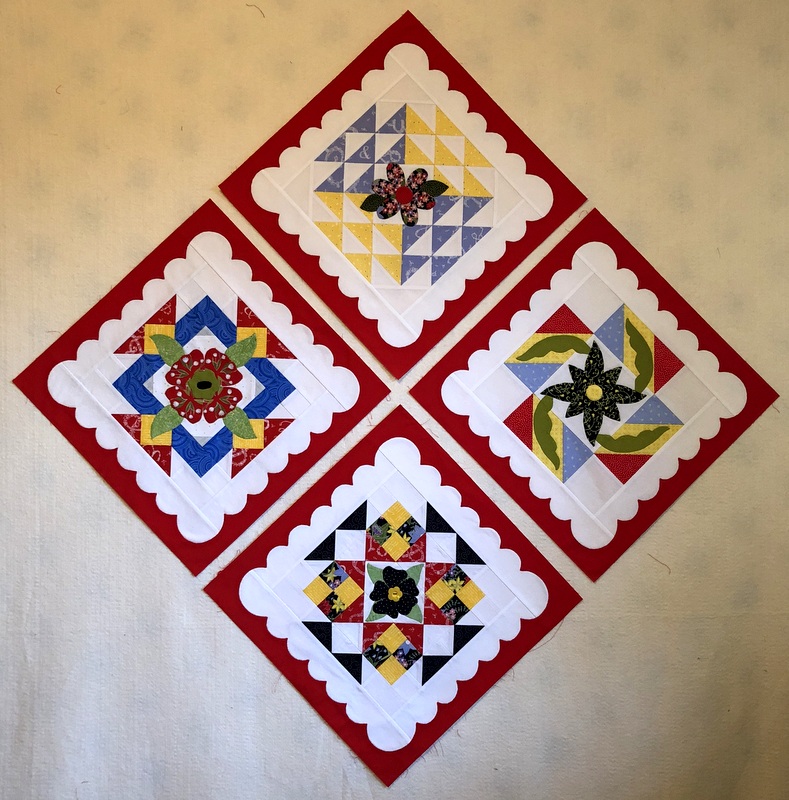
Seven blocks are now framed in red and up on my design wall:


These blocks measure 18½” square. Set on point, they measure about 26″ across and take up a good portion of the design wall.

Progress is slow, partly because I’m not very fast at needleturn appliqué and partly because I’m working on other projects. One of them: another appliqué design totally unrelated to Hazel’s Diary Quilt that has a special story attached to it. I’m getting very close to revealing it so stay tuned.

And I’m longing to dip into my stash of indigo and cheddar fabrics to make some blocks using Jenifer Gaston’s Churning Stars design. I know I shouldn’t be starting a new quilt but the pull is very strong. I don’t think I can resist. . .


Posted in appliqué, Hazel's Diary Quilt, needleturn appliqué, update | 11 Comments

It’s Beginning to Look a Lot Like . . .

. . . a Junior Billie Bag!


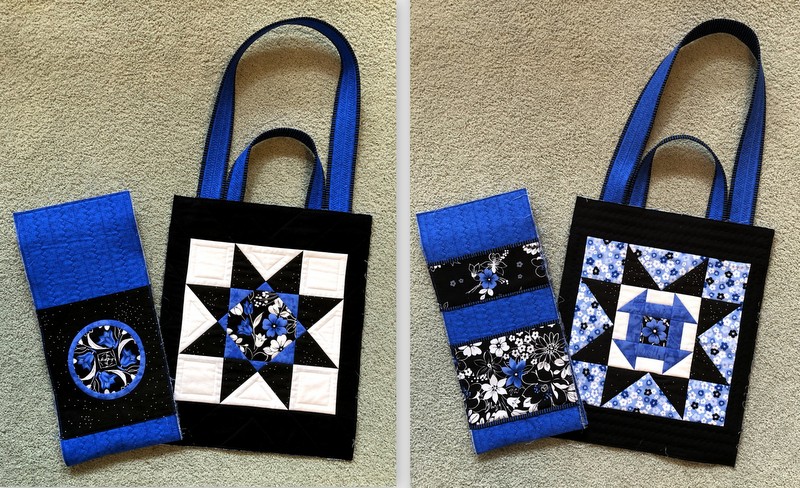
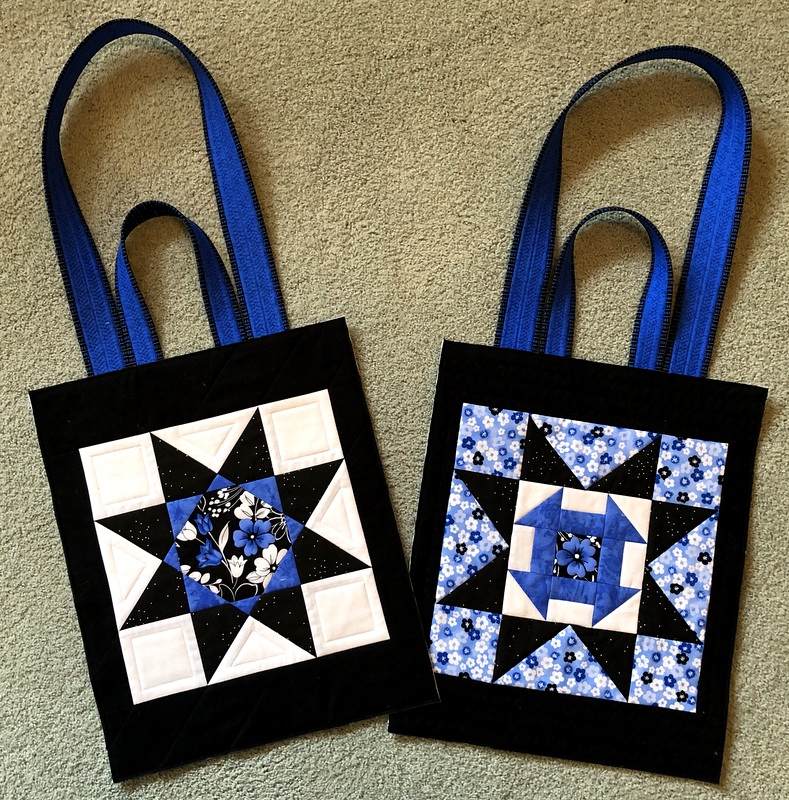
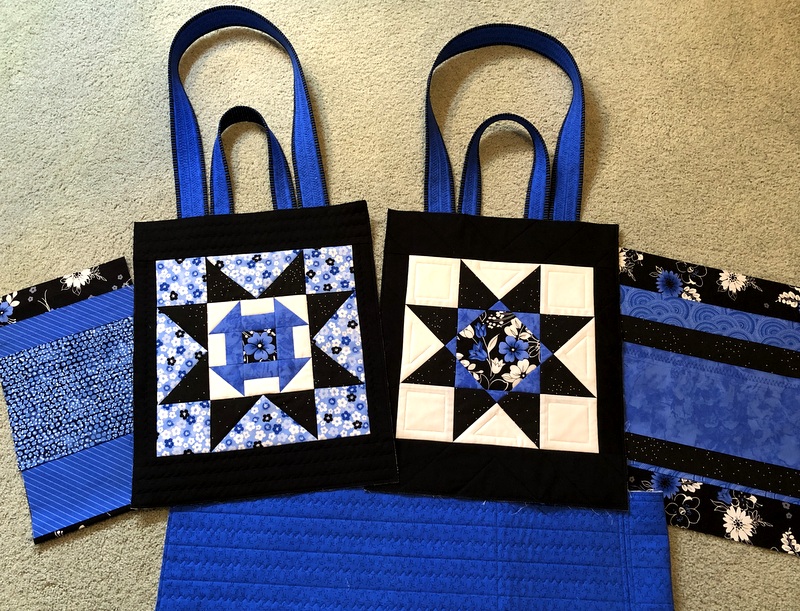
Yes indeed. I’ve been hard at work on the components of this quilter’s tote in preparation for teaching a workshop later this month. The front/back panels are quilted and trimmed and the two sets of handles have been made.

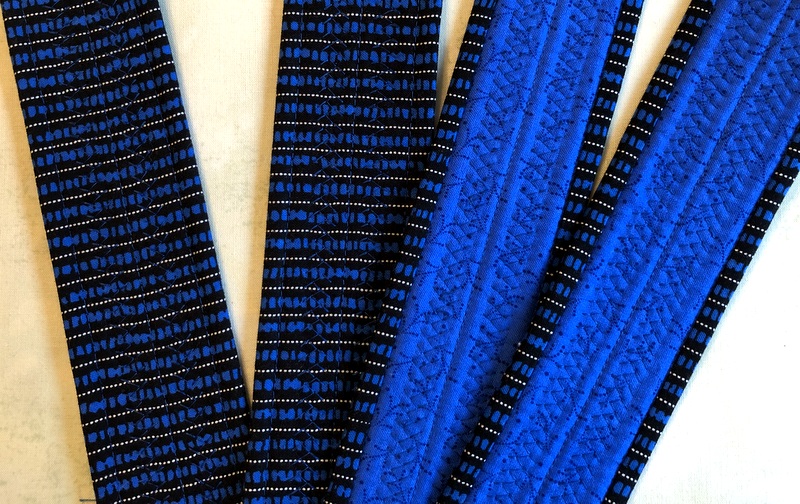
The design of the handles is very clever. You start with strips of different widths, resulting in the wider strip wrapping around to the underside to form a faux piping. In the photo below you can see both sides of the handles:

The dark stripe would ordinarily go on the outside but I’m loving that jolt of royal blue with the contrasting piping so much I’ve decided to put it on the outside. That’s how the straps are positioned in the first photo.

I did some stash diving to come up with fabrics for the various and sundry pockets that make this quilter’s tote such a delight to use. Here you can see a few of the pockets I’ve made for the inside of the bag:

Still to come: pockets for the outside. All told, this Junior Billie Bag will have over 20 pockets, all thoughtfully sized to hold a quilter’s favorite tools.

When I started working on this tote I thought I might give it away. Now I don’t think I can bear to part with it!


Posted in Billie Bag, Junior Billie Bag, tote bags, update | 6 Comments

A Bee in my Bonnet

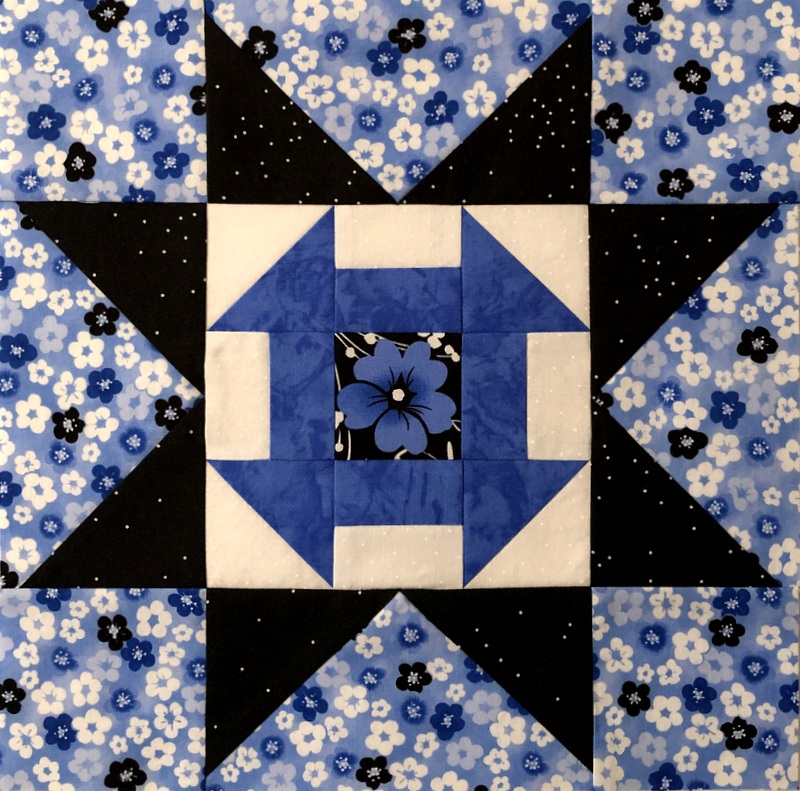
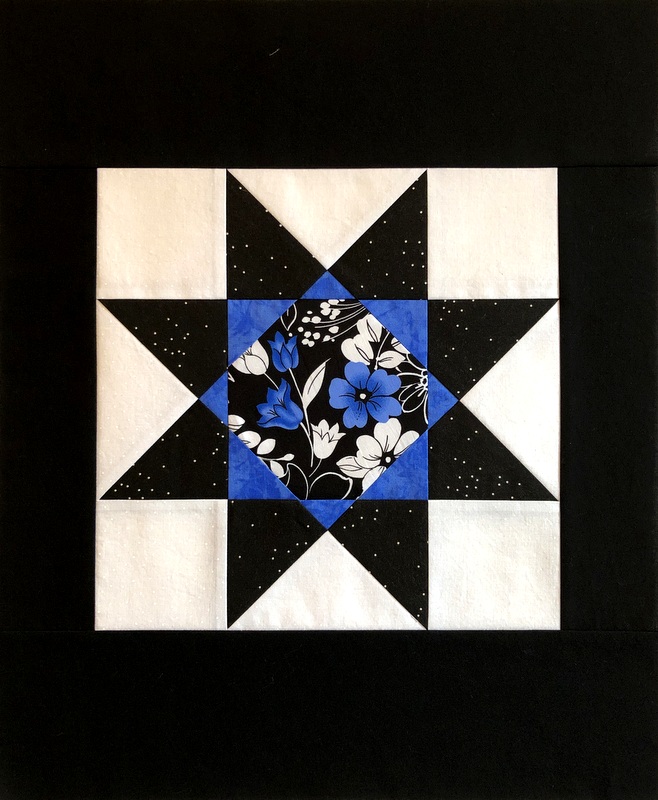
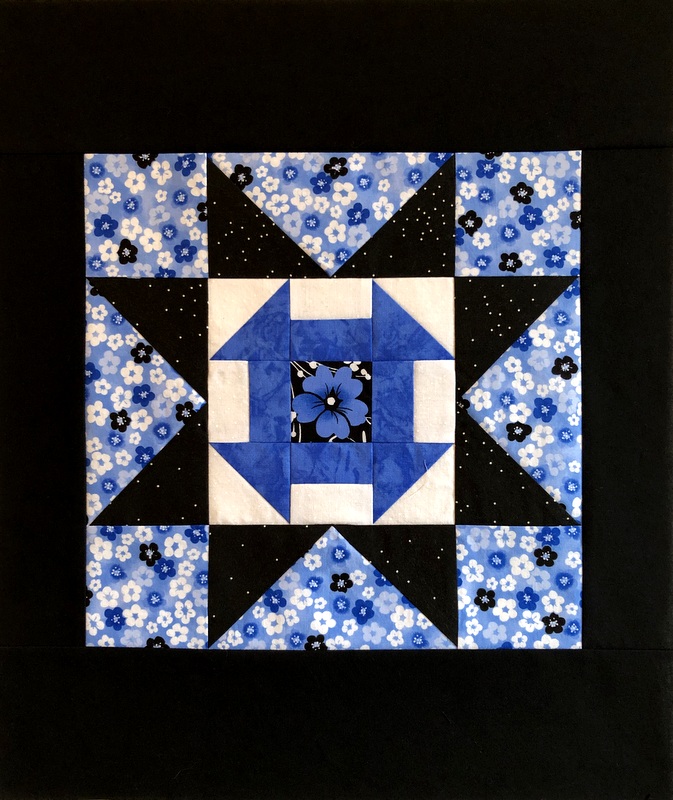
Last night I got the proverbial bee in my bonnet and made this 12½” quilt block:

I’ve been wanting to make a test block since spotting Jenifer Gaston’s Churning Stars quilt in her book Primitive Style: Folk-Art Quilts and Other Finery (Martingale Press, 2015):

I’ve always liked the classic Churn Dash block and I love seeing it in the center of a Sawtooth Star block. I could see making an entire quilt using Jenifer Gaston’s charming design. In fact, I have a collection of indigo and cheddar prints that would be perfect for such a quilt.

For now, though, I am sticking with one block because it’s destined to be one of the front/back panels on my next quilter’s tote, namely the Junior Billie Bag.

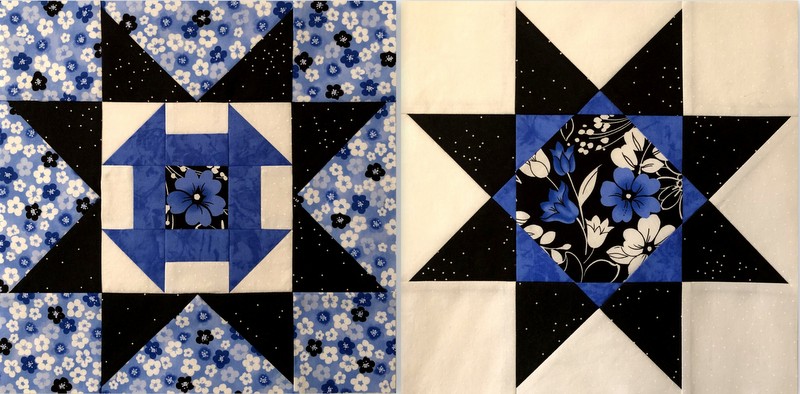
See how well the new block goes with the star block I made the other day?

Not content to stop after making the block, I added the sashing strips that will make both blocks the correct size for the front/back panels of the Junior Billie Bag:

It’s going to be striking, isn’t it?!


Posted in Billie Bag, Churning Stars quilt block, Junior Billie Bag, tote bags, update | 6 Comments

Fancy Farm Girl Has Been Framed!

But in a good way.

Fancy Farm Girl is Block 9 of Hazel’s Diary Quilt, the sampler quilt project I embarked on a year ago. Here’s that Fancy Farm Girl on point, as she will be in the finished quilt, sporting her red scalloped frame:

She joins four other blocks that have been pieced and framed:


Progress has been slow on the appliquéd frames. I discovered I can’t work on my needleturn appliqué in the evening while watching television because the light isn’t great. (How on earth did previous generations of quilters do such beautiful work by candlelight?) I’m also hampered by a certain calico cat demanding lap time (and who am I to deny her?).

Four additional pieced blocks are awaiting their frames. One of the nine blocks will go in the center of the quilt as part of a medallion. I’ll pick the block for the center after all of them have been framed. Of the five so far, Fancy Farm Girl is the leading candidate. Do you have a favorite?


Posted in appliqué, cats, Hazel's Diary Quilt, needleturn appliqué, update | 8 Comments

A Slight Miscalculation. . .

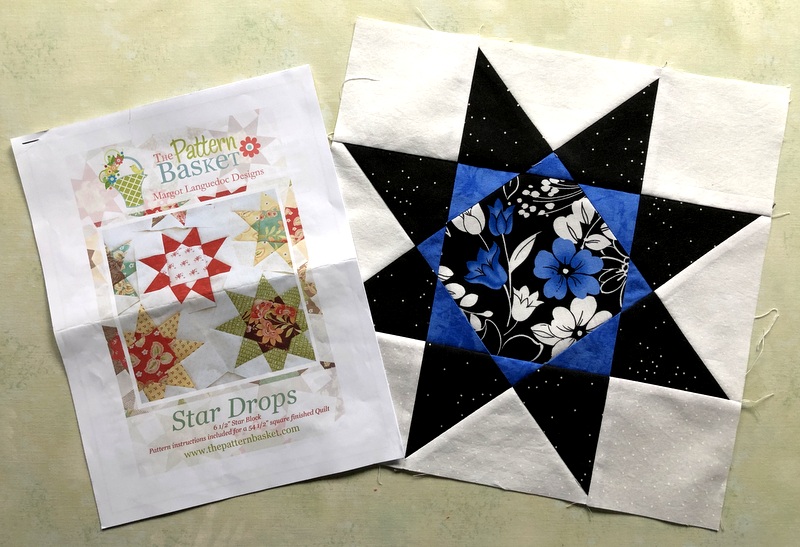
Have you ever made a block that didn’t turn out quite like you expected? Perhaps you were surprised by one of the elements but kept on making the block, not realizing you had made an error. That’s what happened to me a few days ago when I made a test block of Star Drops, designed by Margot Languedoc of the Pattern Basket.

Before I bought the pattern I had studied the design, guessing (correctly) that the outer star points were made from hourglass units that were trimmed on one long side. When I made my test block I resized it from 6″ to 12″ finished, adding an additional design element at the last minute. I wrote about that in my last post.

When I trimmed the hourglass units using the calculations I had made for a block that was double in size, I was surprised that the small triangle in the center wasn’t larger. And when I converted the center square into a snowball block by adding a triangle at each corner, I was surprised that the triangles were larger than the ones in the hourglass blocks. I concluded it was because the center square is larger than the other blocks.

I was wrong.

I had cut a quarter-inch too much off the hourglass units. That’s why the blue triangles were smaller than I expected. Oops! And then I cut the four corner squares a quarter of an inch too small. Oops again. My block was supposed to measure 12½” unfinished but it’s a half-inch shy of that.

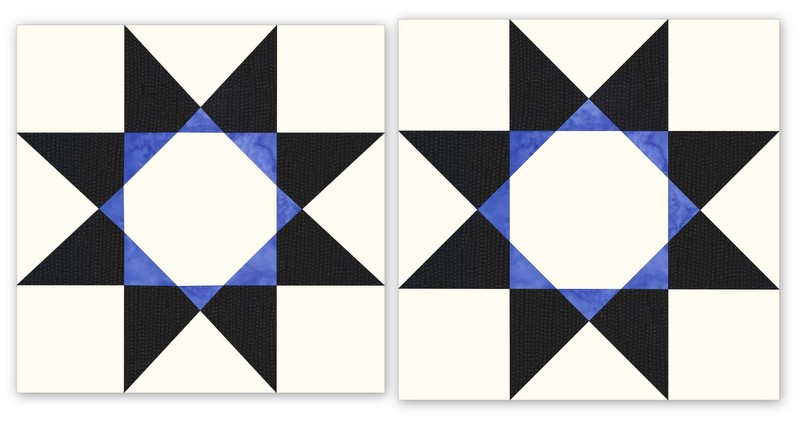
To illustrate the difference, I drew the blocks in the software program EQ7:

The one on the left is a mock-up of the block I made. You can see that four of the triangles are larger than the other four. This block measures 12″ unfinished, 11½” finished.

The block on the right is a mock-up of what my block would have looked like had I trimmed the hourglass blocks properly and made the corner squares the correct size. It measures 12½” unfinished, 12″ finished. (I’m sure this star block has been made many times before and has a name but I haven’t actively searched for it yet. If you happen to know, kindly leave a comment.)

What to do about my oddly sized block? Well, if it were destined for a quilt of 12″ finished blocks, I’d have a real problem. Happily, I am planning to incorporate this block into a Junior Billie Bag panel that finishes at 14″ x 17″ so I’ll simply cut the sashing strips a bit wider to compensate.

So my block is actually a mistake. But you know what? I love it anyway!


Posted in Billie Bag, Junior Billie Bag, snowball blocks, stitch-and-flip corners, update | 6 Comments