Perfect Pillowcases: a Tutorial

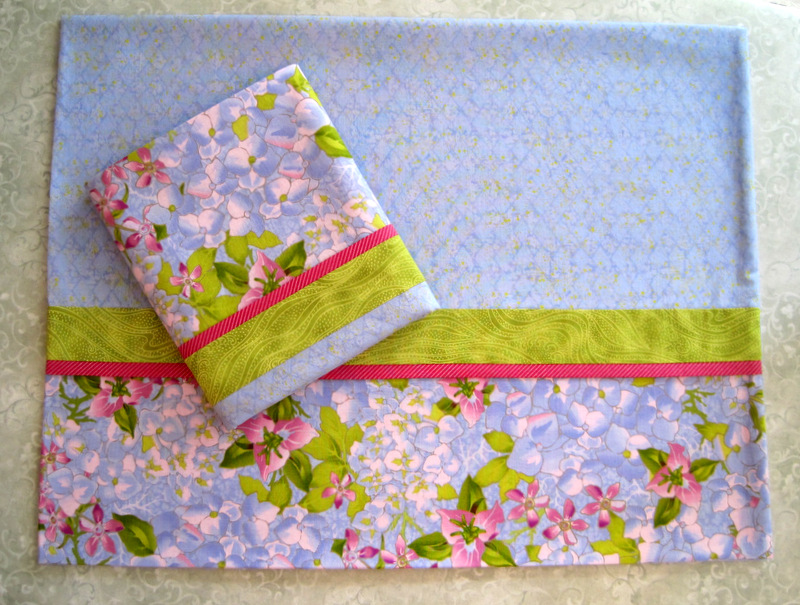
pcases 1 finished cases
Pretty Pillowcases

I’ve been making pillowcases since 2005, when my quilt teacher Billie Mahorney first showed me how to make a “Magic Pillowcase” with French seams and a nifty way of enclosing the band on the inside with no raw edges showing. You’ve probably seen directions for other versions of this pillowcase, variously called the Burrito Pillowcase, the Hot Dog Pillowcase, or the Roll-it-Up Pillowcase.

Over the years I’ve made dozens of pillowcases — for friends and family, for charity, and for the Portland White House. Over the years I’ve tweaked Billie’s method, fiddling with seam allowances and incorporating ideas gleaned from here and there, winding up with what I think is the perfect pillowcase. Try my version and let me know if you agree!

Perfect Pillowcases from First Light Designs

Finished size: @ 20″ x 31″ for standard/queen cases, 20″ x 37″ for king size cases

Fabric requirements for one pillowcase
Pillowcase body: 3/4 yd cotton (for king case, 1 yd)
Bottom band (goes at open end of pillowcase): 1/2 yd cotton
Accent strip: 4″ strip cotton
Flange (folded strip): 2″ strip cotton

Preparation
Wash and iron fabrics first. Why is this important? Two reasons. First, fabric does not come off the bolt evenly wrapped. If you don’t wash and iron it first, the fabric won’t be on the straight of grain when you cut it (and this will become obvious the first time you wash and dry it). Second, fabric comes with sizing, the chemical finish that gives it a crisp feel; washing removes the chemicals and makes the pillowcase ready to sleep on when it’s completed.

When you wash, dry, and iron fabric and then fold it so that the selvages meet, the cut ends (perpendicular to the selvages) rarely line up evenly, and you lose a bit of fabric when you trim the edges. The fabric requirements above take this into account.

Sewing supplies
Sewing machine with ¼” foot or other open-toed foot
New sewing machine needle (I recommend size 80/12 sharp)
Standard sewing supplies (thread, scissors, straight pins, measuring tape, seam ripper)
Rotary cutting equipment (large mat, rotary cutter, rulers short and long)
Point turner or other tool for gently poking out corners

Cutting instructions
WOF = width of fabric, usually 42″ – 44″ before selvages are removed

Pillowcase body: cut one piece 25″ x WOF. (For king case, cut one piece 31″ x WOF.)
Bottom band: cut one piece 13″ x WOF
Accent strip: cut one strip 2″ x WOF
Flange: cut one strip 1¼” x WOF

1. Fold flange in half lengthwise, wrong sides together, and press. With right sides together, align the raw edges of the flange along one long edge of the accent strip and machine baste with 1/8″ or 3/16″ seam.
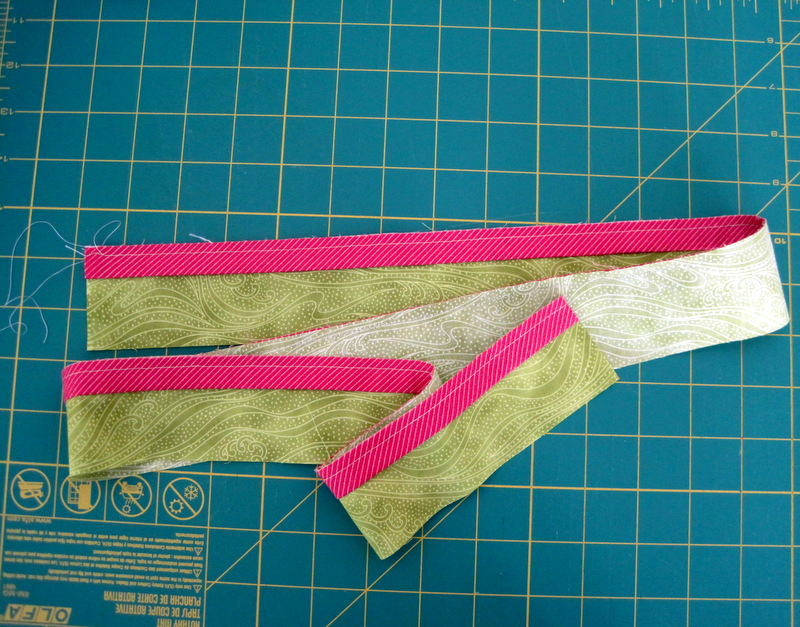
pcases 2 flange and accent strip
Accent Strip with Flange Attached


2. With right sides together, sew the flange edge of the accent strip to one long edge of the bottom band. Note that the basting stitches are in the seam allowance to the right of the seam you are sewing. (Don’t worry if the bottom band, accent strip, and flange are slightly different in length — you’ll trim them evenly in Step 3.)
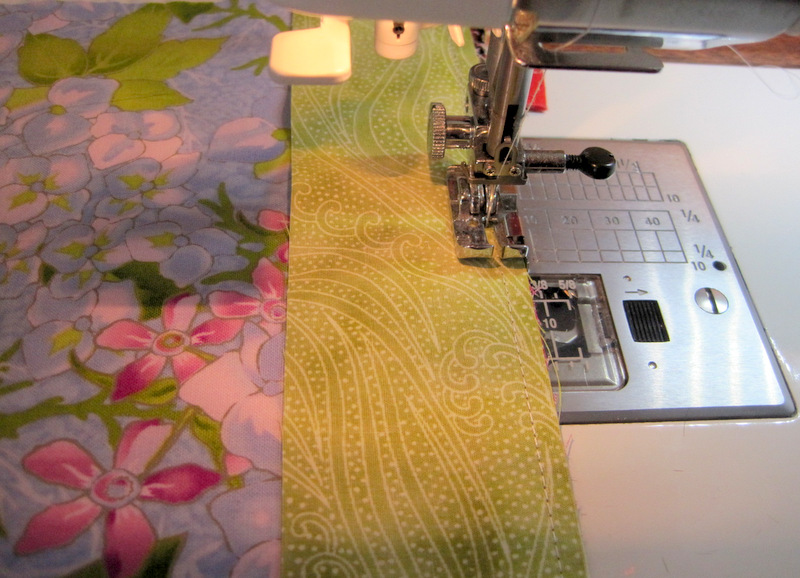
pcases 3 sewing accent strip to bottom band
sewing accent strip to bottom band


Press the line of stitching to “set the seam.” From the front, press the seam toward the accent strip, turning the flange toward the bottom band.
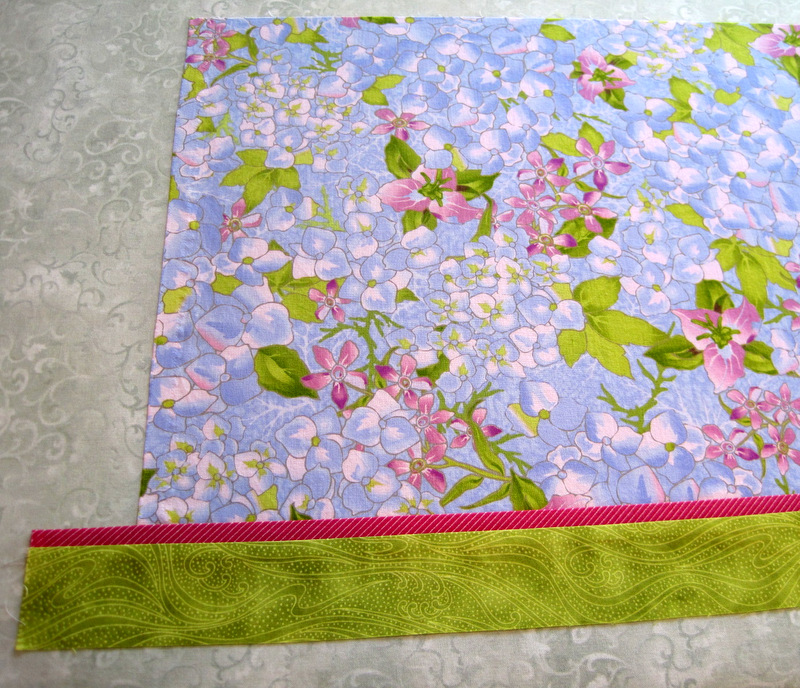
pcases 4 press flange toward bottom band 1
Pressing the seam


3. Fold the band/accent/flange unit in half as shown below and arrange it on a large cutting mat so that the fold is on the left and the selvages are on the right. Make sure the fold is next to one of the inch marking lines on the mat. Measure 20¼” from the fold — you should be within an inch or so of the selvage edges — and align an acrylic ruler on the 20¼” mark:
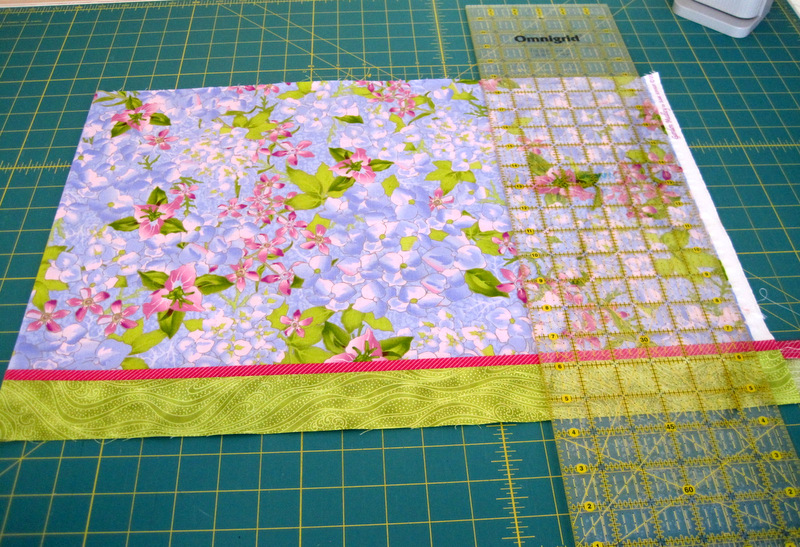
pcases 5 measure 20.25 inches from fold
Measuring 20 1/4″ from the Fold at Left

Trim the selvages. Your band unit should be 40½” wide.
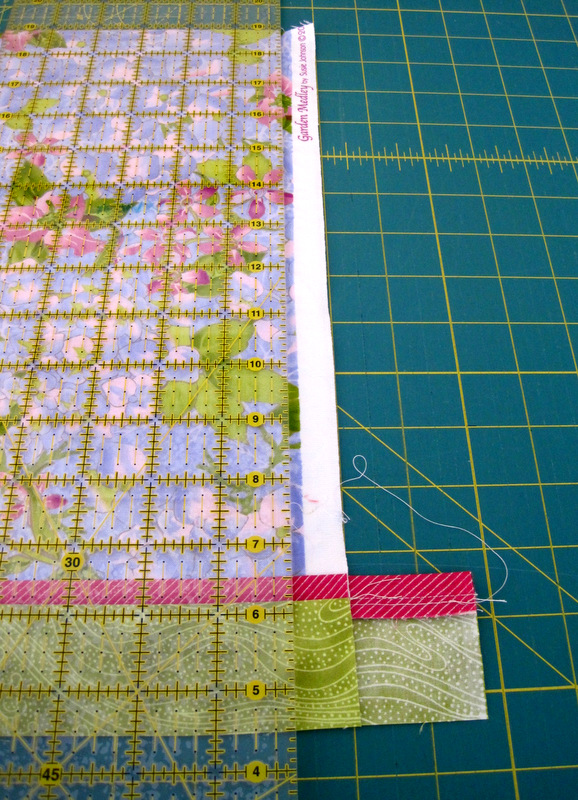
pcases 6 trim selvages
Ready to Trim Edges of Band Unit


4. Trim the selvages from the pillowcase body in the same way, measuring 20¼” from the fold. The pillowcase body should also be 40½” wide. With right sides together, pin one end of the pillowcase body to the other long edge of the accent strip (the edge without the flange). Machine baste with a 1/8″ or 3/16″ seam. Do not press this seam.

5. Lay the pillowcase on a flat surface (I like to use my ironing board) with the seam you just stitched at the top. The band should be underneath and the pillowcase body on top (right sides together):
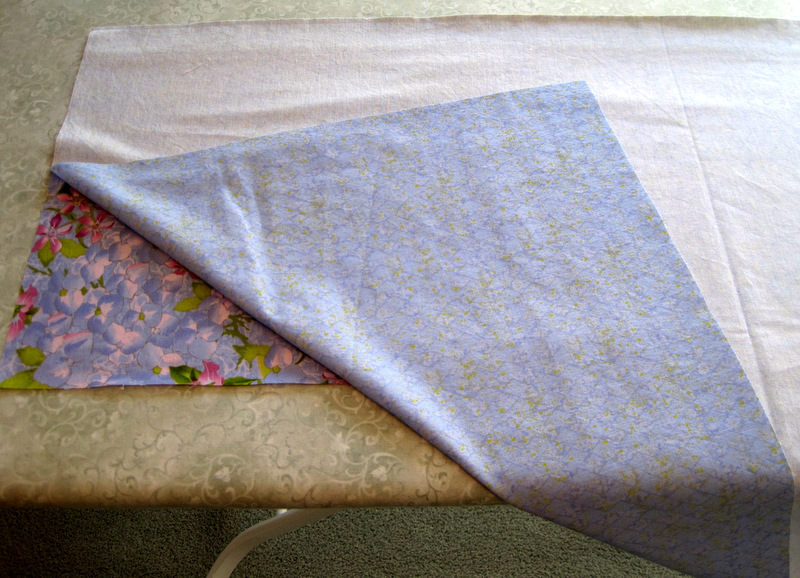
pcases 9 on ironing board
Almost Ready to Roll!


This is where the magic comes in. Let the edge of the pillowcase body dangle off the edge of the ironing board. With both hands grasp the end that is dangling and start rolling it from the bottom toward the top:
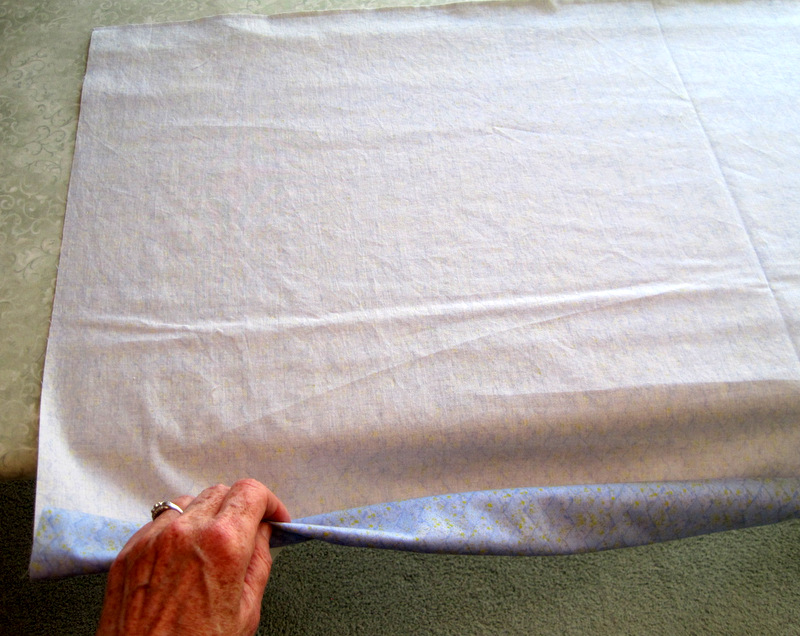
pcases 10 rolling up from bottom
Rollin’, Rollin’, Rollin’

Stop when the roll is in the middle of the band unit:
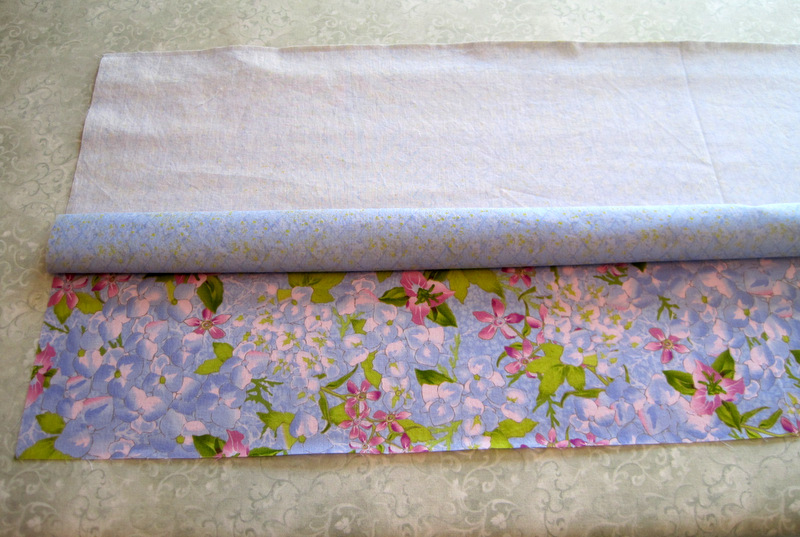
pcases 11 stop rolling
Stop Rolling Here!

Now bring the bottom of the band unit up and over the roll and align it with the top of the unit:
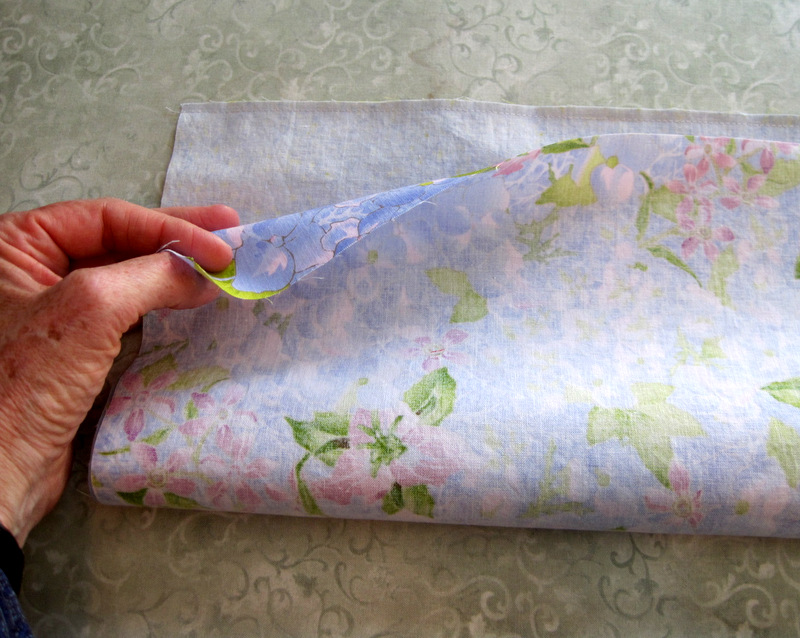
pcases 12 bring raw edges together
Bringing Raw Edges Together

Pin the layers together along the top and stitch with a ¼”seam, backstitching at the beginning and end of the seam. You now have a tube with two open ends.

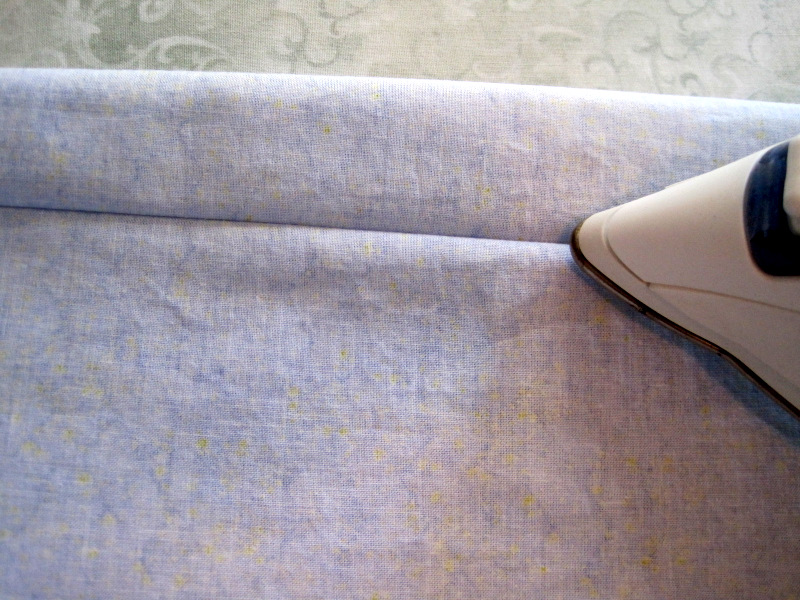
6. Pull the rolled up case out from either end and shake it out flat. Press the bottom band first from the wrong side of the case (don’t press all the way to the fold) and then from the front. Be sure to smooth the fabric away from the seam on both sides before you use the iron to make sure you don’t wind up with folds of fabric at the seamline.
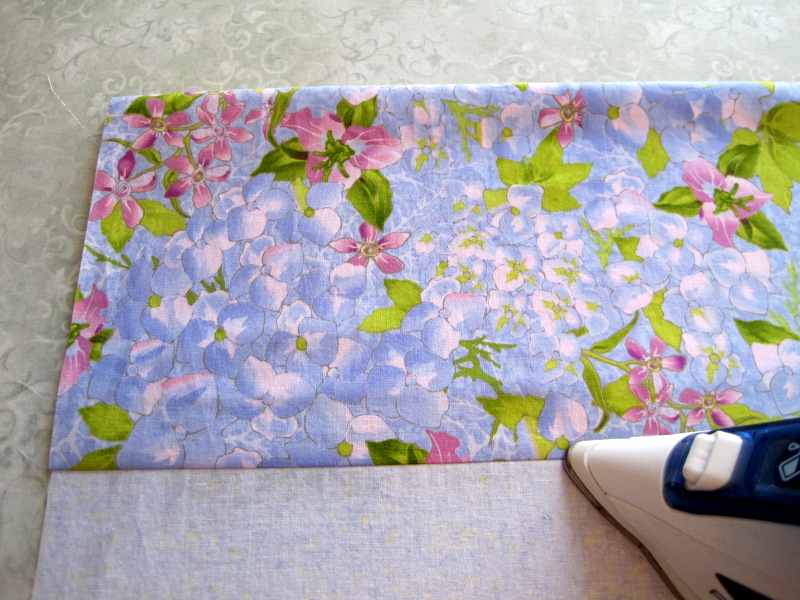
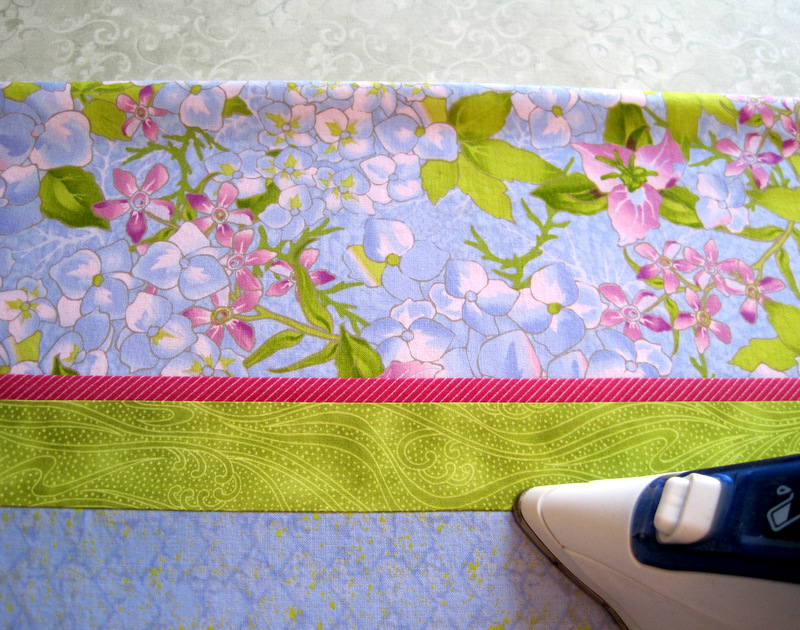
pcase 13 pressing band from the back
Pressing Band from the Back
pcase 14 pressing band from the front
Pressing Band from the Front


Still with me? Good! Now it’s time to finish the pillowcase with French seams, a sewing technique in which raw edges of fabric are enclosed in a seam and then that seam is enclosed in a second one. French seams are often used on lightweight and sheer fabrics. Using them on regular weight cotton adds a bit of bulk, especially in one corner, but it gives you a beautifully finished pillowcase inside and out. Over time I’ve discovered a couple of trimming and pressing techniques that minimize the bulk.

7. Fold pillowcase in half with wrong sides together. Pin the raw edges and sew a ¼” seam, backstitching at both ends. I find it easiest to start at the fold at the top of the pillowcase and end at the bottom of the band. Slow down when you get to the band unit, as you are stitching through several layers of fabric. (This is why it’s smart to start out with a new sharp needle in your sewing machine.)

Note: before I sew the seam I match the seams on the band unit and machine baste them:
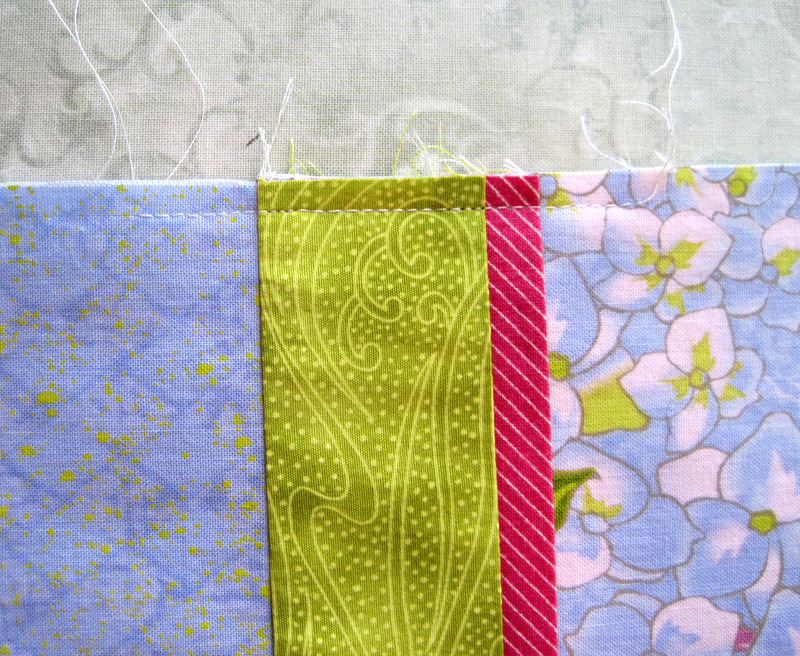
pcases 15 basting raw edges of accent strip
basting before stitching


8. Using a rotary cutter and ruler, trim the seam to 1/8″. (This step trims off the small loose threads that can get caught when you sew the second seam and also allows the second seam to be narrower — hence less bulk.)
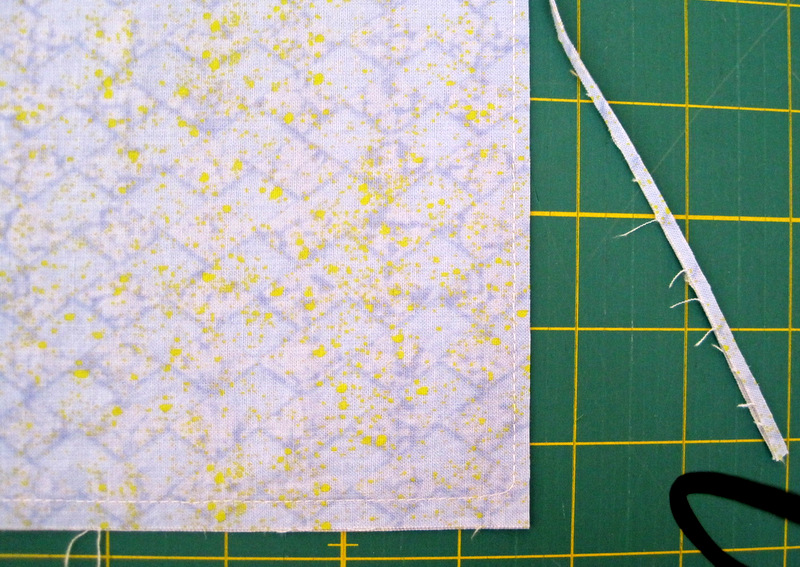
pcases trimming seam to one eighth inch
Trimming Seam to 1/8″

After trimming the seam, turn the pillowcase inside out and gently poke out the corners with a point turner. Before you press the edges of the pillowcase, press the seam to one side to flatten it. Look carefully at the next pictures to see what I mean:
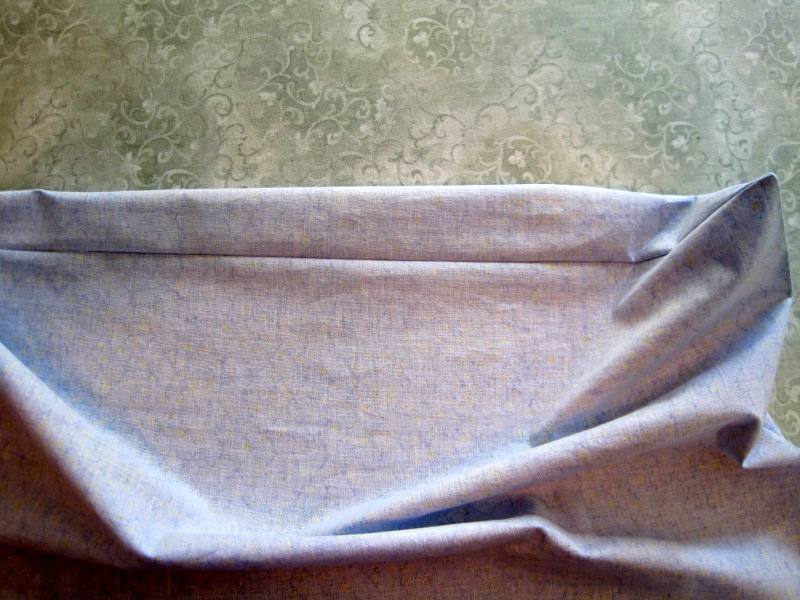
pcases 16 pull top seam down
Pulling Top Seam Down
pcases 17 using tip of iron to flatten seam
Using Tip of Iron to Flatten Seam

See how I have pulled the top seam down a couple of inches from the top edge? I can flatten that seam by pushing it to one side (it doesn’t matter which way) with just the point of the iron. It’s not really clear from these pictures that I am holding the heel of the iron well off the pillowcase so only the point of the iron is touching fabric. I can get the point of the iron to within a couple inches from the corners.

Now do the same thing with the side seam. Pull the side seam toward you on the ironing board, making sure fabric underneath is flat. Use just the tip of the iron to flatten the seam by pushing it to one side:
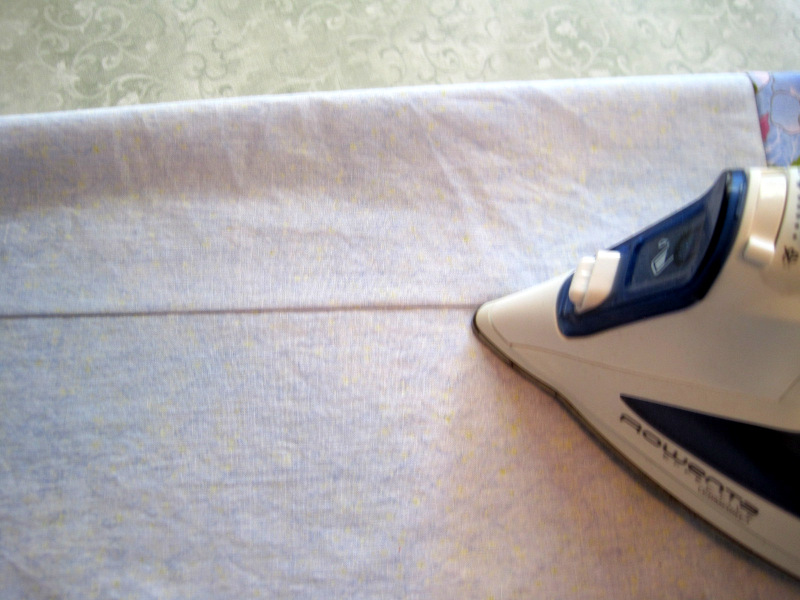
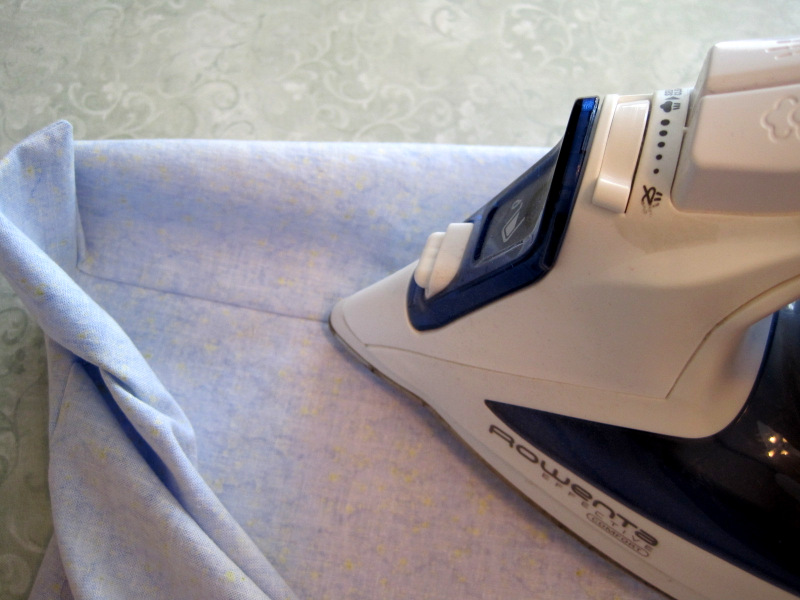
pcases 18 flatten side seam
Flattening side seam with tip of iron
pcase 19 flattening side seam
Getting as Close as Possible to the Corner with Tip of Iron

Now press the entire pillowcase with the seam in its proper position at the outer edge. You should find that the seam can be pressed flat without any excess fabric forming folds at the seamline. Another way of getting the seam flat is to roll it between your fingers but I find this to be a very laborious and time-consuming process.

9. Stitch another ¼” seam all the way around, starting at the top of the pillowcase and ending at the bottom of the band, backstitching at the beginning and end. Go slowly where the flanges meet — going a stitch at a time, if necessary — to help your machine sew through the layers of fabric.

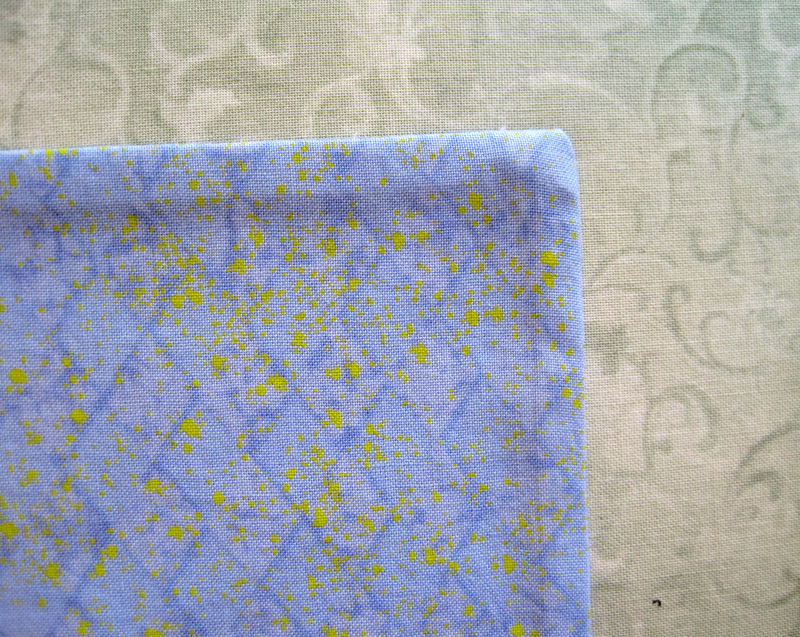
Turn the pillowcase right side out and gently poke out the corner at the fold using the point turner. The other corner is the slightly bulky one; you’ll need to manipulate it with your thumb and finger until it forms a gently rounded right angle when it’s turned to the right side. This is what it looks like on the inside . . .
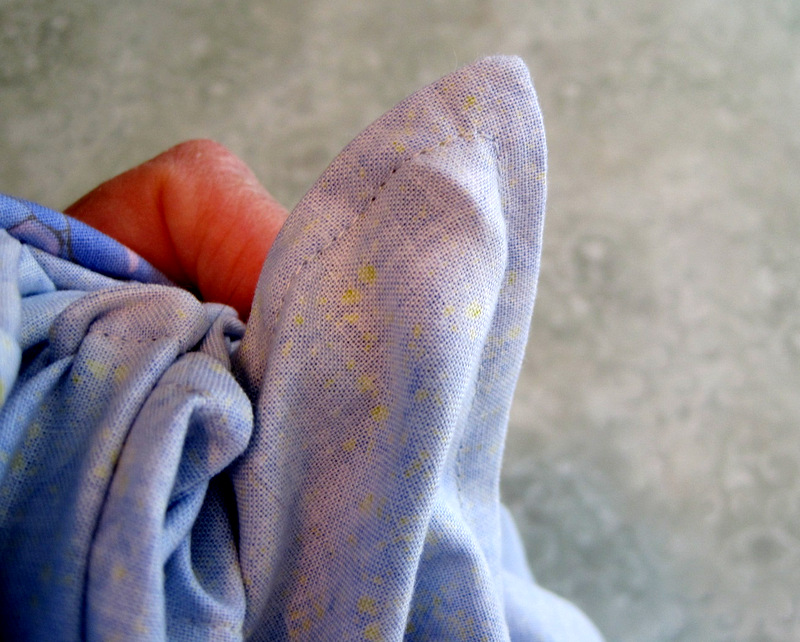
pcases 22 manipulating corner
Corner from the Inside

. . . and this is what it should look like on the outside:
pcase 21 turned and ironed
Slightly Rounded Corner from the Outside

Use the same pressing technique described above in Step 8 to flatten the seams. Give the pillowcase a final press. Voilà!

pcases 1 finished cases
A Pair of Pillowcases for the Portland White House


Posted in roll-it-up pillowcases, update | 9 Comments

Crazy for Kaleidoscopes

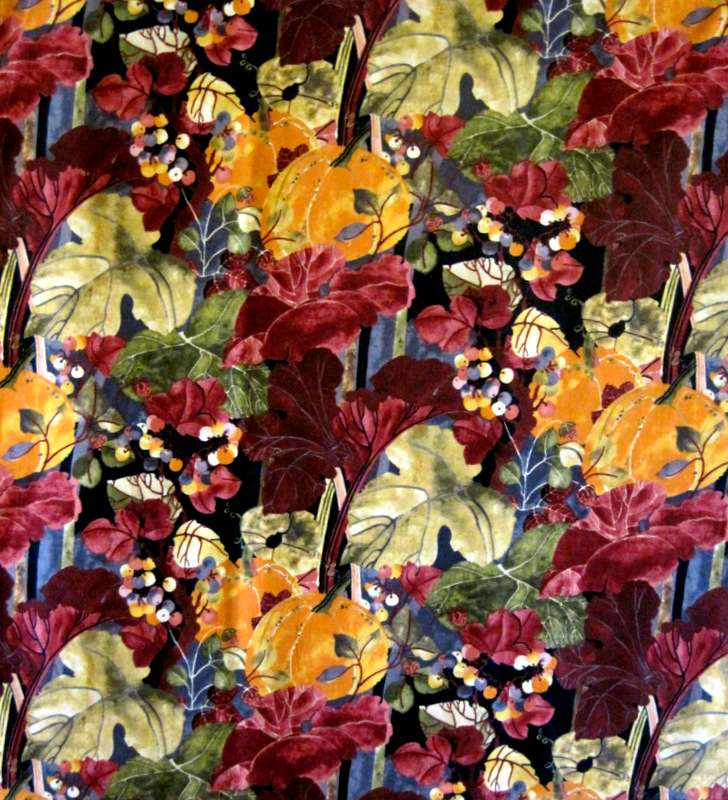
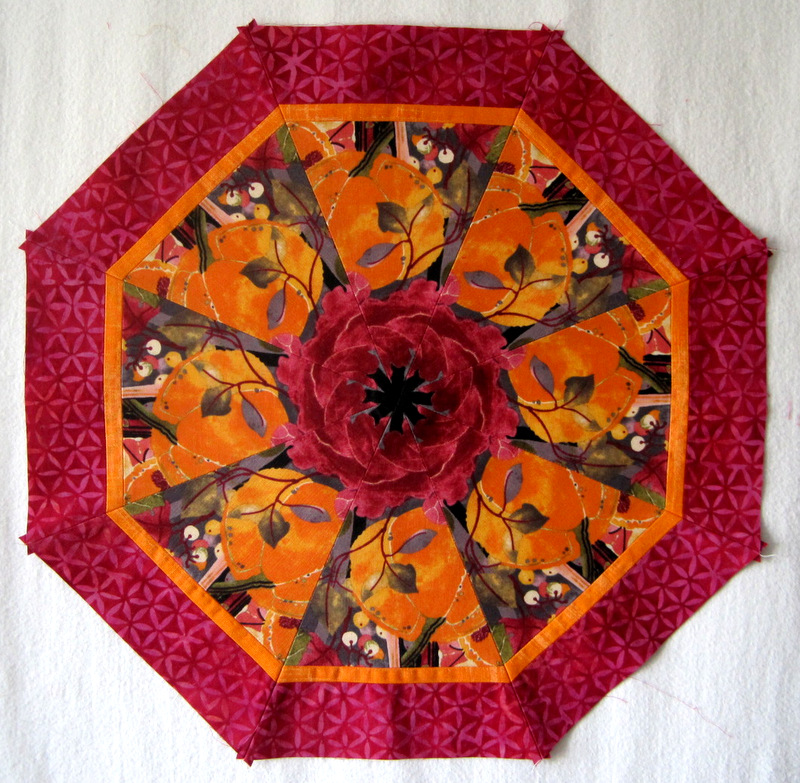
I started out with this fabric . . .

2013-10, In the Beginning fabric
Autumn Harvest by Jason Yenter for In the Beginning Fabrics

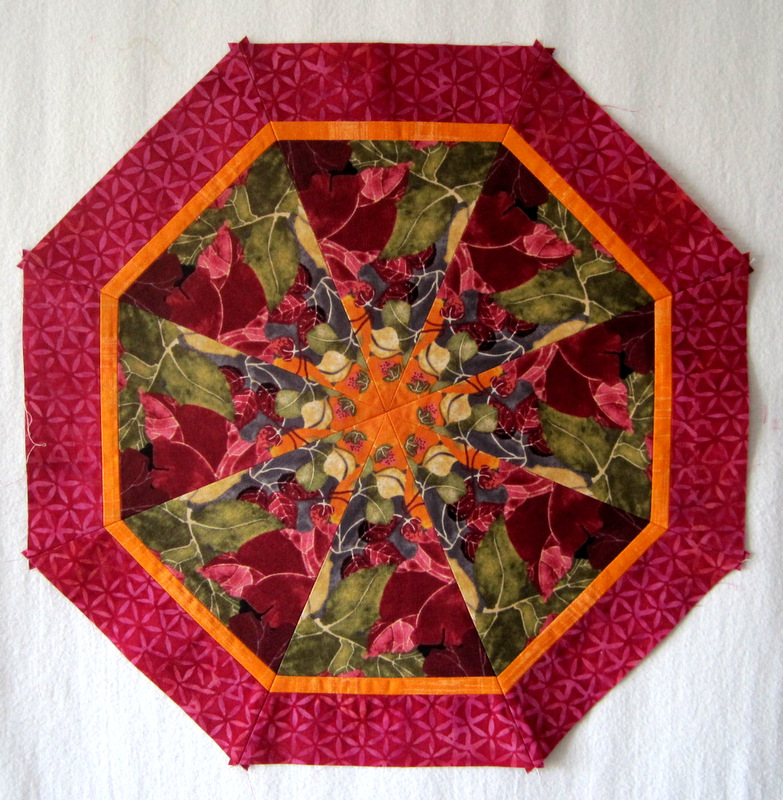
. . . and wound up with this:

2013-10, kaleido block 1
Kaleido Block 1

and this:

2013-10, kaleido block 2
Kaleido Block 2

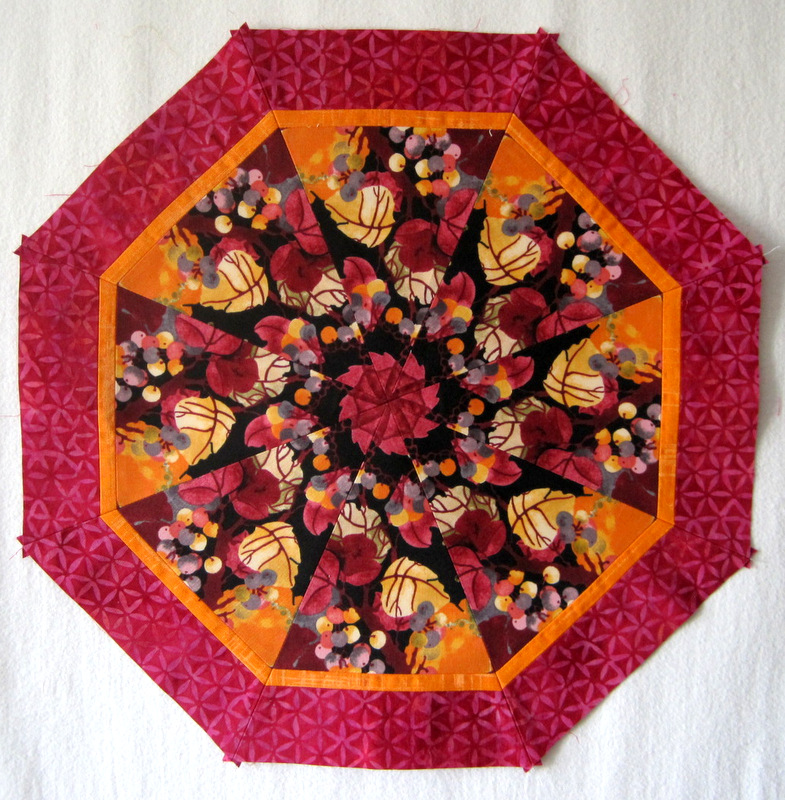
and this:

2013-10, kaleido block 3
Kaleido Block 3


Can you see now why I’m crazy about kaleidoscopes?! I think I will turn these 16″ blocks into a table runner celebrating autumn, “season of mists and mellow fruitfulness.”


Posted in kaleidoscope quilts, update | 11 Comments

My Little Neighbor: Back for the Back

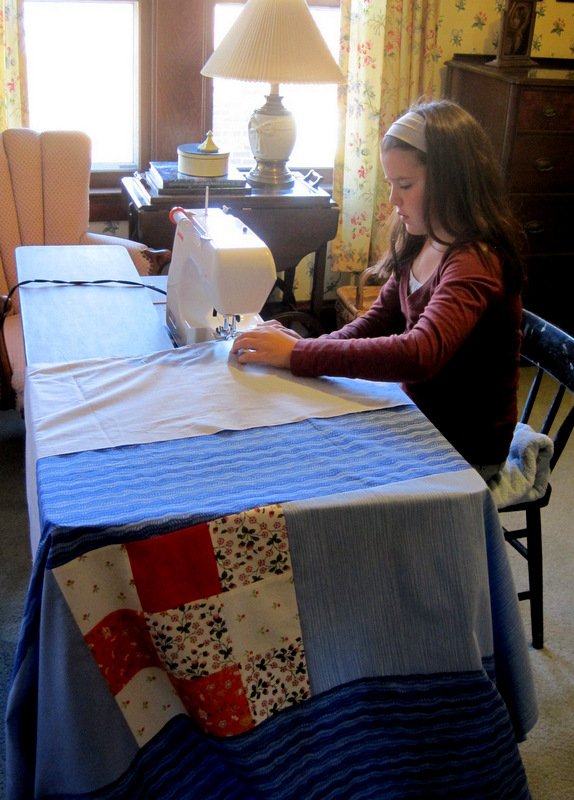
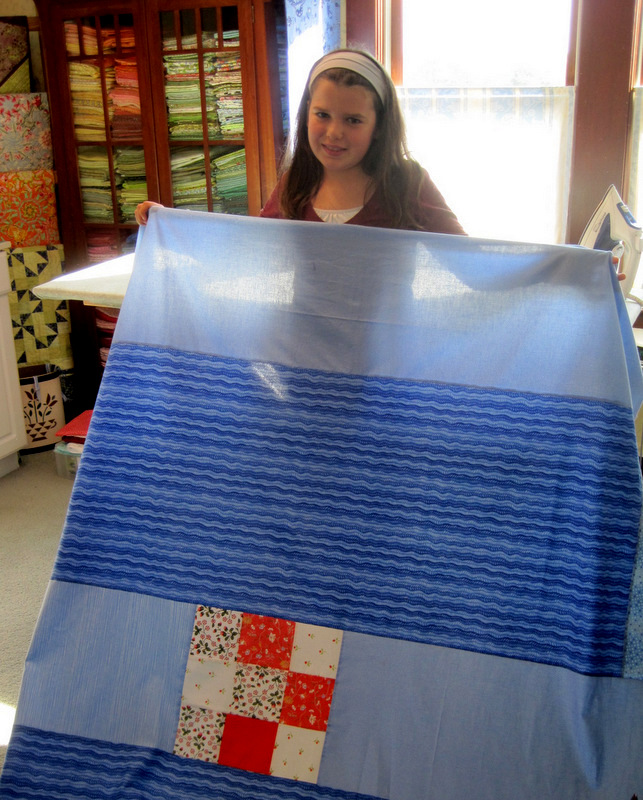
My Little Neighbor, who is working on her first quilt, finished piecing the back yesterday. She had one block left over from the front and decided she wanted to position it in the very center of the quilt back. Here she is sewing the back together . . .

2013-10, MLN sewing quilt back
Sewing on a Sunny October Day

. . . and holding the completed back:

2013-10, MLN with quilt back
The Back Measures 64″ x 78″


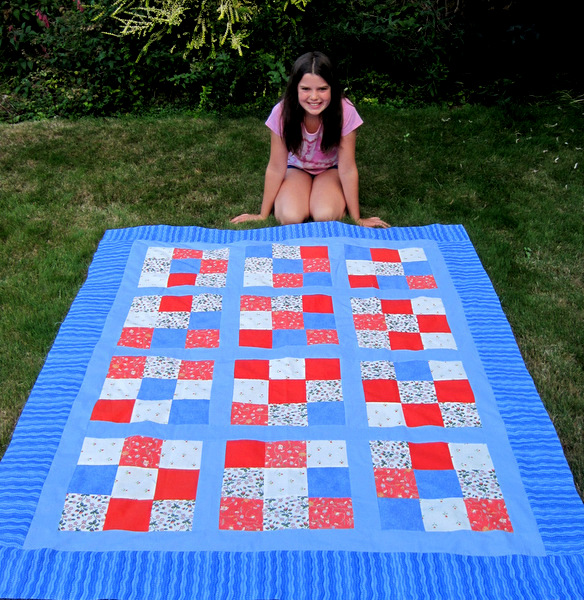
The back is composed of alternating strips of light and medium blue, the same blues used in the sashing on the front. You may remember this photo taken a few weeks ago on the day she finished the top:

2013-9, MLN with her 9-patch
The Top Measures 56″ x 70″


What’s next? Nancy Stovall of Just Quilting will baste the layers together at her longarm studio. My Little Neighbor is planning to quilt this herself!

MLN is 11 now but started the quilt in the summer of 2012 when she was 10. Her 9-patch blocks were all sewn by hand but she moved to the machine to add the sashing and borders. You can follow her journey through these links:

July 6, 2012, Her First Quilt: https://firstlightdesigns.com/?p=1381
August 4, 2012, An Update: https://firstlightdesigns.com/?p=1544
March 2, 2013, Back at Work: https://firstlightdesigns.com/?p=2860
Sept. 2, 2013, Making Progress: https://firstlightdesigns.com/?p=3972
Sept. 3, 2013, The Big Reveal: https://firstlightdesigns.com/?p=3995

I’ll keep you posted on her next steps!


Posted in My Little Neighbor, update | 3 Comments

Banana Split

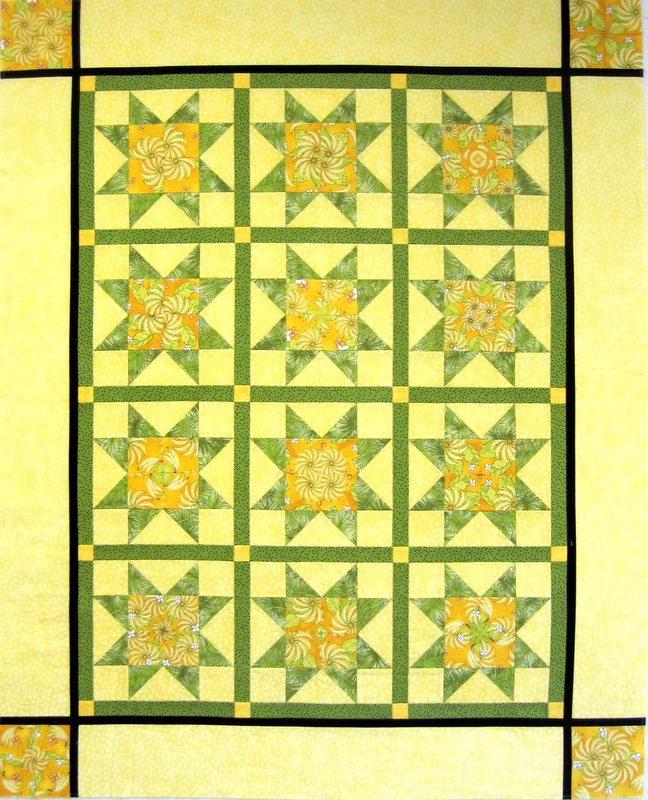
In my continuing quest to complete a stack (not sayin’ how big) of Unfinished Objects and Works-in-Progress, I recently pieced a back for a quilt top I made three years ago. Three years! I don’t know why I waited so long to make the back. Here is the top, which measures about 42″ x 52″:

2013-10, Banana Split, 42 x 52


The centers of the stars are 4-Patch Wonder blocks I made from a banana-themed fabric that caught my eye in a quilt shop in Kearney, Nebraska in the summer of 2010. That was the year my husband and I took a 30-day road trip around the western United States. I hit a fair number of quilt shops in eight states that summer. My own little Shop Hop, so to speak. My husband joked that our gas mileage steadily declined during the trip as the trunk filled with fabric. Hmmm. Maybe he wasn’t joking.

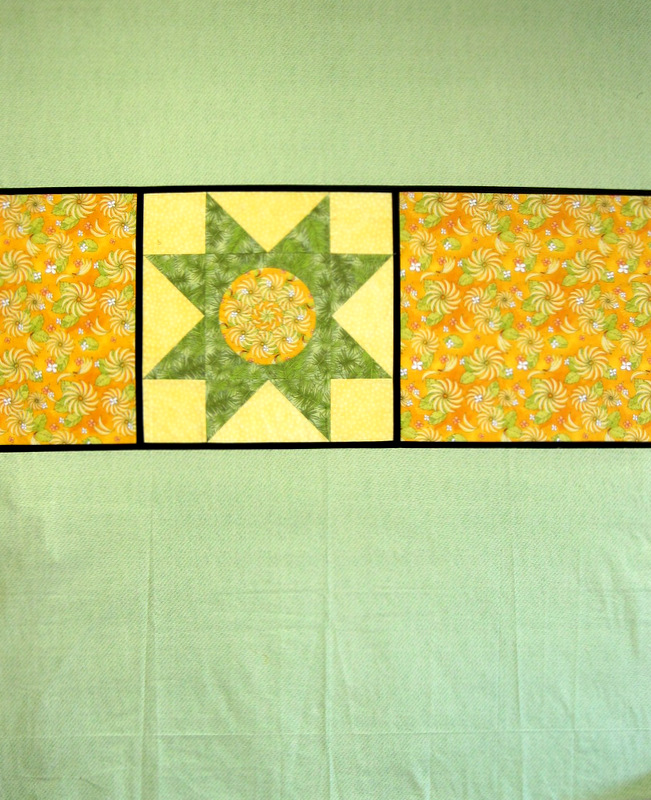
When I pulled out the tub of fabric I had used for the quilt top, I discovered that I had also made several octagonal kaleidoscope blocks out of the banana fabric (enough to make another quilt, in fact). I used one of those kaleido blocks to make an 18″ block for the quilt back, which looks like this:

2013-10, back of Banana Split

You can see the clusters of bananas on the outer pieces of fabric. The repeat on the fabric is very small — just 8″ — so I cut 2¾”squares for the 4-Patch Wonder blocks, resulting in a 4½” square center block. The star blocks finish at 9″ square.

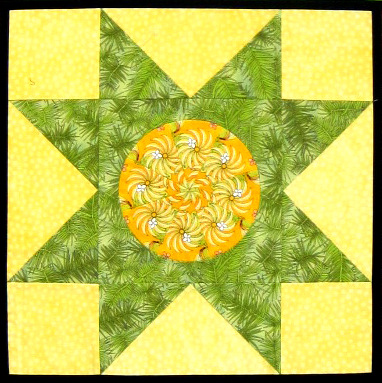
For the big block I converted the octagonal kaleido block into a circle and made an oversize star. Here’s a close-up of the kaleido block:

2013-10, banana split, detail of back block


The minute I started slicing those bananas, I knew what I was going to call this quilt.


Posted in 4-Patch Wonder, kaleidoscope quilts, update | 4 Comments

Bathroom Renovation: an Update

The contractor’s work on our master bath renovation was finished in June but there was more to come before the bathroom could be considered complete. I ordered plantation shutters from a local company and started looking for a console table and stool. Both furniture pieces had to be just the right size to fit in small spaces.

After visiting several vintage and antique shops in Portland and scouring the Internet, all to no avail, I asked Phillip Galyon of Wooden Images to make me custom pieces. Phillip is a master craftsman who specializes in quilt racks and custom furniture. If you have been to the Northwest Quilting Expo in Portland the last few years, you have probably seen Phillip and samples of his beautiful work in the vendor mall. He made the sewing table and cabinet in my sewing room so his work is well known to me.

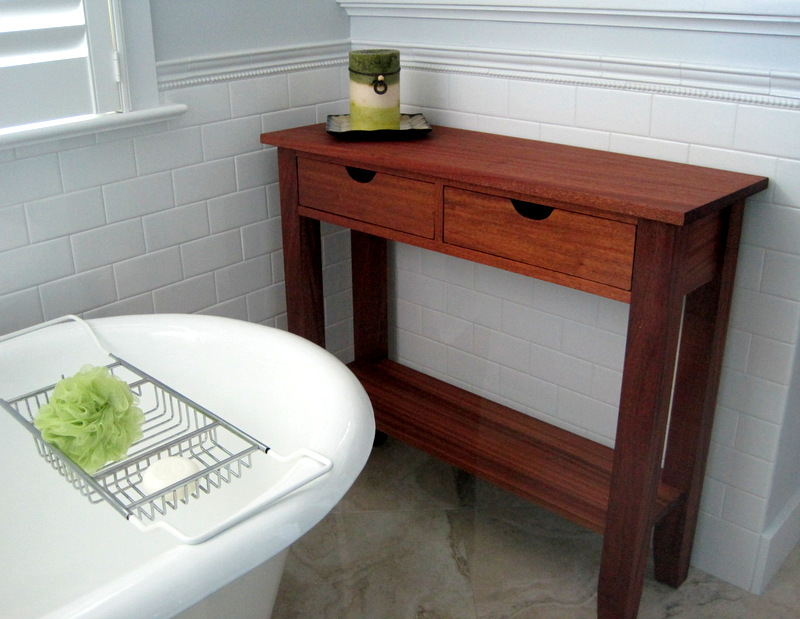
Phillip delivered my table and stool Saturday. Here is the console table:

2013-13, console from the shower

It measures 36″ x 12″ and is 31″ high. (The photo was taken from inside the shower so there’s a slight reflection.)

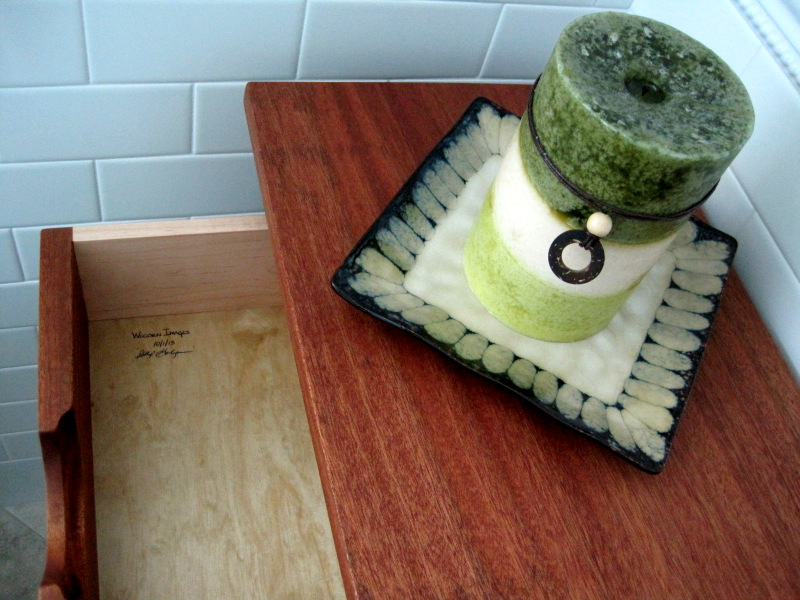
Take a peek inside one of the drawers:

2013-10, console table with drawer open

Phillip signs his work, just like quilters who put labels on the backs of their quilts.

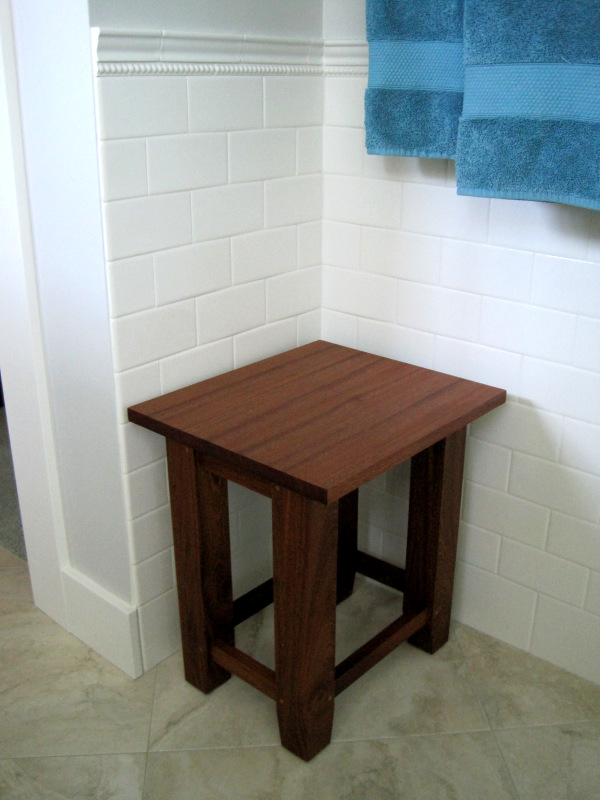
Here’s the stool:

2013-10, bath stool

It measures 14″ x 16″ and is 18″ high. Both pieces are made of African mahogany.

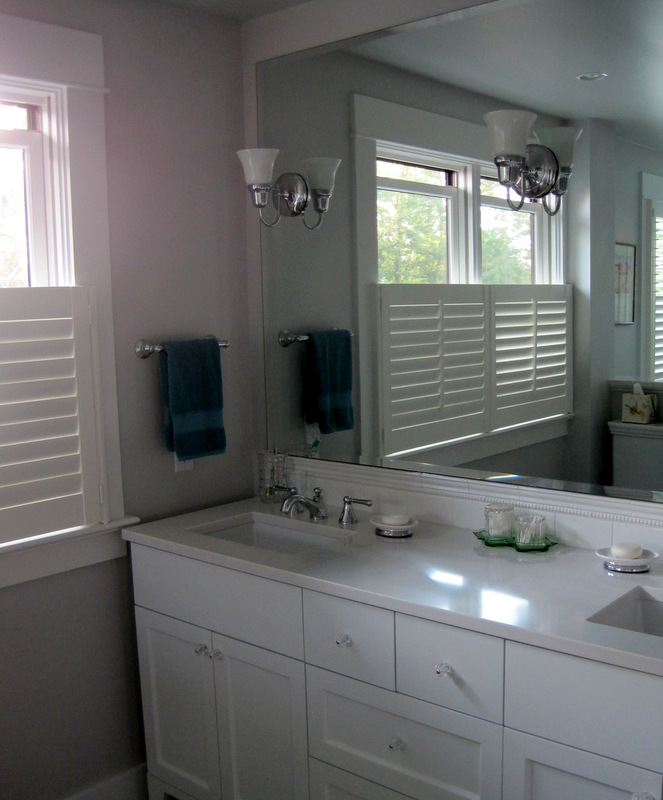
The plantation shutters have been in for a few weeks. The best shot of the café shutters on the sink side of the bathroom is the reflection in the mirror:

2013-8, cafe shutters

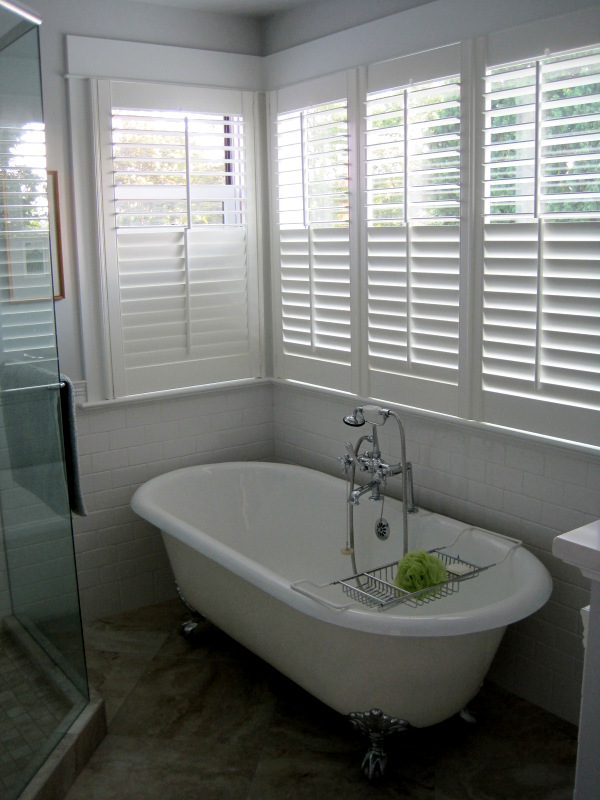
The shutters on the tub side are full size with the split tilt feature that allows the upper and lower halves to open separately, giving both light and privacy:

2013-8, shutters around tub

As you can see, there is a lot of white and light grey in this bathroom. I felt it needed some dark wood for contrast. My new table and stool fit the bill nicely, don’t you think?

If this is your first visit to FirstLightDesigns.com, you may want to check out this earlier post for links to views of the bathroom under renovation. In a few days I’ll have one more post about the bathroom, with before-and-after photos arranged side by side. I hope you’ll stop by to check them out.


Posted in bathroom remodel, update | 3 Comments

Simply Irresistible

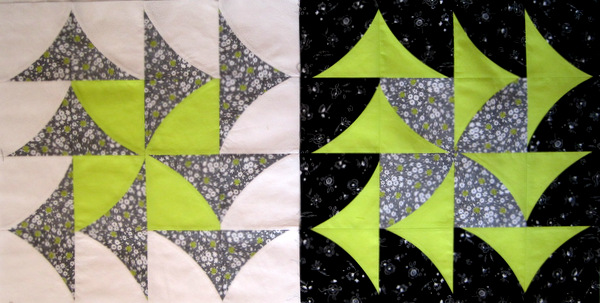
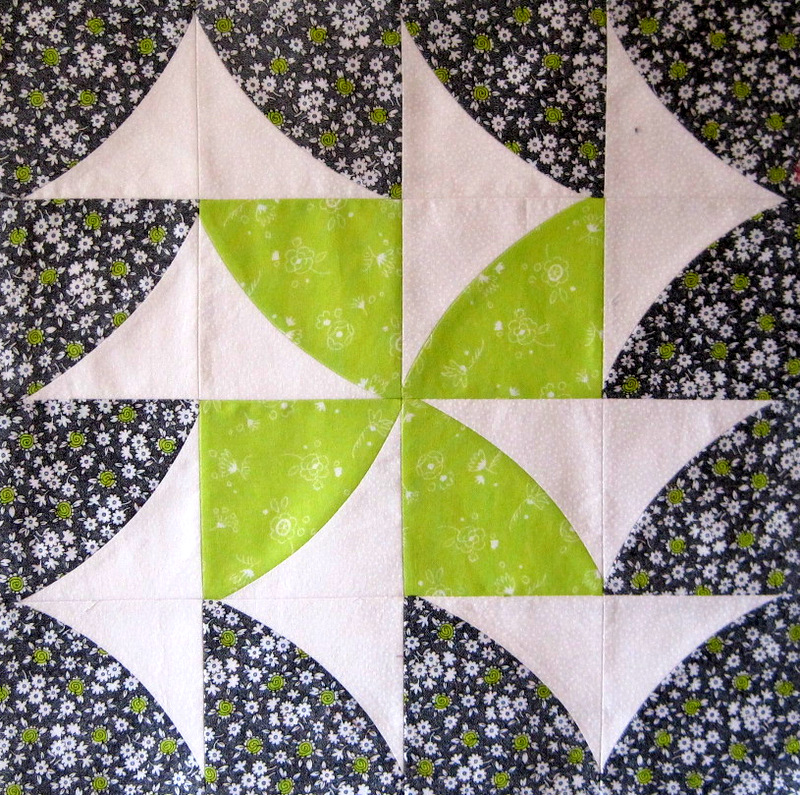
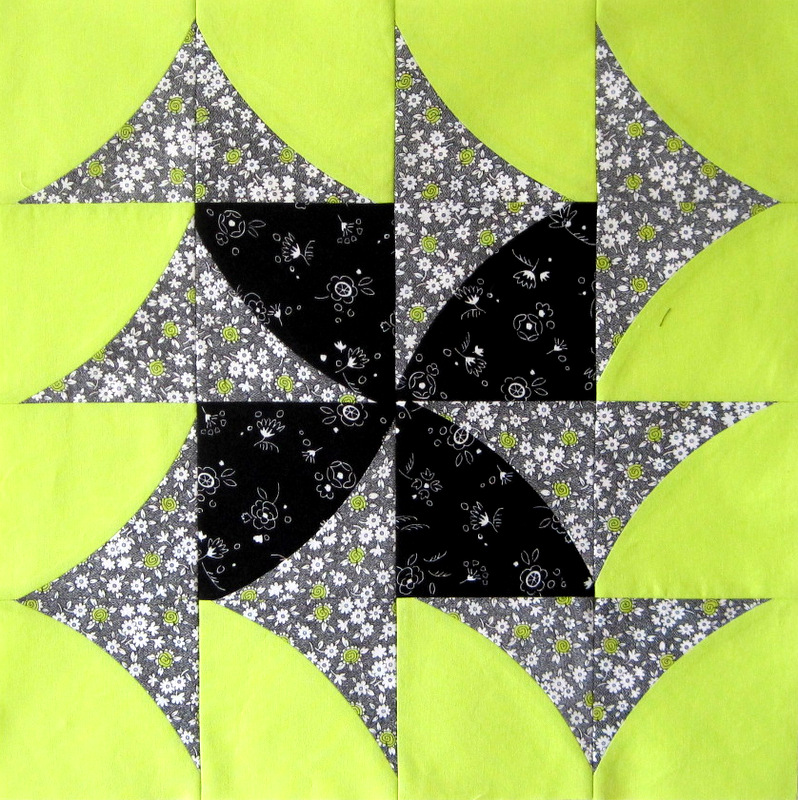
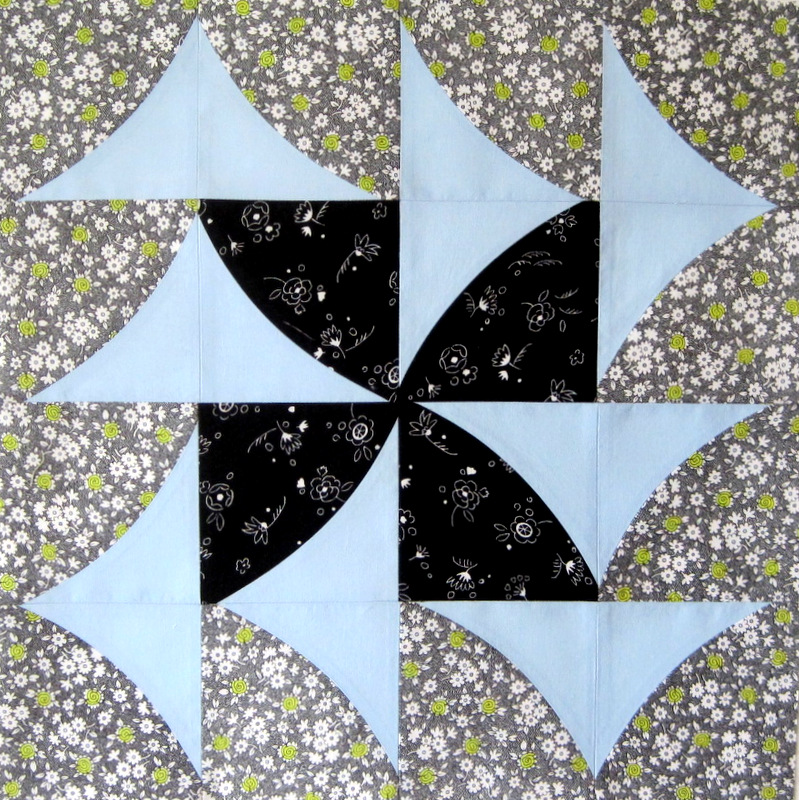
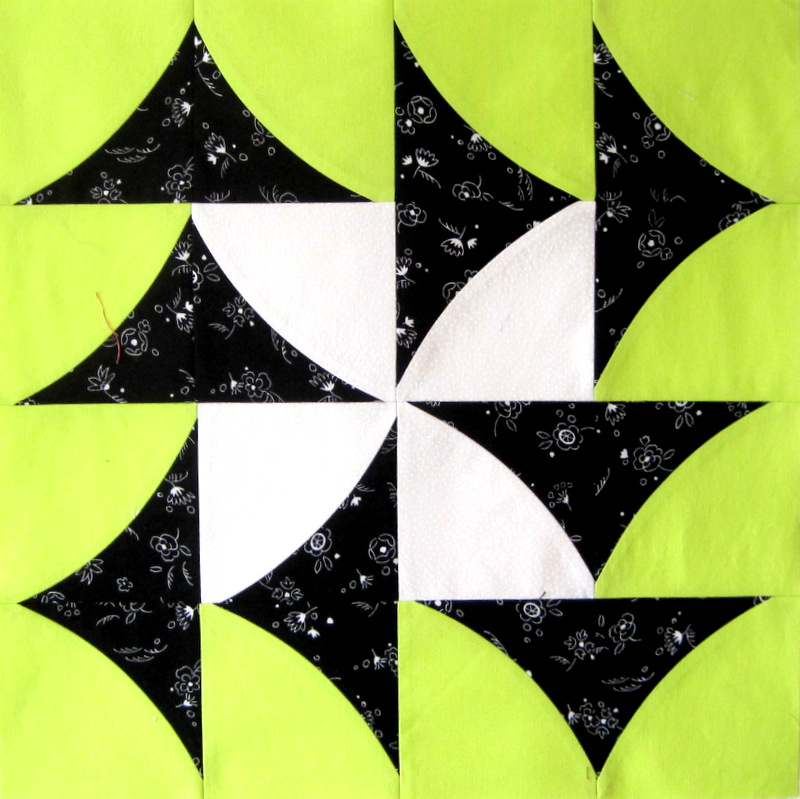
A few weeks ago I posted a picture of a couple of test blocks I made using Jenny Pedigo’s Curvy Geese design, introduced on her blog, Sew Kind of Wonderful. Here’s another look at those two blocks, which finish at 16″:

2013-9, curvy geese blocks

Since then, I’ve made a few more blocks. I just can’t help myself — they are so fun to make. I’m using fabrics from the Doodle line by Timeless Treasures with a few solids mixed in.

Here’s a new block:

2013-9, curvy geese block 3

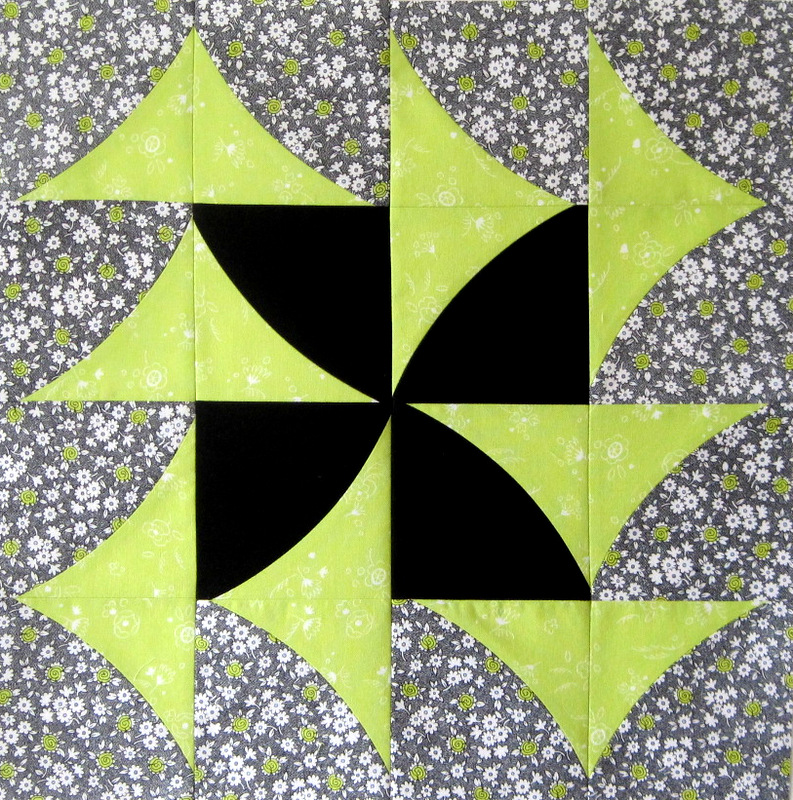
And another:

2013-9, curvy geese block 4

And another:

2013-9, curvy geese block 5

And another:

2013-9, curvy geese block 6

And another:

2013-9, curvy geese block 7
What is it about this block that I find so irresistible? It’s a very traditional block — a pinwheel in the center surrounded by flying geese — but it has a decidedly modern feel that comes from the curvy lines and larger finished block size. It goes together very quickly, thanks to pin-free curved piecing and smaller units that are trimmed to size before being sewn together into rows.

The color palette is pretty controlled but I’m mixing up the positions of the light, medium and dark values for a somewhat scrappy effect. A few more blocks and I’m going to have a quilt top!


Posted in update | 3 Comments

Two Stubborn Females

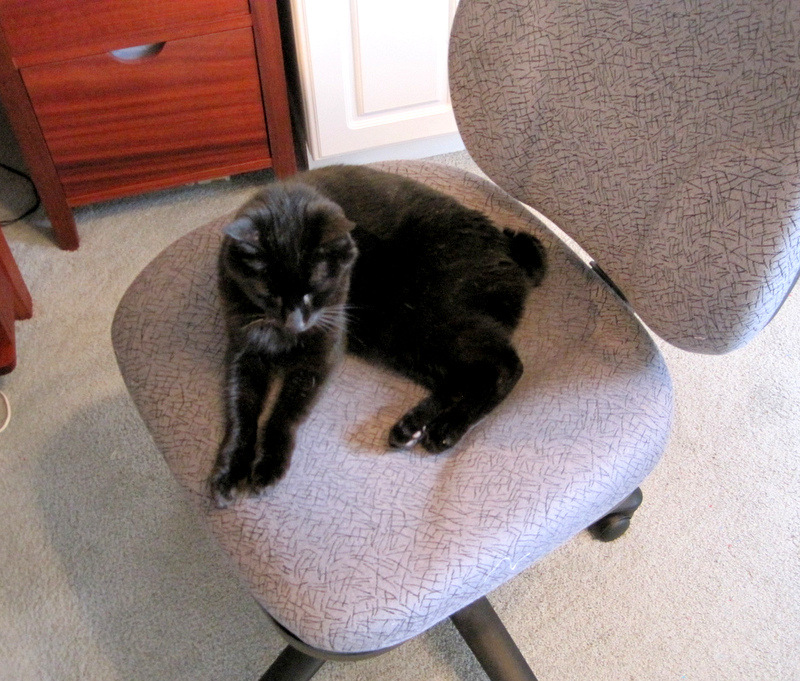
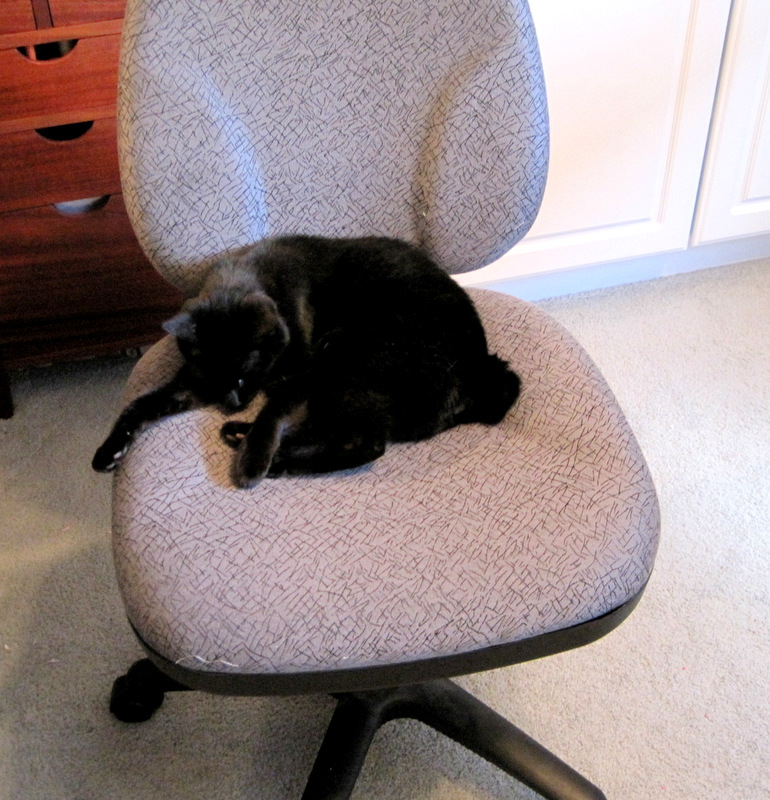
Recently my little cat Theodora (Theo for short) has decided that the perfect spot for her afternoon nap is on the chair in my sewing room. You can guess the problem. Most afternoons I am in my sewing room using that chair.

She waits till I am at the ironing board, with my back to my sewing table, and seizes her opportunity. When I turn around from the ironing board, this is what I see:

2013-9, Theo 1
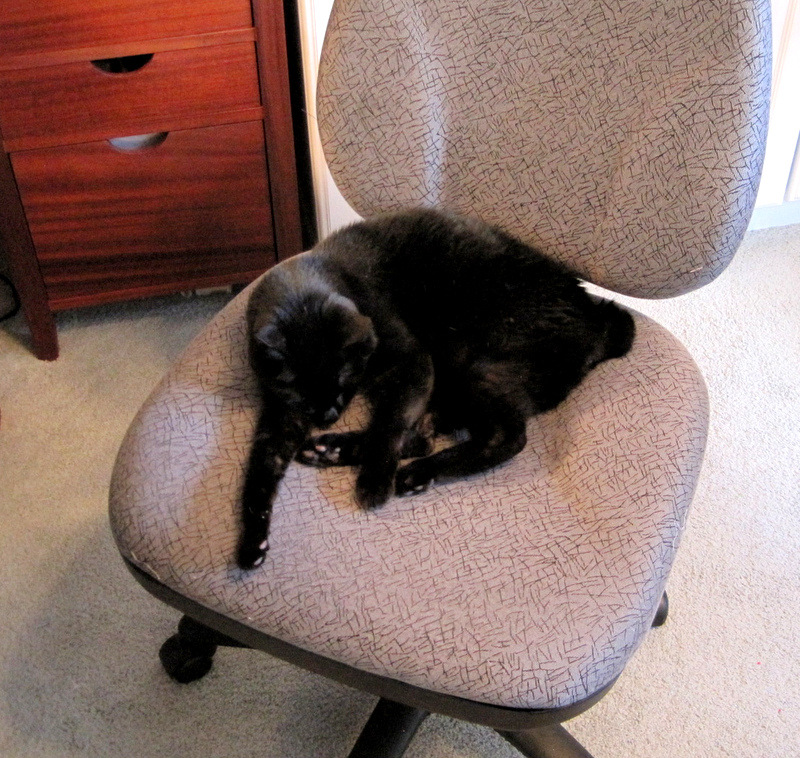
I gently evict her from my chair and sit down. She stalks off. But she doesn’t leave. Oh no. She lurks by the door, and the next time I head to the ironing board she makes her move:

2013-9, Theo 2
I evict her again, not quite so gently this time, and sit back down. Next trip to the ironing board, same thing. I turn around, and there she is:

2013-9, Theo 3
This continues till one of us gives up. If it’s Theo, she wanders off in search of another napping spot. If I cave in first, I move my chair aside (with Theo in it) and pull out the rickety old wooden chair from the closet to sit on.

Some days it’s a wonder I get any sewing done!


Posted in cats, update | 9 Comments

Grab Your Partner

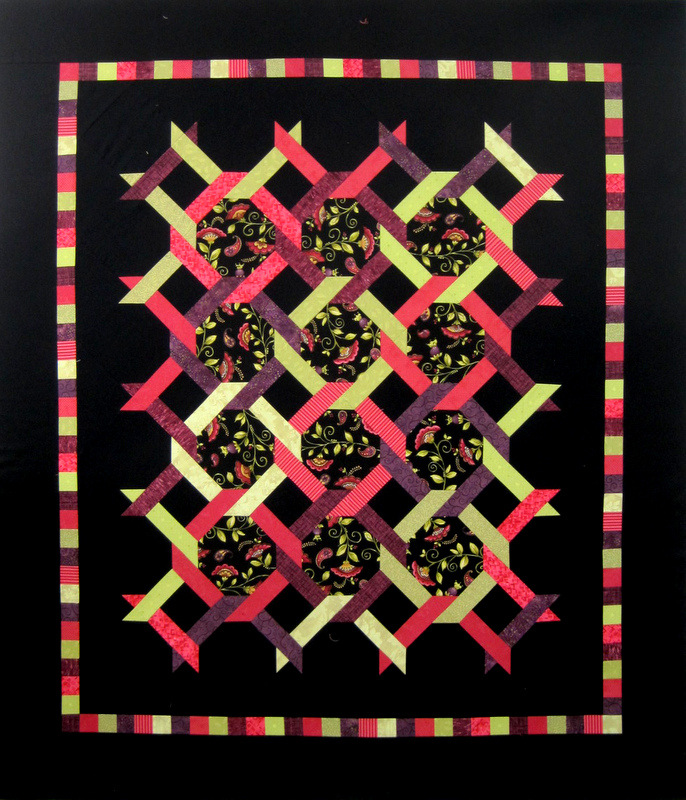
My newly finished quilt top has a name: Square Dance. Something about those interlocking lattice strips made me think of arms joined at the elbow — “allemande left and do-si-do” — and that was before I added the border of squares:

2013-9, Square Dance top 57 x 67

The quilt top measures 57″ x 67.” To read more about the making of Square Dance, click here.

Thanks for stopping by!


Posted in update | 2 Comments

Day for Night

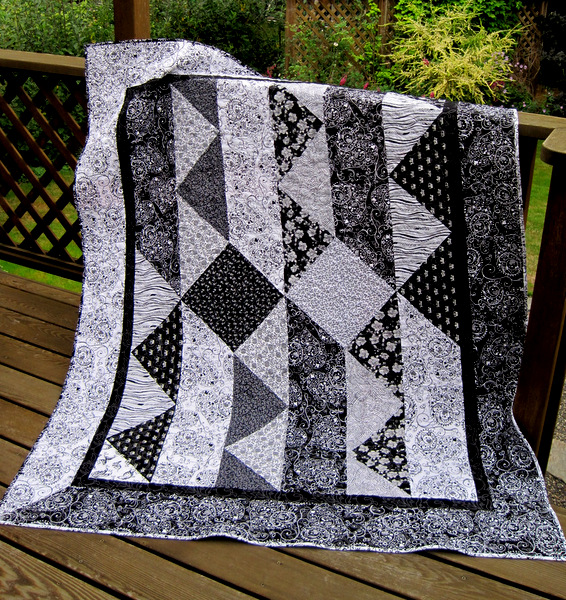
Another UFO bites the dust! That’s right, I have a finished quilt to present to you: Day for Night, begun in June 2012, finished today. It measures 56″ x 69″.

2013-9, Day for Night, front

I made the top in a couple of afternoons last year, when I was in the mood for something fast and fun. You can read about it here.

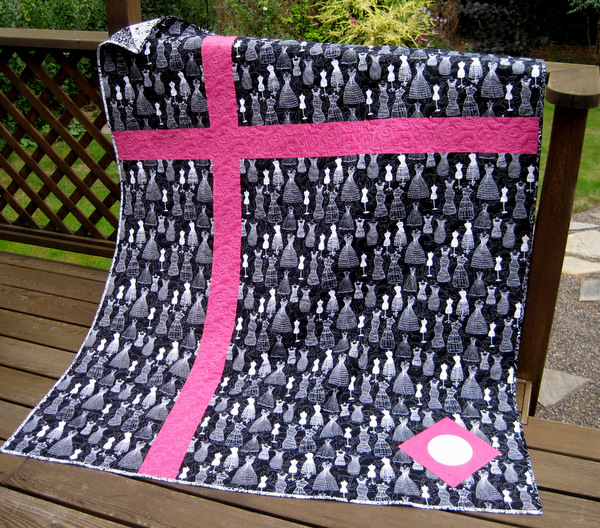
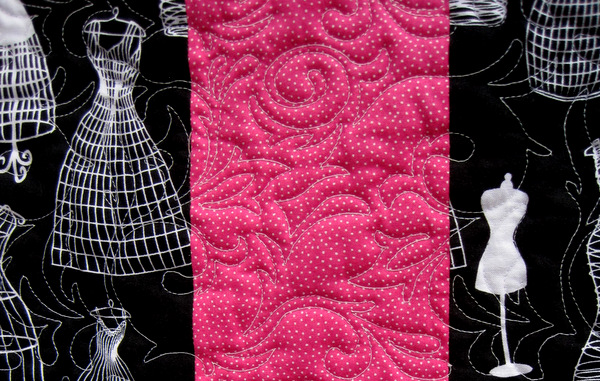
Why did it take so long to finish? One reason is that I hadn’t decided what to put on the back. I often use leftover blocks and strips on my quilt backs but in this case I had given them to one of my nieces for a sewing project. This summer I finally pulled a whimsical black-and-white print from my stash, pairing it with a dotted fuchsia for a jolt of color:

2013-09-16 02.24.22

That’s the label you see in the lower right-hand corner. I fused it to a square of the fuchsia fabric and set it on point to echo some of the blocks on the front.

Nancy Stovall of Just Quilting quilted a swirly edge-to-edge design that blends in perfectly on the front and complements the whimsy of the backing fabric. Here’s a close-up of the back:

2013-9, Day for Night, back, quilting detail
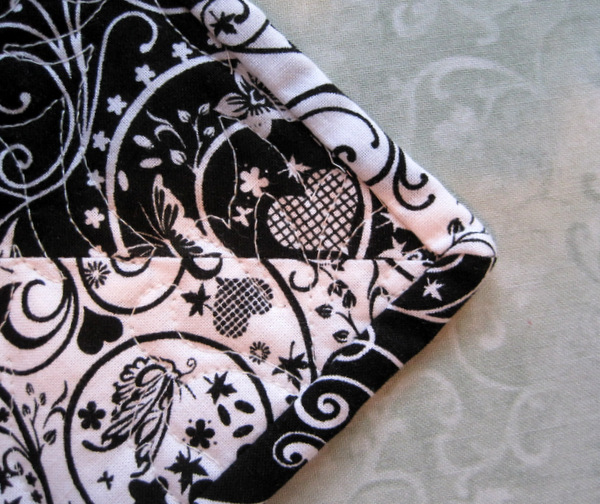
Did you happen to notice that the binding is two different fabrics? I wanted to play with the black-white/positive-negative theme by binding the quilt with fabric that’s the reverse of the fabric right next to it. This was a fun challenge because I had to figure out how to miter the corners where the black and white fabrics meet:

2013-9, Day for Night, binding detail
With double-fold binding (also known as French binding), quilters make it a point to avoid having a seam in a mitered corner but in this case it was deliberate.

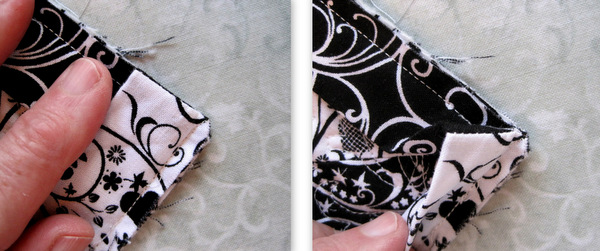
I expected that the seam joining the black and white fabrics would be on the diagonal. Turns out the seam needs to be on the straight of grain. Not only that, when the binding strip is folded on the quilt edge to form the miter, the seam needs to be exactly on the edge that is even with the raw edges of the quilt:

Camera Uploads22
I trimmed the seams to 1/8″. There’s a little extra bulk in the corners but it wasn’t a problem. In fact, now that I know how to do it, I may make another quilt in the future in which the binding fabric changes at the mitered corners.

All in good time, though. I have a few other UFOs and WIPs to tackle first.


Posted in mitered corners, update | 7 Comments

Susan’s Sewing Machine Dust Cover

One of the first things I noticed when I started reading quilt blogs was that many quilting bloggers (blogging quilters?) offer giveaways. It seems like such a nice way to thank the people who visit blogs regularly and offer supportive comments. So after releasing my Sewing Machine Dust Cover pattern in late June, I launched my first Giveaway, offering a half dozen patterns plus a custom made cover for one winner. That winner turned out to be Susan S. of Milledgeville, Georgia.

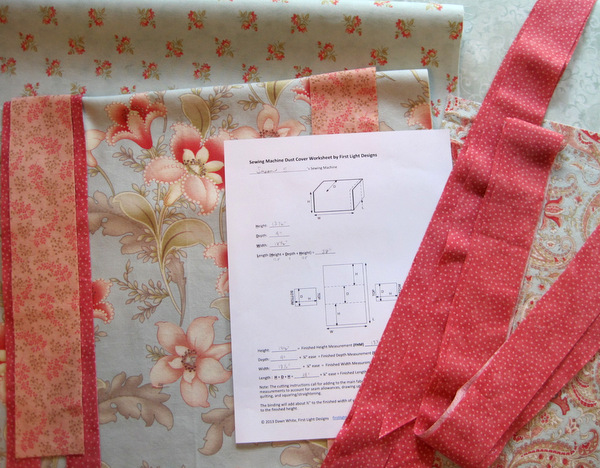
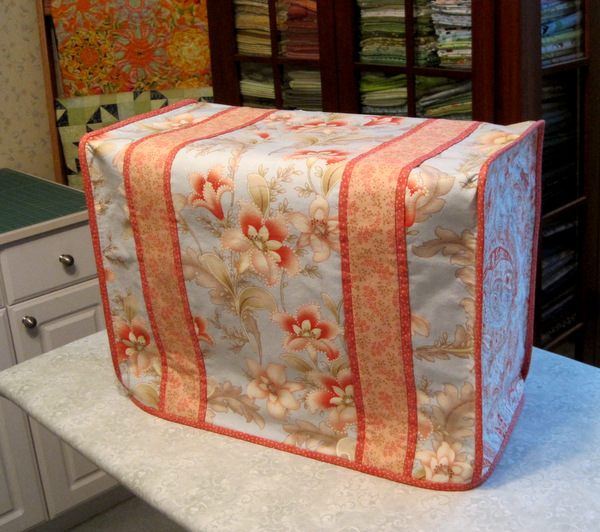
Susan emailed me the dimensions of her Janome embroidery machine and I emailed her photos of four different combinations of fabrics from my stash to choose from. I would have enjoyed making her a cover from any of the four combinations, but she happened to choose one I especially liked: a peach, coral, and aqua combo featuring prints from the Martinique line by 3 Sisters for Moda:

Susan's fabric choices for custom dust cover

How I love Moda fabrics! A couple of other fabrics in my stash were chosen to complement the 3 Sisters prints.

I finished Susan’s sewing machine dust cover last week and took a few photos before popping it in the mail on Monday:

Susan S's sewing machine dust cover 2
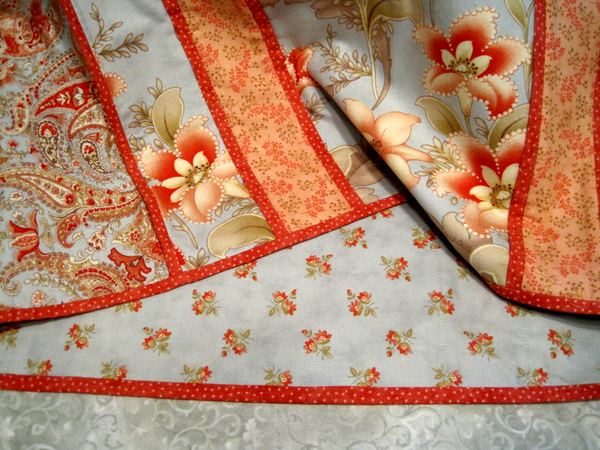
In the photo below you can see the fabric on the inside of the dust cover:

Susan's sewing machine dust cover --inside
Susan’s sewing machine dust cover arrived at its destination today, and she sent me the nicest message:

“GUESS WHAT I GOT IN THE MAIL TODAY??!!!!!! A beautiful sewing machine dust cover that fits my machine perfectly!! I love the gorgeous fabrics you used and it is constructed so very nicely. It really brightens up my sewing room . . . I’m loving it!! Thank you so very much — Susan”

You are welcome, Susan! It was a pleasure to make it for you.


Posted in Giveaway, sewing machine cover, update | 8 Comments