Category Archives: home dec

Winterwood

Here’s the completed quilt top of my winter version of Season to Taste:

It measures 18½” x 55½”.

Season to Taste is a kaleidoscope quilt pattern I created in 2014 with the idea of making one wall hanging or table runner representing each of the four seasons. You’ve seen my spring, summer, and fall versions before on the pages of this blog. I’ll post a photo of all four when I get this last one quilted.

My winter version will be called Winterwood in a nod to one of my favorite songs, written by Don McLean. You may be more familiar with his blockbuster hit “American Pie” from the album of the same name. “Winterwood” is from the same album which was released in 1971. Oh my! That means it’s 50 years old this year.

In my next post I’ll explain my method of getting the narrow accent strips (they finish at ⅜”) on my triangles to line up just so:


Posted in home dec, kaleidoscope quilts, table runner, update, wall hanging | 3 Comments

Mixed Veggies — and a Migration

Hello there! I’ve been silent for a few days because my website/blog is undergoing a migration to a new server. I committed to this undertaking last week only to find out — after the fact — that it could take up to 18 days for the migration to be complete. Yikes!

Today I got the green light to make a post to let you all know what’s going on with First Light Designs. I’m taking advantage of that to include a quick update on one of my recent projects:

Yes, it’s another set of oven mitts following my tutorial posted last month. Aren’t these mitts cute? I made this pair for my friend Debby. She picked the sweet pea fabric for the outside of the mitts and I found the perfect fabric in my stash for the lining fabric that continues the veggie theme:

The mitt on the left above is ready for the binding on the cuff edge to be tacked down, at which point the mitt can be turned right side out. I love the surprise of seeing the colorful veggie fabric when you peek inside a mitt:


An apparent drawback of the current website migration process is that no one can leave comments on my blog for the time being. That’s a big disappointment! Bloggers love to get comments and I have really missed that connection with my regular readers. Let’s hope the migration to the new server is up and running in short order so I can be back in the blogging business (and you can be back in the comment business if you so choose)!


Posted in home dec, oven mitts, update | 2 Comments

Oven Mitt Tutorial from First Light Designs: Part 2 of 2

Welcome to Part 2 of my Oven Mitt Tutorial, which covers the sewing of the mitt and contrasting band around the cuff edge as well as the final step of tacking the band down before turning the mitt right side out.

Part 1 of my tutorial covers fabric requirements, instructions for downloading and printing the pattern, assembling the layers, and quilting the resulting “quilt sandwich.” Click here to see Part 1.

Click here to download the free pattern:
Oven Mitt Pattern, page 1 of 2
Oven Mitt Pattern, page 2 of 2

Click here to see the Prequel to the Tutorial, in which I explain why I decided to write a tutorial and offer some tips on making sure my pattern fits your hand.

In Part 1 you create a 19″ x 14″quilt sandwich” composed of four layers: outer fabric, cotton batting, insulated cotton batting (Insul-bright), and lining fabric:

After quilting the four layers you trim them to 18″ x 13″:

Part 2 starts right now!

Fold the quilt sandwich in half, right sides together, with the fold on the left. Lay the freezer paper pattern on the fabric, shiny side down, making sure you have at least a half-inch clearance all around. Use a hot dry iron to press the pattern in place:


Using a marking pen or pencil, make a small dot on the fabric next to the pattern about halfway down the finger side of the pattern (see arrow in photo below). Draw a line along the edge of the pattern from the dot to the bottom edge. Draw a second line ¼” to the right starting ¼” above the arrow:

That second line is the cutting line.

Use Wonder Clips around the raw edges of the quilt sandwich. You don’t need a lot of clips – just enough to hold the layers together:


Now you’re ready to sew.

Before you start stitching: make sure the thread in your machine matches the dominant background color of the outer fabric. Once you turn the mitt right side out, you’ll be able to see thread stitches along the seamline. (This is also true of store-bought mitts, by the way.) It’s because you are stitching through eight layers; that’s a big load for two interlocking threads to carry, especially when four of the eight layers have some bulk to them. (There may be times when your bobbin thread is a different color than the top thread. It’s the bobbin thread you are likely to see once the mitt is turned.)

Using an open-toed walking foot, which feeds the eight layers together evenly, sew from the bottom edge of the thumb side of the mitt (see photo below) with the needle right next to the freezer paper, stopping when you get to the dot on the opposite side. Backstitch at the beginning and end of the stitching line.

The secret to not getting any sharp points as you stitch around the curves of the thumb and finger portions is to go slowly, stopping when necessary to lift the presser foot and rotate the mitt ever so slightly to keep the line of the curve going smoothly. Any points that get stitched in will be visible when the mitt is turned right side out.

Here’s a close-up of the stitching in process:

You can see why an open-toed foot is important: you need to see the needle going in and out of the fabric right next to the freezer paper.

Using very sharp sewing scissors, cut along the bottom edge (only) as shown:


Gently peel off the freezer paper pattern:

(You can use the pattern over and over again.)

Return to the sewing machine and stitch around the mitt again on the same stitching line, backstitching at the beginning and end:

This step is important to strengthen the seam and relieve some of the stress on the stitching line when the mitt is turned. The stress is greatest on the notch between the thumb and finger sections.

Be as exact as you can stitching on top of the first stitching line. In this close-up of the notch you can see that I took two stitches in a slightly V shape:

You can also pivot at the end of the thumb curve, take two very small stitches straight across, pivot again and start up the finger curve. I’ve tried both ways and it doesn’t seem to make a difference when the mitt is turned.

You can see I used black thread here. That’s because the background color on the right side of this mitt is black. When the mitt is done, you will not be able to see black thread on the inside of the mitt at all.

Now it’s time to trim the seam allowance.

Starting on the side with the partial seam where you marked the outside line (¼” away from the stitching line), cut along that outside line until you are a quarter inch beyond the dot you marked:


Taper to a full 1/8” seam allowance and continue cutting around the finger portion, stopping when you get close to the notch between the thumb and finger portion:

If a 1/8” seam allowance makes you nervous, shoot for 3/16”. It is not necessary to cut a ¼” seam allowance; in fact, it will make it harder to turn the mitt inside out and won’t give your mitt as smooth a look around the curves.

Flip the mitt over and start cutting from the other lower side, working your way around the thumb curve:


When you get to the notch, carefully trim to within 1/8” of the stitching line:


Because you left a partial seam, it’s going to be quite easy to apply the binding:

Check first to see if you need to baste the layers together at the bottom edge. I find that when I quilt my sandwich with overlapping wavy lines, I often need to take this extra step. Here you can see I basted a quarter-inch from the edge:


From the 2″ x WOF binding strip, cut an 18″ strip. (Save the remainder of the strip for a second mitt.) With the mitt opened up, align the strip along the lower edge, right sides together. Extend the top of the strip one inch beyond the side edge of the mitt:


Starting at the top of the binding strip, sew around the bottom edge with a 3/8” seam. It is not necessary to pin the strip to the mitt first. Stop stitching when necessary to make sure the edges are aligned and remember that both sides of the mitt are gently curved along the cuff edge. You’ll need to stop every few stitches to adjust the fabrics as you approach the side seam but you should find it fairly easy to manipulate the fabric under the needle while keeping the edges aligned properly.


When you get to the end of the strip sew right off the edge of the fabric. Here’s what the mitt looks like now:

To finish sewing the seam, clip the edges together, making sure the edges of the binding strip are aligned at the top and bottom edges:

Note that the seam allowances at the top of the binding strip are folded down (see next photo too).

Look very carefully at the next photo. You will see that I have drawn two solid lines visually extending the cutting and stitching lines drawn earlier on the mitt. But I don’t want to sew on that stitching line in the binding strip portion because the binding strip will be too loose; in other words, it won’t fit snugly around the open edge of the mitt when the strip is folded in place. The dotted line to the left of the solid lines is the actual stitching line:

To mark the stitching line place a ruler with a horizontal marking (in this example the 2″ line) aligned with the bottom edges of the binding strip. Draw a dotted line from the dot on the seamline (where the mitt and binding strip were joined) to the bottom of the binding strip. Note that the dotted line is at a 90˚ angle to the horizontal line on your ruler:

Now you can finish stitching the seam, backstitching at the beginning and end. Trim the seam allowance to a generous 1/8″ just as you did around the rest of the mitt:

At this point I know you are eager to turn the mitt inside out but you will find it so much easier to tack down the binding if you do it before turning. So . . .

Start at the seam. Finger press the seam to one side and turn the top edge of the binding strip down about a half-inch:

Turn it own one more time, pulling it snugly over the seamline and making sure the folded edge covers the line of stitching. Hold in place with a clip:


Place a clip on the other side of the seam (where my thumb is) and work your way around the cuff edge, placing a clip every couple of inches:


Using thread to match the binding fabric, tack the folded edge of the binding in place:

Now you are ready to turn the mitt!

You’ll find that the finger portion turns quite easily but it may take some time to work the thumb through. Be patient with this step and do not give in to the temptation to use some object to push the thumb out from the inside. Use your fingers and thumb only until the mitt is fully turned.

Voila! You have a beautiful functional oven mitt. . .

. . . with a pretty interior . . .

. . . and a beautifully finished accent strip around the opening:

Now all it needs is a mate!

This mitt is heat-resistant (mainly because of the Insul-bright batting) but not heat-proof, so use care when wearing it just as you would with a commercial oven mitt made of cotton fabric.

Oven mitts made with this tutorial and using the fabrics specified can be thrown in the washer and dryer. Wash them in warm or cold water and dry them on medium heat.

Please let me know if you have any questions or concerns after reading this tutorial. I’ll be happy to respond!


Posted in home dec, oven mitts, tutorial, update | 3 Comments

Oven Mitt Tutorial from First Light Designs: Part 1 of 2

I’m delighted to bring you Part 1 of my Oven Mitt Tutorial. (Part 2 will be fast on its heels!) I think you will find my method of making a top-quality oven mitt to be fast and efficient, eliminating extra steps in tutorials I found when searching online for a pattern and instructions. My directions include a nifty way to add a contrasting band at the cuff edge.

You’ll also find this a really fun project to work on. So pick out a fabulous 100% cotton print and get ready to dress up your kitchen!

Part 1 covers fabric requirements, instructions for downloading and printing the pattern, assembling the layers, and quilting the resulting “quilt sandwich.”

Part 2 covers the sewing of the mitt and contrasting band around the cuff edge as well as the final step of tacking the band down before turning the mitt right side out.

Fabric and notions for two mitts
½ yard (or two fat quarters) 100% cotton for outer fabric
½ yard (or two fat quarters) 100% cotton for the lining
⅛ yard 100% cotton for the contrast binding at cuff edge
½ yard insulated heat-resistant batting (Insul-bright)
100% cotton batting (enough to cut two 14″ x 19″ rectangles)
100% cotton thread

For the outer fabric choose fabrics that are medium to dark in value; light-colored fabrics are not practical for oven mitts (but they work very well for the lining).

For the insulated batting I prefer Insul-bright, made of polyester fibers needled through a reflective metalized polyester film. According to the Warm Company, maker of Insul-bright, the fibers “resist conduction while the reflective metalized polyester film reflects radiant energy, hot and cold, back to its source.” Insul-bright doesn’t have a right or wrong side.

Supplies
Sewing machine with open-toed walking foot
New needle in your sewing machine (90/14 Jeans or Sharp recommended)
Standard sewing supplies (scissors, pins, measuring tape, seam ripper, etc.)
Rotary cutting equipment (mat, rotary cutter, rulers)
Wonder Clips
One piece of white freezer paper about 10″ x 14″

Part 1. Download and print the free pattern. Click on the links below:
Oven Mitt Pattern, page 1 of 2
Oven Mitt Pattern, page 2 of 2

Check the 1” registration line to make sure the pattern printed at 100%.

Trace the pattern directly onto the flat (not shiny) side of the freezer paper, matching the top and bottom pieces on the dotted lines. Lay your own hand on the pattern to see if it fits. Make any changes you feel necessary. For tips on making adjustments to the pattern, see my post Oven Mitts that Fit: the Prequel.

Cut around the outside edges of the pattern. Do not add a seam allowance. Set aside the pattern for now.

Part 2. Cut the fabrics
For each mitt:
Cut (1) piece 19” x 14” from outer fabric*
Cut (1) piece 19” x 14” from lining fabric*
Cut (1) piece 19″ x 14″ of Insul-bright
Cut (1) piece 19” x 14” of medium-weight cotton batting
Cut (1) strip 2” x WOF from binding trim fabric. (It’s important to cut across the width of fabric rather than the length because you want the strip to have a bit of give. One 2″ strip x WOF will provide binding strips for two mitts.)

*If using directional fabric, keep the direction of the design in mind (as well as the quilting motif if it is directional too). In the photo below, both the design and quilting motif are going across the width of the mitt, not the length:

Part 3. Prepare the quilt sandwich
On a flat surface make a quilt sandwich of your four layers in this order: lining fabric right side down, Insul-bright, cotton batting, outer fabric right side up.

The thread color you use on the outer fabric can blend or contrast; that’s a personal choice. Match the bobbin thread to the lining fabric if you want it to blend. Use your preferred method to baste the layers together and quilt as desired.

Sometimes I quilt a 1” grid as I did on these mitts . . .

. . . but most often I quilt random wavy lines, some of which cross each other, because it’s fast and easy and I don’t have to mark a grid:

The wavy quilting motif is easier to see on the lining side:

Trim the sandwich to 18″ x 13″:

Fold the quilt sandwich in half, right sides together, with the fold on the left. Lay the freezer paper pattern on the fabric, shiny side down, making sure you have at least a half-inch clearance all around. Use a hot dry iron to press the pattern in place:

The sandwich is now ready to be transformed into an oven mitt.

Proceed to Part 2.


Posted in home dec, oven mitts, tutorial, update | 4 Comments

Oven Mitts that Fit: the Prequel

The prequel to the tutorial, that is.

My oven mitt tutorial is almost ready to go. Before I hit “publish” on the post, I want to give you a bit of background (by way of explaining my obsession with making a beautifully finished oven mitt) and a couple of hints on making a pattern for a mitt that fits your own hand.

For the last three or four years I was on the lookout for new oven mitts but was never able to find suitable replacements. The ones in stores were either too big or poorly made, sometimes both. My twin sister Diane was in the same boat. We actually bought our mitts at the same time years ago and they had definitely seen better days. We were bemoaning the lack of good store-bought oven mitts around Thanksgiving last year. At that point I decided to make my own — and make a pair for Diane to boot.

In preparation I went online and checked out several printed tutorials. Boy, was I surprised! Some of the tutorials were way too much work. Some had you cutting out left and right hand patterns. Why on earth . . . ? The mitts are the same shape on both sides, for heaven’s sake.

Others had you make two mitts – one from the main fabric and one from the lining fabric; you inserted the lining mitt into the main mitt and sewed the two together, meaning you were doing twice as much cutting and sewing – and not even getting a mitt that was quilted all the way through. Not one tutorial gave what I considered good instructions for a nicely finished cuff edge made with a contrasting fabric.

There had to be a great method out there somewhere, I thought, and if I couldn’t find one – well, I would just have to figure one out for myself. But I needed a pattern to get started. I downloaded a couple of free templates. When they were printed I could tell they were too big. What to do? Why, make my own pattern.

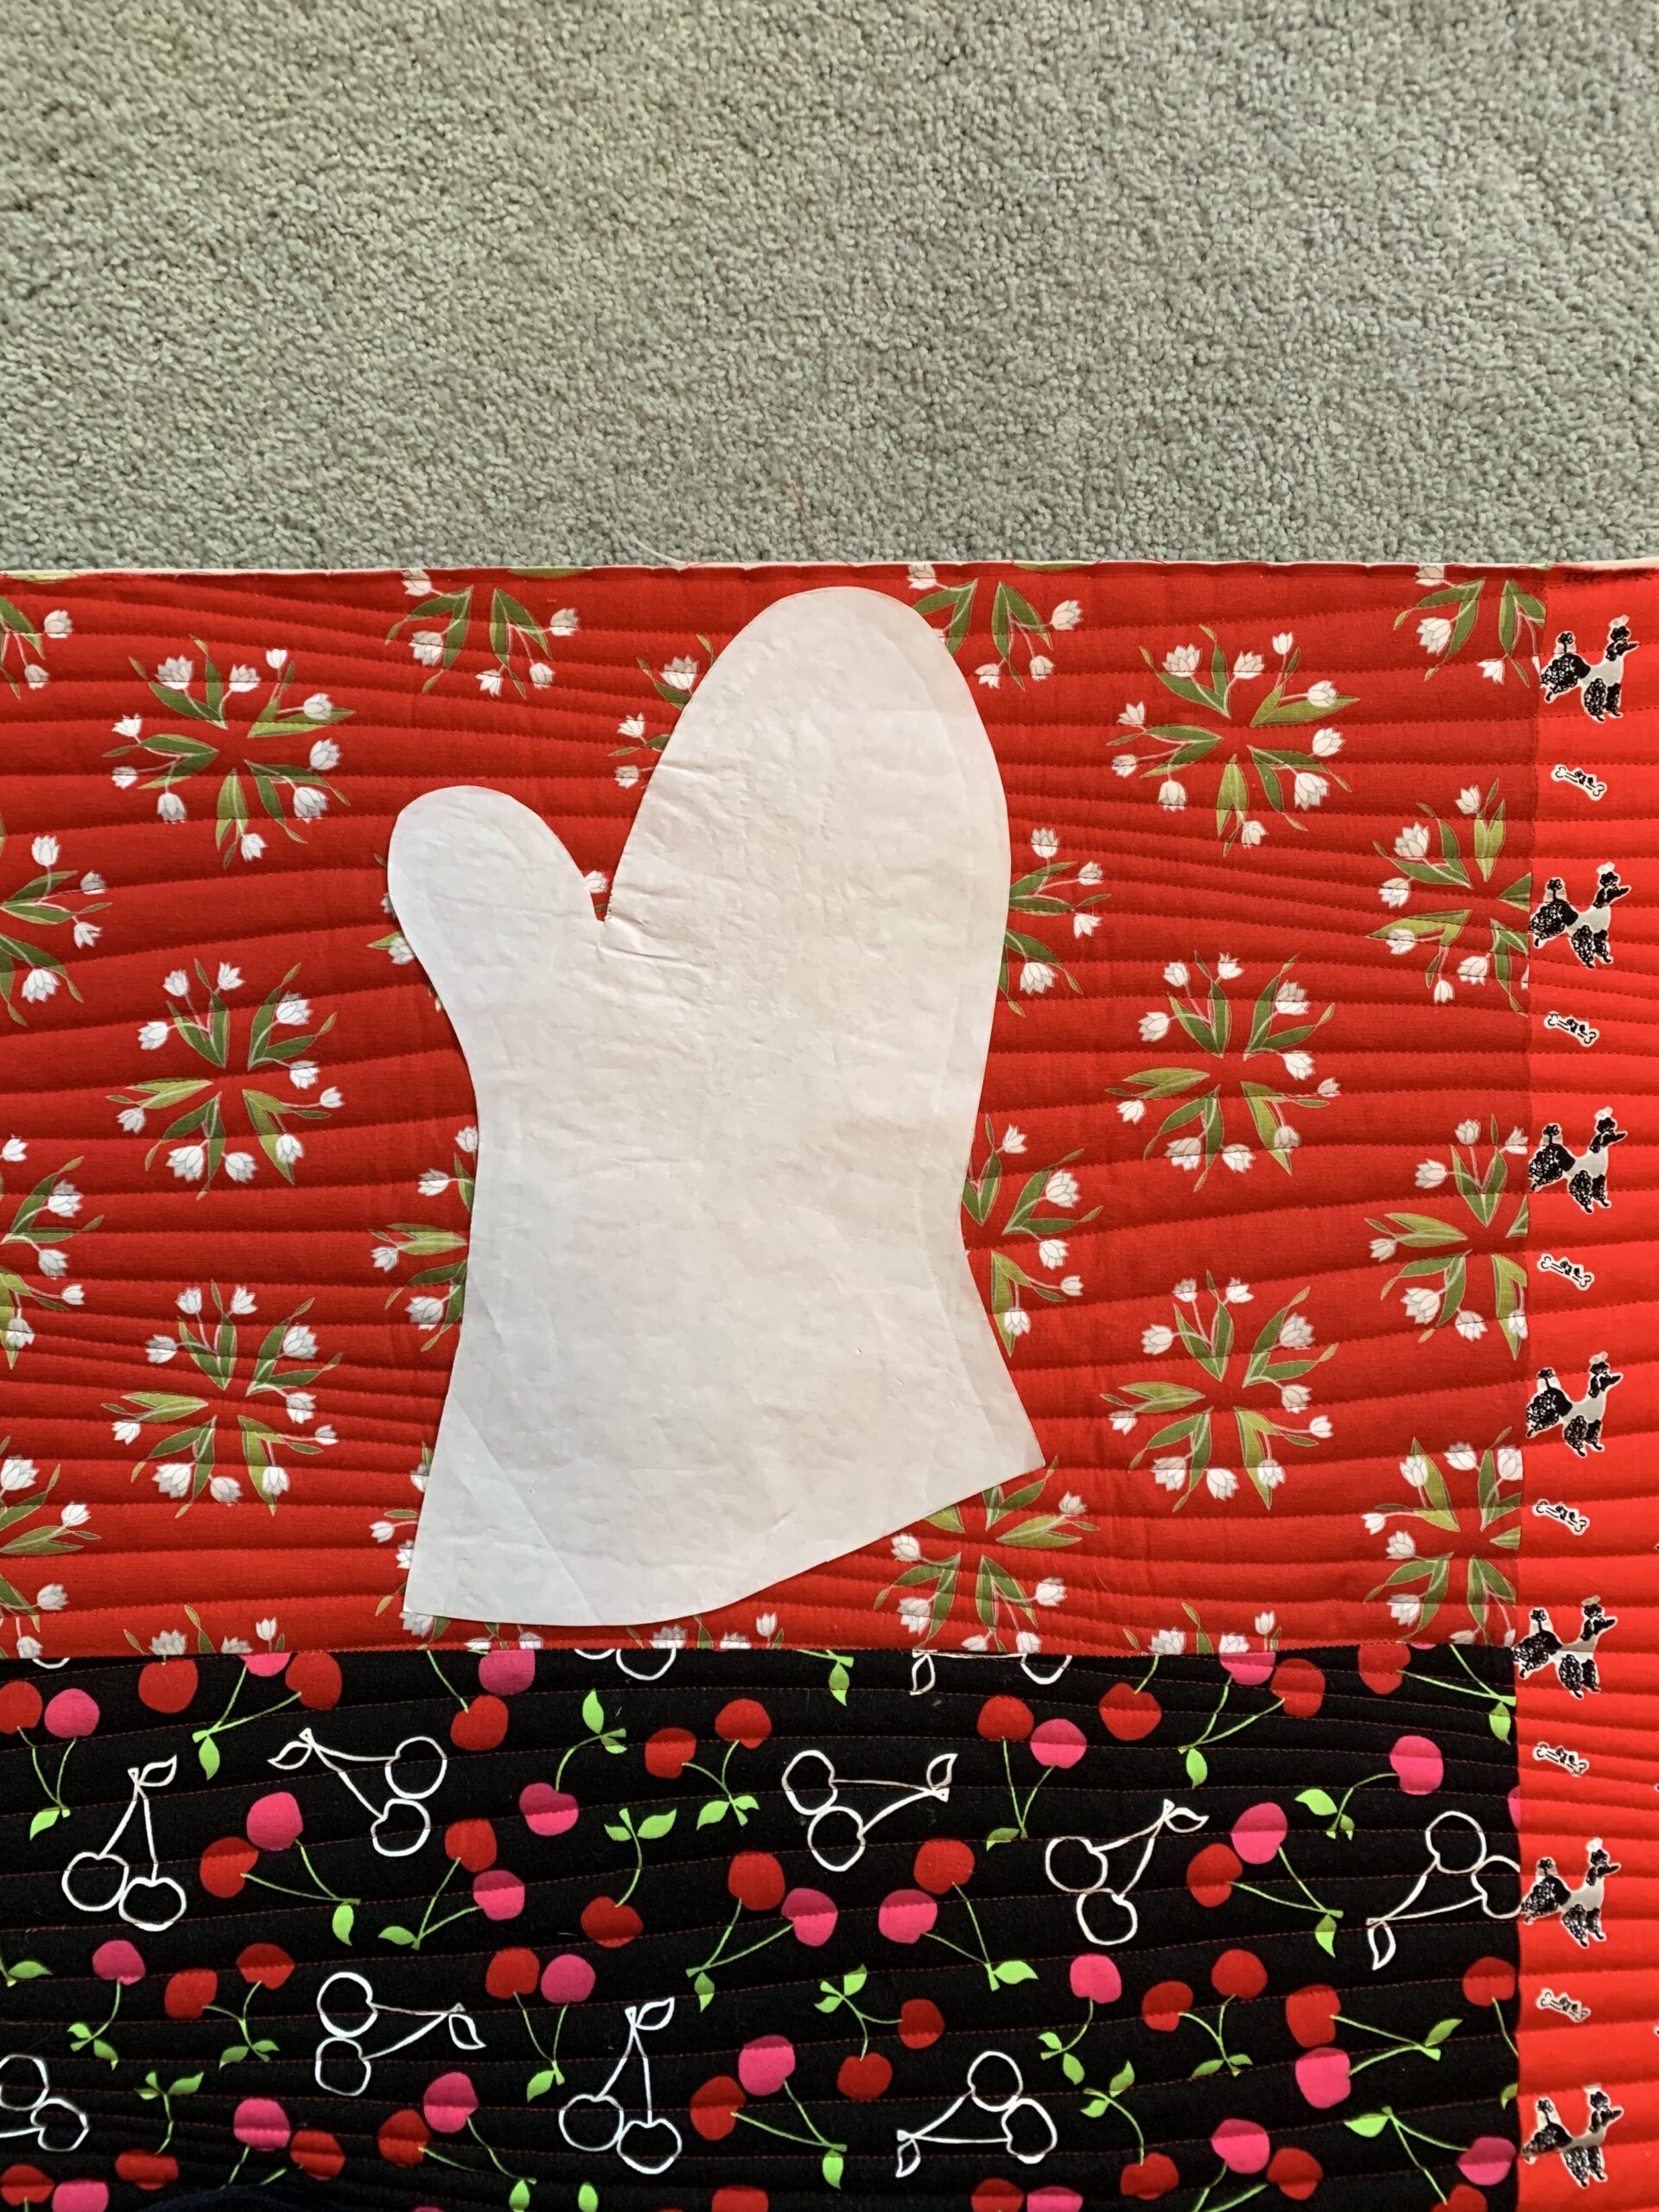
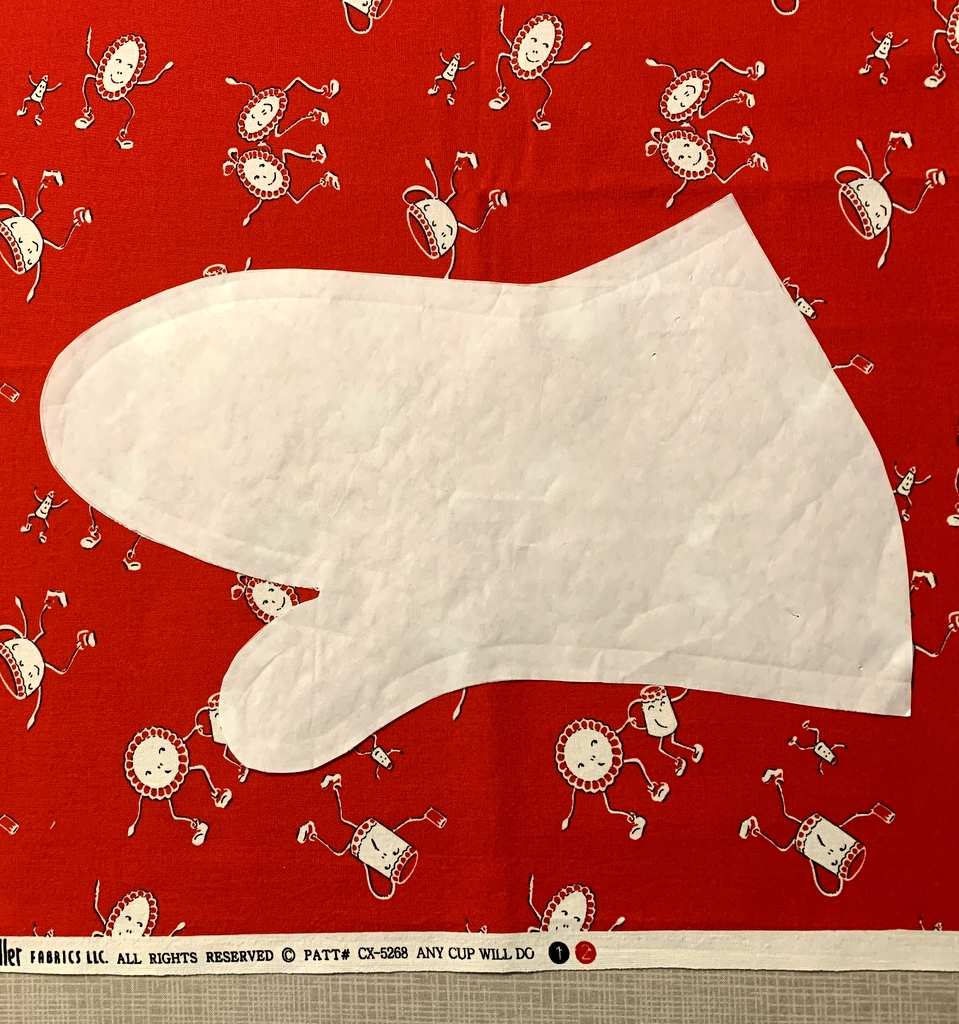
I simply traced around my favorite old mitt on a piece of freezer paper:

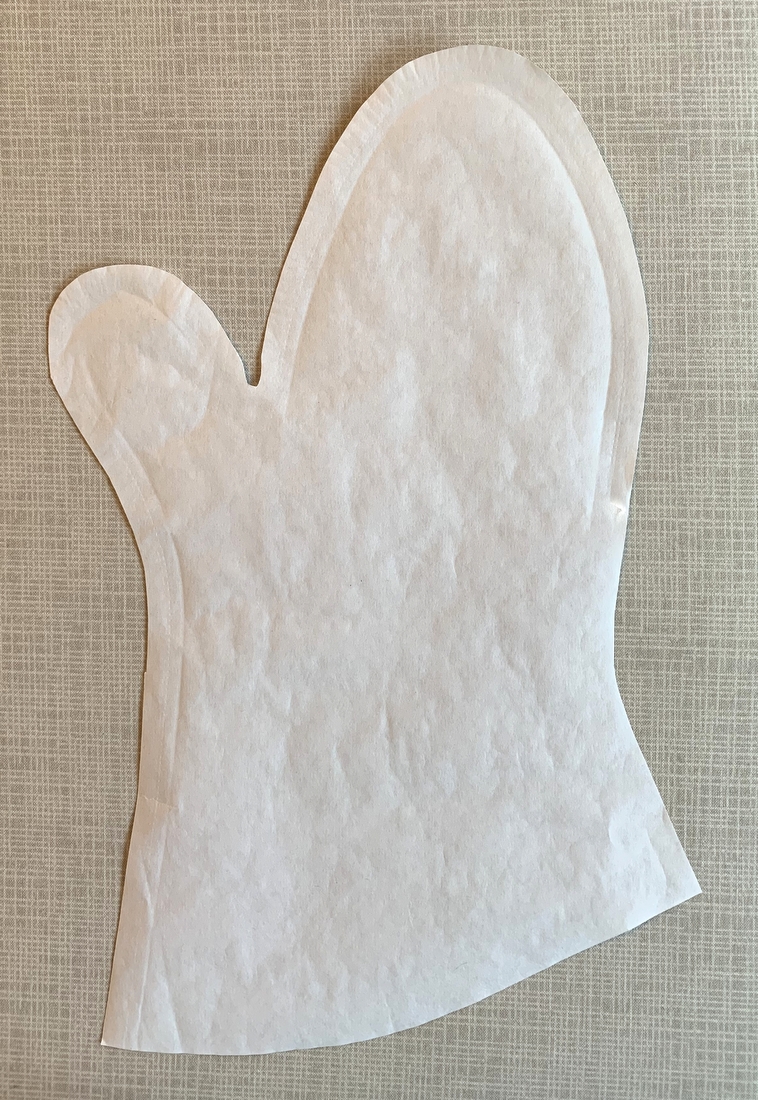
Did you notice that the pattern is flared at the bottom? That makes the mitt easier to slip on if you are wearing a garment with long sleeves.

For those of you unfamiliar with freezer paper, it has a shiny coating on one side that allows it to be ironed temporarily onto fabric. No need to use pins. The freezer paper can be peeled off easily, leaving no residue — and it can be used over and over again. The best place to get your freezer paper? The grocery store! The only brand I’ve ever seen is by Reynolds Kitchens. Crafters and quilters love it.

Combining what seemed to be the best elements of some online tutorials, I made a test mitt. That was the easy part. The hard part was applying the binding strip around the cuff edge. The opening of the mitt is relatively small, presenting a challenge first in moving it under the needle of the sewing machine and then in joining the raw edges neatly. Most tutorials are maddeningly vague about this step or produce results that leave something to be desired.

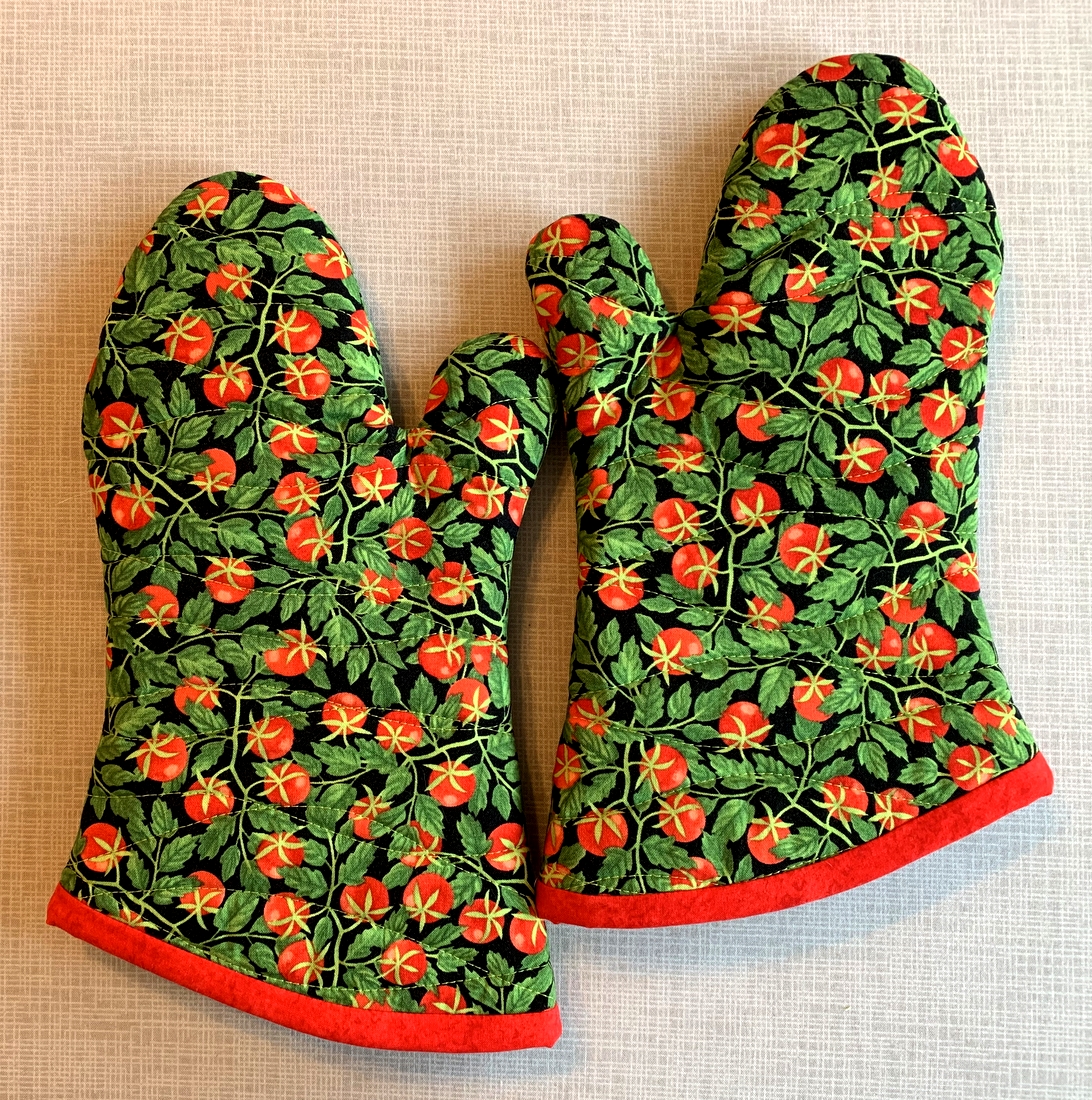
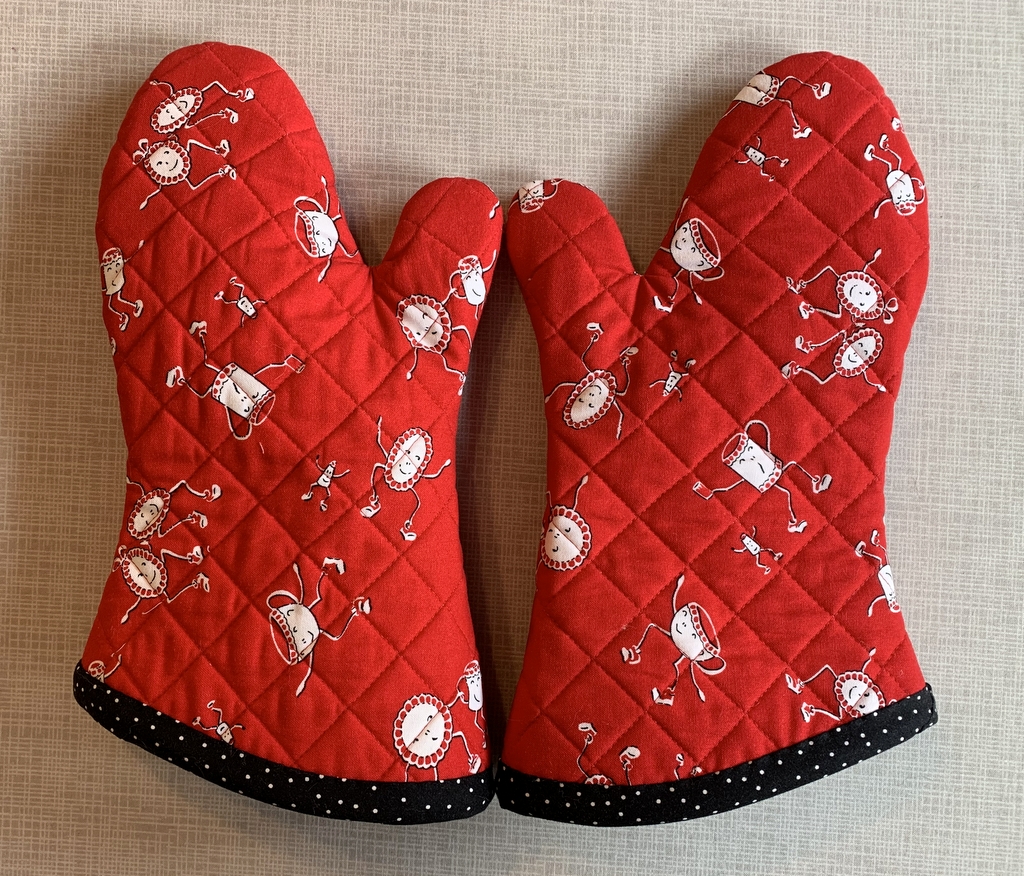
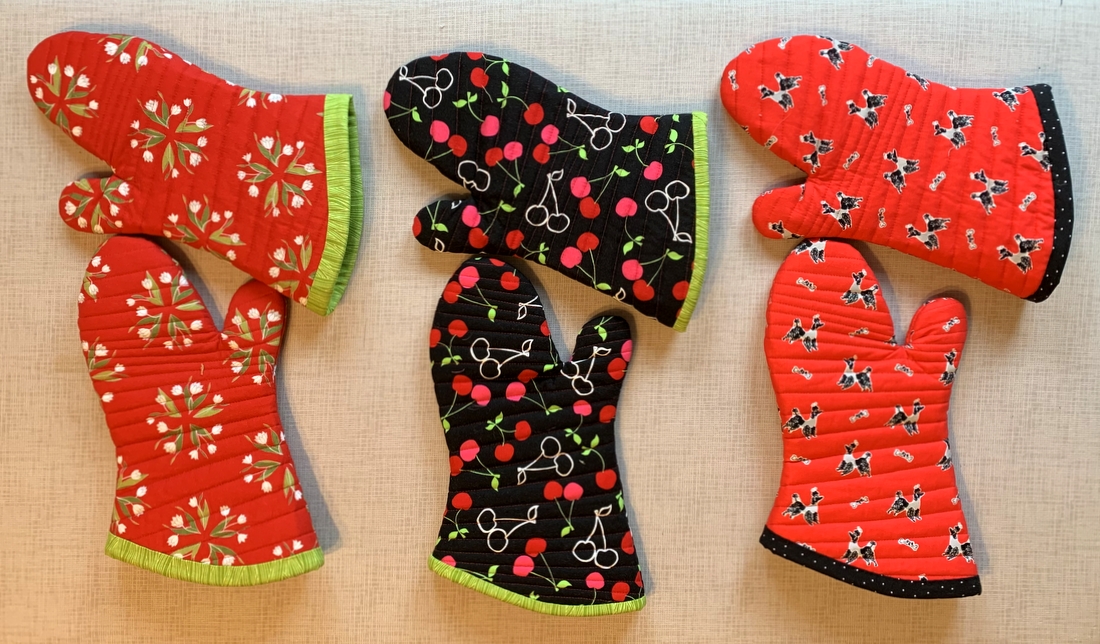
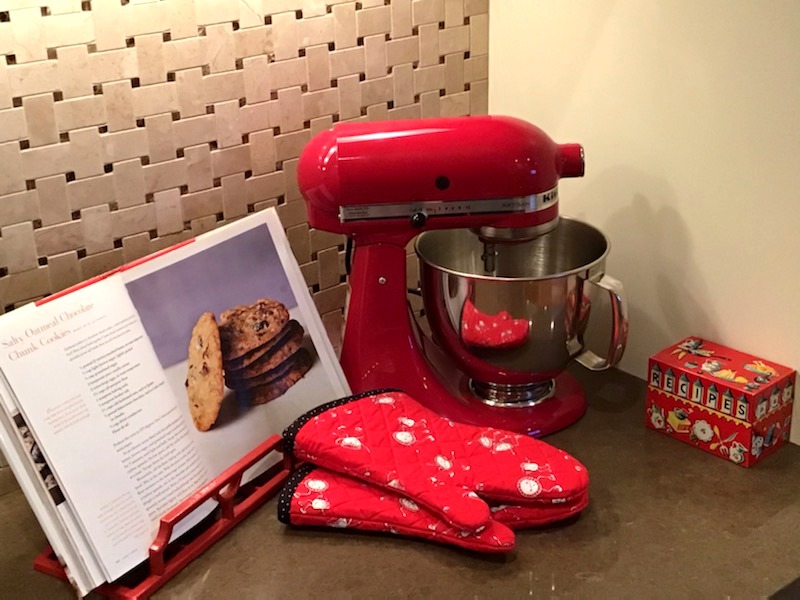
I experimented with different widths of binding strips and various techniques for joining the ends, making several sets of mitts in the process, including this early pair for Diane:

The results were satisfactory . . . but I was looking for something more. The best solution came to me last month in a “what if?” moment. It seems so obvious now.

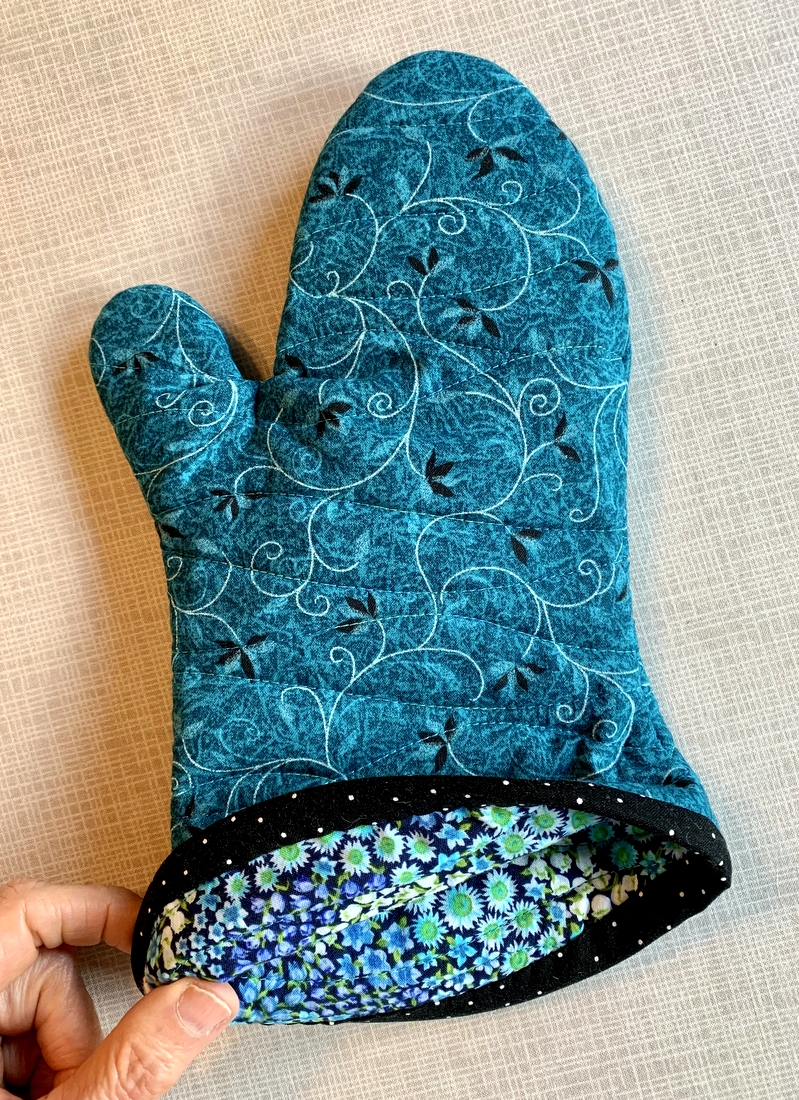
Want to know my secret? A partial seam!

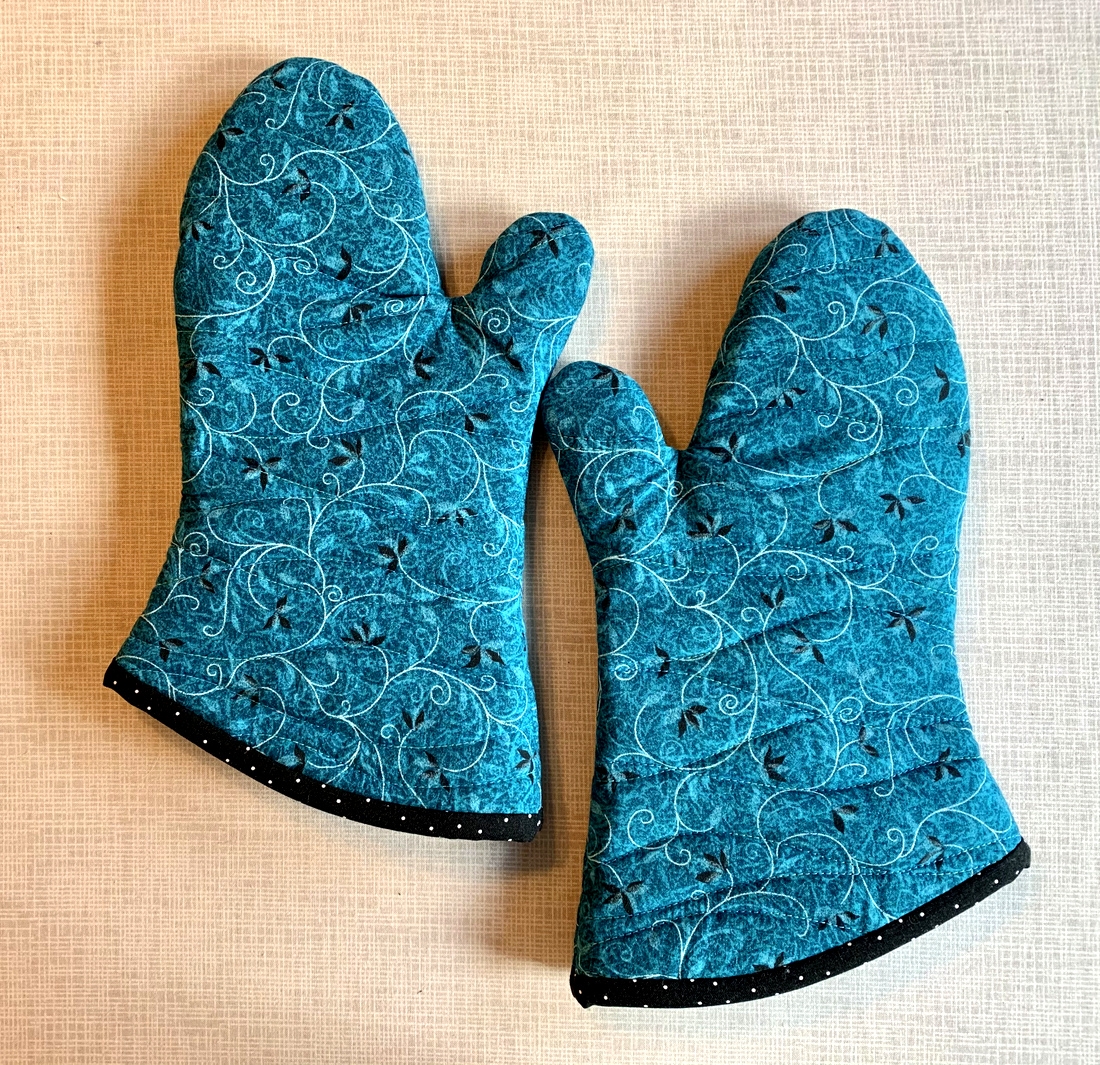
That’s right. By leaving one side seam only partially sewn, there was more room around the cuff edge to manipulate the fabric while applying the binding strip. And then I could finish sewing the side seam, which now includes the binding strip, giving me a beautifully finished mitt when the strip was turned down and tacked to the inside:

Are you intrigued? Want to make your own? I hope so!

My tutorial will come with a link to a printable template so you can make your own freezer paper pattern. Or you can do what I did and draw around a mitt you already have. If you use my pattern you can modify it to fit your own hand. If you make your own pattern by tracing around an existing mitt, you can place your hand on it to test the fit as I do in the photo below.

The edges of the pattern should be at least ¾” wider than your hand around the thumb and finger portions. There should also be at least 1” from the notch between your thumb and fingers to the notch of the pattern and from the tip of your thumb to the end of the thumb on the pattern. Note the arrows:

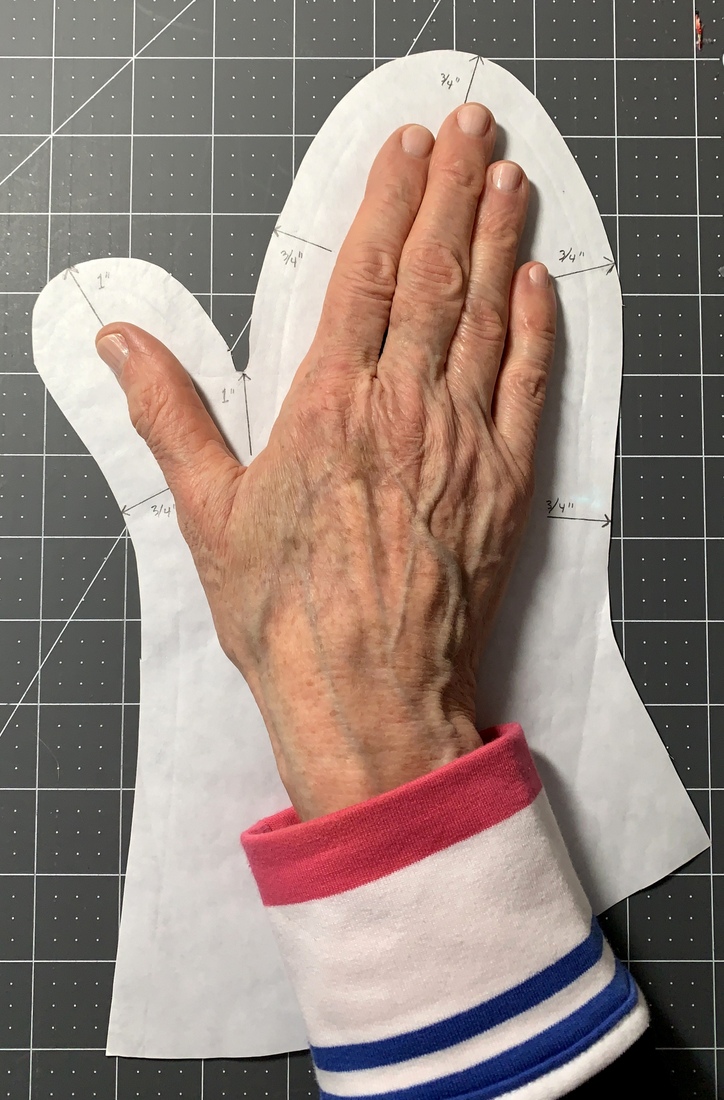
It may look like my hand would be swimming in a mitt that size but you need room to turn the mitt inside out and still have room for the seam allowance.

My tutorial is so detailed and picture-laden that it is coming to you in two parts. Part 1 covers fabric requirements, instructions for downloading and printing the pattern, assembling the layers, and quilting the resulting “quilt sandwich.”

Part 2 covers the sewing of the mitt and band around the cuff edge as well as the final step of tacking the band down.
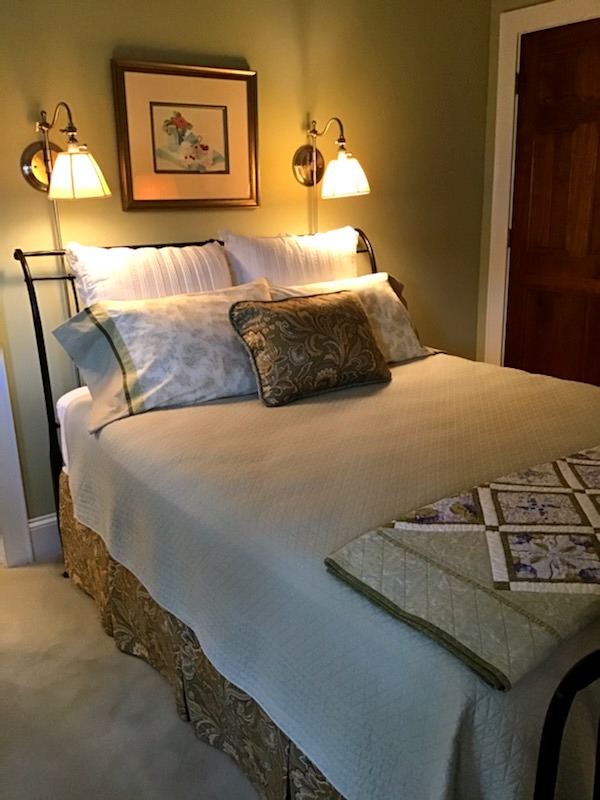
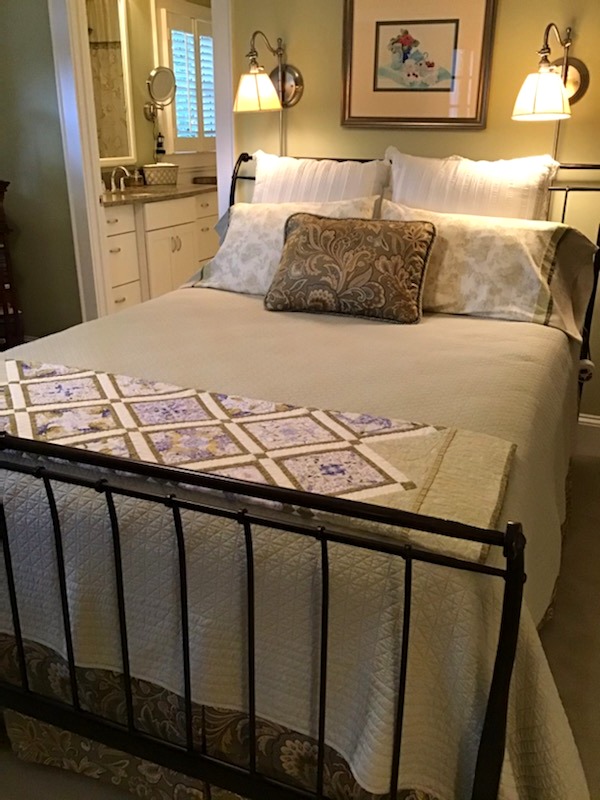
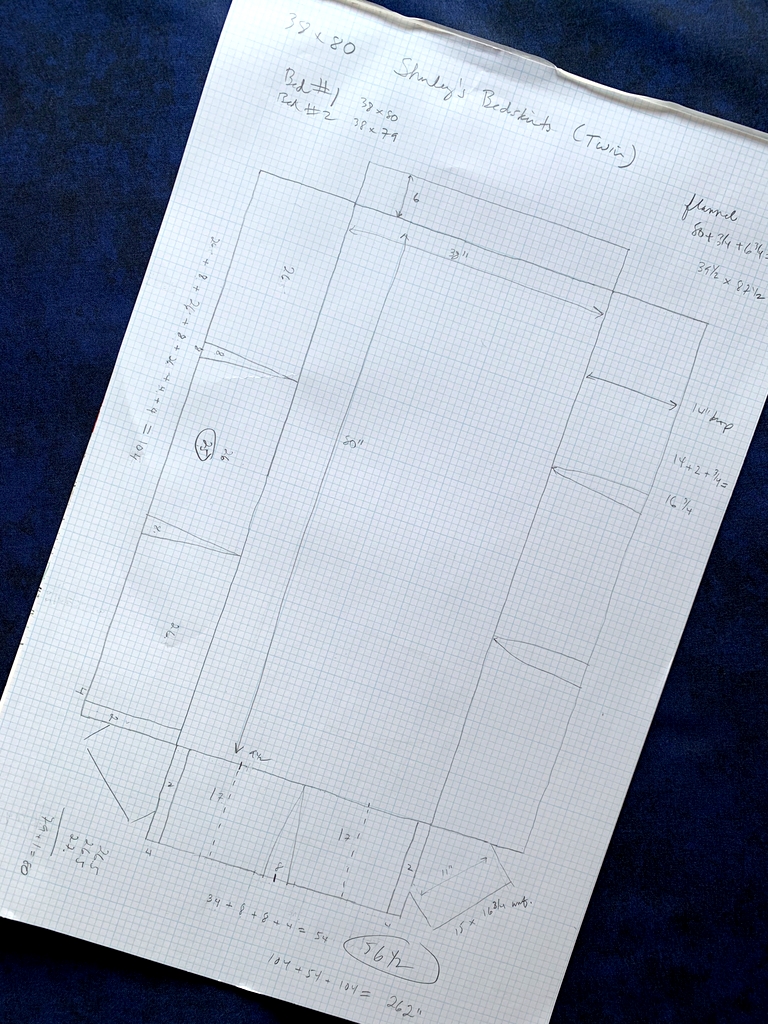


Posted in family, home dec, oven mitts, tutorial, update | 10 Comments

Obsessed with Oven Mitts

Hello there! I’m still around, working hard on my oven mitt tutorial while dreaming of quilts yet to be made.

This may be one of the most detailed tutorials I’ve ever worked on, with lots of process photos. Each time I think I’ve taken the best photos, I find something that needs to be improved. That means making yet another mitt. The result is that the publishing date of my tutorial keeps getting pushed down the road. I really want to get it right so I hope those of you waiting for the tutorial will be patient a bit longer. Every mitt I make brings me closer to the desired end product.

Here’s a pair I made recently for my friend Nancy:

She wanted mitts in turquoise or burgundy. I found a great turquoise fabric in my stash dating back to 1999. I know this because the date is on the selvage.

Nancy is a fabulous gardener so I found a lovely floral fabric for the inside of the mitts. Take a peek:

In exchange for the mitts, Nancy is bringing me a pie made by her husband Cliff, who is known for his delicious pie crusts. I call that a win-win!


Posted in home dec, oven mitts, update | 4 Comments

Giveaway Winners!

Are you ready to learn who the winners are of my Oven Mitt Giveaway? If you entered, the odds were in your favor: 1 in 13. That’s good for the winners but bad for my hundreds of blog subscribers who may not have seen recent posts. I learned a few days ago that subscribers to First Light Designs have not been receiving email notifications of my posts since early January. I’m still working behind the scenes with my blog platform folks to figure out why. I may need to offer another Giveaway just for my subscribers when the issue has been rectified.

But let’s move on to find out who the lucky winners are of this Giveaway. After counting the valid entries (39 — two family members were taken out of contention), I used a Random Number Generator to draw the numbers 17, 2, and 23 in that order.

Number 17 is Elizabeth H., who won these mitts:

Number 2 is Amy M., who won these mitts:

And Number 23 is Pam B., who won these mitts:

Congratulations, ladies! I will email you to find out your mailing addresses. The mitts will come with washing instructions and additional info. Remember, if the mitts are totally the wrong color for your kitchen, let me know. I’ll make you a custom pair in the color of your choice and we’ll throw the mitts you won back into the drawing pool.

My thanks to all who entered!


Posted in Giveaway, home dec, oven mitts, update | 7 Comments

Oven Mitt Giveaway!

That’s right, friends. I’m giving away a set of oven mitts to three lucky winners. Will you be one of them?

I made these oven mitts in preparation for writing a tutorial. The shape of the mitts is the same on all of them — it’s the binding I’ve been tinkering with. I’ve been trying different widths and finishing techniques. Now that I’m finally satisfied, I can get to the tutorial — but now I have to make one more set of mitts to photograph for the tutorial!

The mitts you see above were made of four layers:
⦁ the outer fabric is 100% cotton
⦁ the second layer is 100% cotton batting
⦁ the third layer is Insul-bright, an insulated lining material specifically made for hot pads and oven mitts
⦁ the fourth layer (the inside of the mitt) is cotton with an aluminized coating, commonly used to cover ironing boards. This fabric is not essential but I had some on hand and decided to use it because one of my old oven mitts happened to be lined with it.

To be entered in the giveaway, all you have to do is write a comment at the bottom of this post responding to the question, “What is your favorite kind of food?” If you wish, name a dish you especially like in your favored cuisine. How simple is that? No need for you to subscribe to my blog or follow me on Instagram (though I would be delighted if you chose to do either).

One entry per person. I will mail anywhere in the world so international readers are welcome to enter.

Family members are invited to leave comments but are not eligible to win. (Don’t feel too sorry for them; all they have to do is let me know they want a set and they’ll get one!)

The giveaway will remain open through Friday, January 29. On Saturday, January 30, I’ll use a random number generator to pick three winners. Winner #1 gets the red mitts on the left with the flowers; winner #2 gets the set in the middle with the cherries; and winner #3 gets the set on the right with the poodles.

But wait — there’s more! It it happens that you are a winner and the mitts are totally the wrong color for your kitchen, you can let me know when I contact you and I’ll make you a custom set in the color of your choice. If that happens, I’ll draw a fourth winner for the set that didn’t work for you.

Good luck, everyone!


Posted in family, Giveaway, home dec, oven mitts, tutorial, update | 46 Comments

The Oven Mitt Quilt

Is this not the oddest looking quilt you’ve ever seen?

Actually, it’s not a quilt at all.

I’m gearing up to make a few sets of oven mitts as gifts and I didn’t want to take the time myself to quilt the four layers needed for a well insulated mitt. So . . . I made a “quilt top” using three suitable prints from my stash that could all be quilted with the same color thread and asked Karlee of SewInspired2Day to quilt it for me. The result is what you see above. The quilt motif is “Modern Waves,” one that Karlee has used on another of my quilts, Where It’s @.

Here’s a closer look at those three fabrics, pictured with my oven mitt pattern to give you an idea of the scale of the prints:

I think they’re going to make pretty cute oven mitts!

You may remember the mitts I made last month for my sister Diane. I quilted the fabric for those using a cross-hatch design:

After I published the post I had a few requests for a tutorial. Good news! A tutorial is coming.

And maybe even a giveaway. Stay tuned!


Posted in family, Giveaway, home dec, tutorial, update | 3 Comments

A Gift Beyond Compare

I received the most wonderful gift in the mail last month, this striking quilt made in 2004  by Lee Fowler:

Lee was an incredibly talented quilter and crafter who was only 54 when she died of cancer in 2013. I didn’t meet her until 2009 so I had the pleasure of knowing her for only four years but she touched my life in many ways. I greatly admired her intellect and talent, and I loved her goofy sense of humor.

The quilt you see above is named Rolling Star Revisited. It was designed, pieced, appliquéd, and quilted by Lee. Here are a few detail shots, starting with a single rolling star:

Each star measures 15″ from point to point; the entire quilt measures 58″ square.

Lee was an accomplished longarm quilter. She did hand-guided quilting without a stitch regulator. Here you can see some of her beautiful free-motion quilted feathers:

The circles in the center of each star are hand-appliquéd using the needleturn method as is the reverse-appliquéd border:

You must be wondering how I came into possession of this treasure. Well, in early December I received an email from Lee’s husband Rick, now remarried and living in another part of the state. Rick wrote that he and his daughter Liz were on a mission to send Lee’s quilts out into the world where they could be “loved, cherished, and above all used,” and asked if I would like to have one. He included photos of 16 quilts. I replied immediately, telling Rick I would be thrilled to own one of Lee’s creations and that it had taken me all of two seconds to identify the quilt I would love to have.

Rolling Star Revisited arrived a few days later. Doesn’t it look wonderful on the back of my couch?

This is actually the second quilt Lee made using the Rolling Star block (hence the Revisited part of this quilt’s name). Her first version, made with Depression-era reproduction fabrics, was featured as a pattern in the September 2005 issue of Quilter’s Newsletter Magazine:

Lee had found a circa-1930s newspaper clipping of the block and drafted her own pattern. It’s a challenging project with curves and set-in seams; the directions include sewing the curved pieces by hand or by machine. One of these days I might make a single block just to test my skills.

By the way, this isn’t the first time one of Lee’s quilts has graced my couch. I was one of  two dozen friends who helped Lee complete her last quilt, a magnificent version of Pickle Dish. I wrote about that here. Rick dubbed us “the Pickle Dish Gang.” The quilt was displayed at Lee’s memorial service and afterward it was circulated to each member of the group to have in her own home for a month. It was my turn in 2015:

2015-08-07 13.20.25

I wrote about that here. It was such an honor to have one of Lee’s creations in my home, however temporarily. And now! Now to have one of her quilts as my very own . . . You can understand why I consider Rolling Star Revisited a gift beyond compare. It will be loved, it will be cherished, and it will be used.


Posted in appliqué, free motion quilting, home dec, needleturn appliqué, update | 5 Comments